Great Greens of Yoeme Heritage

Warm summer rains in the Borderlands cue carpets of fast-growing wild greens. Among them is bwarom, an important food plant beloved among Yoeme (Pascua Yaqui) people and other communities of the region. This delightful, nutritious crop is also known as purslane, or verdolagas by Spanish speaking communities. For all of you who enjoy botanical specifications, it is Portulaca oleracea.
Bwarom is easy to grow from seed and with little effort, looking perky on even the hottest Southwestern summer day. The origin of purslane is unknown, but there is reference to it as early as 4,000 years ago during the Roman Empire. Judging by its succulent, juicy stems and fleshy leaves, it may have originated in the desert climates of West Asia and India. Over many moons, the plant made itself at home and naturalized in the Sonoran Desert of so-called northwestern Mexico and southwestern US.

There are two common types of verdolagas: one is delicious and tasty to eat cooked (sauteed, stewed, or in soups) or raw in salads. They have yellow flowers and distinct oblong leaves with a bit of a glossy sheen. The other is referred to as ‘verdolagas de cochi,’ or pig’s purslane, because they’re not very good to eat (it won’t hurt you and I know folks who eat them, but it’s not nearly as palatable). Those have purple flowers, reddish stems, and much rounder leaves which are less shiny than the edible bwarom/verdolagas. Seeing them side by side (see photo) makes them easy to distinguish. I recommend sticking to the “true” bwarom/verdolagas/purslane with yellow flowers and oblong leaves.
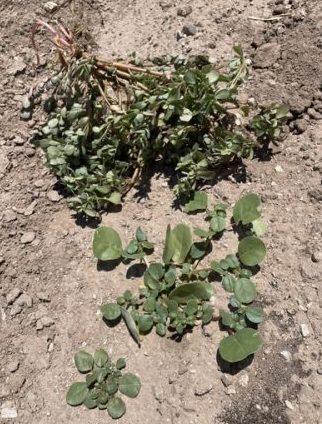
Photo: The more tasty Bwarom/ Verdolagas/ Purslane on top with yellow flowers, and the less-palatable Kowi bwarom/Pig’s Purslane/Verdolaga de Cochi on the bottom with purple flowers and very round leaves.

While working in the Yoeme Garden at Mission Garden alongside friends Angela Montiel and Amalia Reyes, I learned about the Yoeme’s friendly relationship with bwarom, and how they like to prepare it. Angela’s mother Valentina is a plant medicine knowledge keeper, and she appreciates the summer monsoons bringing the plentiful bwarom greens to eat. She taught Angela how to harvest and prepare them. Today, Angela and her young family collect bwarom and share it with numerous households, especially elders who welcome the greens wholeheartedly. She hopes that next generations can learn how to identify, grow, harvest, and enjoy bwarom in traditional and new dishes.
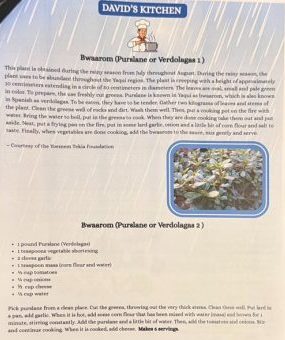
Recipes for bwarom appeared in the Pascua Yaqui Liogue Senior Center newsletter recently, because it is the season and the elders know this plant. Many Yoeme people have their favorite places to harvest bwarom, and they return seasonally to their prime spot to reap armfuls of succulent stems that grow quickly from the preceding season’s scattered seeds. Unfortunately, those places can be lost to development, becoming a Whataburger or whatnot.

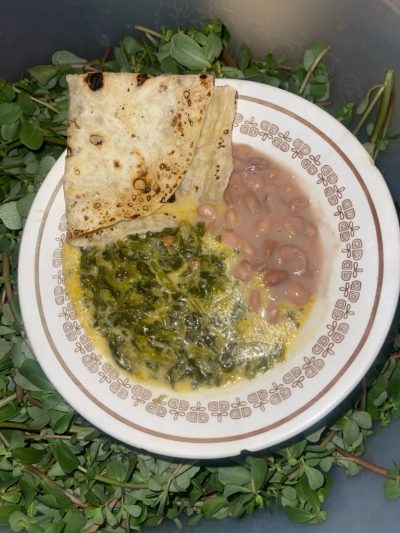
Angela and her family enjoy bwarom with onion, garlic, and tomato, stirring in cheese to melt at the end (recipe below). The hearty greens make a complete meal alongside beans and tortillas. The health benefits of purslane are astounding: they are high in many vitamins and especially alpha-linolenic acid, an omega-3 fatty acid. Purslane has been identified as the richest vegetable source of this essential omega-3, which reduces the thickness of the blood, aiding in heart-healthy prevention and treatment of vascular diseases (Uddin et al, 2014).

The other neat thing about verdolagas is that they are abundant and free. Some folks refer to purslane as a weed, but then again, weeds are defined as “unwanted plants.” What’s not to want and love about bwarom?? It has “tremendous nutritional potential” deserving of special attention from agriculturalists and nutritionists (Uddin, 2014). I admit I’m tempted to suggest it could be labeled as a ‘superfood’ (though this trendy title has proved to be problematic).
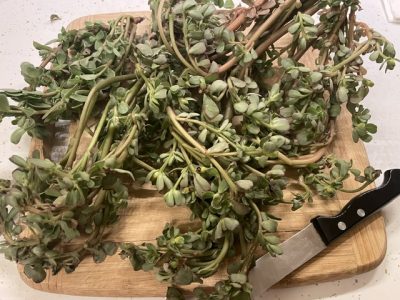
Another traditional knowledge keeper in Tucson’s Yaqui community, Amalia Reyes, is often consulted about Yoeme language, stories, history, plants. She teaches her grandchildren on all these topics, and volunteers at Mission Garden’s Yoeme Garden. She learned to cook from her mother, Maria, and grandmother, Juana, a Yaqui woman who was deported by the Mexican government to the Yucatán in the late 1800s (source: Texas Band of Yaquis). Eventually (or miraculously, as Amalia says), Juana brought back new food traditions to Yoeme lands, such as tropical papaya fruit.

Amalia’s husband doesn’t care for bwarom because he had to eat them more often than he liked when he grew up in Rarámuri (Tarahamara) lands of Chihuahua, Mexico. On the other hand, Amalia’s brother used to venture out to collect the greens, filling a pail for his mother to cook as it was his favorite food. Like Angela, Amalia also notes the changes in access to and availability of bwarom today.
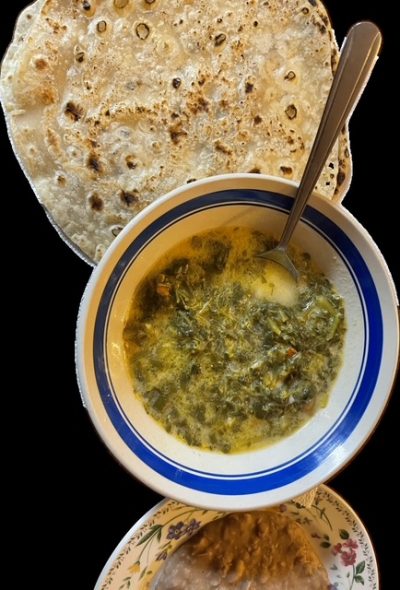
Aside from wild foraging or growing it in your garden, you can sometimes find bwarom/verdolagas in farmers markets and Mexican groceries. Jorge at Las Milipitas grows robust carpets of verdolagas in long beds in his plots at the community garden to sell in the community. They are well known in Latin American cuisine, and many Tohono O’odham people also seek them out.

 Amalia’s family recipe is slightly different: the greens are made thick and silky by a flour roux, recipe to follow. While Amalia and I were recently visiting, she had a great lightbulb moment: an idea for a new way to enjoy verdolagas inspired by her husband’s Rarámuri family’s version of tamales called sapetas or nojim. Amalia envisions making these tamales with fresh ‘green’ corn, and filling them with the bwarom stewed in tomato and onion, maybe a little bit of meat for flavor, and finish by garnishing with fresh queso fresco cheese…It sounds brilliant! (She encouraged me to try to create them myself, which I intend to do, but if you get to it first, please comment below and let us know how you liked it!)

As for me, summer in Tucson means that my friends know what I’m bringing to a potluck, or can pretty well guess what’s for dinner. After the first rains, our corn field and gardens are suddenly covered in lush tufts of short seedlings that grow rapidly, almost magically, becoming more than we can find homes for. Although many people have tried it once or just heard of it, too few people today to take advantage of the richness that it offers, including a strong, regional cultural history, and its incredible health benefits. I’d be thrilled to see it grow into mainstream popularity.

And why shouldn’t it? These are times of harrowing reports of an increasing number of bathtub rings on river reservoirs whose water primarily flows to agricultural regions known as the “salad bowls” of the nation. Succulent verdolagas are heat and drought tolerant, have low water needs, and require no fertilizer. I’m not aware of any pests or diseases that plague this plant, which removes the need for pesticides. Please do seek out, grow, and enjoy this generous and bountiful plant. Also note that it’s not the only quelite green of its kind—try amaranth greens or bledos, for example…

Special thanks to Angela Montiel and Amalia Reyes for their generous information about a culturally significant plant. May your bwarom harvests always be bountiful!

Amalia’s mother MARIA’S Bwarom recipe

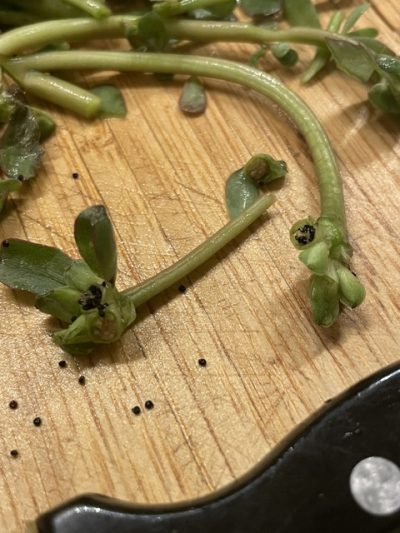
Because purslane grows close to the soil, rinse it three times in a catchment basin. This way you can gather the tiny black seeds (see photo), which are also edible. After all the rinsing, dump the full basin somewhere in the yard, maybe a low spot that gathers a bit of water, and grow more verdolagas.
Then, remove the bigger stems, and chop the greens. Add some olive oil to a wide pan (Amalia‘s mother used manteca– animal fat or lard- but Amalia chooses a heart-healthier oil nowadays). Fry a sliced onion till gently brown. Next add some chopped garlic. Add the verdolagas and sauté a few minutes. In another pan, toast a few tablespoons or so of unbleached flour until it is golden but not burned. The add to it an equal volume of the cooking juices from the verdolagas. Whisk till smooth on low heat – this is called a roux (say: roo). Then put the roux into the greens, stir to incorporate. Add pepper or seasoning to taste, and serve.

Bwarom Recipe from the Yoemem Tekia Foundation Museum  

Gather 2 kg of tender bwarom leaves and stems. Clean the greens well, then put a cooking pot on the fire with water. Boil the water and add the greens to cook. When they are tender, take them out and put them aside. Next, put a frying pan on the fire, add some lard, garlic, onion, and a little bit of corn flour and salt to taste. When the onion and garlic are tender, add the bwarom to the pan, mix gently, and serve.


References

Learn more about Pascua Yaqui (Yoeme) culture at Tucson’s Old Pascua Museum & Cultural Center

Texas Band of Yaqui Indians. (no date). History. Retrieved August 4, 2026, from https://www.tbyi.gov/history

Uddin, M. K., Juraimi, A. S., Hossain, M. S., Nahar, M. A., Ali, M. E., & Rahman, M. M. (2014). Purslane weed (Portulaca oleracea): a prospective plant source of nutrition, omega-3 fatty acid, and antioxidant attributes. The Scientific World  Journal2014, 951019. https://doi.org/10.1155/2014/951019
Bluecorn Biscotti with Seasonal Saguaro Juñ

Cheers for New Years now in the Sonoran Desert as we celebrate harvest time for Saguaro fruit! This important harvest around the Solstice and San Juan’s Day marks the beginning of the Indigenous Tohono O’odham desert year.

Fruit timing this year seems off kilter: plants are marching to new, unprecedented “climatic drummers.” Saguaros bloomed and fruited early, then a spring rain spurred a second bloom. Now, in mid June we are seeing a second wave of maturing fruit. With luscious saguaro bahidaj ripening in the desert around us as I write, the sun beating down, and Father’s Day on the horizon, it’s Tia Marta here to share a fun idea for a healthy, locally-sourced Southwest confection for seasonal festivities. A recipe for a saguaro treat awaits….

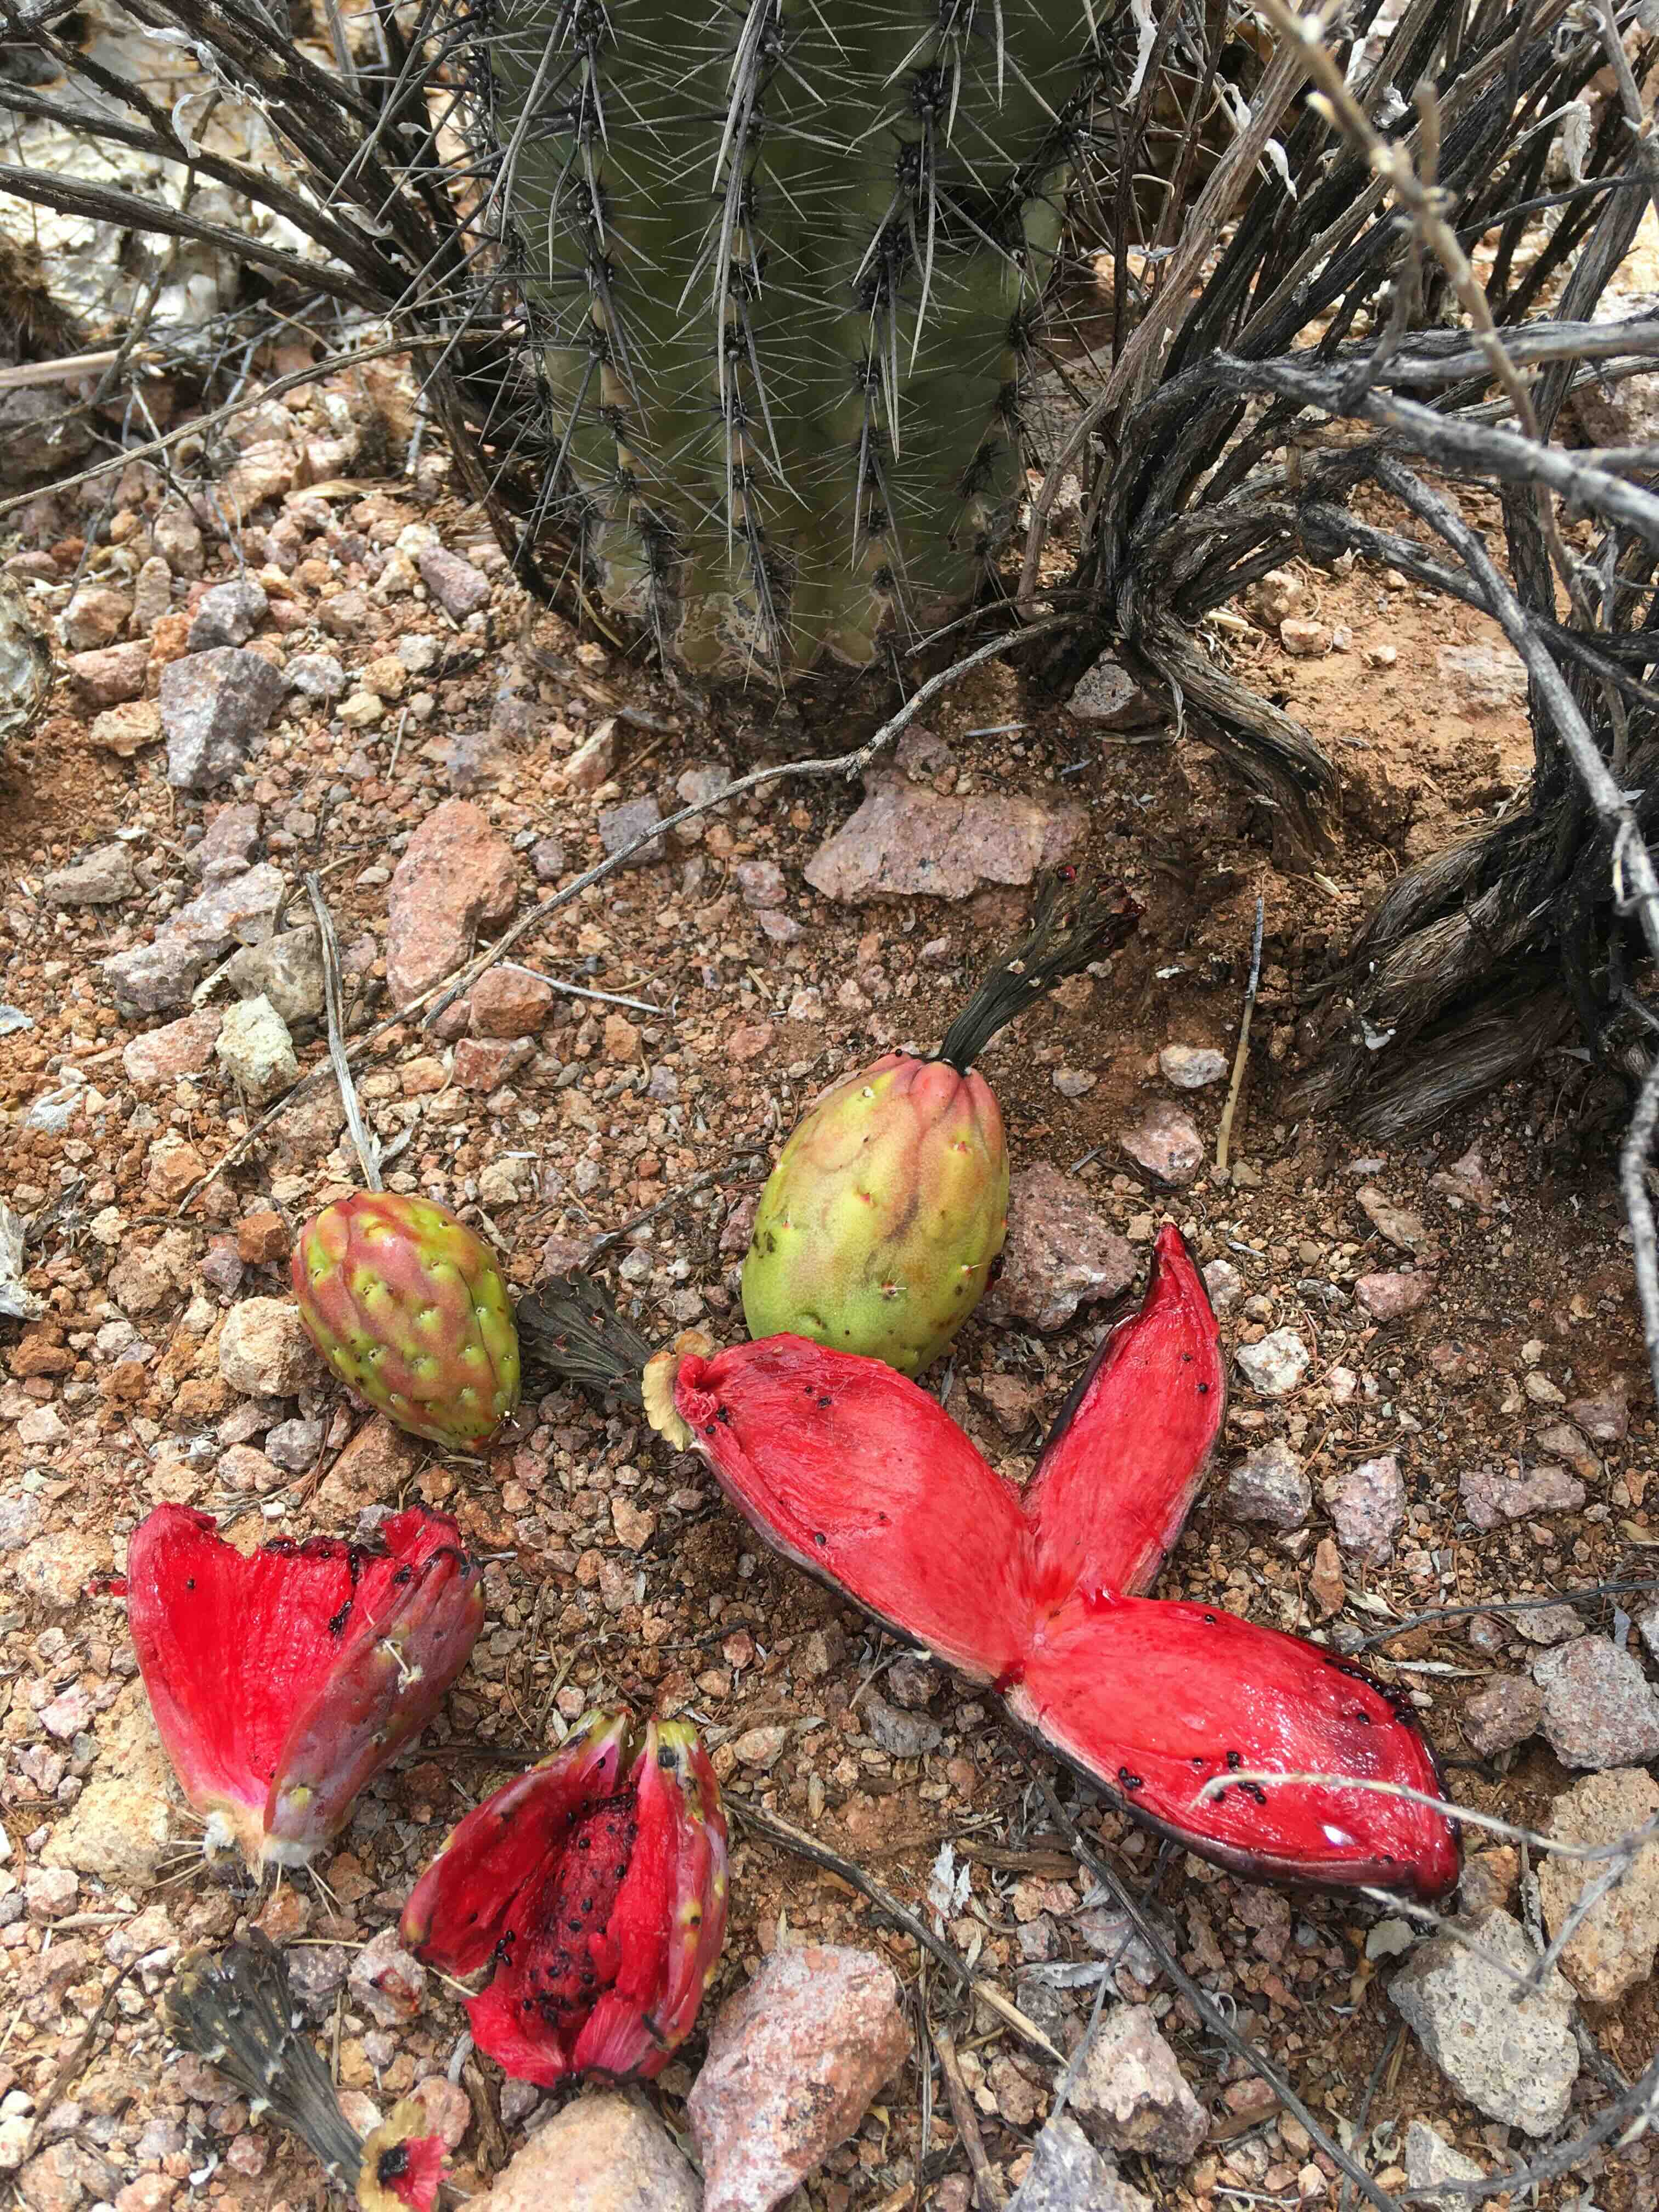
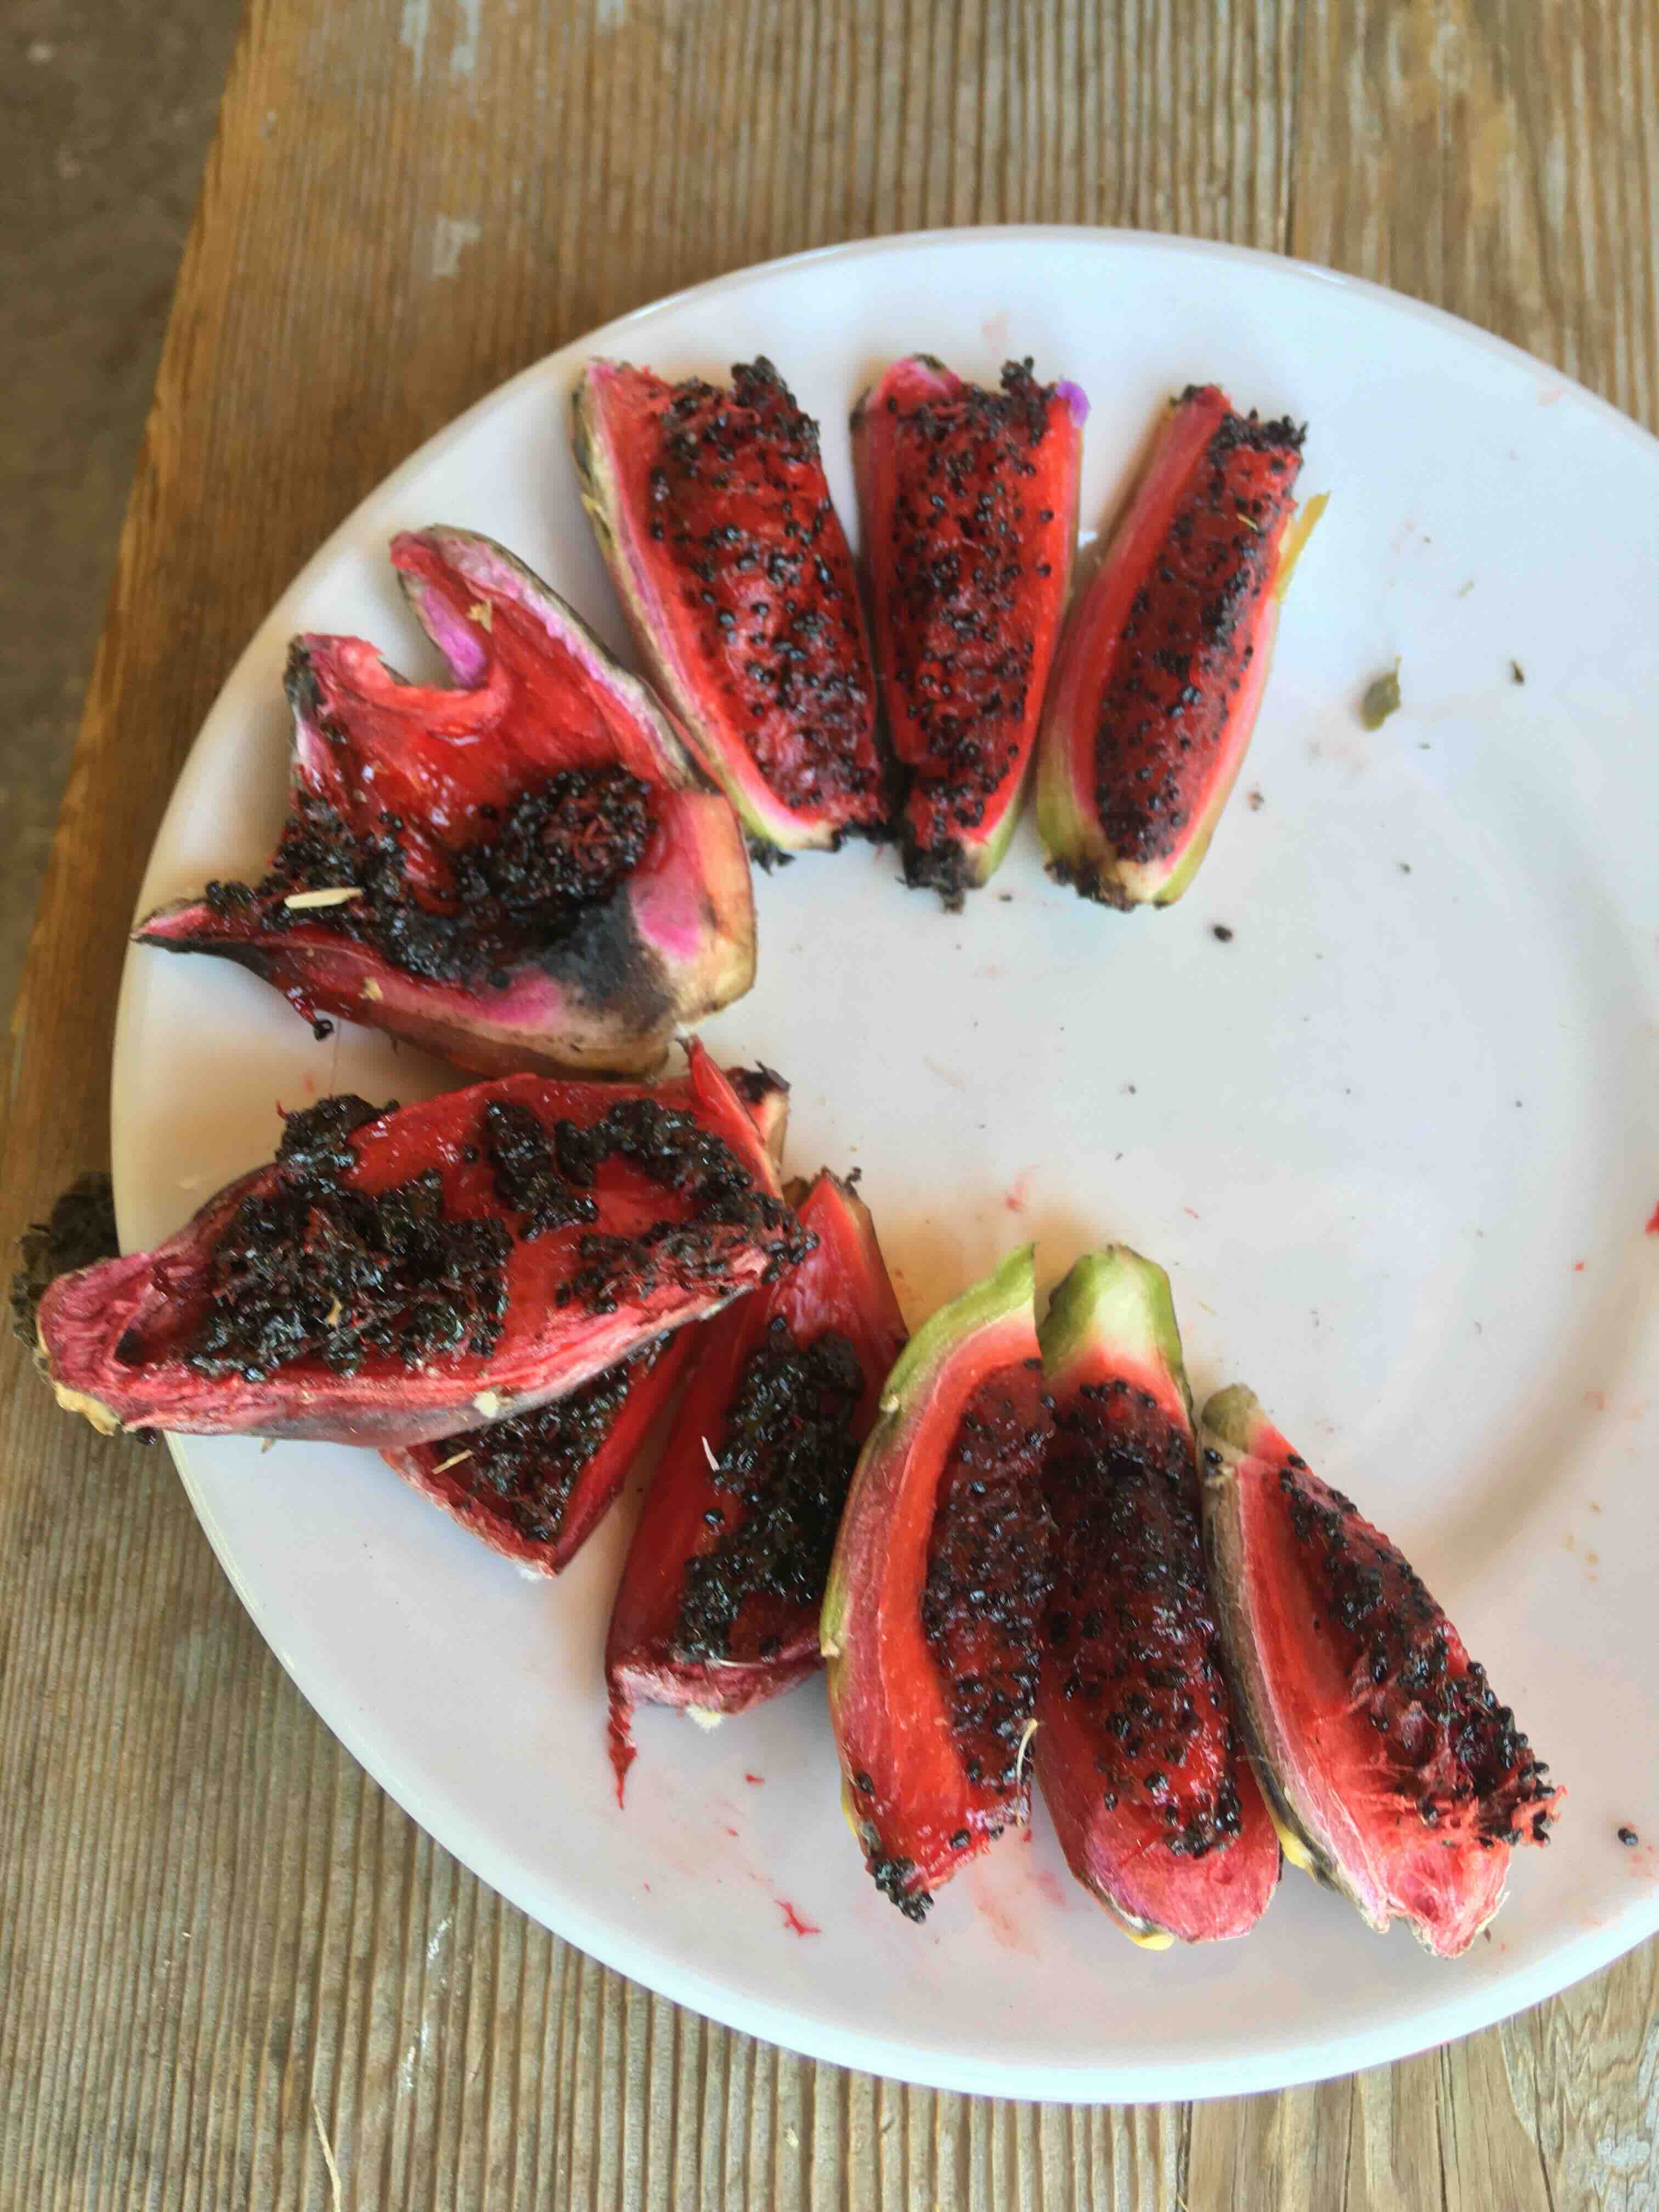
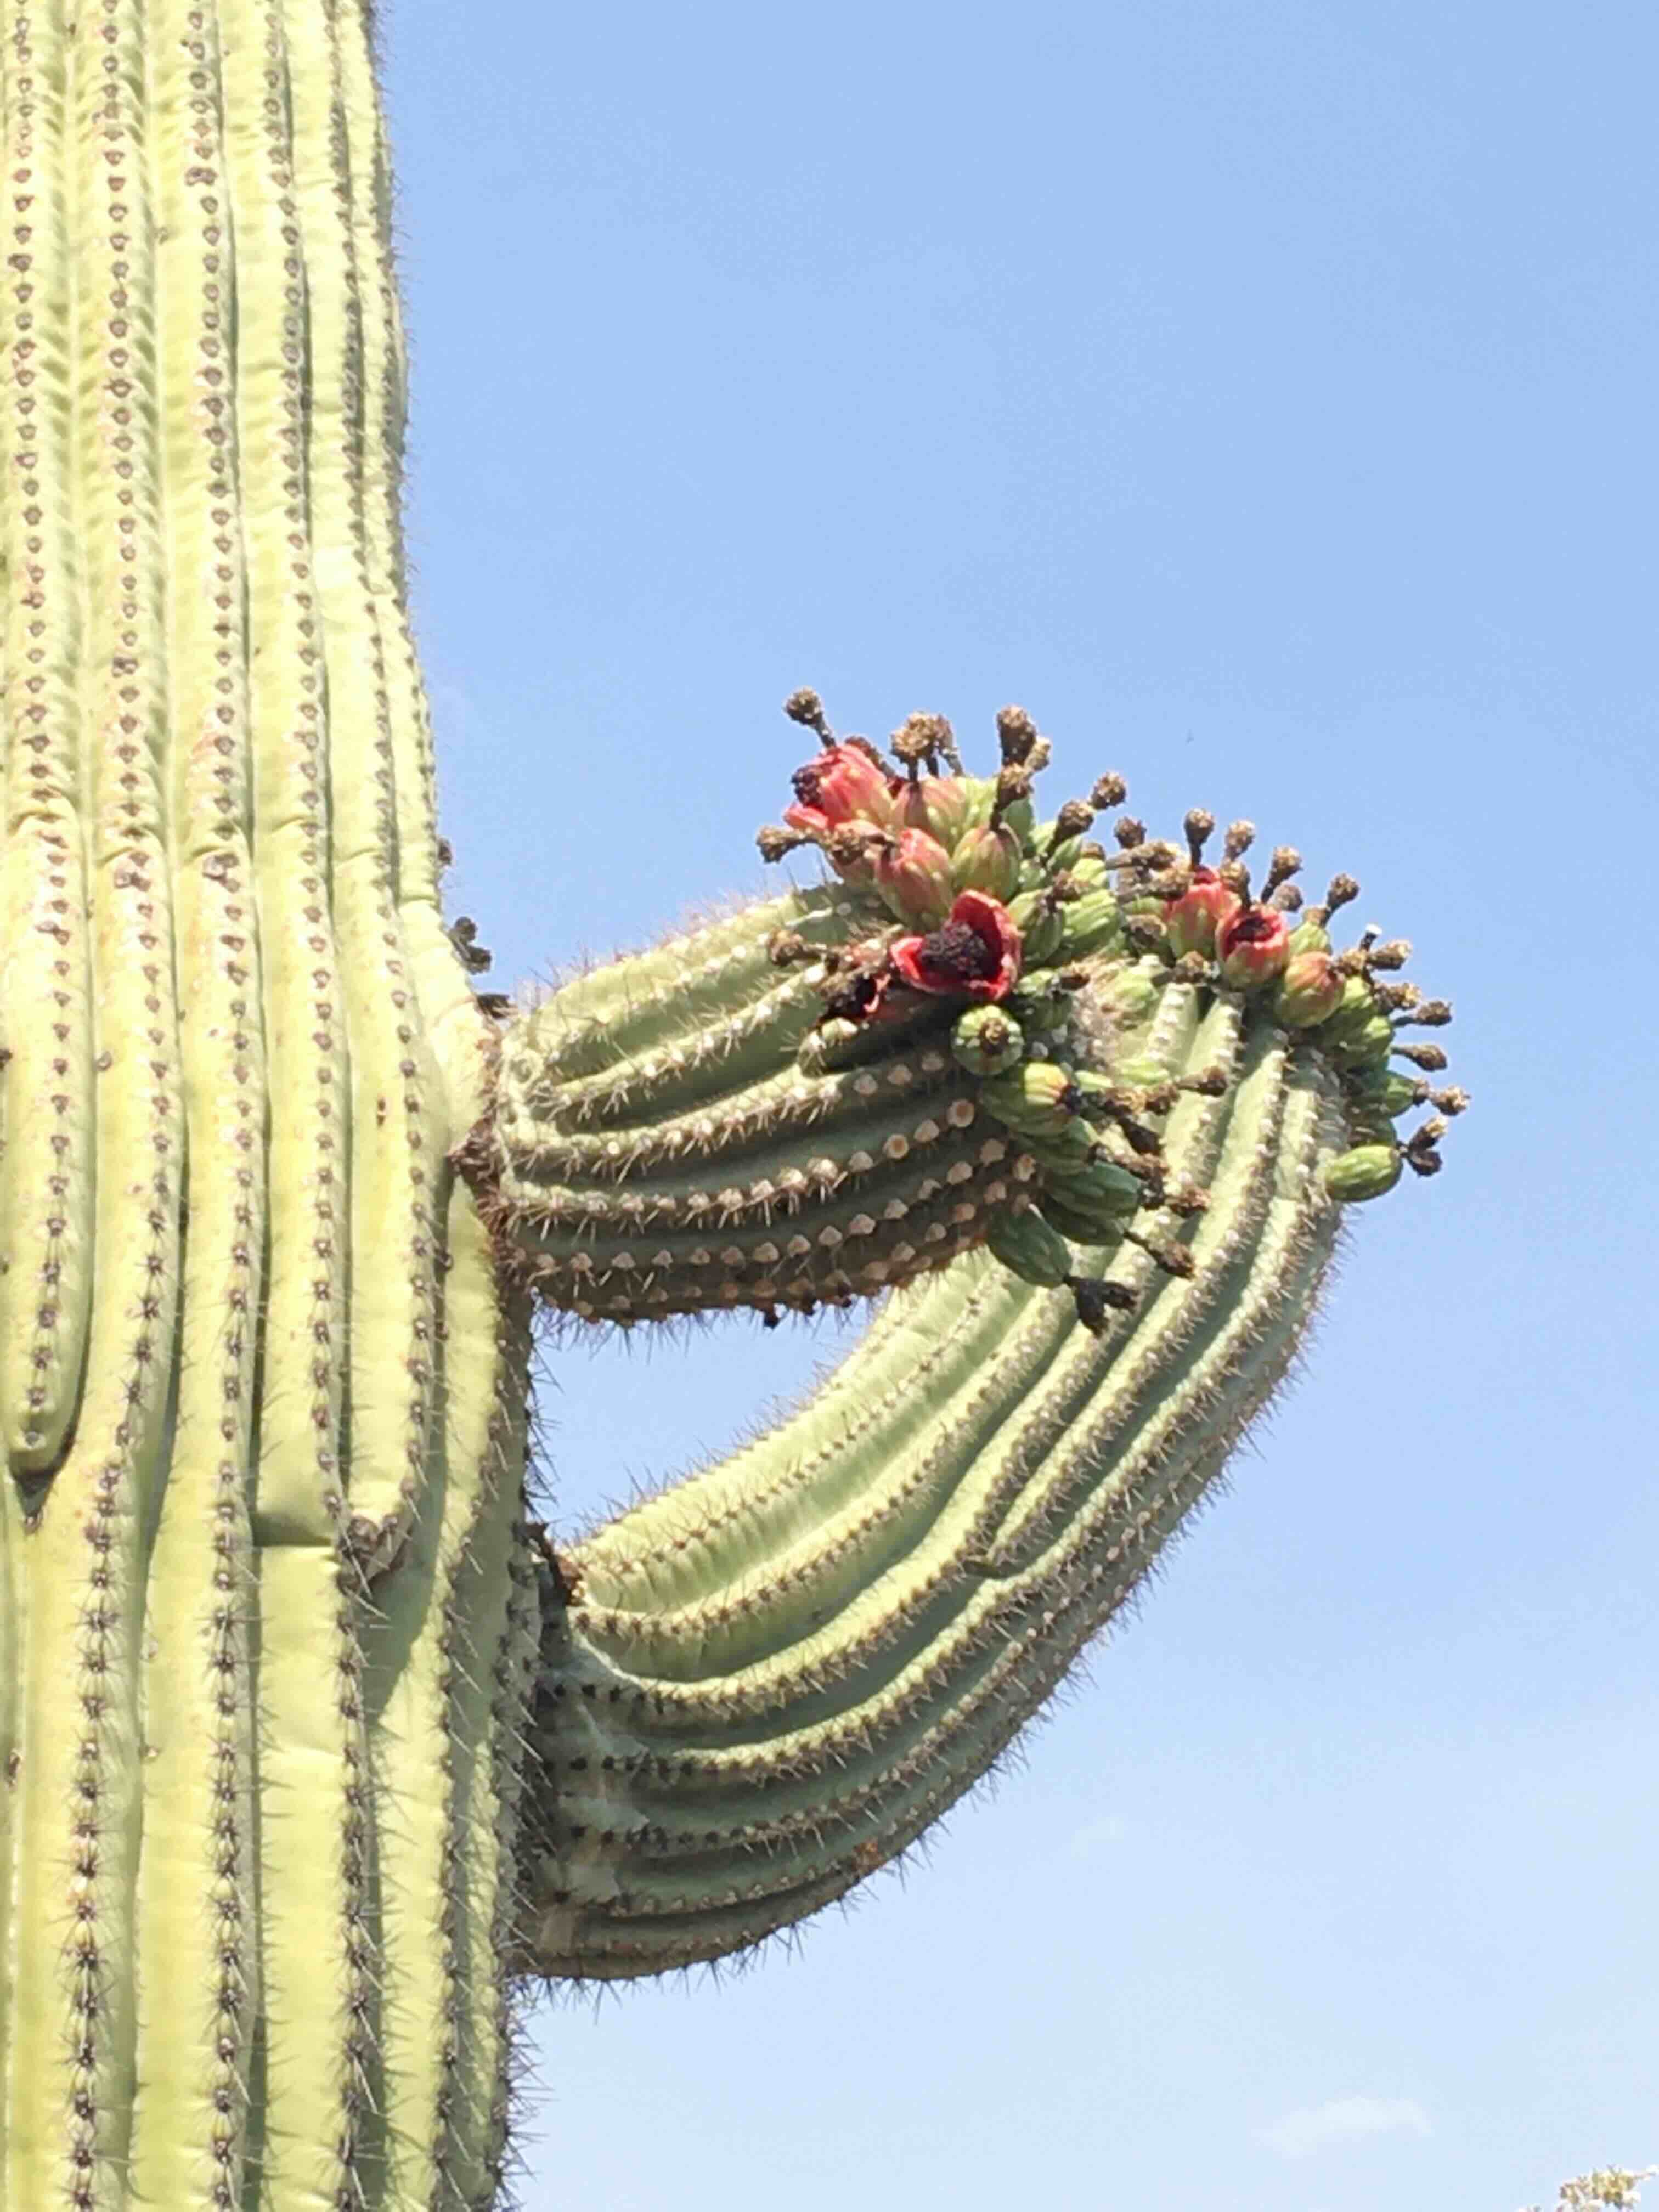
Saguaro fruit, ha:ṣañ bahidaj, is ripe when the outer husk gets a “blush” of red. Peel back the thick rind and inside is a sweet and crunchy treasure. When the moist pulp-seed mass dries it makes a natural fruit-leather called JUÑ pronounced JOONya or just JOON. Dried, it keeps a long time. With juñ you can dress up any salad or sweet–or just eat it joyfully plain, as a gift from Nature and Elder Brother.

We’re going to bake a precious bit of juñ into neat energy bars or biscotti….May this biscotto (literally a twice cooked confection) help you celebrate on many levels!

A few days ahead.. separate moist pulp/seed-mass from husk. Dry the pulp mass in hot sun either in screenbox or spread out on cookie sheets covered with cloth to protect from insects, or in a food drier–until crisp. This may take couple of days! When totally dry, work with hands, or with mortar and pestle, to loosen seeds and pulp.  You’ll use both seed and pulp in these biscotti.

RECIPE: Bluecorn Biscotti with Saguaro Juñ

INGREDIENTS:

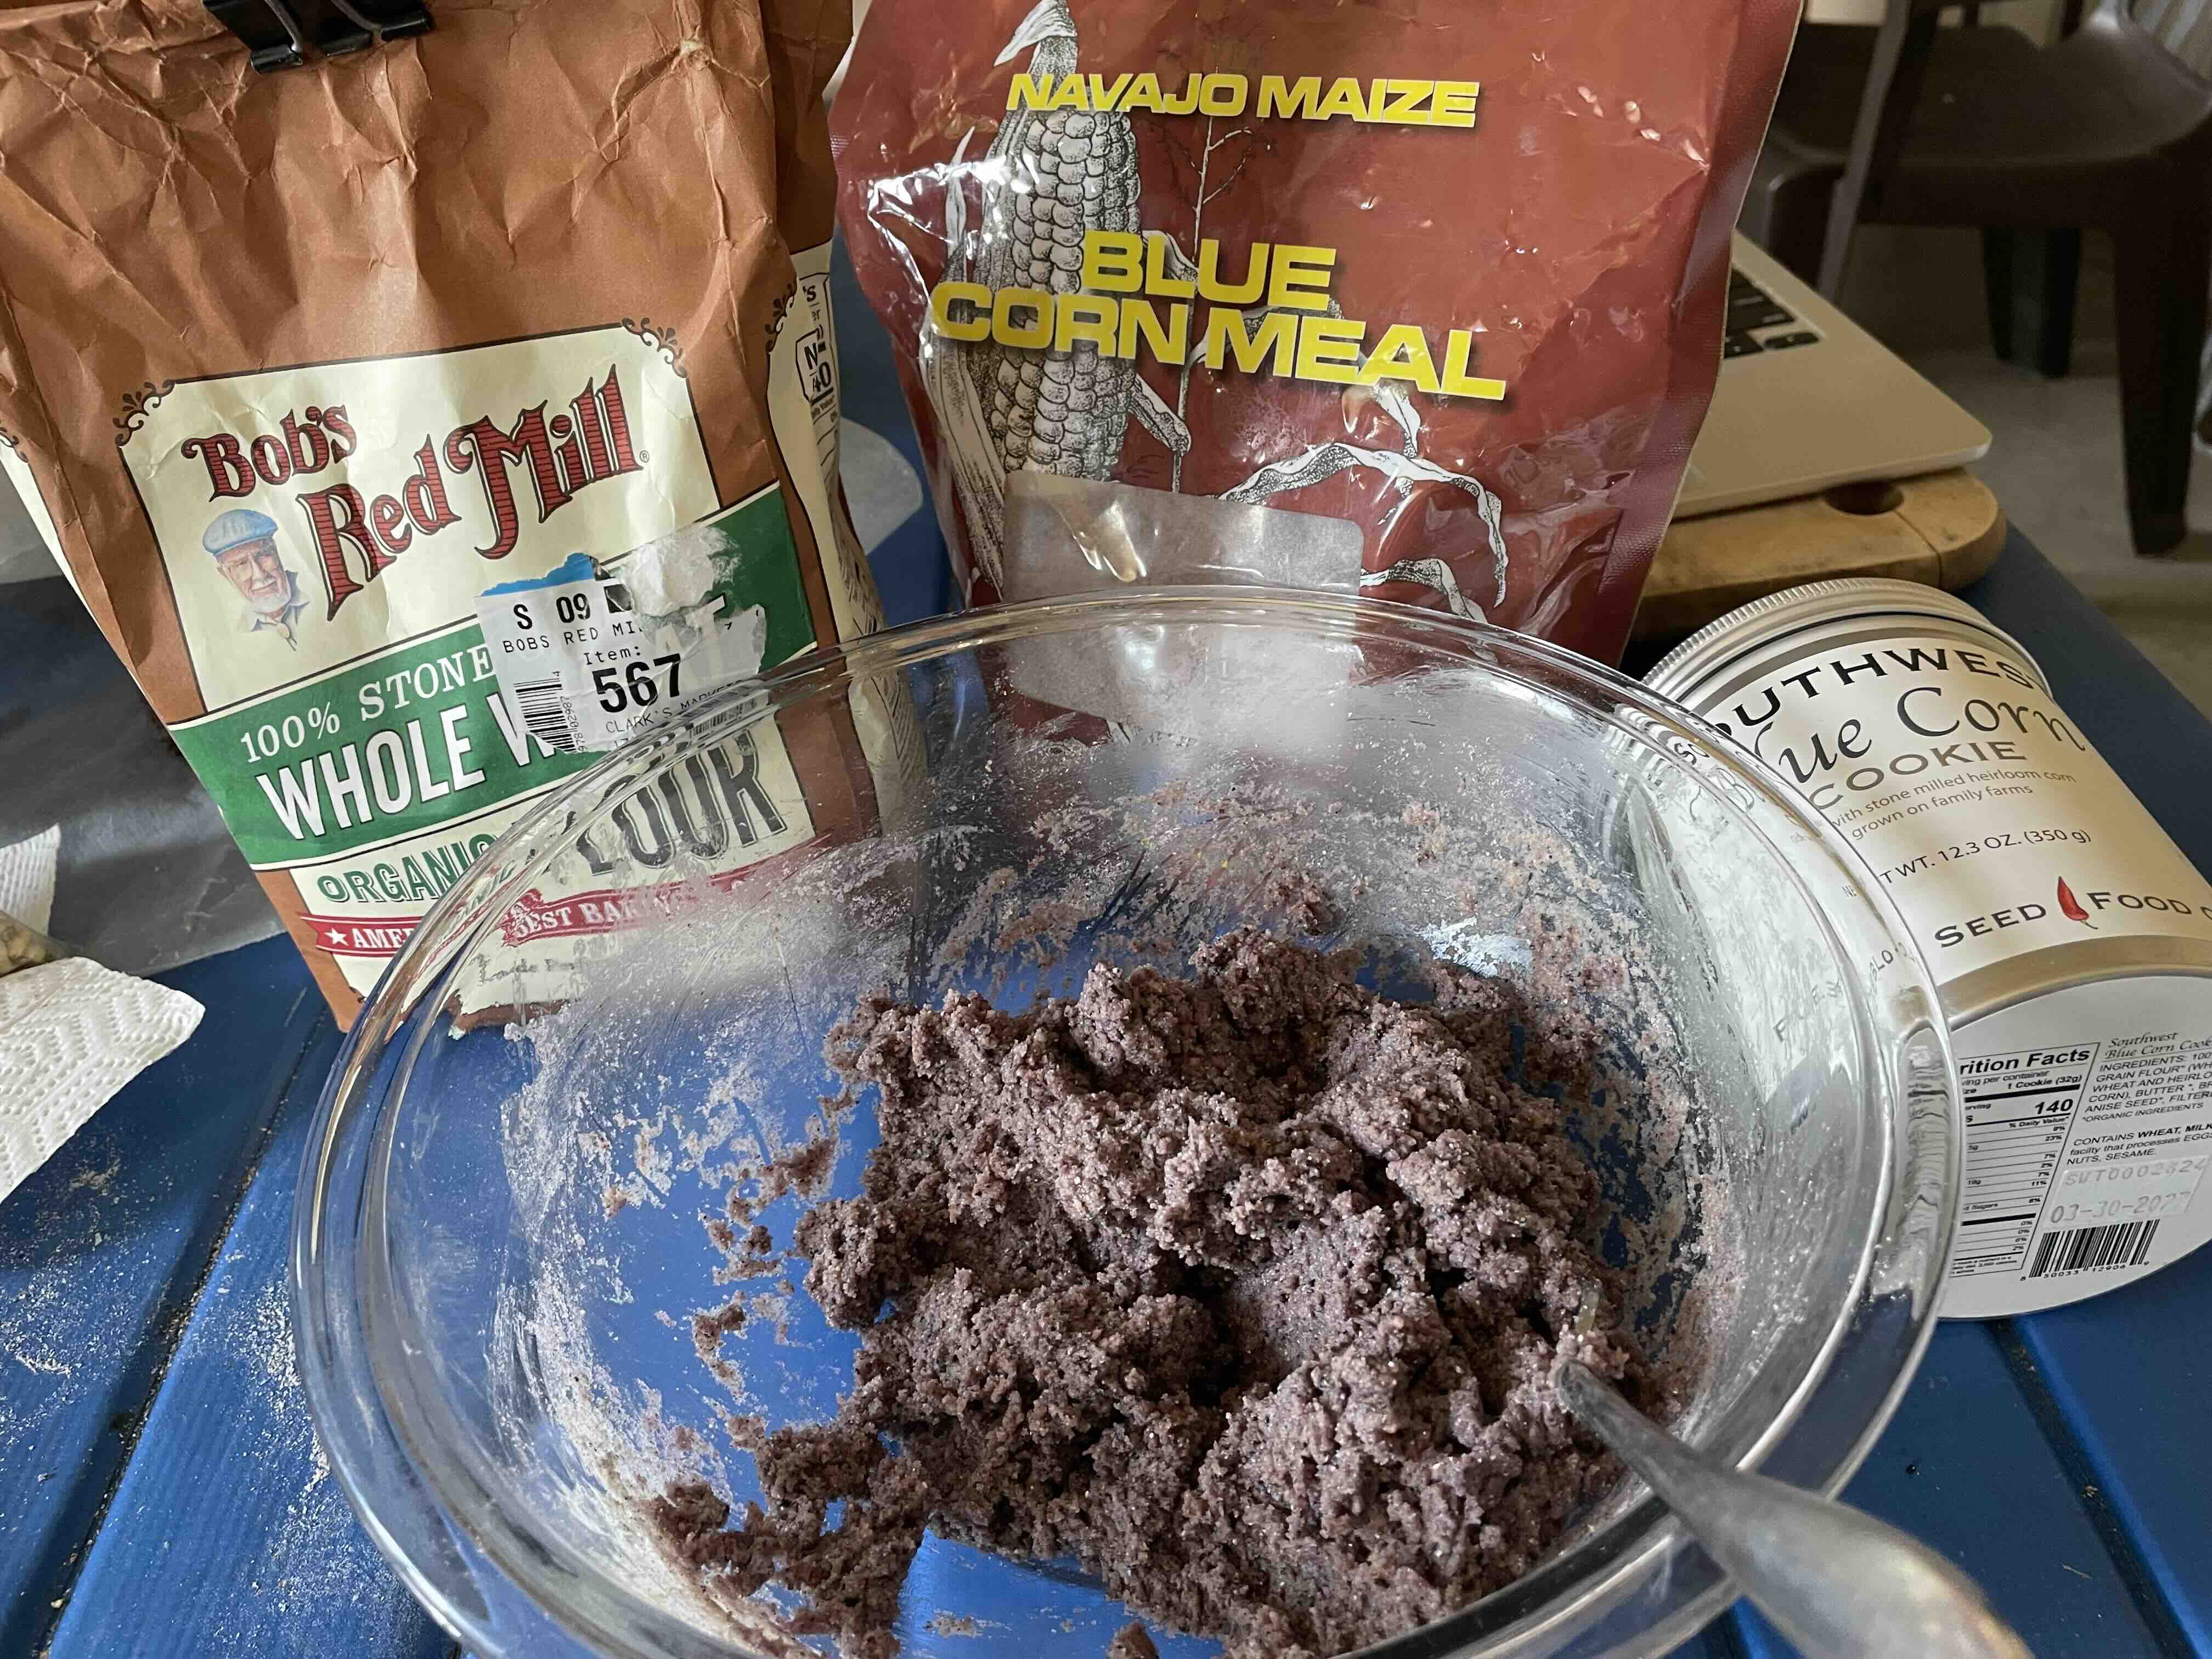
1/2 c. yogurt (non-fat plain yogurt, or butter) 1/2 c. sugar (or agave nectar) 1 egg (or egg substitute). 1 tsp vanilla. 1 c. whole grain flour   1 c. blue cornmeal (available online from NS/S). ¼ c. dried saguaro juñ, pulp and seeds loosened 1 tsp. baking powder. ½ tsp sea salt. (optional additions: 1/8c-1/4 c piñones or chia seed)

Cooking-day Directions: 

Beat yogurt and sugar until creamy. Beat in egg and vanilla. Sprinkle and mix the loosened Juñ into yogurt mixture.  In another bowl, sift together flour, cornmeal, baking powder, salt. Gradually add to yogurt mixture, stirring until completely blended. Dough should be shape-able.

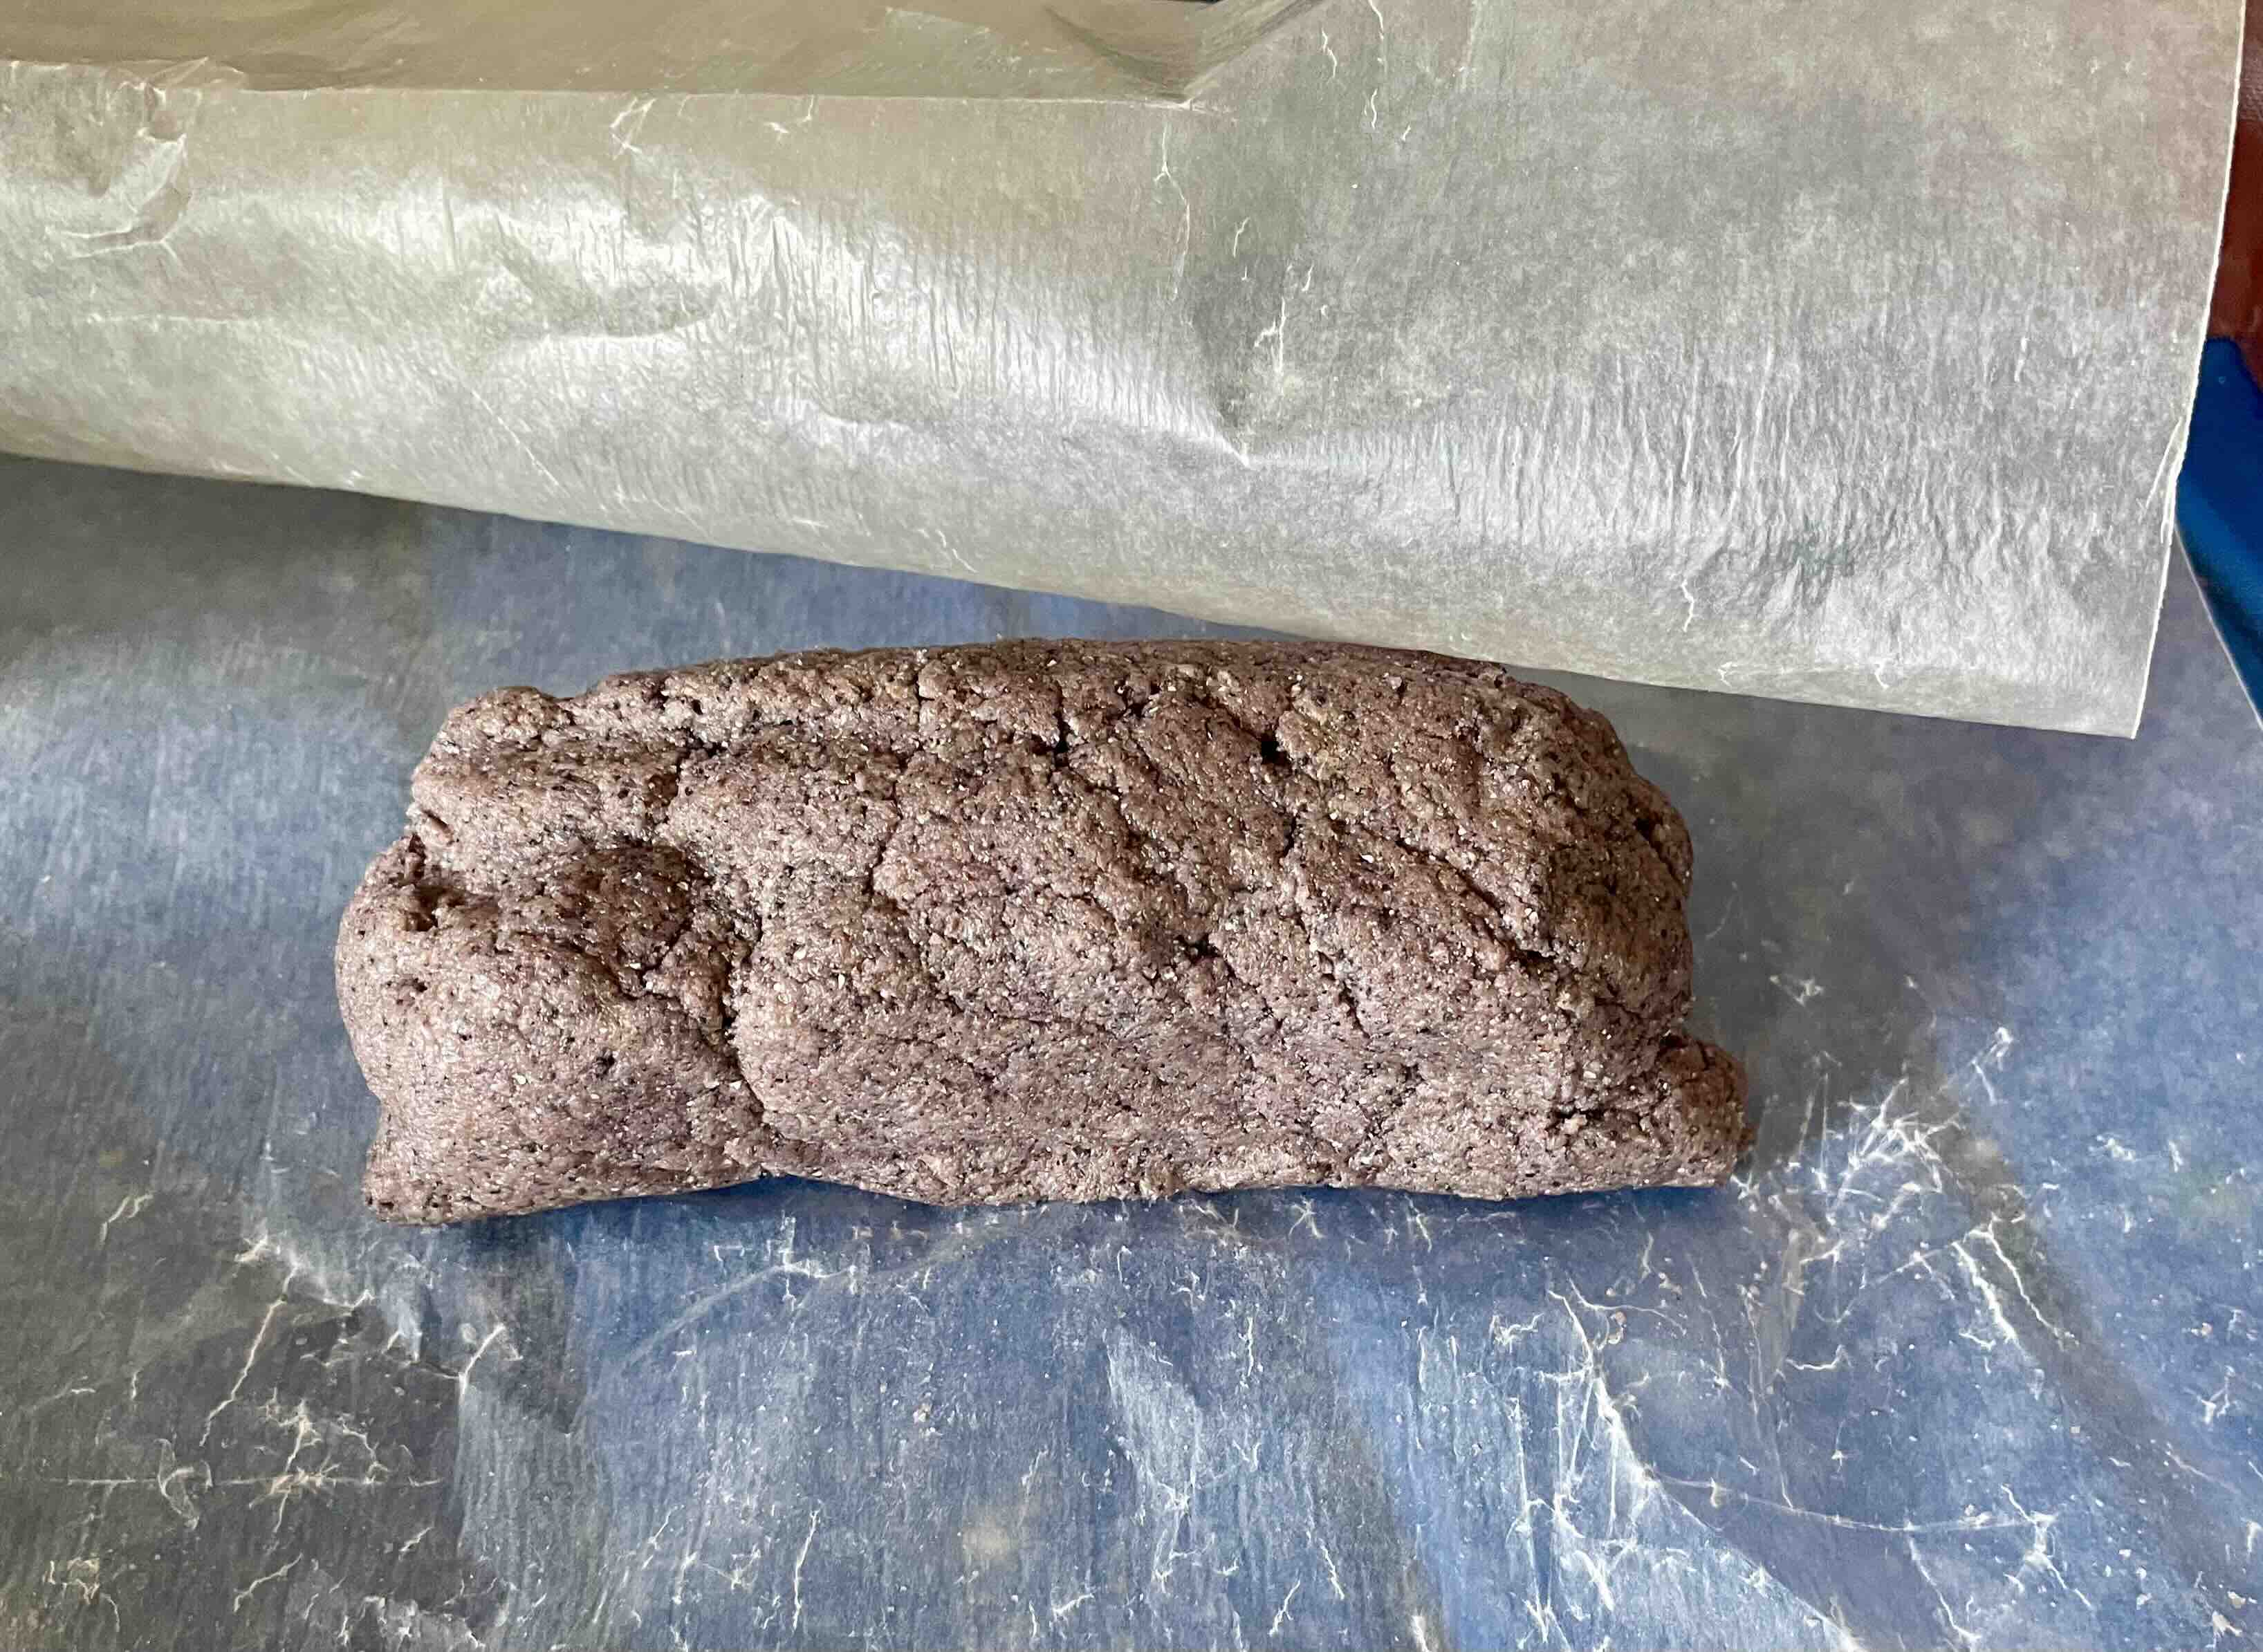
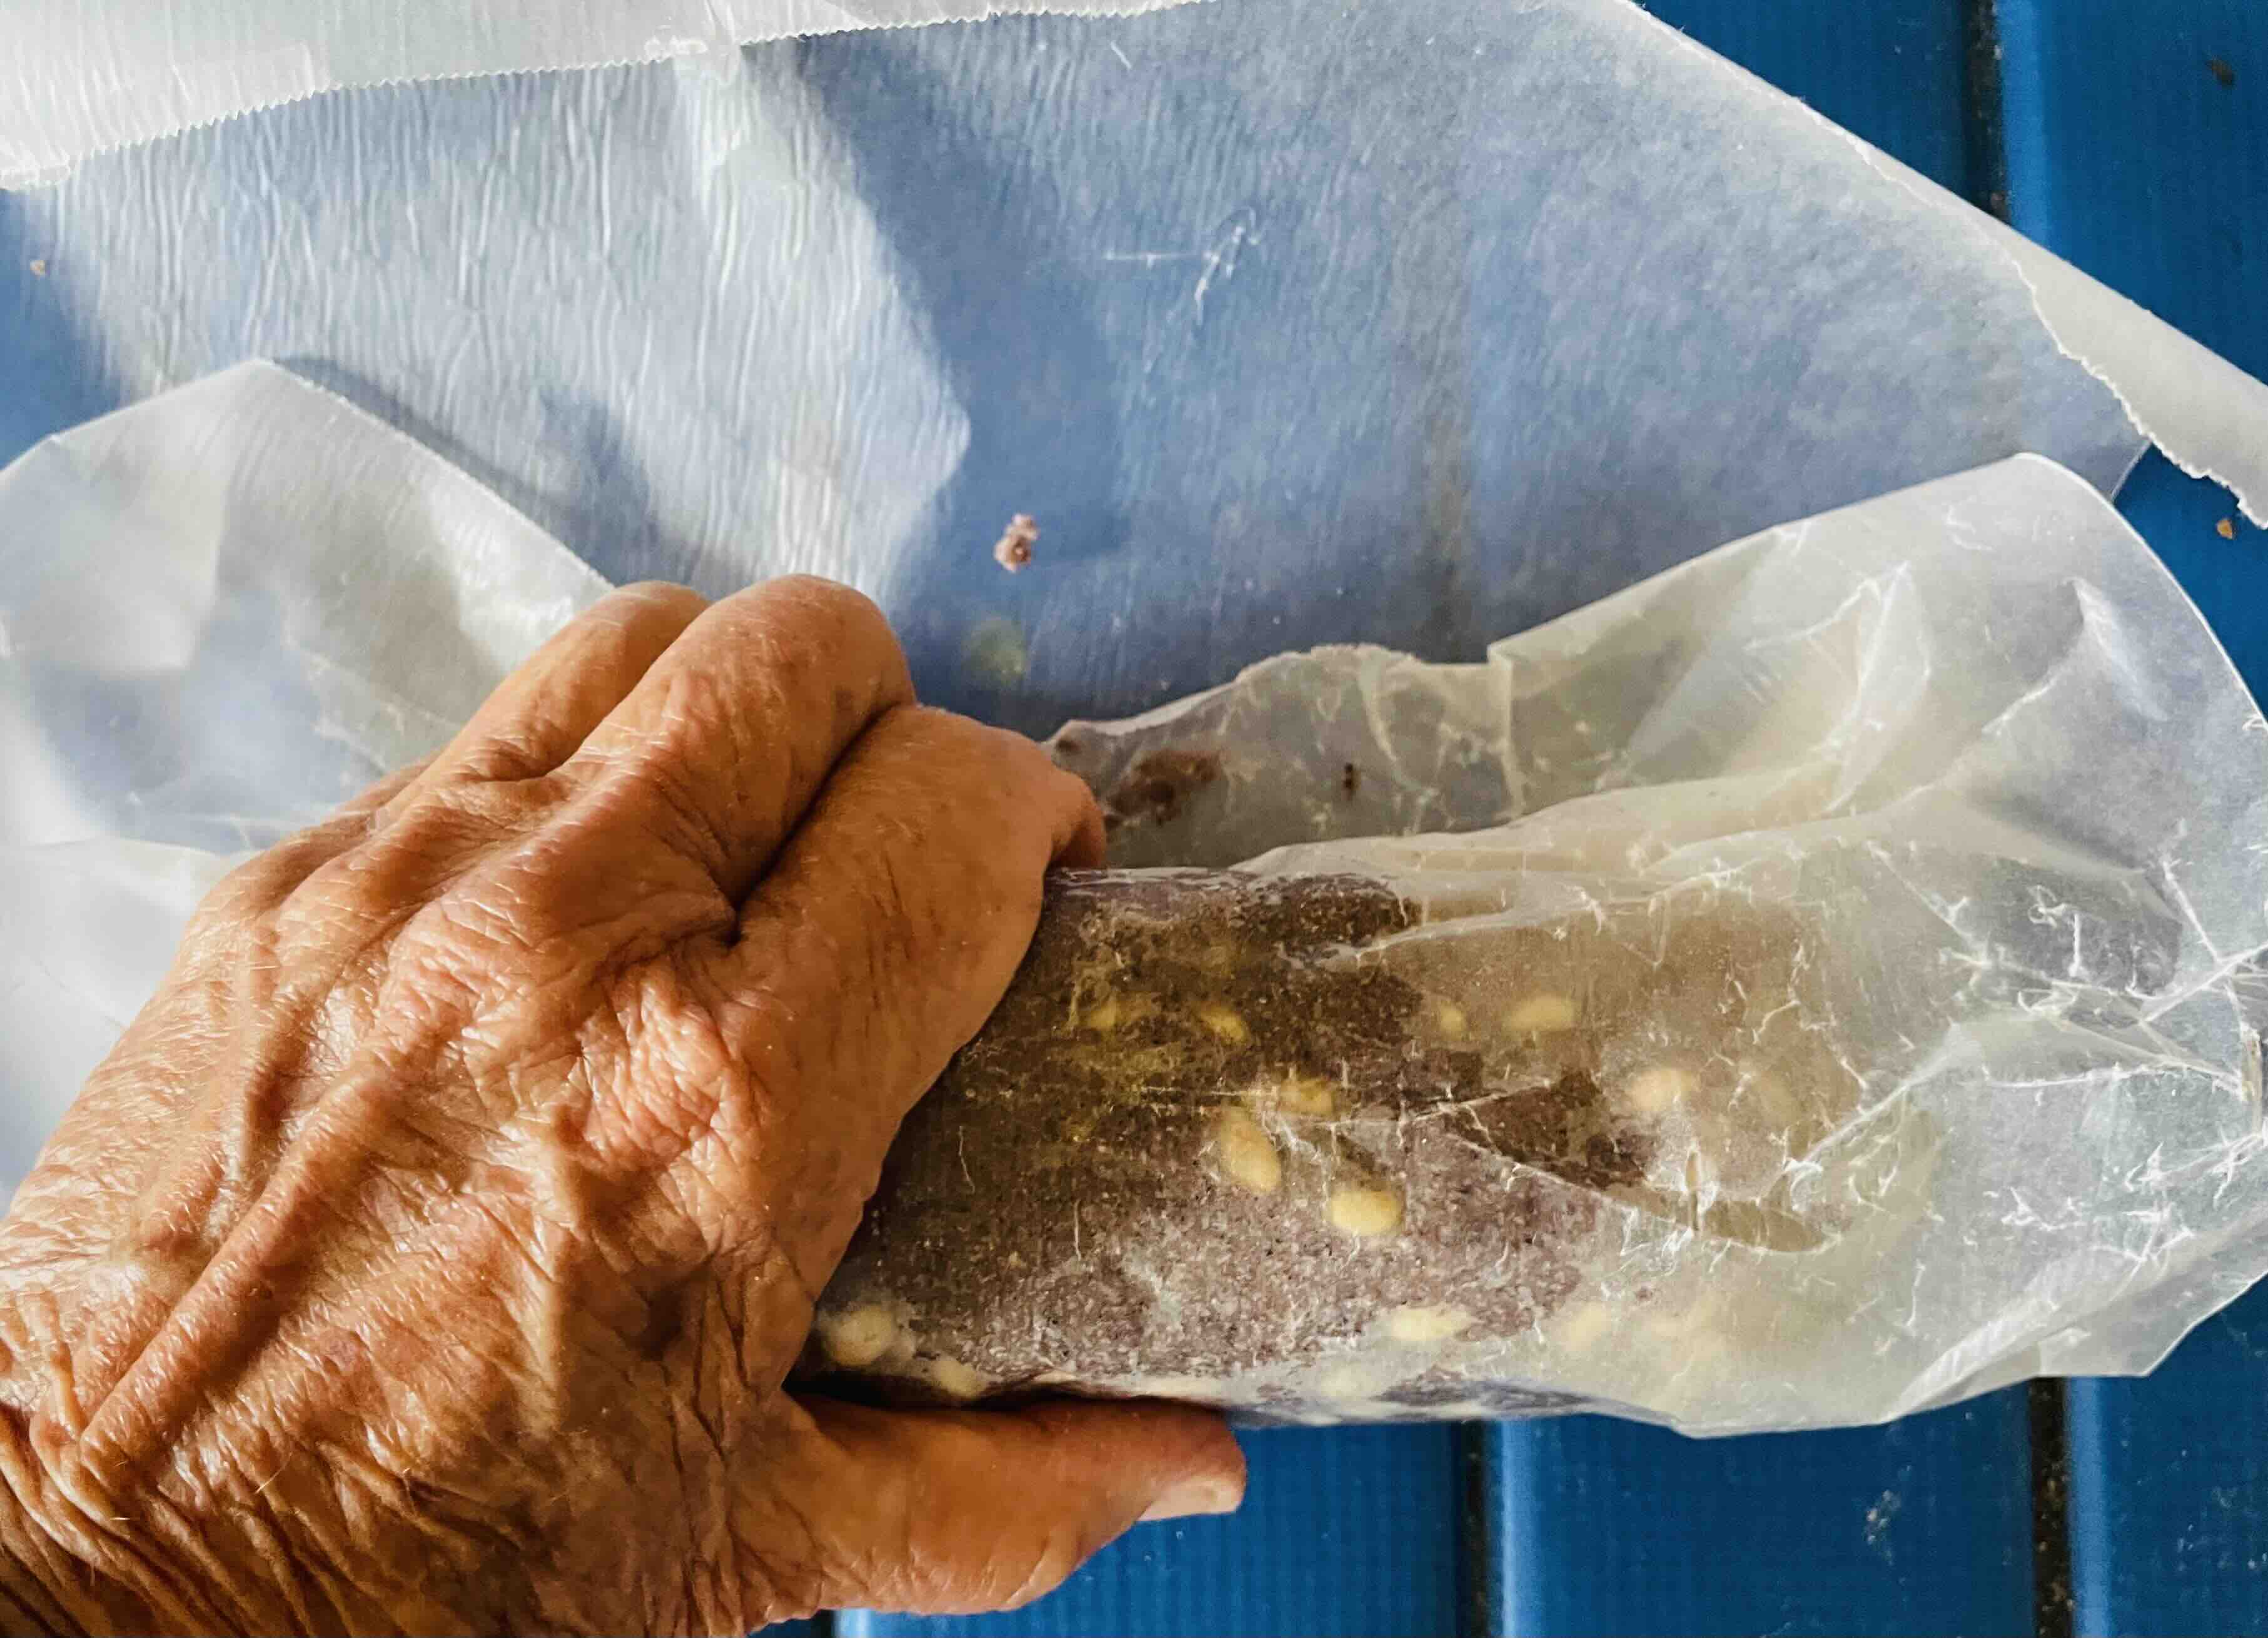
On waxed paper, shape dough into two separate “logs” about 2 inches in diameter. Wrap and chill until firm, at least 3 hours (or up to 3 days).

With my dough for the second “log” I added piñones (in place of usual almond biscotti).

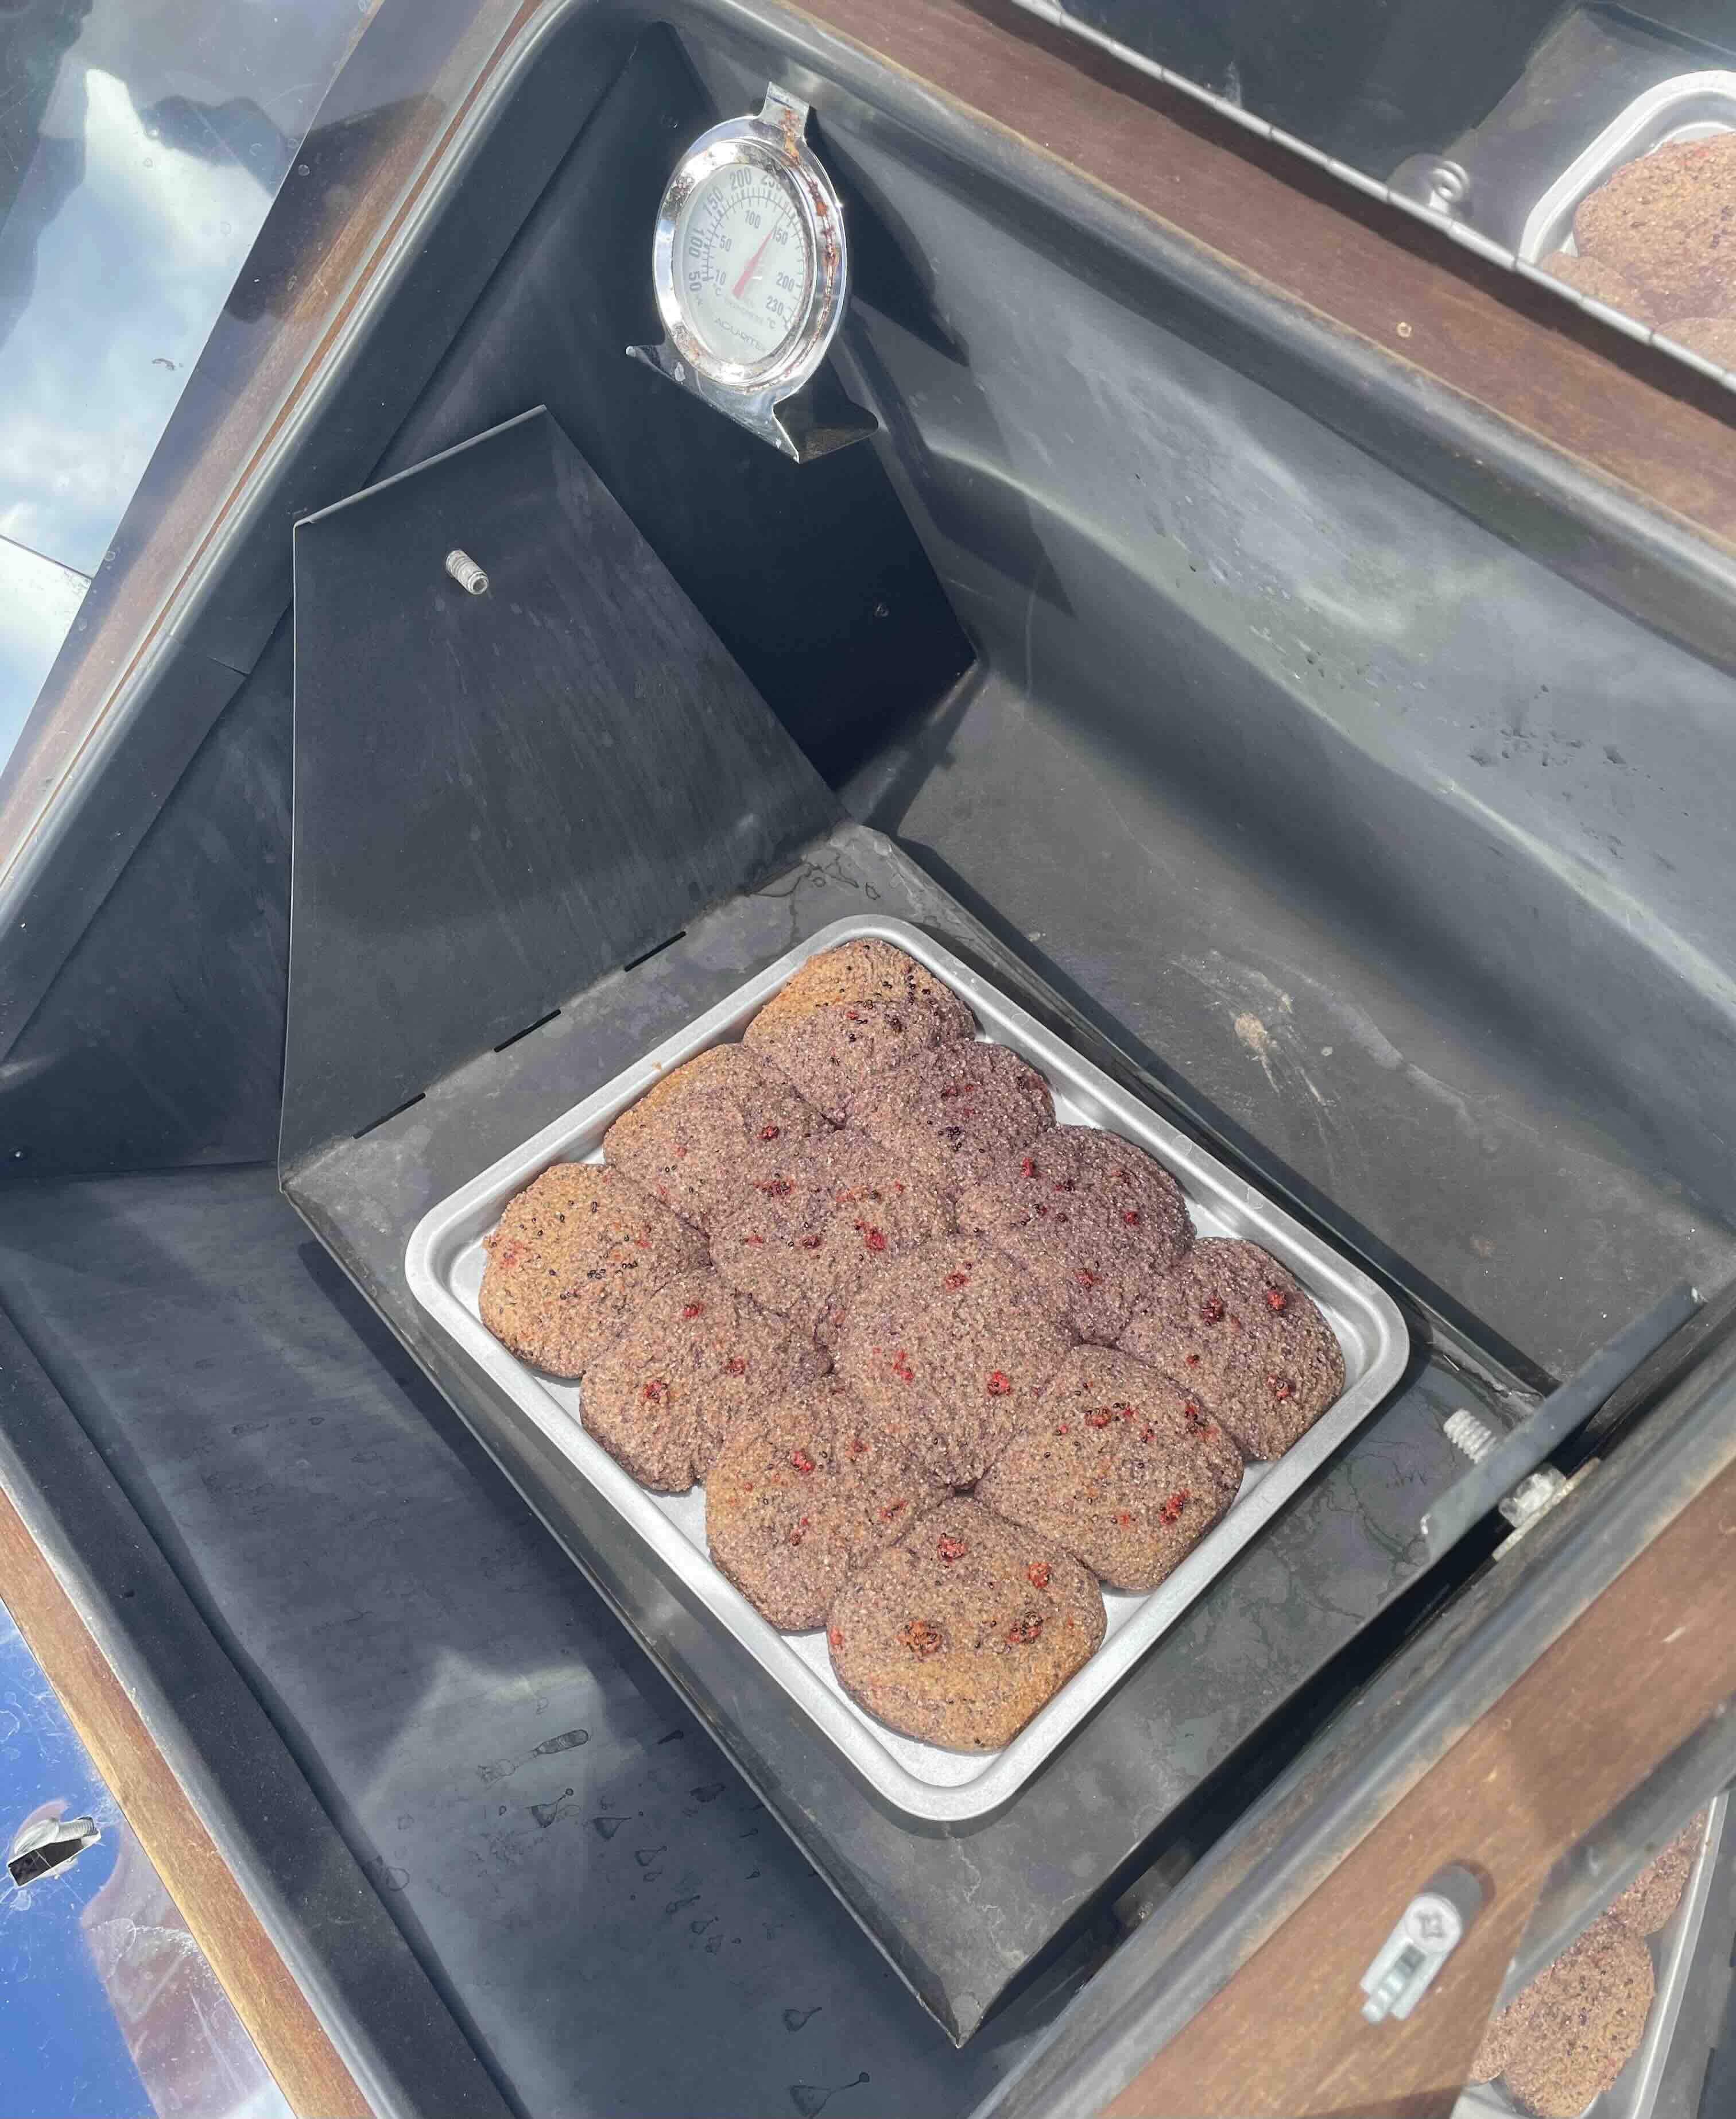
Preheat oven to 325 degrees. (To keep heat out of the kitchen, I love using a solar oven. Heat will be variable so monitoring for sun or clouds is needed.)

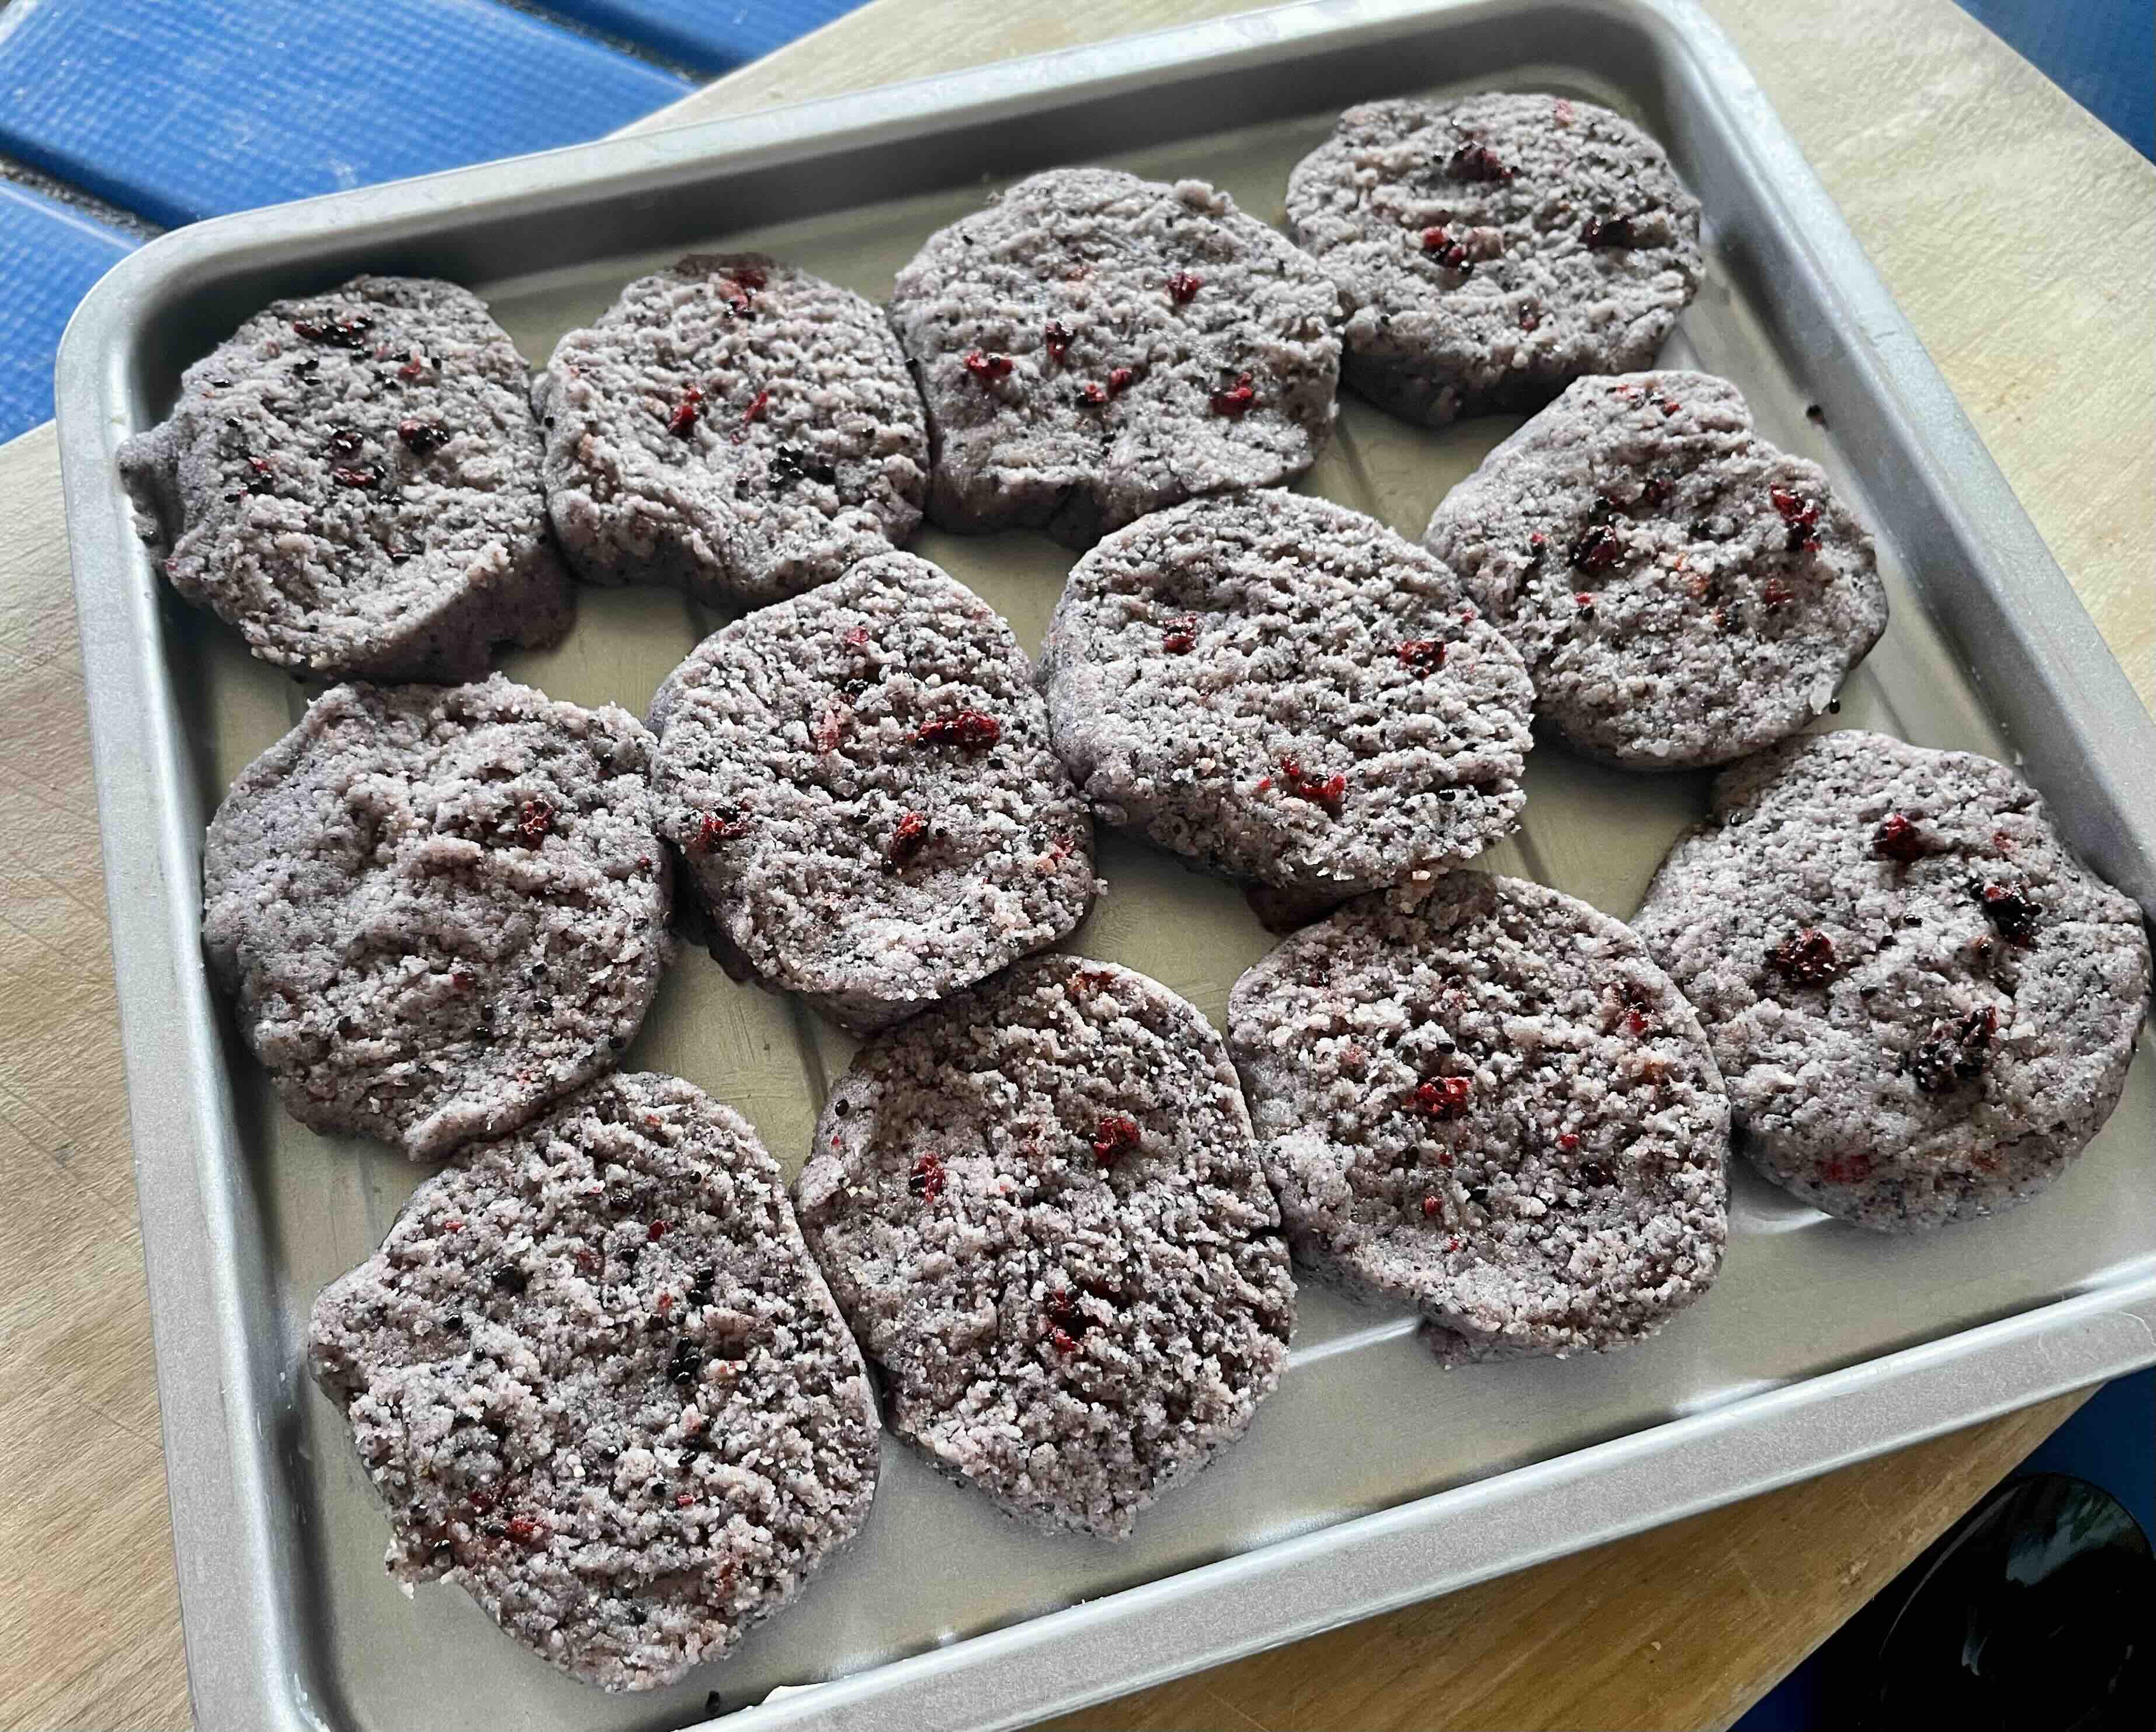
Unwrap dough. Using a sharp knife, cut into 1/4-inch slices. Place slices on greased baking sheets. (Or use parchment paper to avoid greasing.)

Bake at 325 degrees for 12-15 minutes until slightly brown. Add more time to make biscotti crisper.

Solar oven option:  Bake at about 300-325 degrees for 15-20 minutes watching for faint browning.  Depending on sun with monitoring it may take more time for desired crispness. Cool on wire racks. Makes about 2 dozen biscotti bars.

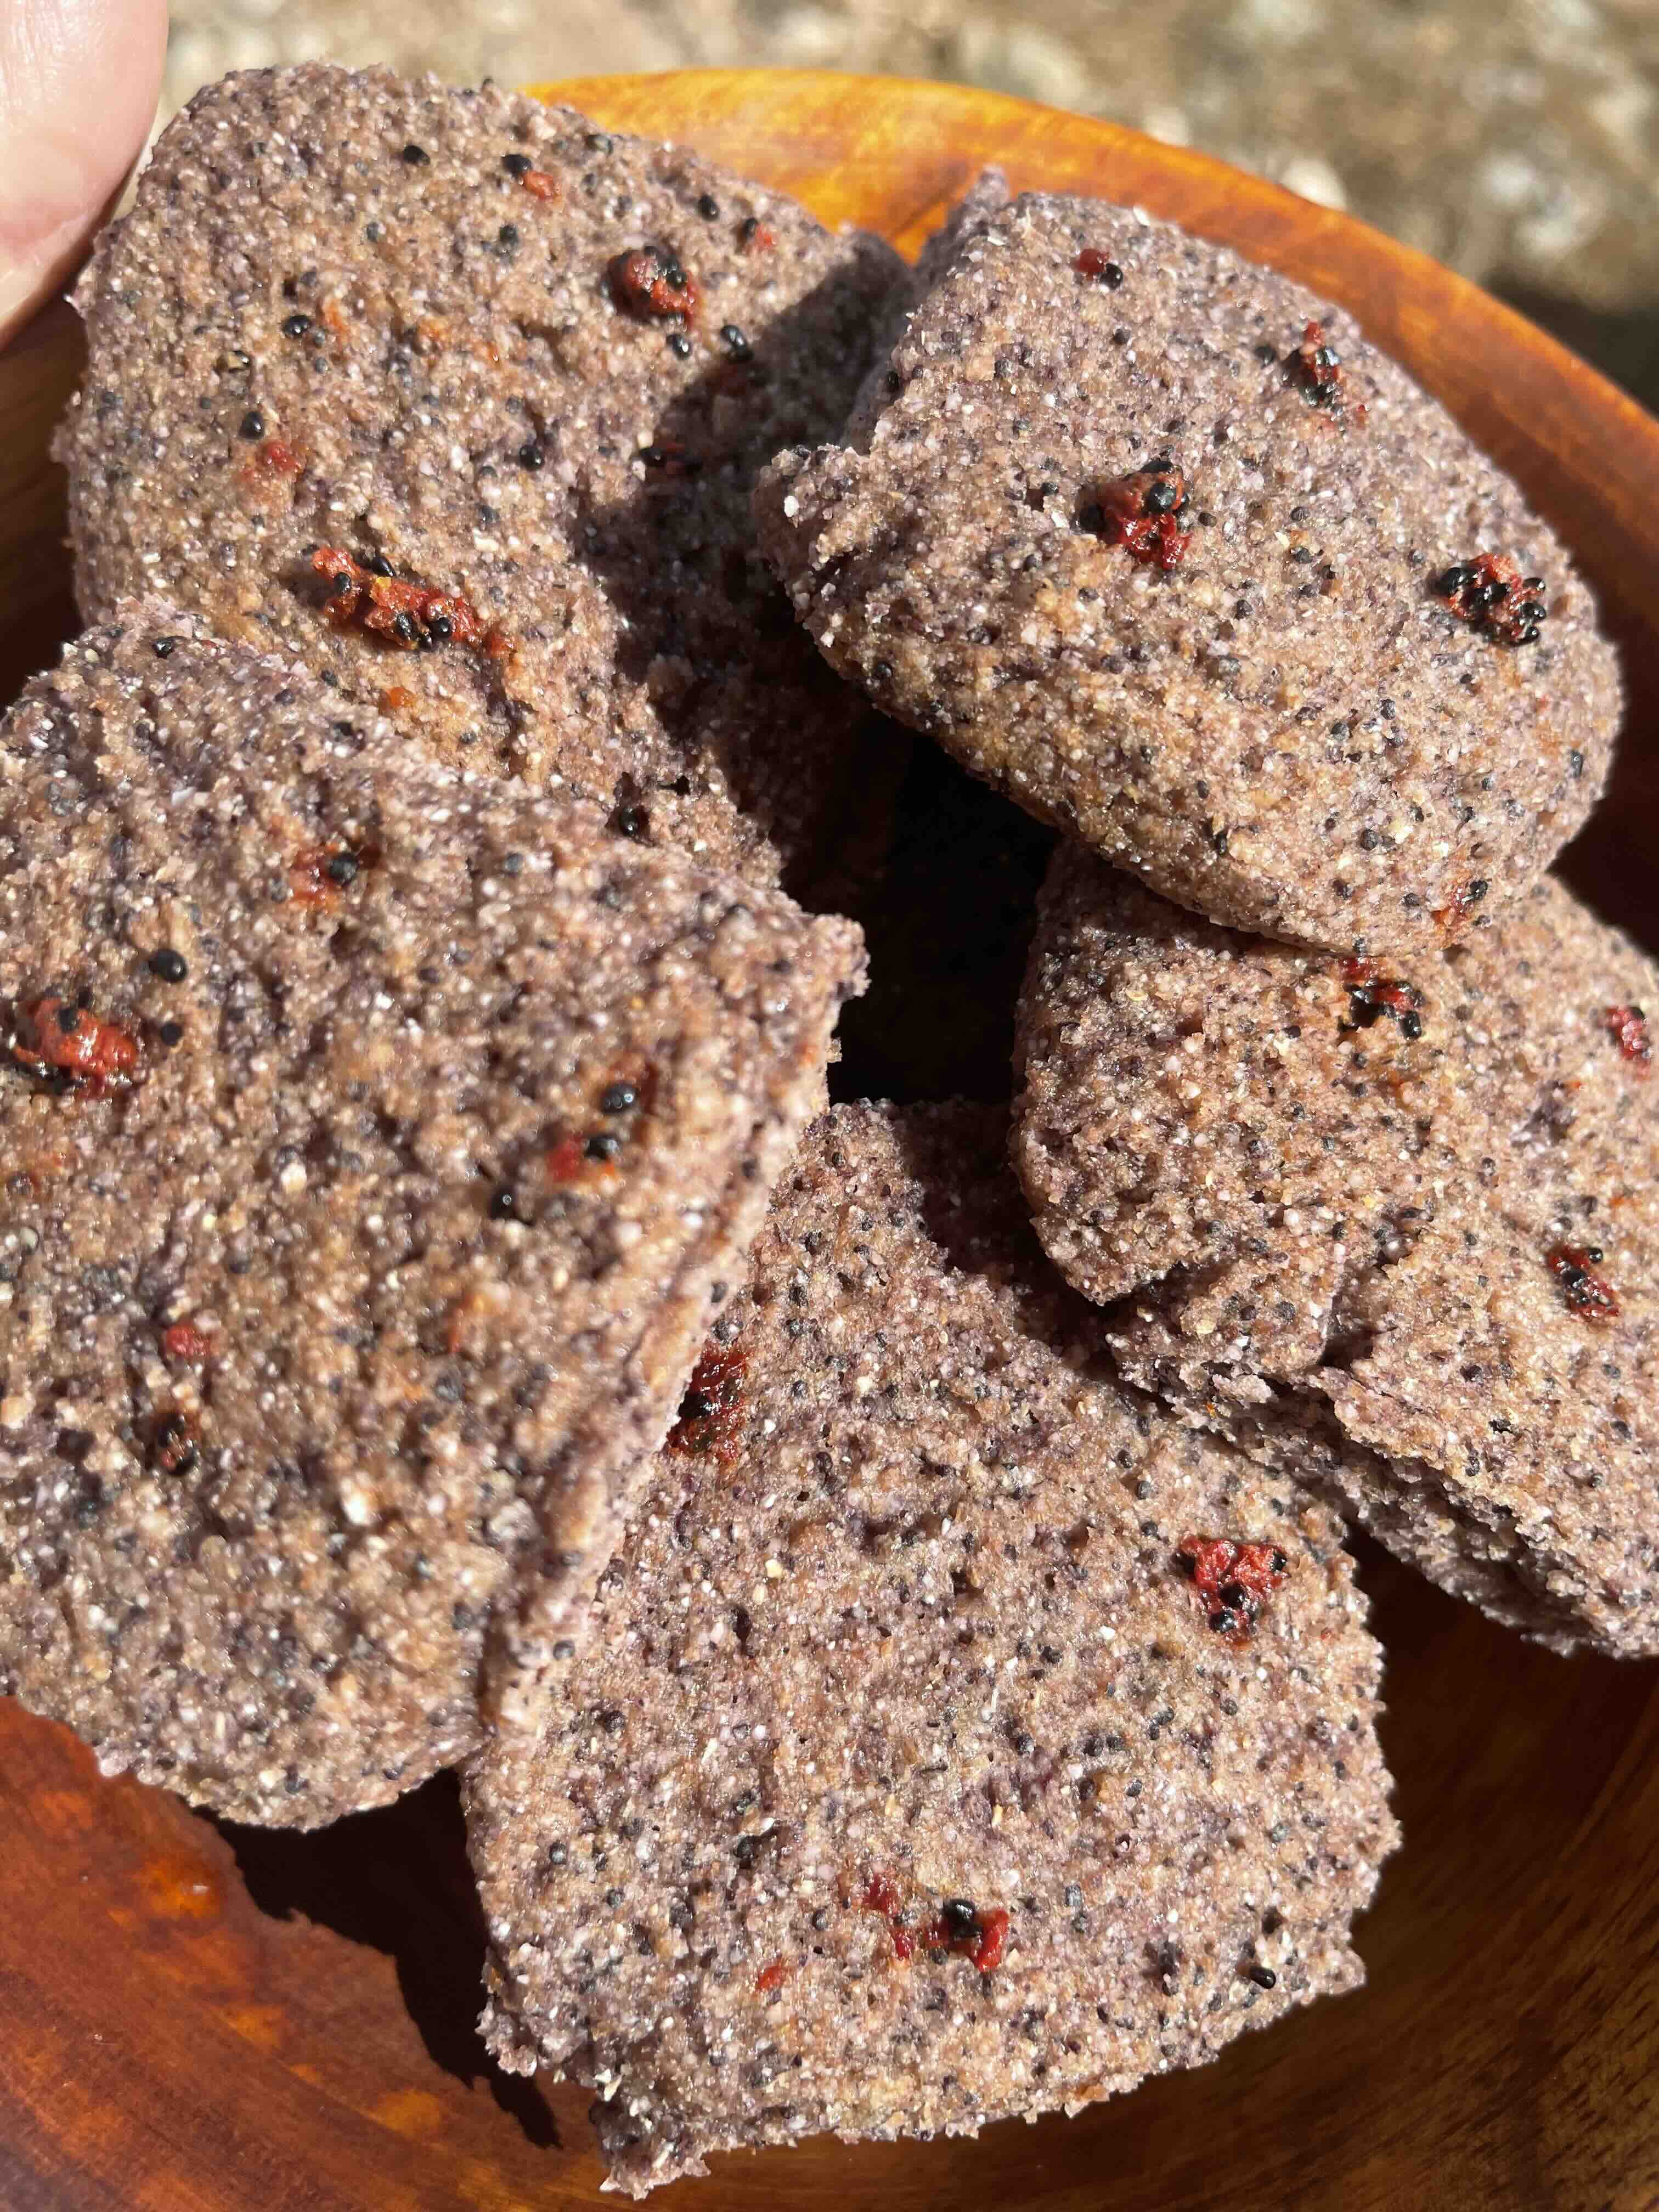
Bluecorn biscotti with Saguaro Juñ–ready to eat! Great for dippers into summertime ice coffee, or served with home-made vanilla sorbet!

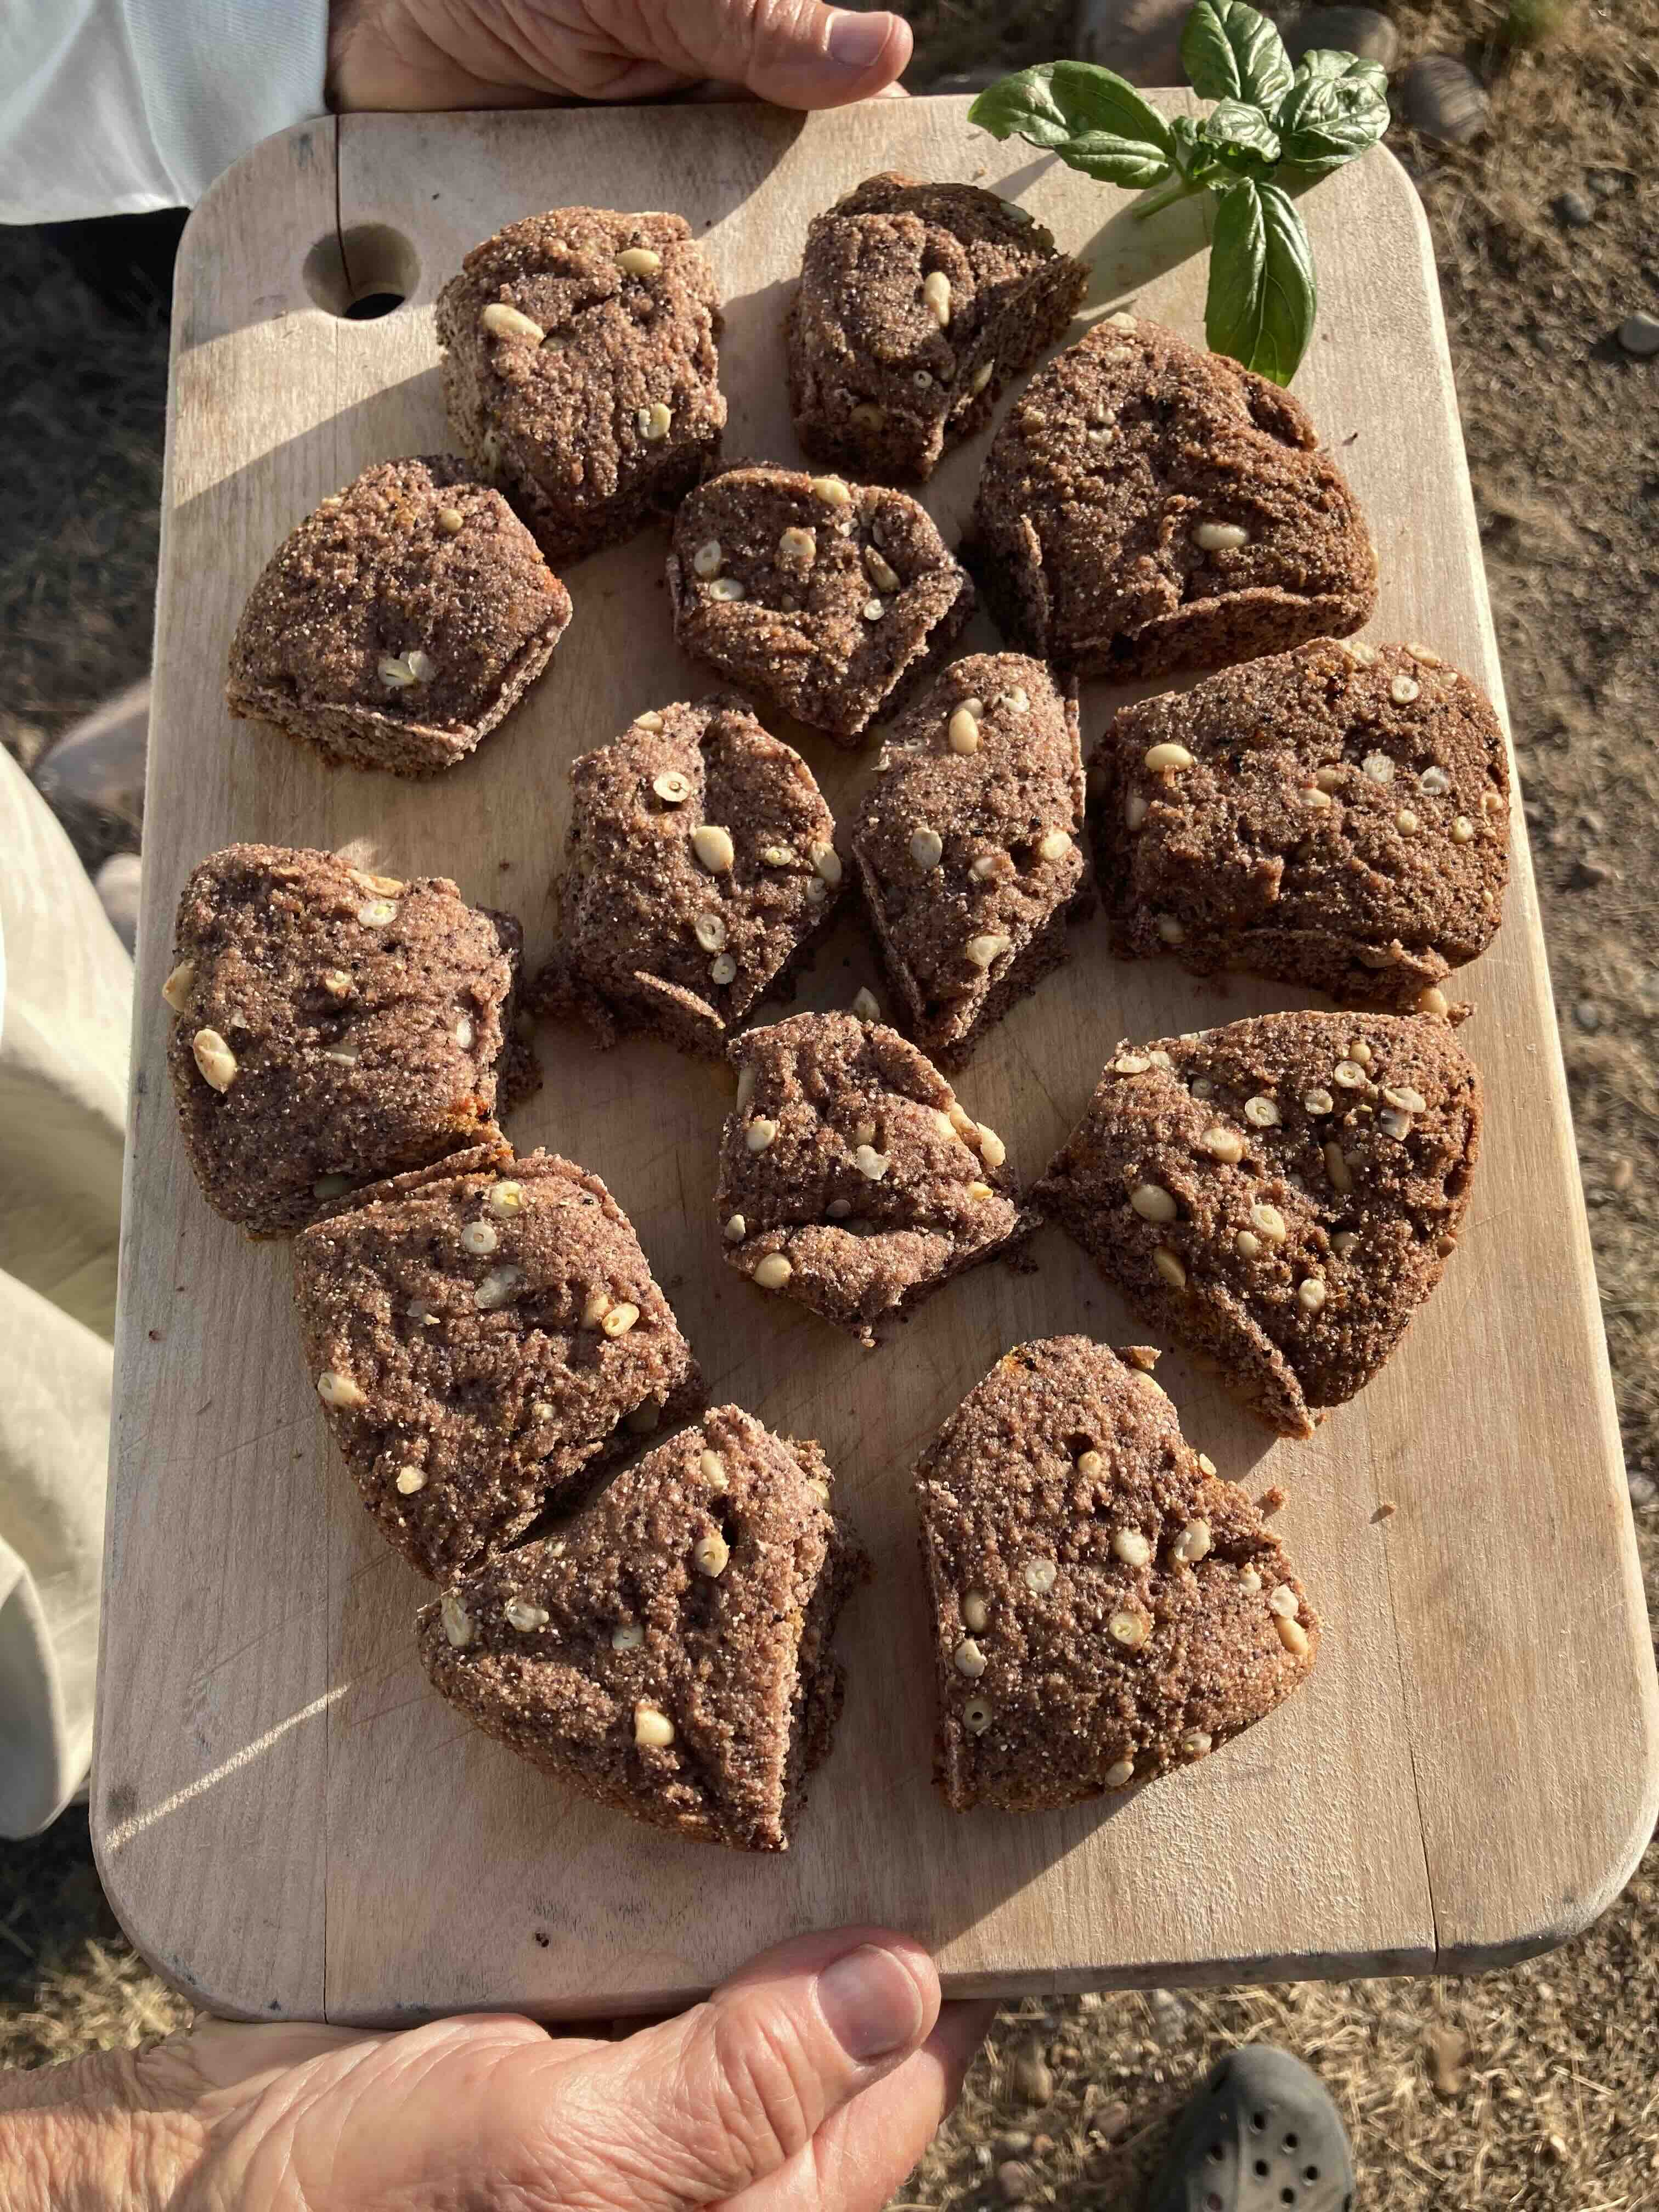
The pine nuts added a great new flavor and texture to these healthful Southwest biscotti. Next batch, I would like to try adding bellotas….

Another easier idea: Add ¼ cup saguaro juñ to NS/S Mesquite Cookie Mix or NS/S Mesquite Poppyseed Scone Mix, or to your favorite sugar cookie recipe

For more ideas with saguaro fruit visit SavortheSouthwest June 2020 blog post on Sonoran Power-Treats.

This saguaro juñ biscotti idea was inspired in part by Betsy Armstrong, infamous NativeSeedsSEARCH staff member and cooks-extraordinaires at NSS. Acknowledgement also to Pueblo Seed and Food Co in Cortez, Colorado (introduced to me by southwest foodie pal Robbie) where you can get fabulous Southwest Blue Corn Anise Cookies.  Their ideas sparked me to introduce nutritious low-desert seeds from the generous giant saguaro into this blue cornmeal treat. Here’s to your good health and desert enjoyment, with homage to the saguaros and maize plants as well, from Tia Marta!

Gifts of Winter Greens in the Desert

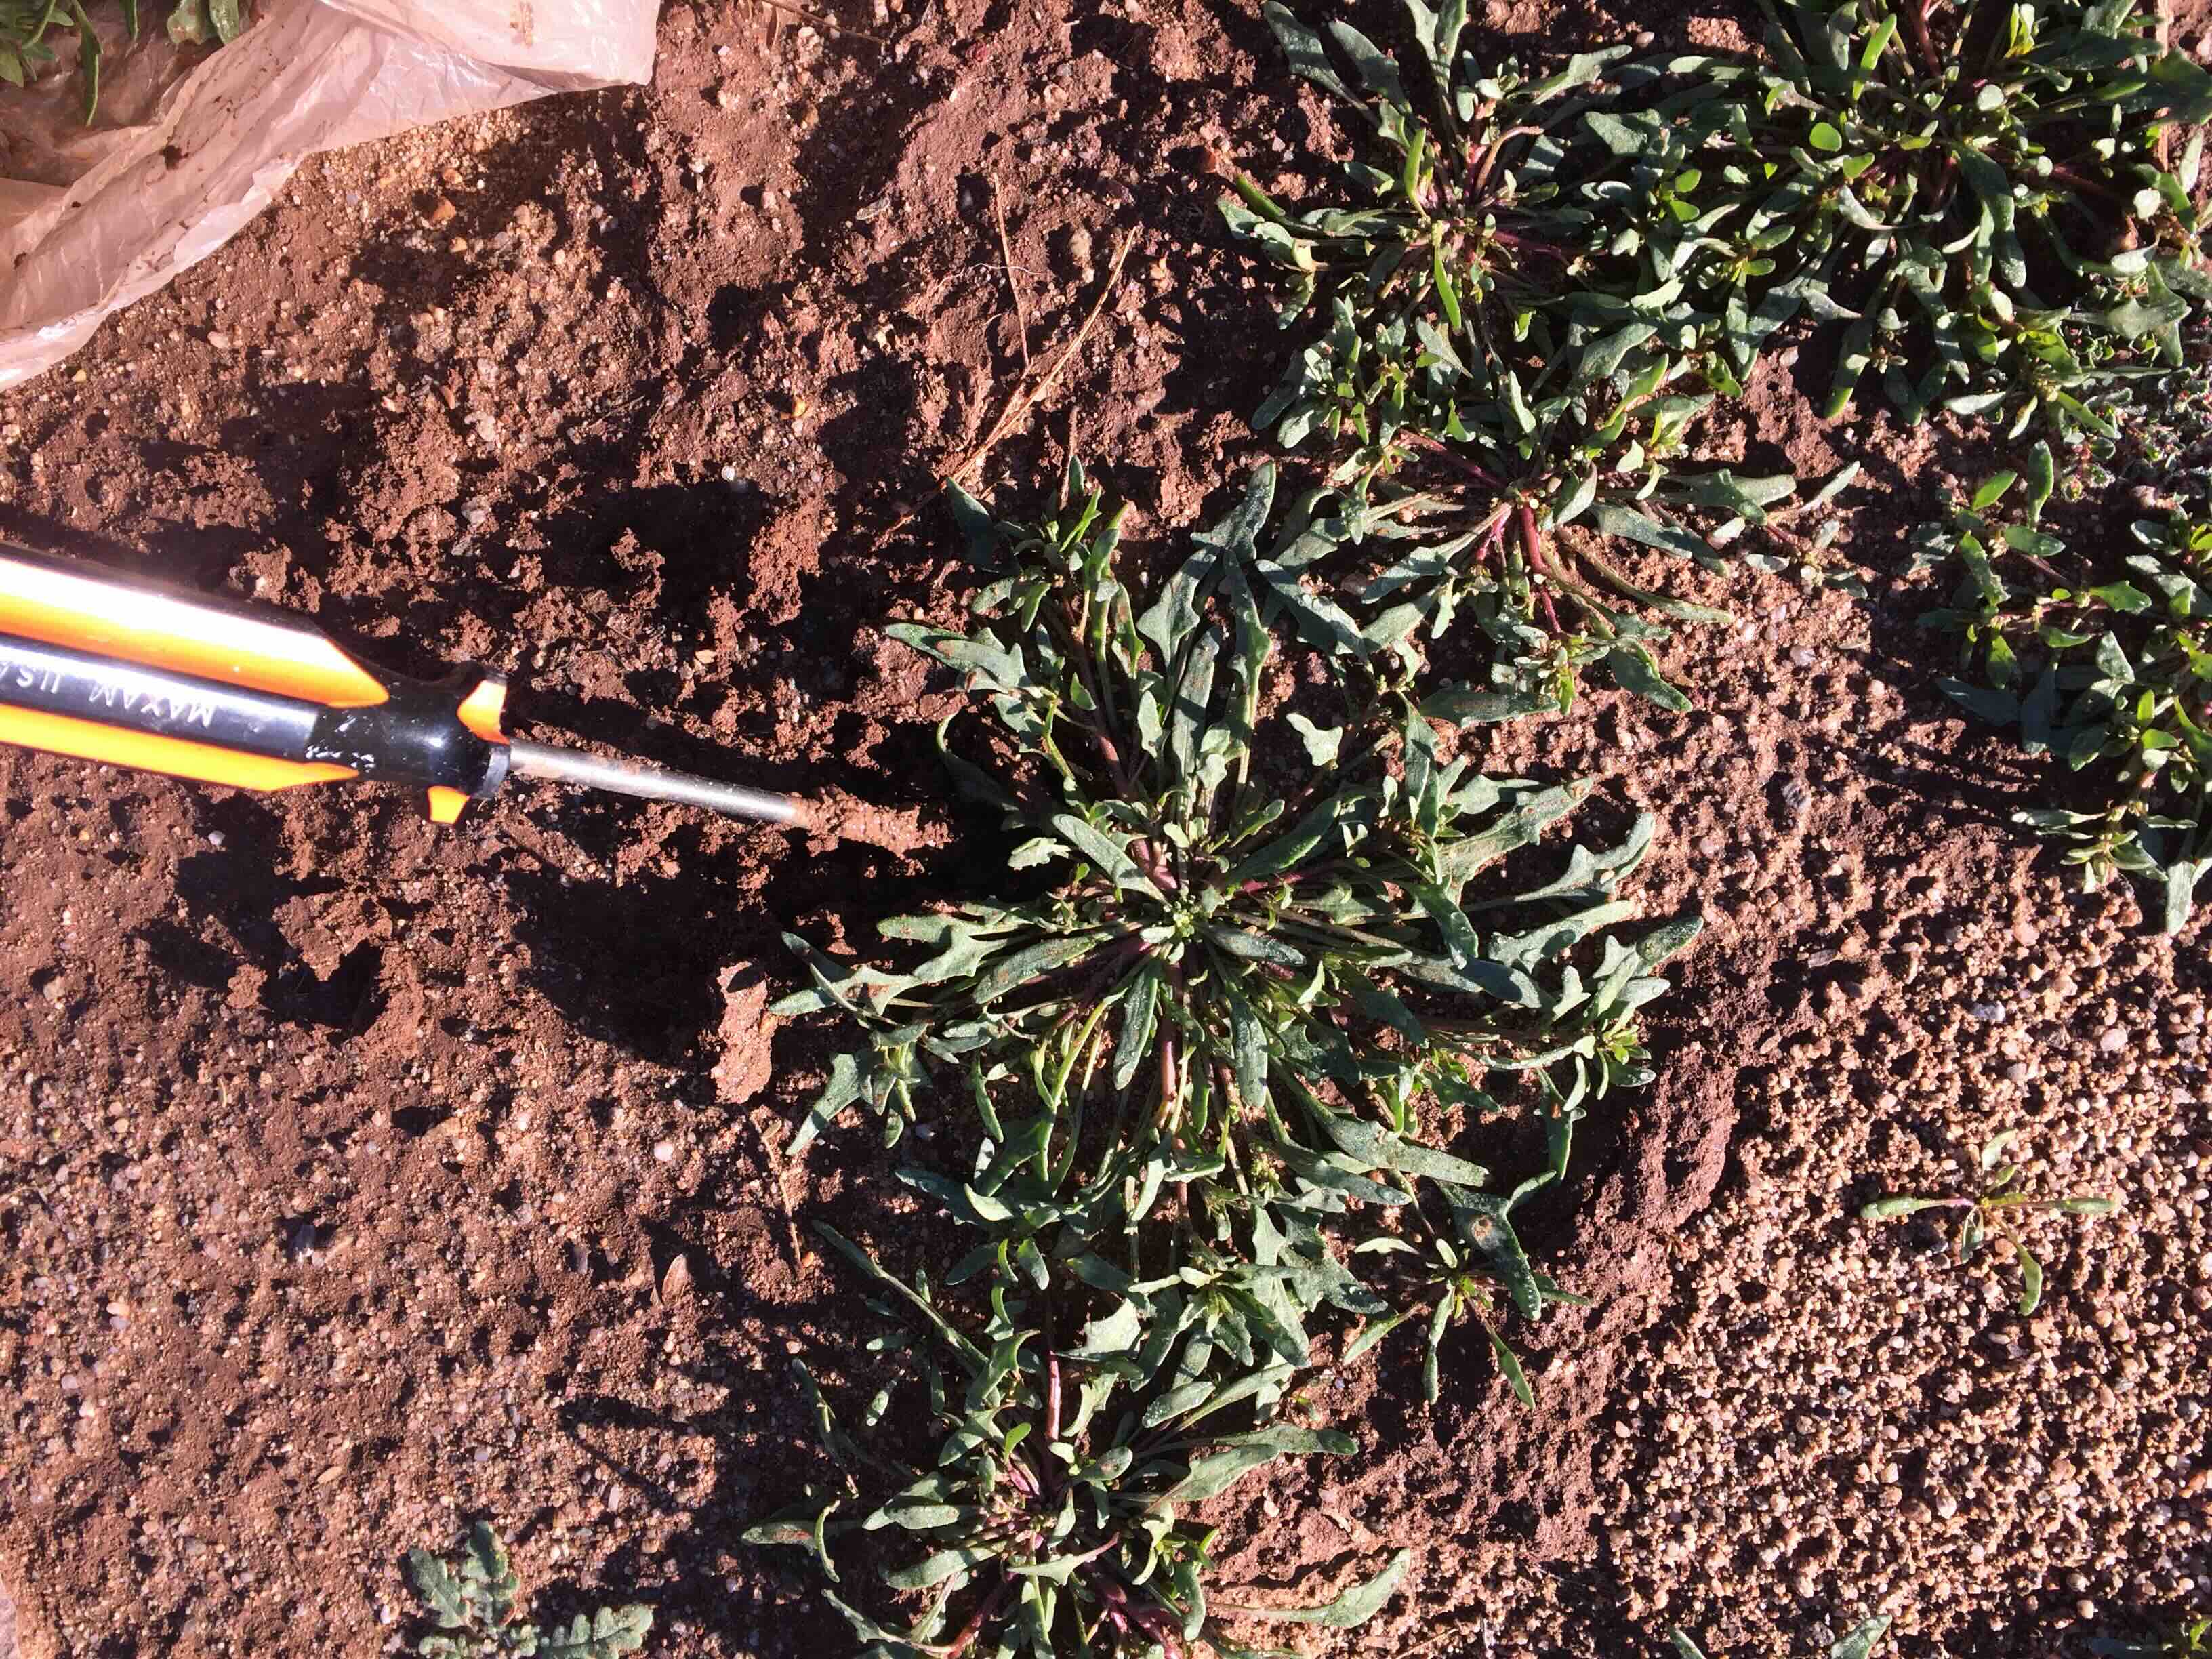
Indeed we’ve been blessed this cool season by some good rains in the Sonoran Desert–and everywhere there is greenery popping up. Weeds, you say? Let’s take a closer look! As our SavorSister Amy shared earlier this month in her tasty “rocket post”, what may LOOK like weeds are actually the gift of wild greens! Tia Marta here to share more ideas for wondrous weed-collecting.

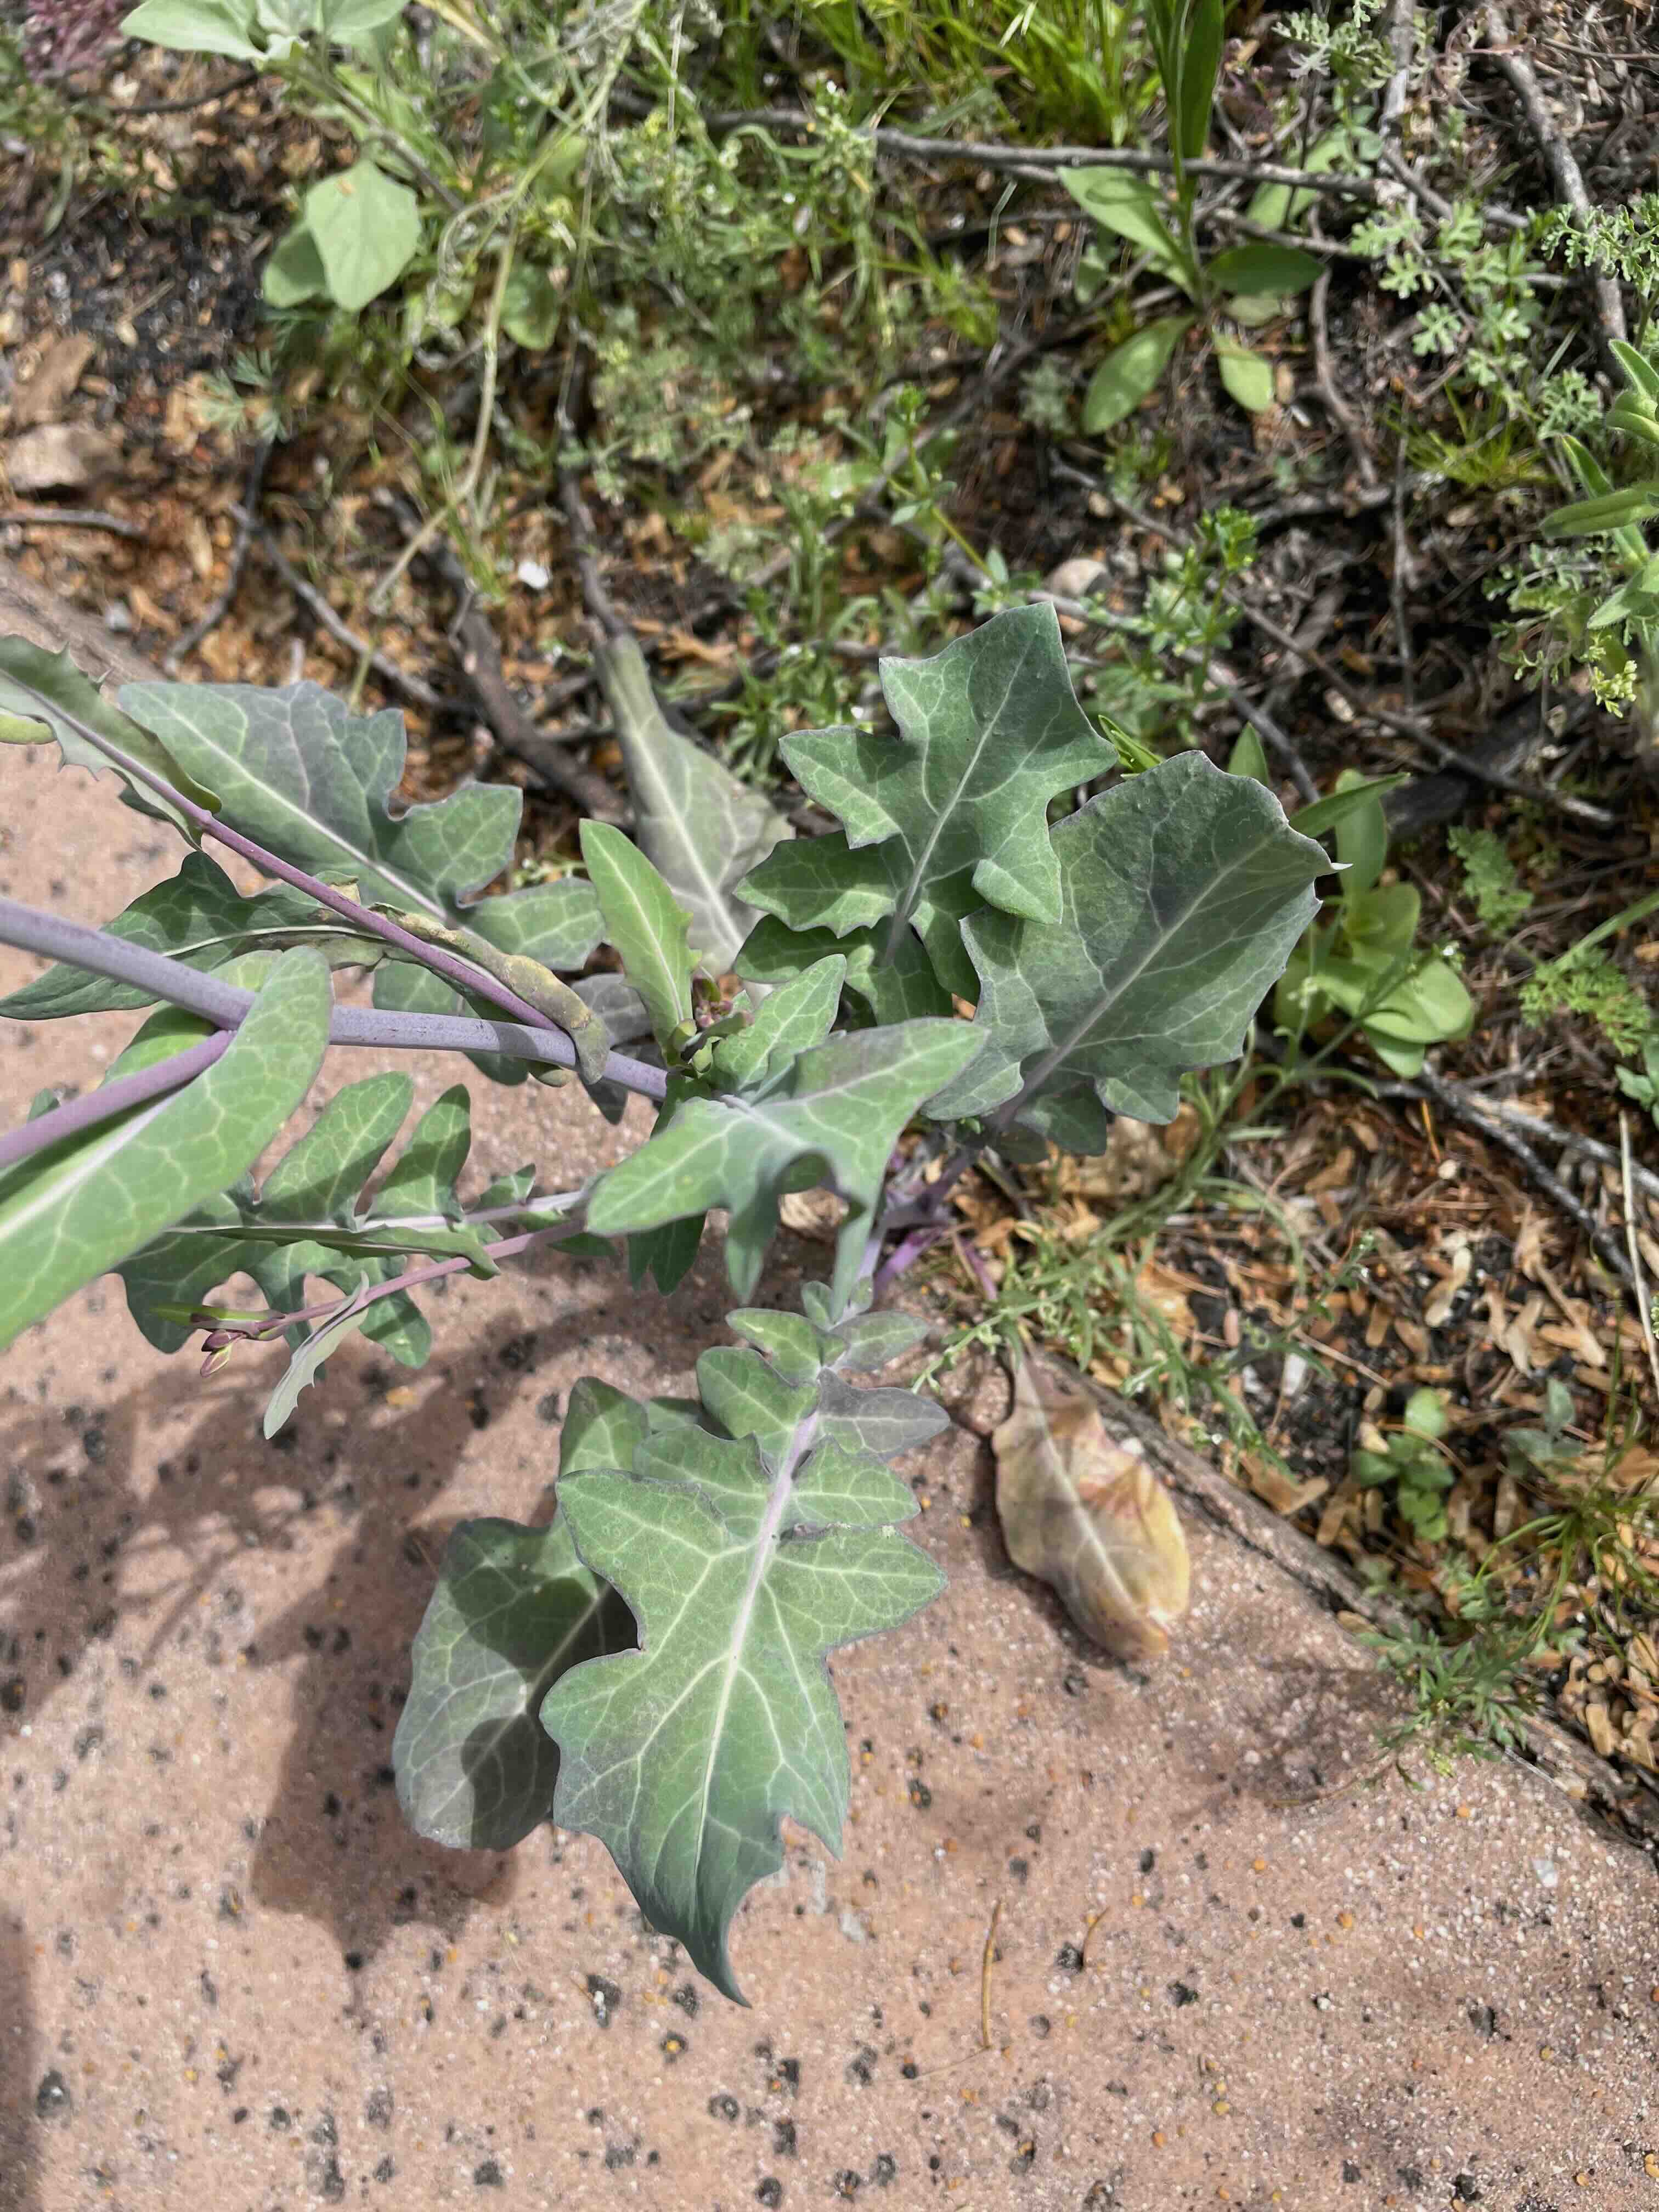
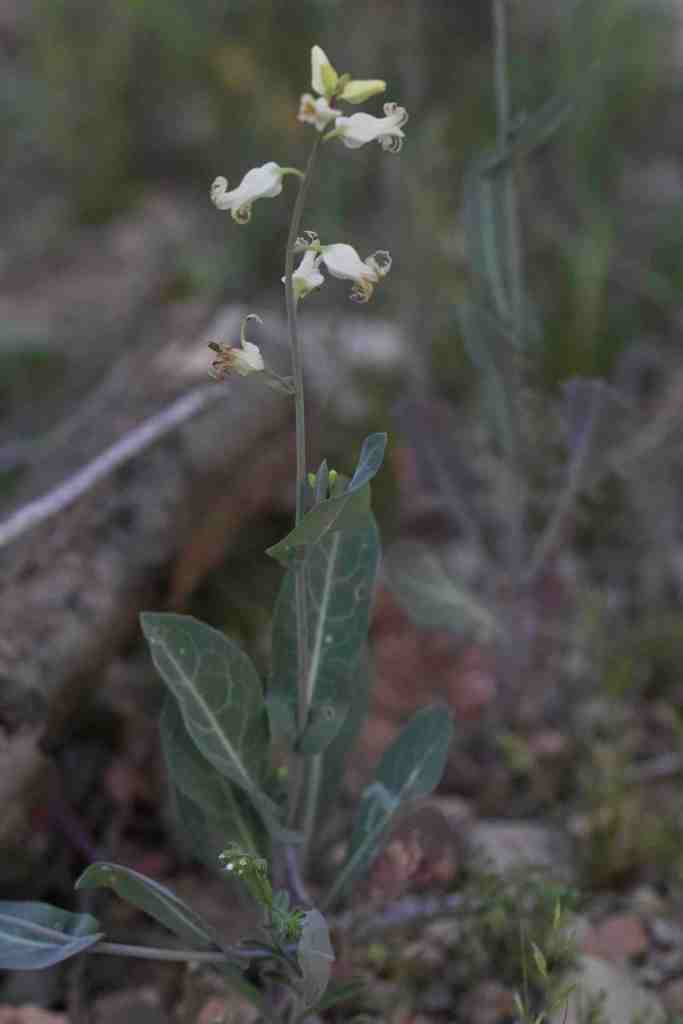
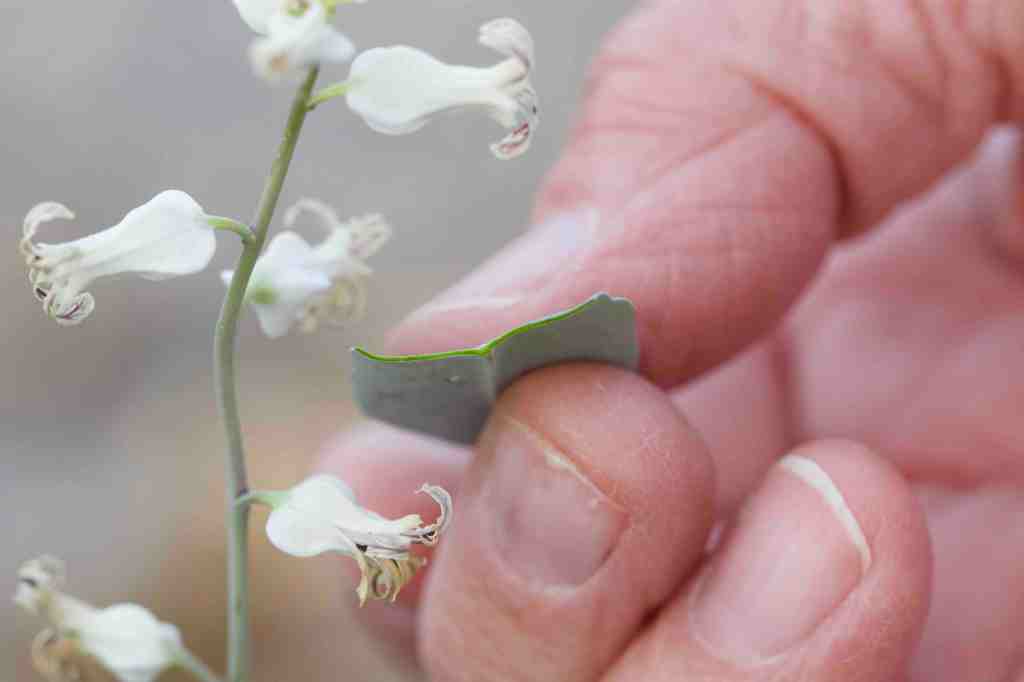
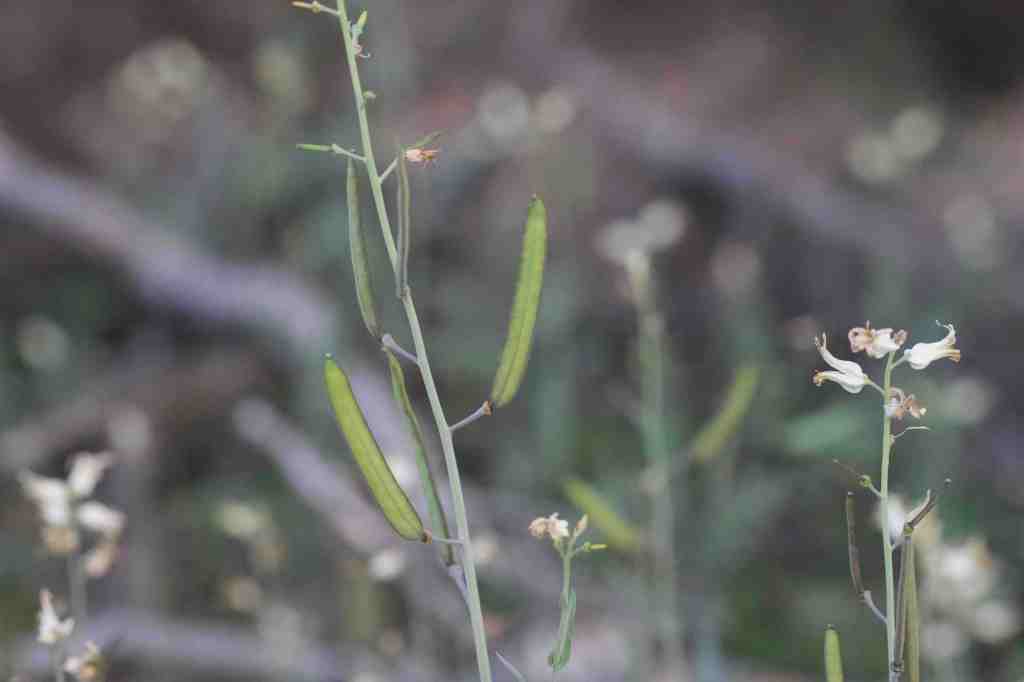
This sweet 4-petaled “Arizona jewel plant” also known as “silverbells” (Streptanthus carinatus), is an endearing wild native mustard with delightfully good taste and nutrition. Planting silverbells seeds can also make a delicate addition to your own edible landscaping.

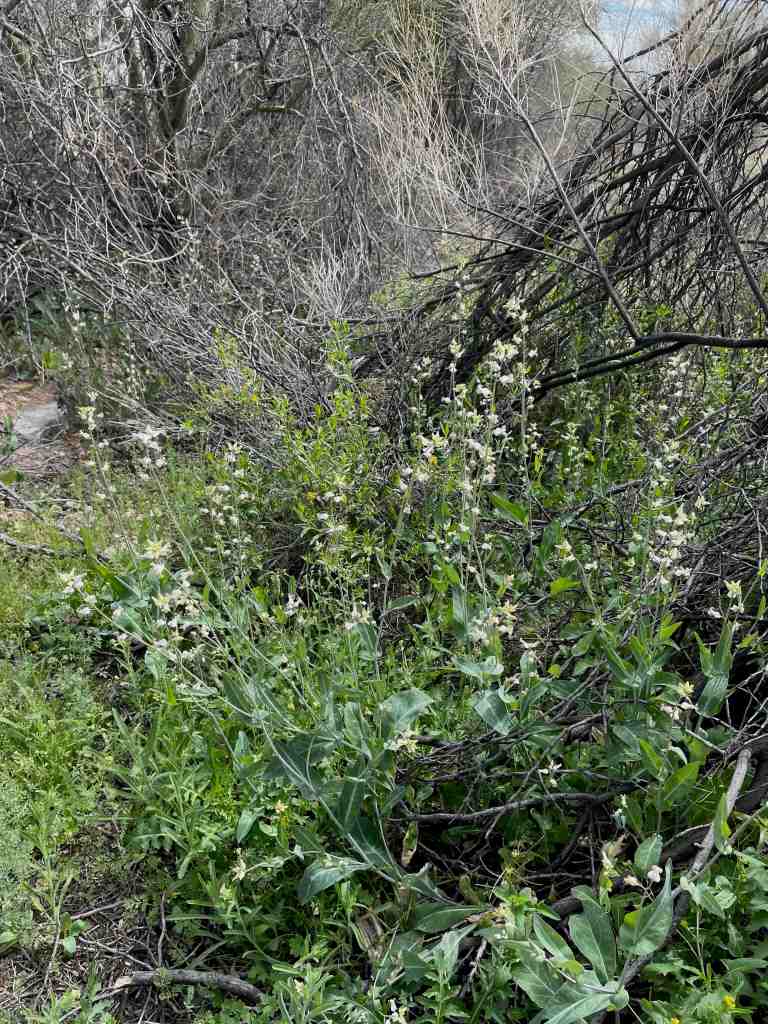
Out in the desert and in town you can find great patches of silverbells right now, especially in the shade of other desert shrubs. At times like these when there is such plenty (with thanks on our lips for these edibles), we can feel some assurance that harvesting a little for our family will still leave lots for other desert creatures and seeds for a future winter.

Silverbells isn’t spicy–no picante bite like the introduced London rocket or mature arugala–…and every above-ground part is flavorful —fresh right off the plant!

To my palate, its symmetrical little urn-shaped flowers even have a slight sweetness.,..

A taste of its flower can be like a communion.

Silverbells’ near-succulent leaf is a perfect addition tossed fresh in a salad. You can see the thickness of the juicy leaf in this cross-section view.

….And silverbells’ young green pods are delectably, “vegetally sweet.” Enjoy them fresh and raw, because, (alert!), with stir-frying the pods suddenly become bitter. They’re best used fresh to bedeck a salad.

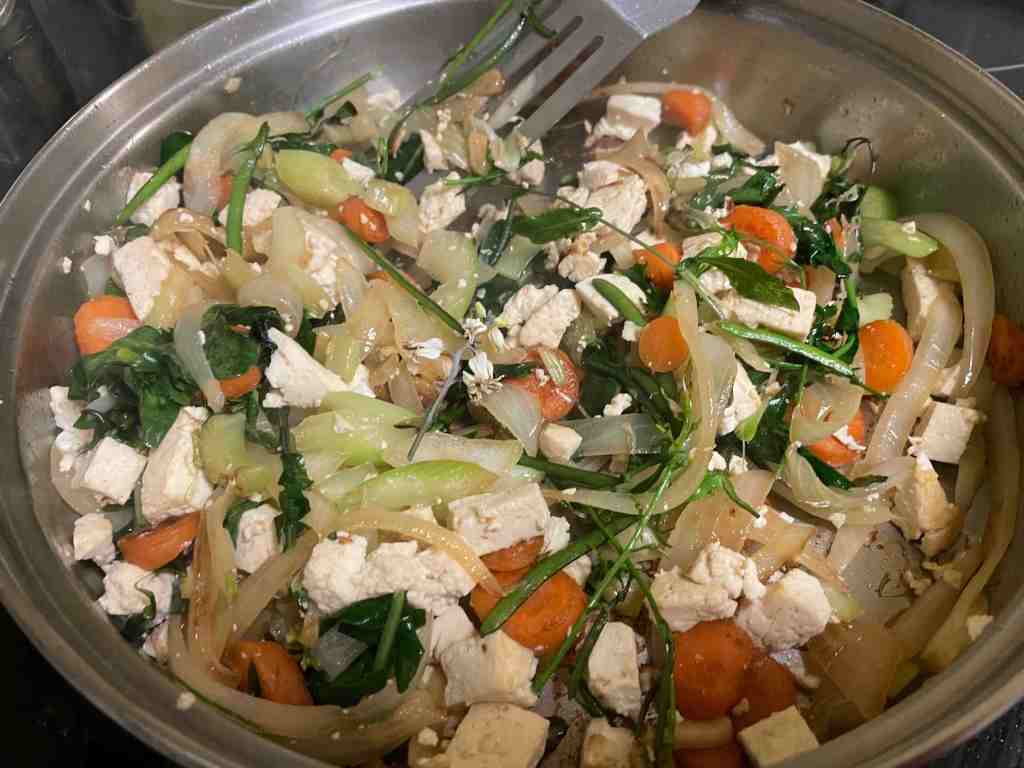
Silverbells is a Brassica, that is, in the cole-family of highly nutritious vegetables. Besides in a fresh mixed salad, my favorite way to enjoy their nutrition (high Ca, vit.A and C, folates) is in a veggie stir-fry. I have added the greens last in this tofu stir-fry. Can you spot the silverbell flowers I topped this dish with?

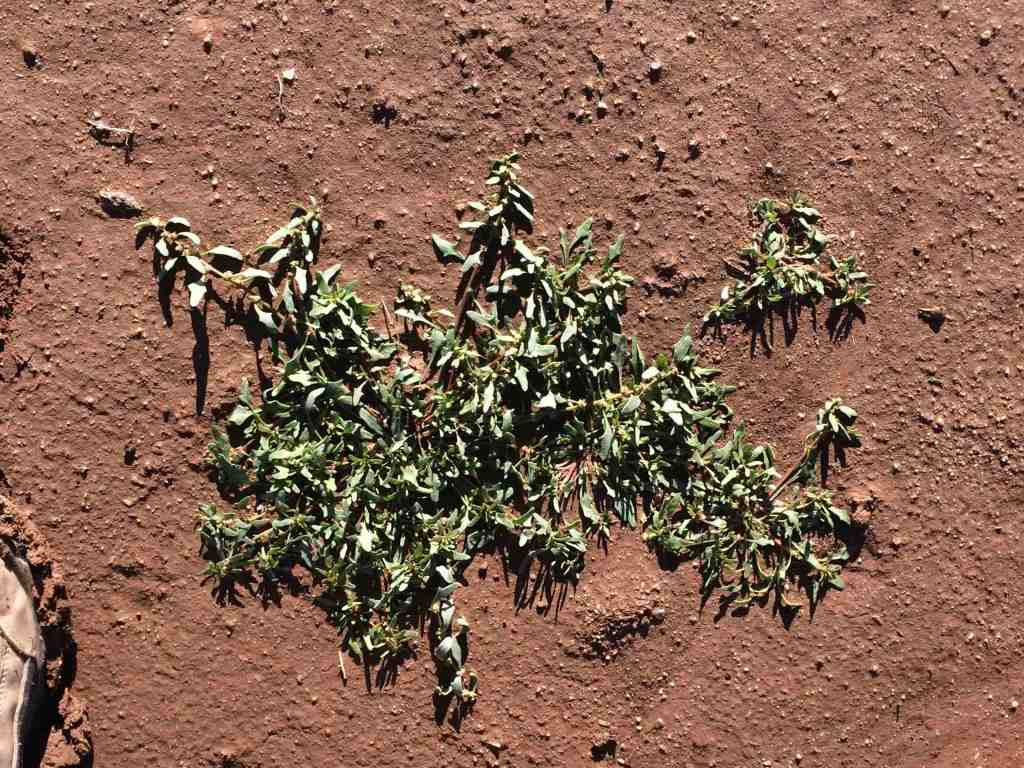
Here’s another “weed”–my very favorite, but very rare–which my O’odham mentor showed me years ago–opon i:wagĭ. Known in Spanish as patota, and in English by the truly misleading term “poverty weed,” it only comes up in certain years with winter rains at just the right times and in right amounts. She led me to harvest in corrals and roadsides on the poorest soils, and there appeared these patches of flat-lying rosettes of small thick leaves, so unassuming. Not very noticeable but worth noticing!

This season, see if you can find some opon i:wagĭ out there in degraded sandy soils! It is easy to dig up the whole plant. Cut off its tap root and steam the little green spinach-like leaves. The best dish my teacher ever cooked for us was opon i:wagĭ fried with i’itoi’s onions in a little bacon drippings. I thank her in my heart for sharing her desert knowledge, to alert us to keep looking and watching for the next surprising desert rain-gifts.

Wild Rocket Risotto

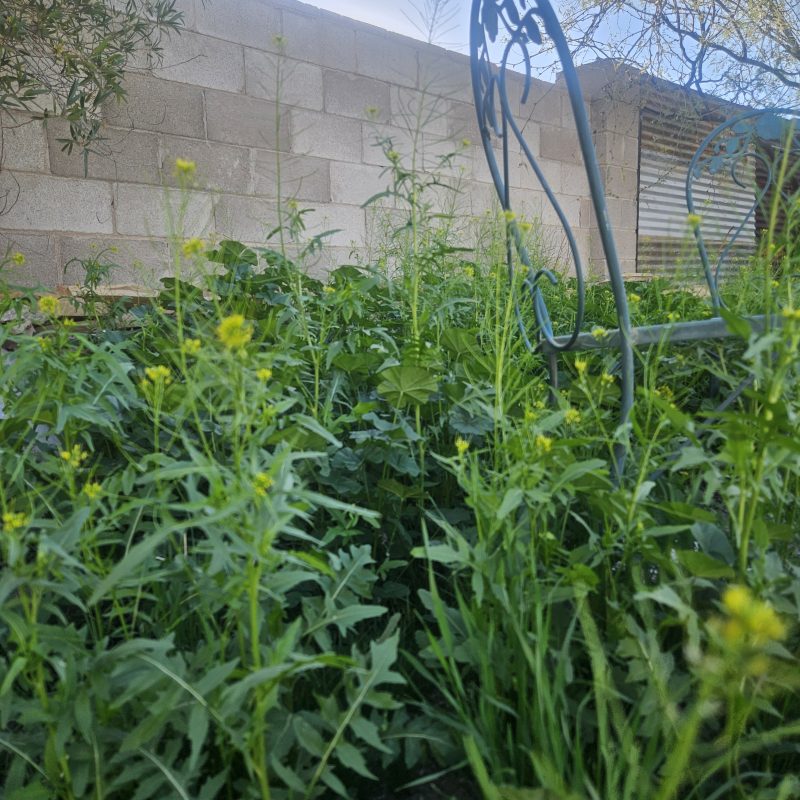
Have you seen an area like this recently?

Wonderful! Amy here, celebrating the yellow flowered wild mustards growing my yard and in the desert. Sisymbrium irio grows in dry, disturbed soil around the world but is orginally from the Middle East, southern Europe and northen Africa. One of its names, London Rocket, supposedly refers to how it uncharacteristically took over there after the Great Fire of 1666. (It loves disturbed soil, in my garden or elsewhere!) Arugula, another mustard family plant also known as rocket, has big white flowers and is actually classified as different genius.

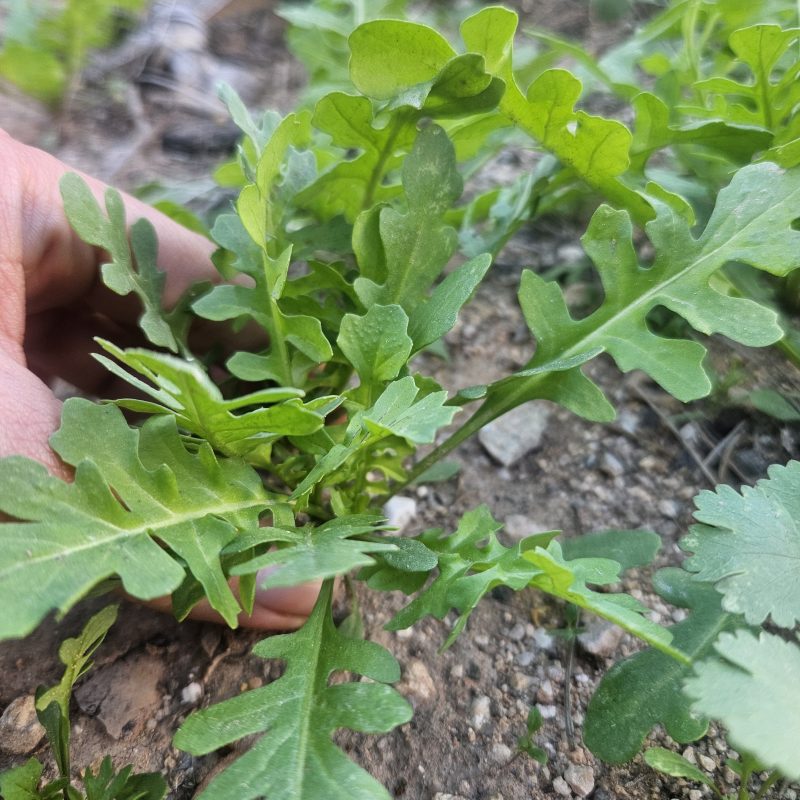
Of course the leaves are edible and tender on the short, young basal rosettes. But the small leaves on the tall, flowering plants are suprisingly tender. The flavor of the leaves from mature plants is spicier, but I think it has more to do with the warming weather of the season as the plants mature. The seeds are edible too but are much smaller than commercial mustard seeds and are difficult to harvest.

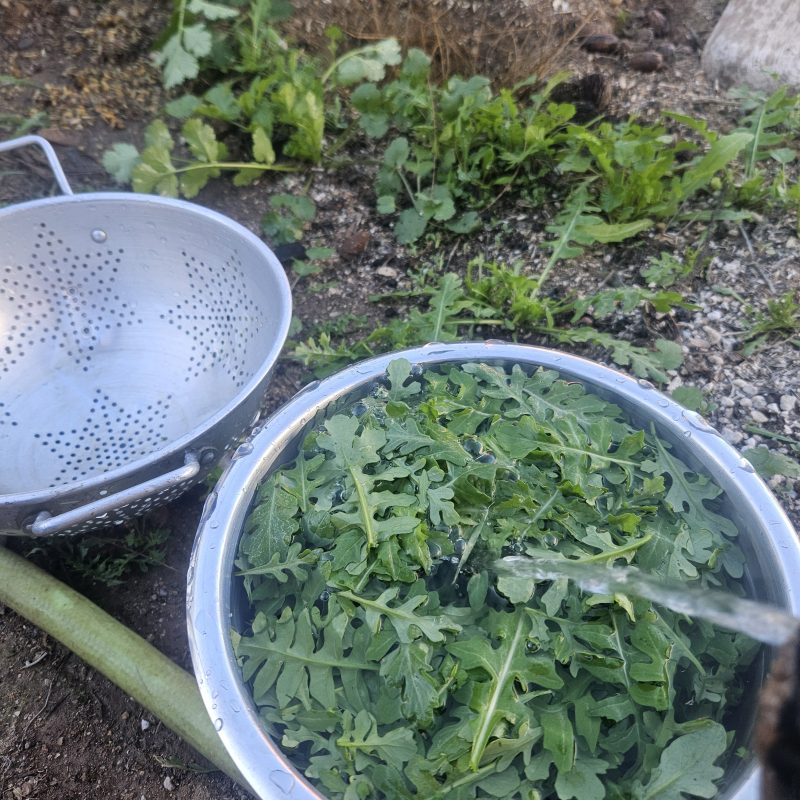
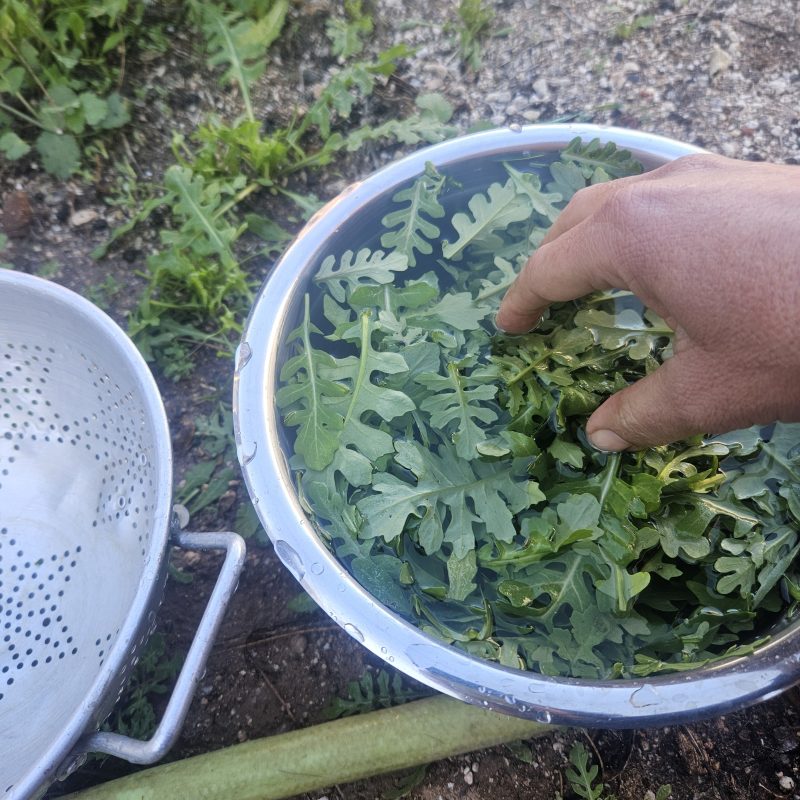
Instead of triple washing, I like to wash once really well, where the wash water going to the garden. After swirling in plenty of water, I lift the leaves out of the water by hand and drain.

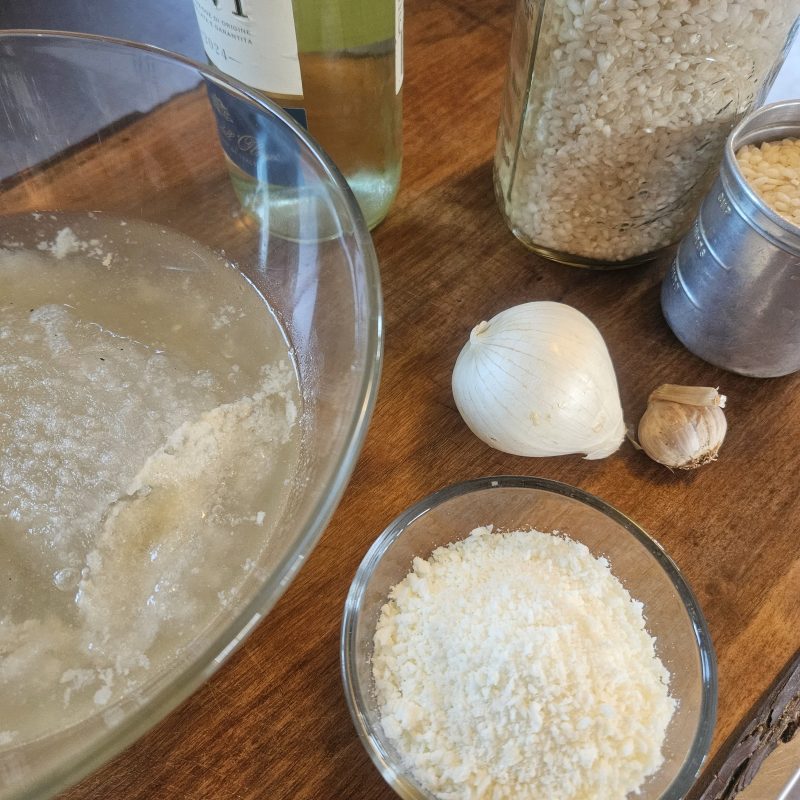
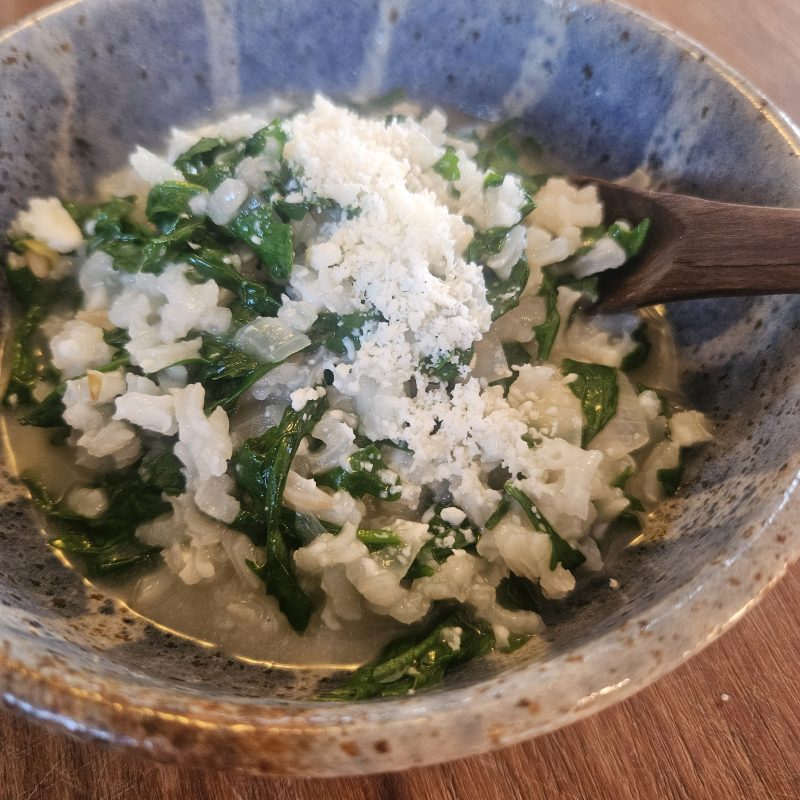
Wild rocket has countless possibilities in the kitchen. The leaves make a spicy salad or garnish on a sandwich, like arugula. My favorite way to enjoy it is wilted into a risotto. Homemade chicken broth (from the freezer) and a splash of wine make it special.

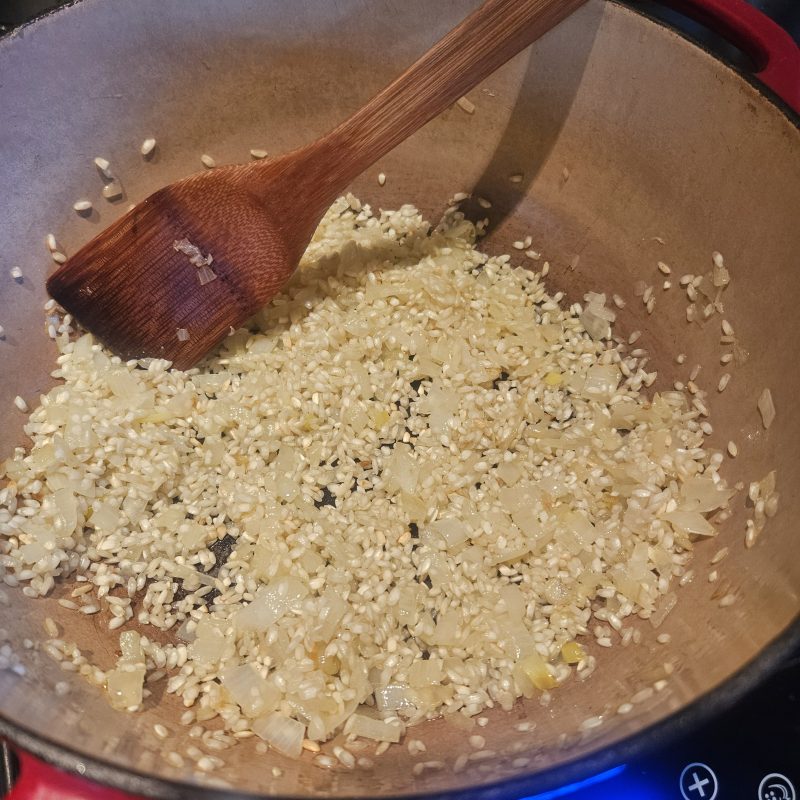
I start by browning rinsed aborio rice, onion and garlic in olive oil.

For traditional risotto with the creamiest texture, add hot broth a little at a time and stir constantly. For the easiest risotto, I just add plenty of broth and simmer slowly in a heavy pot with a lid. Three times the volume of liquid to rice is usually where I start.

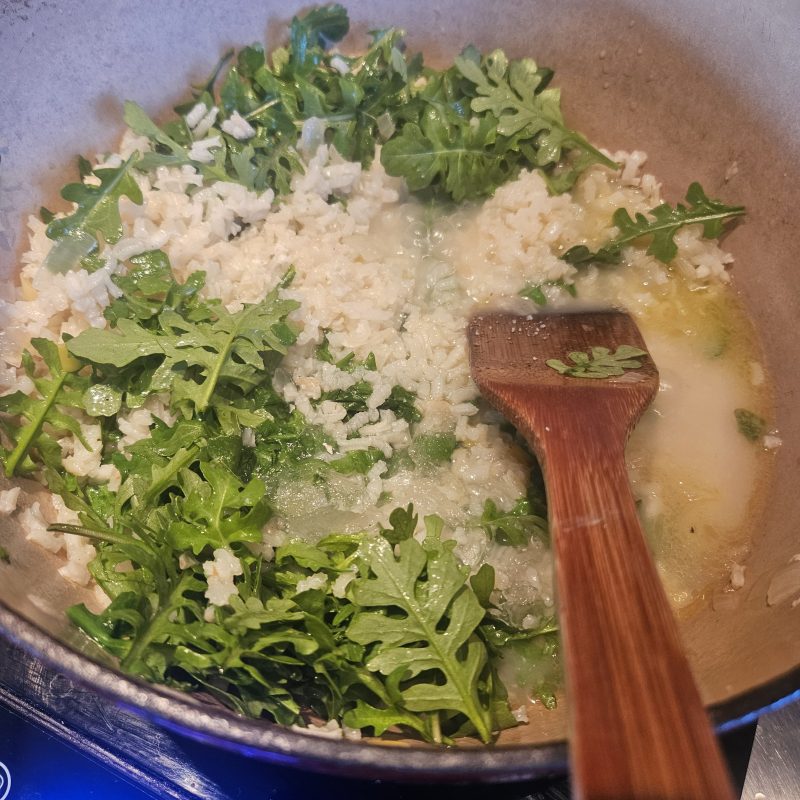
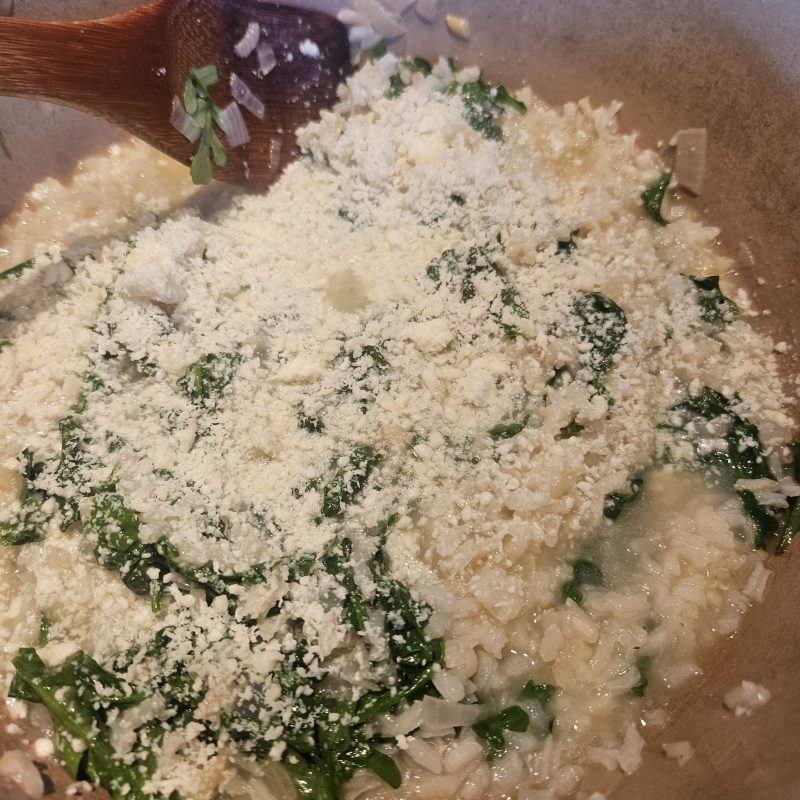
When the rice is tender, I remove the pot from the heat and fold in the whole little leaves. Sprinkle with any cheese, in this case a dry and salty fresh goat cheese. Enjoy right away or at room temperature on a picnic.

Depending on temperature and moisture, we might be eating wild rocket for a couple more months into the spring. What other dishes do you like to make with wild rocket?

A Holiday Crackers Challenge!

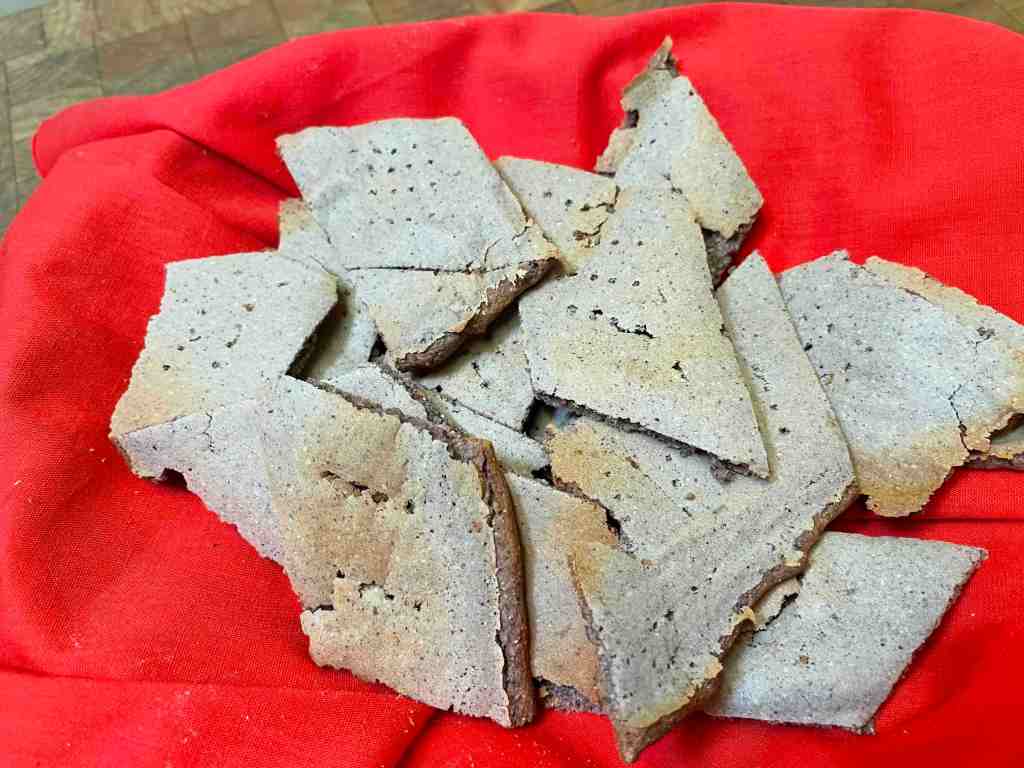
Have you noticed that a box of crackers is costing a whole lot more these days than it used to?–especially if you’re wanting specialized grains or herbed flavors? Why not “save” and make my own? Right! I’ve had a hankering for cracker flavors you just can’t find at the grocery, a lust for crackers made with our super-nutritious Southwest flours and herbs. So…fortified with locally-sourced materials, I searched cracker recipes to guide me, but I batted almost zero–so few recipes are out there. I took this dearth as a challenge. Tia Marta here to share some of my cracker experiments–and to challenge YOU to invent your own holiday crackers!

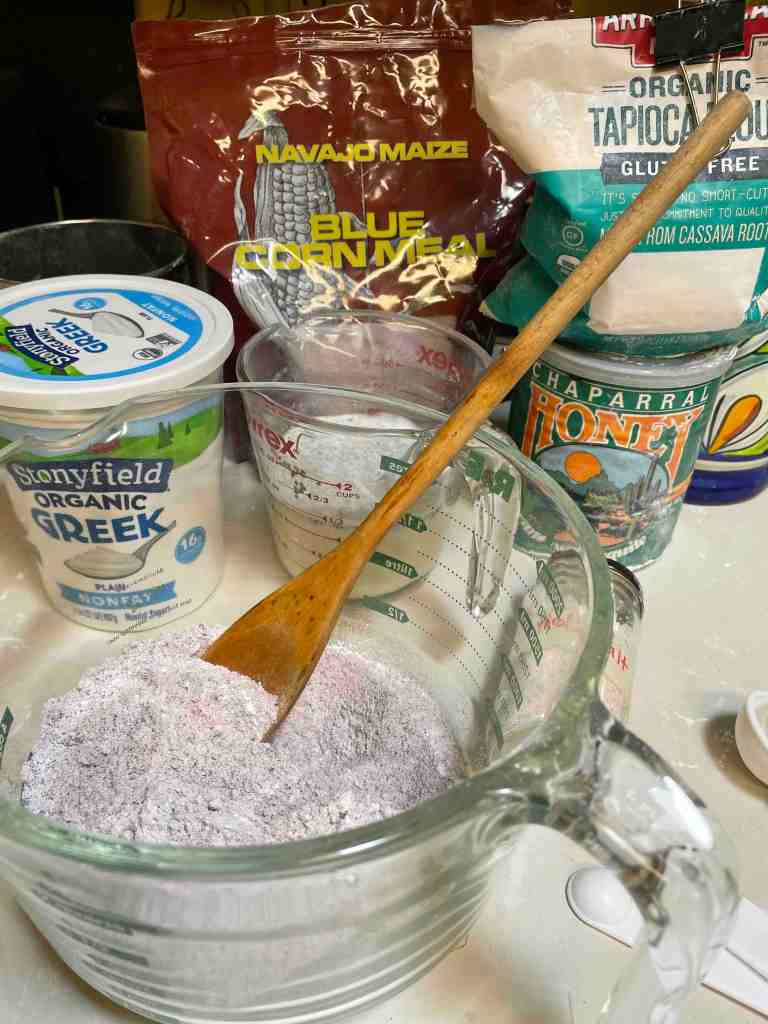
This is fun new territory. First with the goal of a gluten-free Southwest cracker, I took on Native blue cornmeal as the major delicious ingredient, with tapioca flour and chia seed as “binders”.

Recipe for Gluten-free BlueCorn-Amaranth-Chia Crackers:

Ingredients:

3/4 Cup blue corn meal (available from NativeSeedsSEARCH)

3/4 Cup tapioca flour

1/2 Cup amaranth flour 

1/2 tsp baking soda

1/2 tsp sea salt (I used salt from Baja California)

2 Tbsp non-fat plain yogurt (Greek yogurt can be a no-fat substitute for butter)

3/4 Cup lowfat buttermilk

1 Tbsp. chia seed

1 Tbsp mesquite honey (optional, amaranth flour can be a little bitter) (or a generous glob of honey on a teaspoon)

You’ll need a greased pizza pan and a greased rolling pin.

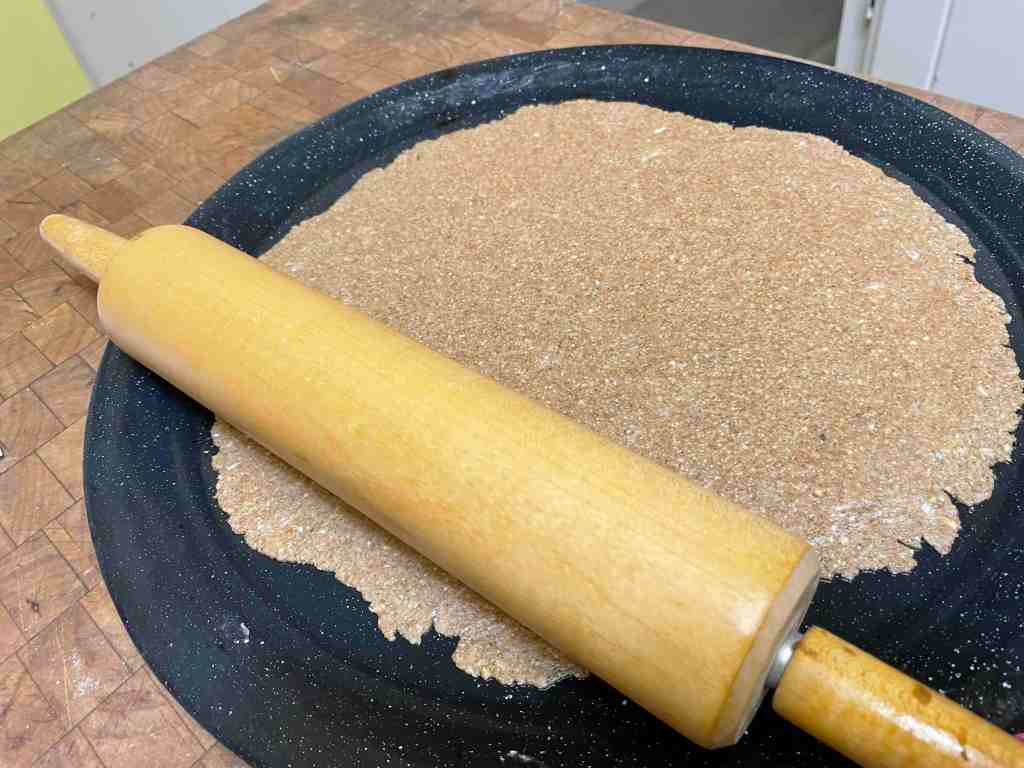
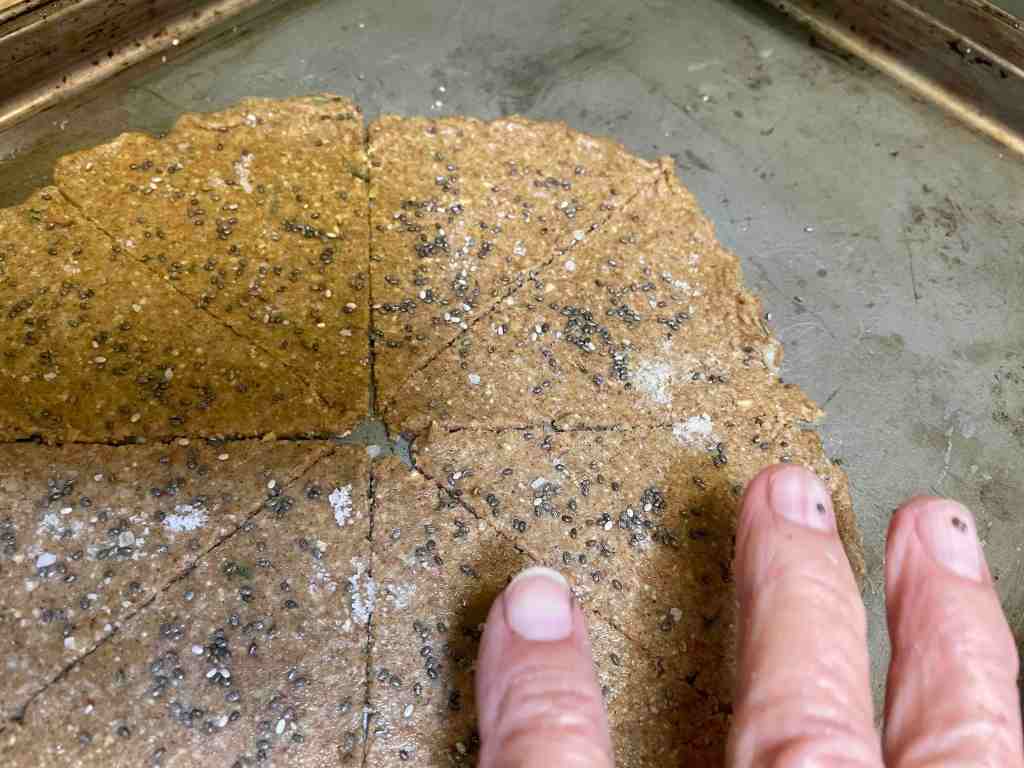
Place half the dough in center of a greased pizza pan. With your fingers press the dough down and outward. Your goal is to create a thin 1/8″ layer of dough on the pan. Using a greased rolling pin, flatten the dough out from the center. Use fingers to push the the thinnest edges back to a uniform thickness, or edges will scorch in the baking. Carefully cut the thinned dough with a sharp knife into squares, and make holes with a fork to even the heat. Bake 8-10 minutes or until you see a toastiness. With a metal spatula, lift the hot crackers off the pan right away to cool.

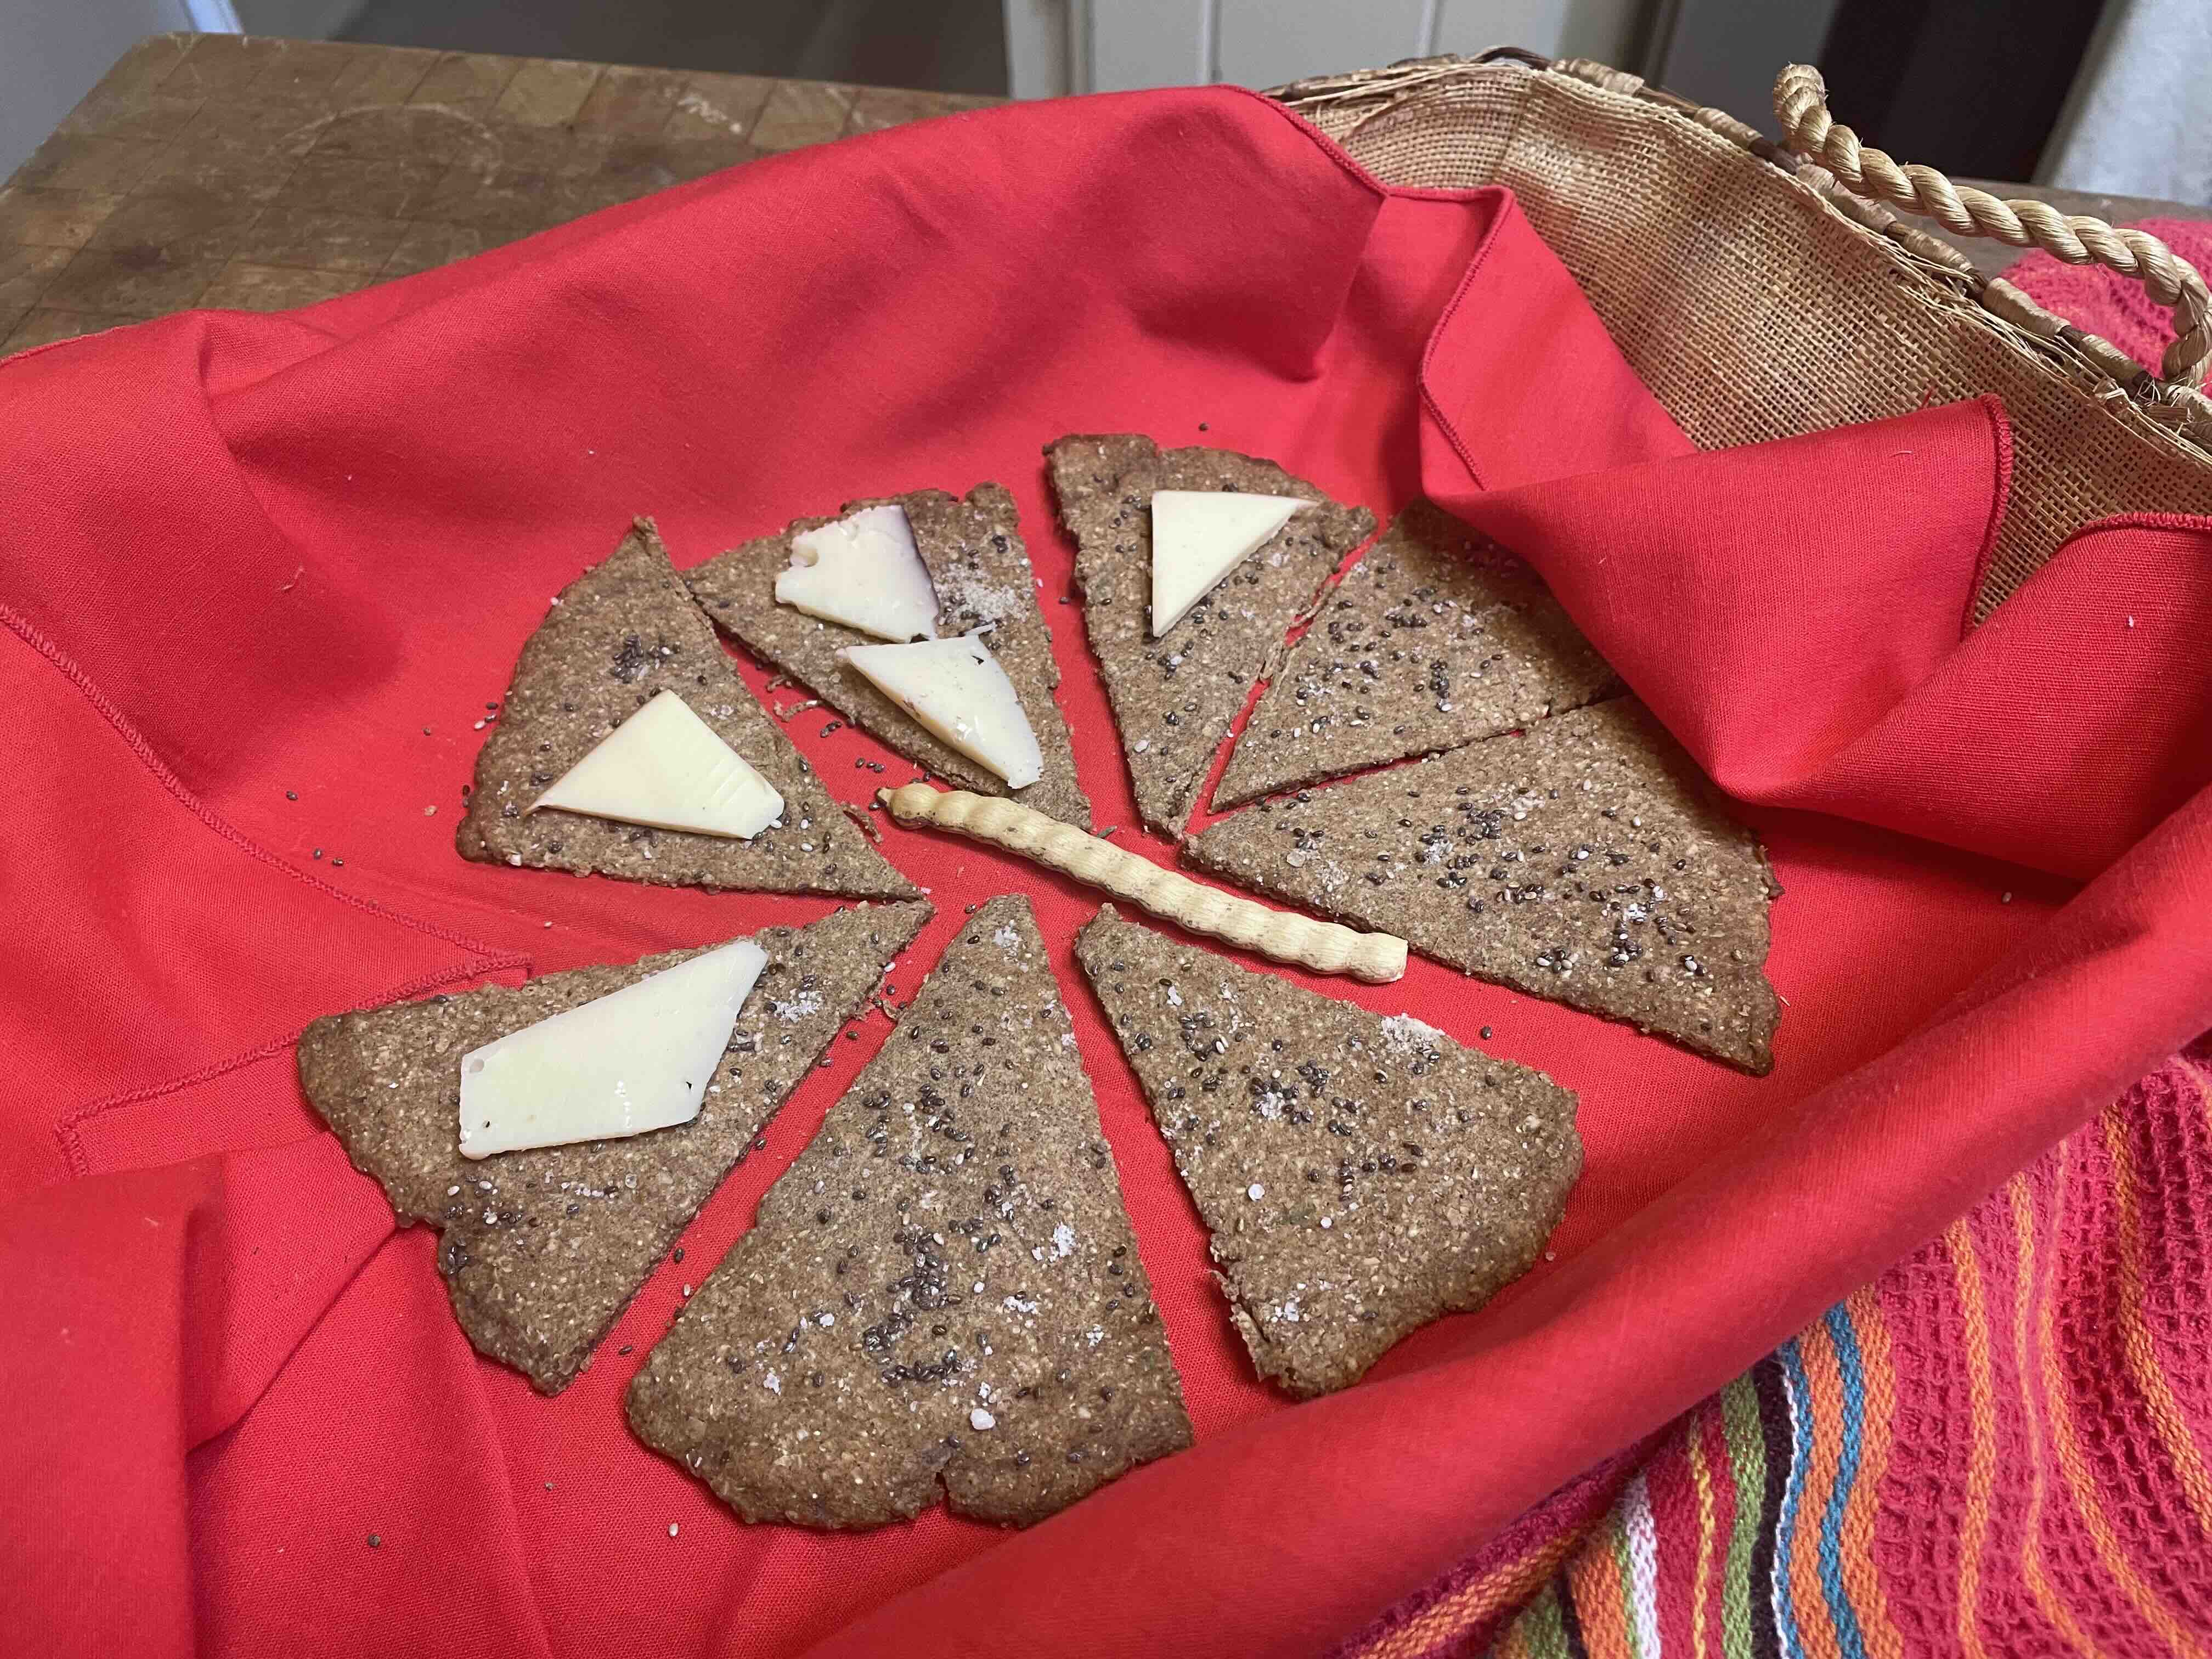
Enjoy nutritious gluten-free BlueCorn-Amaranth crackers with thin slices of membrillo, or with a creamy cheese–a new taste treat with a hint of sweetness.

You’ll see more pictures of the cracker dough prep-process below.

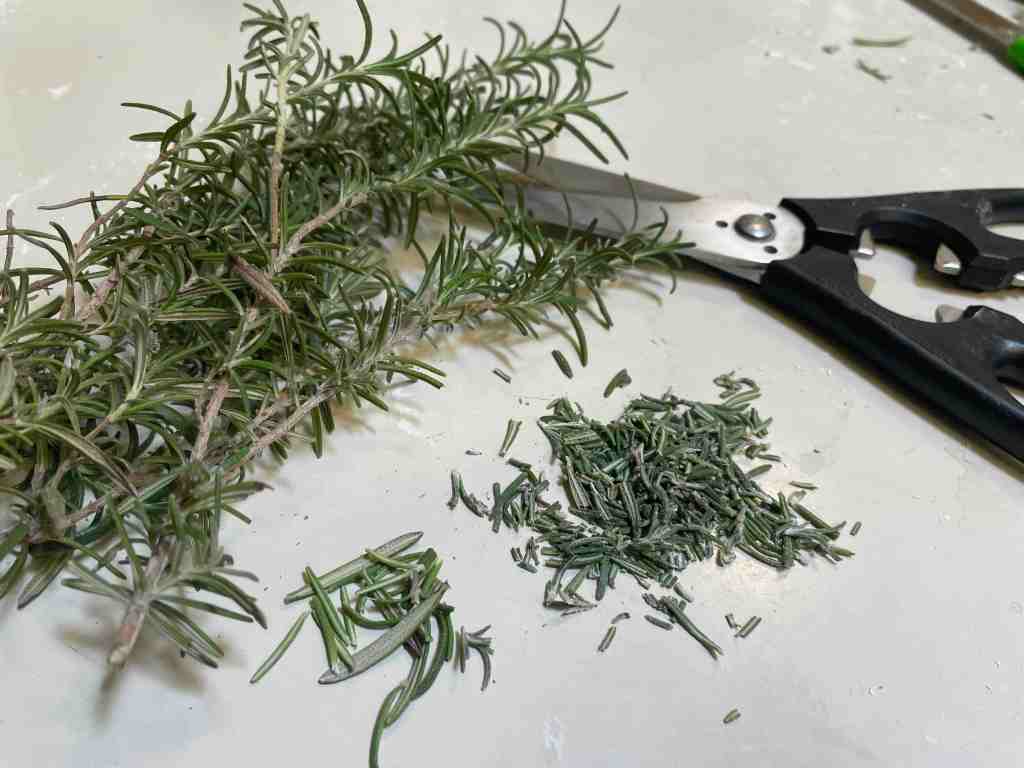
Inspired by rosemary-flavored flatbreads, I decided to try making a rosemary mesquite cracker with local heirloom wheat. Our garden supplied the fresh rosemary to cut into edible bits…. This local combination came out great:

Recipe: ROSEMARY-MESQUITE-PIMACLUB WHEAT Crackers

Ingredients:

3/4 Cup barley flour

1/2 Cup Pima Club wheat flour (from Ramona Farms, Sacaton, AZ)

1/4 Cup mesquite pod flour (any more than this will become too strong a flavor)

1/2 tsp baking soda

1/2 tsp fine sea salt (I used Sea of Cortez pilgrimage salt crystals collected by a friend)

1/4 Cup oat bran

2 Tbsp non-fat plain yogurt

1/2 to 1 Cup low-fat buttermilk

1/2 tsp glob of mesquite honey (optional)

Optional “topping” suggestions: 1/8 tsp additional, dry, finely chopped rosemary leaf; 1/8 tsp crystallized sea salt; 1/2 tsp barrel cactus seed or saguaro seed; 1/2 tsp popped amaranth seed; 1 Tbsp grated aged cheddar

You’ll need a greased pizza pan or baking sheet, and a greased rolling pin.

Directions (similar to previous recipe):

Preheat oven to 350F.  Pre-soak rosemary bits in buttermilk to enhance flavor.  Sift together all dry ingredients except the oat bran.  Add oat bran separately as it will not pass thru sifter easily.  Cut yogurt into dry ingredient mixture.  Add buttermilk mixture gradually until dough is firm–not liquidy.

Place half the dough in center of greased pan and roll outwards until very thin and even (approx 1/8″ thickness). Be sure to tuck edges back to be equal thickness as center.

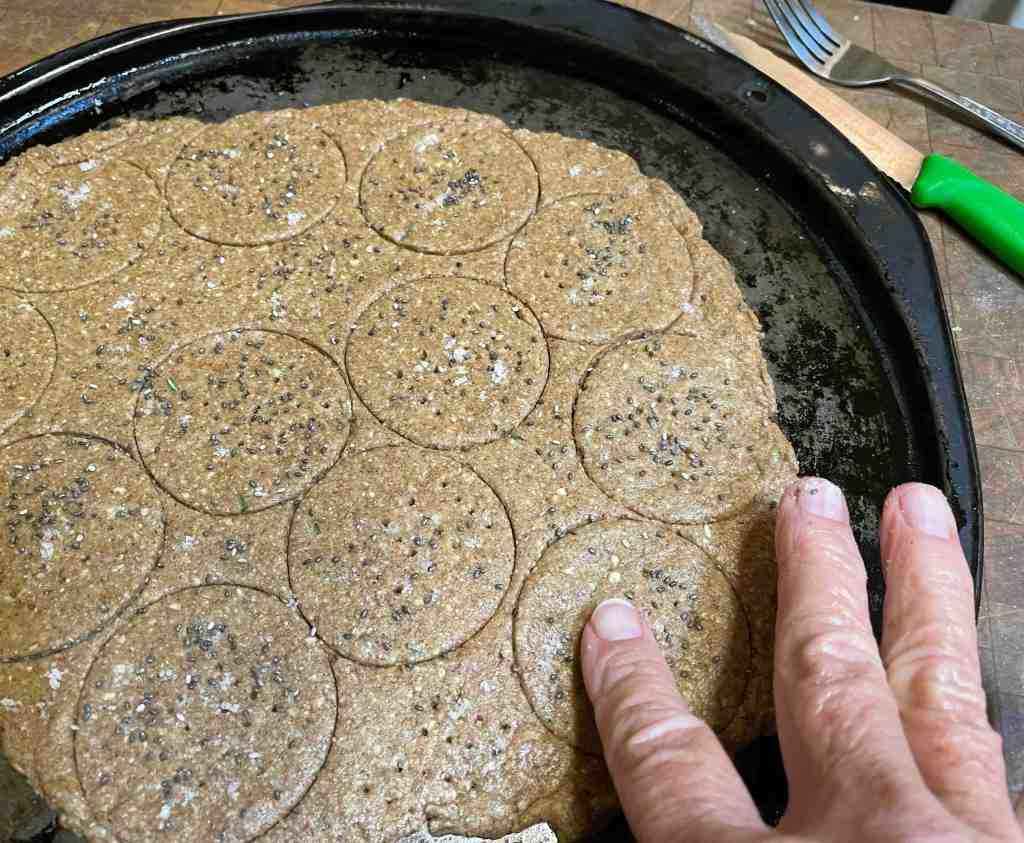
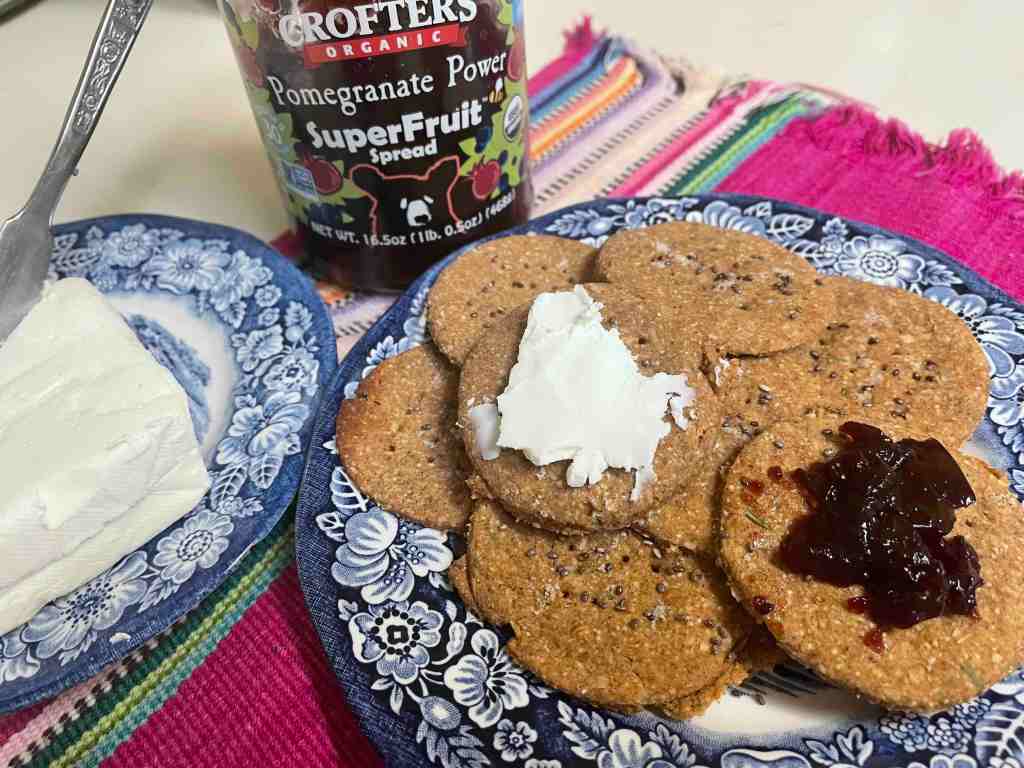
Sprinkle top of thinned dough with your desired topping. Here I’ve used rosemary bits, crystals of sea salt, and a sprinkle of chia. Pat the “topping” into the dough with your fingers so it will stick when baked. For this batch I used a cookie cutter through the rolled dough to make round crackers.

With the other half of the dough I used a greased rectangular pan which confined the rolling pin action to only two directions. Here I formed the dough into a thin circle to make “pie” wedge crackers.

Bake 8-10 minutes and check to see that the crackers have crisped. With metal spatula lift them from pan immediately to cool.

These Rosemary-Mesquite-PimaClub Wheat crackers are savory and pair well with cream cheese and jam, or as a foundation for colorful holiday canapes.

Lots of work goes into making crackers! But if our wonderful local desert grains aren’t available as crackers commercially, this is the only way to go. I challenge you to give them a try–to experiment with your own local grain combos!

Crackers are best made in greater quantity–not piecemeal. I’ve had this vision of an Indigenous-owned and -operated enterprise, with ingredients sourced sustainably from the desert, someday filling this “cracker niche,” making good revenues and providing us all with nutritious, appropriate Southwest-flavored crackers….

Pods to Meal to Cookies at home, TODAY!

Hello friends, Amy here with a baked good I made last week. I wanted to bring treats to share with my friends, something we could nibble while we passed the break table. And if no one had to wash plates, forks or spoons, that was a bonus. My people truly delight in cooking, hadn’t had anything mesquite in ages, and I wanted to impress. After considering my options for a month, I suddenly realized… that’s this afternoon!!!

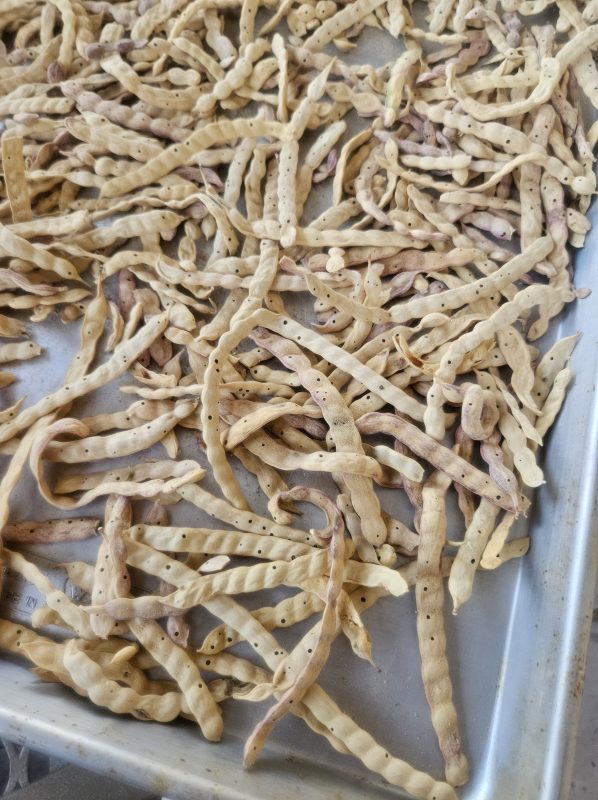
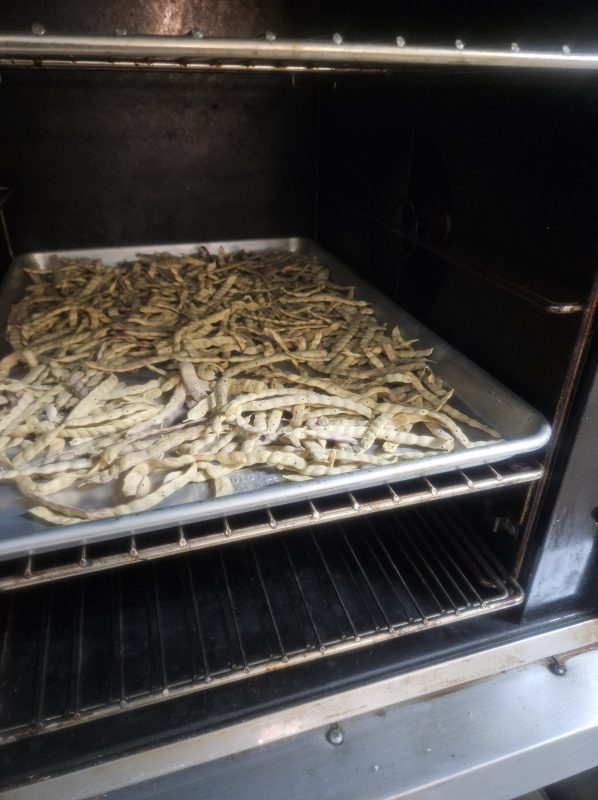
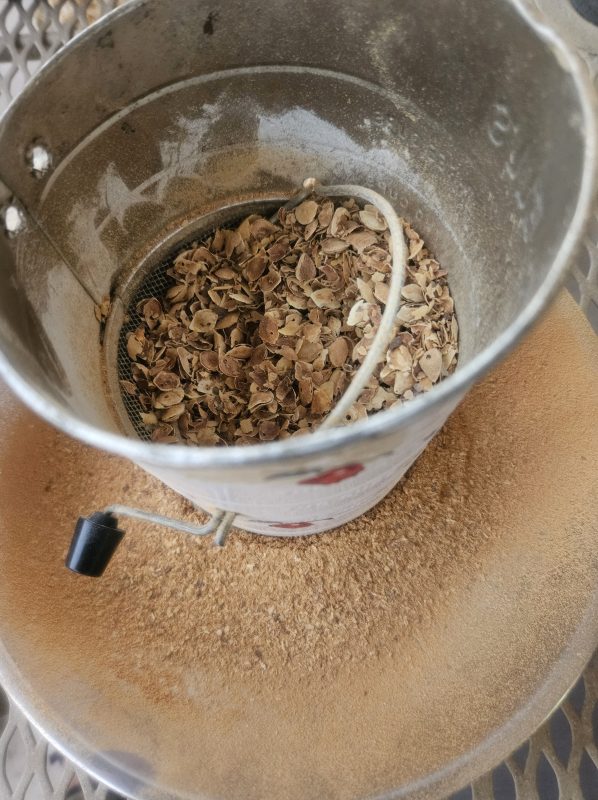
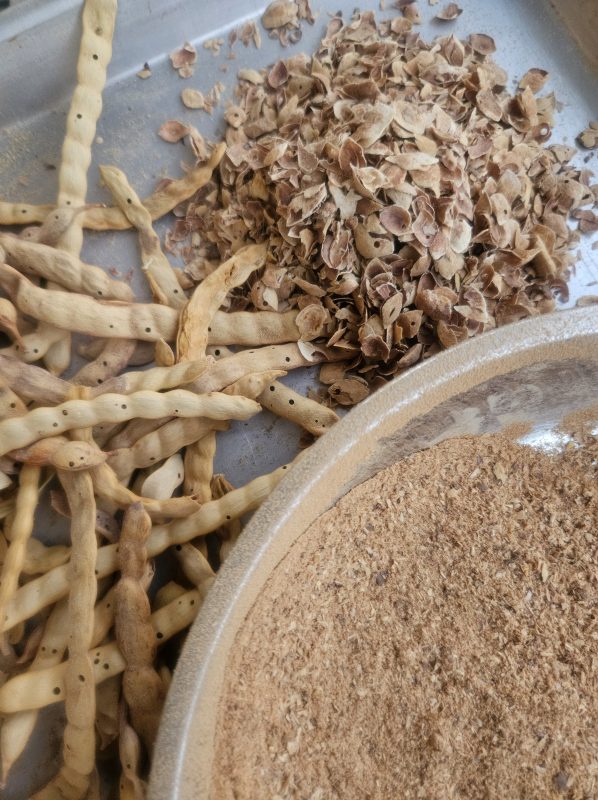
Drought makes for patchy harvesting, but I had a stash of pods. The trick to making HOME grinding work, especially in humid weather, is to toast the pods RIGHT before grinding. No community mesquite pod milling event near you? Need that mesquite meal TODAY? No problem!

I baked in a thin layer at about 275 degrees F with convection for maybe 5 minutes. Try longer if you don’t use or have a fan. It should smell sweeeeet. I opted to not develop any golden color, but that’s an option!

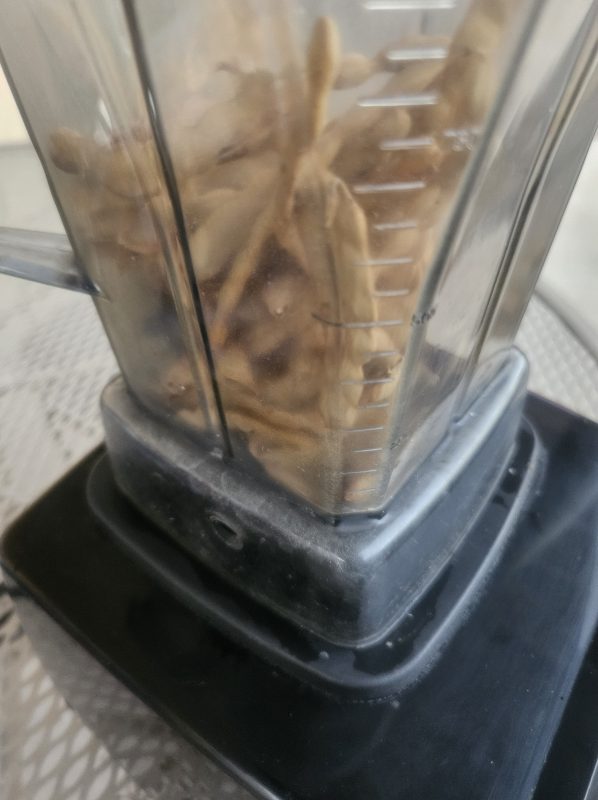
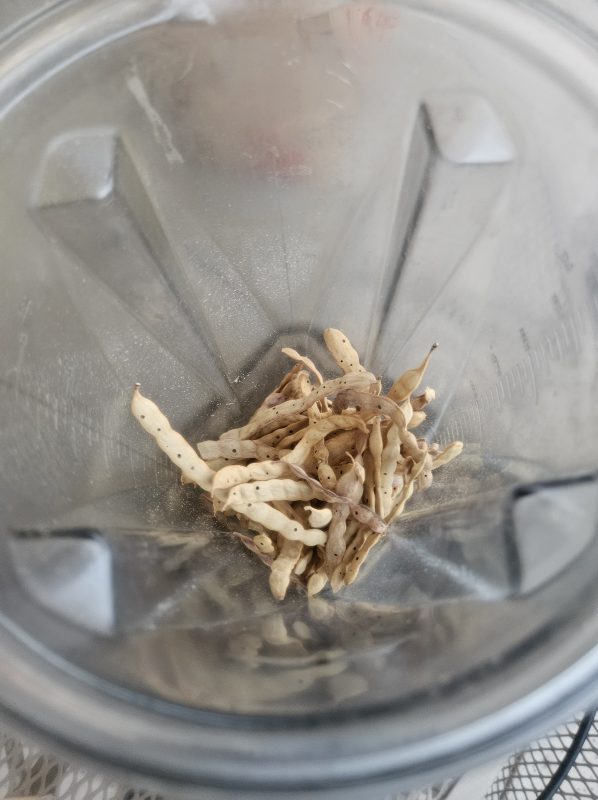
After cooling JUST enough to handle easily, I tossed the pods into a high powered blender. A regular blender or food process does not suffice. Without the last minute toasting, grinding makes a paste in there. This of course is an issue with any mesquite meal grinding method, but expecially for the blender or stone tools.

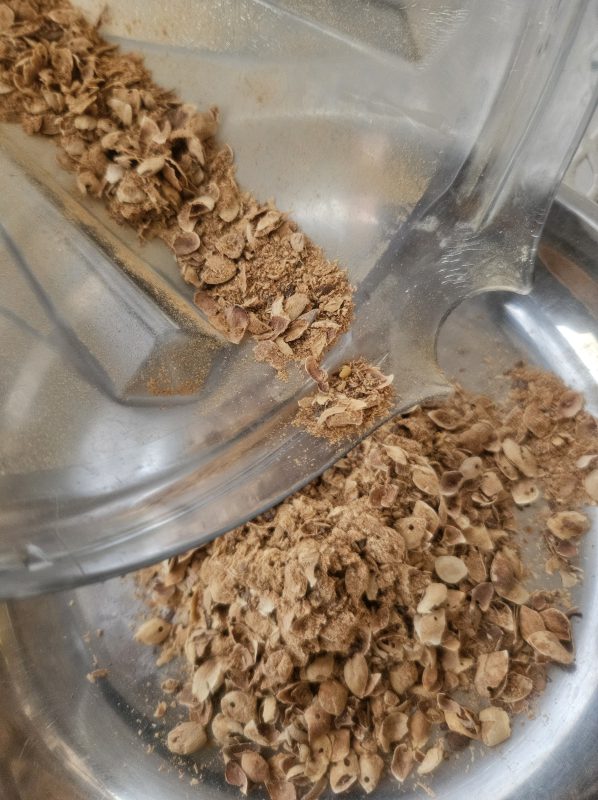
Unbelievablly, it only takes a few pulses.

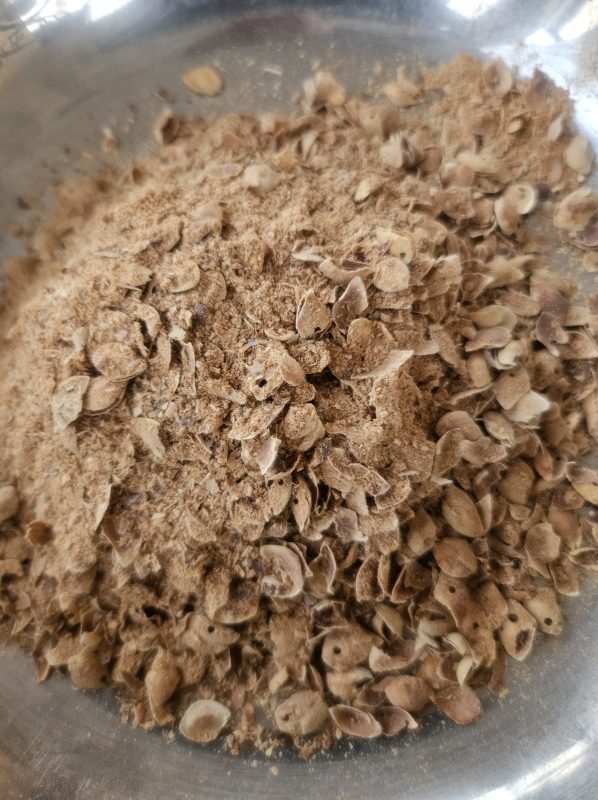
Any fine sieve or a flour sifter can remove the meal form the hard bits of unground pod and seed. Any grinding method will require this step, even hammer mills.

Sifting is even faster than grinding, depending on the size of the holes and quanity of mesquite meal needed.

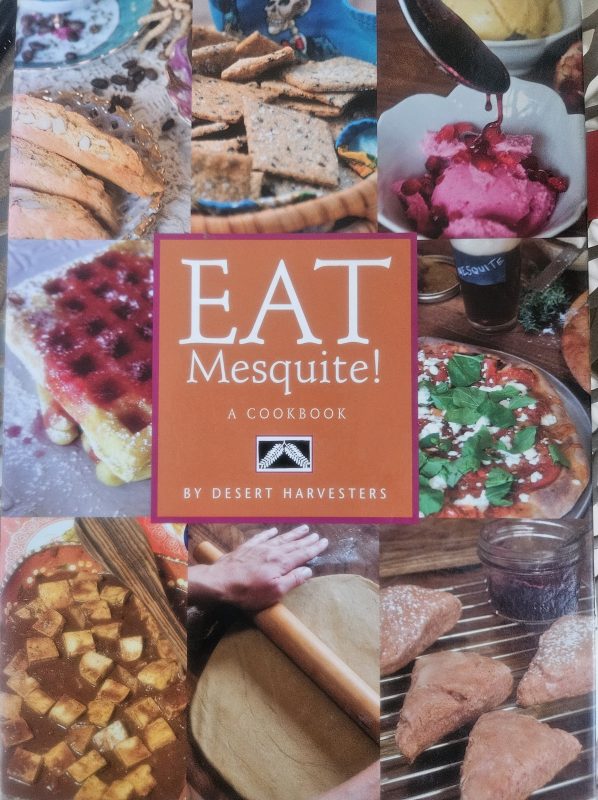
To show off this flour, I impulsively chose a simple recipe from this small out of print book. However, you can purchase the huge current edition!

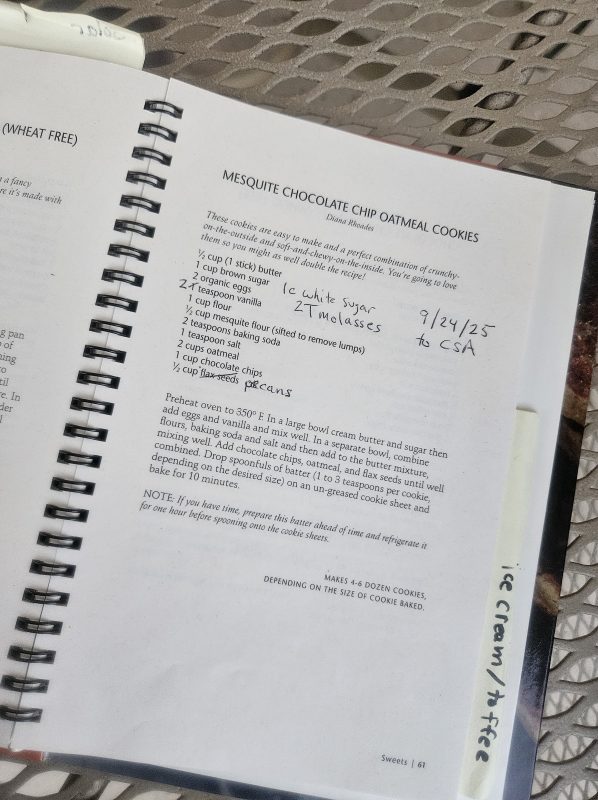
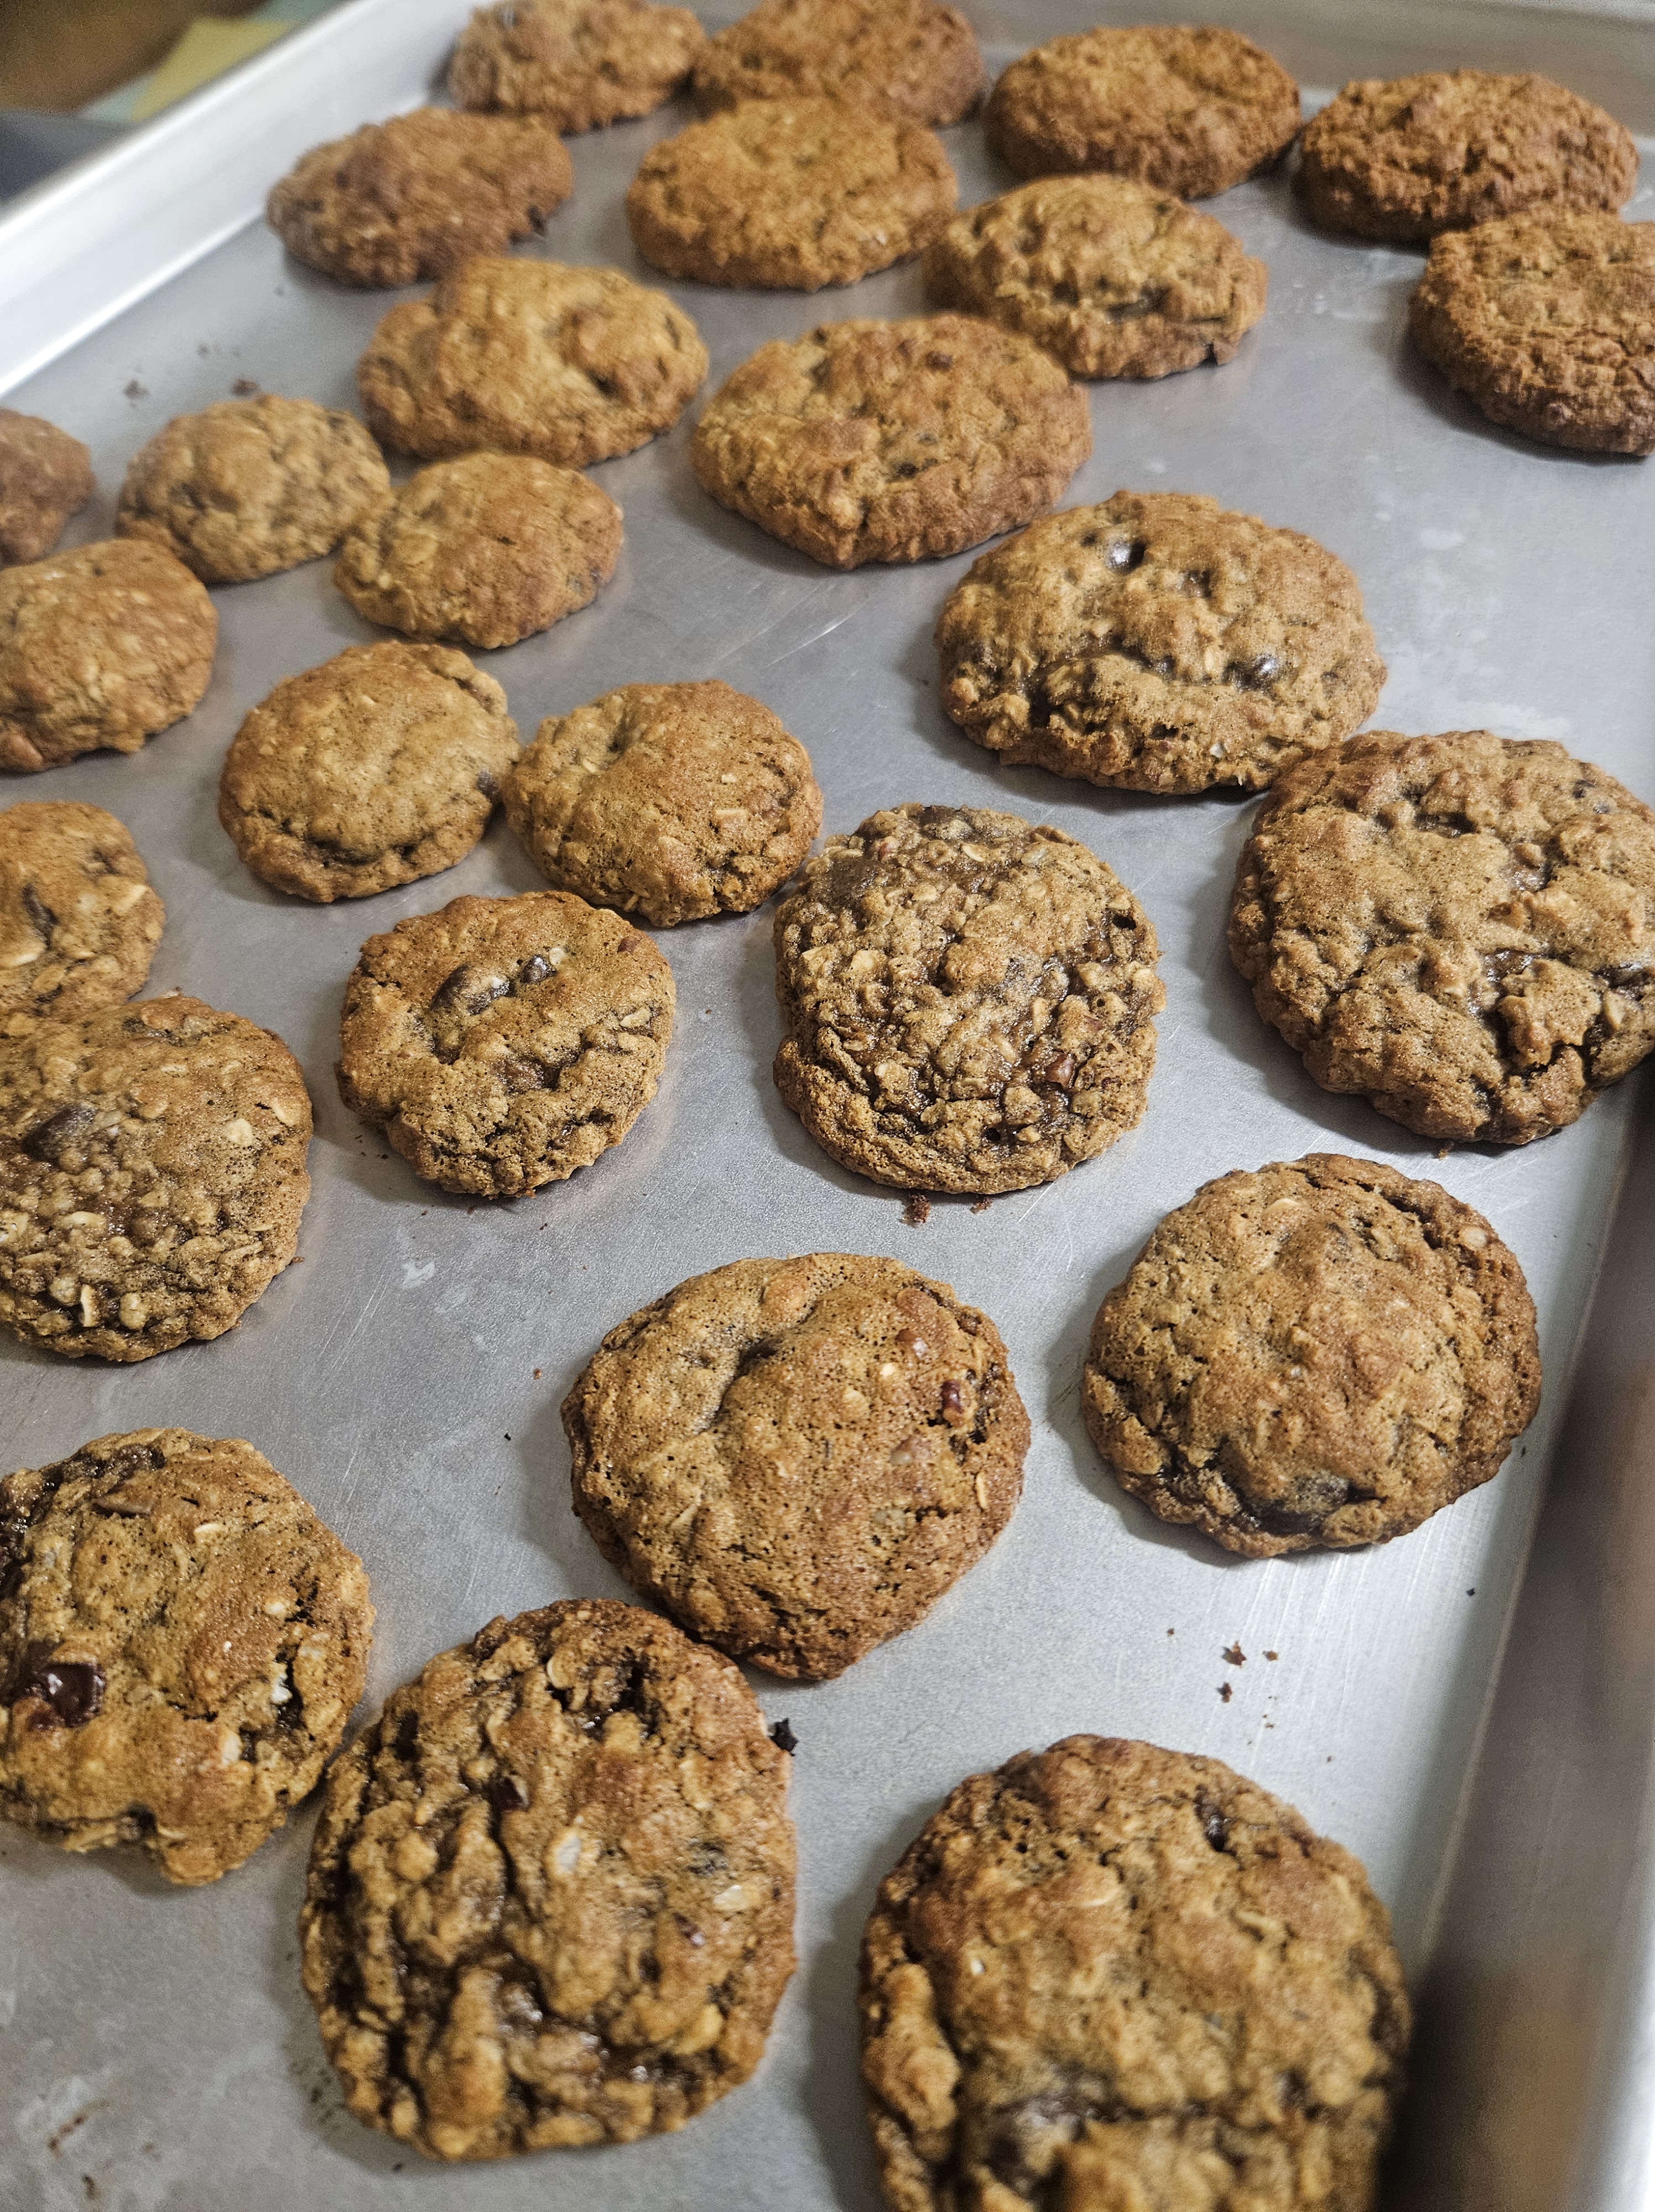
Chocolate chip cookies! I had a half bag of chocolate chips and pecans on hand, and chocolate with mesquite is classic. In case my butter spent too much time in the freezer, I doubled the vanilla. No brown sugar in sight, but a gallon of mollassas to use up.

I love making my notes in hard copy cookbooks, and reading the kitchen culture from long gone relatives in their books. And the bookmarks that are labels from my friends’ gifted food creations are my kind of treasures.

I baked these chocolate chip oatmeal mesquite pecan cookies until just barely set, let them finish cooling in transit, and served them chewy with the chocolate still melted. I’m sure they would not tolerate stacking. Some were full sized, the others bit sized. None were leftover.

Happy autumn!

A Foraging Consciousness for Famine Times

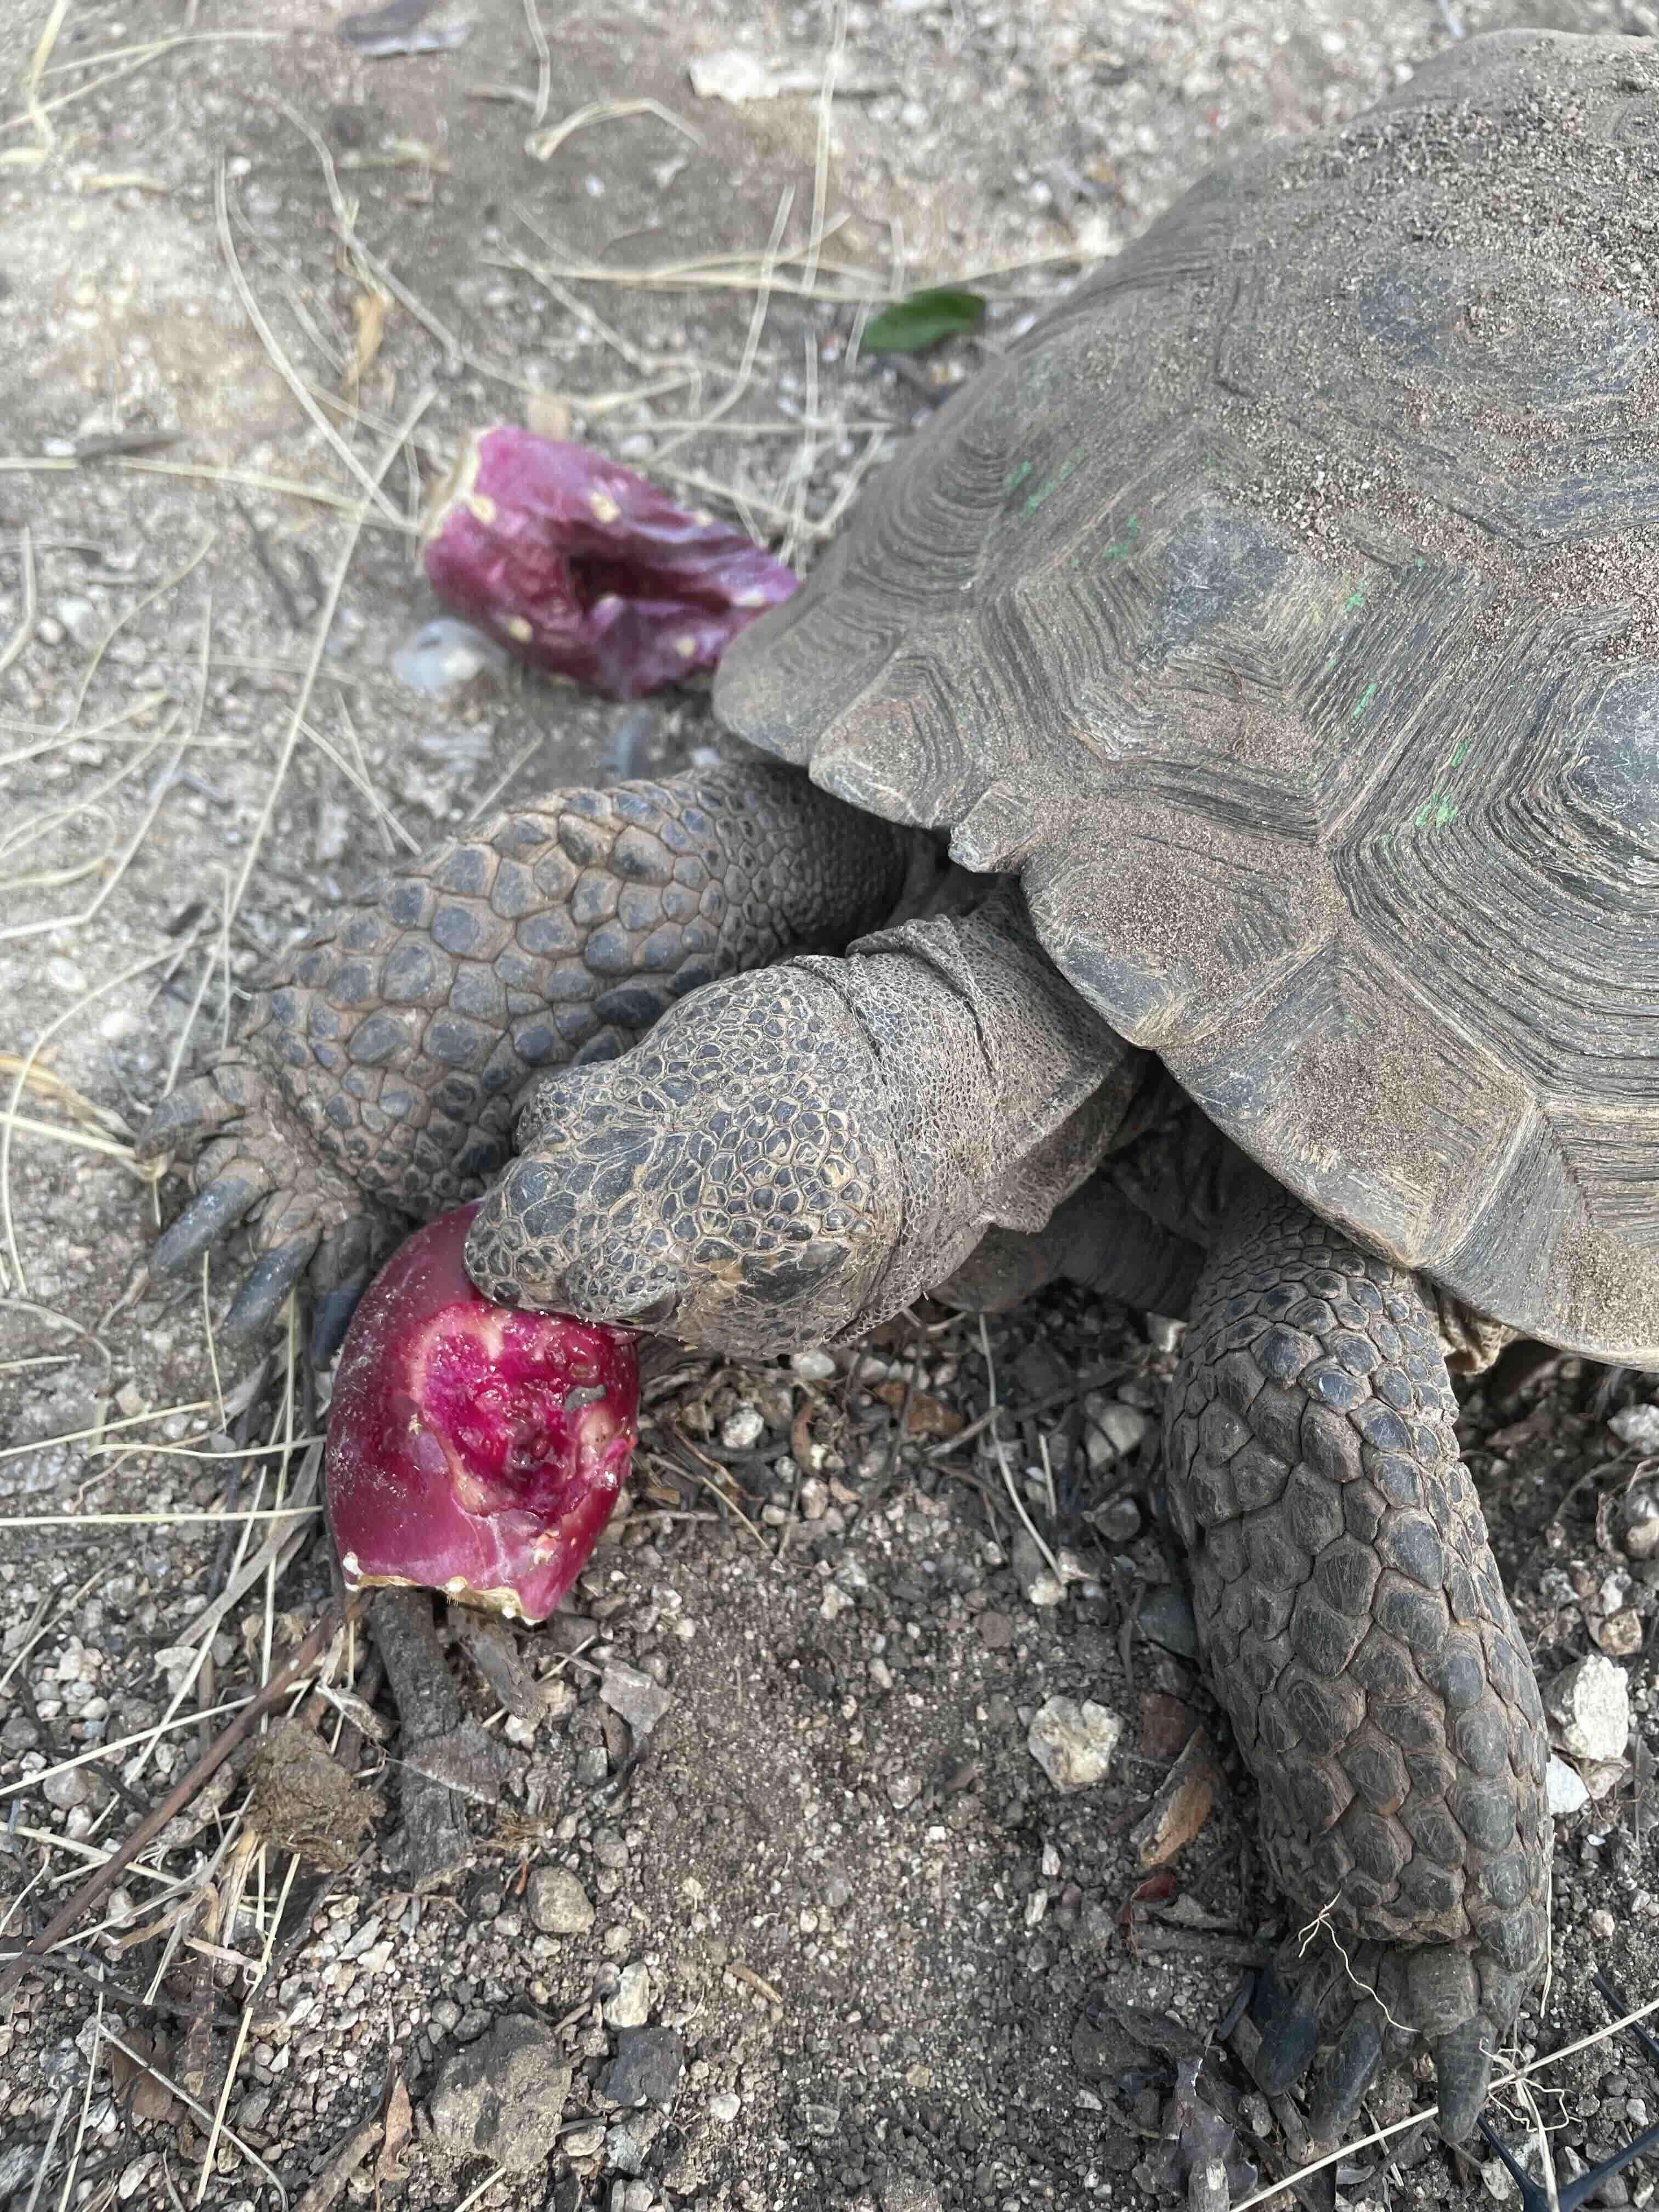
We aren’t alone. Living through this extended drought and awesome heat in the Sonoran Desert is a major feat for any creature out there–plant or animal–no matter how desert-adapted it may be! We are all feeling it. Difficult to imagine how creatures, like the long-lived desert tortoise, manage through the kind of intense drought we are experiencing.

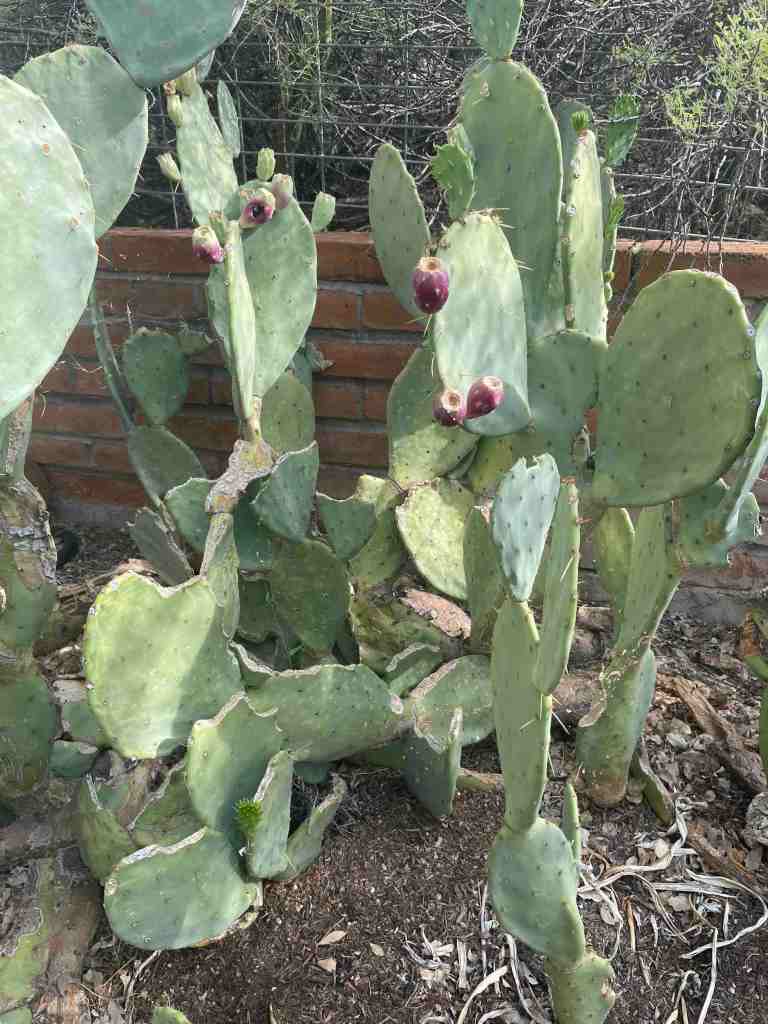
Even in my back yard, my tended prickly pear, covered in buds and tender nopales last April, is ending this summer with tunas dropping before mature or devoured by cactus wrens, and pads chomped by packrats or ground squirrels.

Tia Marta here to share some thoughts about us humans harvesting from the wild. As I learned from my Tohono O’odham mentor, in earlier times Indigenous people had to suffer through lean times using the desert foods they’d stored from times of plenty. They knew sporatic seasonal productivity is the name of the game in the desert. Wise cultural tradition dictates that you harvest abundance when it happens, share your plenty, and store as much as possible against the expected lean times.

Very few native prickly pears have produced fruit this year in the Sonoran Desert, so as human desert harvesters I feel we must refrain this year, and consider the needs of our wild neighbors, the deer, javalina, cottontails, rodents, birds, etc who need what forage remains– far more than we do.

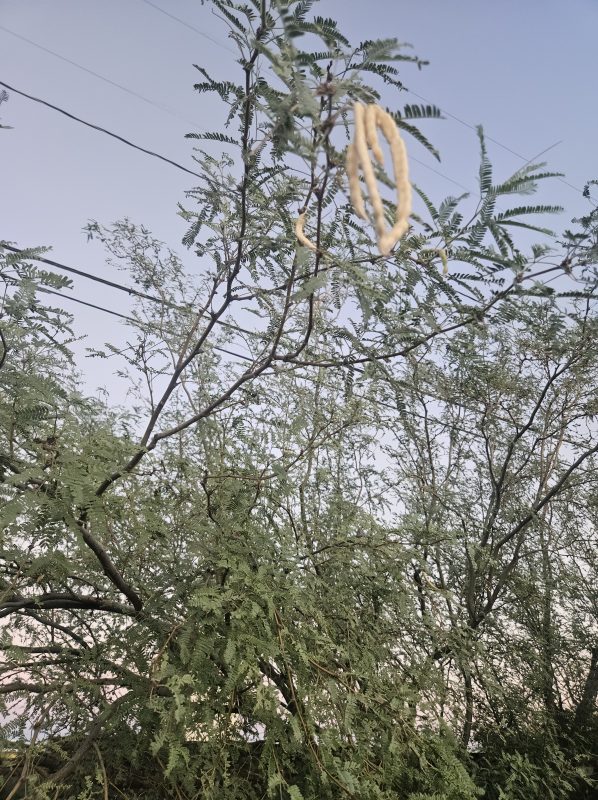
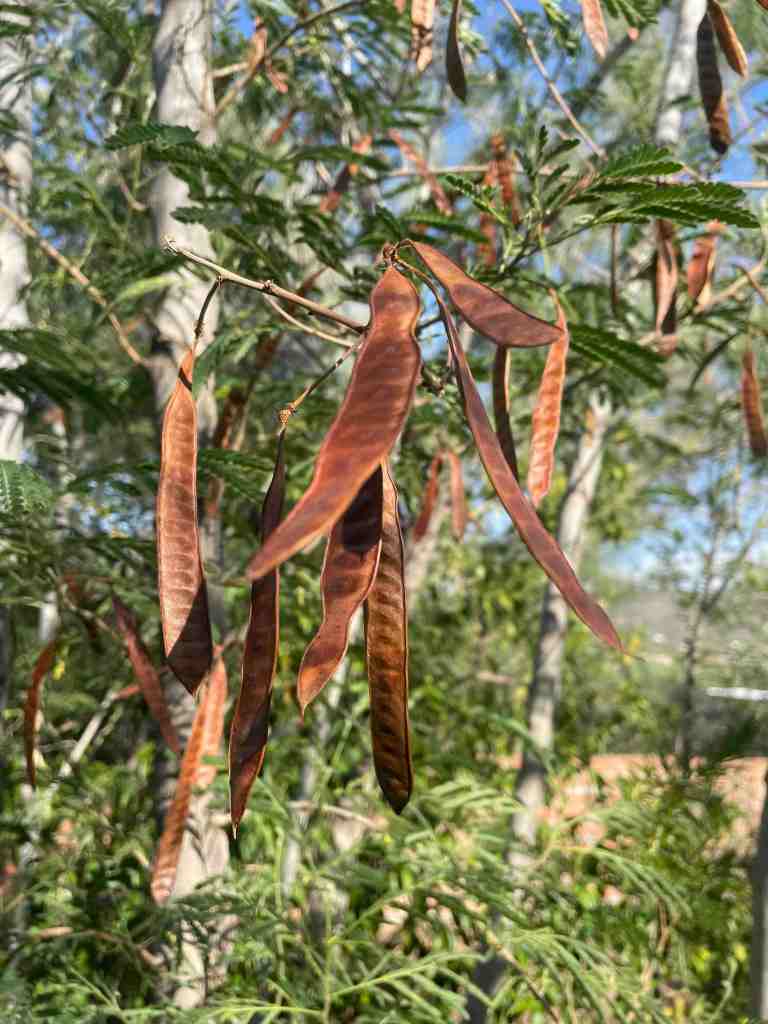
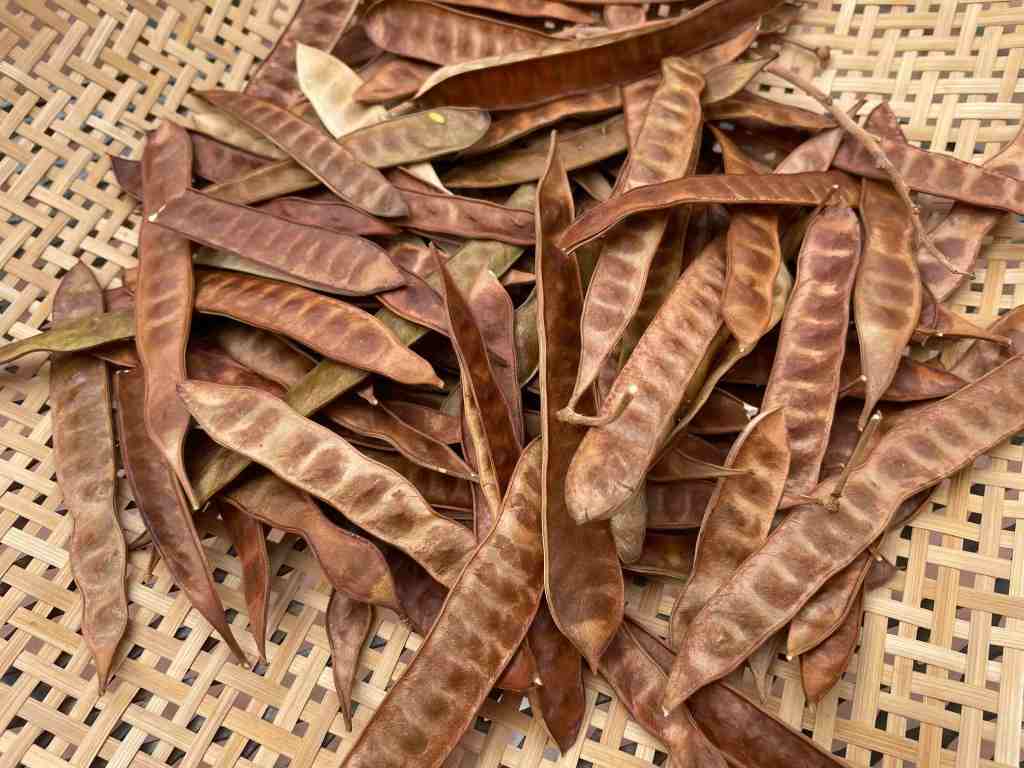
Instead, I suggest we go for an invasive! How about eating from the white lead tree, known as guaje in Mexico, huaxin by the Aztec in its region of origin? Its presence as an invader into the Sonoran Desert generates interesting controversy. The seeds contain an amino acid mimocine toxic for us mammals who have no rumen for digestion. However Guaje‘s young pods, when green, can be cooked in soups or in tacos, as cooking removes the toxicity. This small fast-growing tree has other positive attributes: It is used as great cattle fodder, provides stovewood fuel, erosion remediation, herbal medicine, and it adds soil nitrogen. Its profuse and often continued flowering makes it a good pollinator support. Caution: it IS an invasive species and, if let loose in our desert, could compromise our precious natives..

Guajes (Leucaena leucocephala) have been known and appreciated in Sonora, Mexico, for decades if not centuries. It is planted on the University of Arizona campus (see UA Arboretum) and is being researched as a potential future food plant for climate change by horticulturists at Mission Garden. I’m glad guaje volunteered in our yard from soil in a potted plant. It created a little grove of blessed shade for us, and bees have been abuzz over its puffs of cream-white flowers every spring.

I recently gathered a gallon bag of dry pods which yielded only 1/8 cup of small seed. They resemble flax seed. I soaked them to see if any were viable. About 1/3 of them swelled. When cooked for 15 minutes to remove mimosine, and drained, they proved nut-like and tasty. I’m adding them to my home-made bean dip. As a legume they will provide good protein in addition to texture and new flavor.

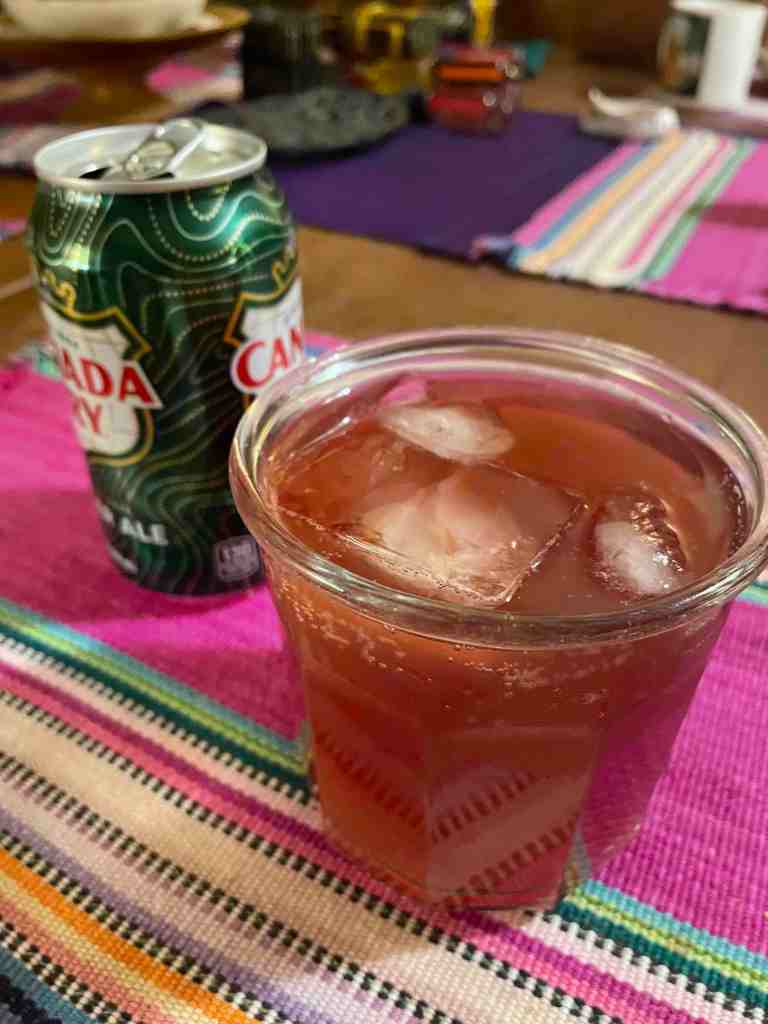
To go with the dip, I’m using a scant amount (a tablespoon per 8oz) of my conserved prickly pear juice, harvested and frozen August last year, with flavored fizzy, gingerale and a splash of mescal. With this dressed up punch, we’re sending a toast to all desert creatures out there! We hope they are benefitting from any prickly pear tunas that may be ripening in our hot, dry desert!

May we be conscious of all the plants and animals around us during these weather-stress times! For more ideas on local “famine foods” see SavorSister Carolyn’s post and Tia Marta’s post. For ideas of what we can grow in prep for more climate extremes, check out Ethnobotanist Gary Paul Nabhan’s inspirational book Growing Food in a Hotter, Drier Land: Lessons from Desert Farmers on Adapting to Climate Uncertainty.

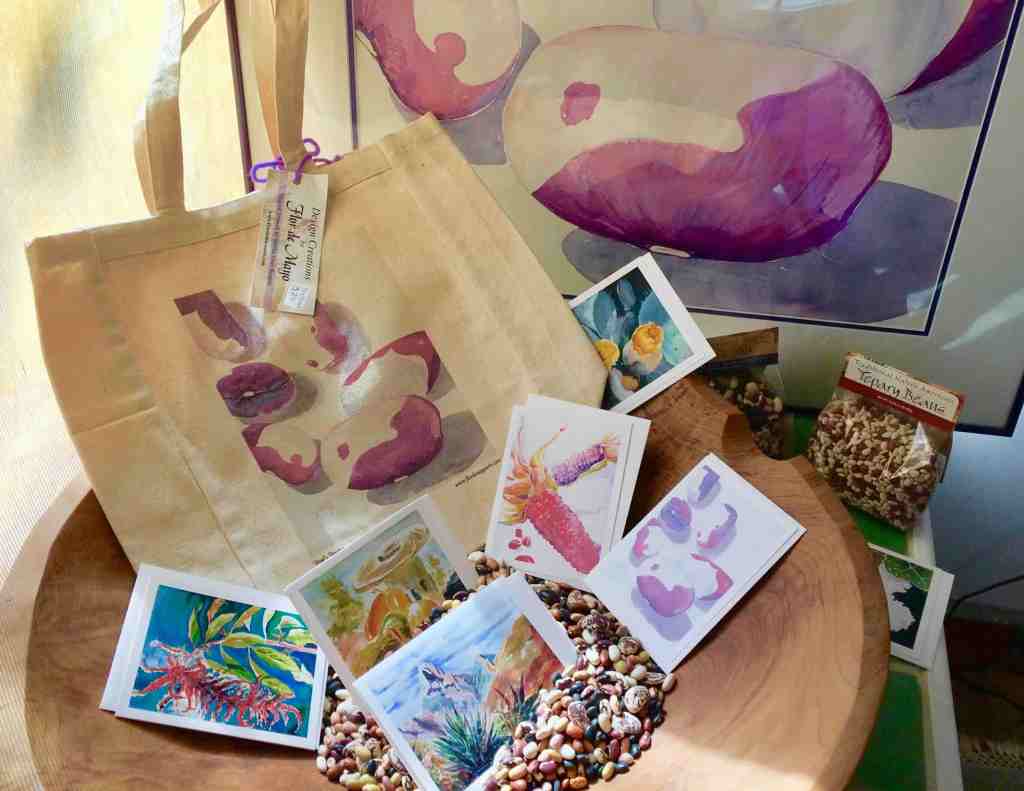
A colorful assortment of Tia Marta’s watercolor art-notecards depicting Southwest Native American heirloom foods can be found at the Mission Garden shop, or online at NativeSeeds/SEARCH.

Gathering the Desert, and Gathering Around Honey Wine

Honey, the golden elixir of the bees, is famous for its impressive shelf stability, or resistance to spoiling. By its nature, it can remain edible for an extraordinarily long time. In grade school, I remember delighting in the fact that archaeologists found honey in King Tutankhamun’s 3,000 year old tomb. Cave paintings in Africa dated to thousands of years ago depict honey hunters who braved a defensive colony of bees (Hollmann 2015) to access the calorically valuable, medicinal, and tantalizing substance which could be consumed or stored long term. 

I love to think about the early honey harvesters of Africa and imagine the first time someone combined honey with water, and fermentation soon began–an exciting transformation took place! This is thanks to the action of microbes (as is commonly the case, at least with fermented foods). While humans crave the complex sweetness of honey, it turns out that honey is a favorite food of some microbes such as Saccharomyces cerevisiae, a species of yeast. The yeast consume the honey and convert it to alcohols and carbon dioxide. 

Honey wine, T’ej…sweet and warm like the solstice evening light.

It is thought that honey wine known as t’ej (say: “tedge”, with a soft d) originated in Ethiopia and Eritrea, and upwards of 5 million people consume t’ej on a daily basis (Belay n.d.). However honey wine variations are found in many parts of the world including Mexico and Poland (Katz 2012). You may know t’ej by its other name of mead, an alcoholic beverage made by fermenting honey with water. It is truly simple and fun to make t’ej at home by adding raw unpasteurized honey (which contains natural yeasts that kickstart fermentation) with pure water, but you can also add an endless variety of edible botanicals like herbs and fruit to create a unique or medicinal mead. While mead can be aged for months, you can drink it “young” after only a couple weeks of high-energy fermentation. What kinds of honey wine will you make to share with family and friends?

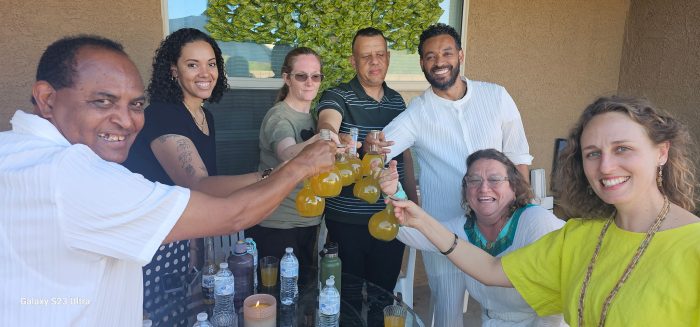
I was inspired to make t’ej for the first time by my friend Andrias Asnakew, a Tucsonan of Ethiopian descent who established Brillé Mead Company here in 2023. I was honored to share homemade t’ej with him and his welcoming friends who hosted us on Easter, clinking glasses as they described the traditional recipe. They taught me that East African t’ej is traditionally made with honey, water, and the leaves of gesho (Latin name Rhamnus prinoides, a plant native to southern and eastern Africa) which adds a distinct bitter flavor and wild yeast to start the brew (Belay, n.d.). I am grateful for the family’s hospitality and generosity, and to Andrias whose knowledge guided me through the process.

Friends gathering with traditional t’ej (Ethiopean honey wine).

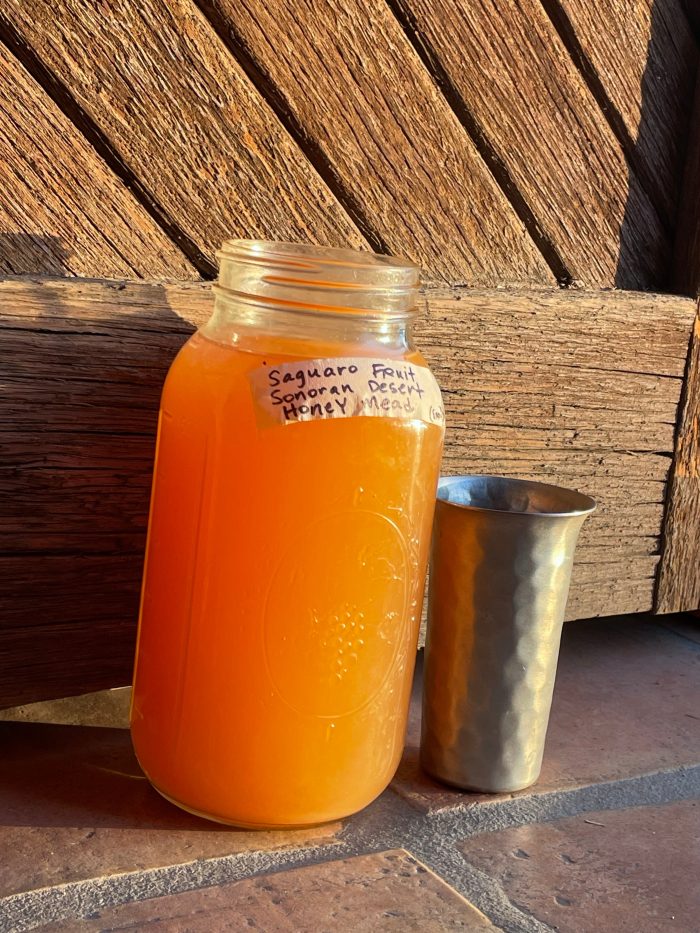
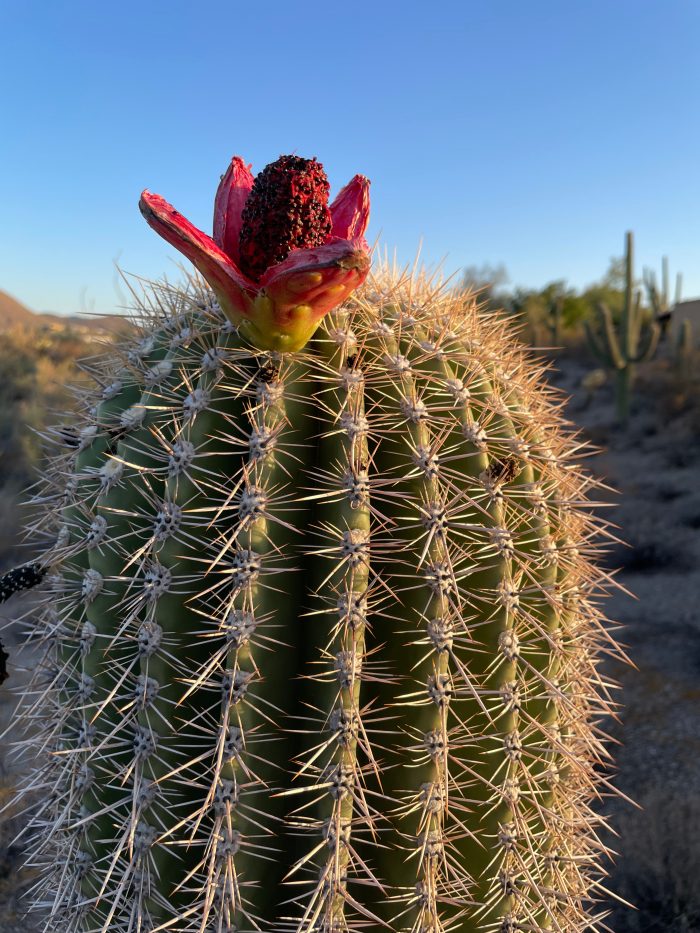
Around the time I was pondering which ingredient to include in my first mead, I was marveling at the crowns of white trumpeting blossoms on the haan (Tohono O’odham name for the native saguaro cacti). I wondered what saguaro fruit honey wine would taste like? It seemed that using fresh red bahidaj saguaro fruit would be a perfect way to celebrate the solstice on June 20th, and to harken for rain on Dia de San Juan on June 24th. (For more on saguaro traditions, enjoy reading about the Tohono O’odham’s beloved bahidaj saguaro fruit from teacher Muffin, known as Sister Marta here at Savor the Southwest blog: Summer Solstice, and Sister Carolyn’s It’s Saguaro Season.). This mead would be fully Sonoran desert, made from local honey and saguaro fruit…

Bahidaj (Tohono O’odham for saguaro fruit), June 2025

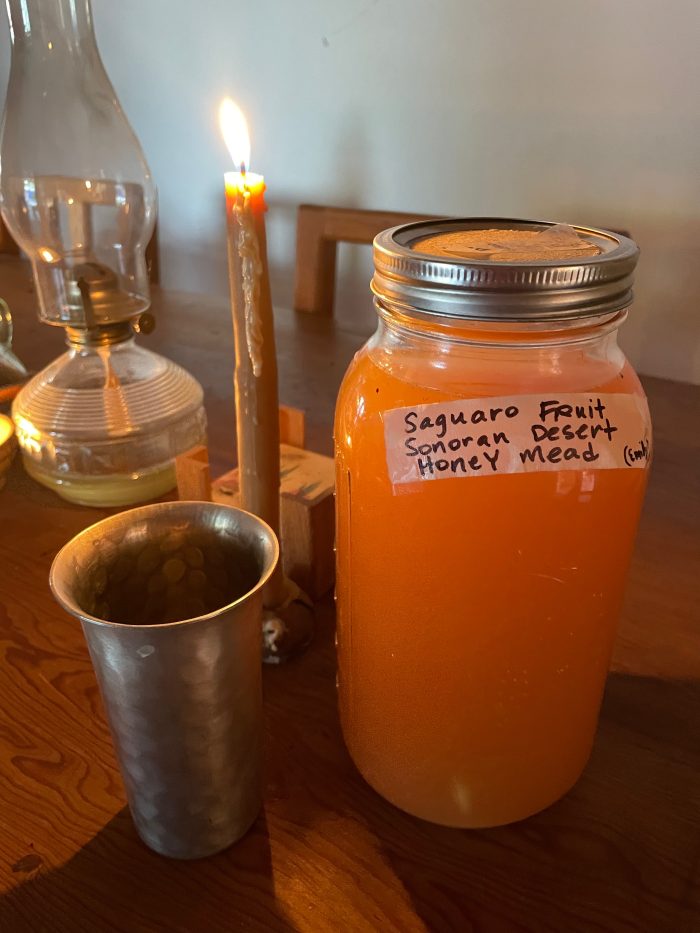
I am glad to report that my first batch of honey wine/mead/t’ej was a happy success (recipe to follow) with very little cost and effort. The tasters gave feedback that the flavor is more dynamic than they expected, with real body and interest. There’s a bit of liveliness, but it’s not bubbly. Many folks commented on its balance: a little citrusy, and not too sweet; a light fruitiness, and warmth from the honey. There is a pleasant yeastiness like fresh bread, though it doesn’t taste strongly of alcohol. We all noted the way it gently, pleasantly nudges you toward relaxation (I estimate the percent alcohol of my brew 4.5-5% ABV). If you prefer a stronger t’ej, you can increase the amount of honey, or a lighter less alcoholic brew can be made using less honey. 

The recipe is so flexible and invites endless experimentation. The ratio of honey to water is anywhere from 1:4 (one part honey added to four parts water) to 1:16 (for a very light mead, or if you’re adding a lot of sweet fruit also). The variety of creative optional additions is endless: fresh or dried fruit (berries, native fruits encouraged), herbs (lemon balm, rose, mint) or spices (ginger, cardamom, cloves, or cinnamon). Take notes of your selection, process, and quantities. Andrias started experimenting with different flavors: strawberry, carkeda (hibiscus), habañero. It is a natural beverage; you know exactly what went into it when you make it yourself.

Recipe for Honey Wine (T’ej or Mead)

This recipe was adapted from Sandor Elix Katz’s excellent book, The Art of Fermentation, with inspiration and guidance from Ethiopian t’ej maker Andrias Asnakew (Tucson, Arizona). 

This recipe yields about 2+ gallons mead (can be scaled), potentially 4-5% alcohol, approximately (a hydrometer can measure this precisely if you wish)

1 quart local raw honey (32 ounces)– my personal favorite is Tucson Honey Company from Tucson local farmer’s markets.  
2 gallons+ pure, filtered water (~260 ounces) (if tap water is the only option, see below**) 
~1 cup raisins, optional but recommended to feed the yeast–added a little at a time.
Optional ½ teaspoon mead yeast (such as strain EC-1118. Check your local brew shop or find online).
Optional fresh or dried fruit (local and native fruits encouraged), herbs or spices. Experiment with quantity: a few cups of fresh fruit, or maybe around one cup if of dried herbs. For spices, try a handful or so and see how it goes. 

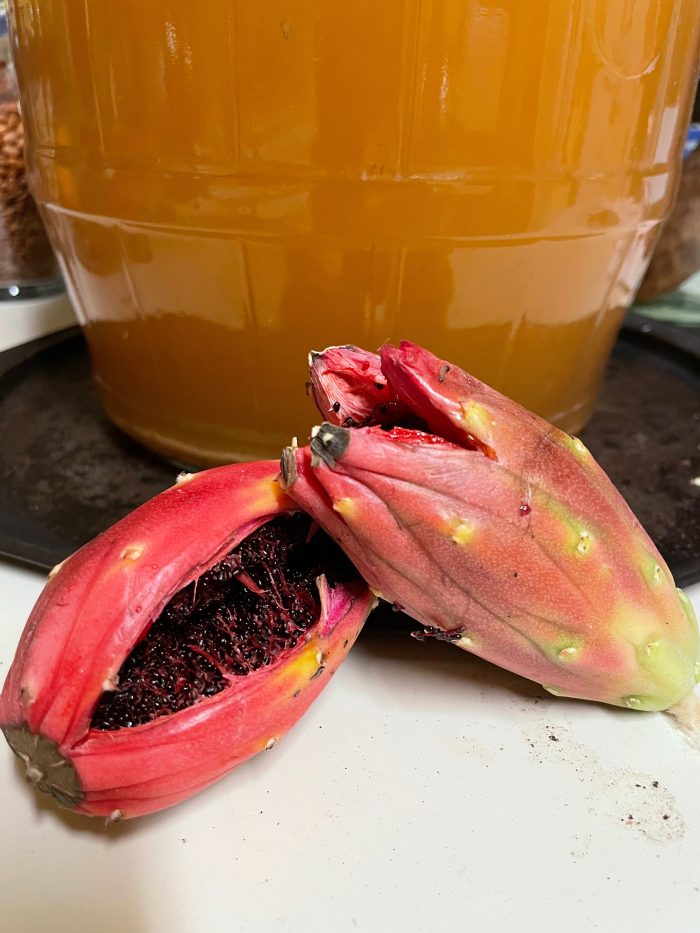
Ripe saguaro fruit

1. Clean a ~2.5 gallon fermentation vessel (ideally glass or stainless steel, but food grade plastic works). Wide mouth is best. 

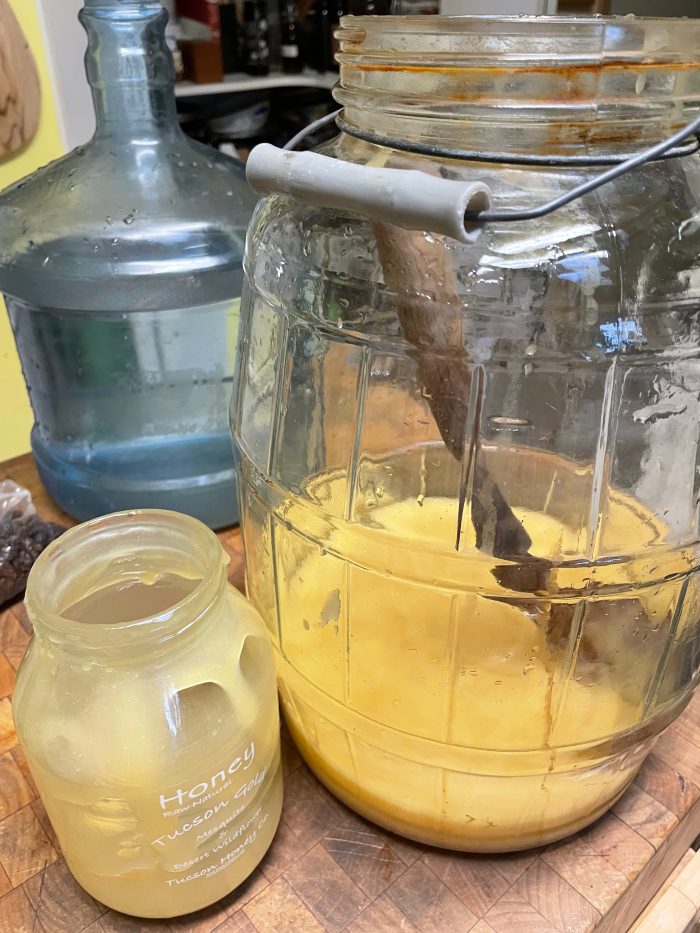
2. Pour the honey into the vessel, and add about half the water. Stir stir stir till it dissolves, then add the rest of the water, leaving just a few inches at the top for bubbles and stirring. Cover with a cloth or loose lid, and place on a baking sheet to catch any drips. Add optional yeast, and optional fruit or herbs/spices.

Dissolve honey in pure water to start the fermentation process.

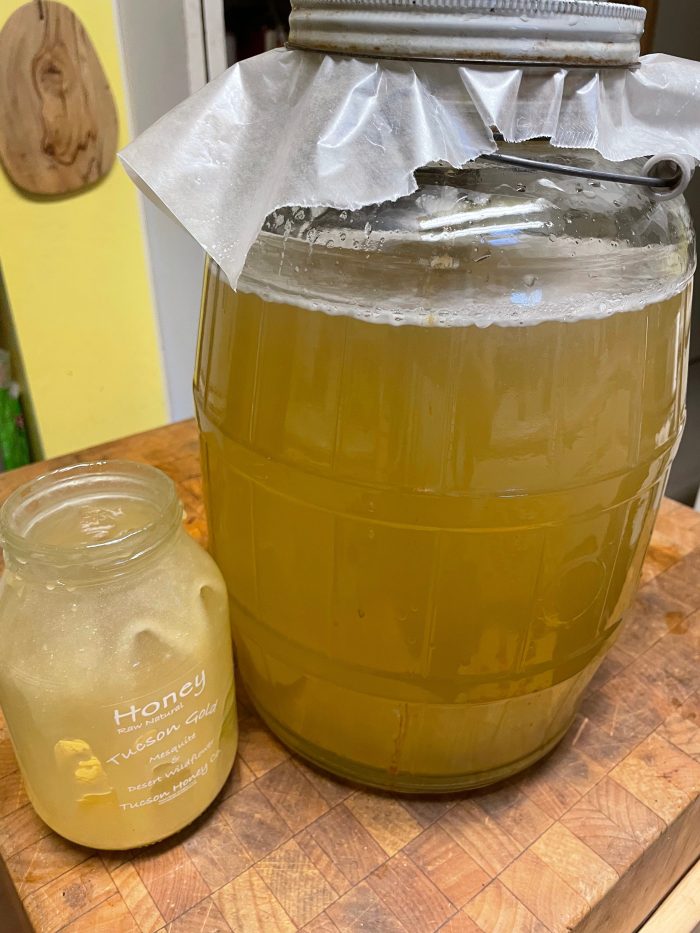
3. This is Day 0. Leave in a cool spot in the house where you’ll walk by frequently. I keep a long stirring spoon next to the vessel and stir it often, daily (at least two or three times+ daily). This introduces air for the yeast. Sandor Katz recommends we stir a few revolutions, then reverse the stir quickly to introduce air (biodynamic style!). Delight in the bubbles and give your greetings to the millions of hungry microbes hard at work! 

Full quantity of water mixed with honey. Ready to ferment!

4. After a few days of frequent stirring, you should start to see more and more bubbles when you stir. The yeast is waking up. This is Day 3. Add a palmful of raisins (a special ingredient by Andrias- he says it provides food to the yeast!) (This is the point when I harvested and added ripe fresh saguaro fruit, but it can be added at the beginning, too.)

Red saguaro fruit has been added to the bubbling brew.

5. Continue stirring multiple times per day. On Day 5 or 6, add another palmful of raisins, and again at Day 8-9. 

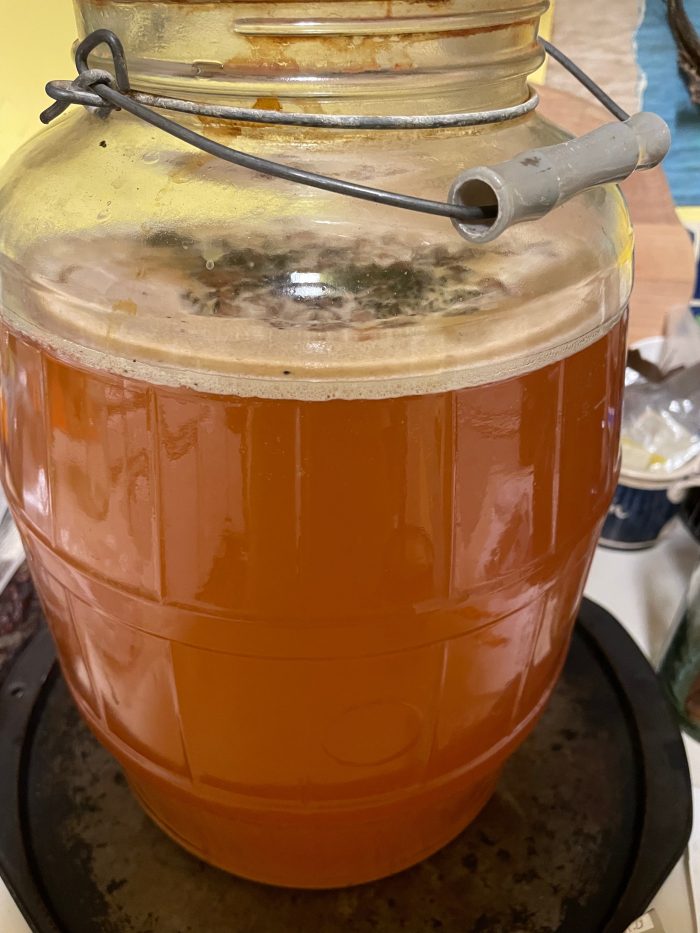
6. At about Day 10-12, the bubbles will begin to reduce in number and fervor. The yeast quickly consume and ferment most of the natural glucose in the honey, producing the alcohol and delicious brew. (The natural fructose takes longer to ferment and only does so if you age your mead for weeks and months.)

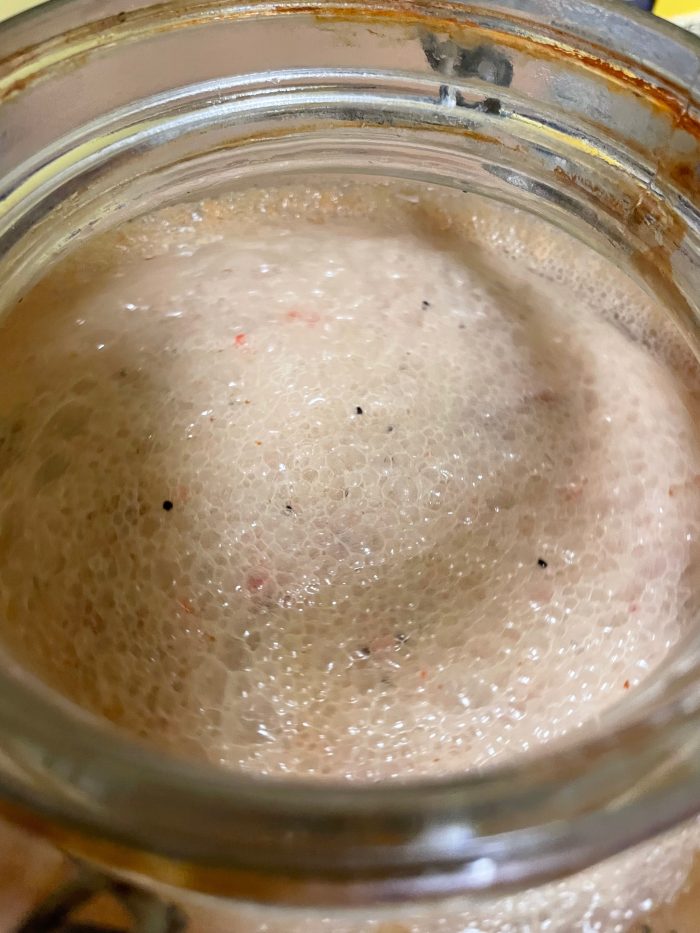
Frothy bubbles of active yeast activity!

7. Taste the mead. If it is too sweet for your liking, you can continue to stir and ferment a bit longer to “dry it out”. If you prefer more sweetness, Andras suggests you can “back sweeten” (add a bit of honey) to taste if desired, ideally a day prior to drinking it. 

8. Strain out any fruit, and serve at room temperature or chilled. Try both! The typical serving vessel for t’ej is a narrow-necked bottle called a berele.

The best way to enjoy your homemade honey wine is with friends, of course. I bet that you’ll pique curiosities about your brewing methods and newfound skill, and bring smiles to everyone’s face. Andrias thoughtfully shared that “you can tell from the smile that the food or drink is good”.

Honey Wine with Saguaro Fruit, Summer Solstice 2025

In Appreciation: 

Thank you to my teachers, including the bahidaj (saguaros), for their ongoing generosity and cultivation of our minds and hearts. 

Thanks to my new friends Andrias and incredible hosts Tilahun and his wife Kidist who are sharing their culture from Ethiopia with all of us in Tucson, Arizona.

Thanks to my mother Judith for kindly copy editing.

**To remove chlorine from the water simply draw the necessary amount of water and leave it out overnight. The chlorine will naturally evaporate from the open vessel. 


Bibliography

Belay, T. B. (n.d.). Call for access and benefit sharing of Rhamnus prinoides (Gesho). Ethiopian Biodiversity Institute, Genetic Resource Access and Benefit Sharing Directorate.

Jeremy C. Hollmann (2015): Bees, honey and brood: southern African hunter-gatherer rock paintings of bees and bees’ nests, uKhahlamba- Drakensberg, KwaZulu-Natal, South Africa, Azania: Archaeological Research in Africa, DOI: 10.1080/0067270X.2015.1079378

Katz, S. E., The Art of Fermentation: An In-depth Exploration of Essential Concepts and Processes from Around the World. Chelsea Green Publishing, 2012.

GET READY FOR NOPALITO SEASON

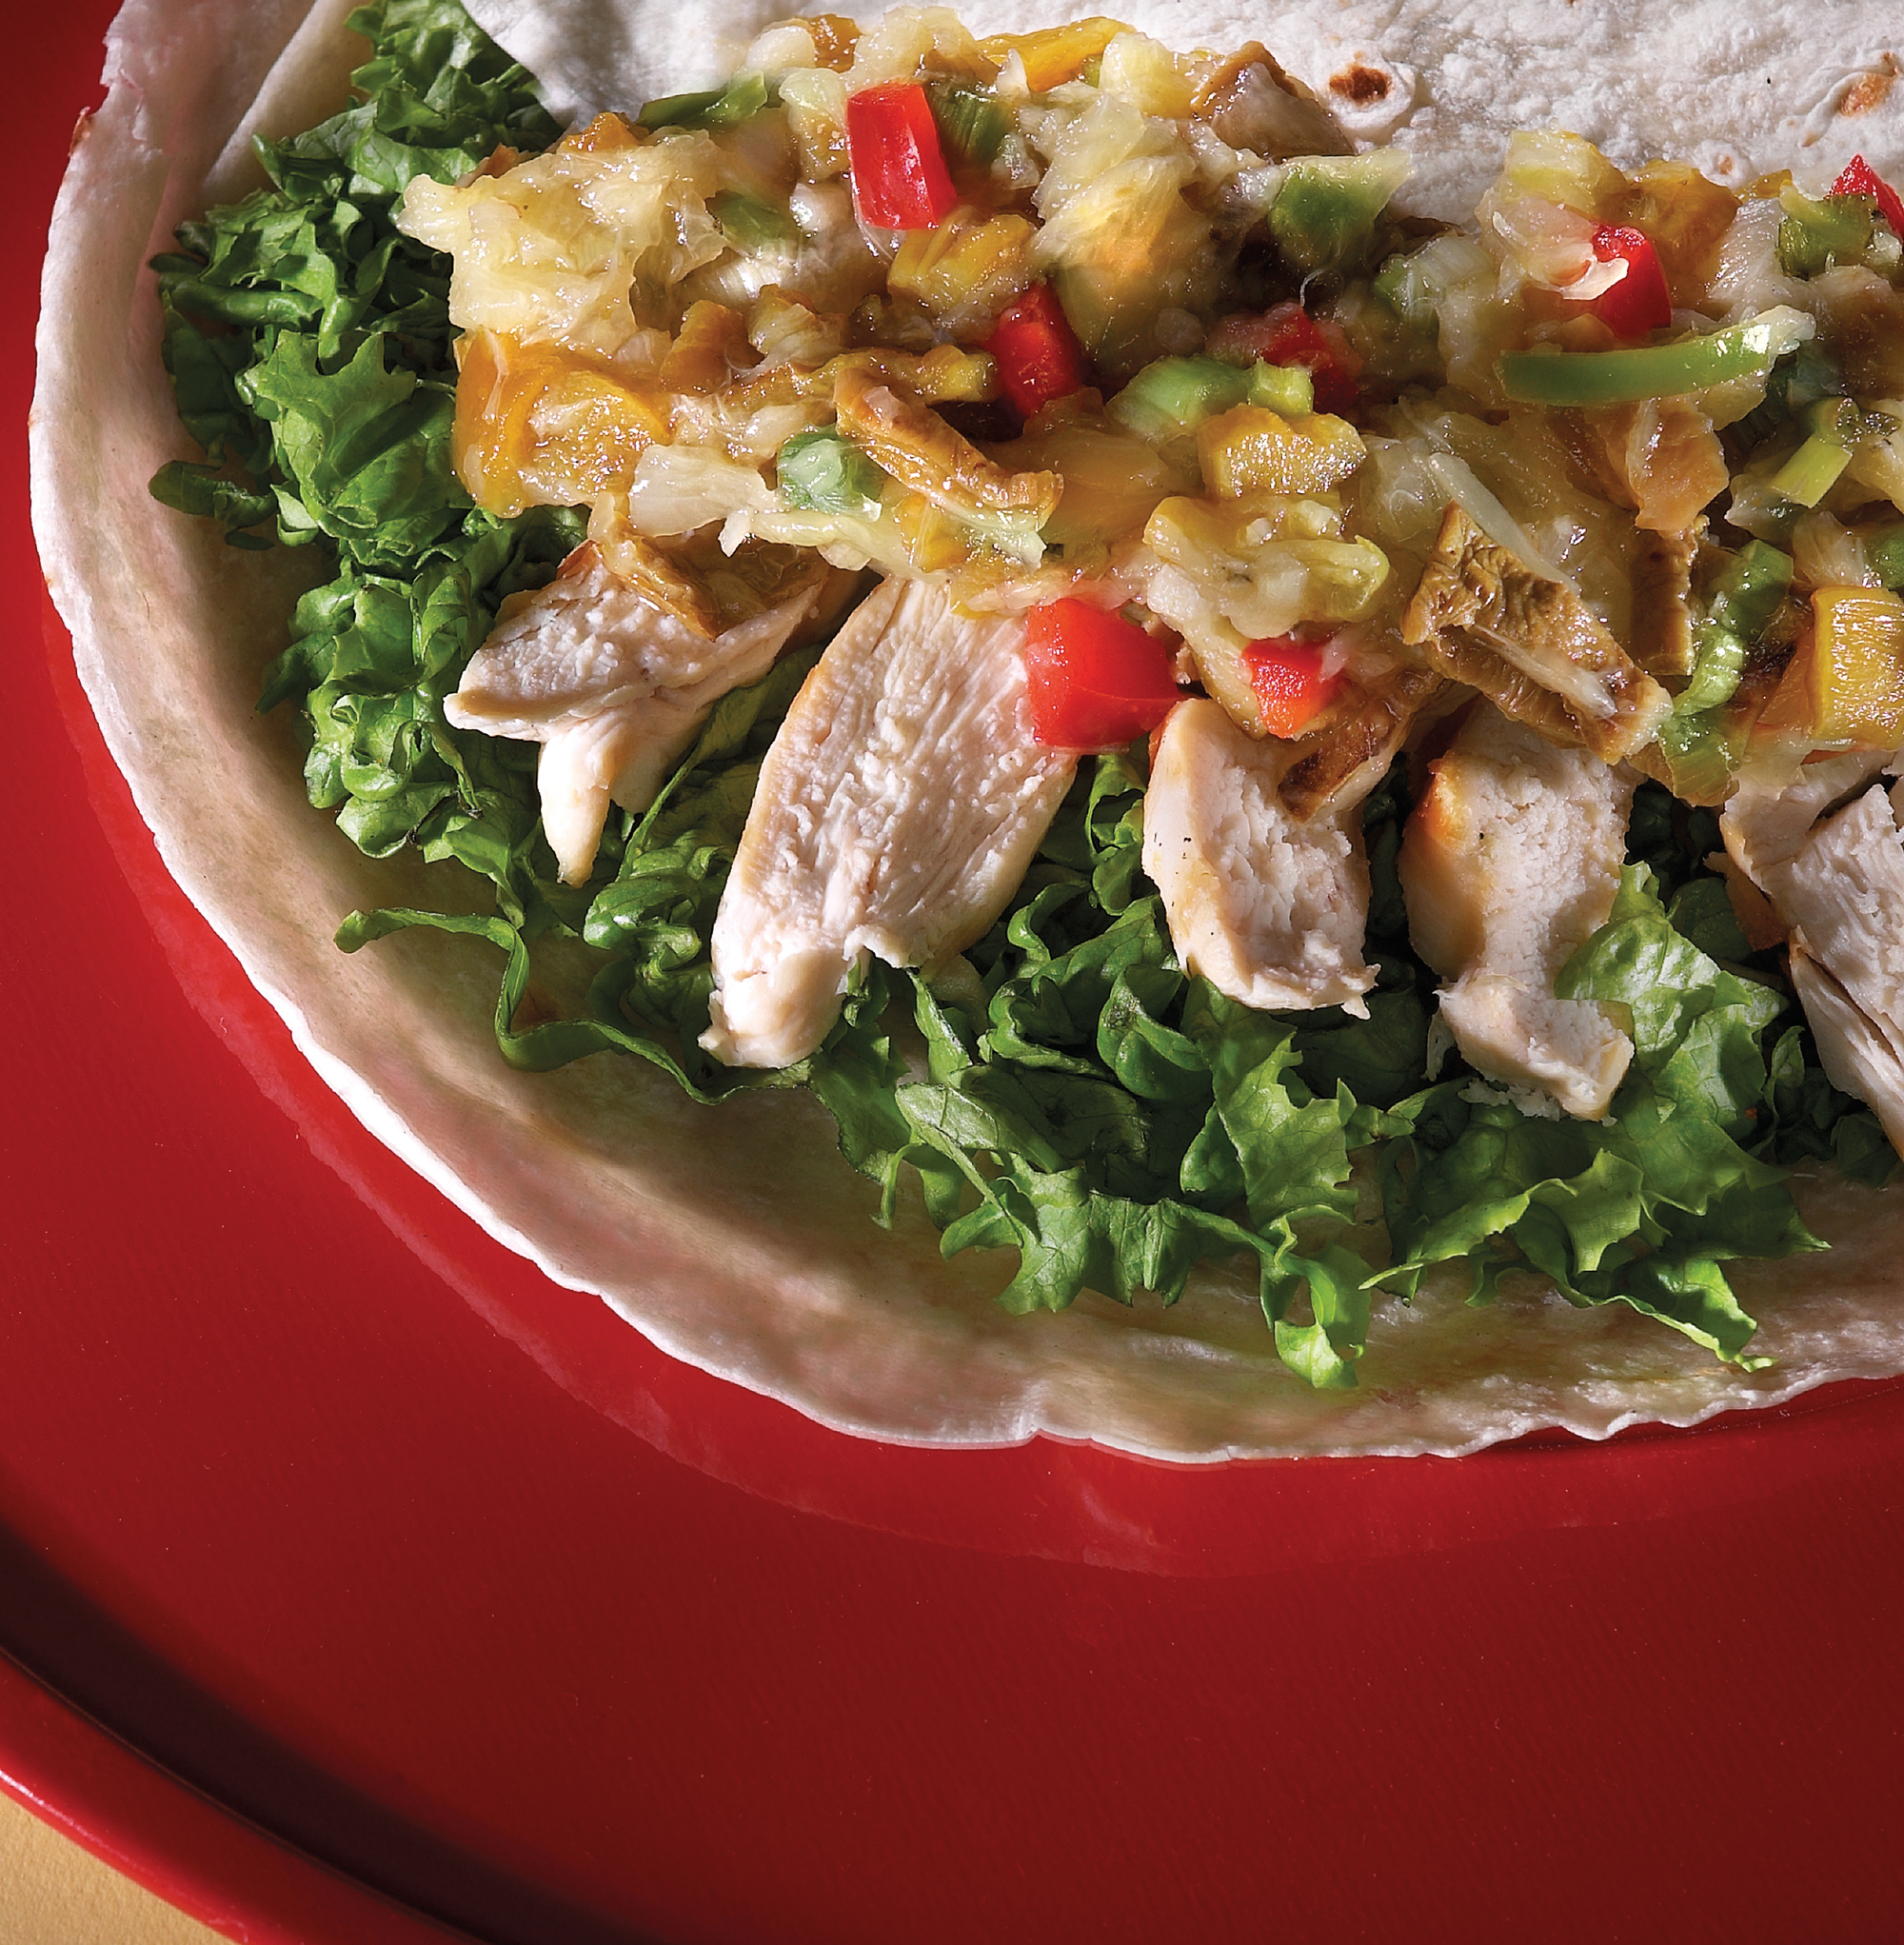
Grilled Chicken with Nopalito and Pineapple Salsa

Grilled Chicken with Nopalito and Pineapple Salsa (from The Prickly Pear Cookbook)

(Note: I will be teaching a class on cooking with nopales at the Presidio of Tucson on April 3. You can sign up on their website.)

The new prickly pear pads (nopales) that we cook and use for nopalitos are usually ready in from March to early May.  It’s Carolyn here today tempting you with two recipes for a delicious salsas made with nopalitos. (Definition of nopalito: a nopal, or cactus pad, cut into little pieces).

Why bother to learn how to use prickly pear pads? For hundreds of years, both the fruit and pads were considered folk medicine in Mexico and early research showed that the fibers in nopales were helpful in curbing blood sugar. Today, researchers in the US and Europe are using sophisticated laboratory techniques and specially bred mouse models (that would be transgenic mice, not transgender mice)  to investigate prickly pear fruits, pads, flowers, and seeds as a cure for a wide array variety of ills.

Investigators are looking into prickly pear compounds as antioxidant, antiviral, anti tumor, anti diabetic, and antiparasite.  It may be useful in combating a range of cancers including leukemia, lung, gastric, colon, and ovarian. Studies have considered its use in the treatment of ulcers and alcoholism and a possible role in boosting memory and energy metabolism. Many research labs are investigating prickly pear for cancer prevention.

The many varieties of prickly pear put out their new growth when the spring warms up. All prickly pear pads are edible (meaning they not only won’t kill you but in this case are very nutritious), but they are only appropriate for food when they are new. After about six weeks, they develop a fibrous infrastructure. The easiest kind of pads to prepare are those from the large Mexican variety of prickly pear that do not grow wild north of Mexico. You can grow them in your yard if your winter doesn’t bring much freezing. Or you can get them at a Mexican grocery story. They are called Ficus indica or sometimes Burbank because Luther Burbank did some breeding work on them. The wild cactus pads are also delicious, but harder to prepare because of the abundance of spines.

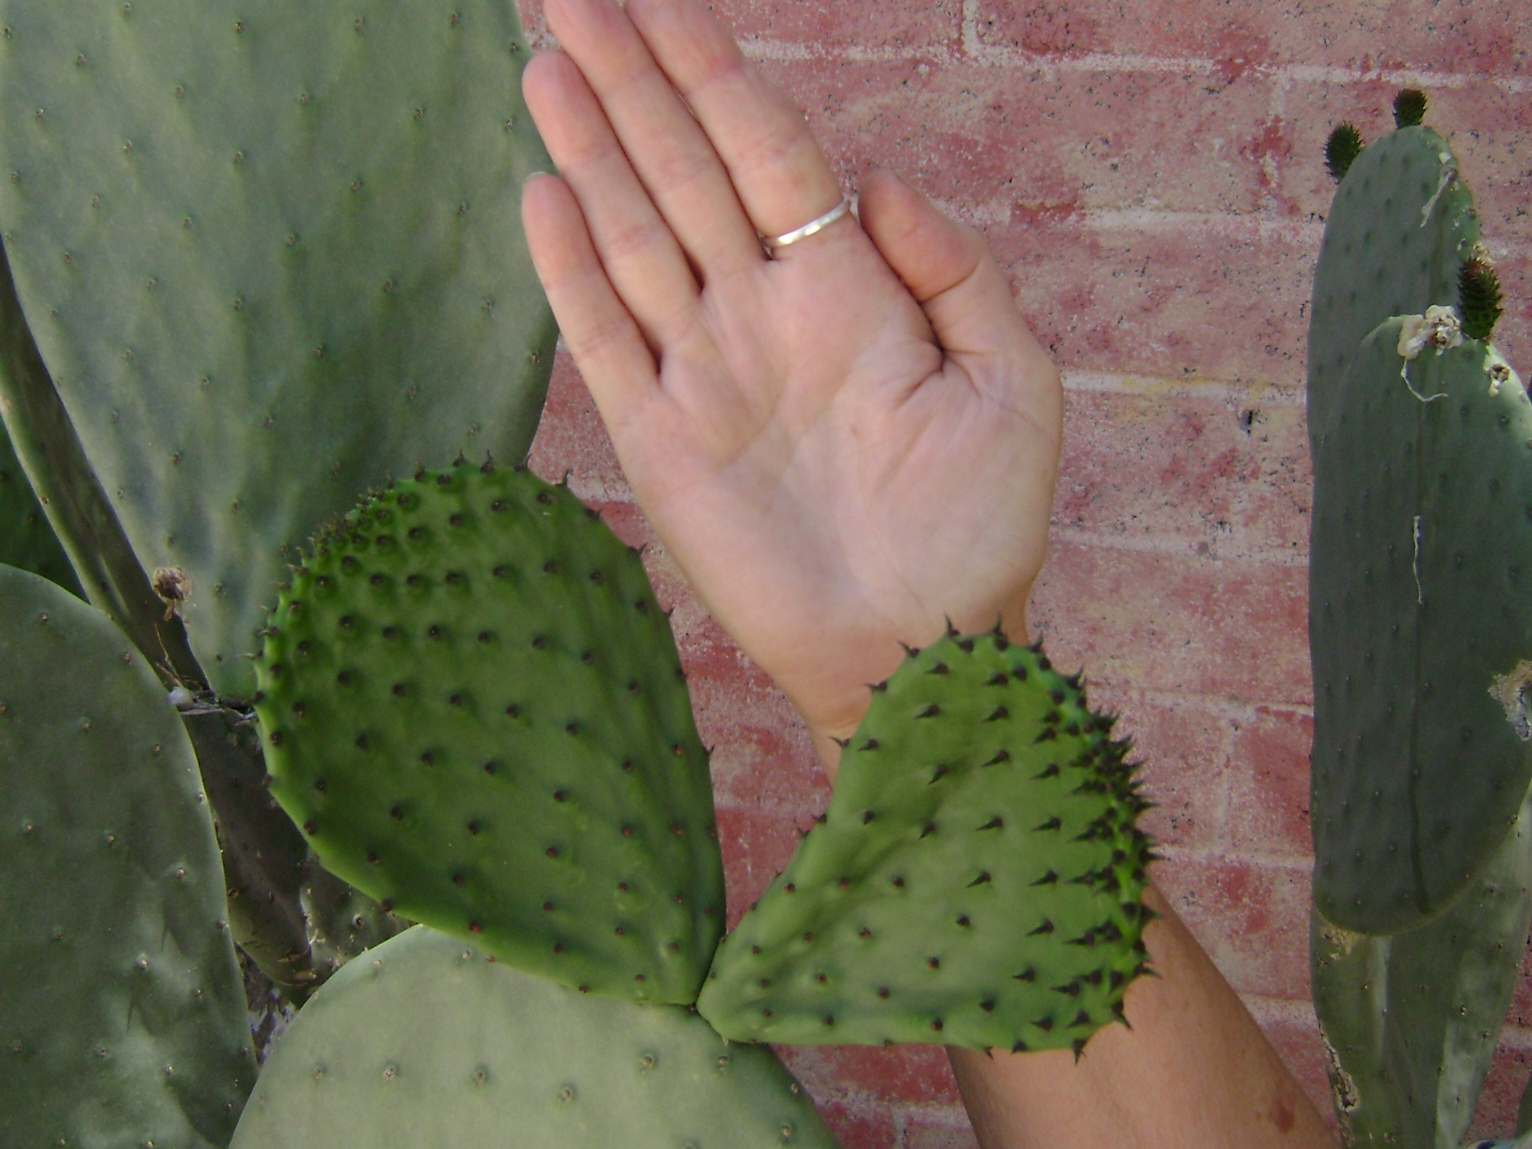
You can do a rough estimate of when a pad is ready to pick if it is about the size of your hand. The nopales available in Mexican grocery stores are grown by farmers who know how to manipulate the plant to keep fresh pads coming year ’round.

Pick nopales in the spring when the size of your hand.

Pick nopales in the spring when the size of your hand.

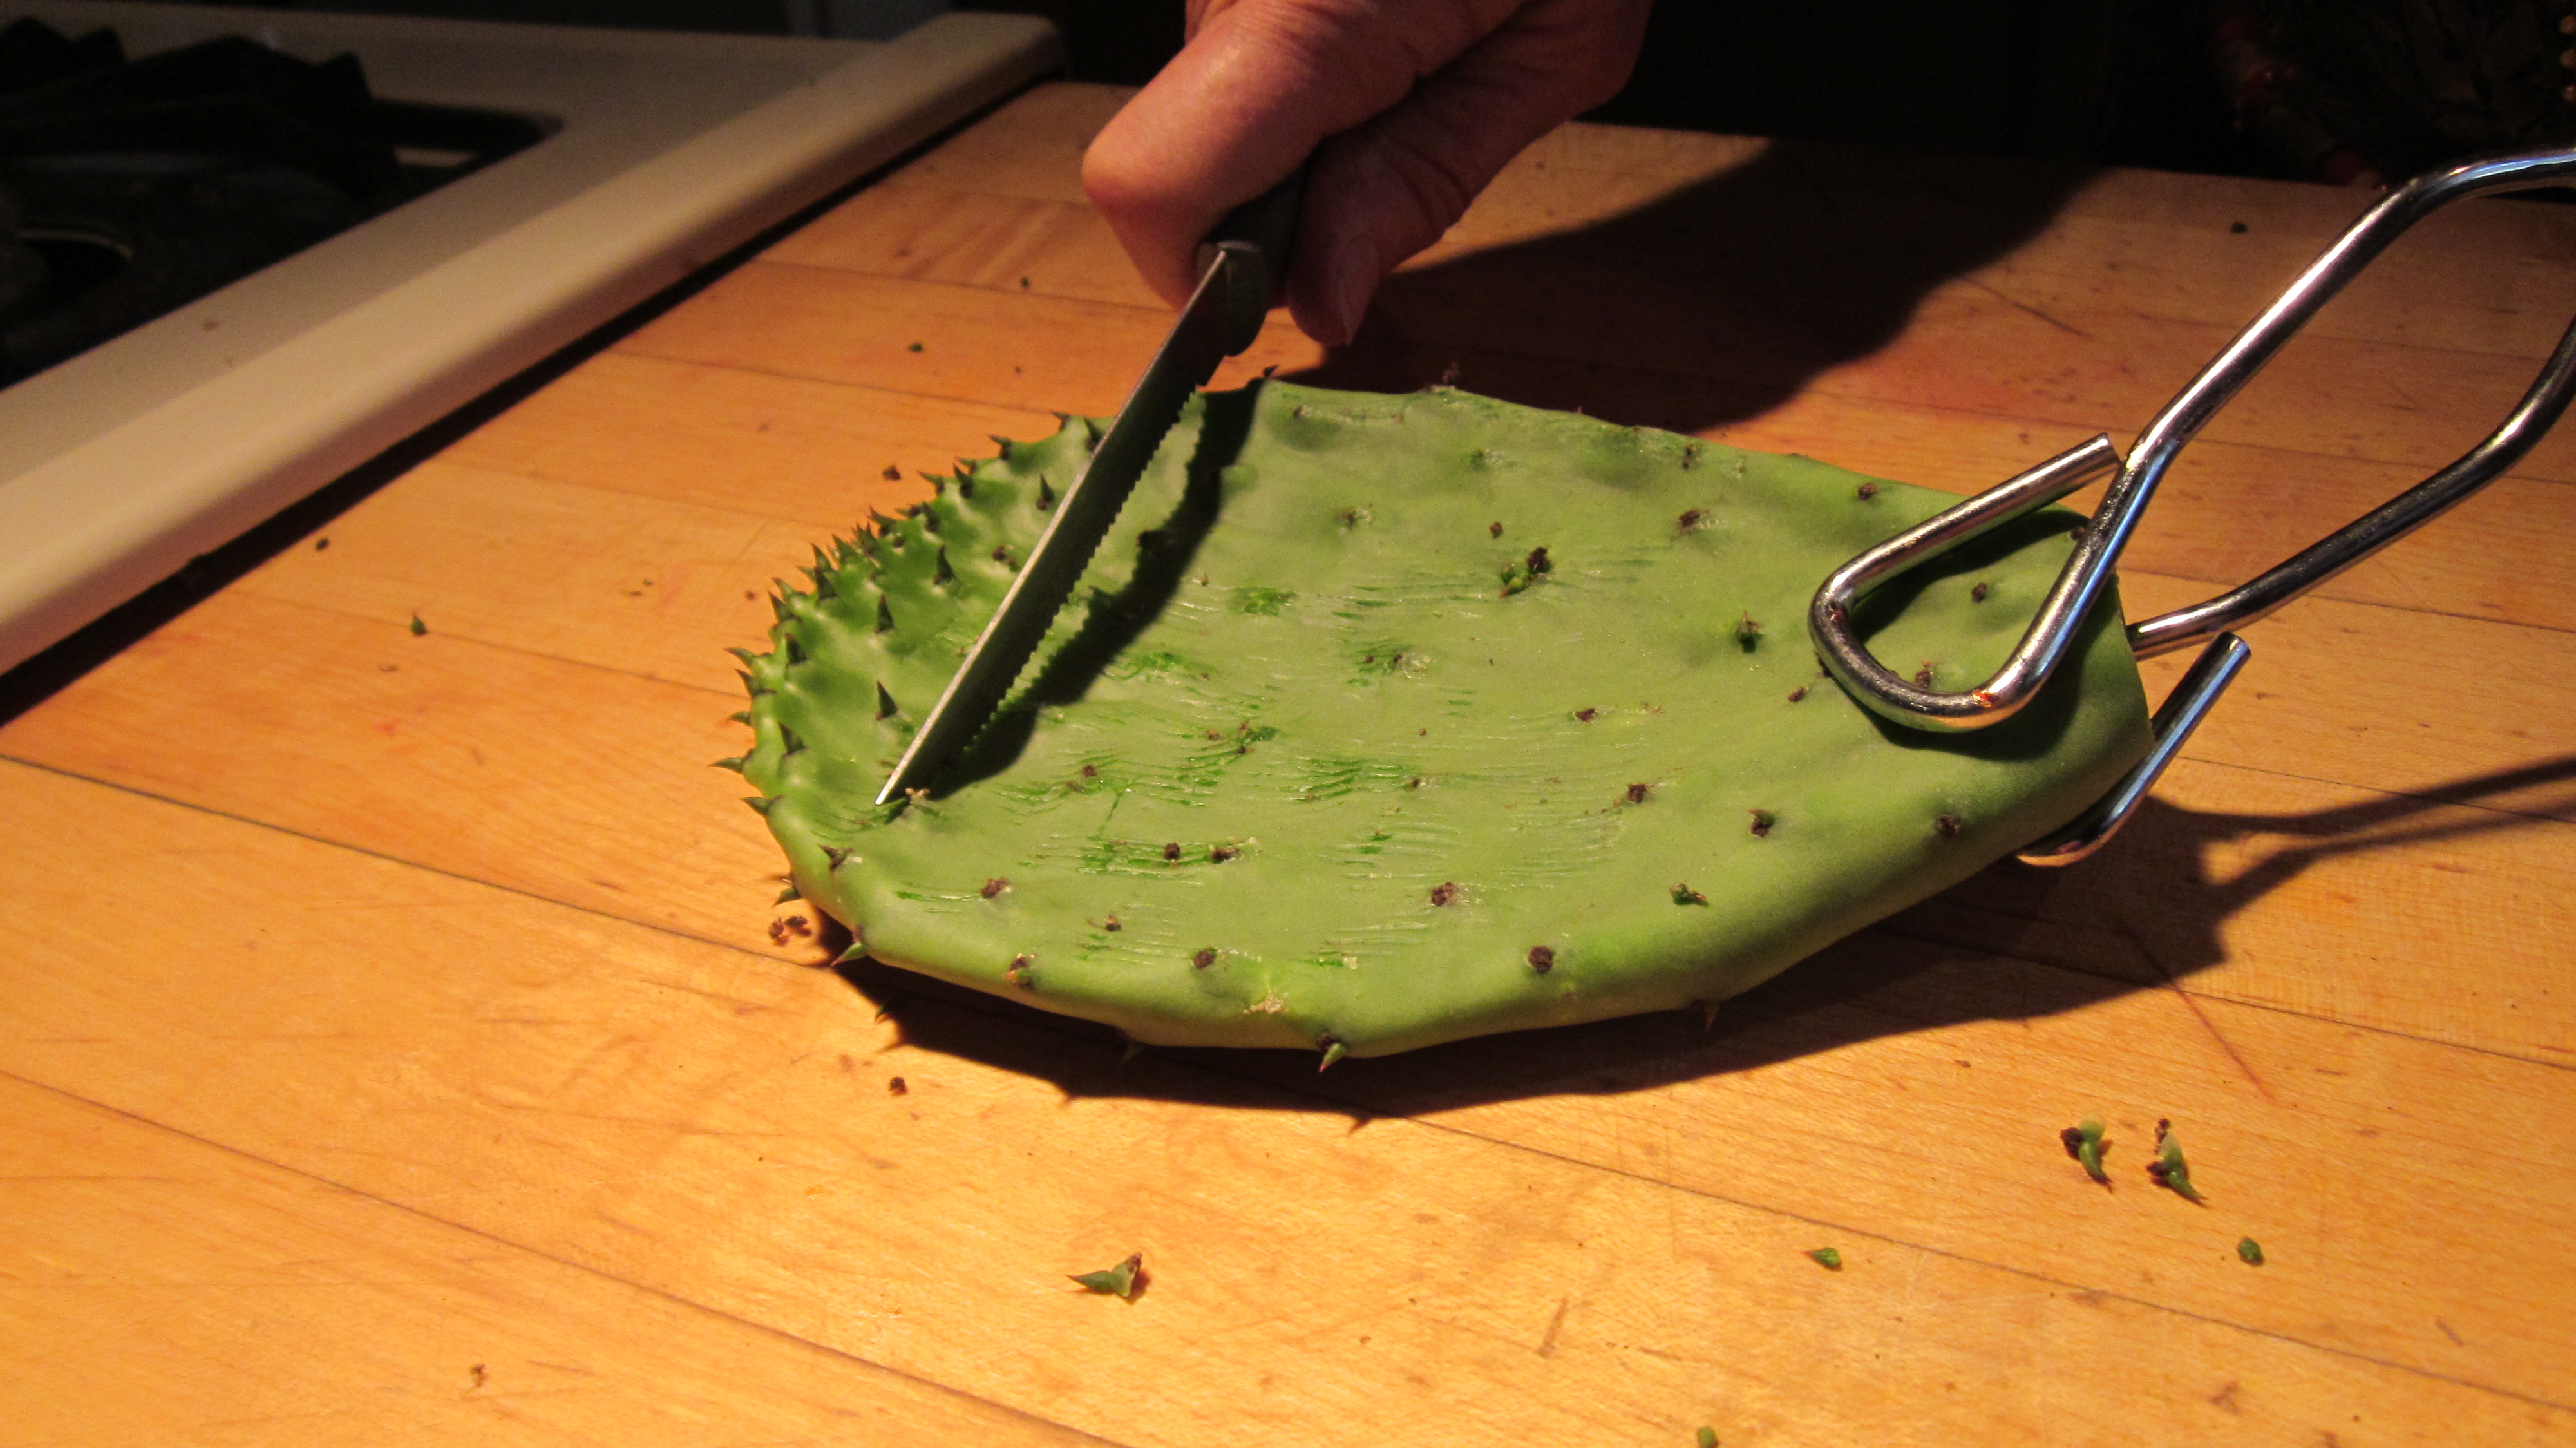
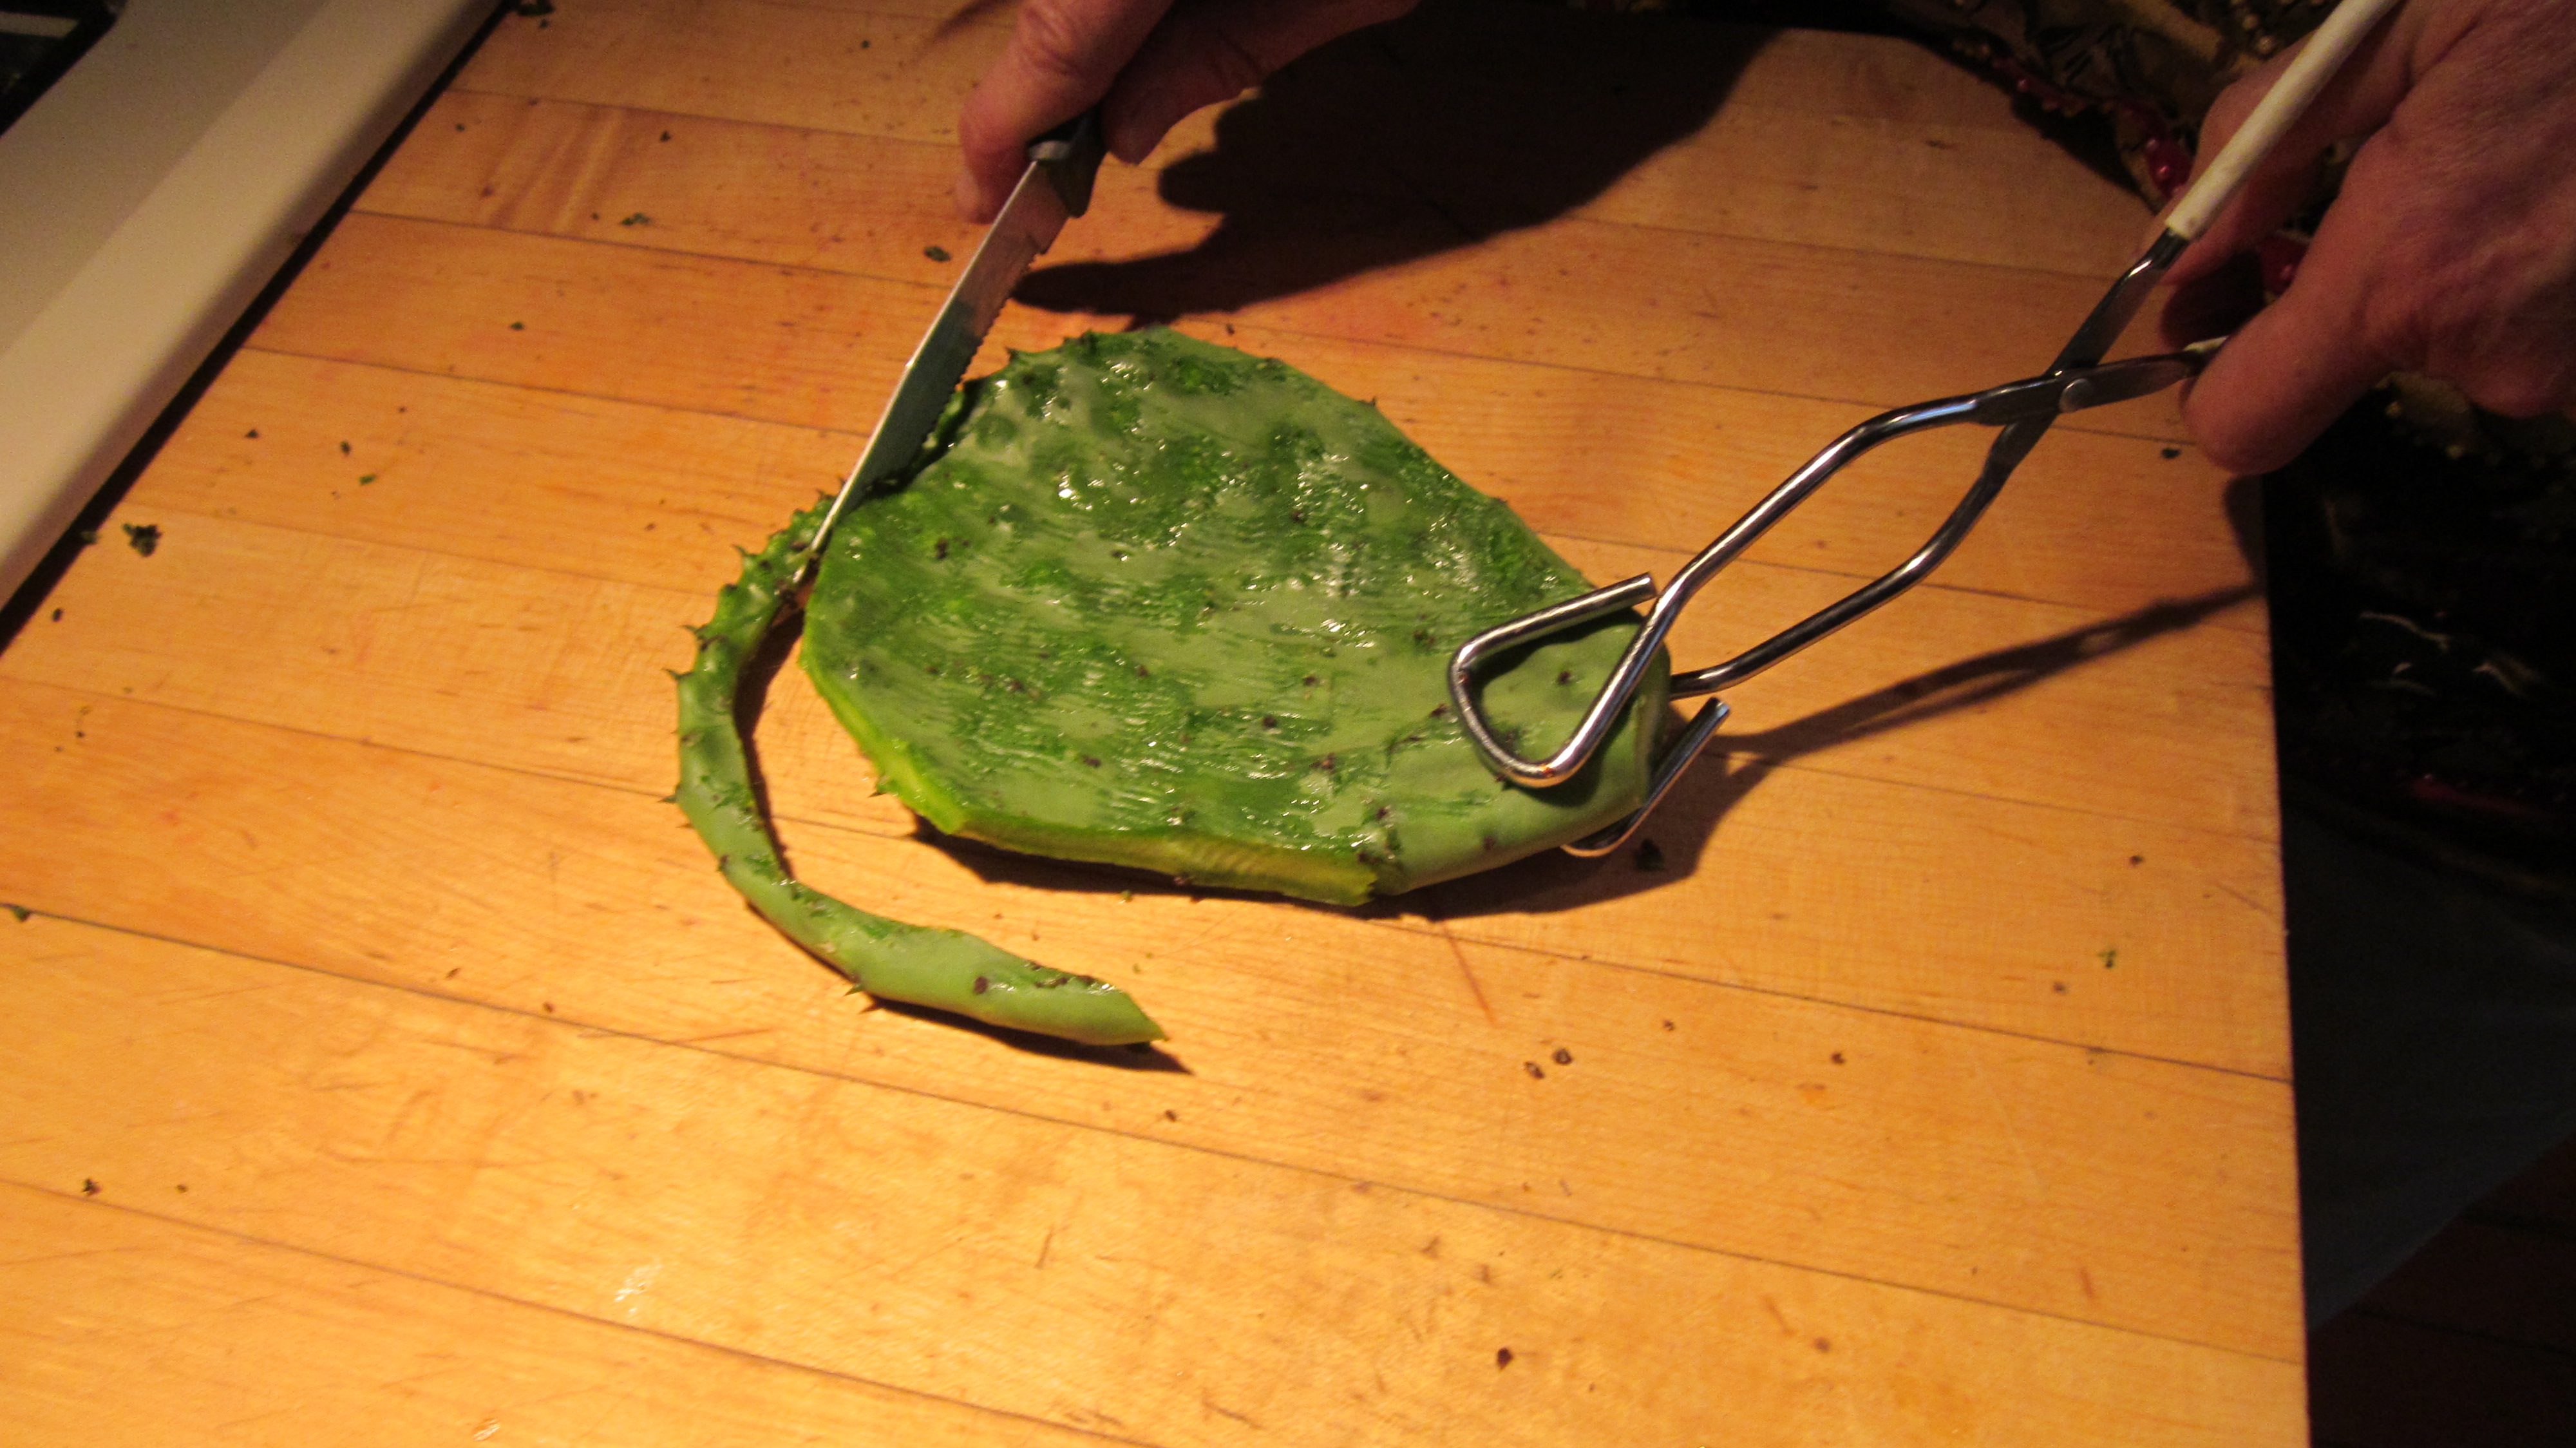
To prepare the nopales, you’ll use  tongs, of course, and then don rubber kitchen gloves to protect your hands as you get rid of the stickers. You don’t need industrial strength gloves, just good quality ones from the grocery store will do. Using a common steak knife, scrape vigorously against the growth (from outer edge to stem) to remove the stickers.

Scrape the thorns vigorously in the direction of the stem.

Scrape the thorns vigorously in the direction of the stem.

The edge has lots of stickers so just trim it off.

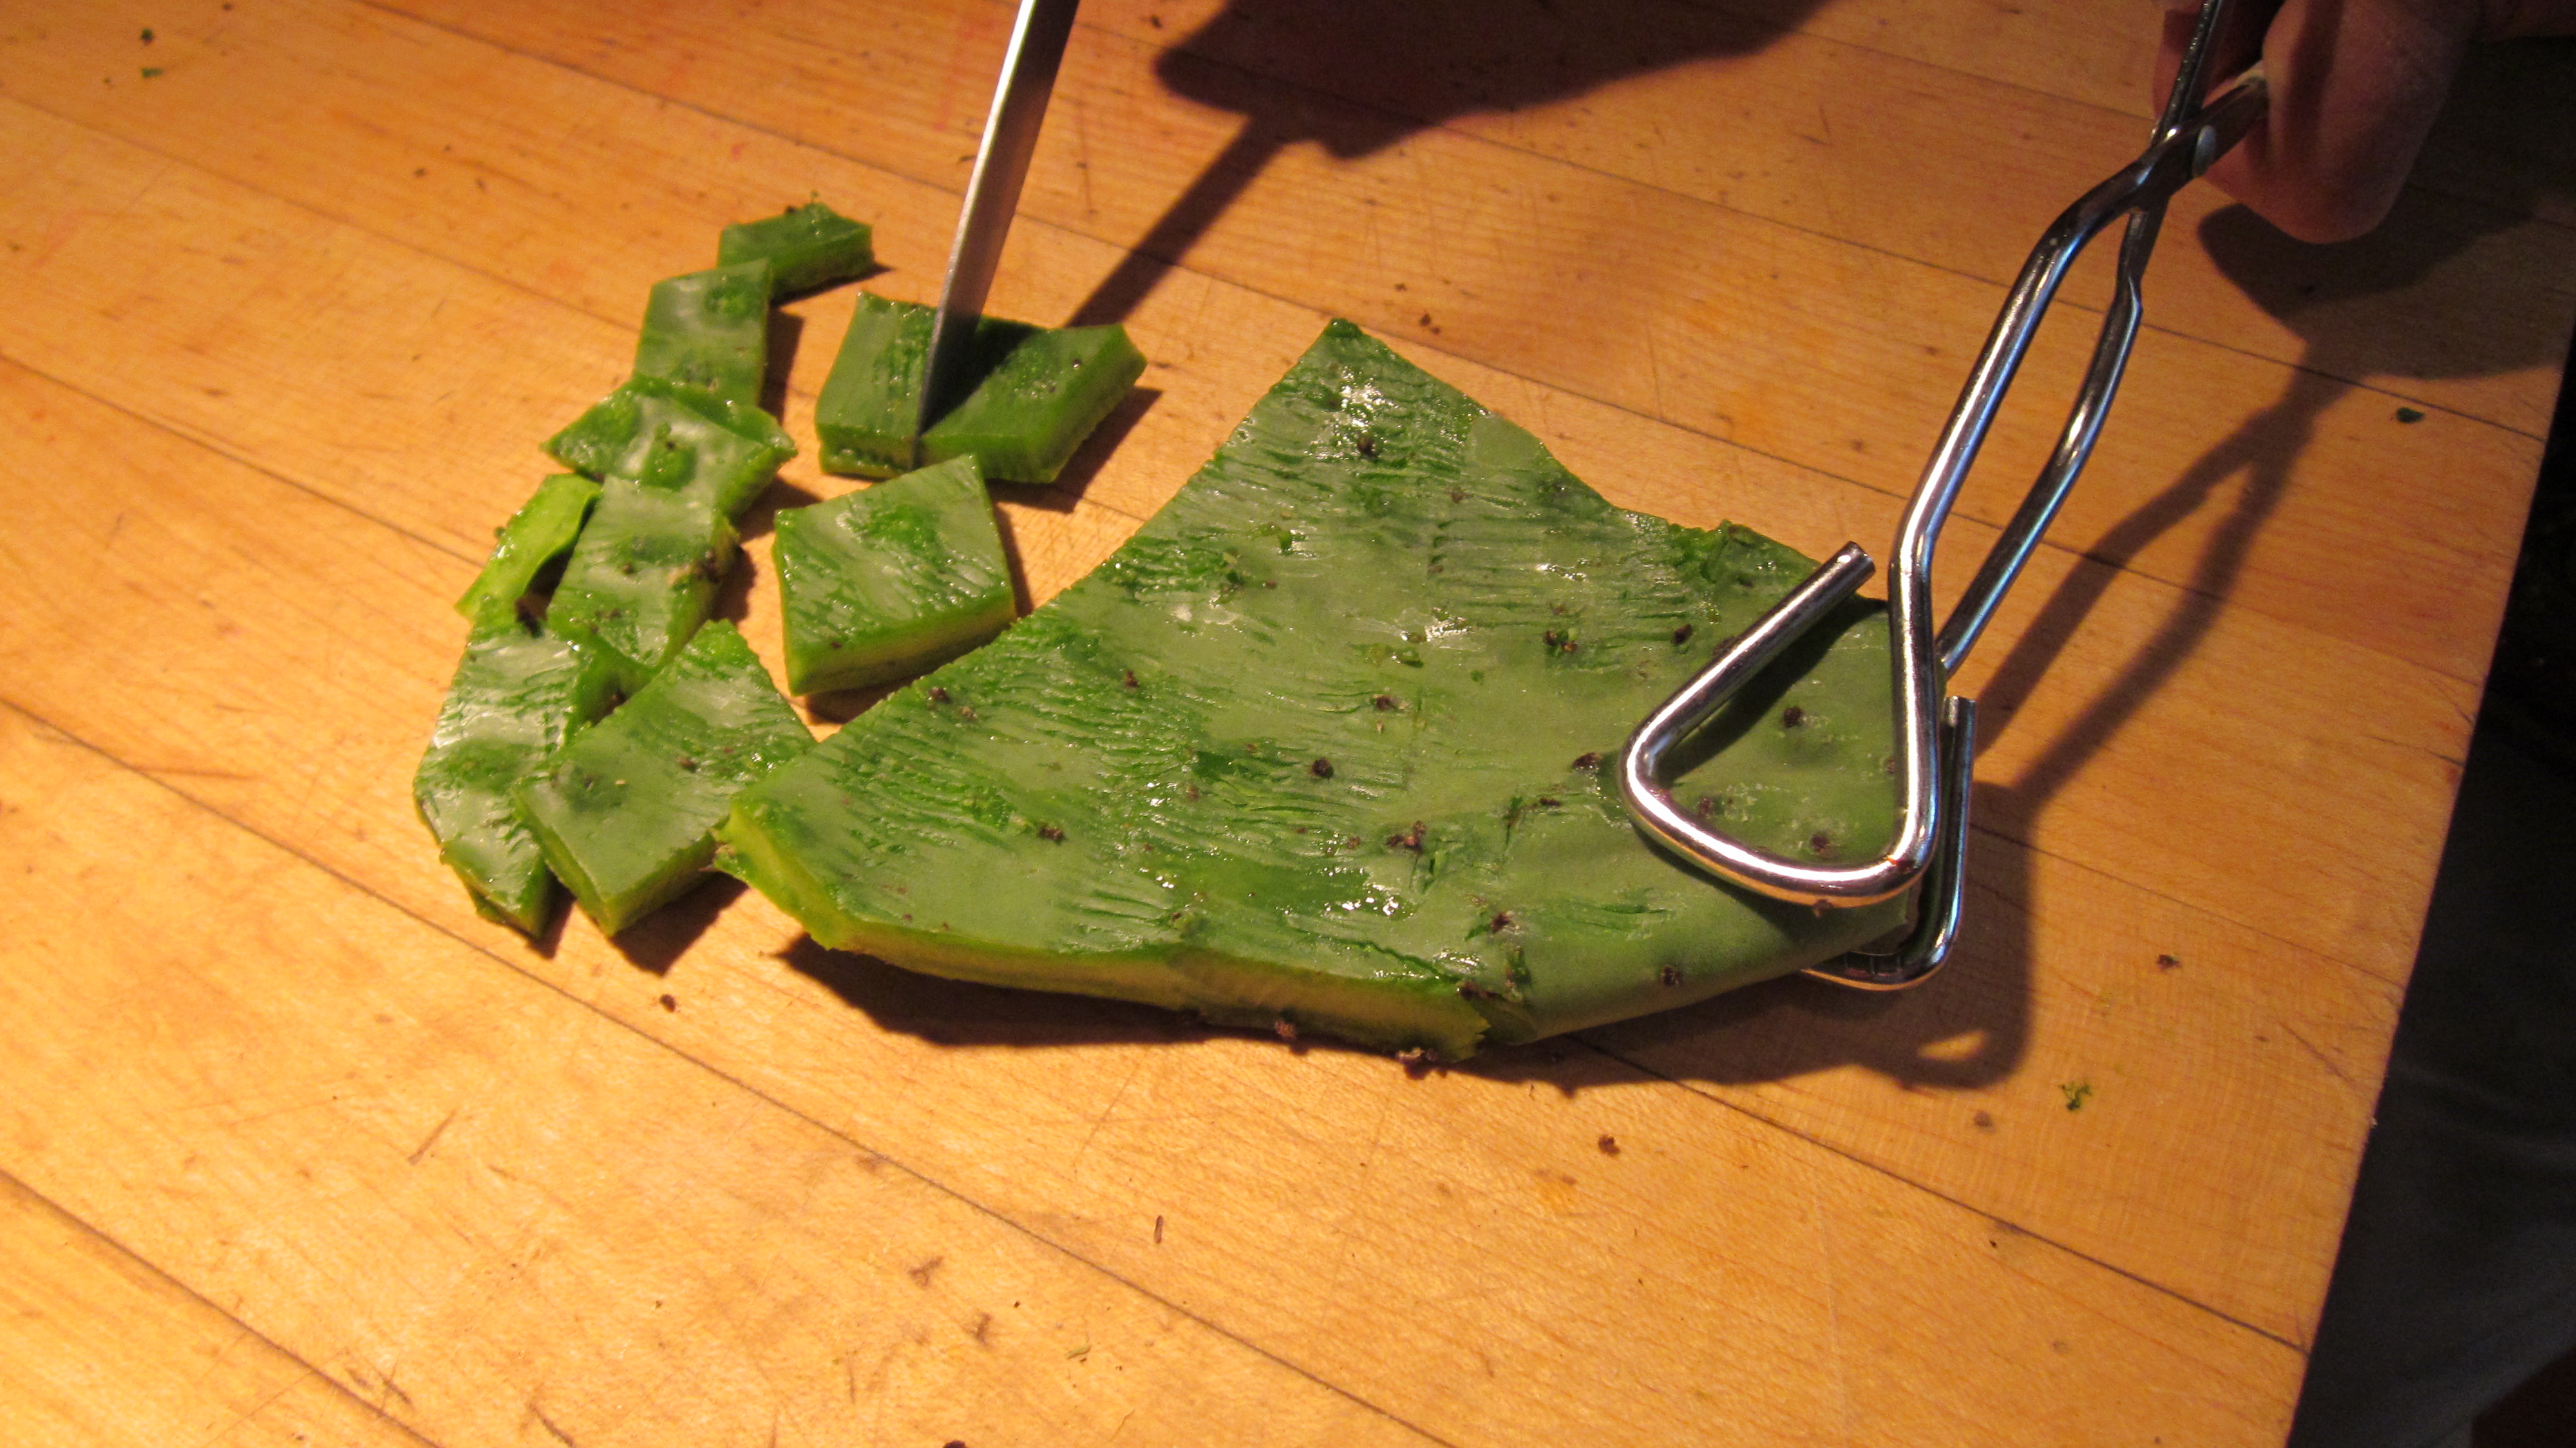
IMG_0196At this point, you can cut it into small pieces to cook or leave it whole and cut it up later. You can cook them in a frying pan filmed with oil, or use the Rick Bayless method (of TV show fame) and toss them with a little oil, sprinkle with sale, put on a cookie sheet and roast in a 375 degree oven for 20 minutes.  In any case, you should check them and turn them over as they cook.

Cut into small pieces to cook.

Cut into small pieces to cook.

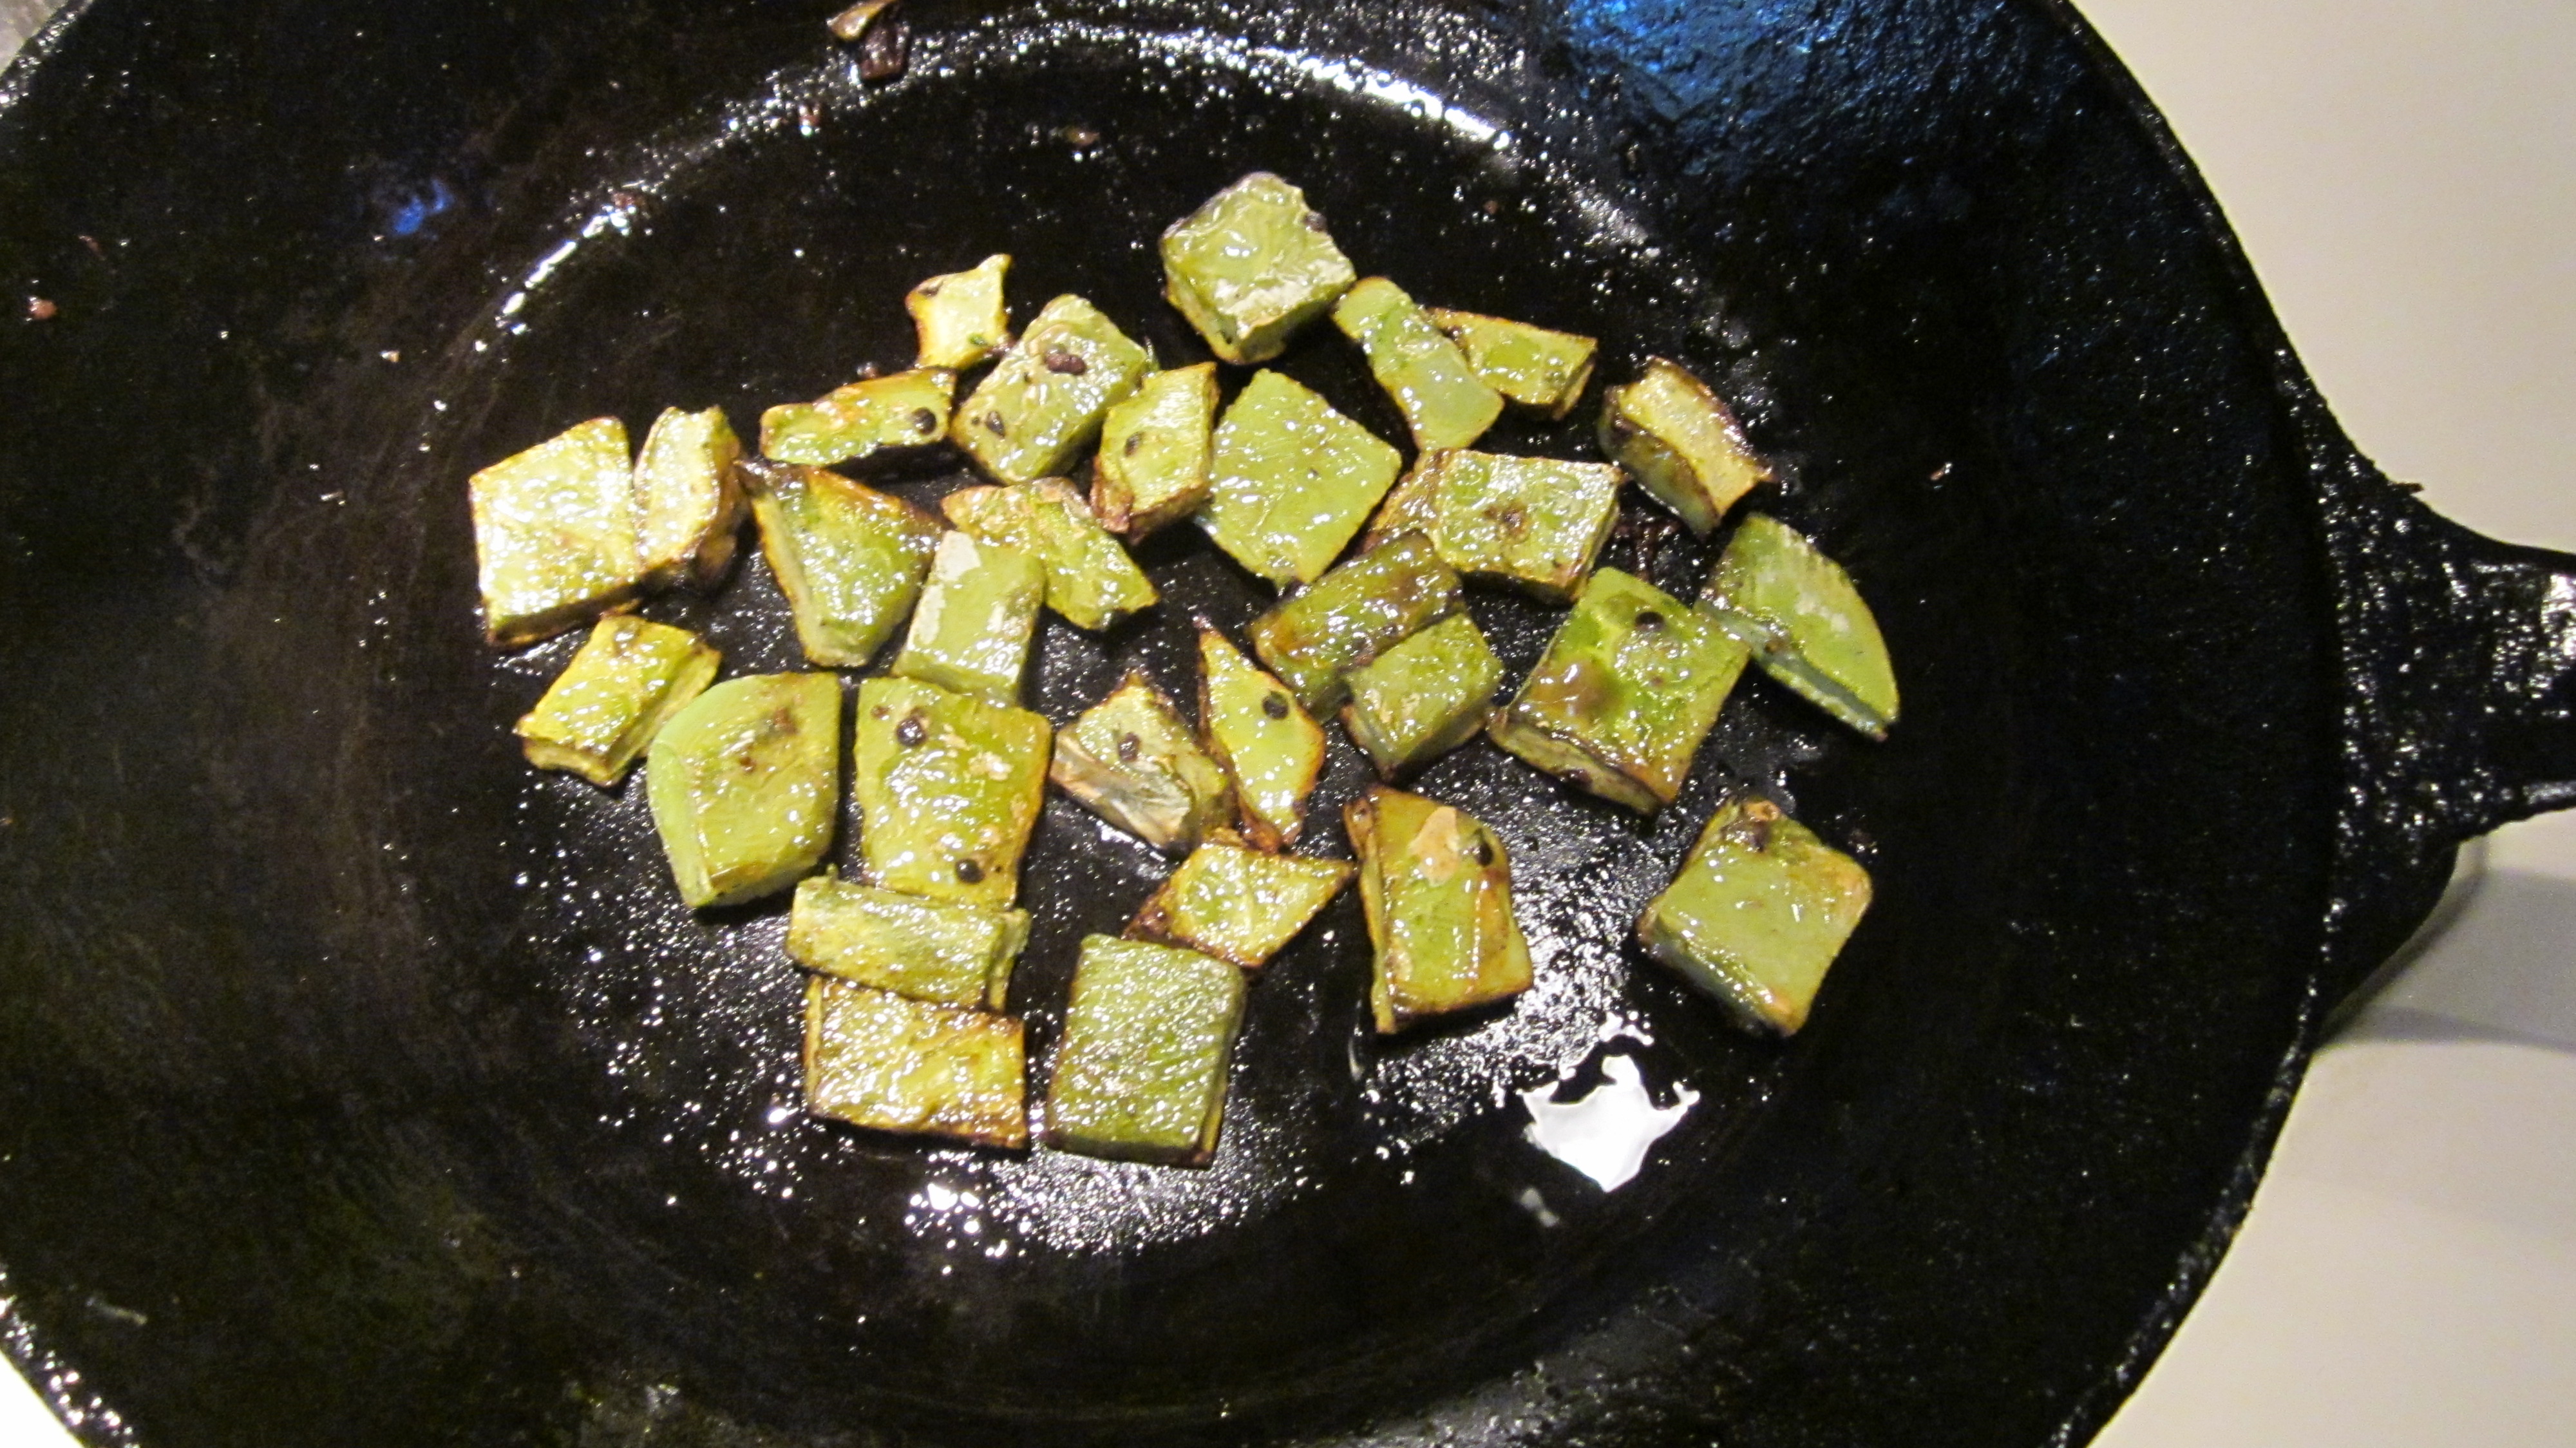
The nopales will turn from bright green to a more olive color as they cook. The gummy sap that some people find objectionable will dry up and become less noticeable.

The cooked nopalitos turn from bright green to olive.

The cooked nopalitos turn from bright green to olive.

You can also cook nopales on the barbecue alongside some chicken to make a delicious taco. 

Here’s the recipe for the sauce in the picture at the top of the blog:

Nopalito and Pineapple Salsa

1 raw, cleaned prickly pear pad

1 tablespoon vegetable oil

1 cup canned crushed pineapple packed in it’s own juice

¼ cup finely chopped red bell pepper

¼ cup thinly sliced green onions, including some tops

1 tablespoon canned green chiles

1 finely minced serrano chile (optional)

½ teaspoon finely minced garlic

2 tablespoons lime juice

¼ teaspoon salt

1 tablespoon finely minced cilantro (optional)

Cut prickly pear pad in 1 ½ inch squares.  Film a heavy frying pan with the oil and add the prickly pear pads.  Cook over low heat, turning occasionally, until pieces have given up much of their juice and are slightly brown. Remove from pan, cool, and chop into pieces as wide as a matchstick and about ¼-inch long.

Transfer to medium bowl.  Add remaining ingredients, stir to combine and set aside for flavors to mingle.

Nopalito and Bean Salsa

Here’s an even easier recipe and you might have everything except the nopales in your pantry.

1 1/2 cups commercial red salsa

1/2 cup canned black beans, rinsed

1/2 cup cooked nopalitos

1 tablespoon lime juice

1-2 tablespoons chopped cilantro

Combine all ingredients in a bowl. Serve with chips.

______________________

You can learn more about the history of food in Southern Arizona in my latest book A Desert Feast, the story of the last 4,000 years of food in the Sonoran Desert. Want more recipes using  foods of the Southwest? You’d find ideas for collecting and using 23 easily recognized and gathered desert foods in Cooking the Wild Southwest: Delicious Recipes for Desert Foods.  . Recipes from top Southwest chefs are collected in The New Southwest Cookbook. Just click on the titles for more information. You can learn more about me on my website.

Chapulines–a taste of past & future

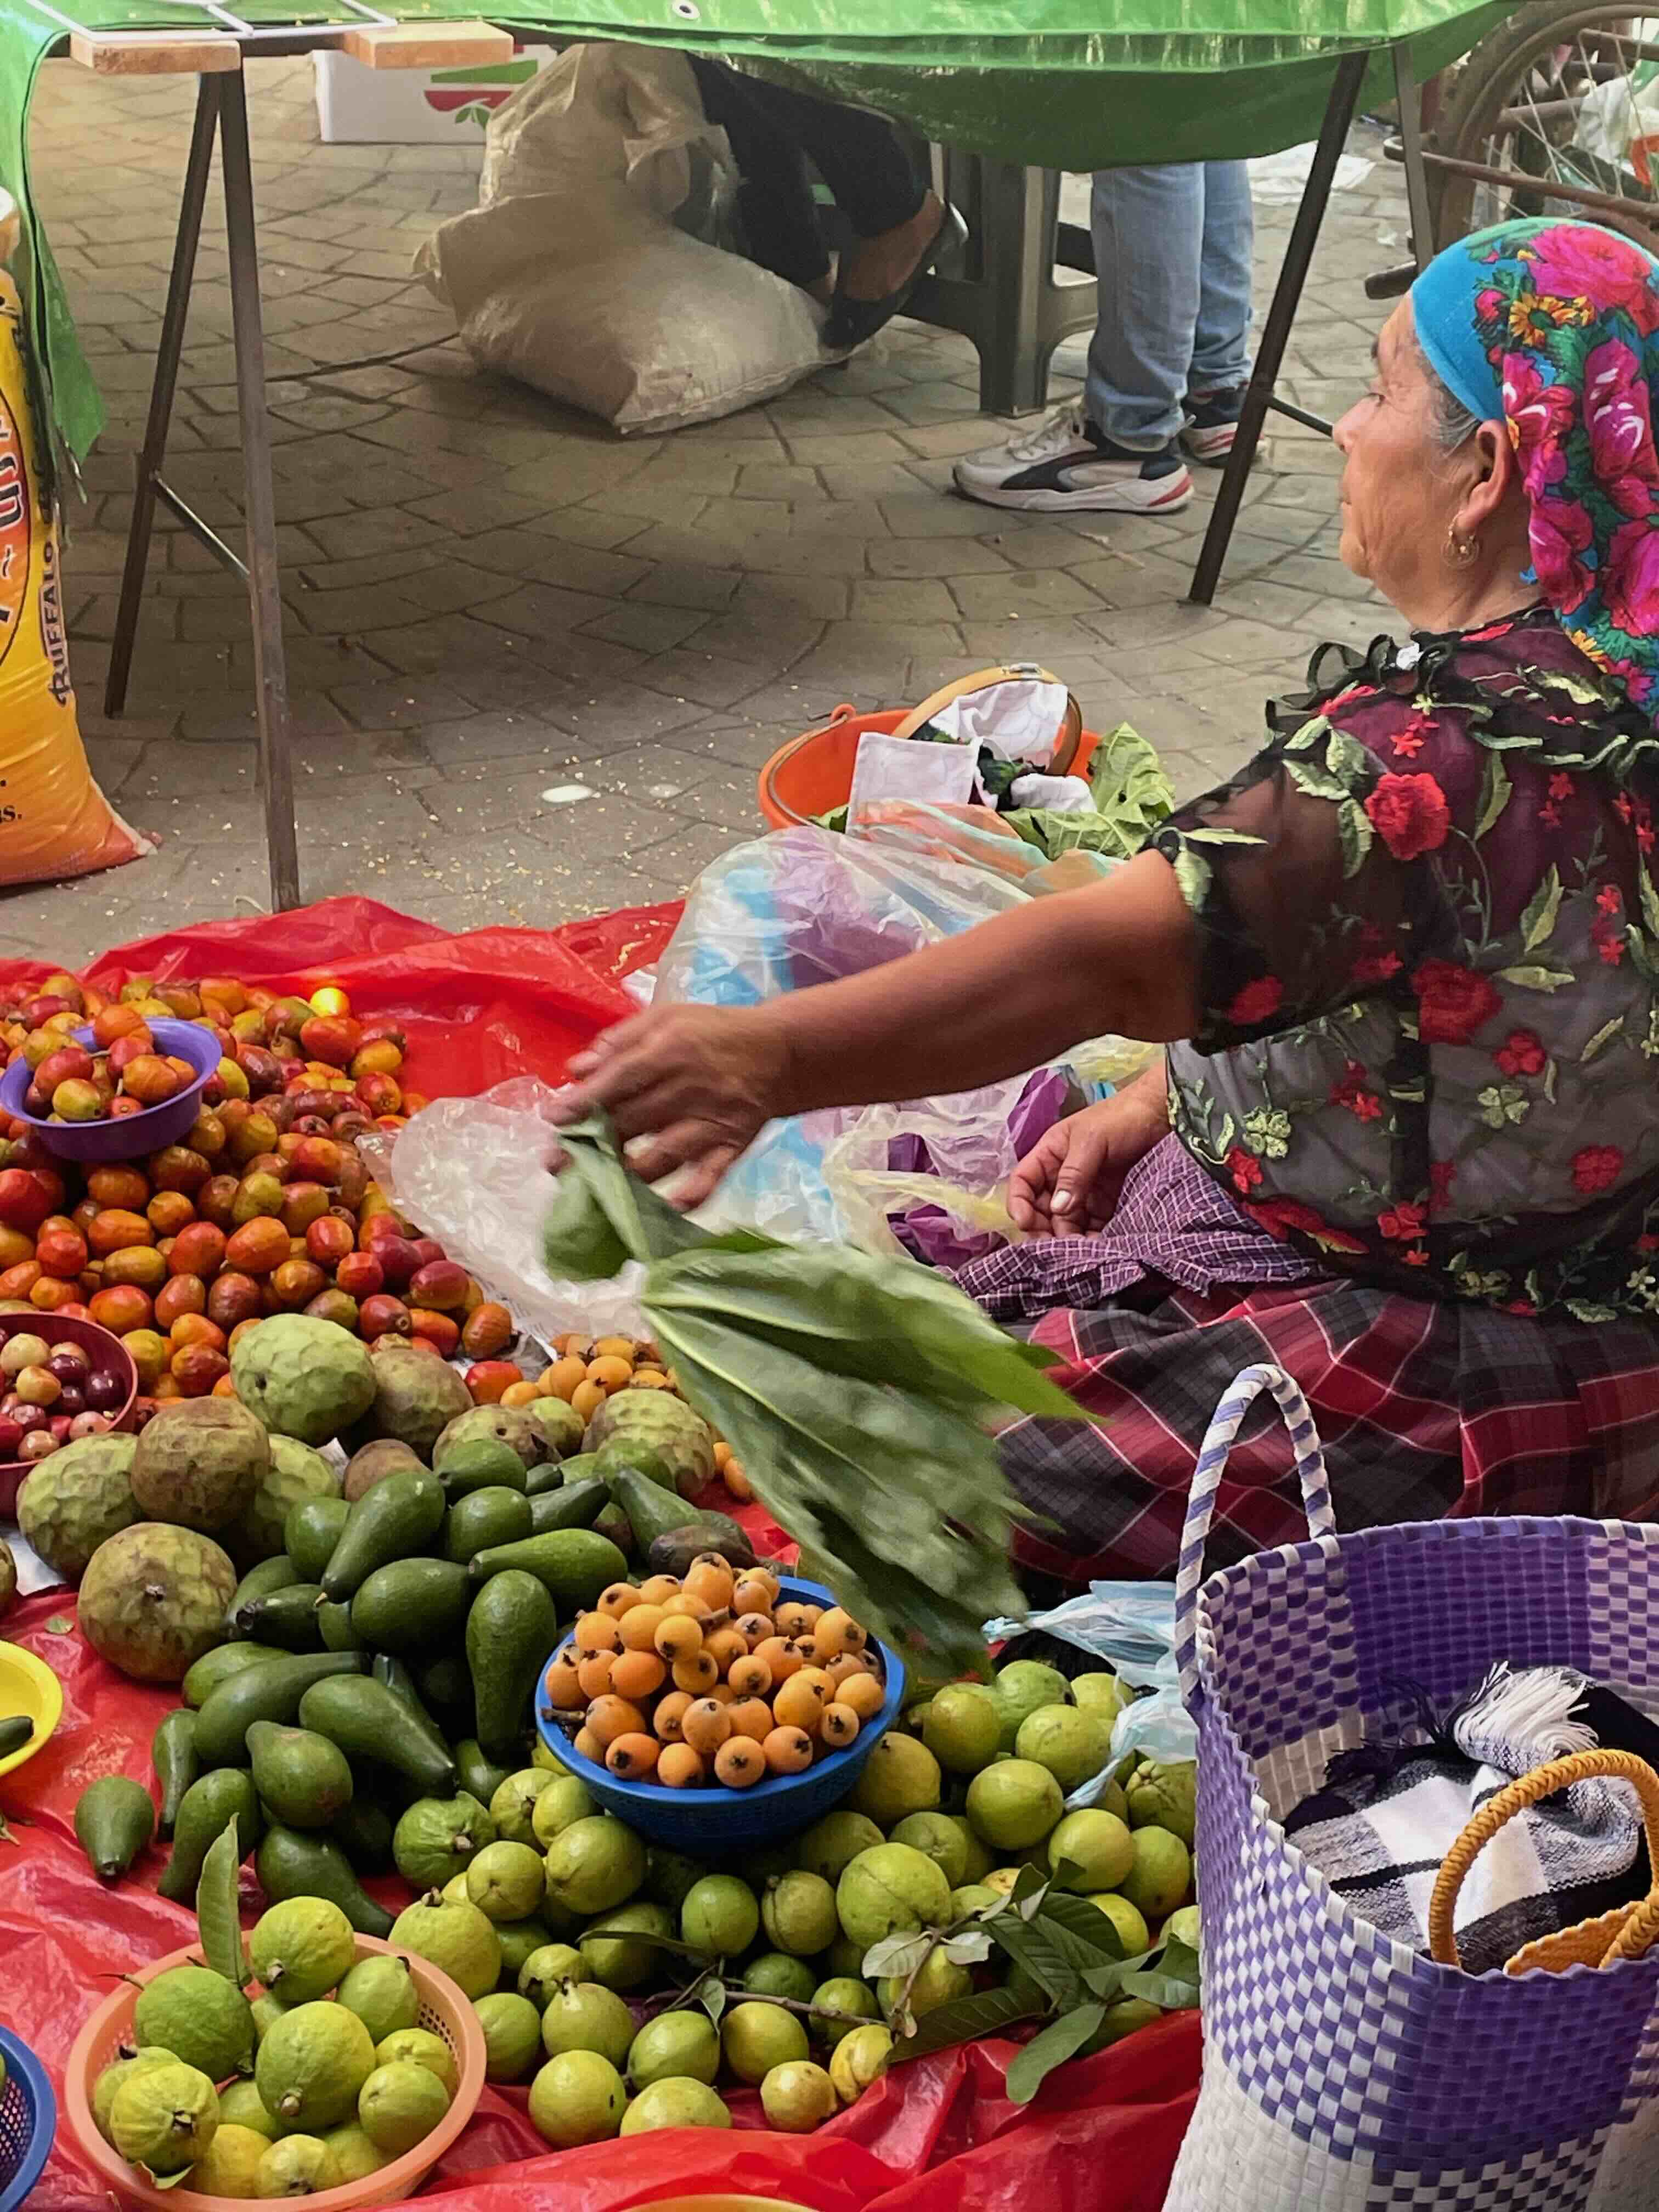
It was a whole new gastronomic experience for me–now perhaps for you too! On a recent trip to colorful Oaxaca, Mexico, with a Mission Garden tour, my eyes and tastes were opened to traditions and to tantalizing potentials of grasshoppers!! Chapulines! (cha-poo-LEE-nays). Tia Marta here to share some fun ideas for trying chapulines creatively, AND some surprising facts about their nutrition.

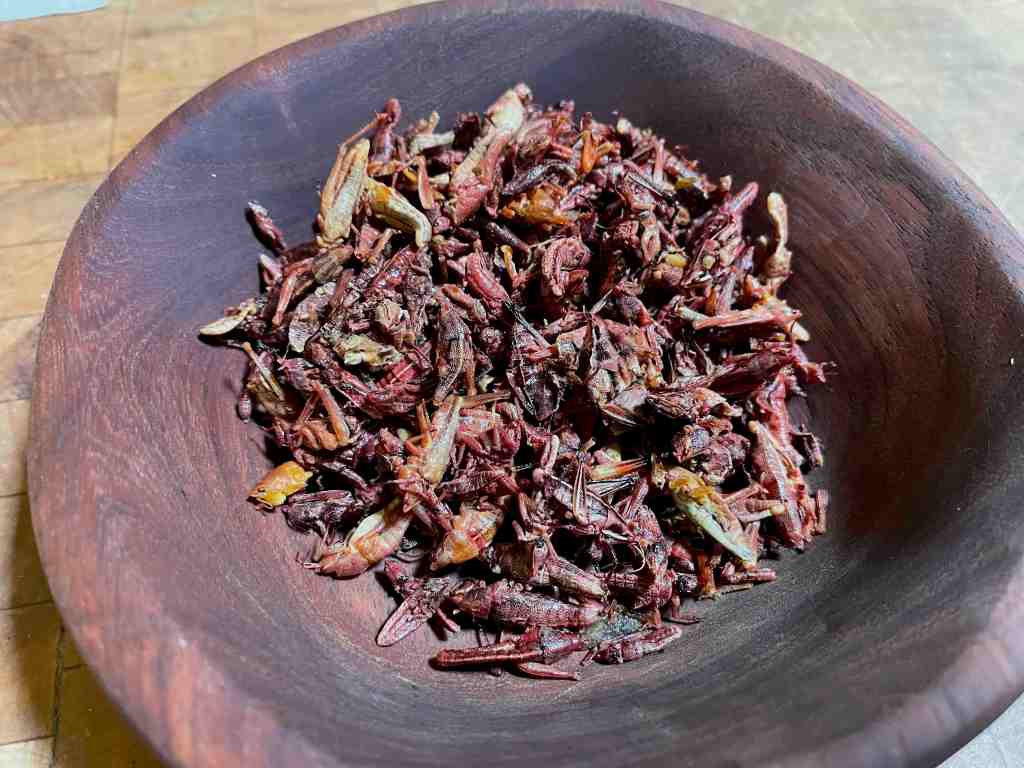
Grasshoppers, when cooked like this with salt and lime, look a bit more palatable than in nature. Better still–They crunch pleasantly and have tasty snack flavors! Get curious–throw preconceived notions to the wind! After all, insects are the wave of our food-future. (Now I see that chapulines are available all over the internet–no need to travel, but Oaxaca IS a special place to visit for amazing foods!)

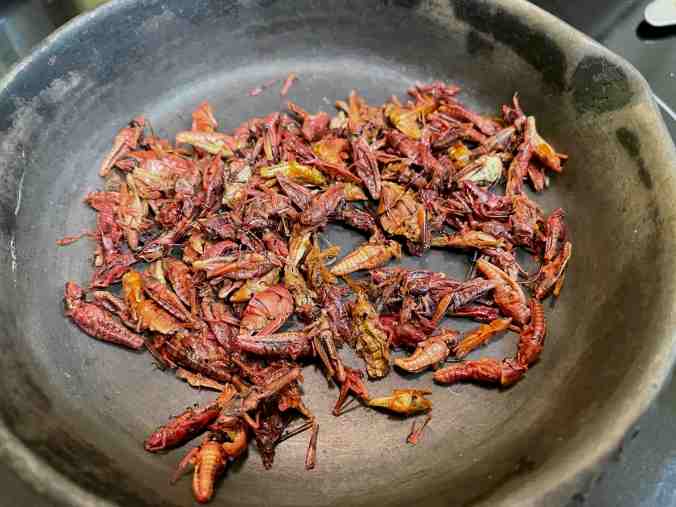
Step 1–Roasting or toasting already-cooked chapulines in a dry iron skillet makes them into crispy delicacies–and they’re much easier to grind into the Perfect Chapulin Spice Mix, full of flavor and NUTRITION too! Did you know they are high in protein, dietary fiber, rich in vitamins A,B,and C, have magnesium, calcium, zinc, and essential fatty acids? We might think of them as “recycled, concentrated vegetables.”

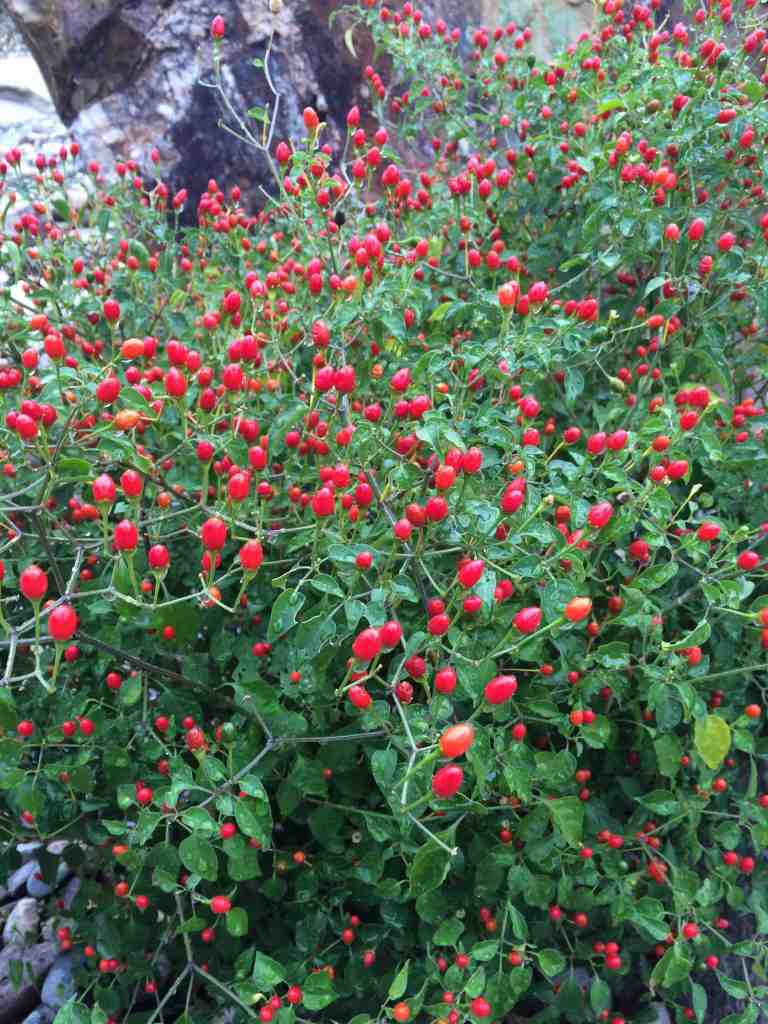
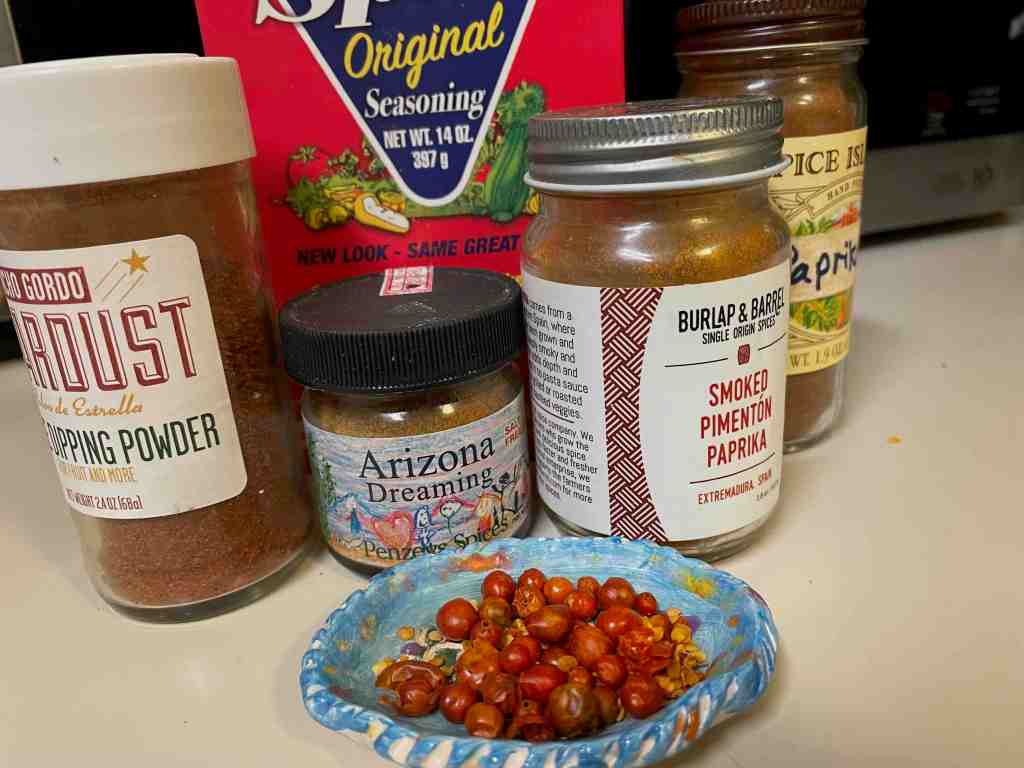
Step 2 for the Perfect Chapulin Spice Mix: collect and dry a few chiltepin peppers from your own bush before the birds get them–or find them at NativeSeedsSEARCH or Tucson’s Mission Garden. When pods are dry, you only need 2 or 3 tiny chiltepin pods to add to your spice mix.

Your chapulinchiltepin spice mix will be more off-the-wall better than any other!

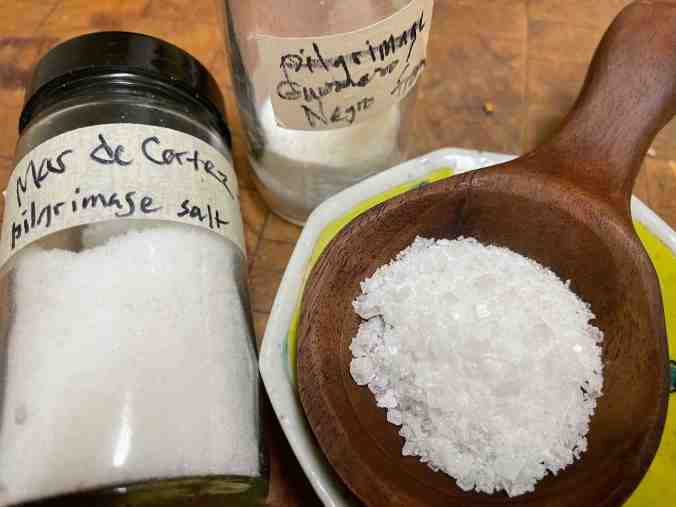
Step 3: Find good natural sea salt–available at many stores. To stay as Sonoran-Desert-local as possible for this project, I made a mix of local salt crystals, one from the Sea of Cortez gifted to me by ASDM ethnobotanist/explorer/educator Jesus Garcia, and another from Guerrero Negro actually made on the Pacific coast of Baja California by Mission Garden volunteer Gay Gilbert.

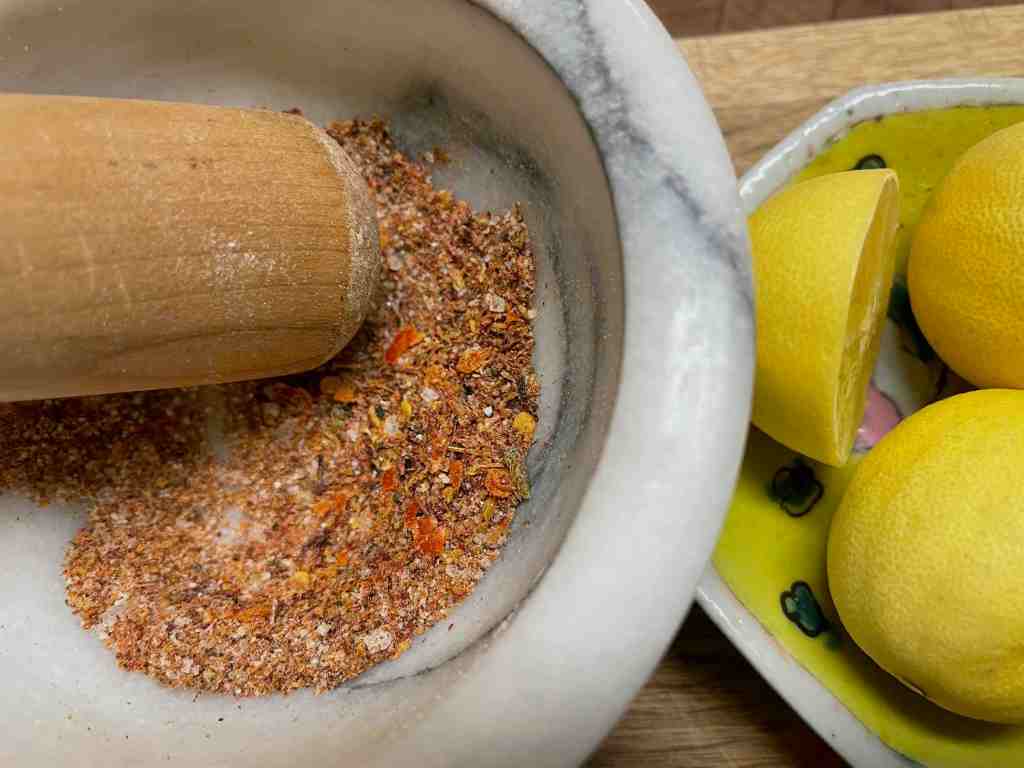
Step 4: You are ready to crush your ingredients with a hand mortar and pestle! RECIPE for the Perfect Chapulin Spice Mix: (This is a good ratio for any quantity): 1 Tbsp. toasted chapulines 1 tsp. sea salt crystals 2-3 tiny chiltepin pods (to desired “heat”) Mill to desired rough or fine texture.

1st idea: sprinkle on jicama slices w/lime!

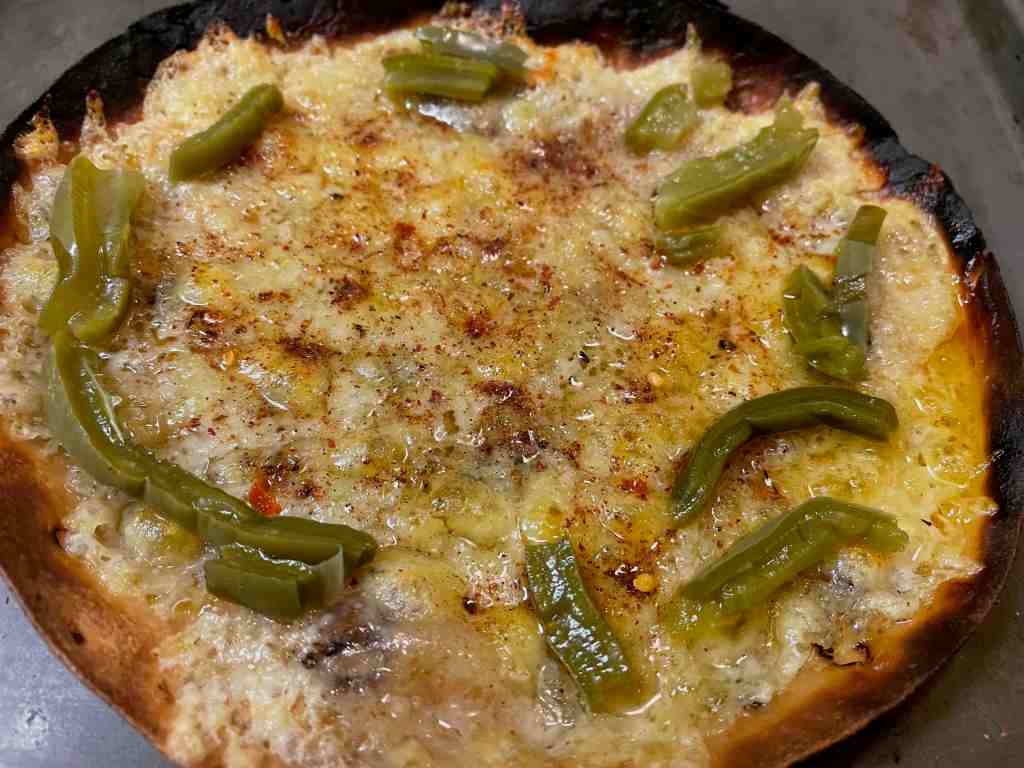
2nd idea: Chapulin Spice Mix on homemade pizza or quesadillas! I sprinkled my mix for a fast delicious lunch on a tortilla with melted cheddar cheese and nopalitos–yum!

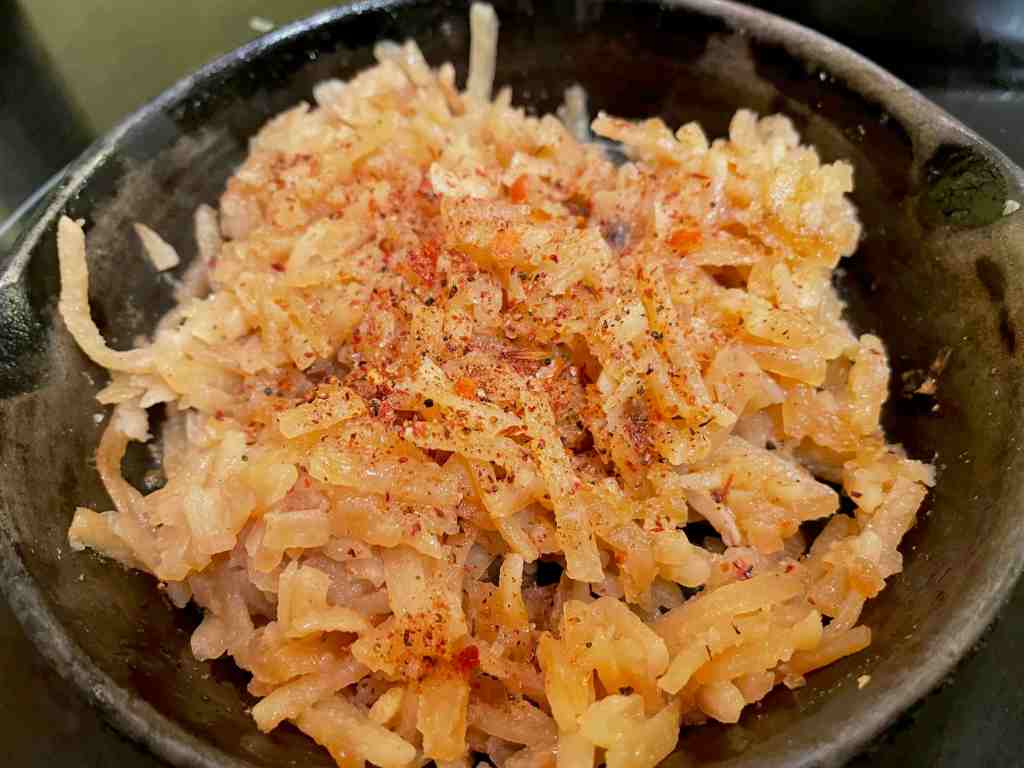
3rd idea: Dress up hash browns for a zippy Southwest palate-pleaser with your Chapulin Spice Mix!

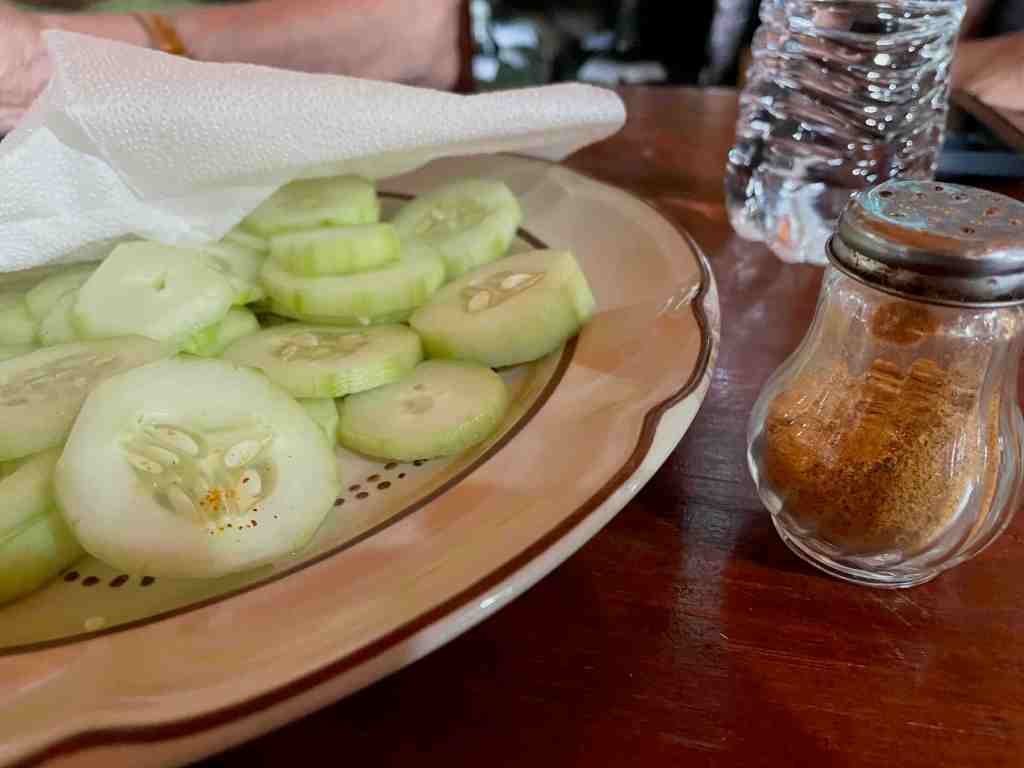
4th idea: For a cool (and simple) buffet or hors d’oeuvre, sprinkle Chapulin Spice Mix on sliced cucumbers or other veggies. It adds a little kick!

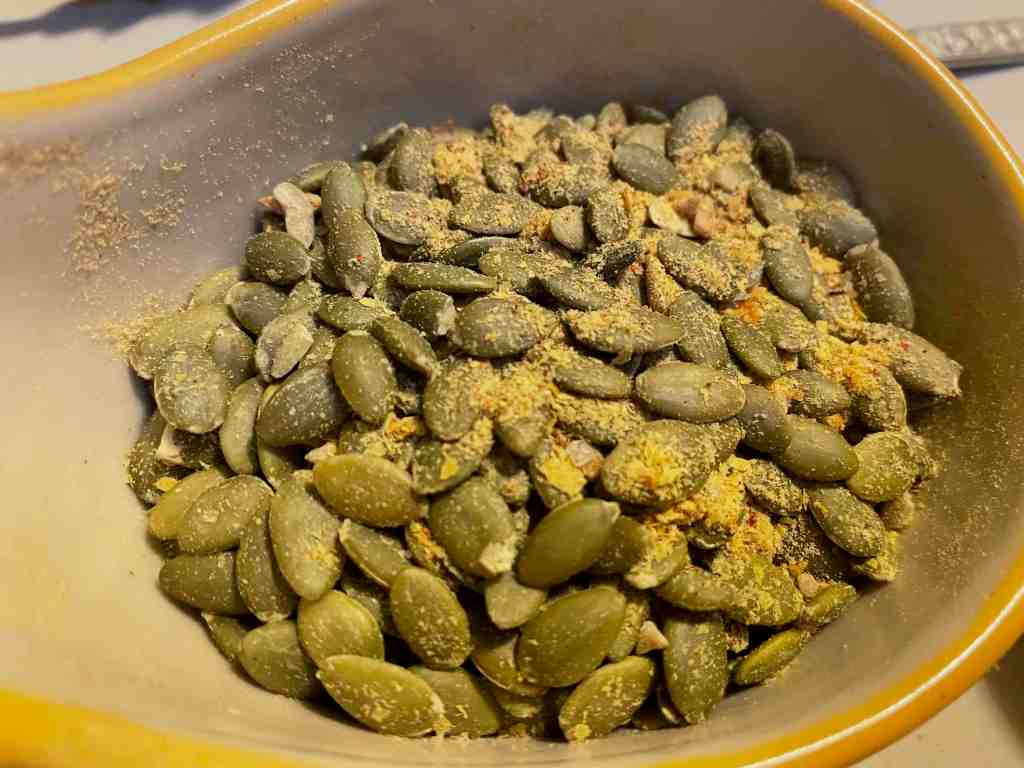
Another super-healthy idea: Add Braggs’ Nutritional Yeast to your Chapulin Spice Mix and toss it with pumpkin seeds or sunflower seeds for a grand health-enhancing snack or energy-boosting trail-mix!

Tia Marta encouraging you–don’t hesitate to take on these delicious gifts of Nature–chapulines! yes, grasshoppers– and try your hand experimenting with your own ways of enjoying them! The next time there is a grasshopper outbreak, don’t swear and fret. Grab your butterfly net! Get out to the garden for a new and different harvest on the fly! Bake them, toast them, spice them up for treats! See what kept early Zapotec and Mixtec cultures thriving with these tiny but plentiful gifts of the insect world. You will be a pace-setter for a future with changing climate!