Brown butter pecan ice cream

Hello friends, happy summer. Amy here, sharing a dream come true: goat sitting! Friends that were home all last year became new goat parents during quarantine, but are finally traveling and busy again. Ten years ago I co-milked a huge mama goat in my neighborhood with three other families. Eventually the goats moved to the grassland southeast of Tucson but sharing the responsibilities of milking twice a day suits me well.

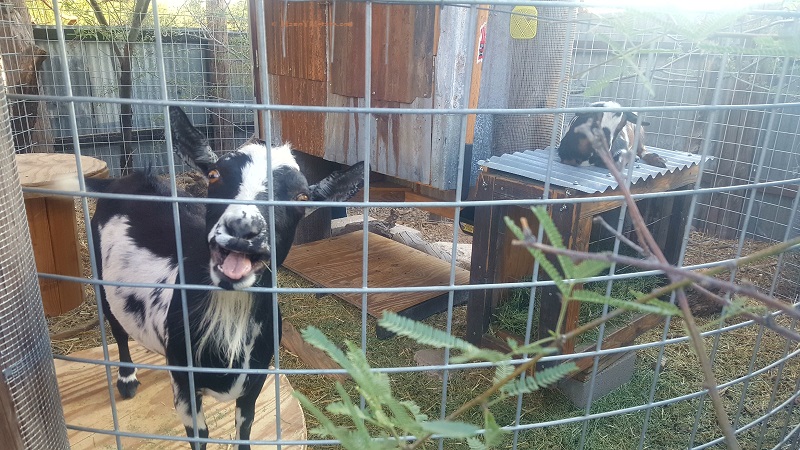
Lyric is a miniature milk goat that lives a mile from my house. Her baby Skunky was born in February completely black and white, like a spotted skunk. Twice a day they go on guided foraging excursions in their urban neighborhood. Lyric is easy going, but Skunky gets stir crazy without her walks.

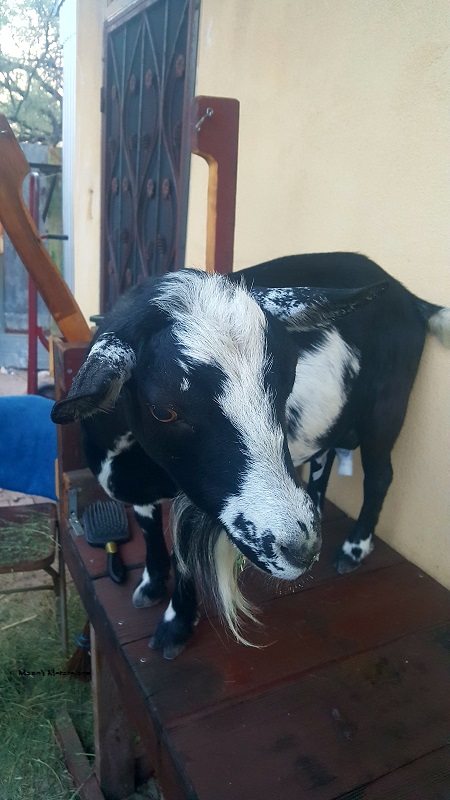
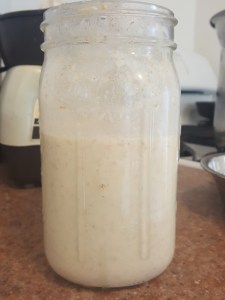
While Lyric is the easiest going goat imaginable, it still takes all my concentration and both hands to milk. I’ll have more photos someday. Lyric provides two cups twice a day, so I’m freezing it, saving up to make cheese. But a batch of ice cream only takes a pint!

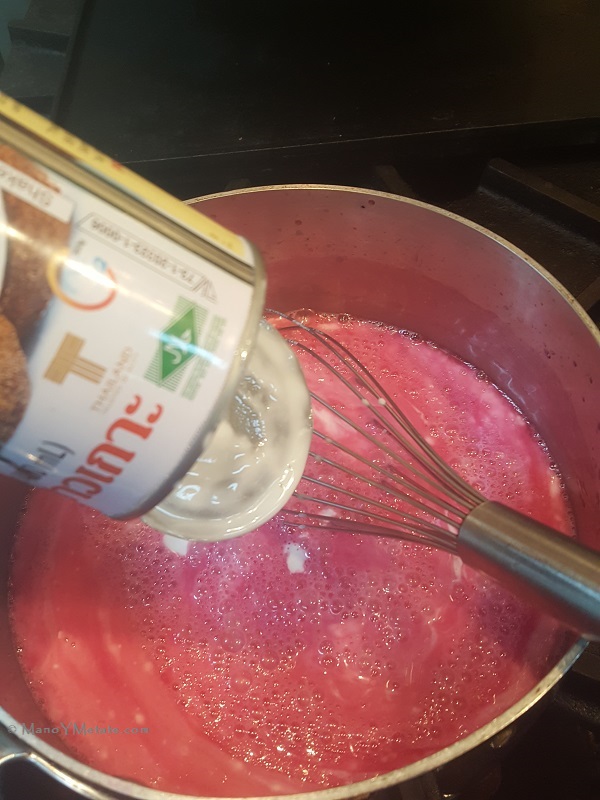
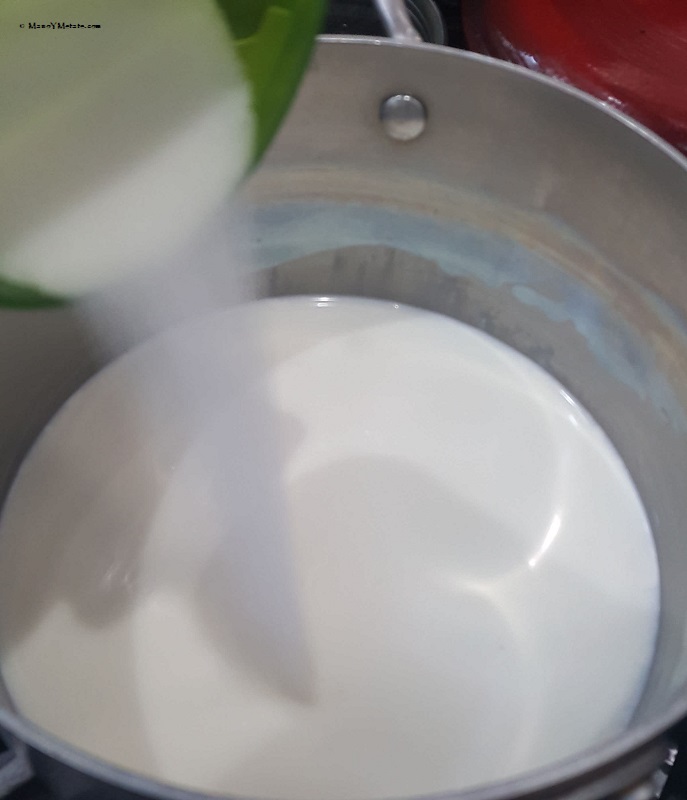
I didn’t want to buy cream and I didn’t want rock hard ice milk. Wondering if I could add enough butter to make it work, I found this recipe and adapted it to make butter pecan. I started with just over 2 cups milk, a scant 3/4 cup sugar, 1/2 teaspoon vanilla powder (ground vanilla pods) and 1/8 teaspoon salt over low heat.

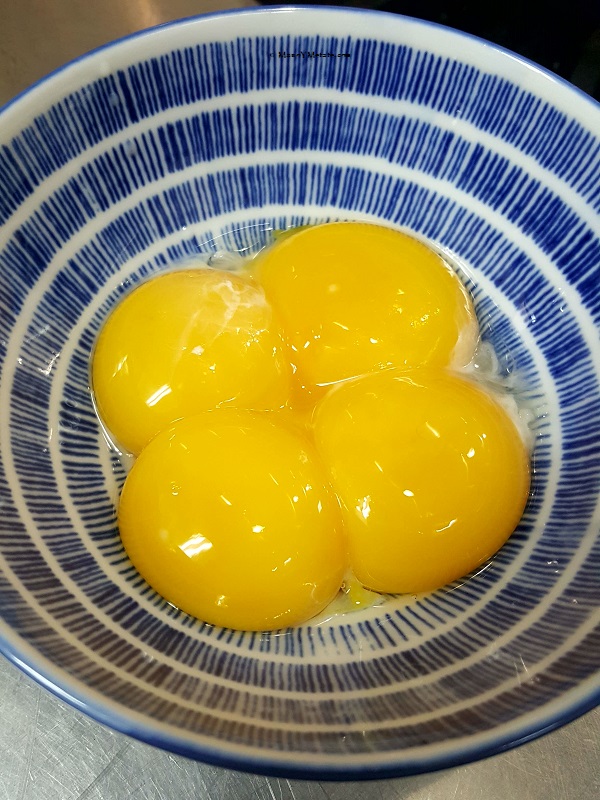
I separated 4 room temperature egg yolks and used the whites for another meal.

After mixing a small amount of the hot milk to the yolks, I added the mix to the pot. I stirred while heating slowly until the mixture was barely thickened. Then I strained the thin custard to remove any traces of egg white and cooled it somewhat in the refrigerator.

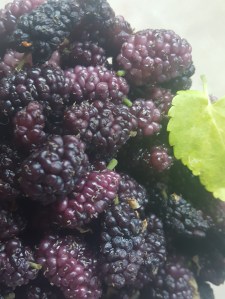
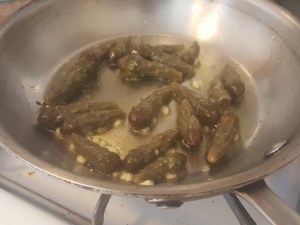
Meanwhile, I made the flavor. A friend from Bisbee gave me pecans from her tree.

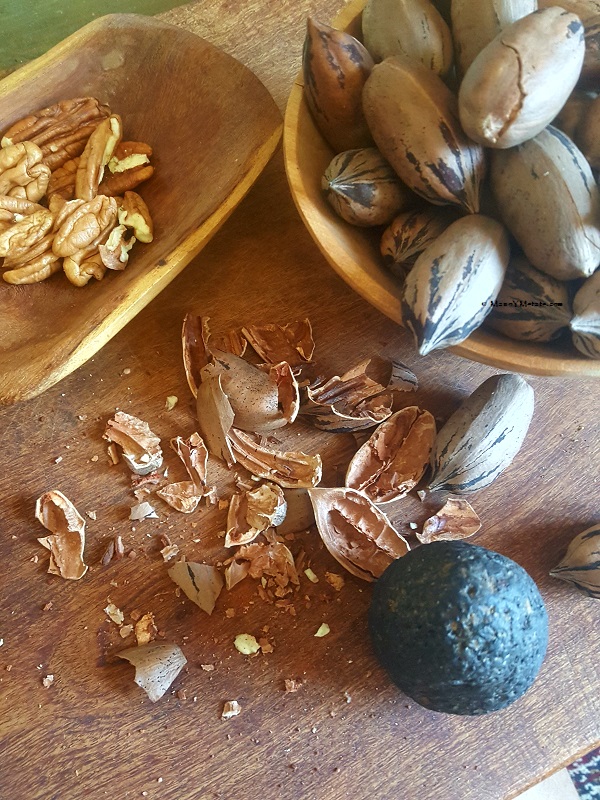
I browned 5 tablespoons unsalted butter! (Remember, this is making it like ice CREAM instead of ice MILK.) Then I added over half a cup of broken pecans to toast in the butter. Yes, it smelled as good as it looks.

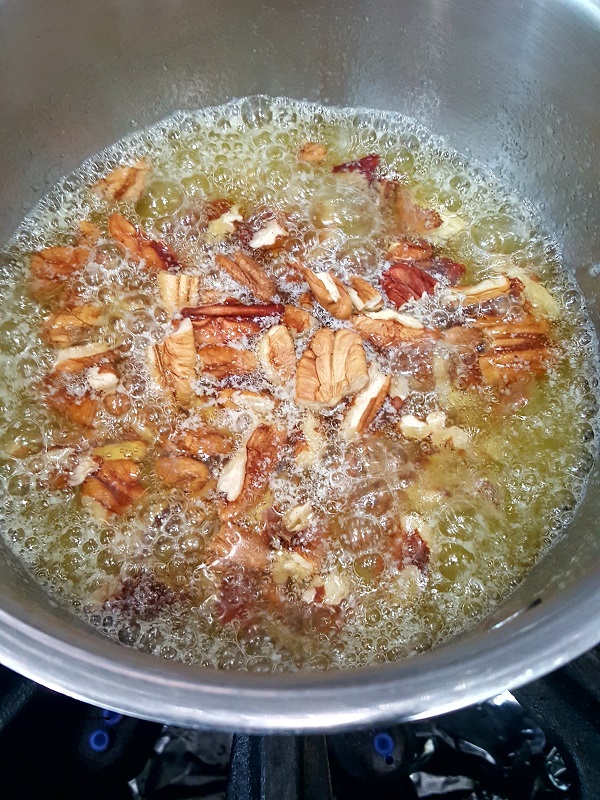
I added the slightly cooled custard to the browned liquid butter.

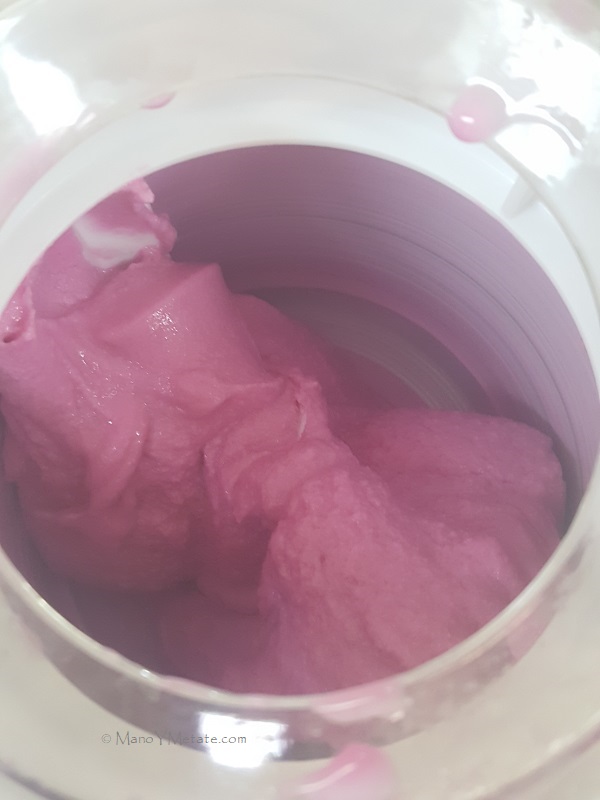
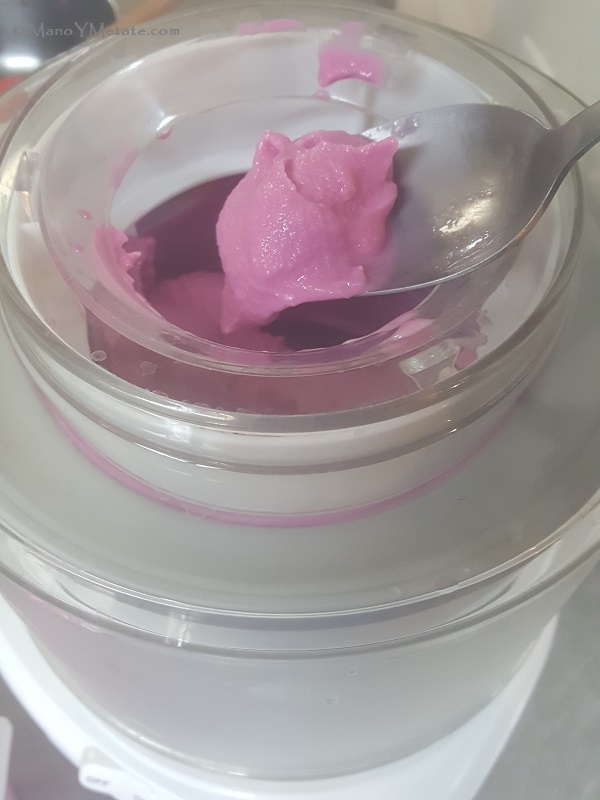
and poured the whole into a little electric ice cream maker. Some butter did solidify into tiny bits, which remained in the finished product. But the nutty butter pieces combined with the nut pieces and it is actually a DELICIOUS result. Rich and flavorful.

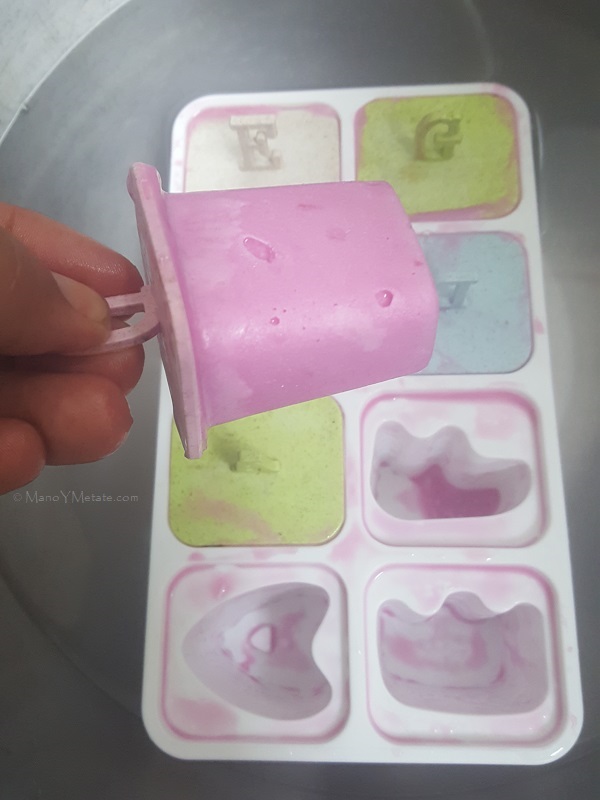
Soon it firmed up to soft serve. After a time in the freezer, it made perfectly delicious, not too hard. ice cream.

Enjoy!

Sweet Squash Crisp

Hello Friends, Amy here with my new favorite way to enjoy winter squash. Some years I find myself with manageable butternuts or stringy cushaws that I only want to puree for soups or sweet dishes. But this year Tucson CSA had Fairytale, Cinderella, Red kuri, and various hubbards all sweet and smooth textured! Also, this fall the apples were so crisp and flavorful that I never got around to making apple crisp. To make up for this, I decided to give winter squash the apple crisp treatment.

I started by dropping a hard shelled winter squash on the patio floor. Crack!

I then scooped out the seeds, cut the skin off, and trimmed the ragged portions that bordered the central cavity. (The inner trimmings simmered in a small amount of water until tender and ended up pureed for another project.) I made the tidy pieces of raw squash into cubes and placed them in a buttered baking dish. I gave those a head start in a 350 degree F oven while I made the topping.

I never use a recipe for the topping but it works. It is different every time but still totally delicious. In the food processor I pulse together about 2 cups of oatmeal, 6 tablespoons butter, a handful of walnuts, brown sugar to taste and a dash of salt and cinnamon. If the mixture seems very dry, I add more butter or a bit of liquid (maybe some mesquite broth). Anything from wet sand to drop biscuit dough will be fine. I like to leave it coarse, but it can be blitzed if you prefer. Coconut oil works in place of the butter beautifully. Basically this is granola, which makes a great substitute for all the other ingredients. In the past I’ve added mesquite meal and different sweeteners and spices. Seriously, just go for it. It is not expected to rise or stay together anyway. Who says baking is not improvisational!

I spread this over the not quite tender squash and put in back in the oven. When the top is browned and the squash tender, it is ready. Serve hot or room temperature for dessert or breakfast. Vegetables in every course, YUM!

Prickly Pear Coconut Frozen Pops

Hello friends, it’s Amy here with my new favorite late summer treat. Pink prickly pear pops are creamy and easy to bite, yet vegan using coconut milk. For a prickly pear peach sorbet using cream and honey, try Carolyn’s recipe from last season. Also, try Tia Marta’s Prickly Pear-Mesquite-White Sonora Wheat Muffins (Ihbhai c Kui Wihog Pas-tihl).


With the drought, there are very few prickly pears out in the wild this year.

However, the young plants in my yard near water harvesting basins set a decent amount of fruit, especially for their size.

Even though the fruit may look purple sooner, I usually wait until September to harvest. If picked before total ripeness, the firm flesh holds onto the juice and it is more difficult to extract. To check, I simply pluck them off the plant with kitchen tongs. Ideally, the fruit separates easily from the plant and the skin with no tinge of green at the base tears the fruit open a bit (see the holes in the bottoms of the fruit in the photo below). If juice runs where the tongs squeeze the flesh, it’s definitely ready!!!! 

I then blend the whole fruit, spines and all.

The hard seeds remain intact, while the pulp and skins are pureed. Then I strain the slurry through a cloth napkin or other piece of fabric. Cheese cloth is not fine enough.

This strains out the seeds, pulp, pieces of skin, spines and the tiny, skin-irritating glochids.

It drains slowly, so sometimes I tie the ends of the fabric, hanging it to drip in the refrigerator. 

The clear juice is ready to make treats or savory food right away, or freeze for later. As an extra precaution, I let the juice stand, then pour the clear liquid from the top, sacrificing the bottom inch from the vessel to leave behind any sediment.

To make pops, I heated some juice with lemon and sugar, then thickened it slightly with cornstarch to make a thin syrup.

After taking it off the heat, I added a can of coconut milk. Add a little lemon or orange extract, if you like.

When completely chilled in the refrigerator over night, it is ready to be frozen in an ice cream maker.

If you just pour the mixture into the pop molds, it will freeze as hard as ice. But this method makes pops that are easy to bite.

Of course, it can be eaten now as soft serve or frozen in one container to enjoy as a sorbet. But spooned into reusable pop molds, it is portion controlled!!!

Prickly pear coconut frozen pops (or sorbet) 

By Amy Valdes Schwemm

1 cup prickly pear juice

1 ½ cups sugar

¼ teaspoon salt

¼ cup lemon juice

1 tablespoon cornstarch

13-15 oz coconut milk

lemon or orange extract (commercial or 100 proof vodka infused with zest) to taste

Bring first four ingredients to a gentle boil. Dissolve cornstarch in 2 tablespoons water in a small dish. Add to pan, and simmer for one minute. Add coconut milk and extract. Remove from heat to cool and refrigerate until well chilled. Pour into ice cream maker and freeze. Firm in freezer, either in pop molds or a lidded container. Enjoy!

Peanut Butter Bellota Bars

As we are sequestering, we Sonoran Desertofiles should all be out harvesting juicy tunas, ok more on that later, because….

It’s also bellota time!  In mid-August, we went on a bellota quest. Three of us set out, socially distanced, up into Arizona’s oak woodland near the border.  Two inspiring foodie-pals, Dr.Letitia McCune “BotanyDoc.com” and Mission Garden mover-shaker Emily Rockey, y yo–Tia Marta–were on a treasure hunt to relocate the wonderful, giving trees where my Tohono O’odham mentor Juanita Ahil used to gather wi-yo:thi.  Our quarry:  the little acorns of Emory oak.

Socially distanced bellota-rustlers under giant Emory oaks near the border

Yes we found them, with thanks–Ah such plenty!  Fruit of Quercus emoryi  are the only acorns I know of in the world that don’t need to be leached of their tannins before eating.  You can eat them fresh off the tree.

Quick-wash the dust off your bellota harvest

…then quick-dry or “roast” your bellotas in the hot sunshine

Bellotas are increditbly nutritious– full of complex carbs that help balance blood sugar and almost 50% rich oil similar in quality to olive oil.

But they require some work, and can be difficult to de-hull to extract each little morsel of goodness inside–the nutmeat.

Always check for holes–We aren’t the only ones who eat bellota.  Nature needs to feed all her creatures.

There are lots of ways to crack the shell.  I  like to crack them ever-so-gently when placed longitudinally between opposite molars, then manually remove the shell.  Jesus Garcia, the Desert Museum’s primo ethnobotanist, demonstrates the “traditional Sonoran” method using his incisors to cut a “waistline” around the midriff of the acorn so two perfect half-cups of shell release a perfect nutmeat.  Experiment to find your own favorite method.

Don’t use the rolling pin method unless your bellota shells are very brittle–or you’ll be hunter/gatherer once again, indoors.

…A tedious process no matter what. Hey, try shelling bellotas while listening to audiobooks or good music.

As with your molars, if you’re careful, cracking bellota shells with pliers can yield perfect nutmeats.

Ingredients you’ll need for Peanut Butter Bellota Bars (shelled bellotas to left, mesquite flour to right)

This easy recipe combines sweets, like mesquite pod flour and piñon nuts, with the excitingly bitter notes of bellotas.  Bellota Bars, with chocolate, are a decadent dessert served with ice-cream.  Without chocolate (less melt-able), they are an energizing bar great for hikes and picnics.

RECIPE — Tia Marta’s Peanut Butter Bellota Bars —

Ingredients:

1/2 C chunky organic peanut butter

1/3 C butter

1   C sugar

1/2  C  brown sugar

2 eggs

1 tsp vanilla

1  C  flour (any flour combo works–I used 1/2 cup whole wheat pastry flour & 1/2 cup barley flour)

1/4 C  mesquite flour

1 tsp baking powder

1/2 tsp sea salt

1/2 C  shelled pinyon nuts. (optional)

1/2  C high cacao chocolate morsels (optional)

Topping:   1/4  C shelled bellotas (Quercus emoryi acorn nutmeats)

As you sprinkle bellotas on top, pat the dough evenly into all corners of your pyrex baking dish.

Recipe Directions:  Preheat oven to 350F.  Cream peanut butter and butter.  Add sugar and brown sugar.  Beat in eggs.  Add vanilla and beat until smooth.  Separately, sift flours, baking powder and salt together.  Mix these dry ingredients into wet ingredients thoroughly.  Add optional pinyones and/or chocolate morsels according to your “richness palette.”  Press dough into a 8×8″ greased pyrex pan.  Sprinkle bellotas as “topping”.  Bake 30-35 minutes.  Cool, then cut into delectable chewy energy bars.

When cool, cut into small squares, as they are super-rich and energy-packed.

If you can’t harvest your own bellotas, you can buy them this time of year, before Dia de San Francisco in October, at most Mexican markets or along the road to Magdalena, Sonora.  They will keep a long time in your frig or freezer for future joyful cracking.  Nature’s wild bounty is so diverse in our borderlands desert!

Find many of our Southwest traditional foods respectfully captured in my artwork at www.flordemayoarts.com for all to enjoy.

Check our SavortheSouthwest blog archive for other bellota recipe ideas and anecdotes.

Raspberry Beet Stem Turnovers

Amy here today, with beautiful red beets! You know, beet stems look like rhubarb…what if…

I had beets from Tucson CSA and from a friend’s garden. There are plenty of beet root dishes I make, like roasted beet salads, pickled or fermented beets, and borscht. Also, I LOVE cooked beet greens, with their salty, mineral character, sautéed in olive oil and garlic or many other ways. I usually chop the stems and cook along with the leaves, but they have a different texture and make the dish more red than green. Like in beans simmered with greens, or in a quiche, I want less of that hue. What to do with extra beet stems? Since they look like rhubarb, would they work as a substitute????


Rhubarb, and wild desert rhubarb (See Tia Marta’s desert rhubarb upside down cake and pie on this blog) are much more tart that beet stems, so I could add lemon. Strawberries are the classic pair with rhubarb, but raspberries have the tartness I wanted. I harvested wild raspberries in the mountains last summer for the freezer, but they were long gone. A little carton of raspberries from the store had the same volume as the chopped beet stems I had, so that’s what I used.


I simmered the beet stems, raspberries, a lot of lemon juice and zest, sugar and a shot of vanilla, then thickened with cornstarch. A delicious compote. It totally worked!!!!!
There wasn’t enough to fill a pie plate, so I made a few turnovers.


A simple short pastry: butter cut into all-purpose flour, a pinch of salt, a bit of cold water to make it come together, and refrigerated until firm.

After dividing the dough into 8 balls, I rolled one thinly. Then filled with the compote, moistened the edges with water and folded. On ungreased parchment paper, I crimped, poked steam vents, wet the tops with water and sprinkled with sugar. Maybe next time they’ll get egg wash or fancy sugar.


At 425 degrees F they took 20 minutes to get golden brown top and bottom.


They came out flakey, tart, and beautiful color. Don’t waste those beet stems!

Raspberry and Beet Stem Turnovers

by Amy Valdés Schwemm

Filling:

1 cup red beet stems, chopped

1 cup red raspberries

1/2 cup lemon juice

1/4 cup sugar

1 teaspoon lemon zest

1/2 teaspoon vanilla

1 teaspoon cornstarch

Pastry:

1 cup all purpose flour

5 tablespoons cold butter

dash of salt, if using unsalted butter

1/3 cup cold water


Cut butter (and salt if using unsalted butter) into flour to make uneven crumbs. Add water to make a dough, form a ball and refrigerate until firm.

Simmer the beet stems with sugar and lemon juice until tender. Add raspberries and lemon zest, and cook until reduced and the raspberries fall apart. Mix the cornstarch in a tablespoon of water, add to the pan and cook until clear and thickened. Stir in vanilla and allow to cool.

Preheat the oven to 425 degrees F.

Divide the dough into 8 balls. Roll one ball into a thin circle and fill with two tablespoons of the compote. Moisten the edges with water and fold. Place on a baking sheet lined with parchment paper; no need to grease. Crimp the edges with a fork or fingers and poke steam vents in the top with a fork or knife. When all are formed, wet the tops with water or a beaten egg and sprinkle with sugar.

Bake for 15 to 20 minutes or until golden brown, top and bottom.

Enjoy!

Heartease

In a few short days it will be February – and it can be a dreary month, often rainy and cold, even in southern Arizona. All hearts need some easing in this upcoming shortest of months. Luckily, here in southern Arizona, February is the month we can easily grow one of the most hearteasing and cheerful flowers on the face of the earth. Heartease is the common name for Viola tricolor, best known as one of the mothers of the pansy. The simple beauty and delightfully friendly tricolored faces of heartease, pansies, and violets have long been admired by poets, artists, lovers, and cooks!

viola 2289974_1280

Use.
Pansies and violets have a long history of human consumption. The flowers, fresh or candied, were a favorite edible decoration at medieval banquets. Tarts made from pansies or violets were a Victorian delicacy.

viola 1767463_1280

Top a custard tart with berries and heartease.

Heartease flowers can be used to flavor and color salads, herbal butters, jams, jellies, syrups, desserts, herbal vinegars, and even wines. Studies indicate that flowers contain appreciable amounts of vitamins A and C, so along with adding color to the salad they are healthy for you.

viola 1982626_1280

All of these are high in Vitamin C.

Ethnomedicinally, pansies and violets have been used to treat health problems ranging from epilepsy to depression. A tea made from the leaves was prescribed for quelling anger and inducing sleep. Roman revelers wore wreaths of violets in hopes of preventing hangovers.

salad with salmon 1443366_1280

Smoked salmon salad with purple pansies – colorful and yummy.


Grow.
Heartease, pansies and violets grow well in Tucson from seed sown in October. At this time of year it is best to buy “seedlings” or already growing plants. Replant seedlings into the ground or containers in partial to full sun, and keep these temperate climate plants watered.

Viola odorata 006

Tiny Viola odorata is incredibly fragrant and grows well in our area.

I like planting pansies and violets in containers with potting soil for three reasons. First, Viola do best in rich, moist soil with good drainage. Second, I put the containers up on a table with metal legs so the critters can’t climb up and eat my plants. Third, these charmers are up where I can easily see them and enjoy their beauty. Harvest them too, when I’m making a dinner salad.

viola 1997578_1280

Yogurt with chia, berries, and hearease. A great way to start the day.

Caution.
Ornamental plants from “big box” nurseries are very often treated with toxic insecticides and fungicides (biocides) that are systemic (throughout all plant tissues) and stay in the plants for around three months. Herbs and vegetable plants from a nursery are not treated with systemic biocides because they are edibles.


JAS avatarIf you live in Southeastern Arizona, please come to one of my lectures. Look for me at your local Pima County Library branch, Steam Pump Ranch, Tubac Presidio, Tucson Festival of Books and other venues. After each event I will be signing copies of my books, including the latest, Month-by-Month Garden Guide for Arizona, Nevada, and New Mexico (Cool Springs Press, $26).
© Article copyright by Jacqueline A. Soule. All rights reserved. Republishing an entire blog post or article is prohibited without permission. I receive many requests to reprint my work. My policy is that you may use a short excerpt but you must give proper credit to the author, and must include a link back to the original post on our site. Photos © Jacqueline A. Soule where marked and they may not be used.

Cholla Crepes with Hollandaise and Mulberry Compote Yogurt Crepes


20170420_160134

Spring in Tucson means cholla buds and mulberries! Amy here with two of our perennial favorites, wrapped in crepes.

20170420_090508

A found a budding Pencil Cholla Cactus in a friend’s yard, and I could pick in exchange for a harvesting lesson. See Tia Marta’s Cholla bud post to learn how to collect and process this favorite desert food. This wasn’t a stellar year in the wild, so I was glad to harvest from a few plants thriving with a bit of care. Pencil chollas, hard to find in the wild, have few spines for the size of the bud and fall off easily when brushed.

Mulberries are another cultivated cousin of a wild desert riparian food, and my grandfather planed a beautiful tree many years ago that produces enough fruit for birds, dogs and people, too.

20170421_184021

I cooked a bowlful of mulberries with a splash of rum and a squeeze of lemon. I added a bit of water while cooking, just to keep it from sticking.

Brainstorming how to show off these little treasures, I remembered crepes! My mom and aunt taught my family to make crepes with a special electric skillet designed to dunk into a wide shallow bowl of batter, making a delicate skin and browning it delicately.

Lacking the very wide, very shallow bowl and the electric crepe maker, I have been making them lately on a cast iron griddle. Start by whirling one cup flour (I used half whole wheat and half all purpose), one and a half cups half and half (milk or milk substitute works fine), 3 tablespoons butter melted completely (or oil), four eggs, and a dash of salt in the blender. Transfer to a quart jar or measuring cup for easy pouring.

20170420_154347

Heat a cast iron pan to medium, swirl the pan before the very first crepe with a small pat of butter, and take a relaxing breath. With one hand, pour batter on the griddle while quickly rotating the pan until the batter reaches the pan’s edges. Hopefully most of the batter is set by then, but if not, just use a little less batter next time and cook this crepe a little longer. If the batter gets too thick, thin with water so it is easier to swirl on the griddle.

20170420_154359

When the edges are papery and the bottom spotted with brown, flip the crepe with your fingertips and brown briefly on the other side.

20170420_154420

Stack the cooked crepes on a plate directly on top of each other. This batch of batter made about a dozen for me.

Cholla Bud in Crepes with Hollandaise

20170420_133519

Boil the de-spined cholla buds in water for 10 minutes, then drain. Heat a bit of olive oil, add a clove of minced garlic, a dash of salt and the buds.

20170420_155137

To make hollandaise, put one egg yolk, a tablespoon butter, a squeeze of lemon and a dash of salt in a double boiler. Whisk until creamy, adding a splash of hot water if necessary to thin the sauce. Incorporate one more tablespoon of butter and keep warm. The sauce can easily be doubled or quadrupled as necessary. Assemble, roll and enjoy!

20170420_155738

For Mulberry Crepes, you can add a pinch of sugar to the batter if you want. Spread a hot crepe with mulberry compote and a spoon of plain yogurt.

20170420_160424

Fold in quarters and garnish with pansies.

20170420_160552

Enjoy the last days of spring, and I’ll be back in summer. Love, Amy


20170420_093731