Within & Without: WILDFLOWER Honey Facial Mask (DIY)

Aunt Linda here, on this breezy Tucson morning. IMG_7283 As I write, the full moon shines powerfully in the west, as it sets. The bee yard is aglow. The beams of moonlight bounce off the hives;  alight upon the honey house roof;  shine through west facing doors and windows. The bees are hunkered down in their hives this morning. They will not launch into their foraging flights as early as they did in the summer. They are solar beings, and navigate with the sun. Being past the equinox , and with less sunlight available, their first flight begin later and their return home in the evening, earlier. They are also affected by cooler temperatures,  and are not partial to the winds we have been having. We are all, bee and human, between night and day; between summer and winter. As the cycles of flow and blossoming  constantly change, so do the stores of nectar, pollen and honey within the hive. The “inside” of a hive here in Tucson reflects the light yellow color/light aroma of Mesquite Flows from earlier in season, to the darker, stronger tasting and smelling honey of desert wildflowers of late summer and fall. The pollen comes in different colors as well. So it is that bees, in the process of their practicality, create mosaics of pollen and canvases of honey, depending on what is available to them regionally and seasonally. Below: you can see the variation of color and texture of pollen both on the bees’s “pollen baskets” on their hind legs, as well as in their “mosaic” of pollen stores within the hive. IMG_2744

IMG_7186

See how this desert wildflower yields a bight orange colored pollen (back legs of bee) as compared to the lighter yellow in the above photo.

By now you may be reveling in all the colors and tastes (and smells!)  of honey. Visit your local beekeeper at a farmers market  or health food store this weekend, and see how real and raw honey differs from the “honey bear honey” sold on many grocery store shelves. Bees have “honey stomachs” that they use to carry nectar back from the flowers, and into the hives to produce honey. The variation in plant nectars account for the variation on types of honey.

DSC_7013

Note the difference in color of the  very light Mesquite Honey (in the exquisite photo ABOVE – taken by Ben Johnson; you can learn more about this talented man at ben@benjohnsonart.com) as compared with the deeper colored Cactus Flower honey (photo below).

IMG_7793 True Fall Wildflower honey is usually an even deeper brown (bottom photo) and has higher antioxidant levels, which may be better for our skin! IMG_7218  Within and Without:  WILDFLOWER Honey Facial Mask (DIY)

Ingredients: raw honey and time How To:

This simple facial mask takes us from our own pores to the pores of plants.  As you can see in the photos,  the honey produced inside the hive literally reflects the environment around it. When we plant a garden or keep a hive, we move from being being a food consumer, to a participant in our food production. So, too, with our health products. It is wildly fun, and often more economical,  to use your own honey (or to purchase directly from a local beekeeper!!! That is a powerful act which moves you closer the “source”), than to purchase a  prepared product.

Honey has been used for skin repair and nourishment for thousands of years. Literally.  It is a humectant,  an anti-oxidant (darker, fall wildflower honey shows higher anti-oxidant levels than other types of honey,  in scientific studies),  and aroma “therapy” (is smells so, well, sweet!).

The idea here is as much about the Ritual as the Result.  Enjoy the smells and sensations WHILE applying the honey. Place the attention we so easily abdicate to the external world within once again. Our attention is rarely our own anymore, and a ritual as simple and everyday as washing our faces, can be a vehicle to practice enjoying the moment.

1) Exfoliate, however you like. This allows the properties of the honey to do their magic, without the barriers of dirt and oils.  Rinse. (Facials are not for everyday … at least not in my world.   I like to do the facial mask in the shower, on days when I wash my hair (which is not everyday) in order to utilize the humidity that the shower provides to open pores. (Water is a precious element in the desert, and I like to use Permaculture wisdom of “stacking functions” in order to lessen my water use.)    Truthfully, I do this facial mask less frequently than I should.

2) Right as you apply your conditioner, apply the honey to your face. Then wrap up your conditioning hair in a towel and step out of the shower  for about 20 minutes.  Who knows … during those magical twenty minutes you might even the feel the flights of the worker bees,  the “waggle dance” as specific foraging information is passed along,  the way the flowers tip and bend in the breeze, the smell of flower,  the sacred offering of pollen at dawn.  Once you have soaked up both the tangible and intangible properties of the fall facial mask, rinse (both face and hair, if you are doing a duo) and apply your favorite facial cream. Your skin will GLOW.

More Wild-Flower Foraging Fotos IMG_7193 The photo above shows how the hairs on a bees body gather pollen; note head on left bee. The photos  below show honey bees (and native bees) foraging in a variety of desert plants; and what “uncapped” honey looks like.   IMG_0748 IMG_1293 IMG_7804 IMG_1886 IMG_2173 IMG_7071

Soup Weather: Adobo Mixed Veggie Stew

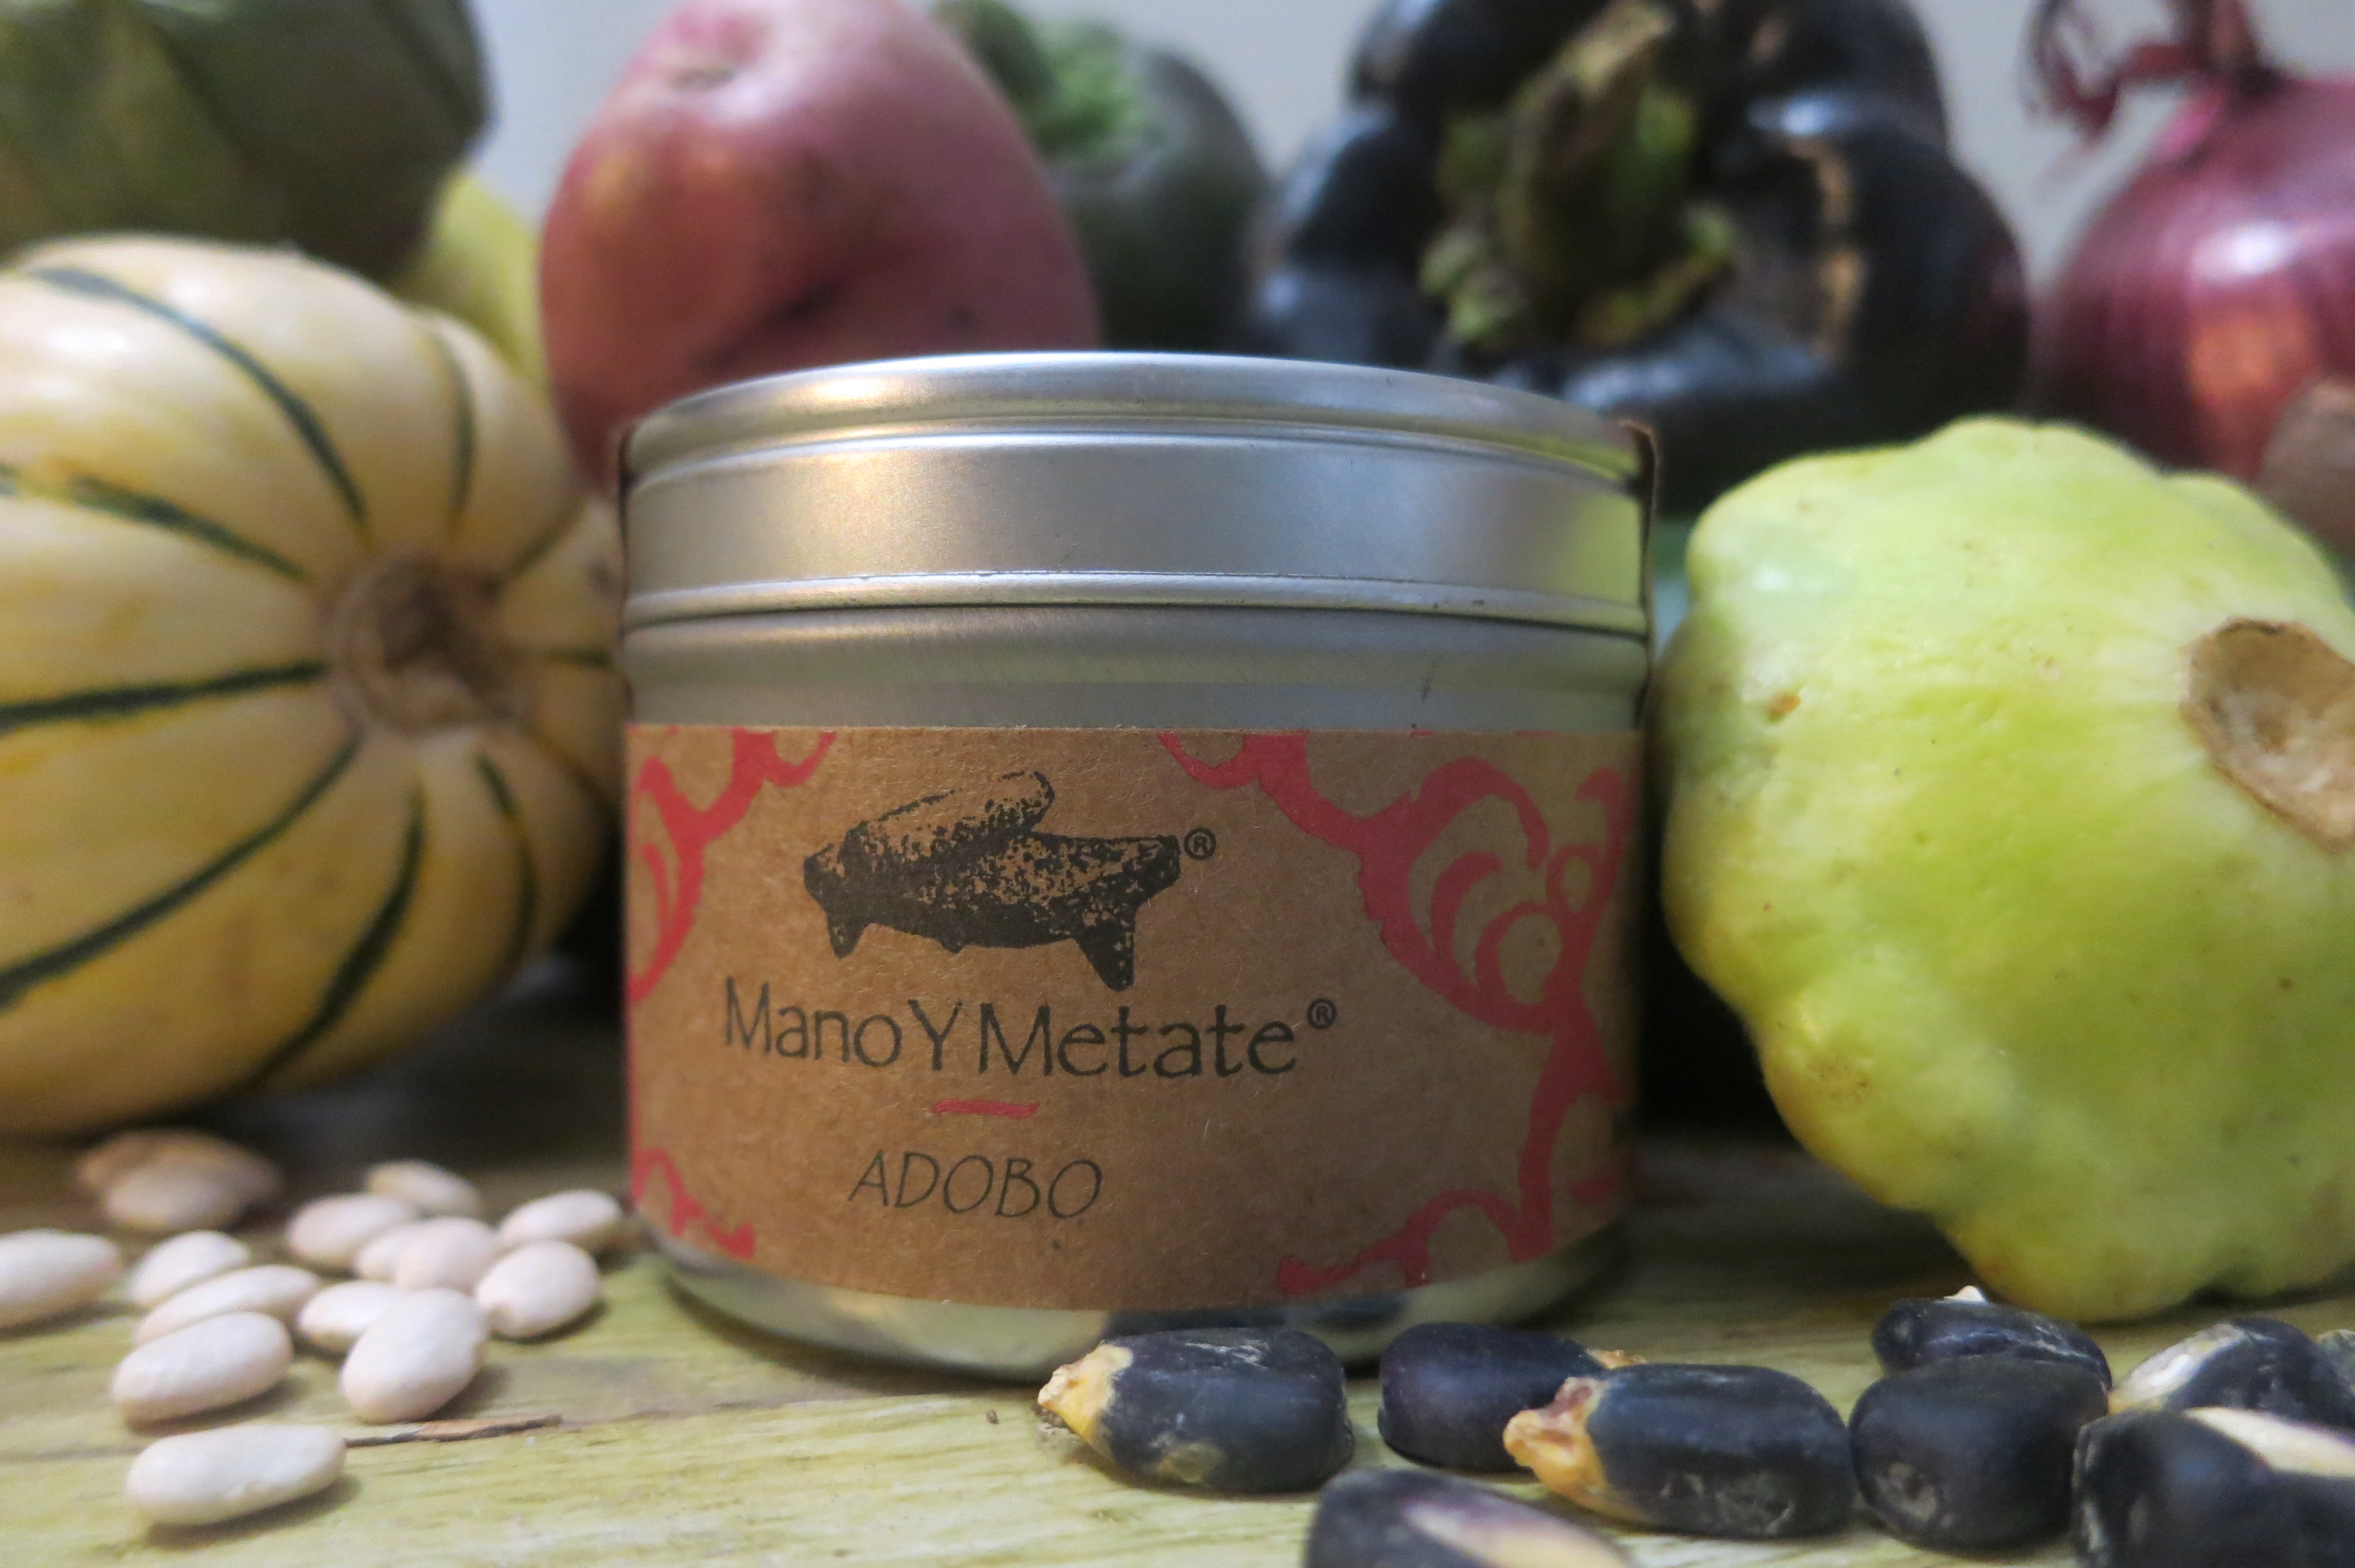
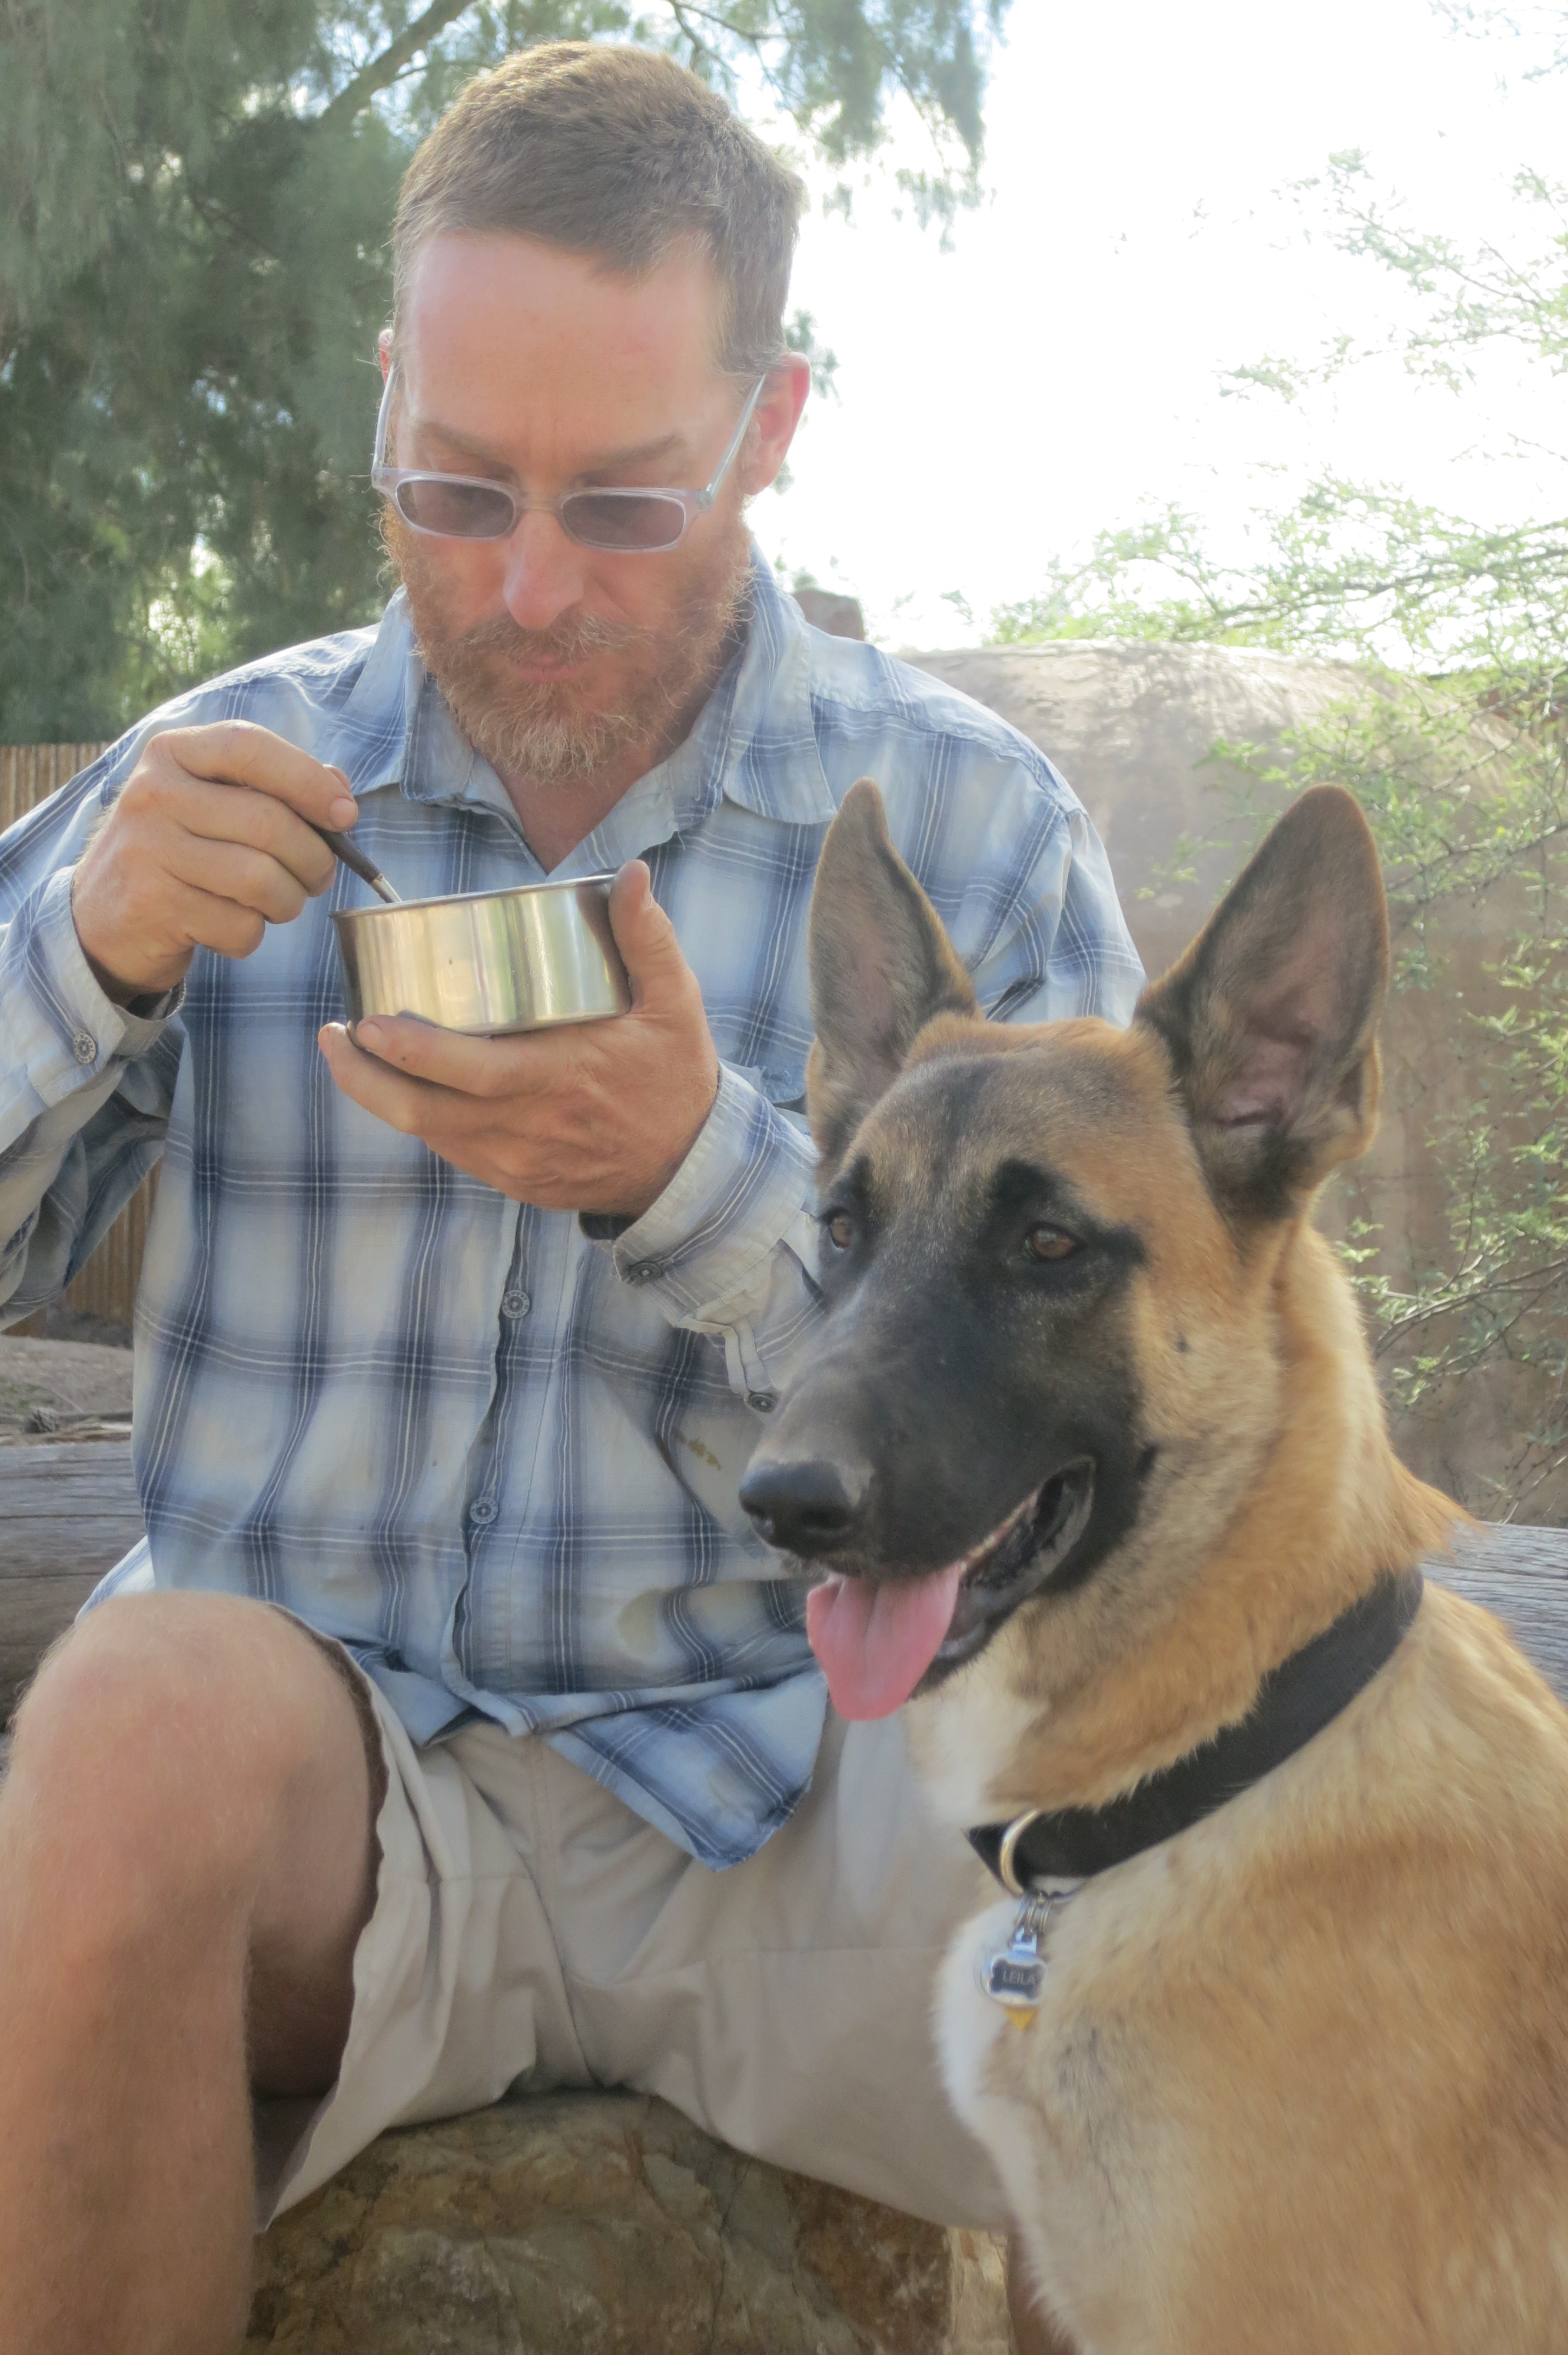
013 Hello, this is Amy. I always love a bowl of hot soup, but especially when evenings are cool. We’ve been camping in the yard this week with our new dog, Leila and eating lots of soup. I have many basic templates and here is one of the easiest. Adobo powder really brings together the disparate characters in the veggie drawer. The entire CSA share in one big pot!A1 tin

Adobo refers to many different things around the world. It comes from the word adobar, to marinate. Made into a sauce (especially with vinegar) or used dry, it does make an excellent marinade. Mano Y Metate Adobo is made with Santa Cruz Chili, hot. This is very special chile from Tumacacori, Arizona. That bright red color! I pair that with a little chile ancho for depth. Sesame seed and organic corn tortilla meal give the finished soup or sauce some body. Cumin and Mexican oregano are two of the standout spices, with cloves and Mexican cinnamon in the background. Five flavors: spicy chile, the little bit of ancho has a hint of bitter, plenty of salt and evaporated cane juice for balance. All that’s missing is sour from a lime wedge squeezed into the bowl.

A2 pdr

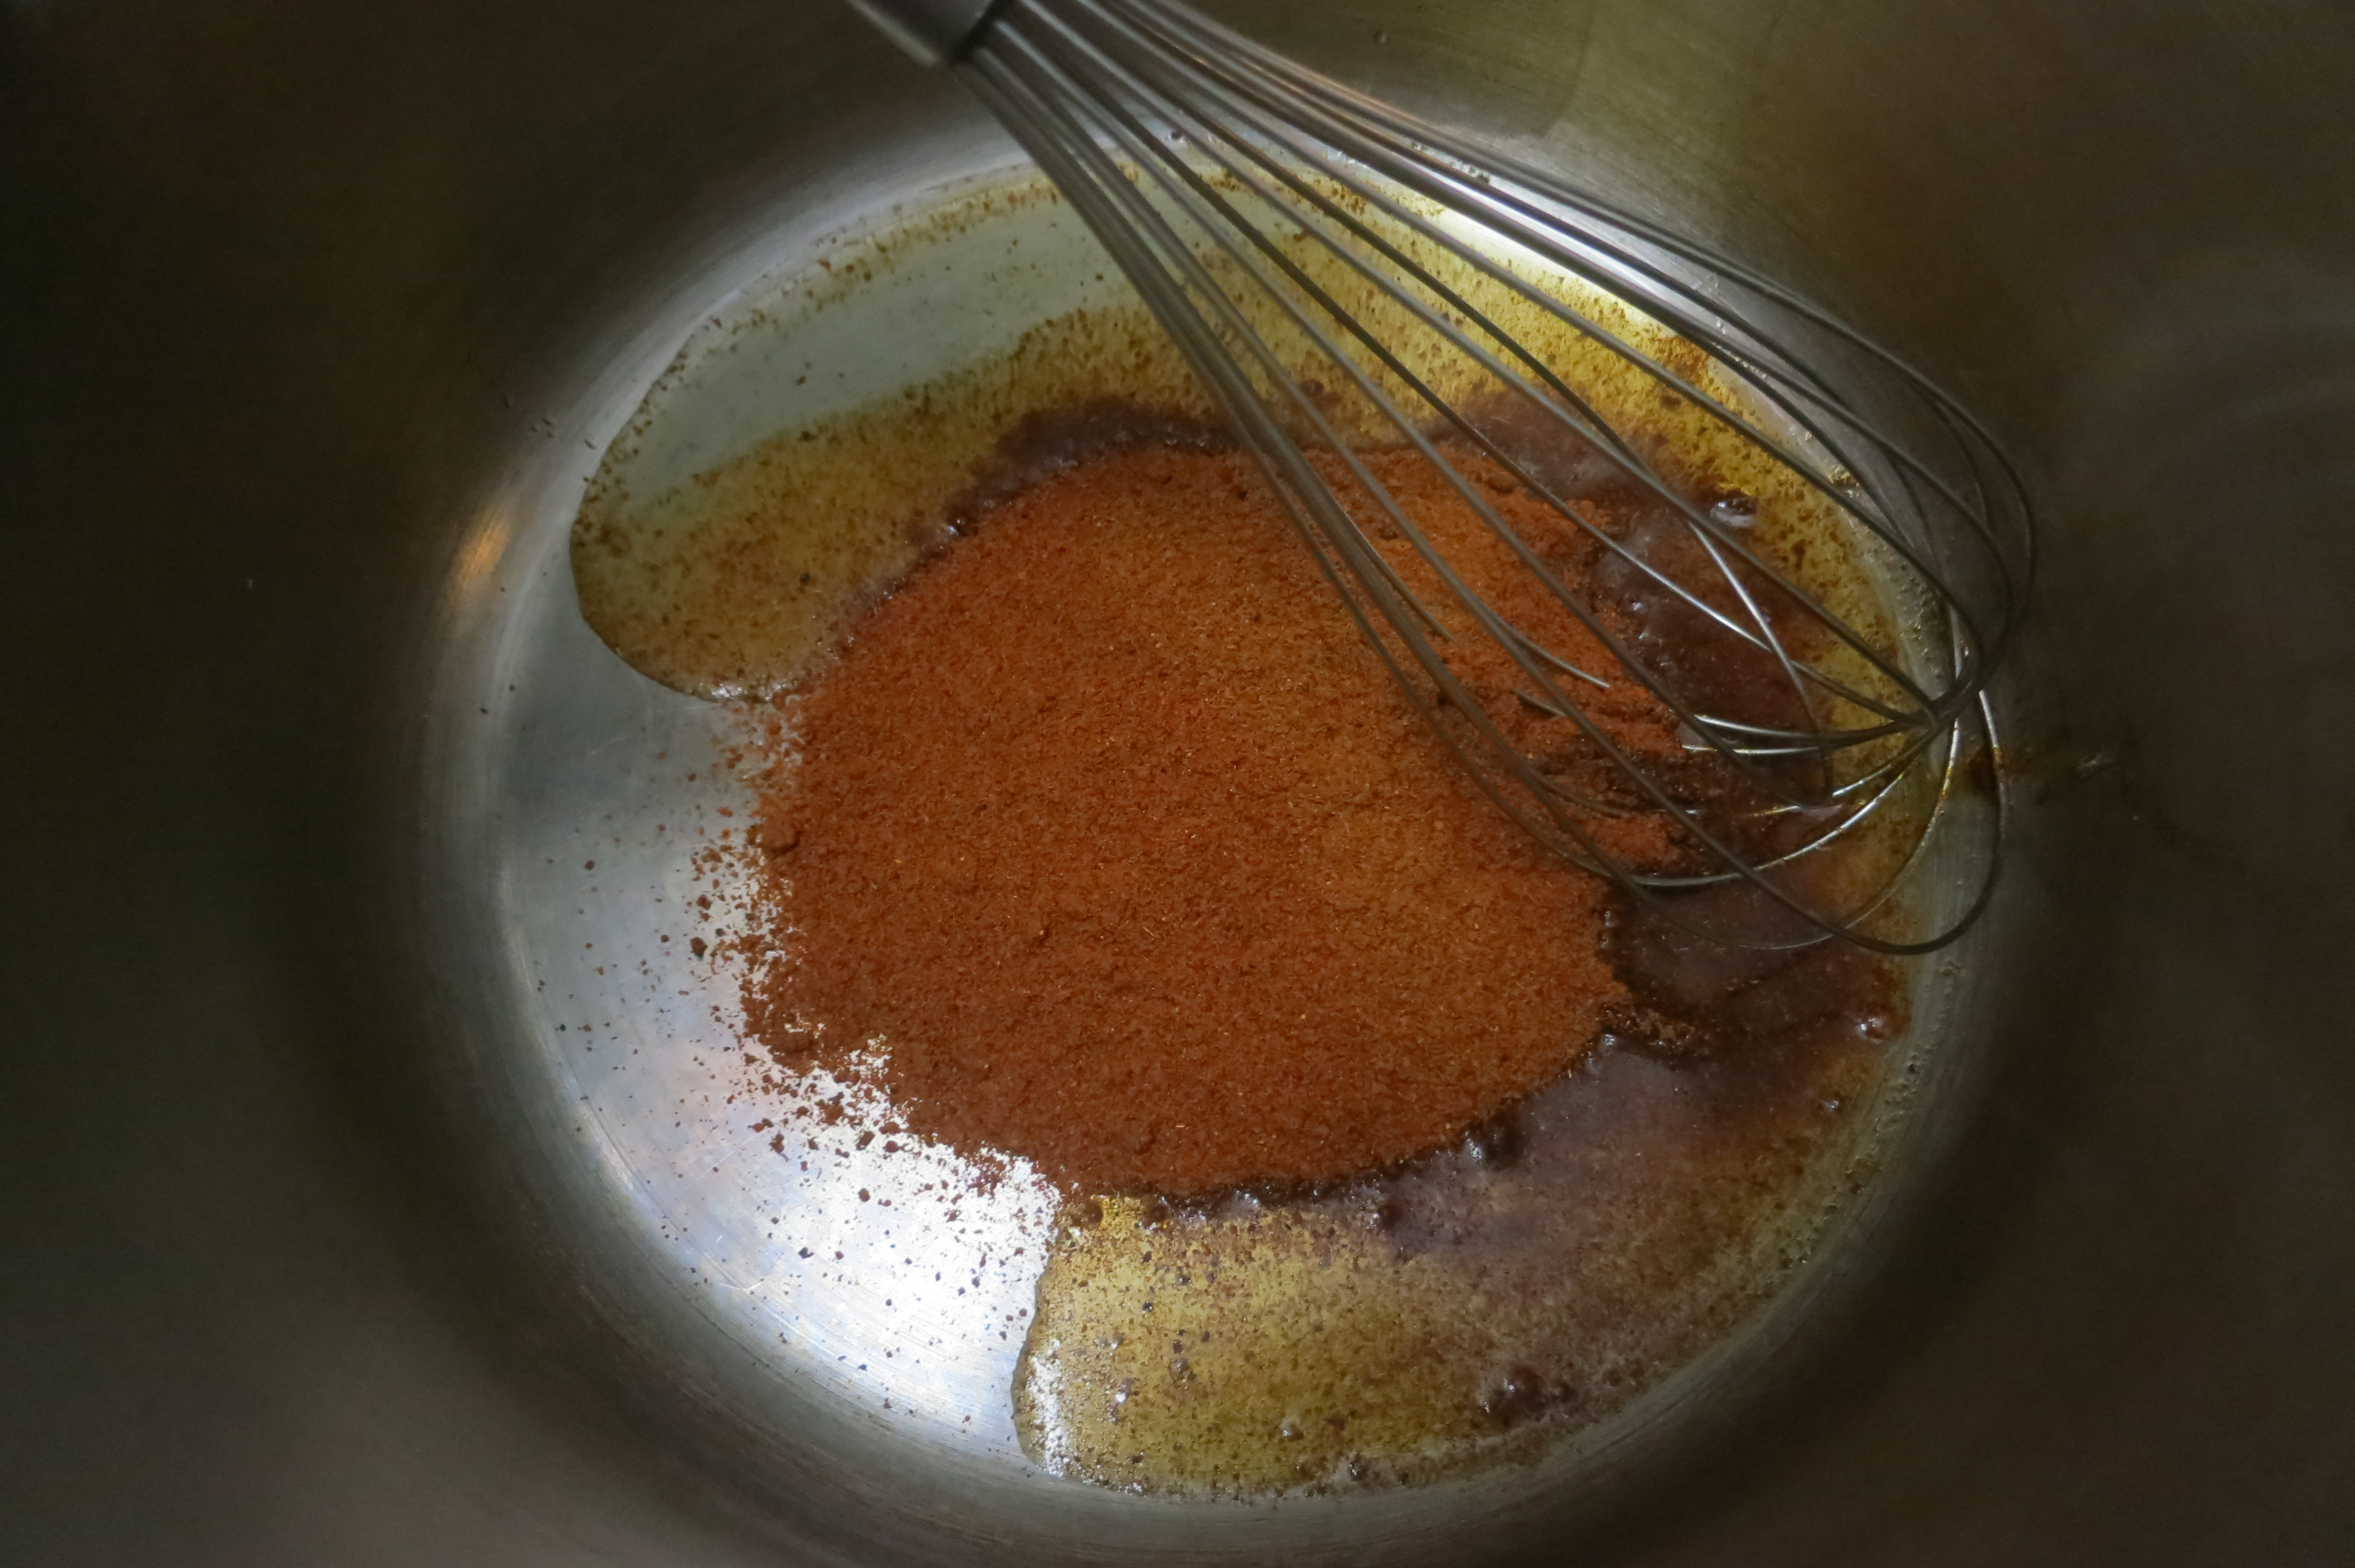
To make a soup, put a tin of Adobo powder and a few tablespoons of oil in a soup pot.

A3 paste

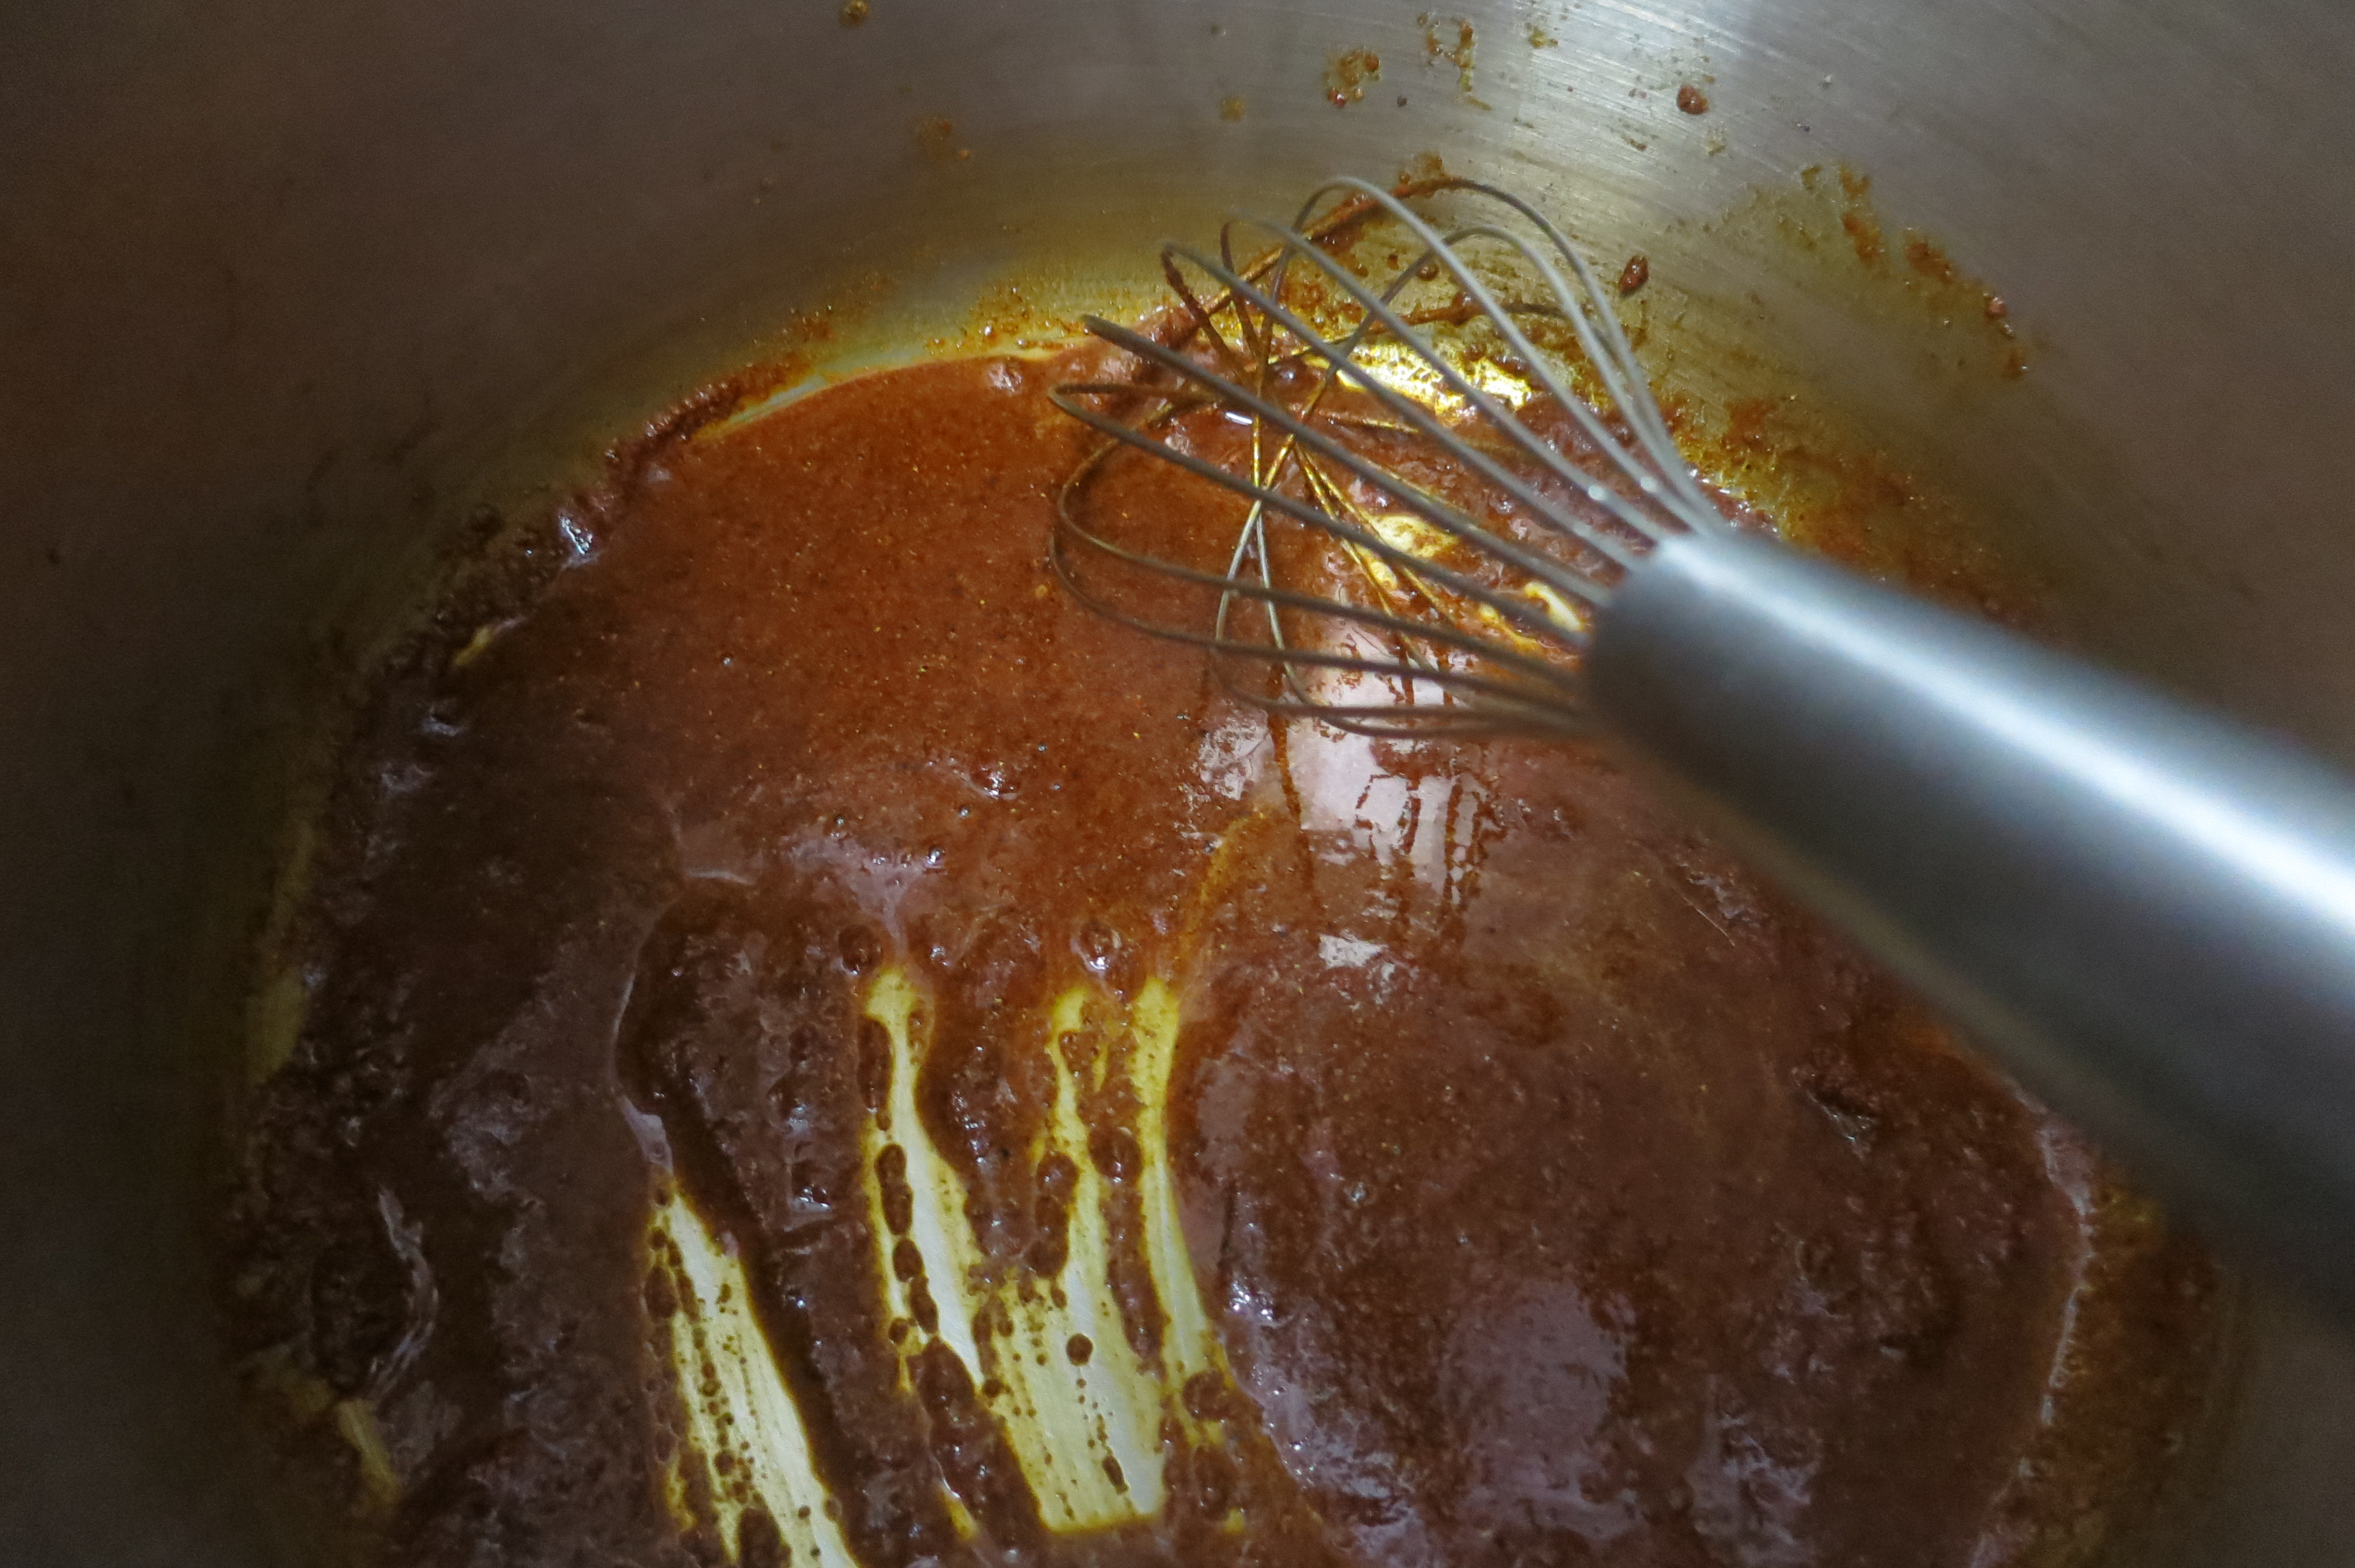
Cook over medium heat until it turns a shade darker in color and smells fragrant.

a4diced veg

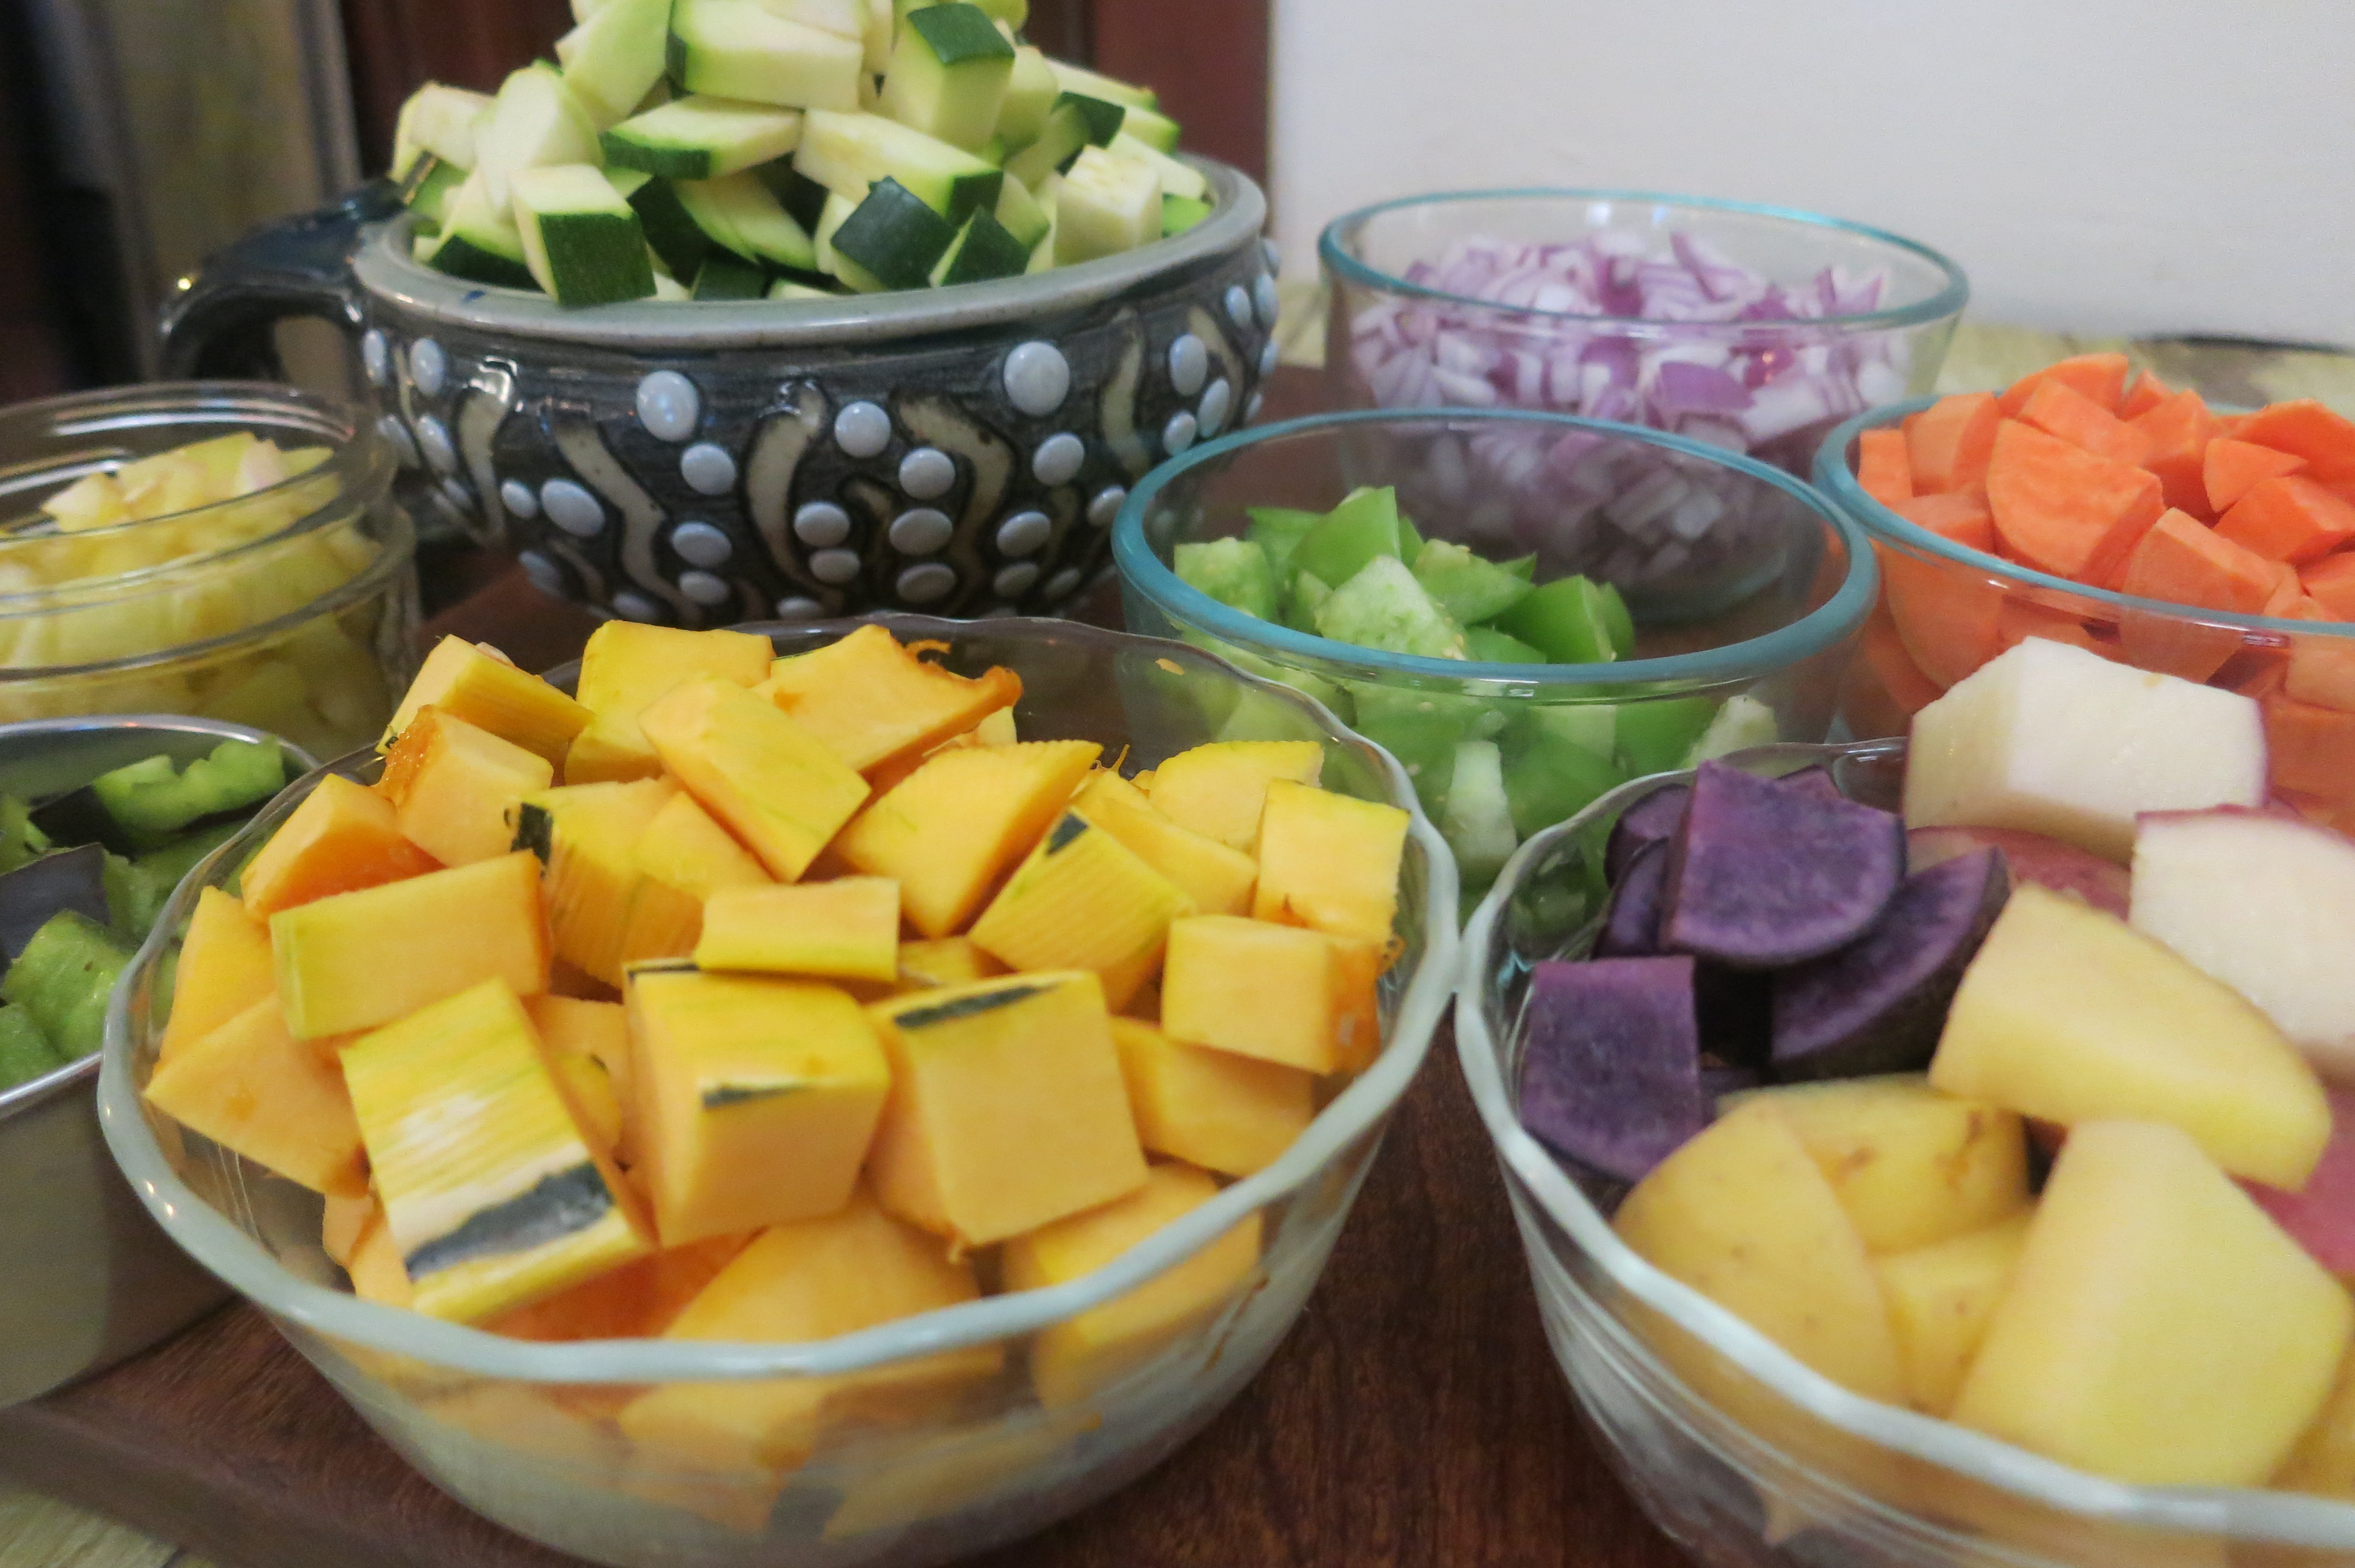
I have listed below some of the specific vegetables I used simply because I love them. Use what you have and love. Fresh or leftover meat is a great addition. Every single ingredient in this recipe is optional.

a5add veggies

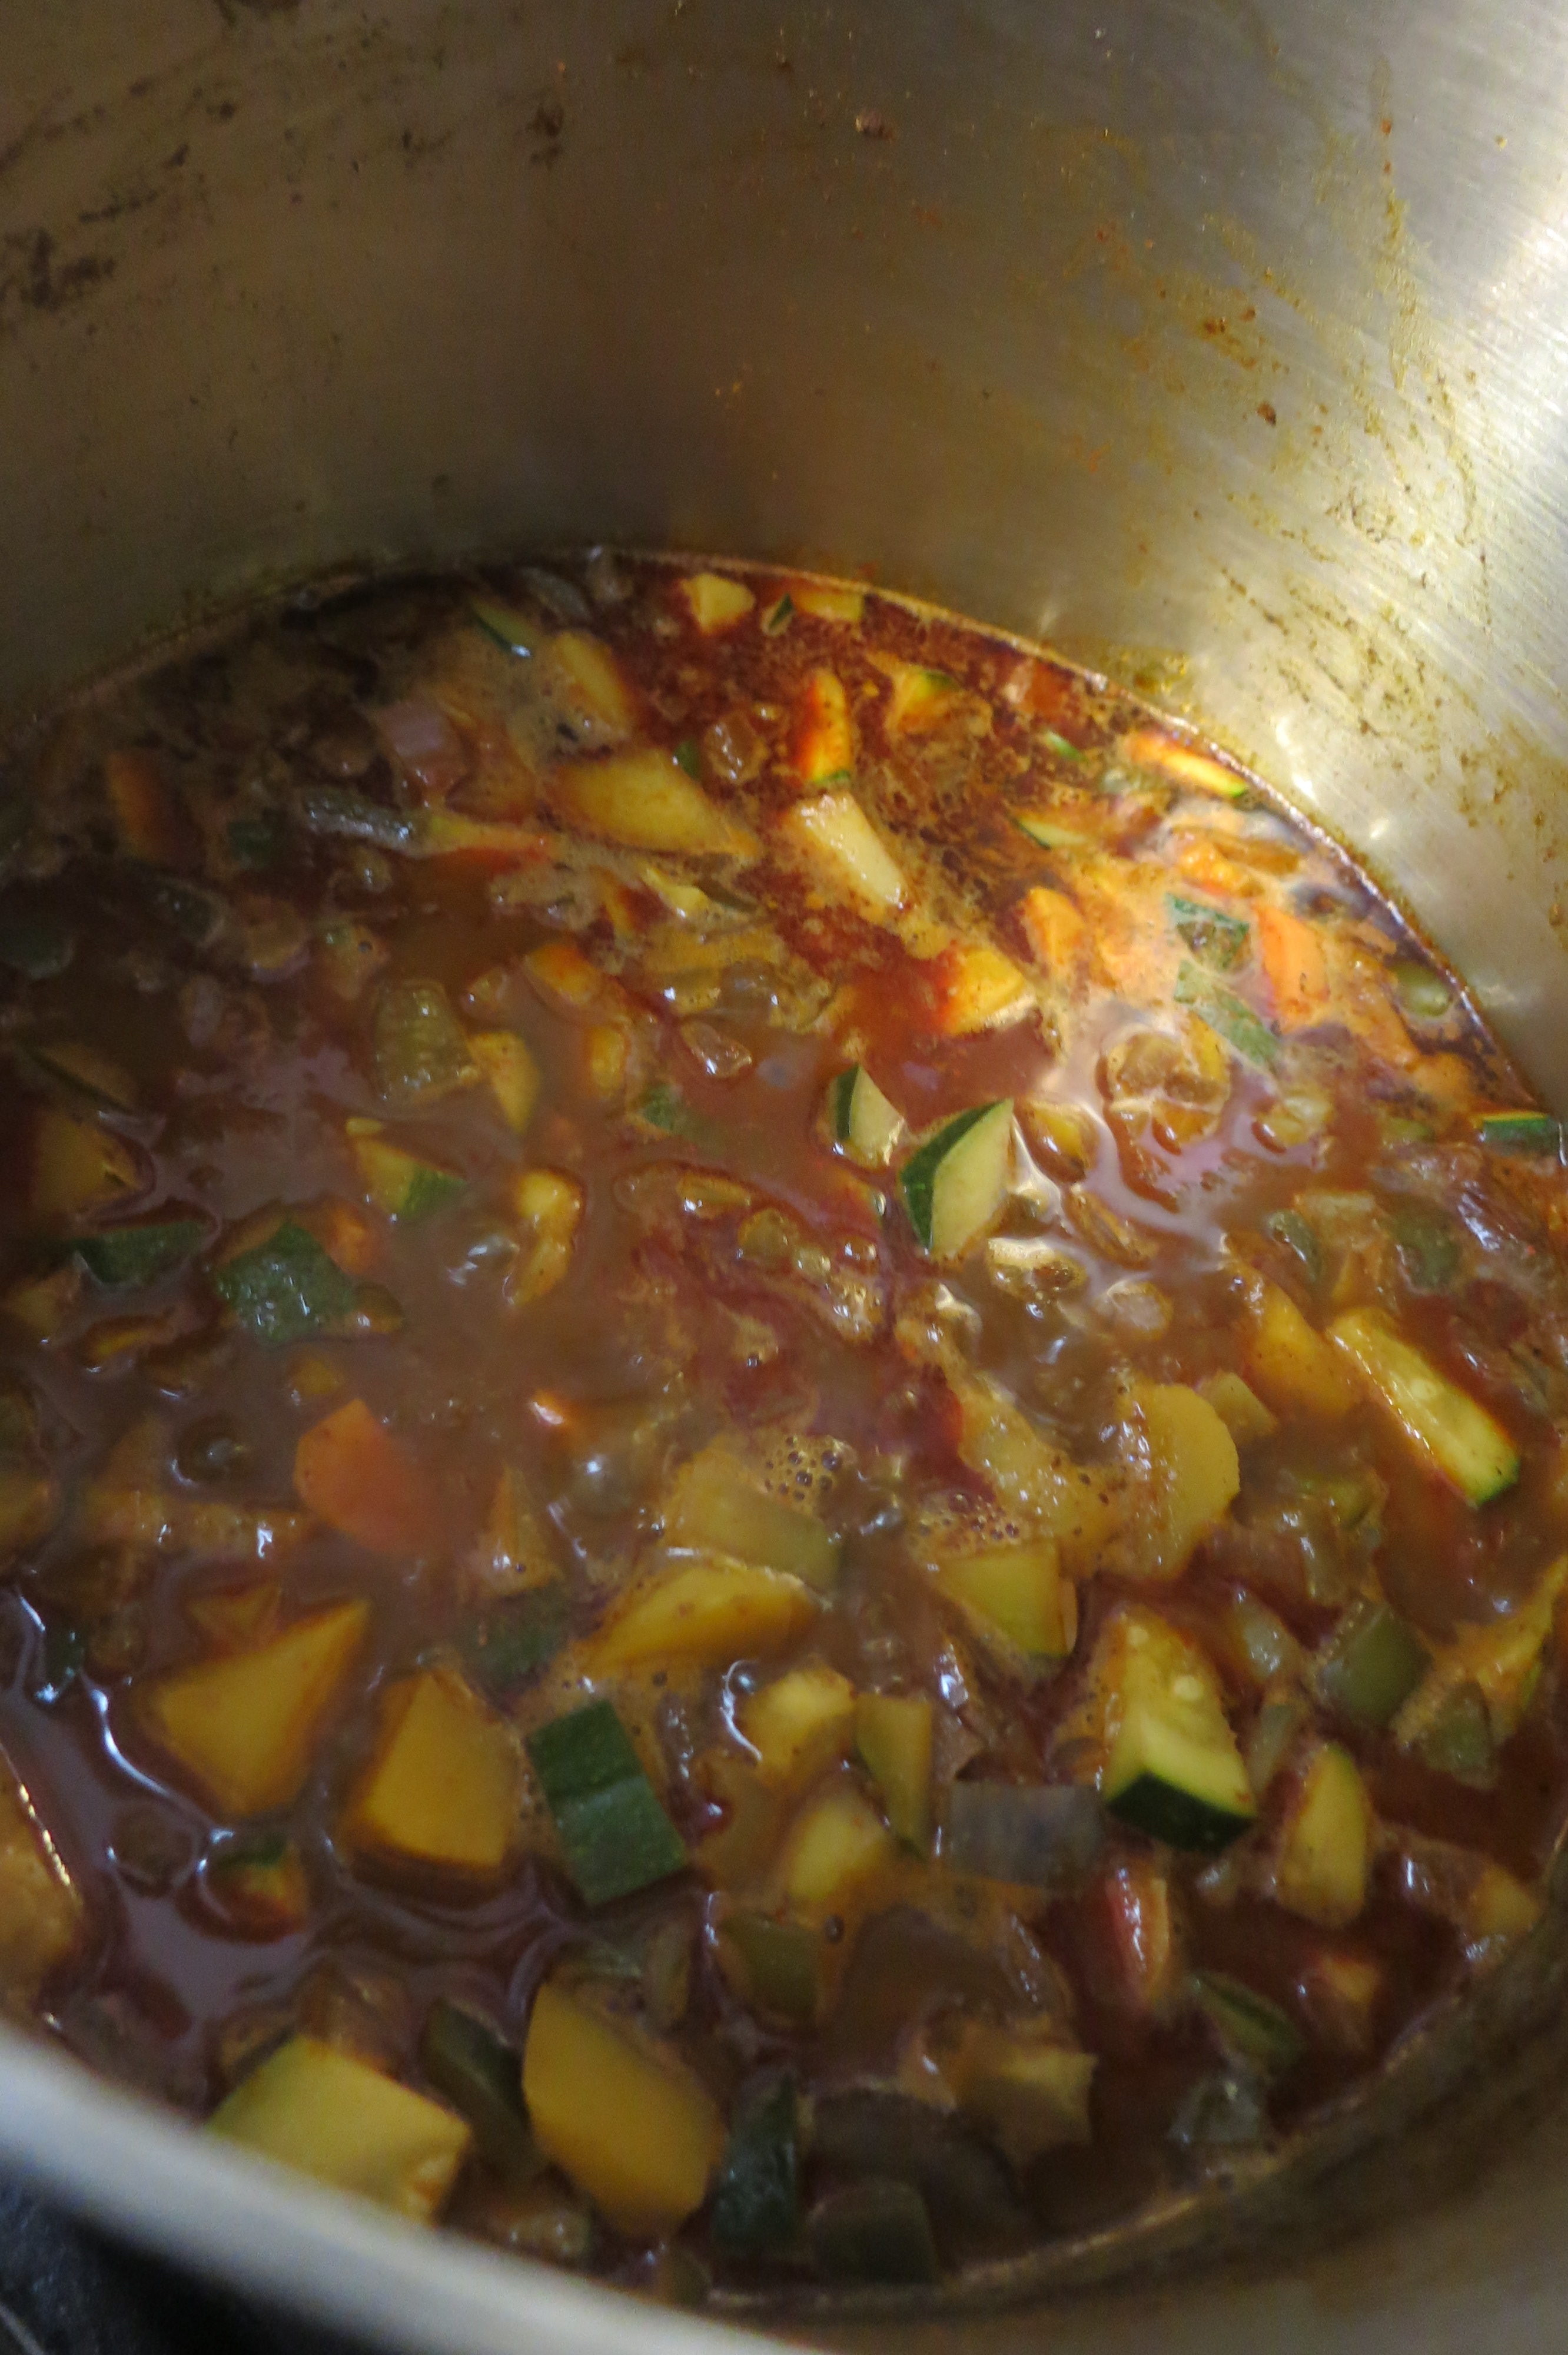
Add the longer cooking veggies and stir to prevent sticking. Before it burns, add a quart of water or broth. When making Adobo into a sauce, I insist upon using broth. However, for this soup water works fine.

a6blue posole

Add the quicker cooking veggies as inspired, including precooked posole or beans, if using. I cook the posole and beans separately to ensure that they cook thoroughly but not at the expense of overcooking the tender veggies.

a7 soup cooking

When everything is tender, salt to taste. Garnish with lime wedges, avocado, thinly sliced white or green onion and cilantro.

Ingredients:

Mano Y Metate Adobo Powder
Cooking oil, like mild olive
Water or broth
Summer squash (zucchini, patty pan)
Winter squash (Delicata)
Potatoes (Red LaSoda, Yukon Gold, Purple)
Sweet Potato (Beauregard)
Sweet peppers (various colors and shapes)
Chiles (roasted and peeled, or diced and sautéed in oil first)
Tomatillo
Onion (red)
Garlic
Blue posole (heirloom dry posole available from NS/S or Flor de Mayo. The Savor Sisters promise at least one post soon about traditional posole.)
White Tepary Beans
Salt
Lime wedges, green onion, avocado and cilantro for garnish

Mac and Leila

Mac and Leila

Savoring Our First Anniversary (and Mesquite Cake)

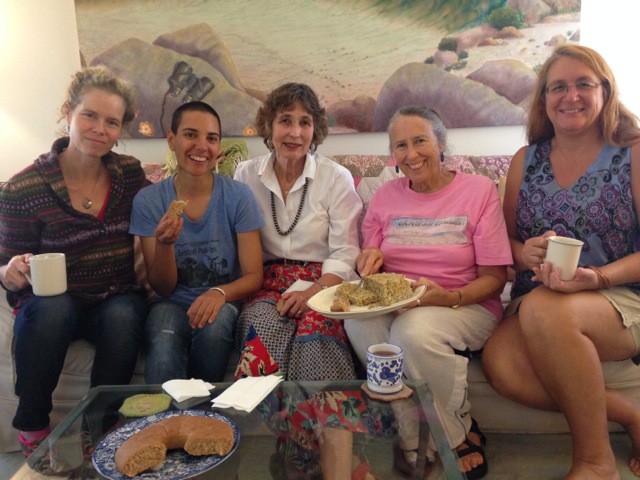
(From left) Aunt Linda, Amy Valdez Schwem, Carolyn Niethammer,  Tia Marta, and Jacqueline Soule.

The Savor sisters: (From left) Aunt Linda, Amy Valdes Schwemm, Carolyn Niethammer, Tia Marta, and Jacqueline Soule.

Carolyn Niethammer here today with this celebratory post. The Savor Sisters, the five writers who bring you Savor the Southwest, got together this week to celebrate the first anniversary of our wide ranging blog about the glories of Southwest food traditions –  traditional, modern, wild and cultivated. The Savor the Southwest month always starts out with Aunt Linda who frequently writes about her bees, recipes with honey, and even making cheese from milk from cows on her ranch. Her posts are lyrical and sometimes spirtual. On the second Friday, you hear from Tia Marta (Muffin Burgess), our ethnobotanist who keeps an eye on what the desert is producing, traditional Native American agricultural products, and ingredients she sometimes uses in her Flor de Mayo products.  I take the third Friday and write about edible desert plants, Southwest specialties and interview other interesting folks in the food world.  On the fourth Friday we hear from Jacqueline Soule who has been taking us through her book Father Kino’s Herbs among other subjects. That’s her gluten-free barrel cactus seed cake Muffin is slicing in the photo. You’ll get the recipe later this month. So far we have only heard from Amy Valdes Schwemm, producer of fabulous spices, on the occasional fifth Friday, but she will be writing more frequently in the coming year.

We are grateful to all of you readers who join us each week as we explore and celebrate the culinary delights of this fabulous area here on the Sonoran desert where we are so privileged to live. Every celebration needs something sweet, so today I’m going to give you a recipe for an easy and delicious mesquite cake that uses whatever fruits are in season. I used peaches and grapes, but plums, pears, apples or even prickly pear would be great additions. This is good for brunch or a not-too-sweet dessert.

Golden Mesquite Fruit Cake

3/4 cup all-purpose flour

1/4 cup mesquite meal

2 teaspoons baking powder

1/2 teaspoon ginger or cinnamon

1/4 teaspoon salt

1 stick soft butter

3/4 cup sugar

2 large egs

1 teaspoon vanilla extract

1 cup chopped fresh fruit

For topping

1 tablespoon mesquite meal

1 tablespoon sugar

1/2 teaspoon ginger or cinnamon

Method:

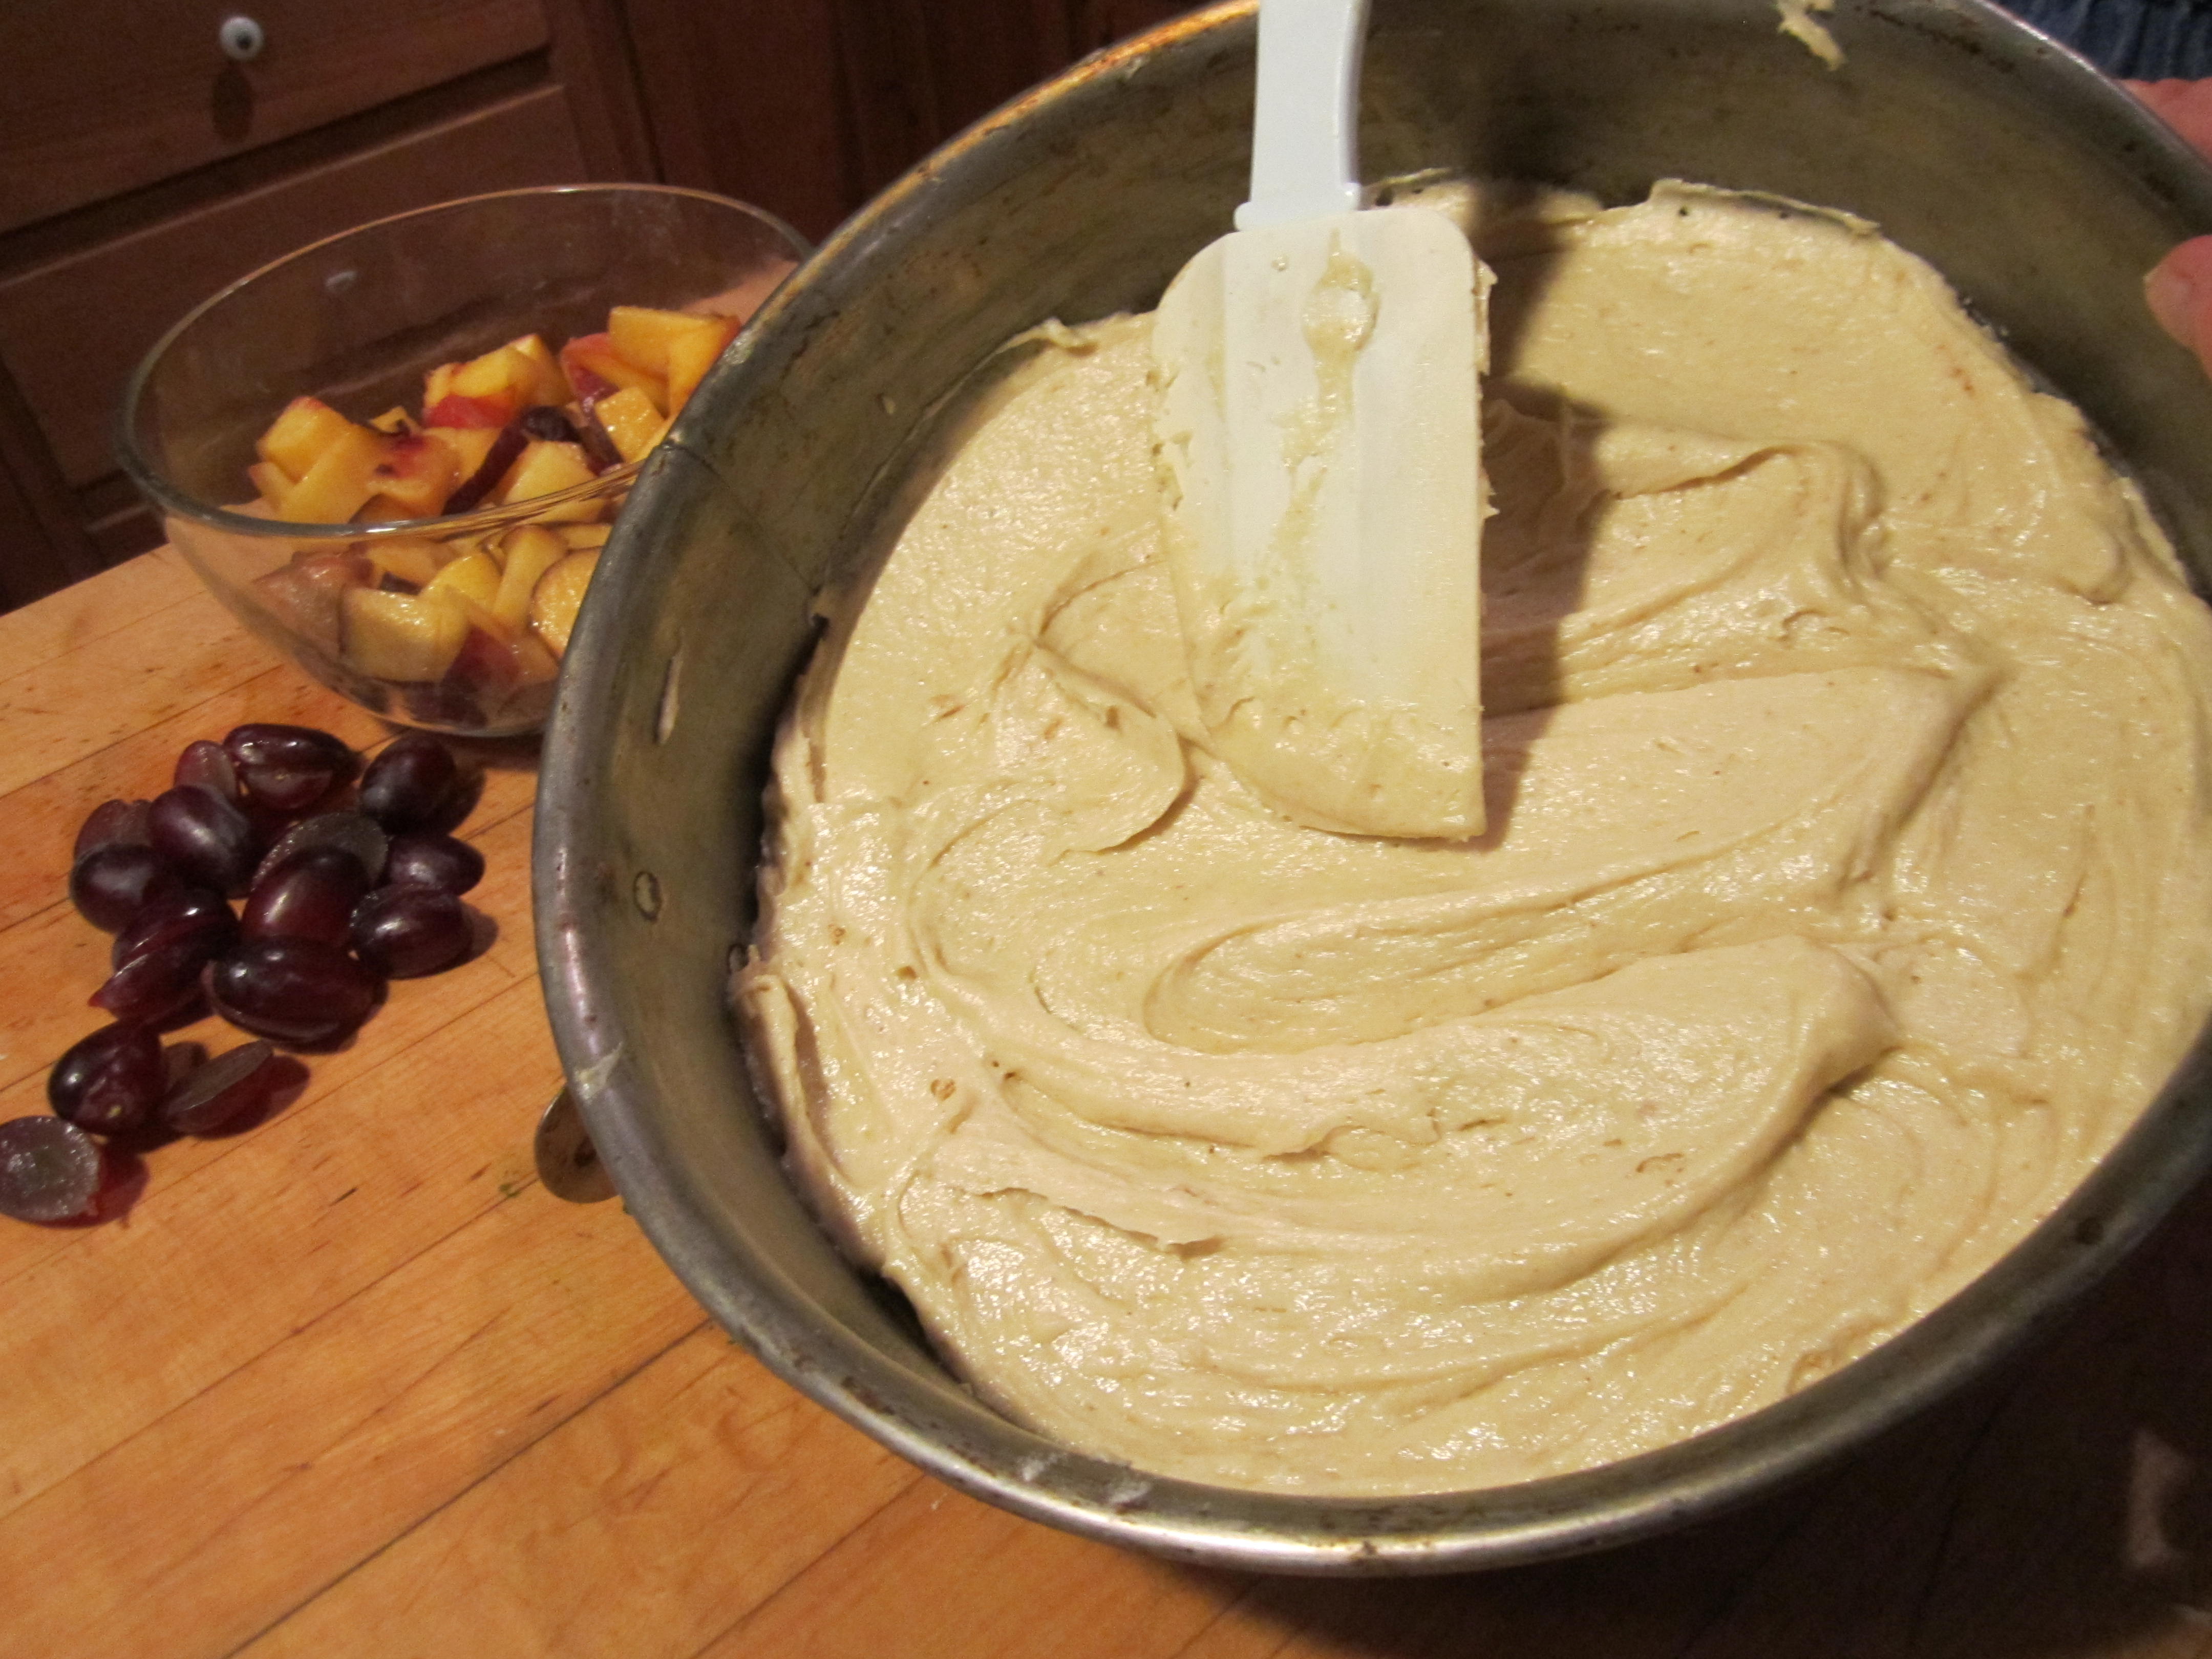
Preheat oven to 350 degrees F with rack in middle. Chop fruit. Lightly butter a springform pan. In a small bowl, whisk together flour, baking powder, salt and spice of choice. In medium bowl, beat butter and sugar with an electic mixer until pale and fluffy. Add eggs one at a time, beating well after each addiotn, then beat in vanilla. At low speed,  add flour mixture until ljust combined. Spread batter evenly in pan.

Spread batter evenly in springform pan.

Spread batter evenly in springform pan.

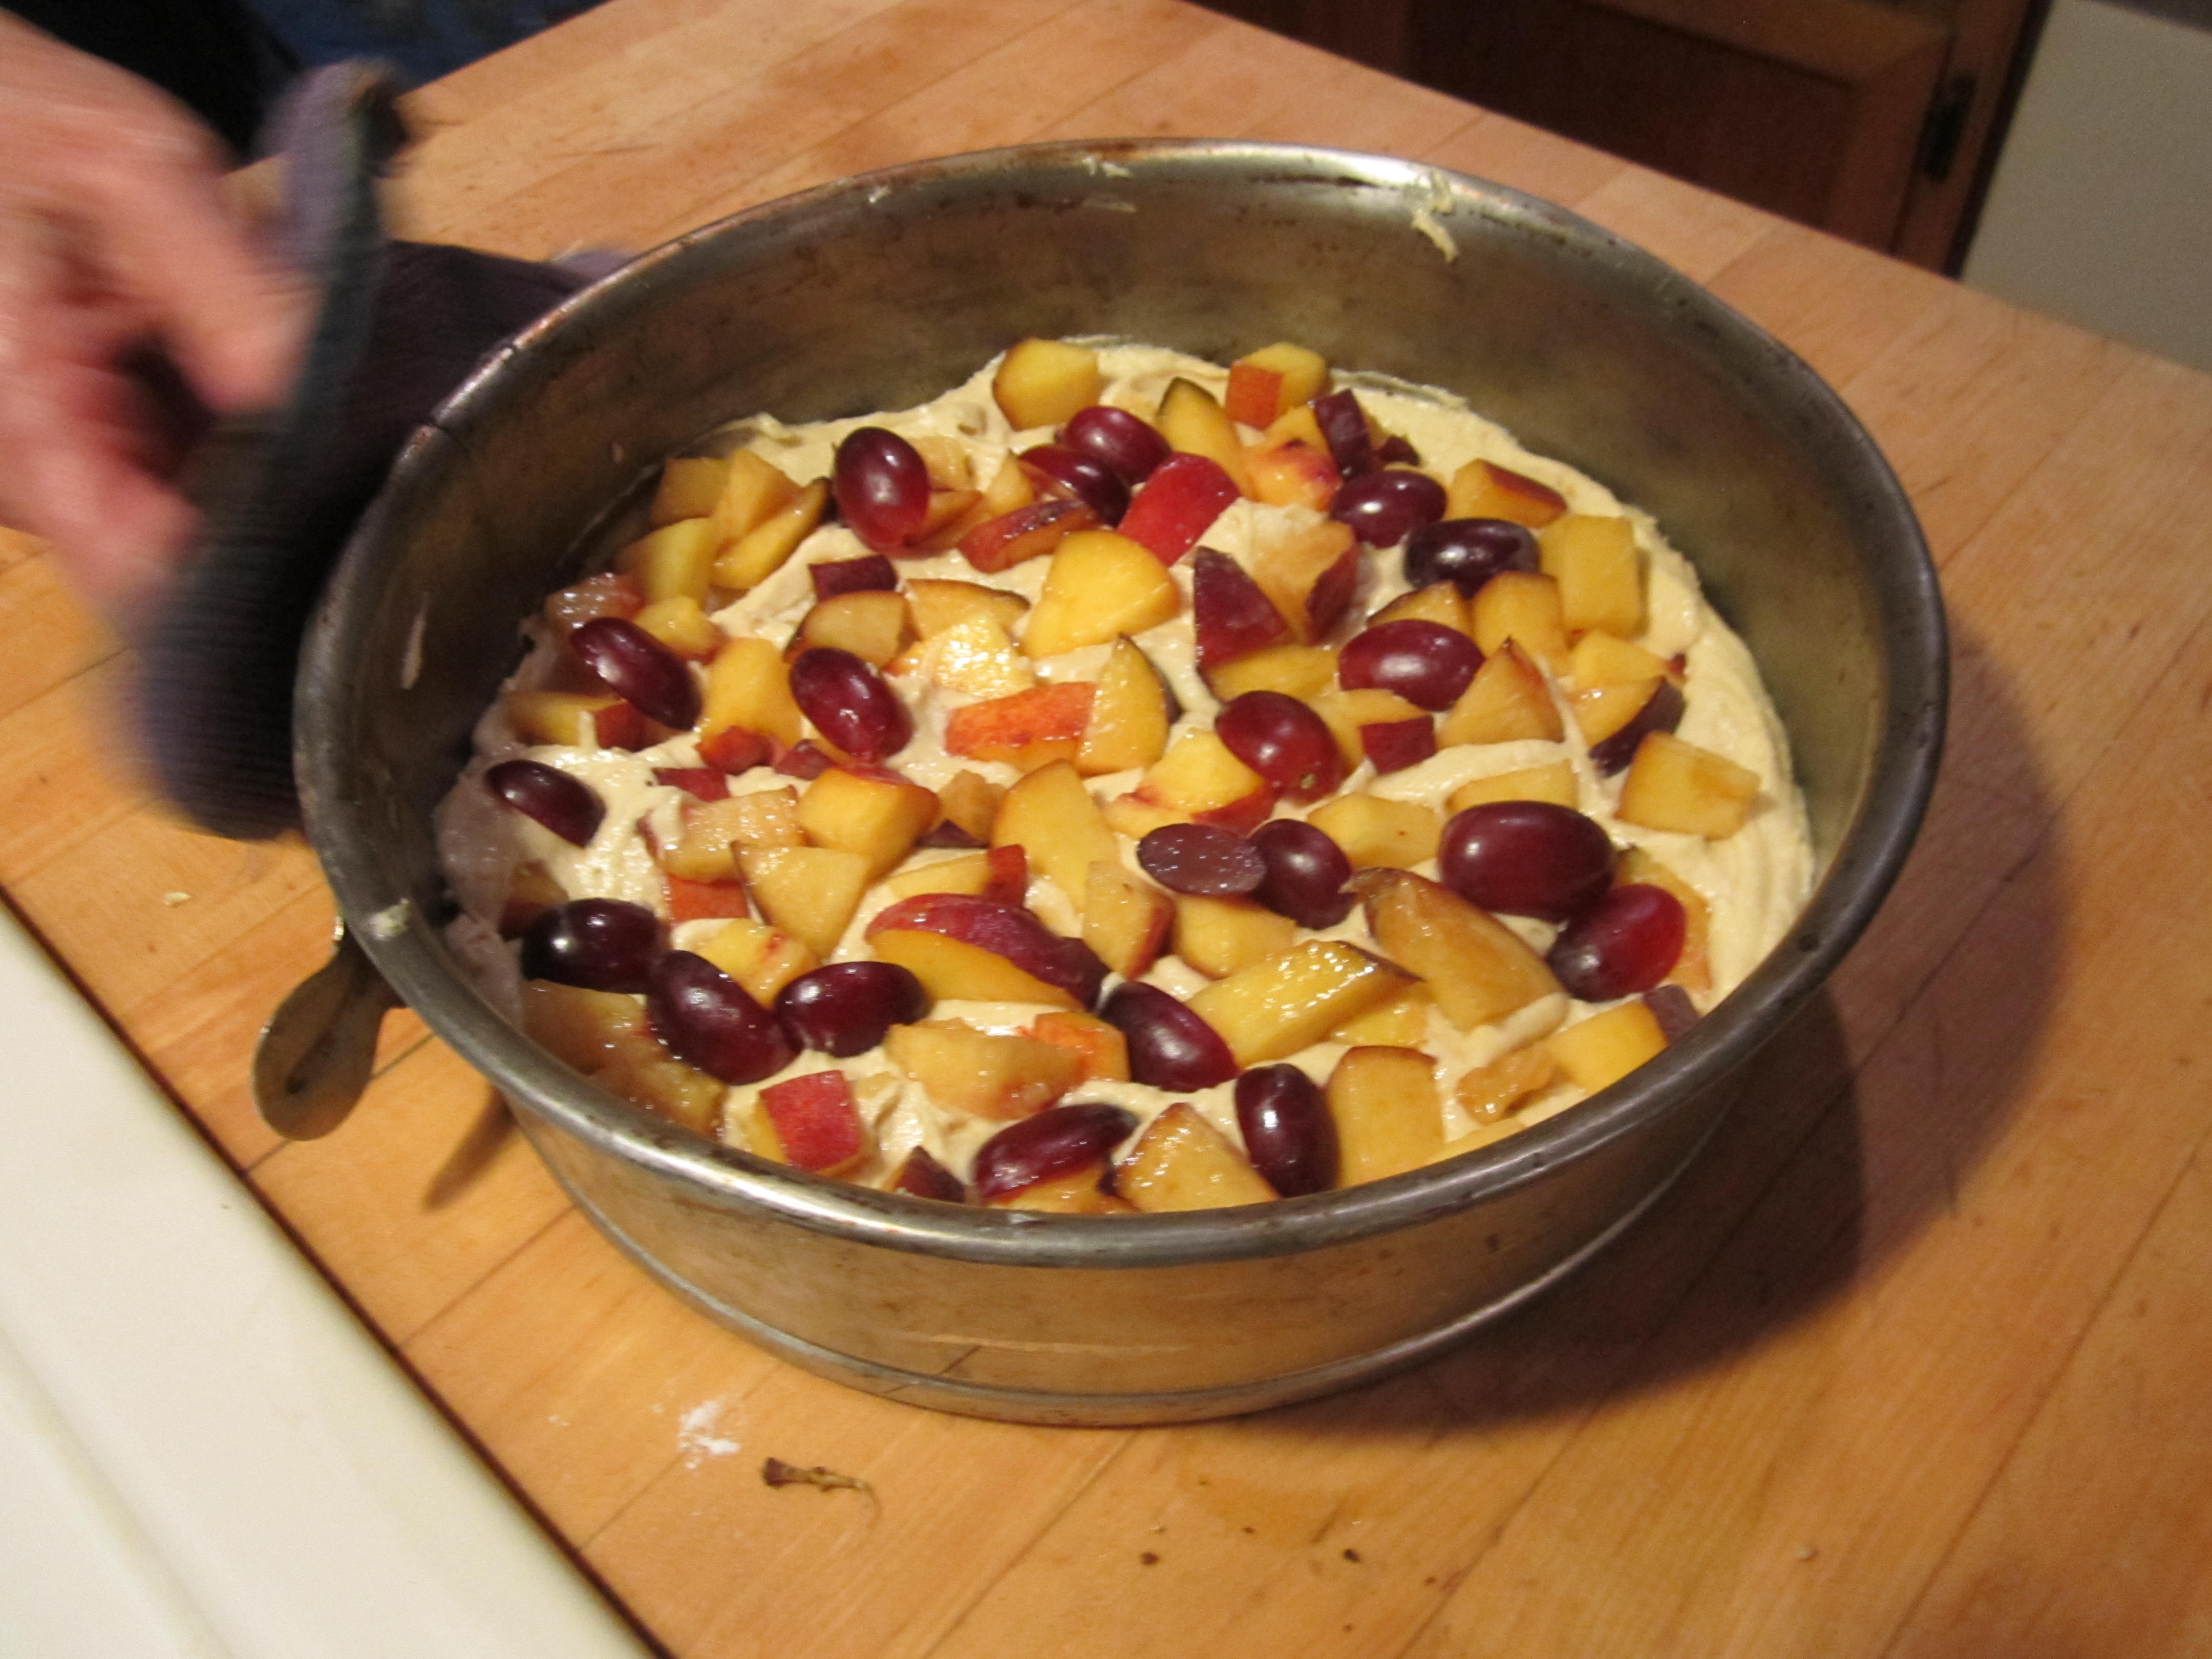
Scatter chopped fruit over top of batter.

Scatter chopped fruit over top of batter.

In a small bowl, stir together the topping mixture and sprinkle evenly over the cake.

Sprinkle sugar mixture evenly over cake.

Sprinkle sugar mixture evenly over cake.

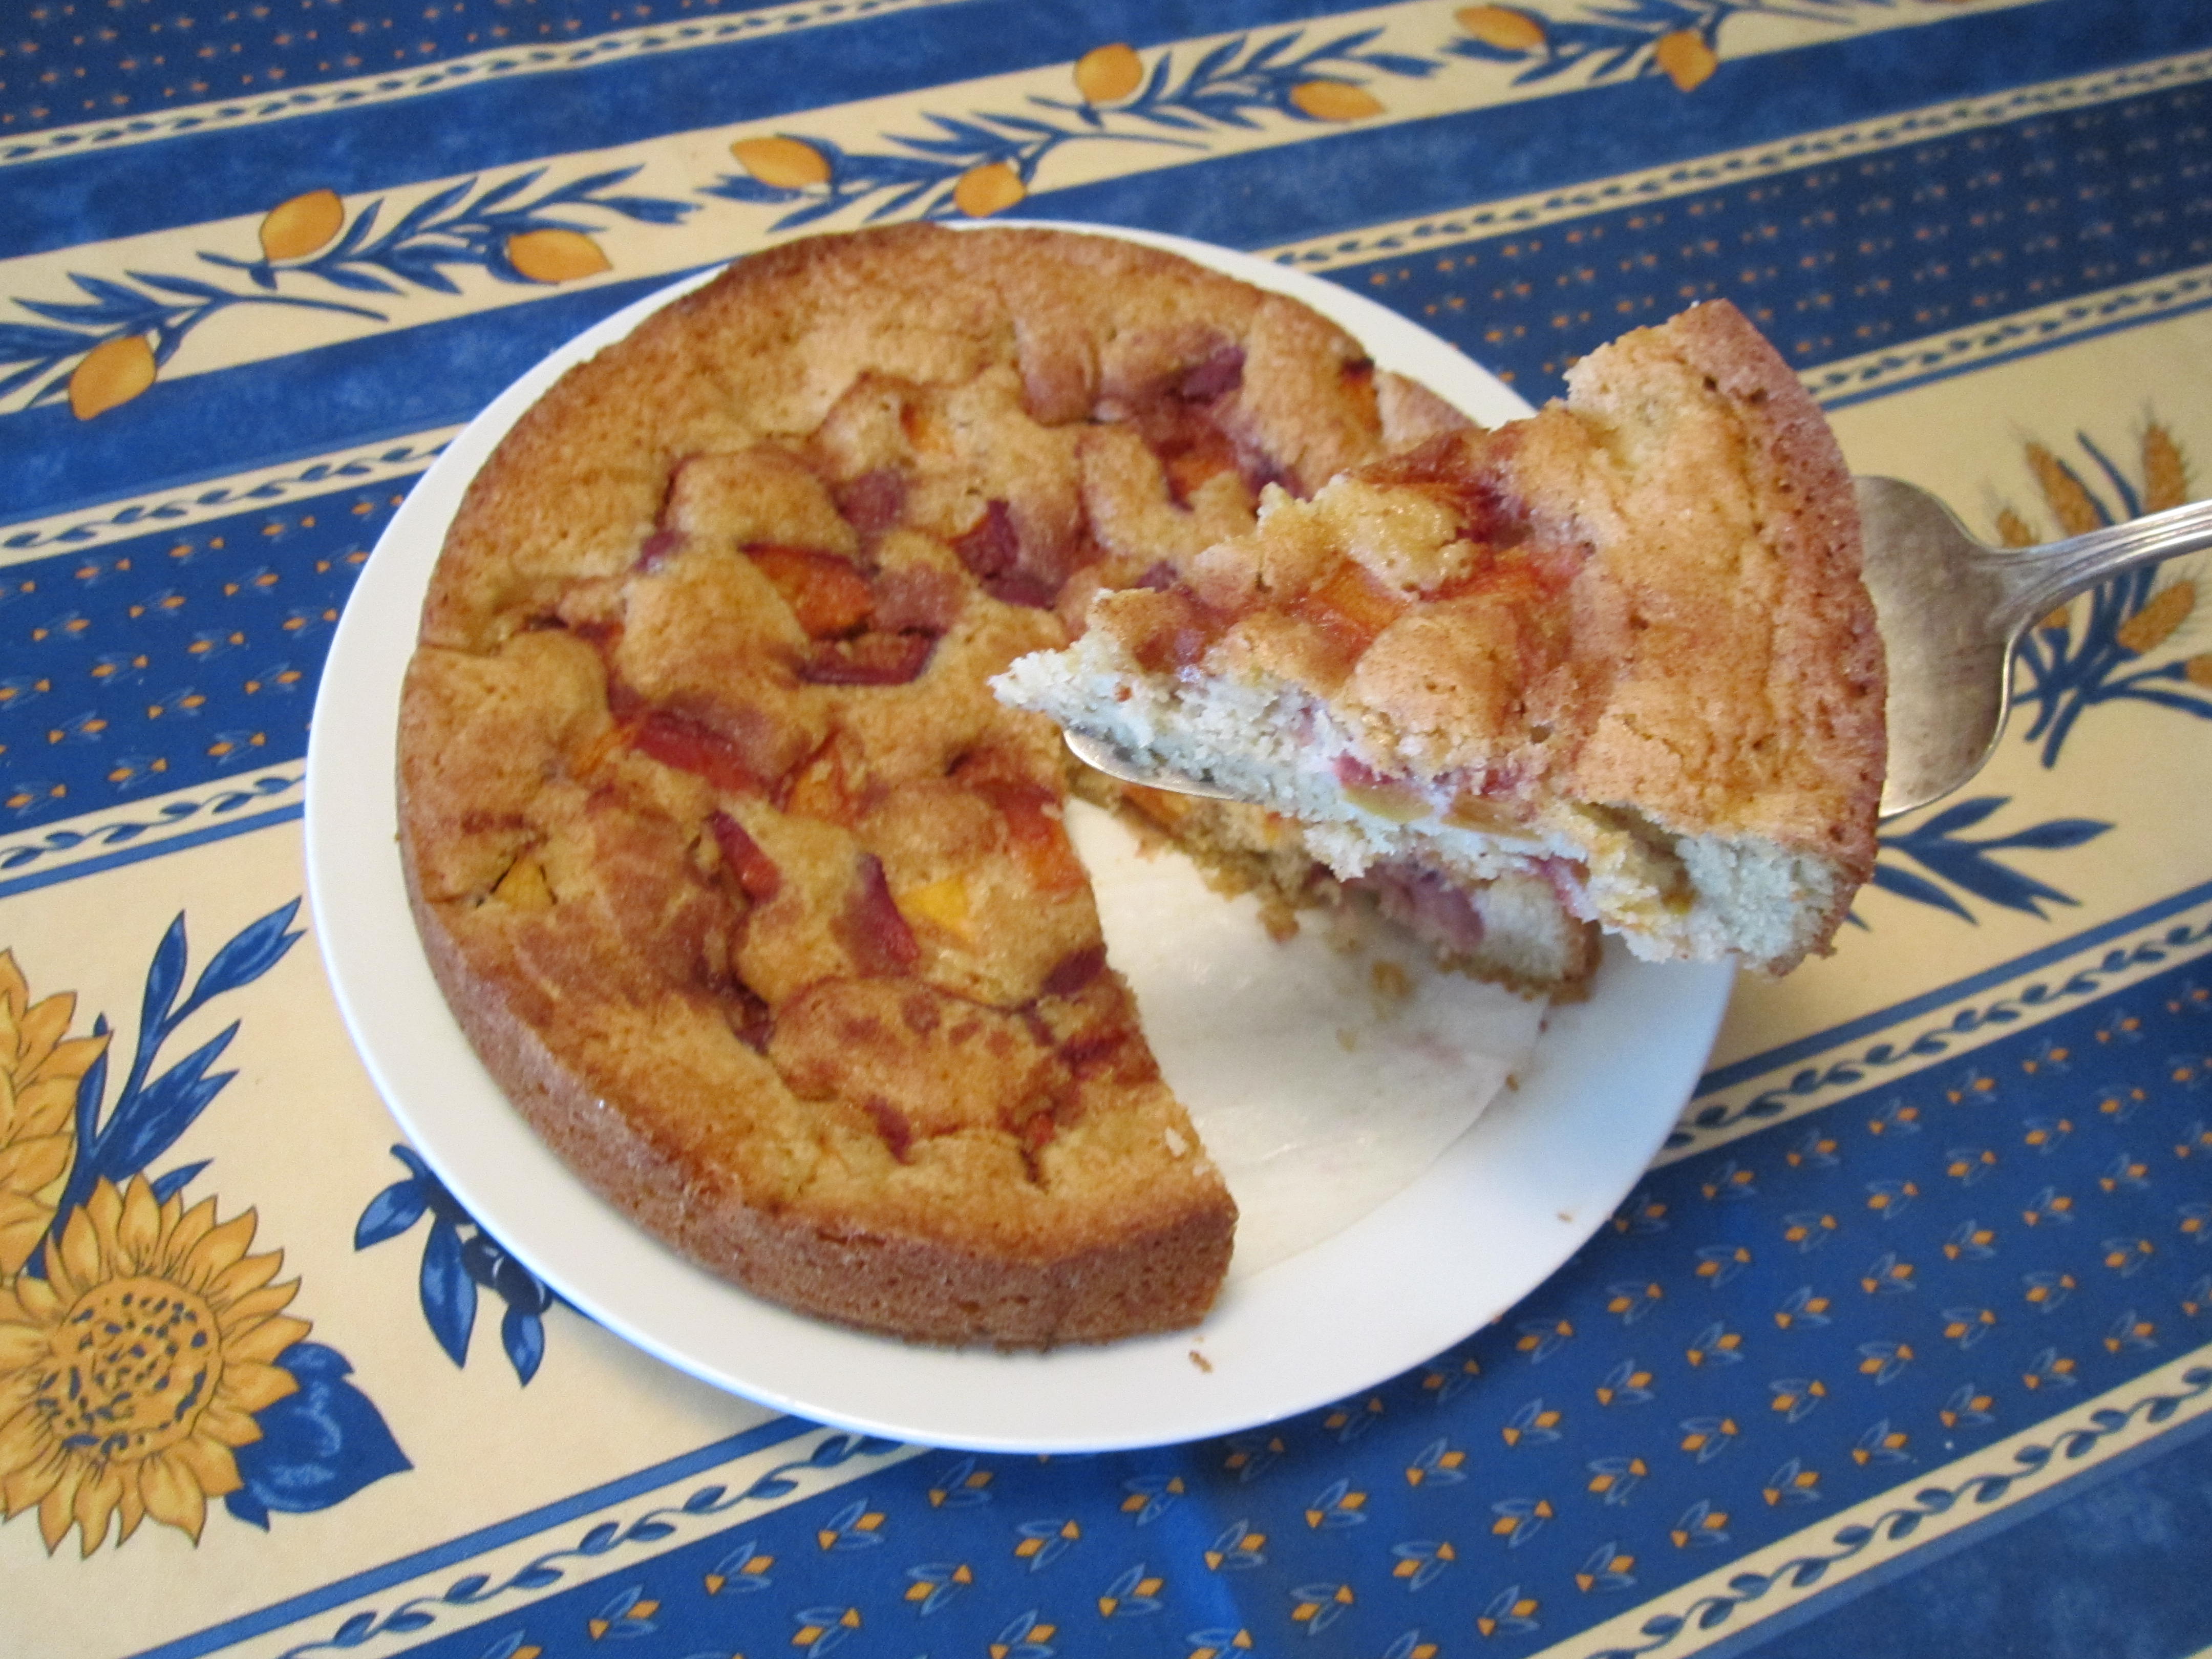
Put in preheated oven for 45 to 50 minutes. As the cake bakes it will rise over the fruit. Cake is done when it is golden brown and top is firm but tender when lightly touched. Cool in the pan for around 10 minutes and then remove the sides of the pan. Serve warm or at room temperature. A little whipped cream never hurt anything.

Yummm, warm and fragrant from the oven.

Yummm, warm and fragrant from the oven.

________________________________

Want more delicious recipes using ingredients from the Southwest?  I have lots of ideas for you. In Cooking the Wild Southwest, I introduce you to 23 easily identified and delicious wild plants of the arid Southwest. The Prickly Pear Cookbook is all about the fruits and leaves of the nopal plant. In The New Southwest Cookbook, you’ll meet some of the most innovative professional chefs in the Southwest and get to try the recipes they serve in their restaurants.


A Southwest Twist on Mac ‘n Cheese

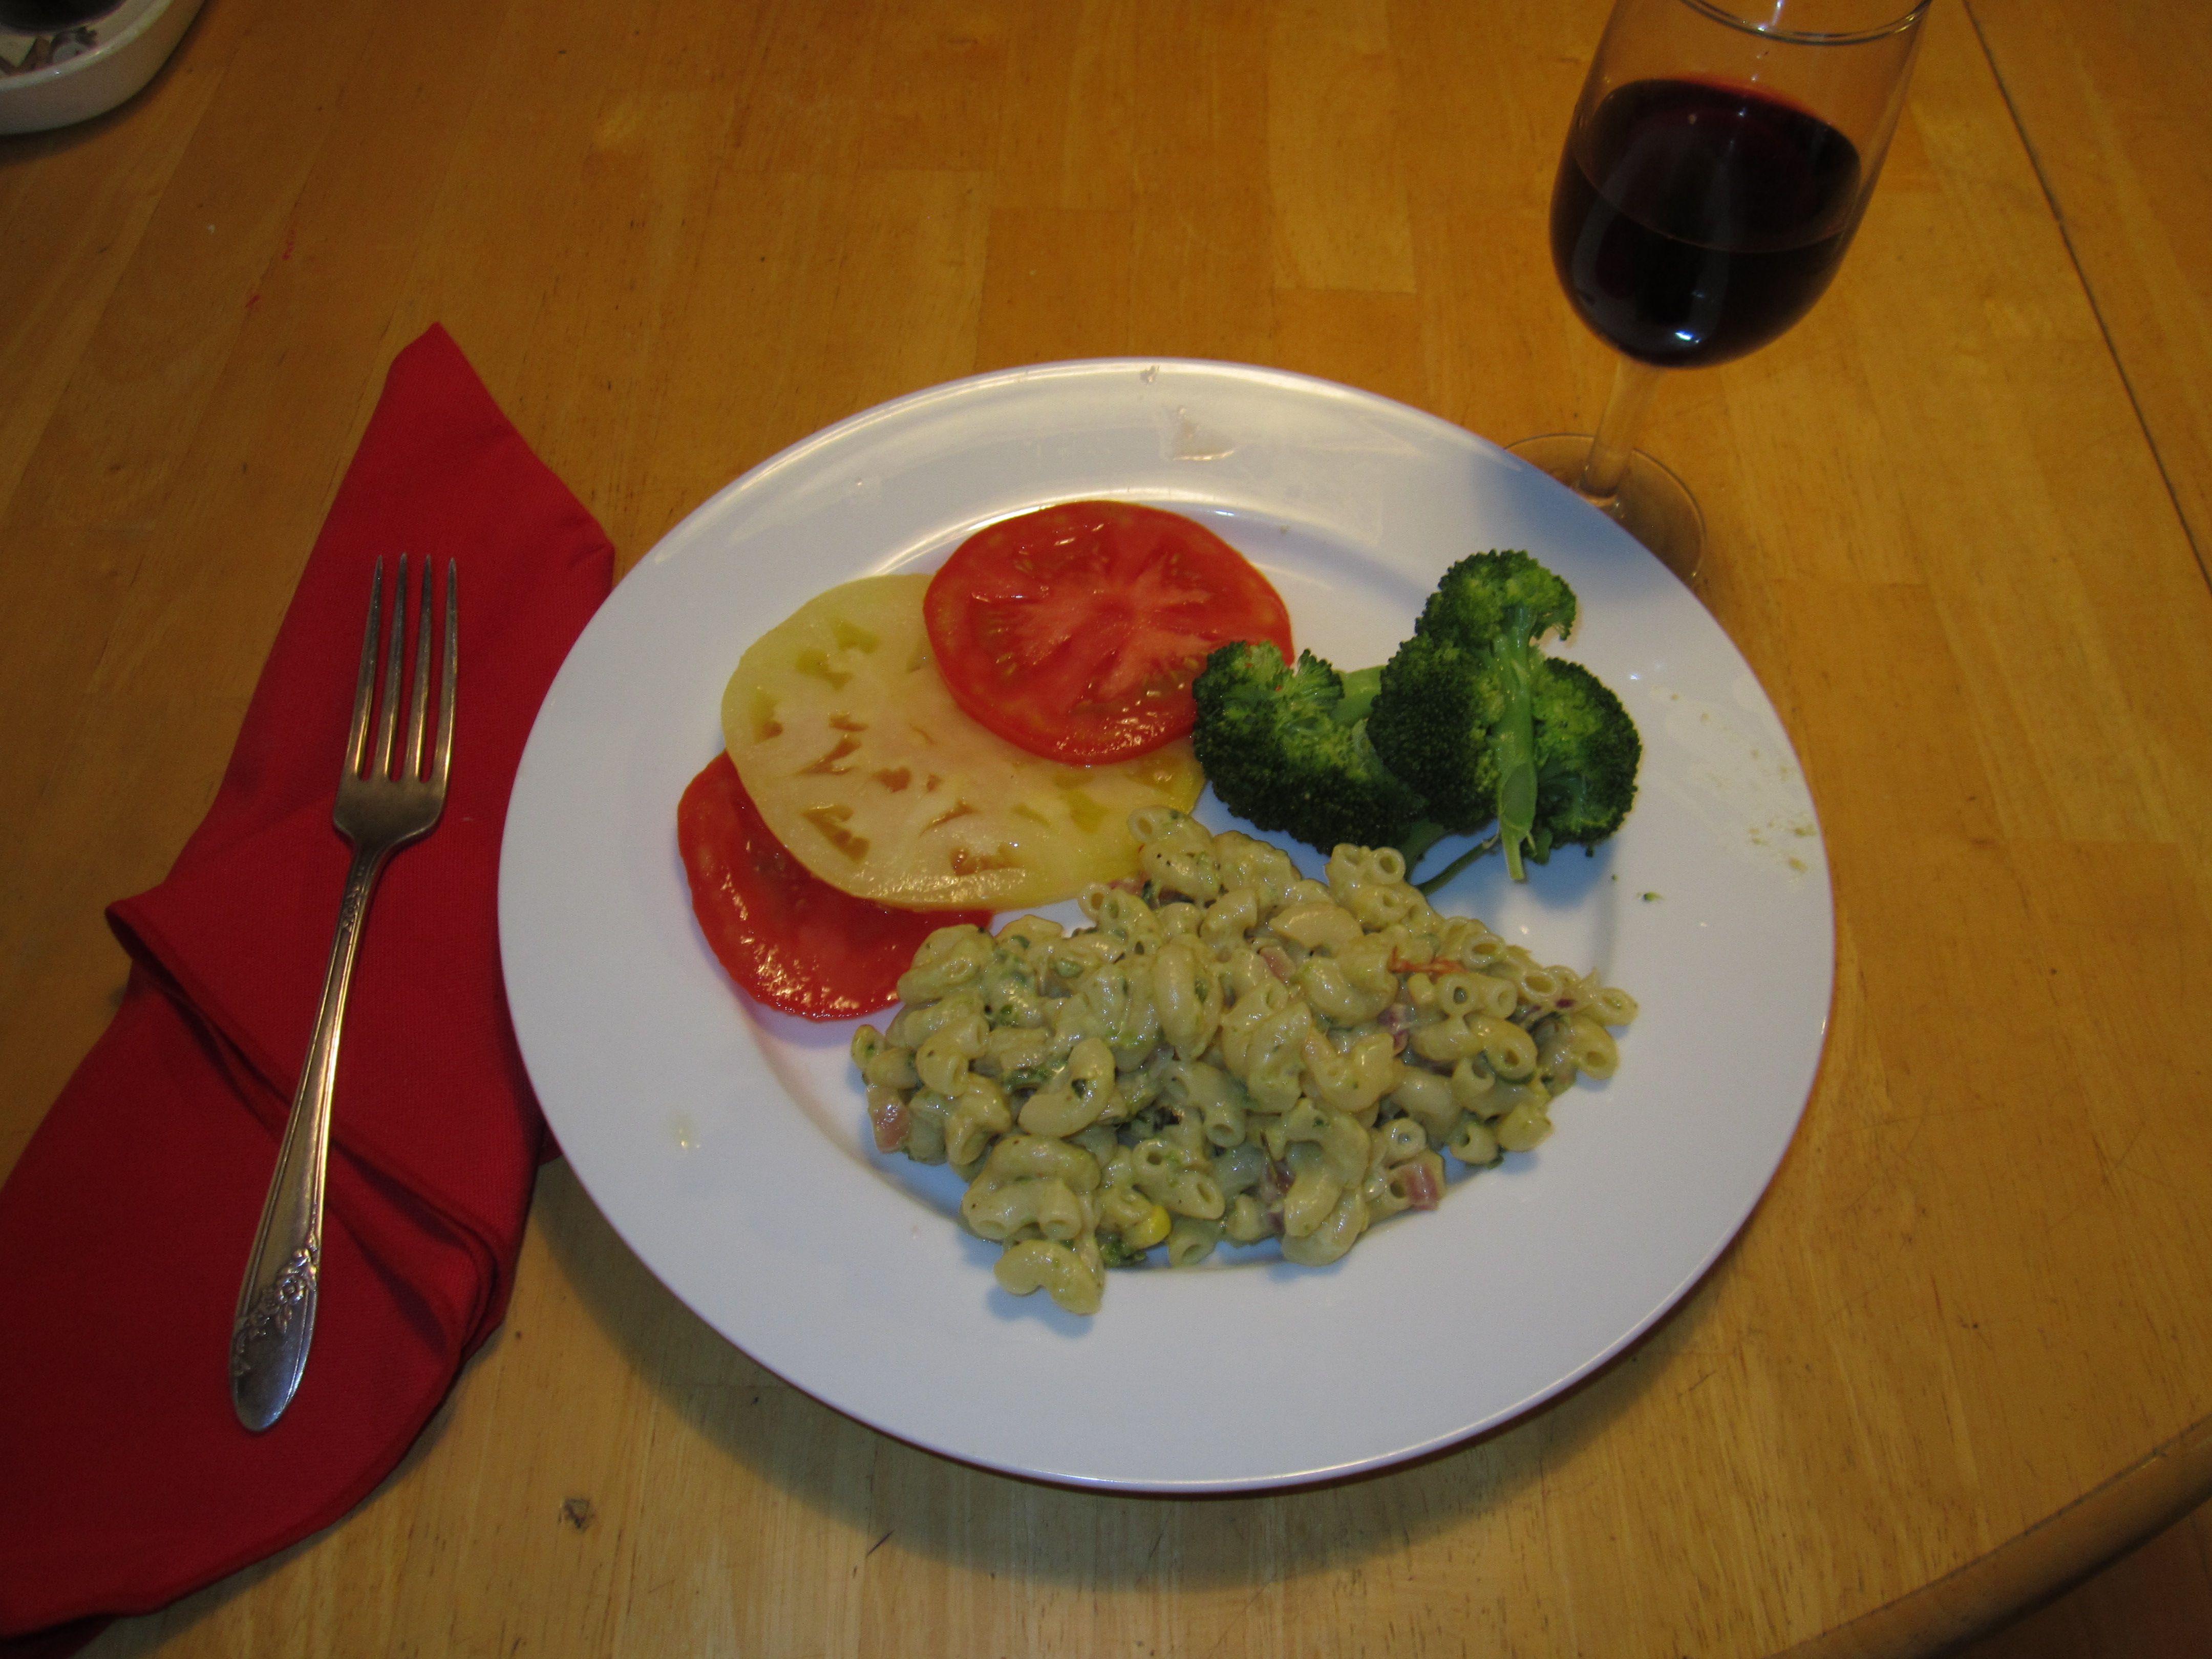
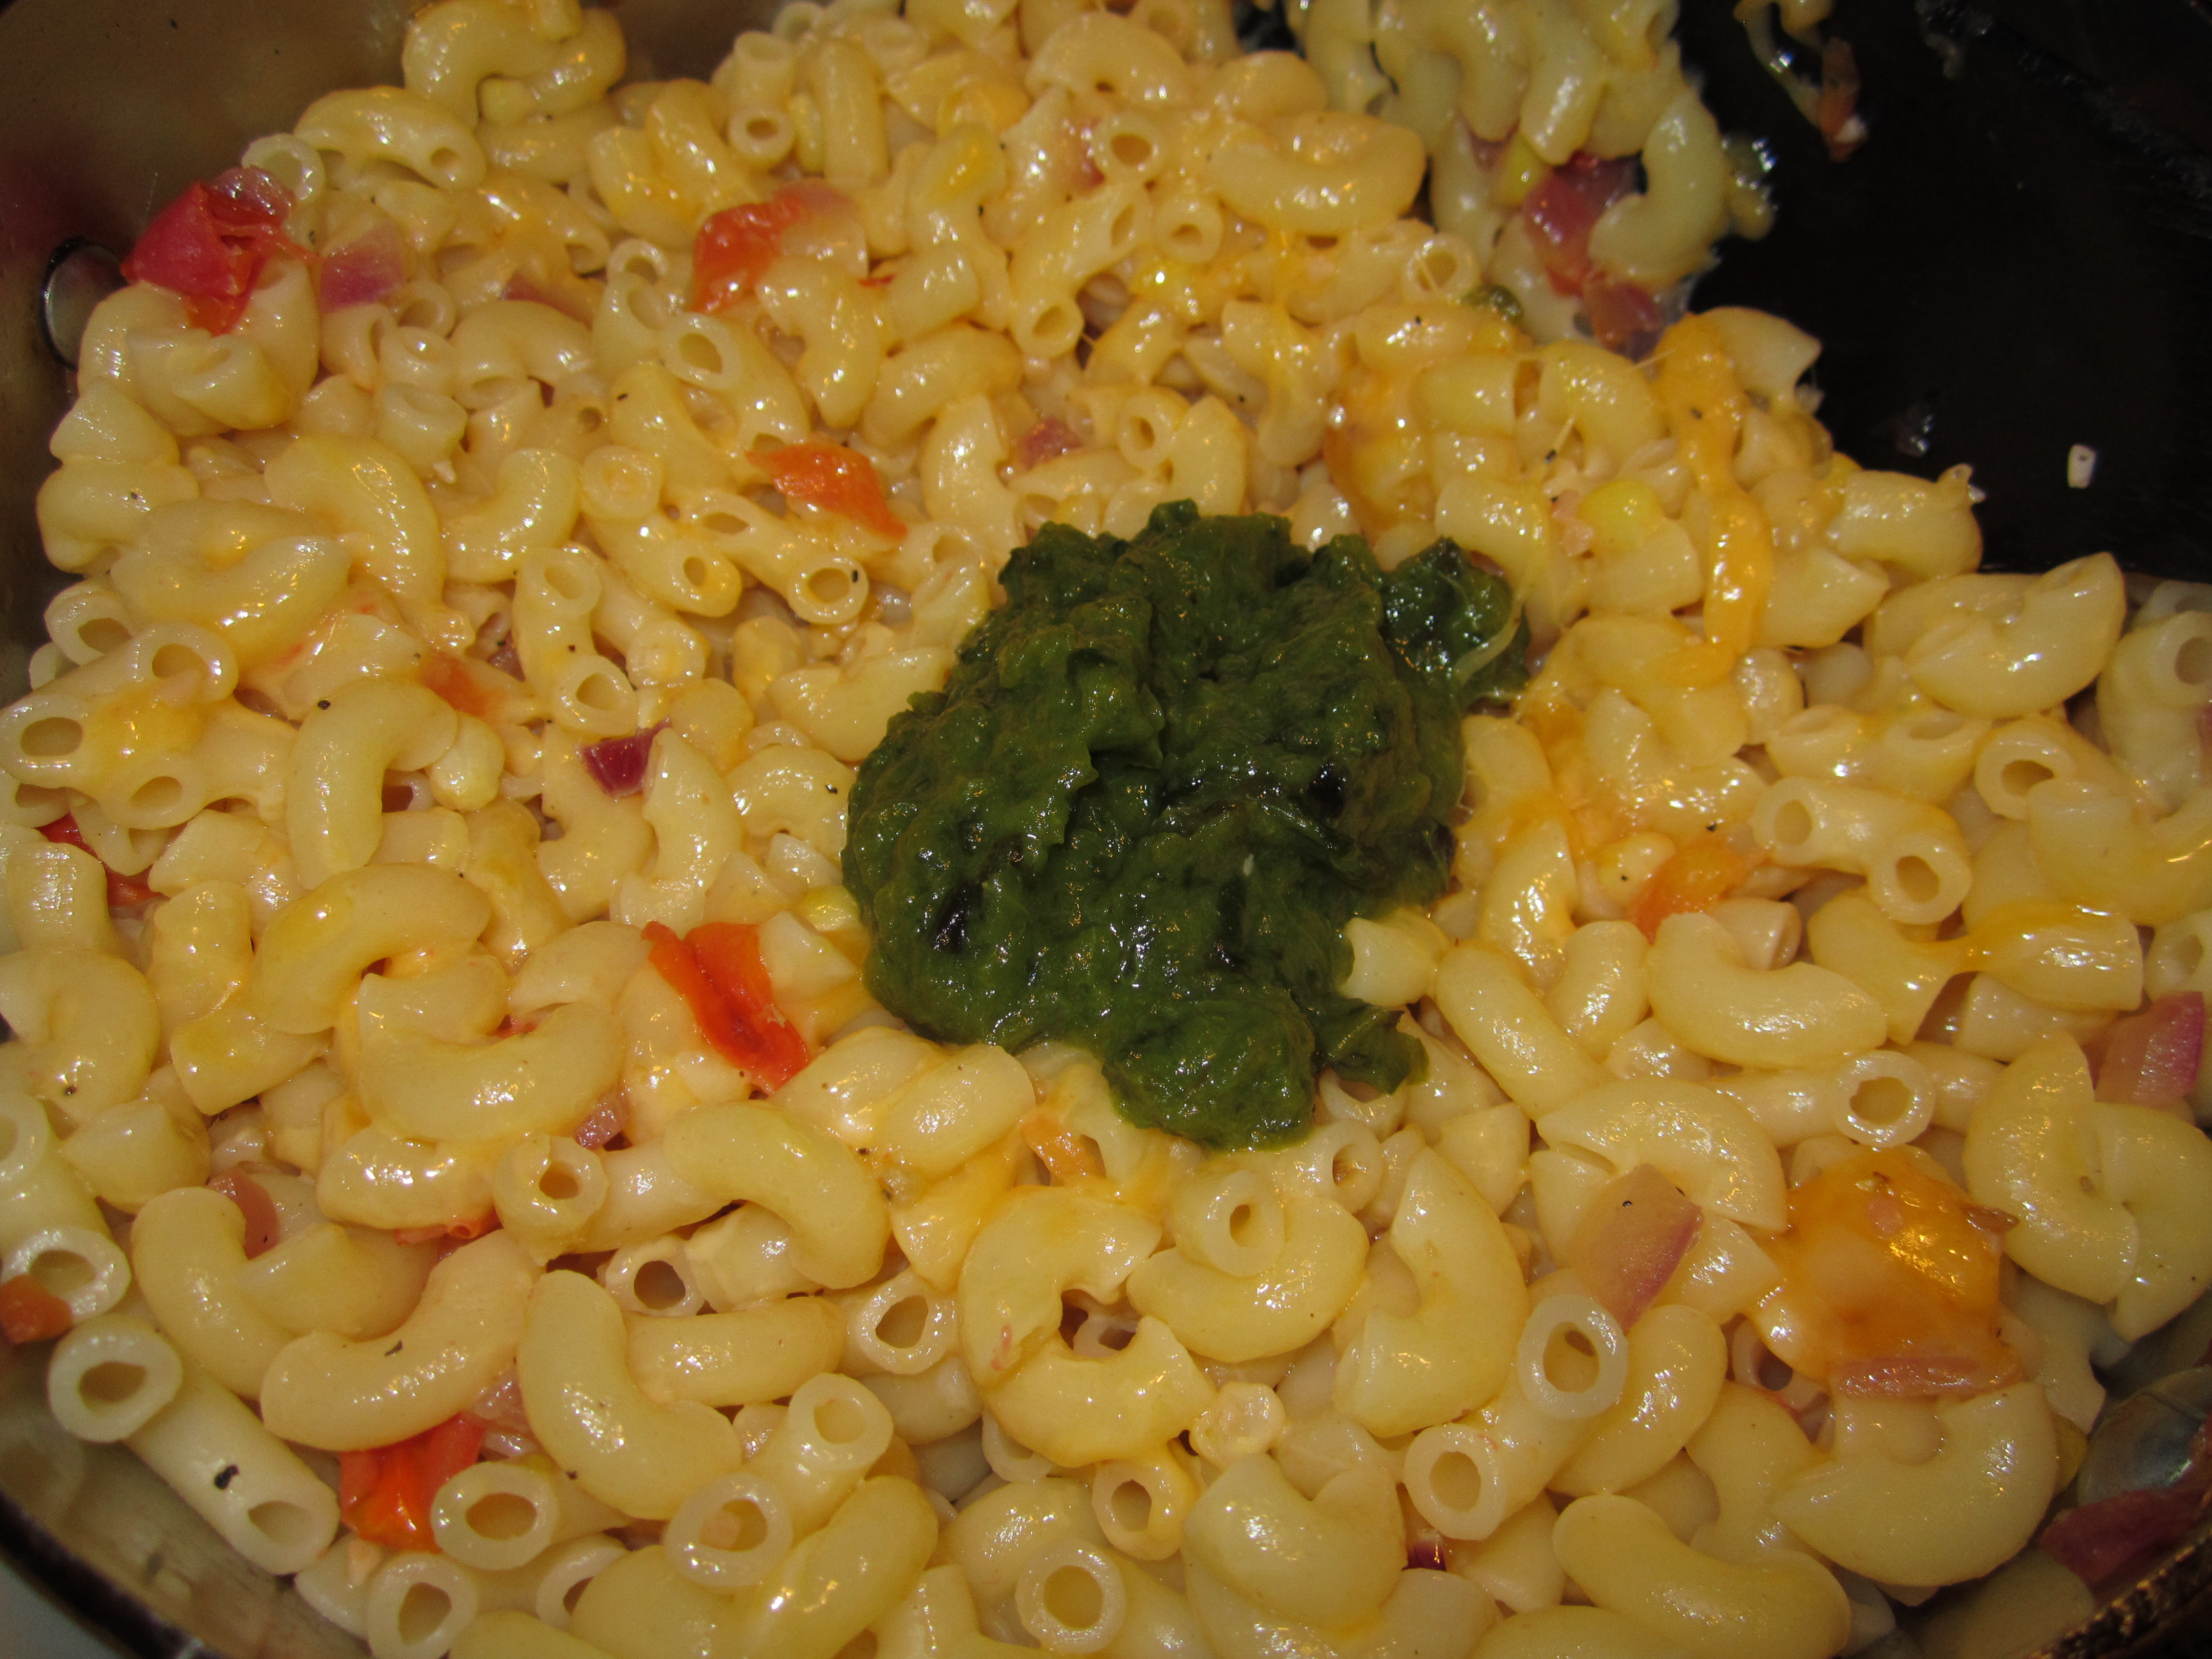
Green Chile Macaroni gives a Southwest twist to everybody's comfort food.

Green Chile Macaroni gives a Southwest twist to everybody’s comfort food.

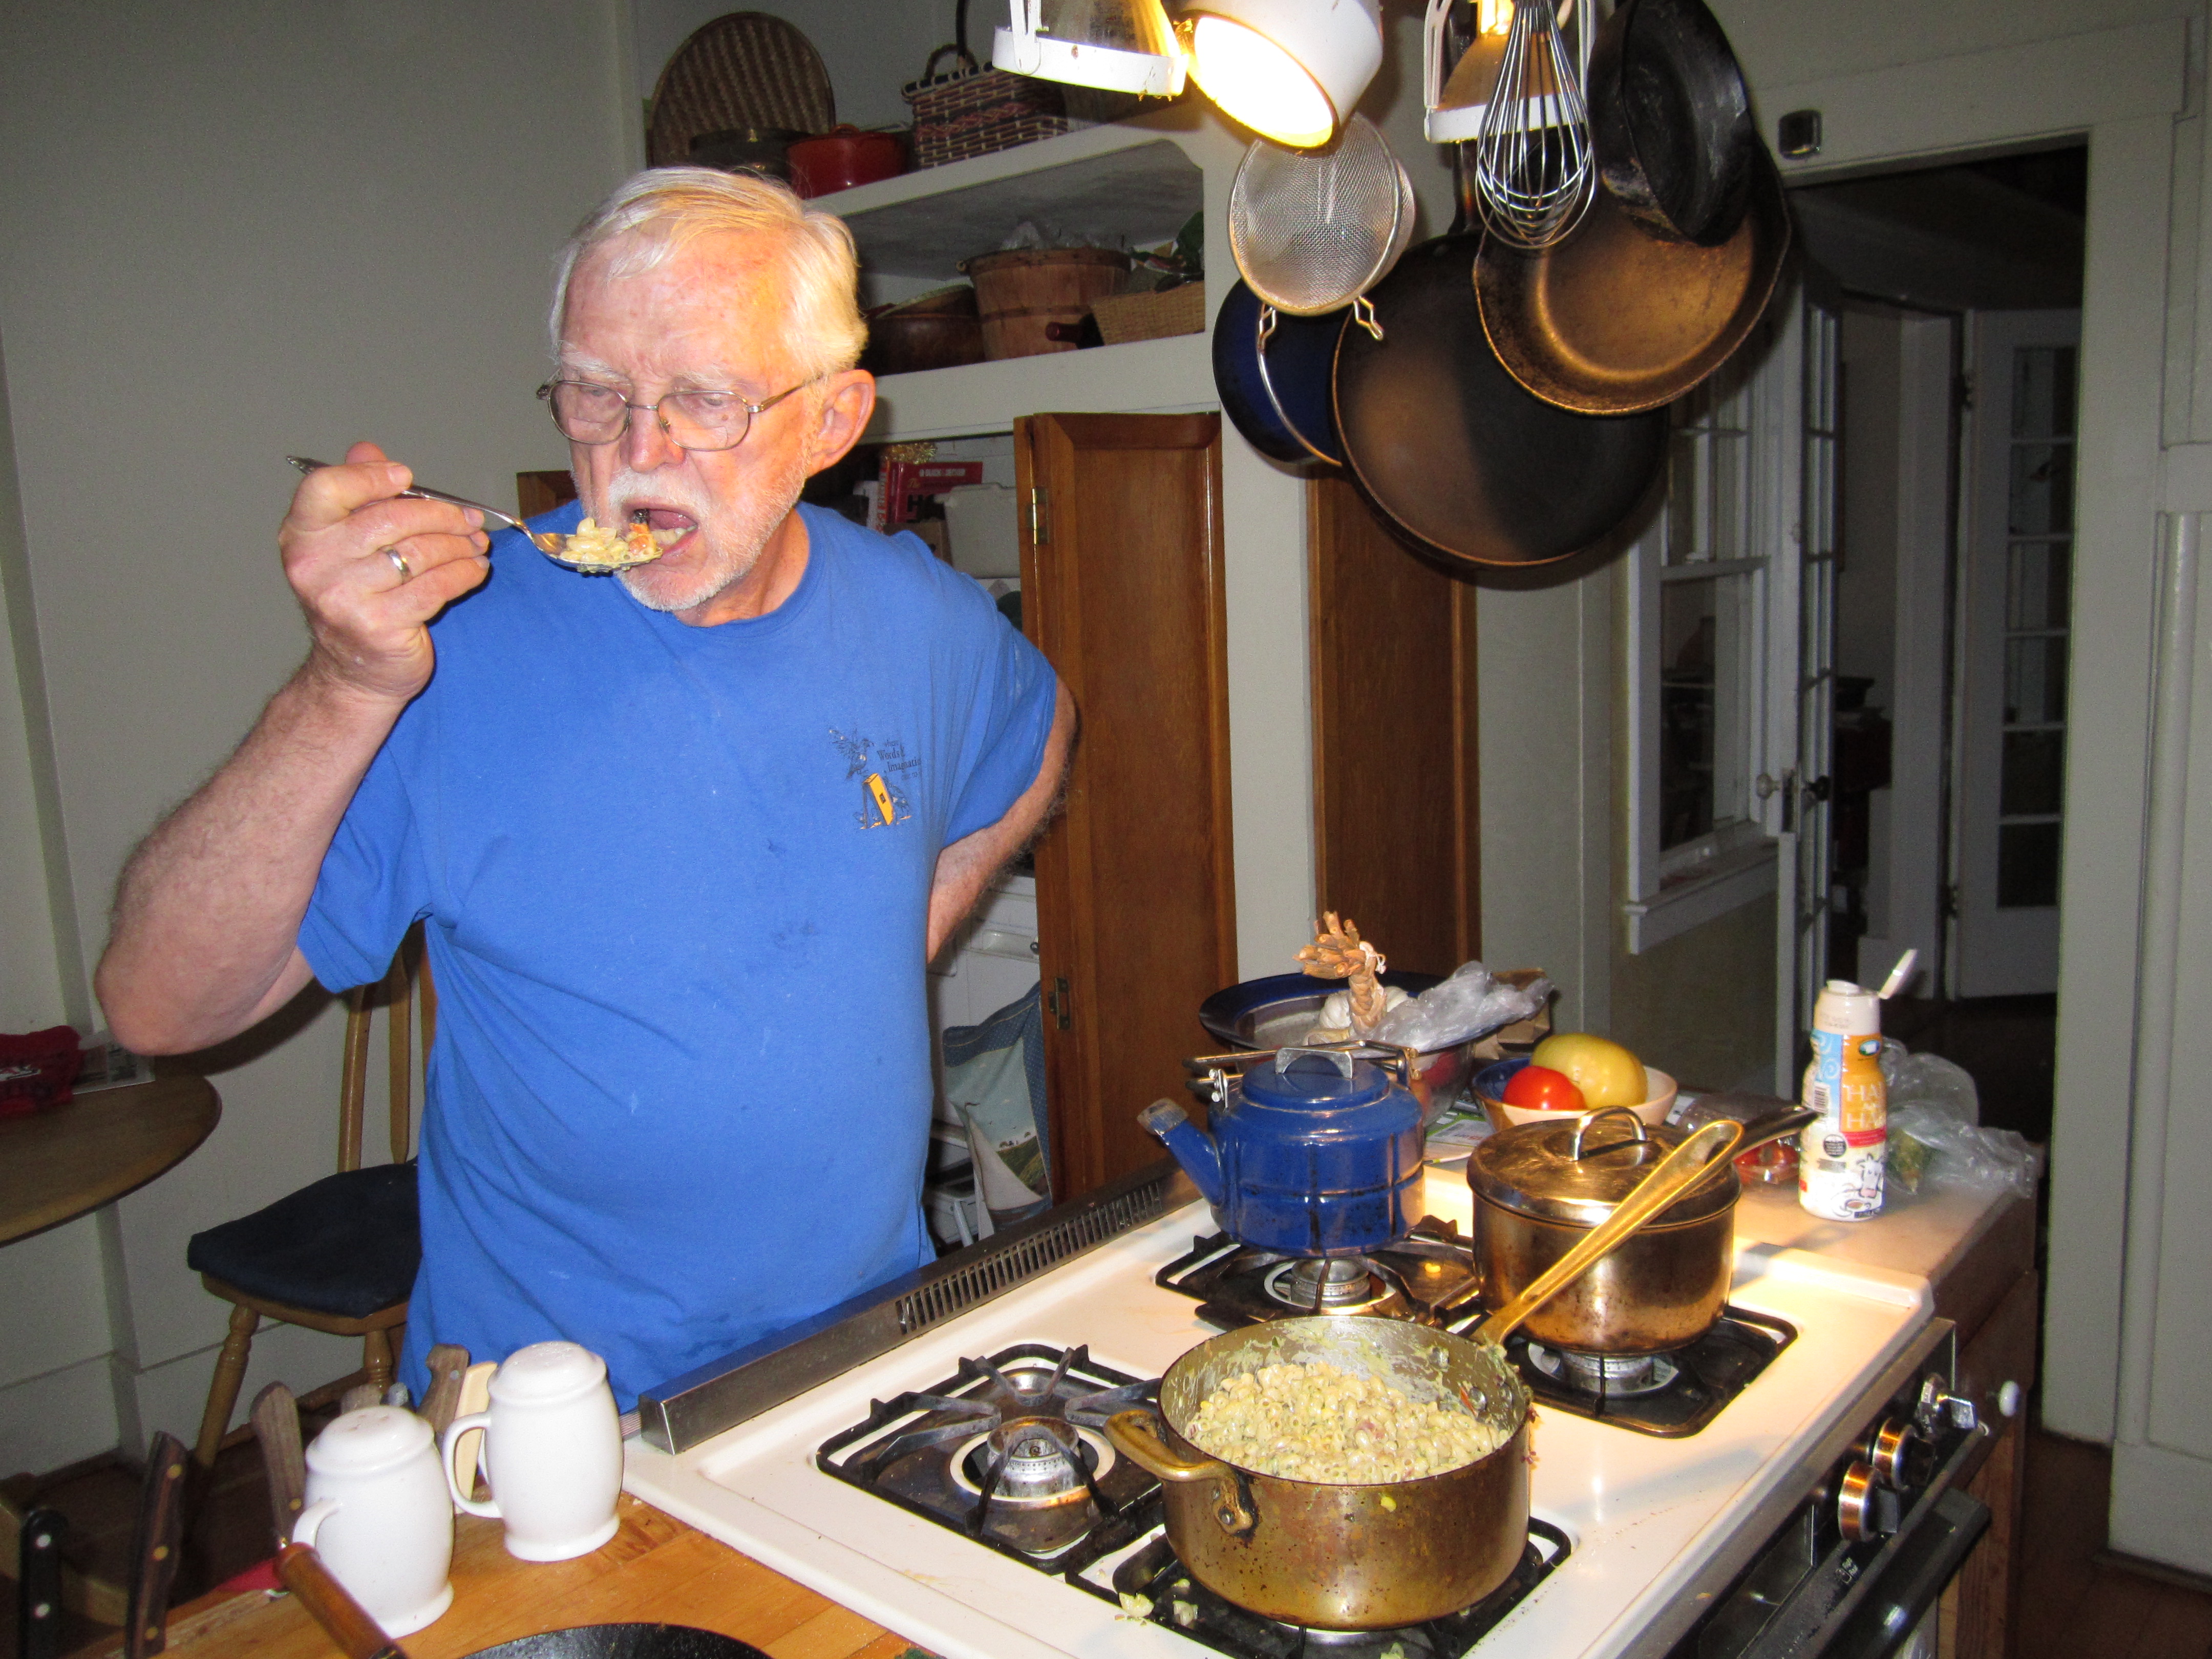
My husband is good at making breakfast — coffee, fruit, toast. And he can put together a salad if I have plenty of veggies in my garden or the fridge. But recently he decided he should learn how to actually cook something, and we decided on macaroni and cheese. From scratch, not out of a box. I looked in all my old standard cookbooks: The Joy of Cooking (both the 1964 and 1997  versions); How to Cook Everything, by Mark Bittman, and The New Basics by Rosso and Lukins. Ultimately, I decided the best recipe was in my own New Southwest Cookbook. I didn’t devise the recipe; it came from Chef Robert McGrath at the Roaring Forks Restaurant in Scottsdale.

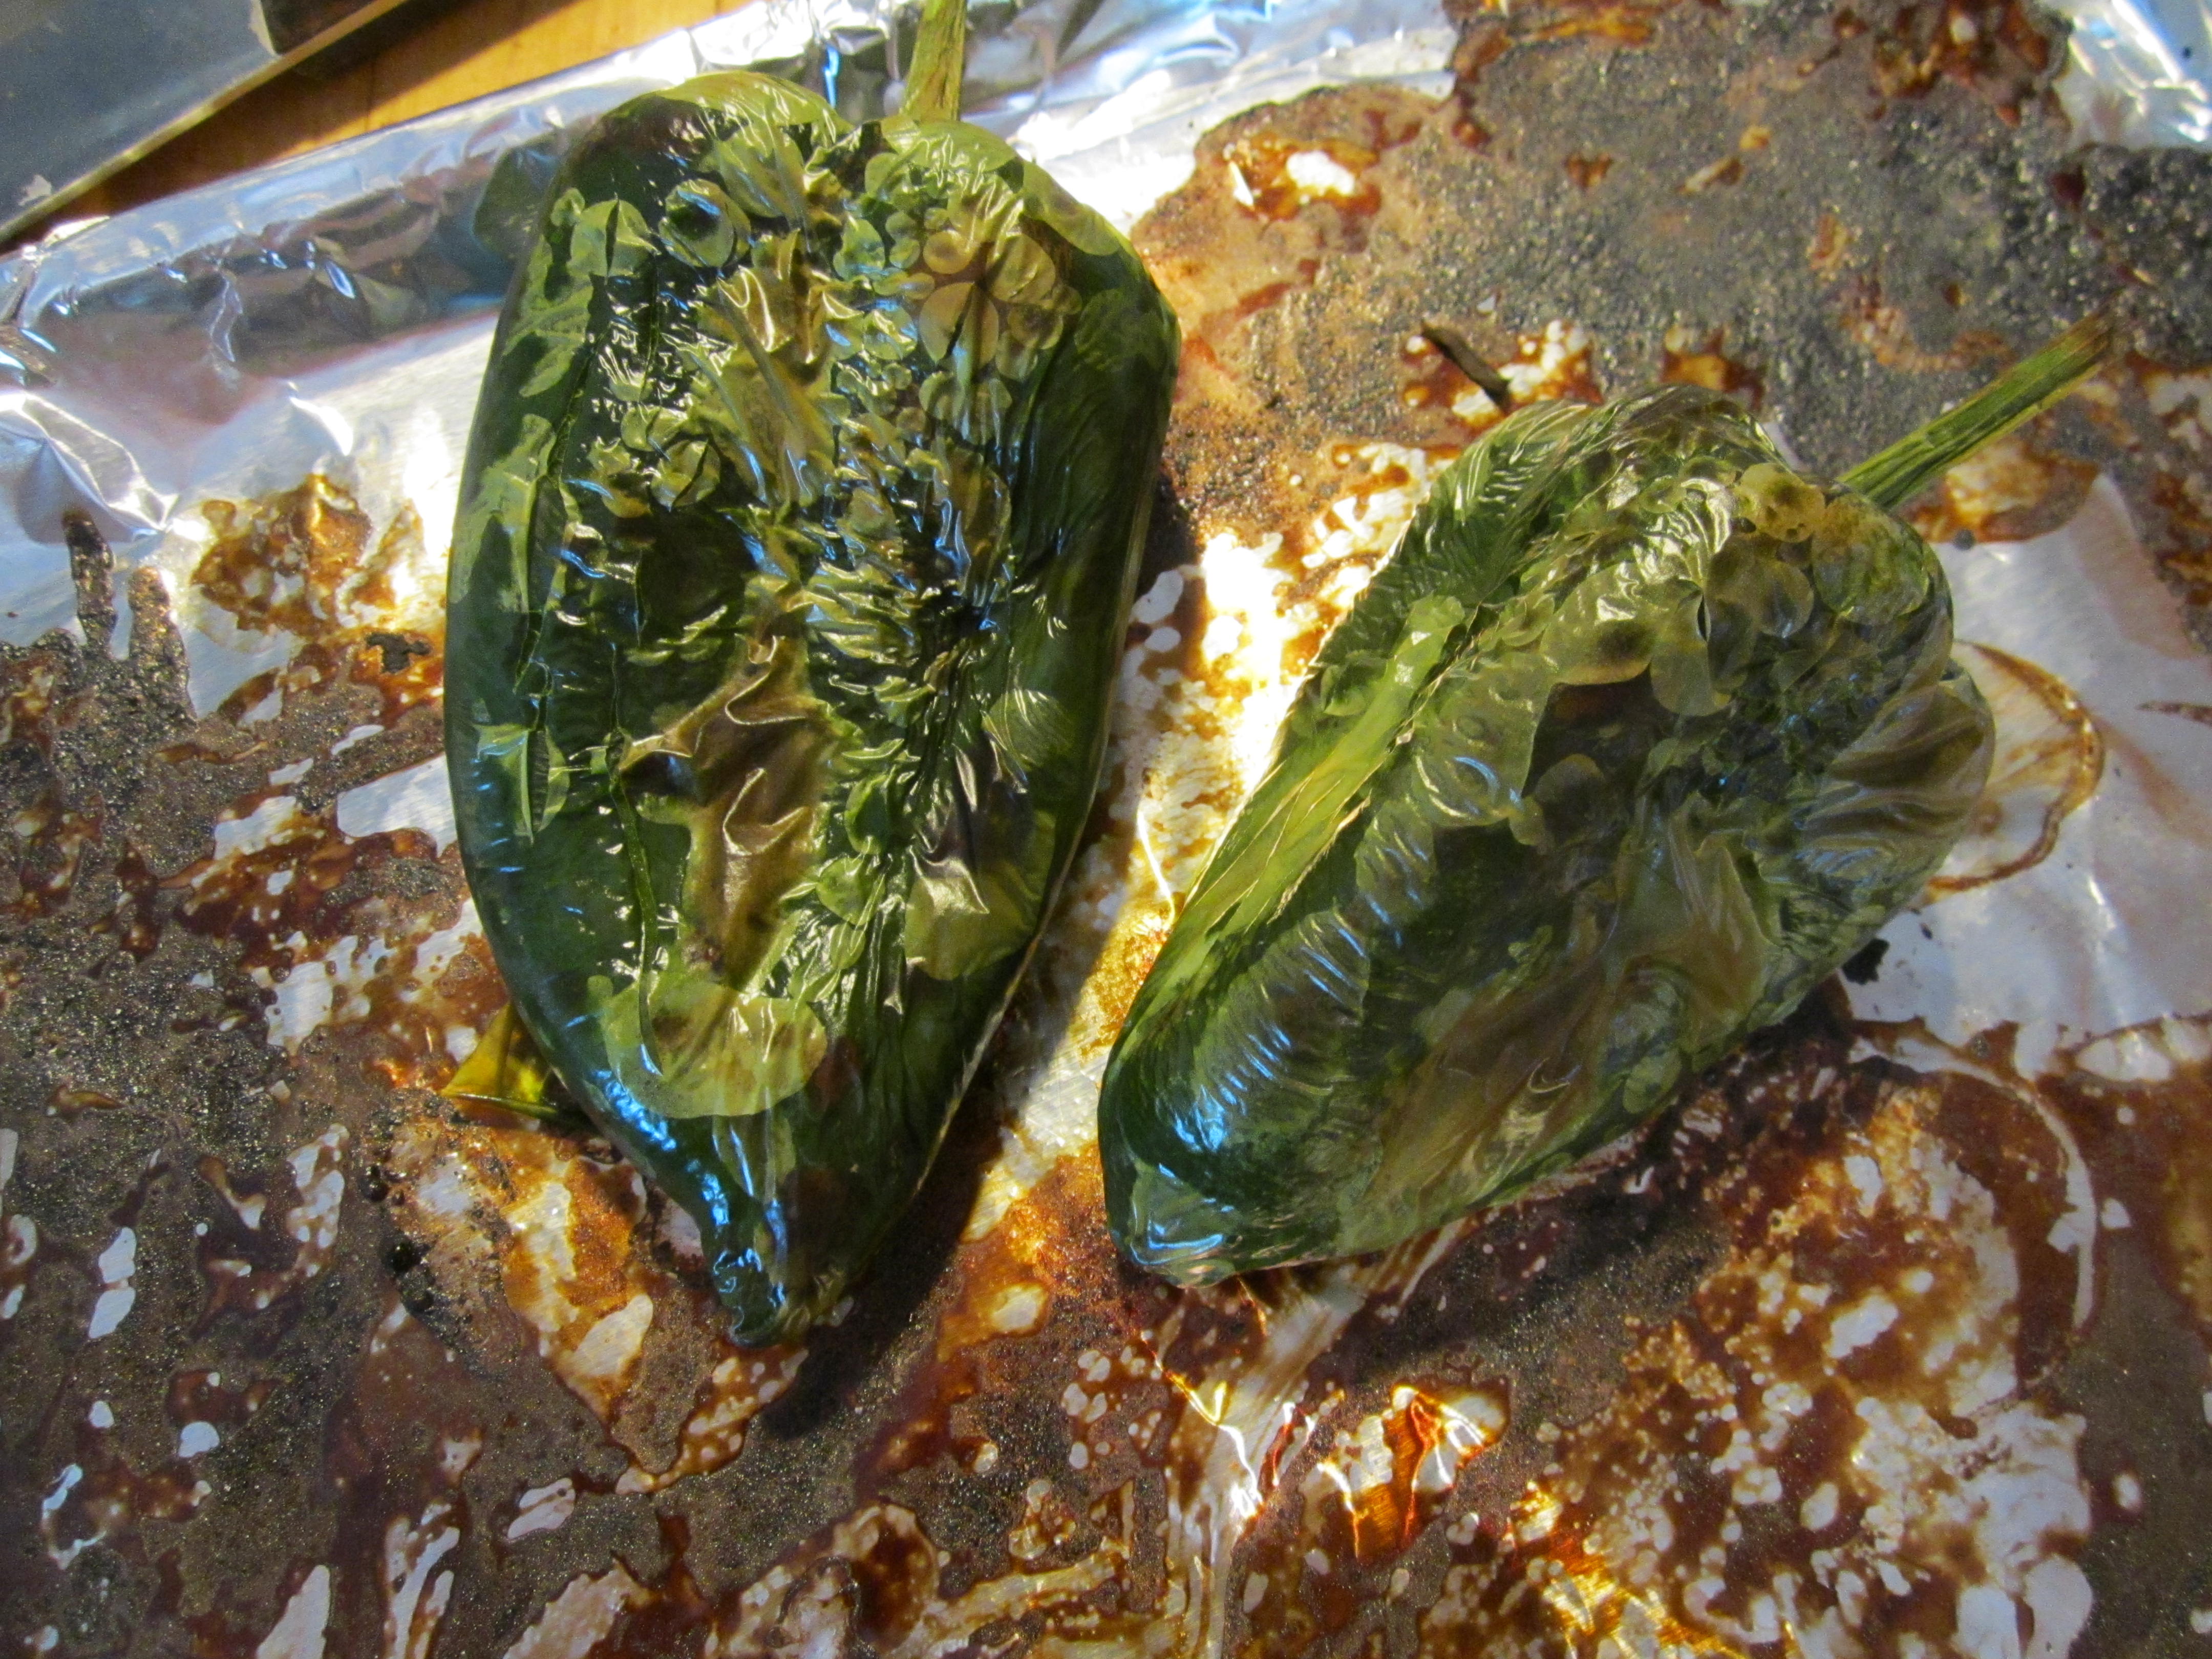
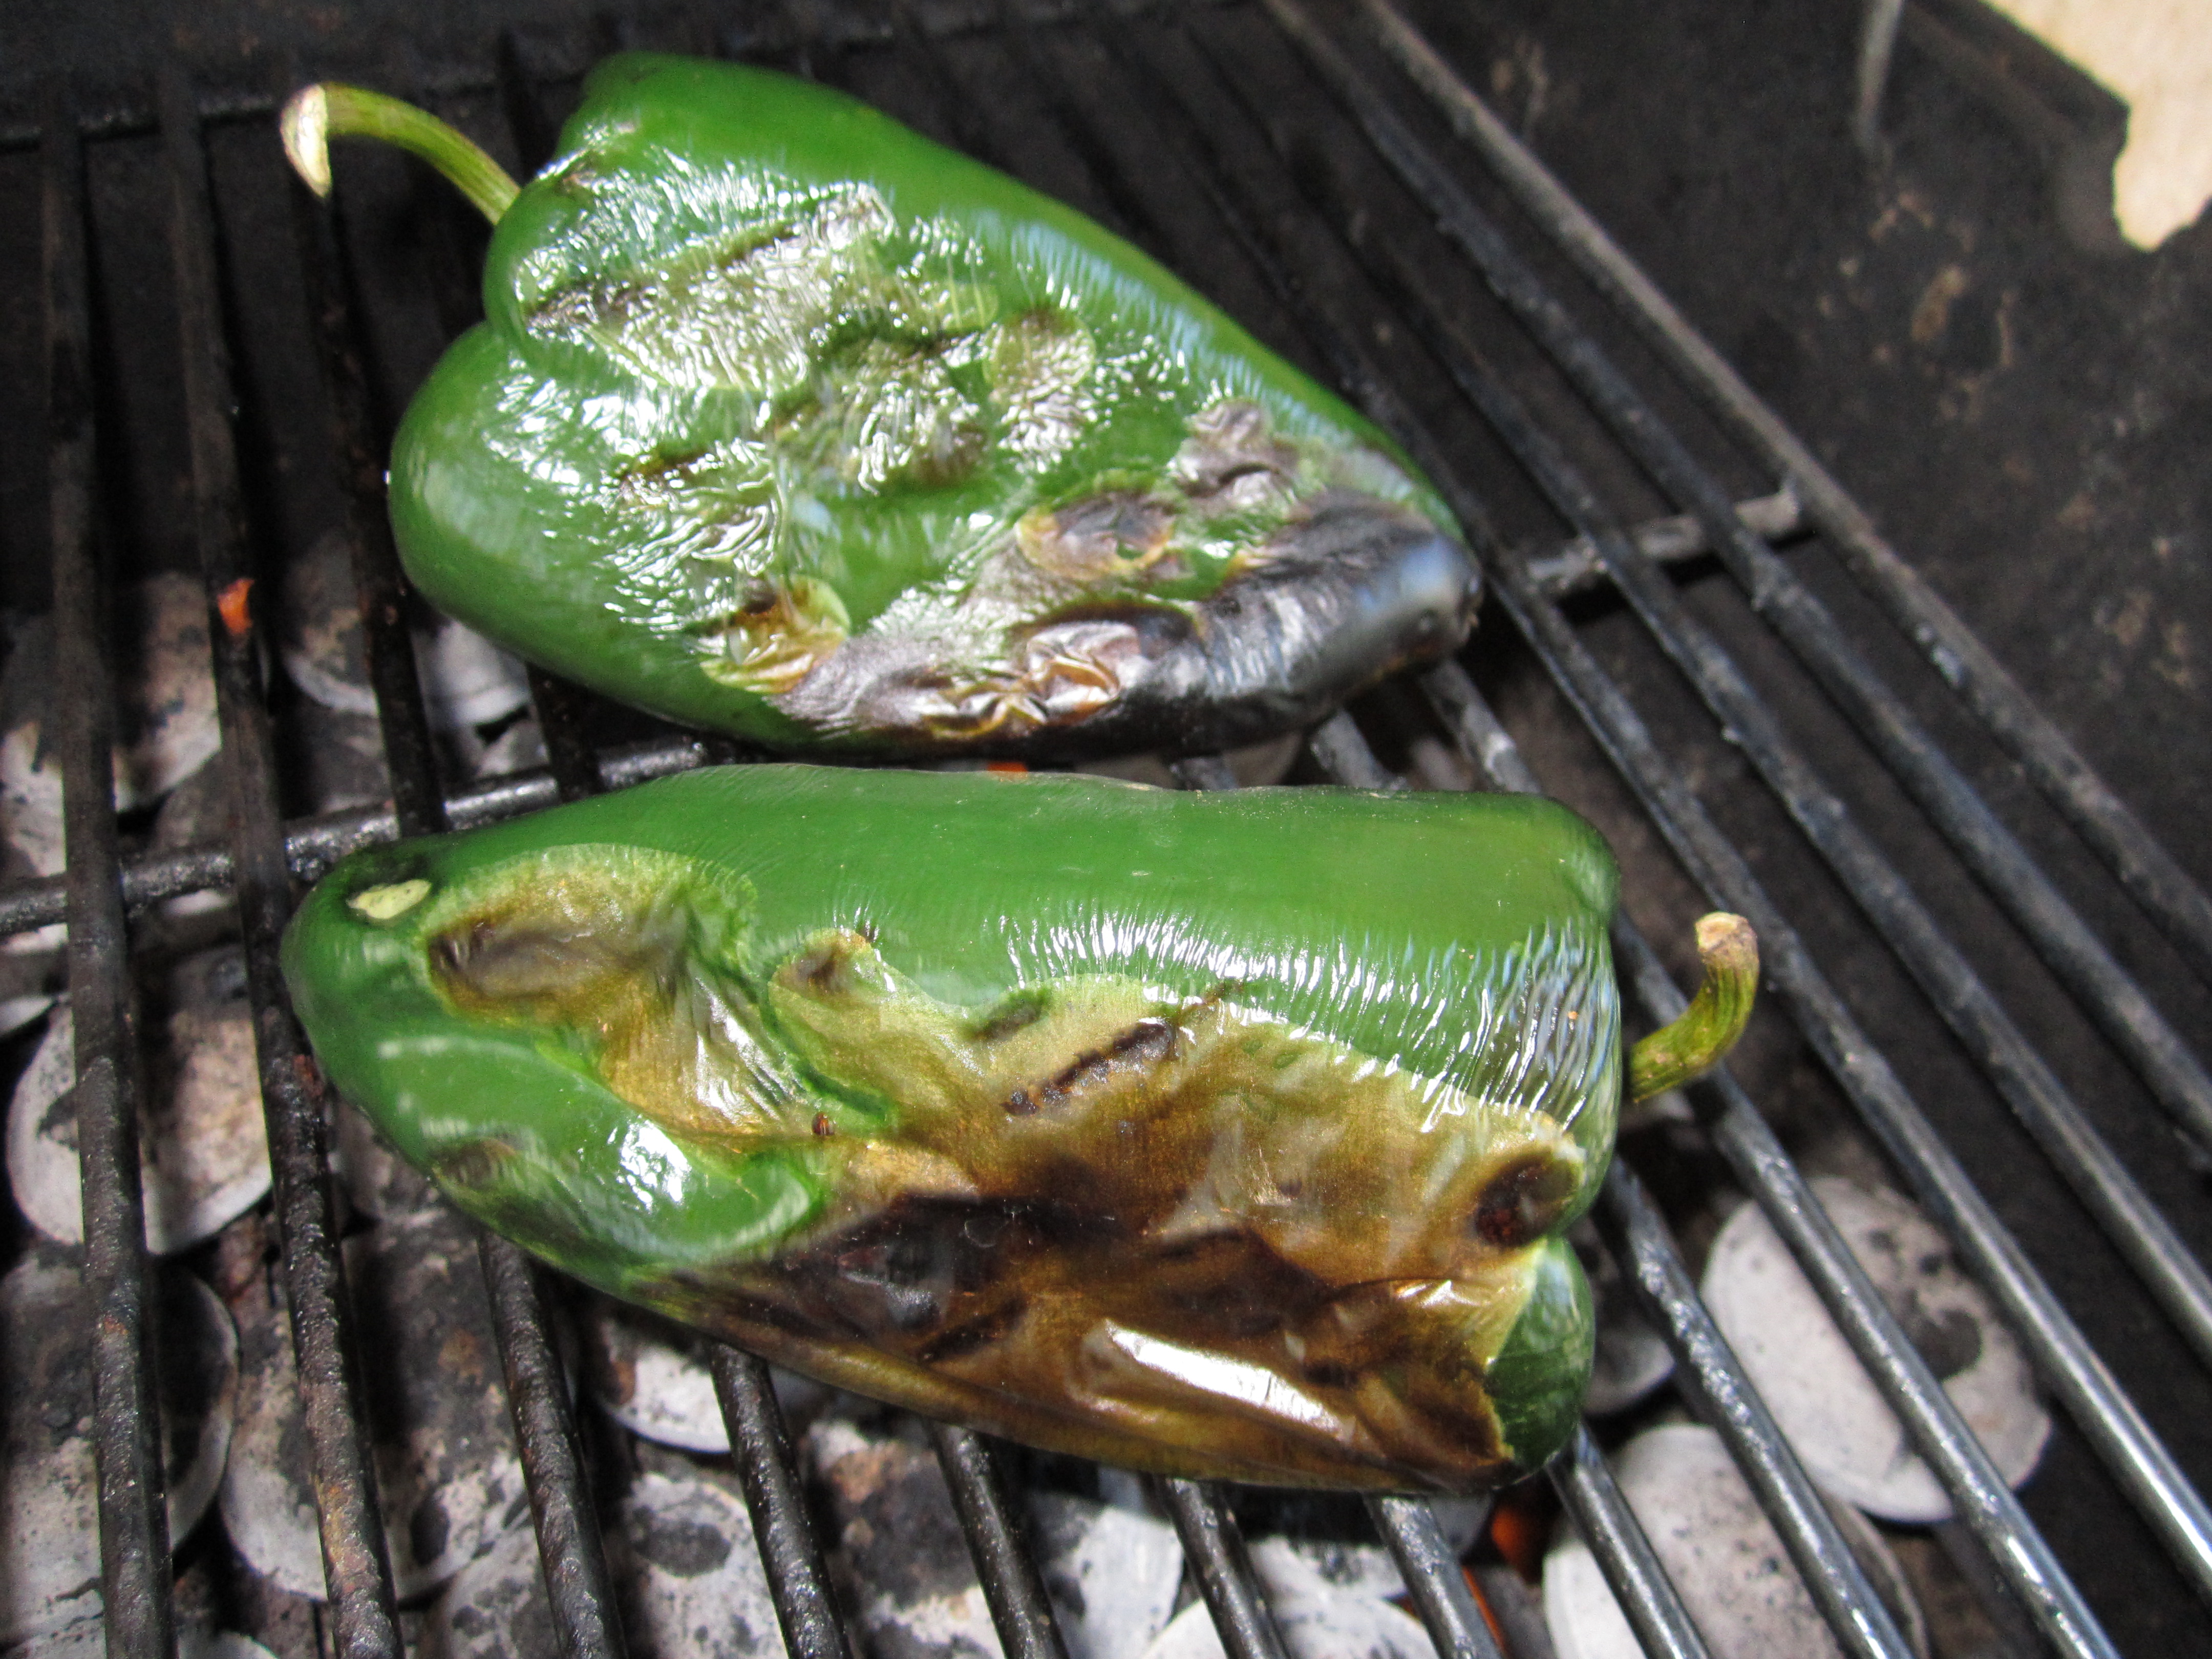
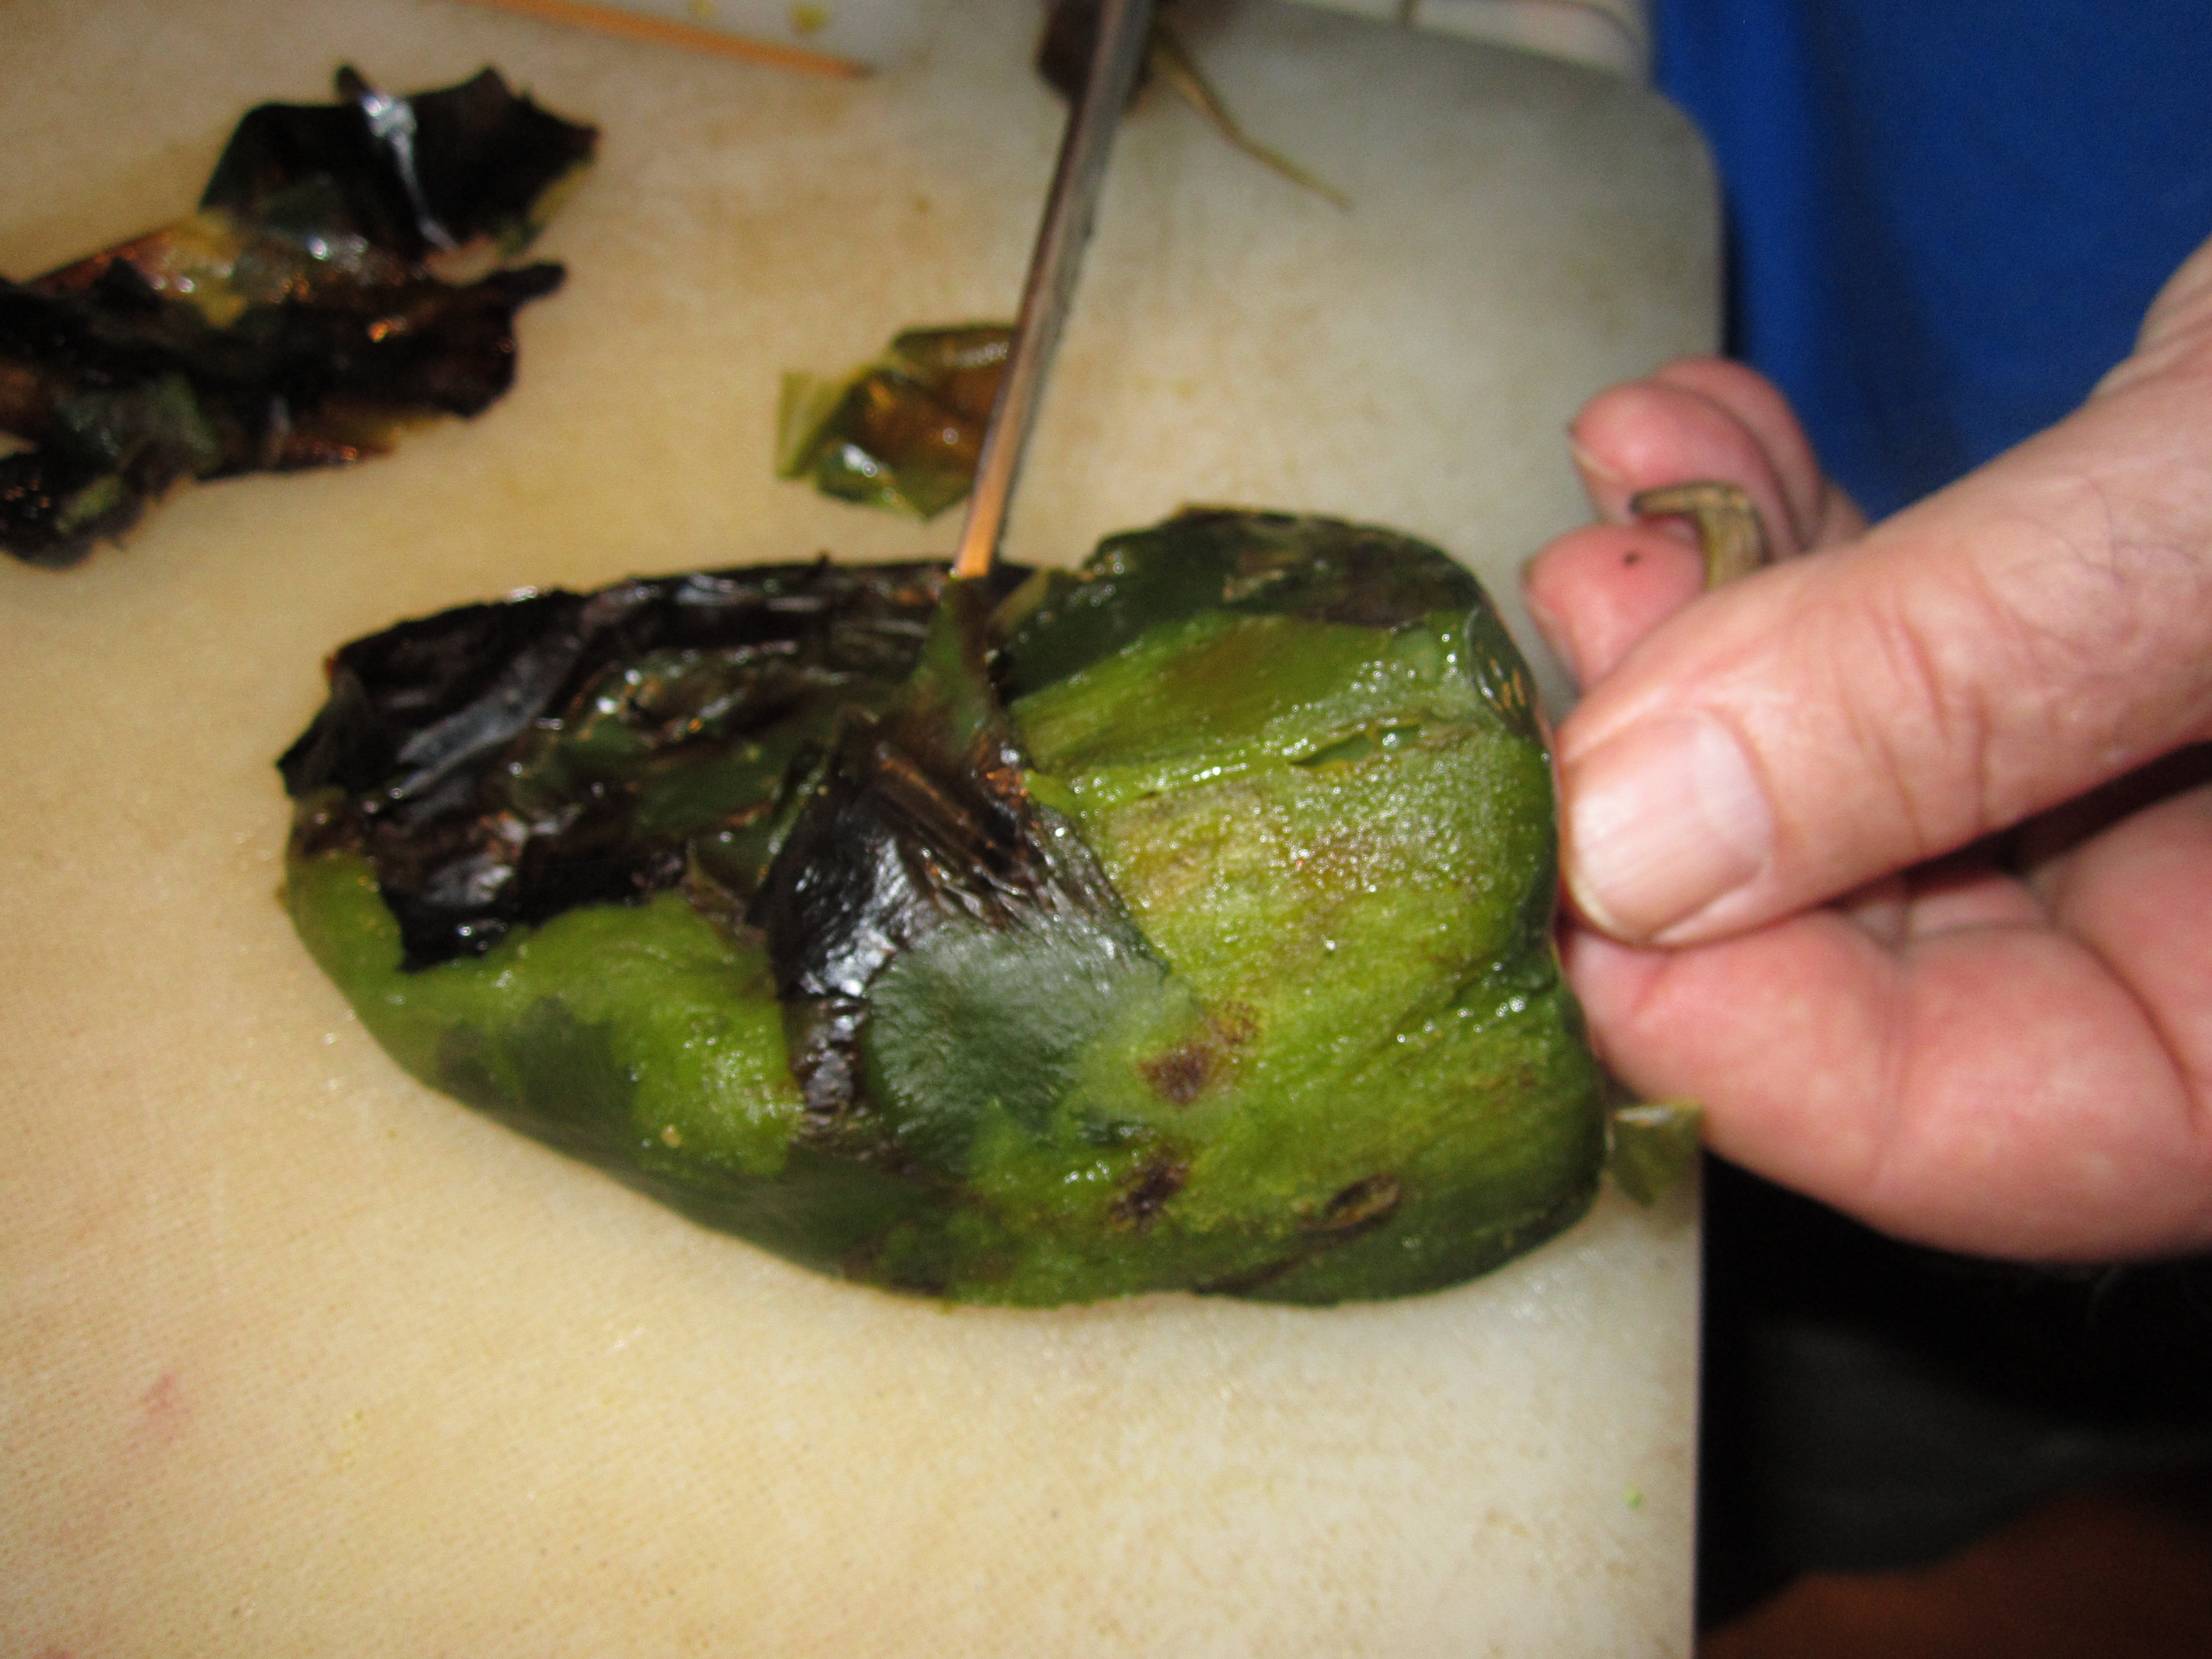
To me the special flavor comes from the poblano chiles. I think they have a better flavor than the typical Anaheims. Frequently, but not always, they are less hot while still giving a great chile flavor. You must roast and puree them first. If you have a grill, roast them there. Otherwise, the broiler on your oven will do. The trick is to the get the skin nicely charred but not to burn the thick juicy chile walls.

These chiles are charred on one side. I have turned them to blacken another side.

These chiles are charred on one side. I have turned them to blacken another side.

Skin is easily removed after steaming.

Skin is easily removed after steaming.

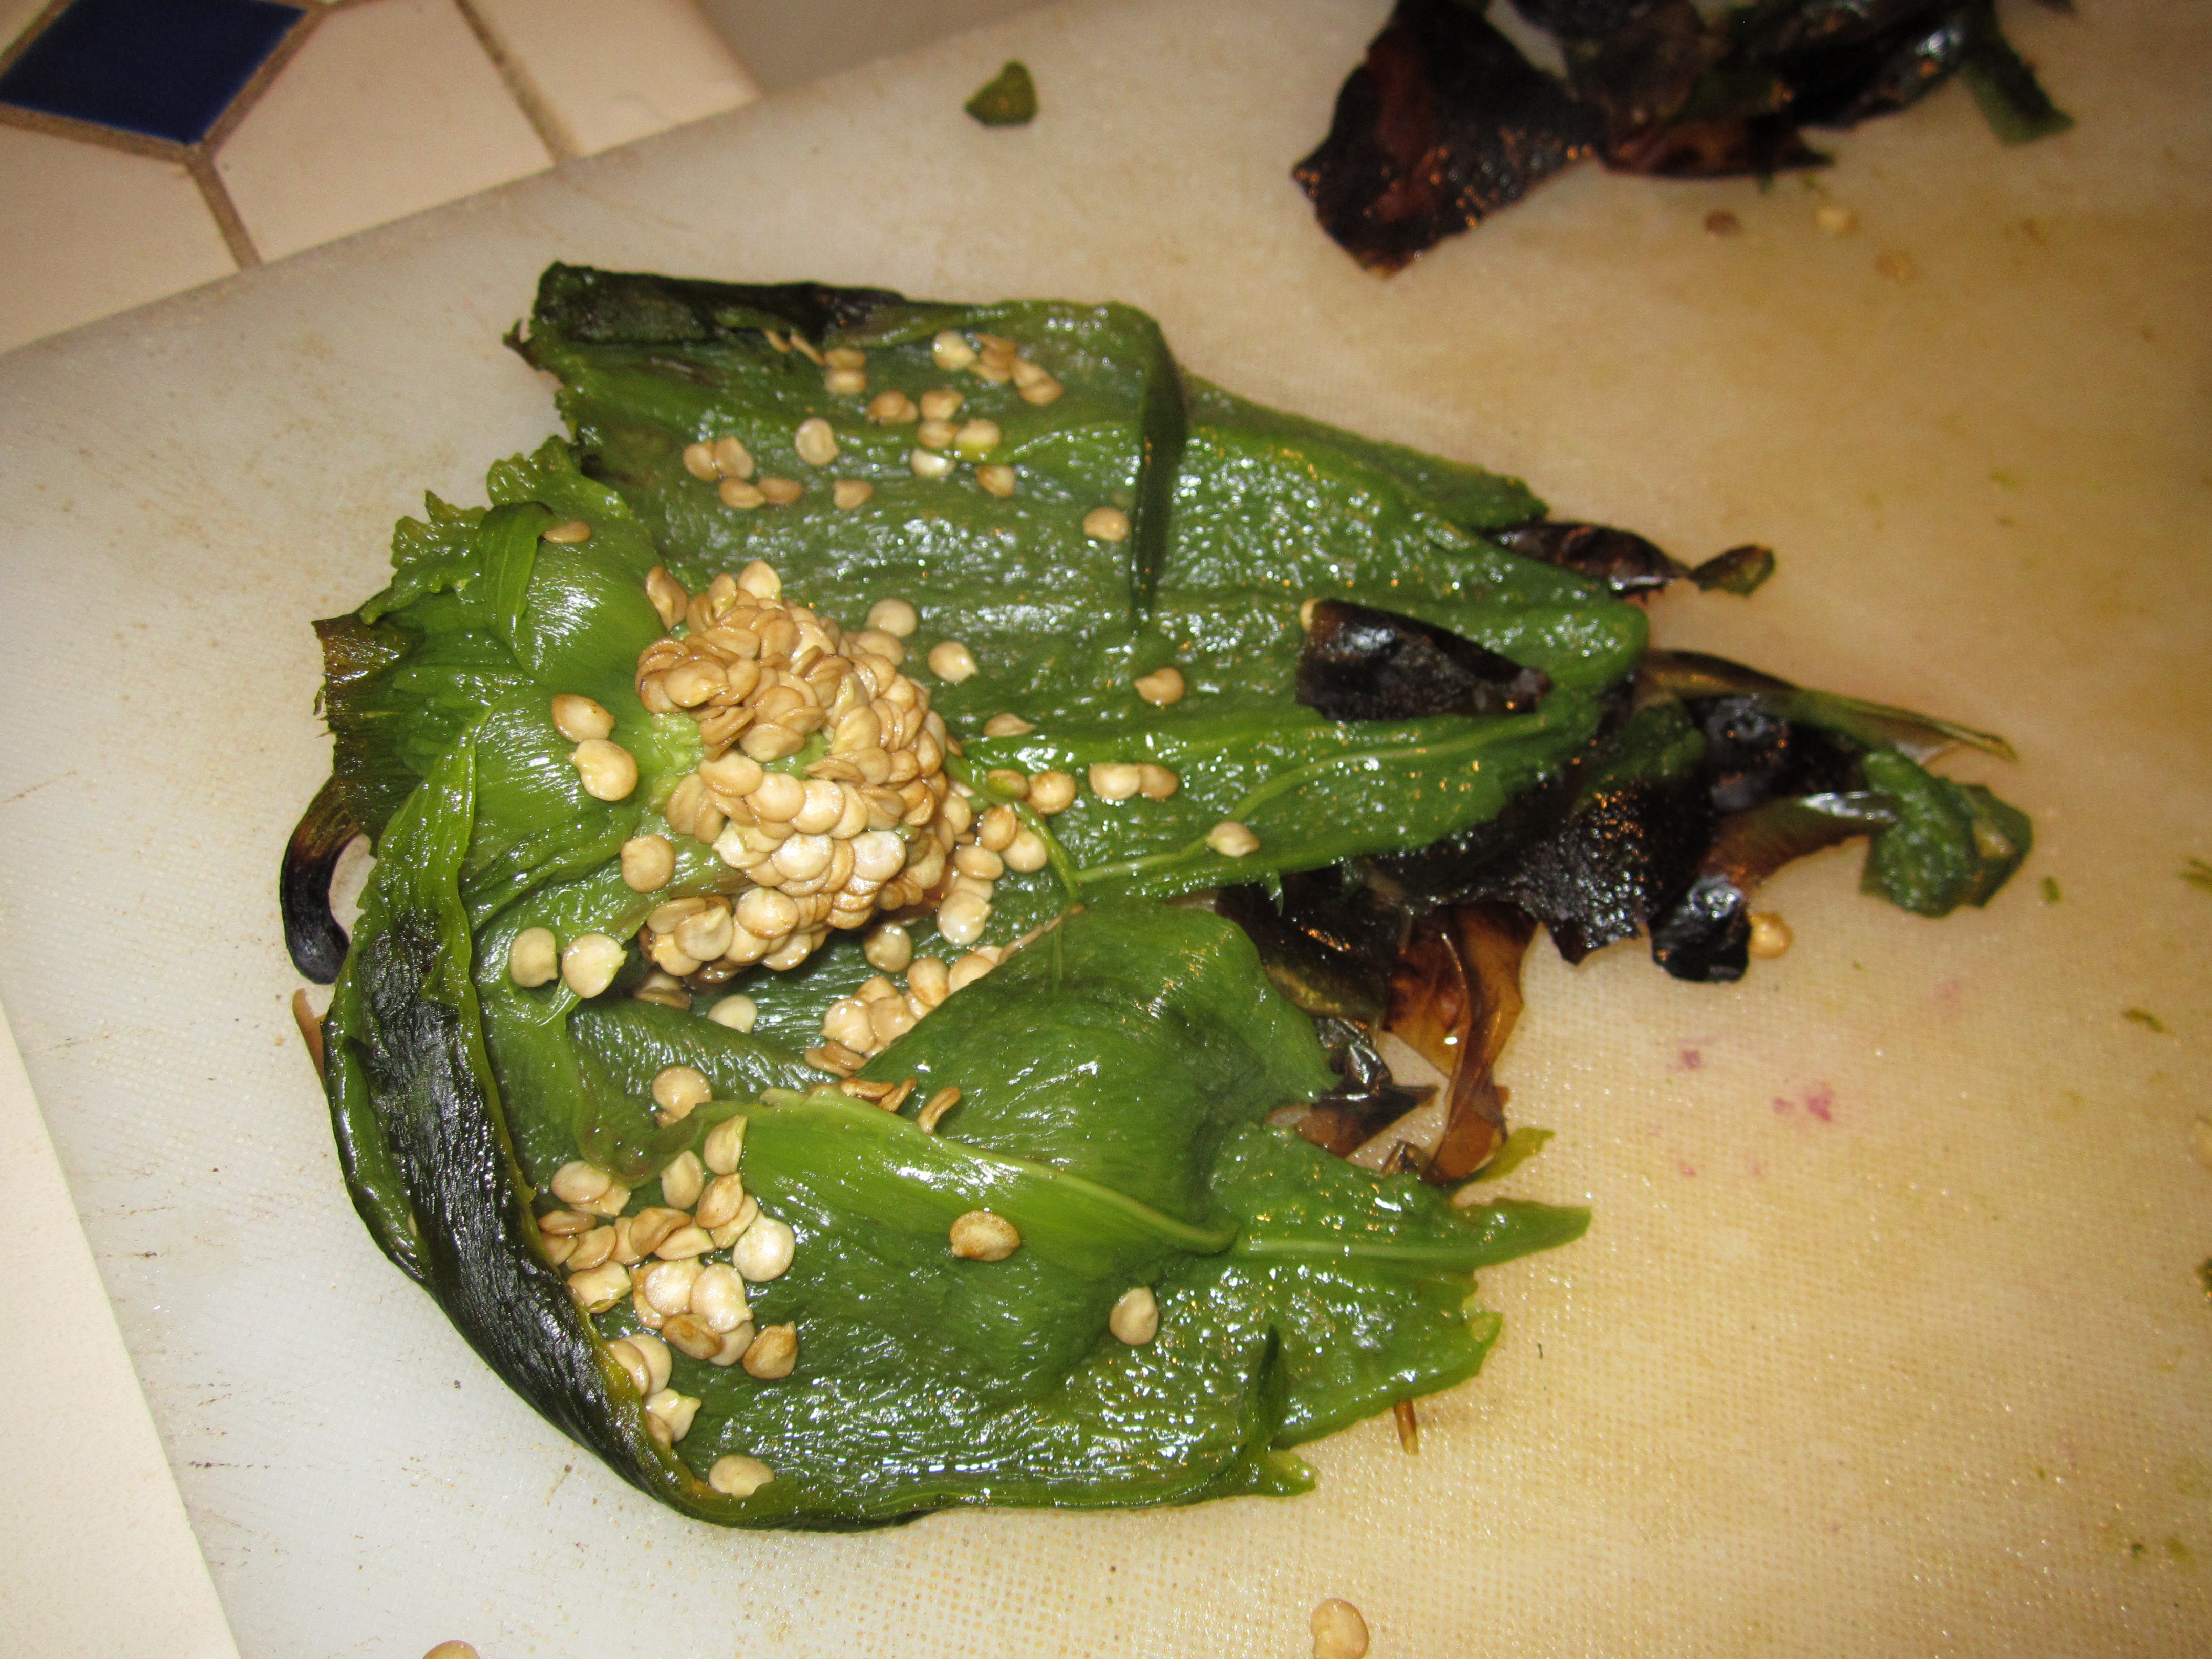
Open chiles and remove seeds.

Open chiles and remove seeds.

Once the seeds are removed, puree the poblanos in a blender or food processor and set them aside.

Put some water to boil for the macaroni. Any shape will do, but I used the classic elbow-shaped. While the water is boiling and then the macaroni is cooking, you will have time to grate the cheese, and chop and saute the red pepper, onion, garlic  and corn. Use can use fresh corn cut from the cob or just canned works also.

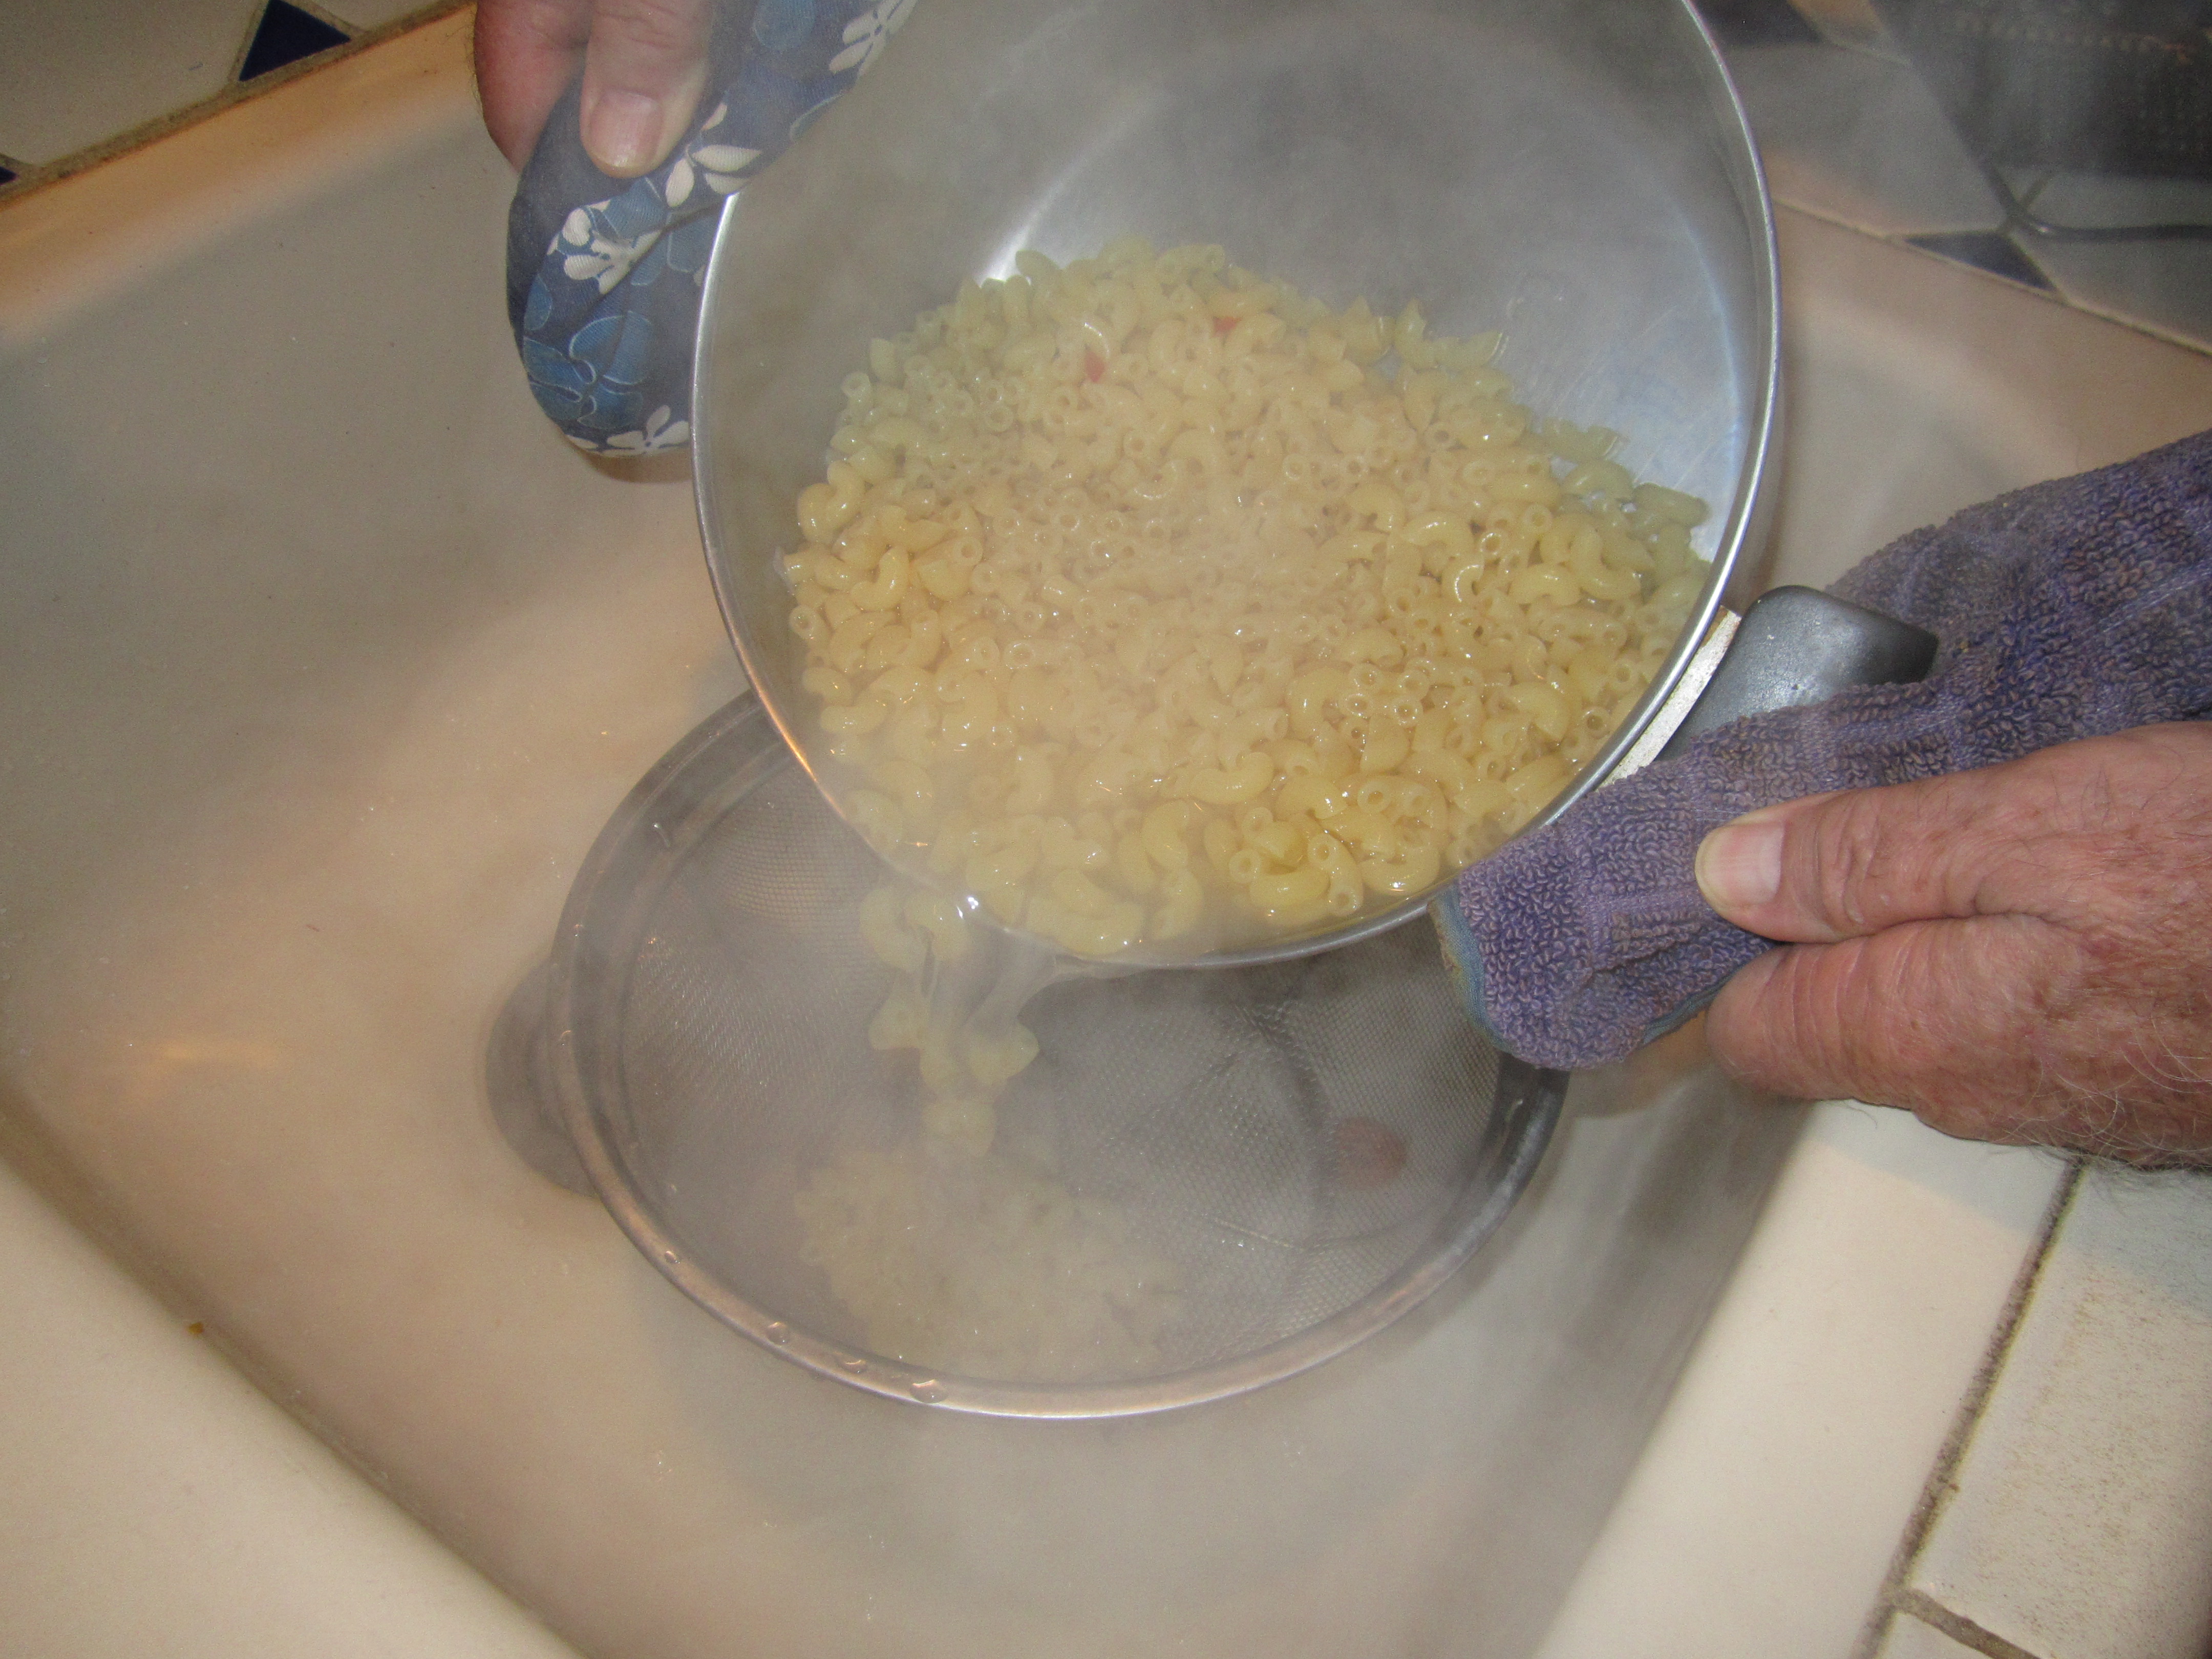
Drain the macaroni.

Drain the macaroni.

When the macaroni is tender, return it to the pot and stir in all the ingredients. Last will be the cream. The recipe calls for heavy cream, but I used half-and-half. When I was collecting recipes for The New Southwest Cookbook, I discovered that lots of butter and cream are the professional chefs’ secret ingredients. THAT is why everything they make tastes so good.

Stir in the chile and other vegetables.

Stir in the chile and other vegetables.

Ford tastes for seasoning. It might need salt.

Ford tastes for seasoning. It might need salt.

Here’s the recipe.  It is supposed to be four servings, and it is. But everybody usually wants seconds so doubling the recipe makes sense.

Green Chile Macaroni  (Makes 4 servings)

1/4 cup diced red bell pepper

1/2 cup sweet corn kernels

1/4 cup  diced red onion

2 teaspoons chopped garlic

1 teaspoon corn oil

2 cups  cooked macaroni

1/2  to 3/4 cup puree of roasted, peeled poblano chile

2/3 cup  grated cheese (hot pepper jack, cheddar or mixture)

1/4 cup heavy cream

Kosher salt and cracked black pepper to taste


Sauté the red bell pepper, corn, red onion, and garlic in the oil in a heavy pan.  Add the macaroni, poblano puree, and  cheese and stir until cheese is melted. Fold in the heavy cream.  Season with salt and pepper to taste.

_____________________________________

Find more great recipes with a Southwest flair in The New Southwest Cookbook, The Prickly Pear Cookbook, and Cooking the Wild Southwest

Gifts from September Gardens–intentional and otherwise

Tia Marta here to share some culinary ideas happening now in Baja Arizona herb gardens, and to extend an invitation to visit el jardinito de hierbas at Tucson’s Mission Garden to experience the herbs in action!

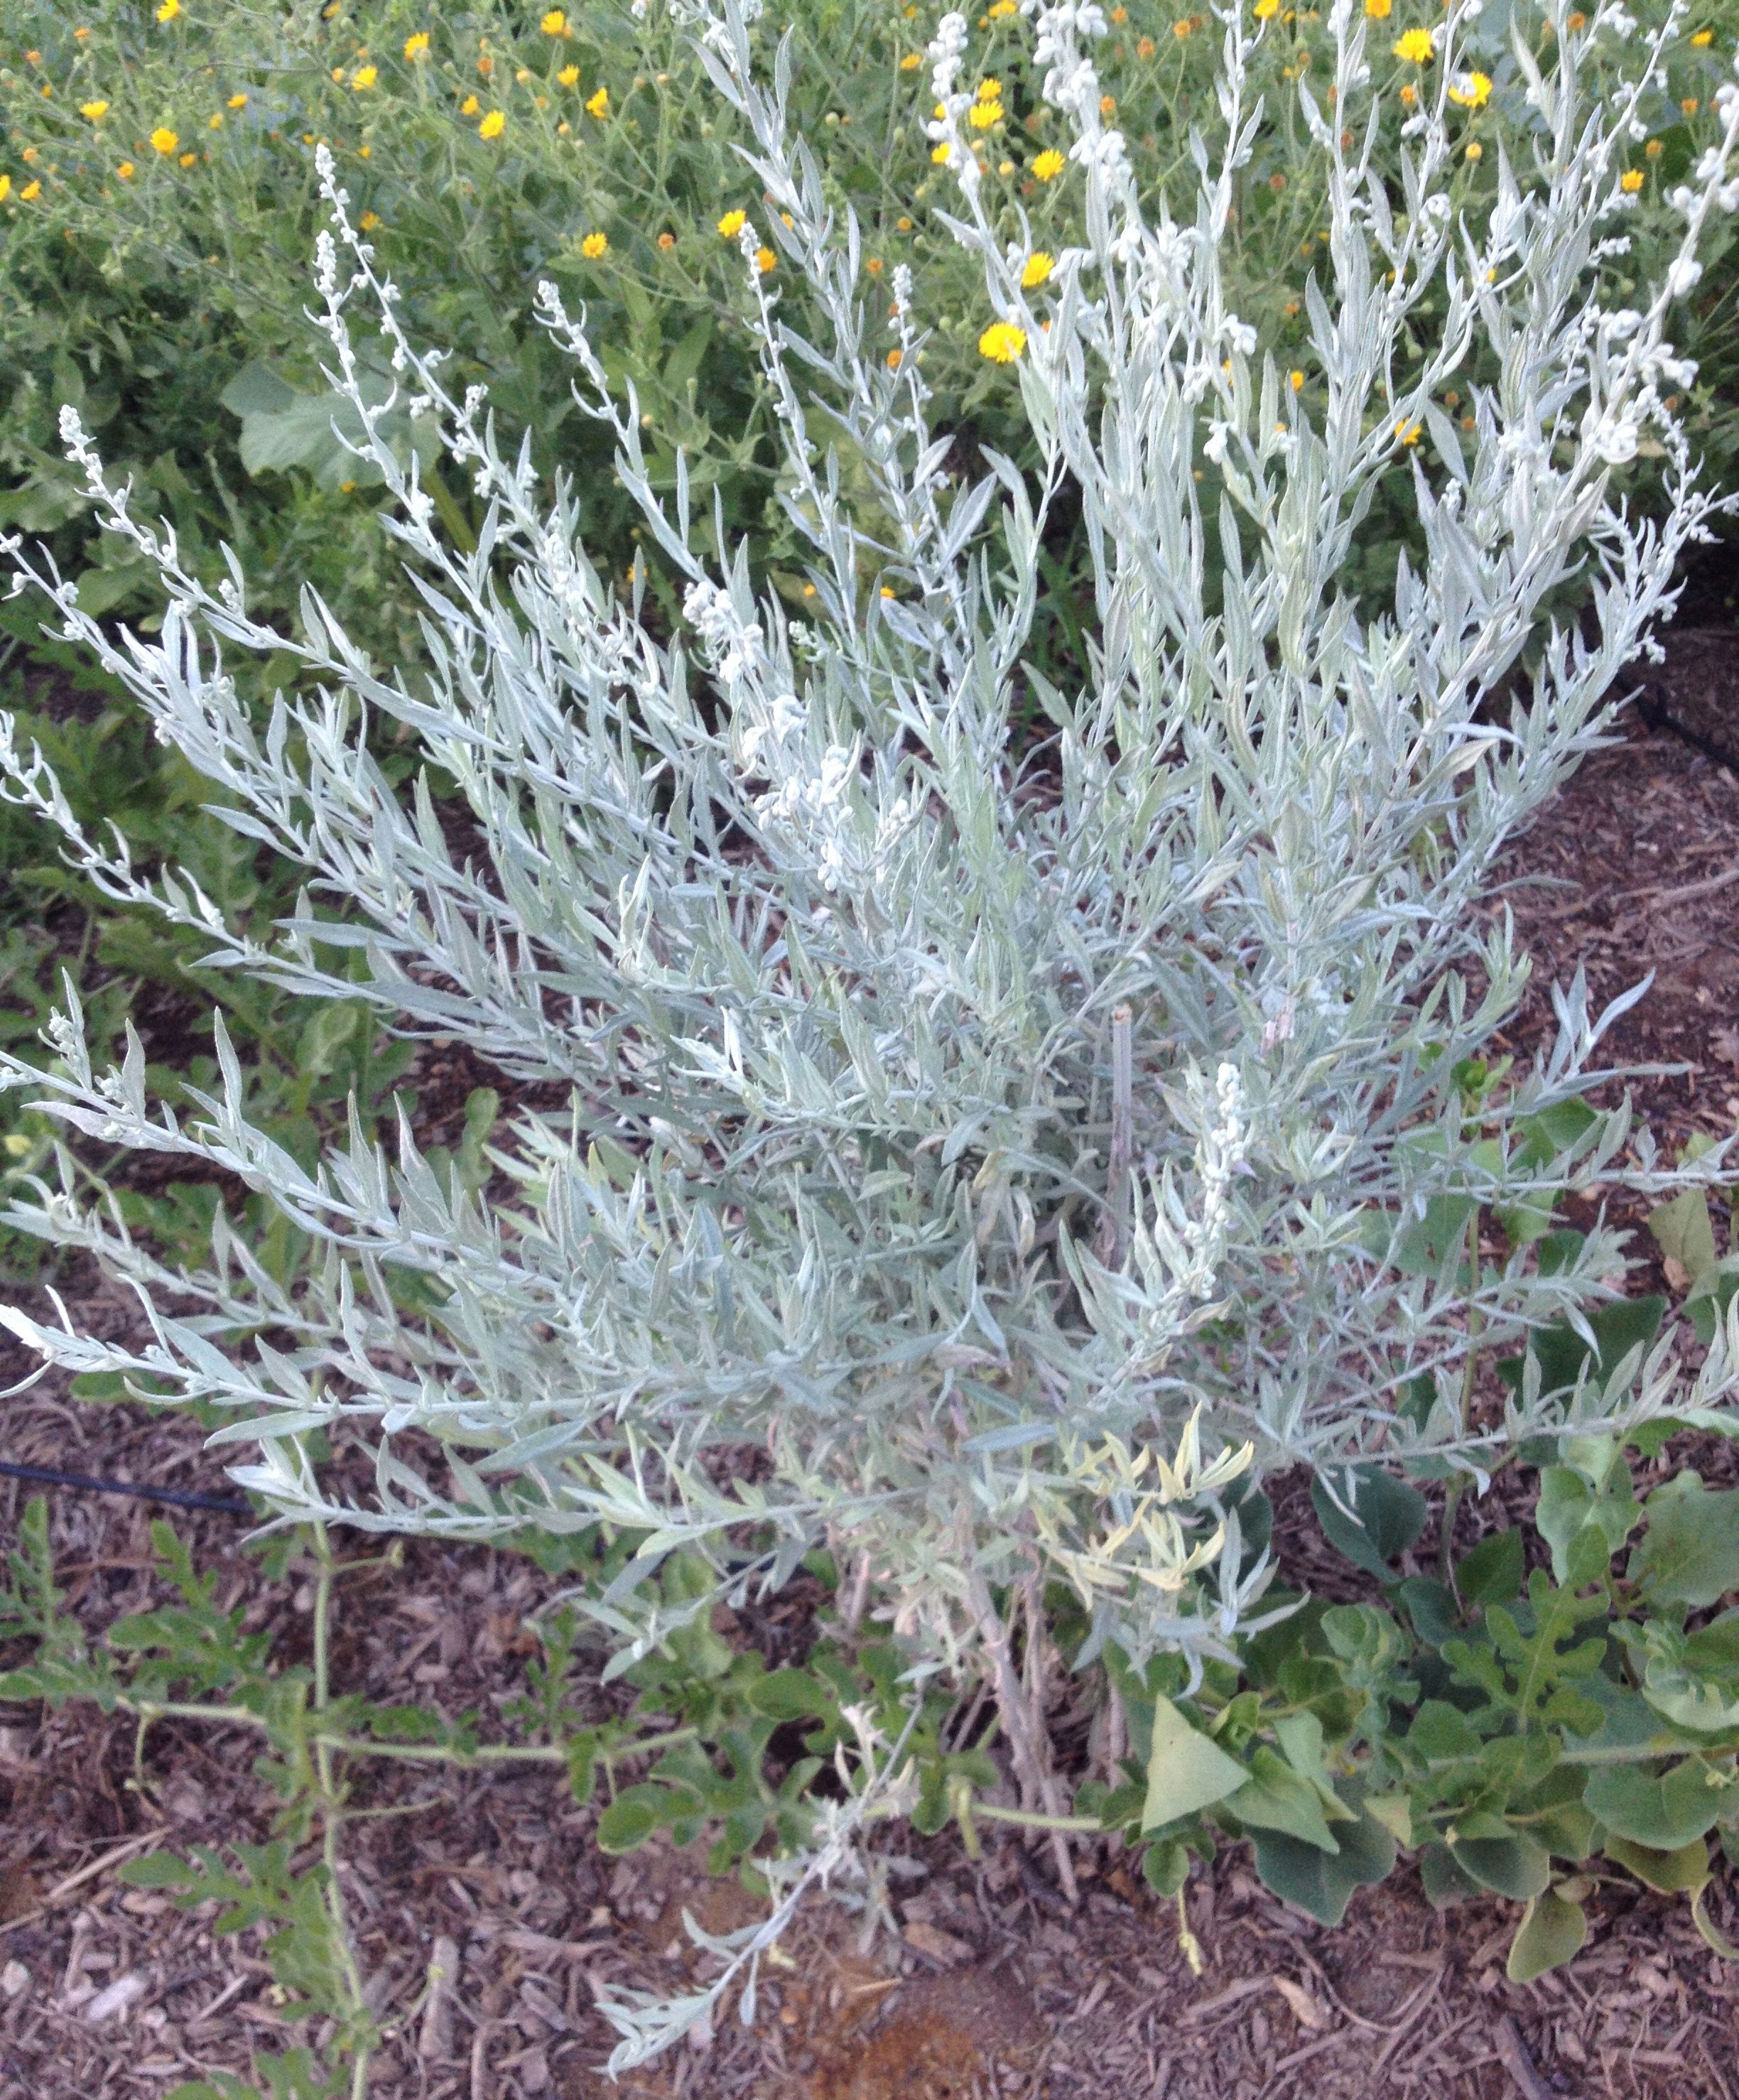
Estafiate--all purpose Artemisia ludoviciana--in the herb plot, Mission Garden (MABurgess photo)

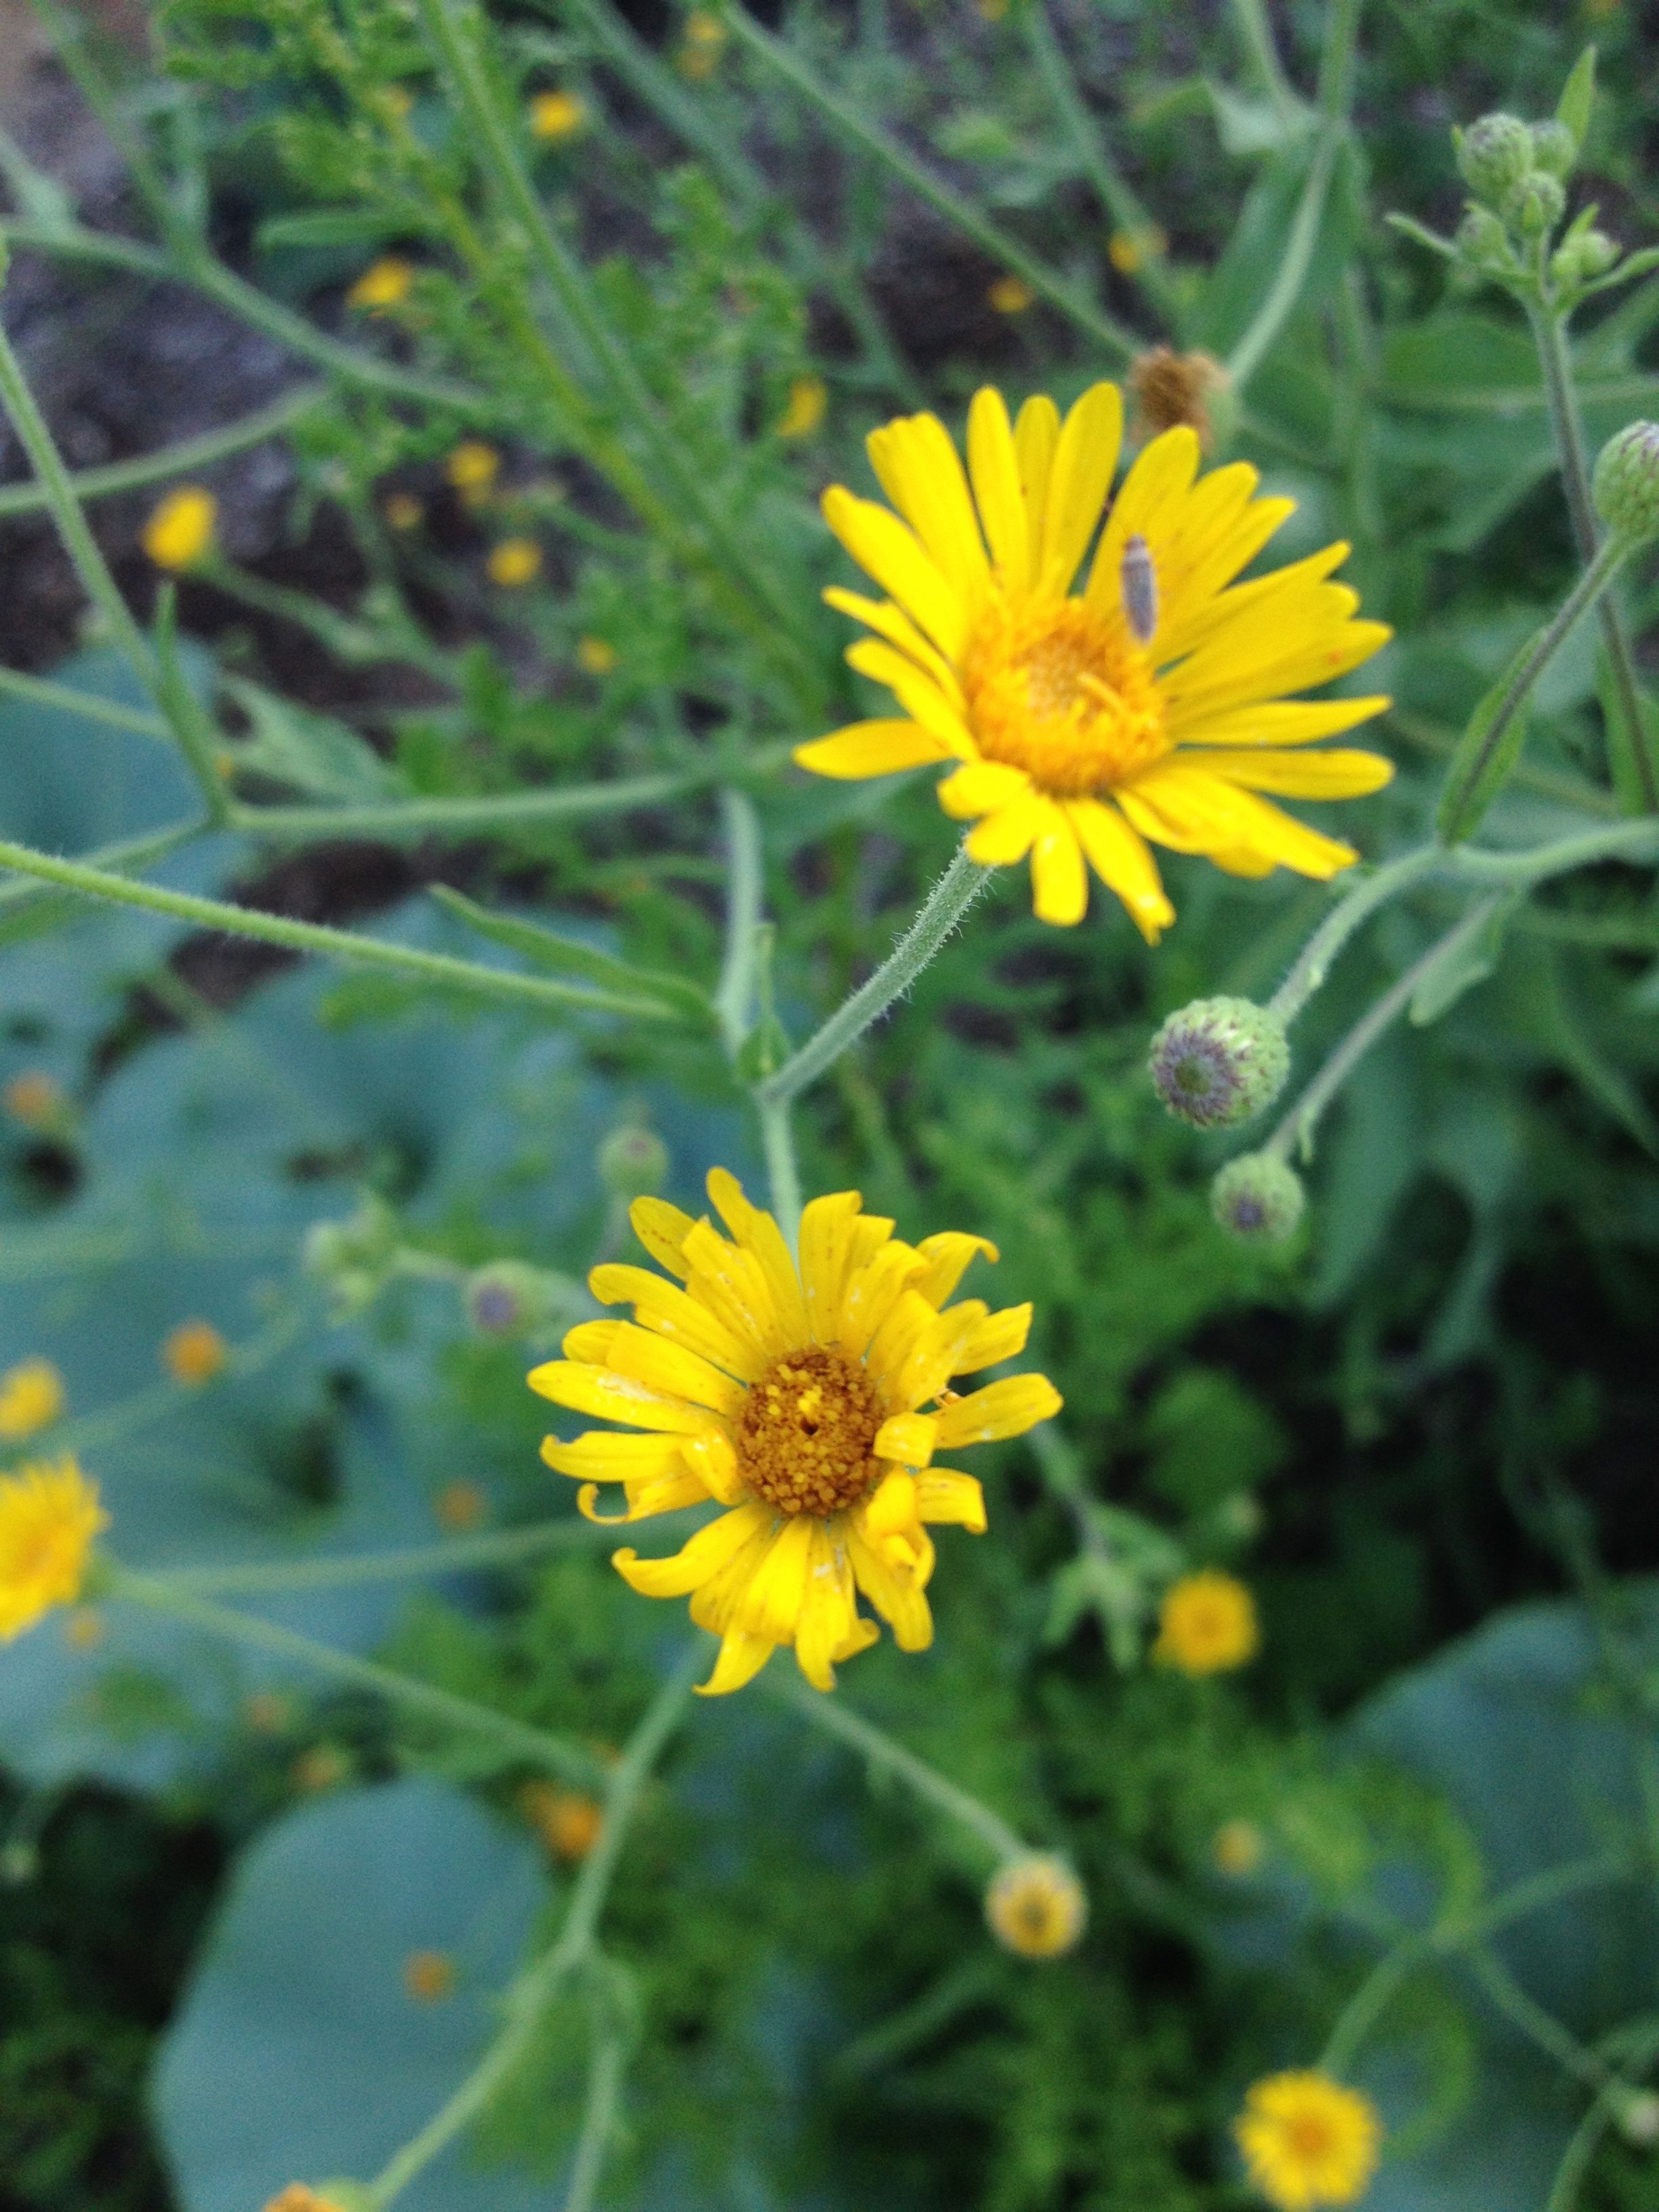
Estafiate–all purpose Artemisia ludoviciana–and Mexican arnica beyond (close-up of flower below), in the herb plot, Mission Garden (MABurgess photos)

Heterotheca--Mexican arnica flower (MABurgess photo)

Of all the herbs in our Southwest summer gardens—presently rejoicing in monsoon humidity and in the soppy tail of Hurricane Norbert—I think the most exuberant has gotta be Mrs Burns’ Famous Lemon Basil……..

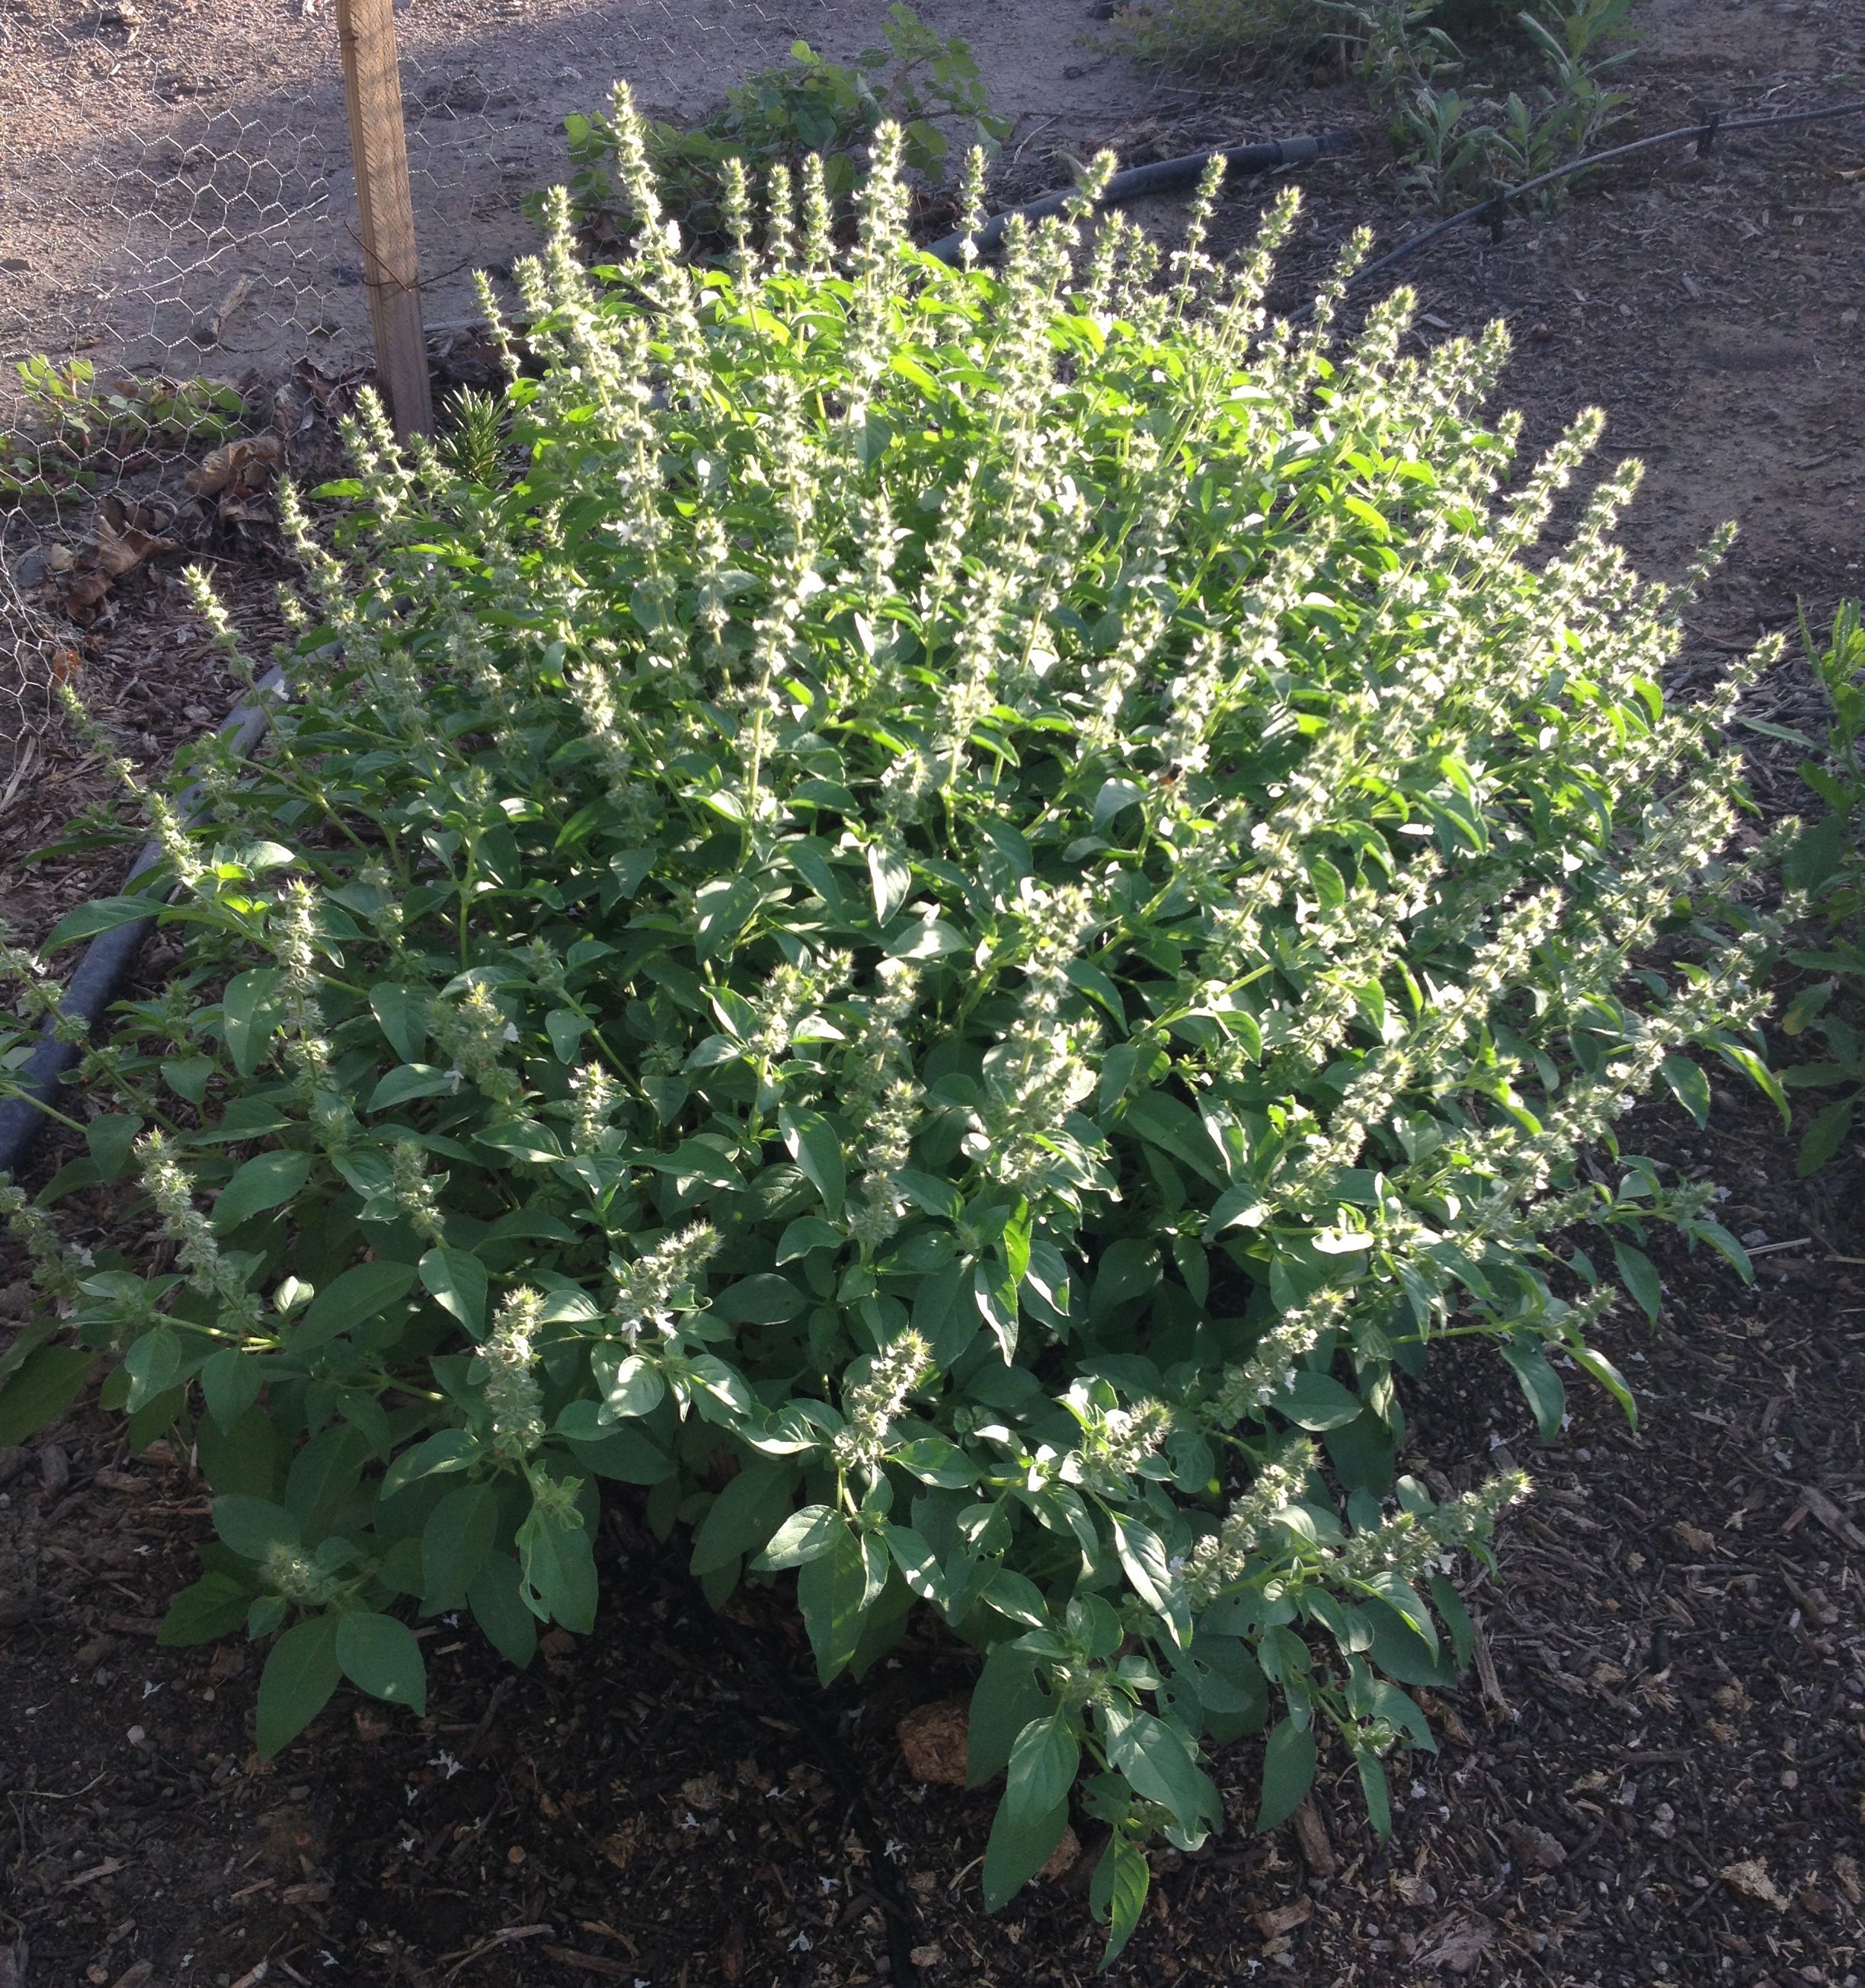
Mrs Burns' Famous Lemon Basil, at Mission Garden (MABurgess photo)

Mrs Burns’ Famous Lemon Basil, at Mission Garden (MABurgess photo)

In its versatility, Mrs Burns’ lemon basil provides many possibilities for the kitchen and the cosmetic chest, the first being olfactory delight. Brush its foliage lightly with your hands and you get an instant rush of enlivening yet calming lemon bouquet. Like Monarda or lavender, this lemon basil is definitely one to plant in a “moon garden” for nighttime enjoyment, or along a narrow walkway where you have to pleasantly brush up against it, getting a hit en route, always a reminder that life is good.

I wish this blog could be “scratch-and-sniff” so you could sense the sweet lemony aroma of this heirloom right now. Maybe technology can do that for us someday, but meanwhile, find a Native Seeds/SEARCH aficionado who has planted it and get yourself a sprig to sniff.   On any Saturday morning, come visit and whiff this desert-adapted basil at Mission Garden (the living history exhibit at the base of “A”-Mountain created by Friends of Tucson’s Birthplace). There, among Padre Kino’s heirloom fruit trees, in the monsoon Huerta vegetable plot, a group of herbalists known as Tucson Herbalist Collective (usually referred to as THC—like far out, righteous herbs, man, whatever) has planted a patch of traditional Mission-period medicinal and culinary herbs within reach of the fence. Lean over and touch Mrs Burns’ lemon basil for a real treat. At present (mid-September) “her” basil is a mound of dense smallish leaves and is sending up a zillion flower stalks sporting tiny white flowers. High time to snip the tops to encourage more foliage. Snippings can be used to zest a salad, to bedeck a platter of lamb chops, or to dry for a long-lasting potpourri.

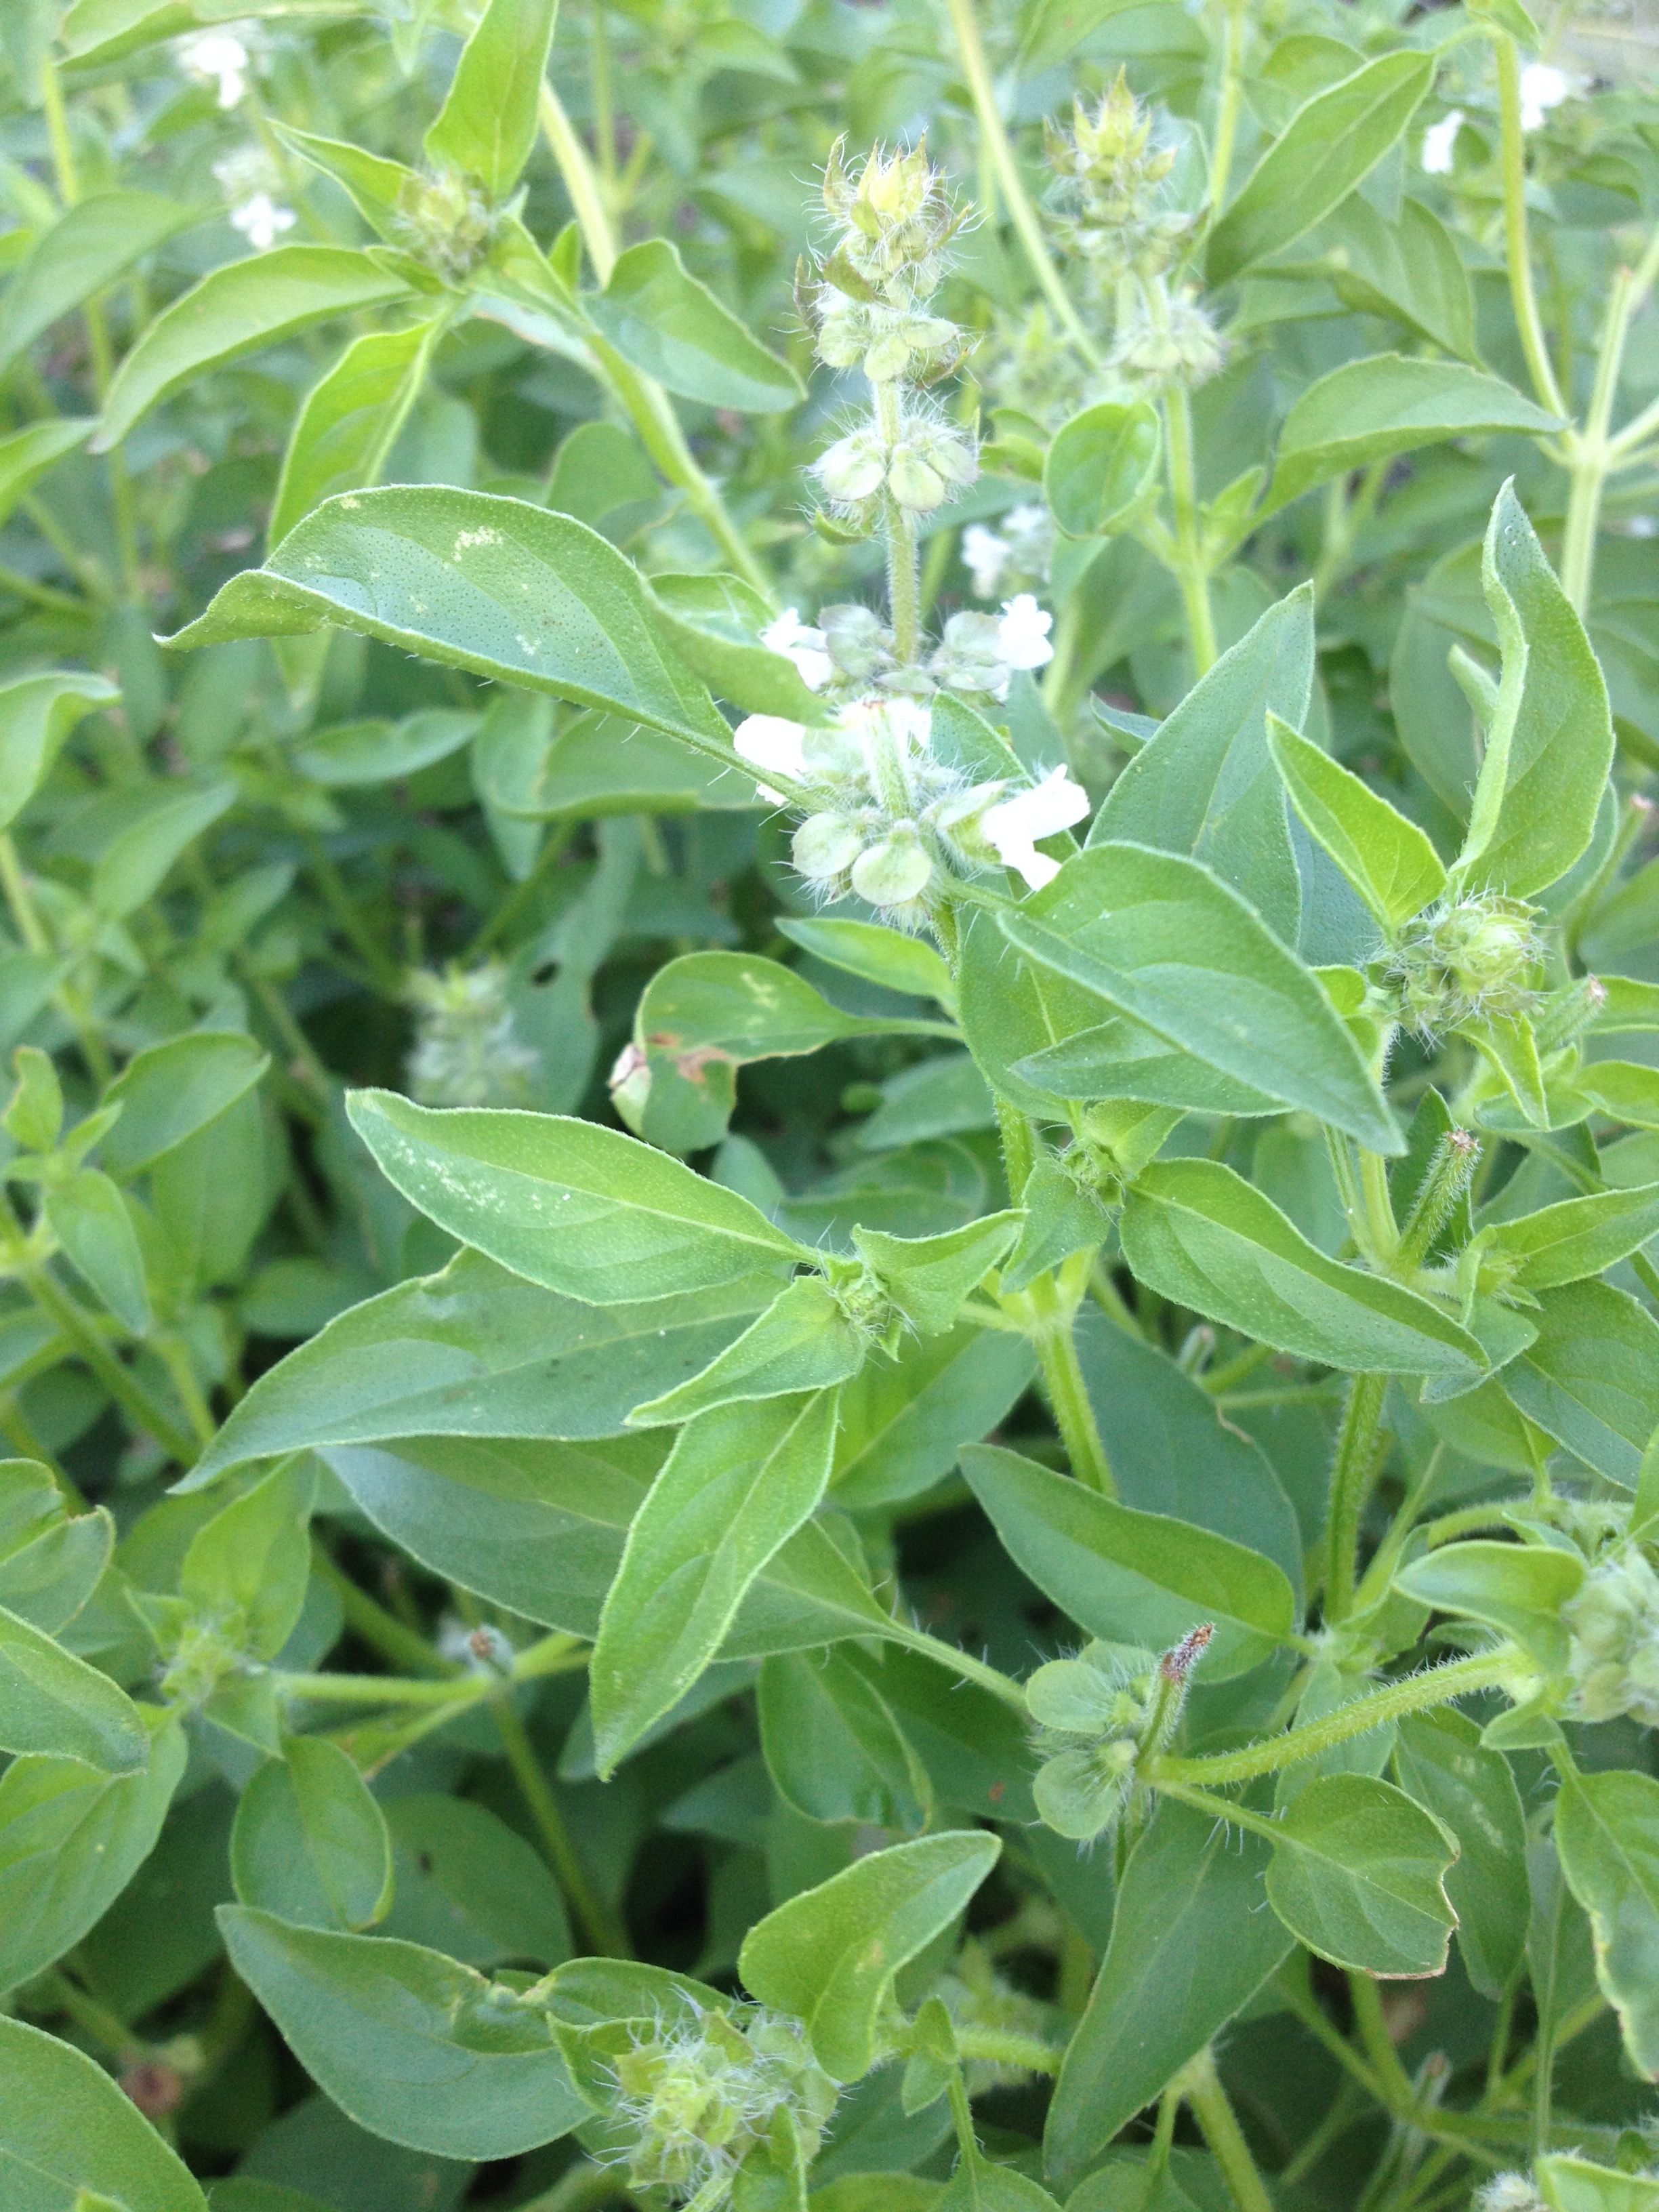
Close-up view of Mrs Burns' Famous Lemon Basil flowers and foliage (MAB)

Close-up view of Mrs Burns’ Famous Lemon Basil flowers and foliage (MAB)

Mrs Burns’ lemon basil—not your typical, soft, floppy-leafed basil—is bred for desert living, with smaller, sturdier foliage. Yes, it does need water, but it can take the desert’s heat and sun. This heirloom’s history is worthy of note and relating it honors the Burns family. The person who put “Famous” into the name Mrs Burns’ Famous Lemon Basil was Dr. Barney T. Burns, one of the founders of the seed conservation organization NativeSeeds/SEARCH and an amazing seed-saver himself, whose recent passing we mourn and whose life we gratefully rejoice in. It was his mother, Janet Burns, transplanted from Canada to Carlsbad, NM, who, with a neighbor over several decades, continued to grow and select surviving, desert-hardy seed in Southwestern heat. Barney contributed her basil seed as one of the first arid heirlooms to become part of the NSS collection. Interestingly, these tiny seeds have since traveled around the globe. One year Johnny’s Seeds picked it up, grew it out for their catalog, and sent NSS a check for $600 in royalties, having profited considerably from its sale.

You can use Mrs Burns’ Famous Lemon Basil leaf in many marvelous dishes. Layer fresh leaves with slices of farmers’ market tomatoes and thin slices of feta or fontina cheese and droozle with flavored olive oil. (I like Queen Creek Olive Mill blood-orange.) And OMG—this basil makes phenomenal pesto. Include this lemon basil with roast chicken for the best lemon-chicken ever. Dry it and put it in stuffing. Add a few fresh leaves to salad for a taste surprise. Or, add a sprig to soups to add a tang. You can even bedeck a glass of V-8 or your Bloody Mary with a lemon basil sprig to fancy up your presentation.


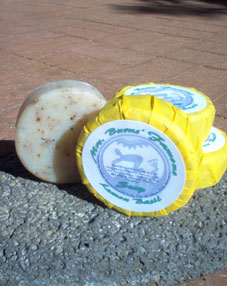
Handmade soap with Mrs Burns' Lemon Basil-infused jojoba oil (MABurgess photo)

Handmade soap with Mrs Burns’ Lemon Basil-infused jojoba oil (MABurgess photo)

Once when I enthusiastically grew a 50-foot row of Mrs Burns’ basil, it produced for me bags of dried herb, inspiring some fragrant projects. I distilled the aroma-rich herb to make a gentle hydrosol spray which, I feel, carries medicinal/psychological qualities of soothing, pacifying refreshment. By first infusing this marvelous herb in jojoba oil, I create beauty bars—with Mrs Burns’ Famous Lemon Basil as the exfoliant in the soap—available at the NativeSeeds/SEARCH store, the Flor de Mayo booth at St Phillips Farmers Market, or at http://www.flordemayoarts.com.

In my mass planting of lemon basil, I observed bees going totally ecstatic over the profuse flowers and so wished that I had had bee boxes close-by. If any desert bee-keepers want to try a new gift to their bees and to us consumers of honey, I recommend they plant this one. Can’t think of anything finer than Mrs Burns’ Famous Lemon Basil honey!

Brush leaves of devilsclaw for a cooling sensation (MABurgess)

Brush leaves of devilsclaw for a cooling sensation (MABurgess)

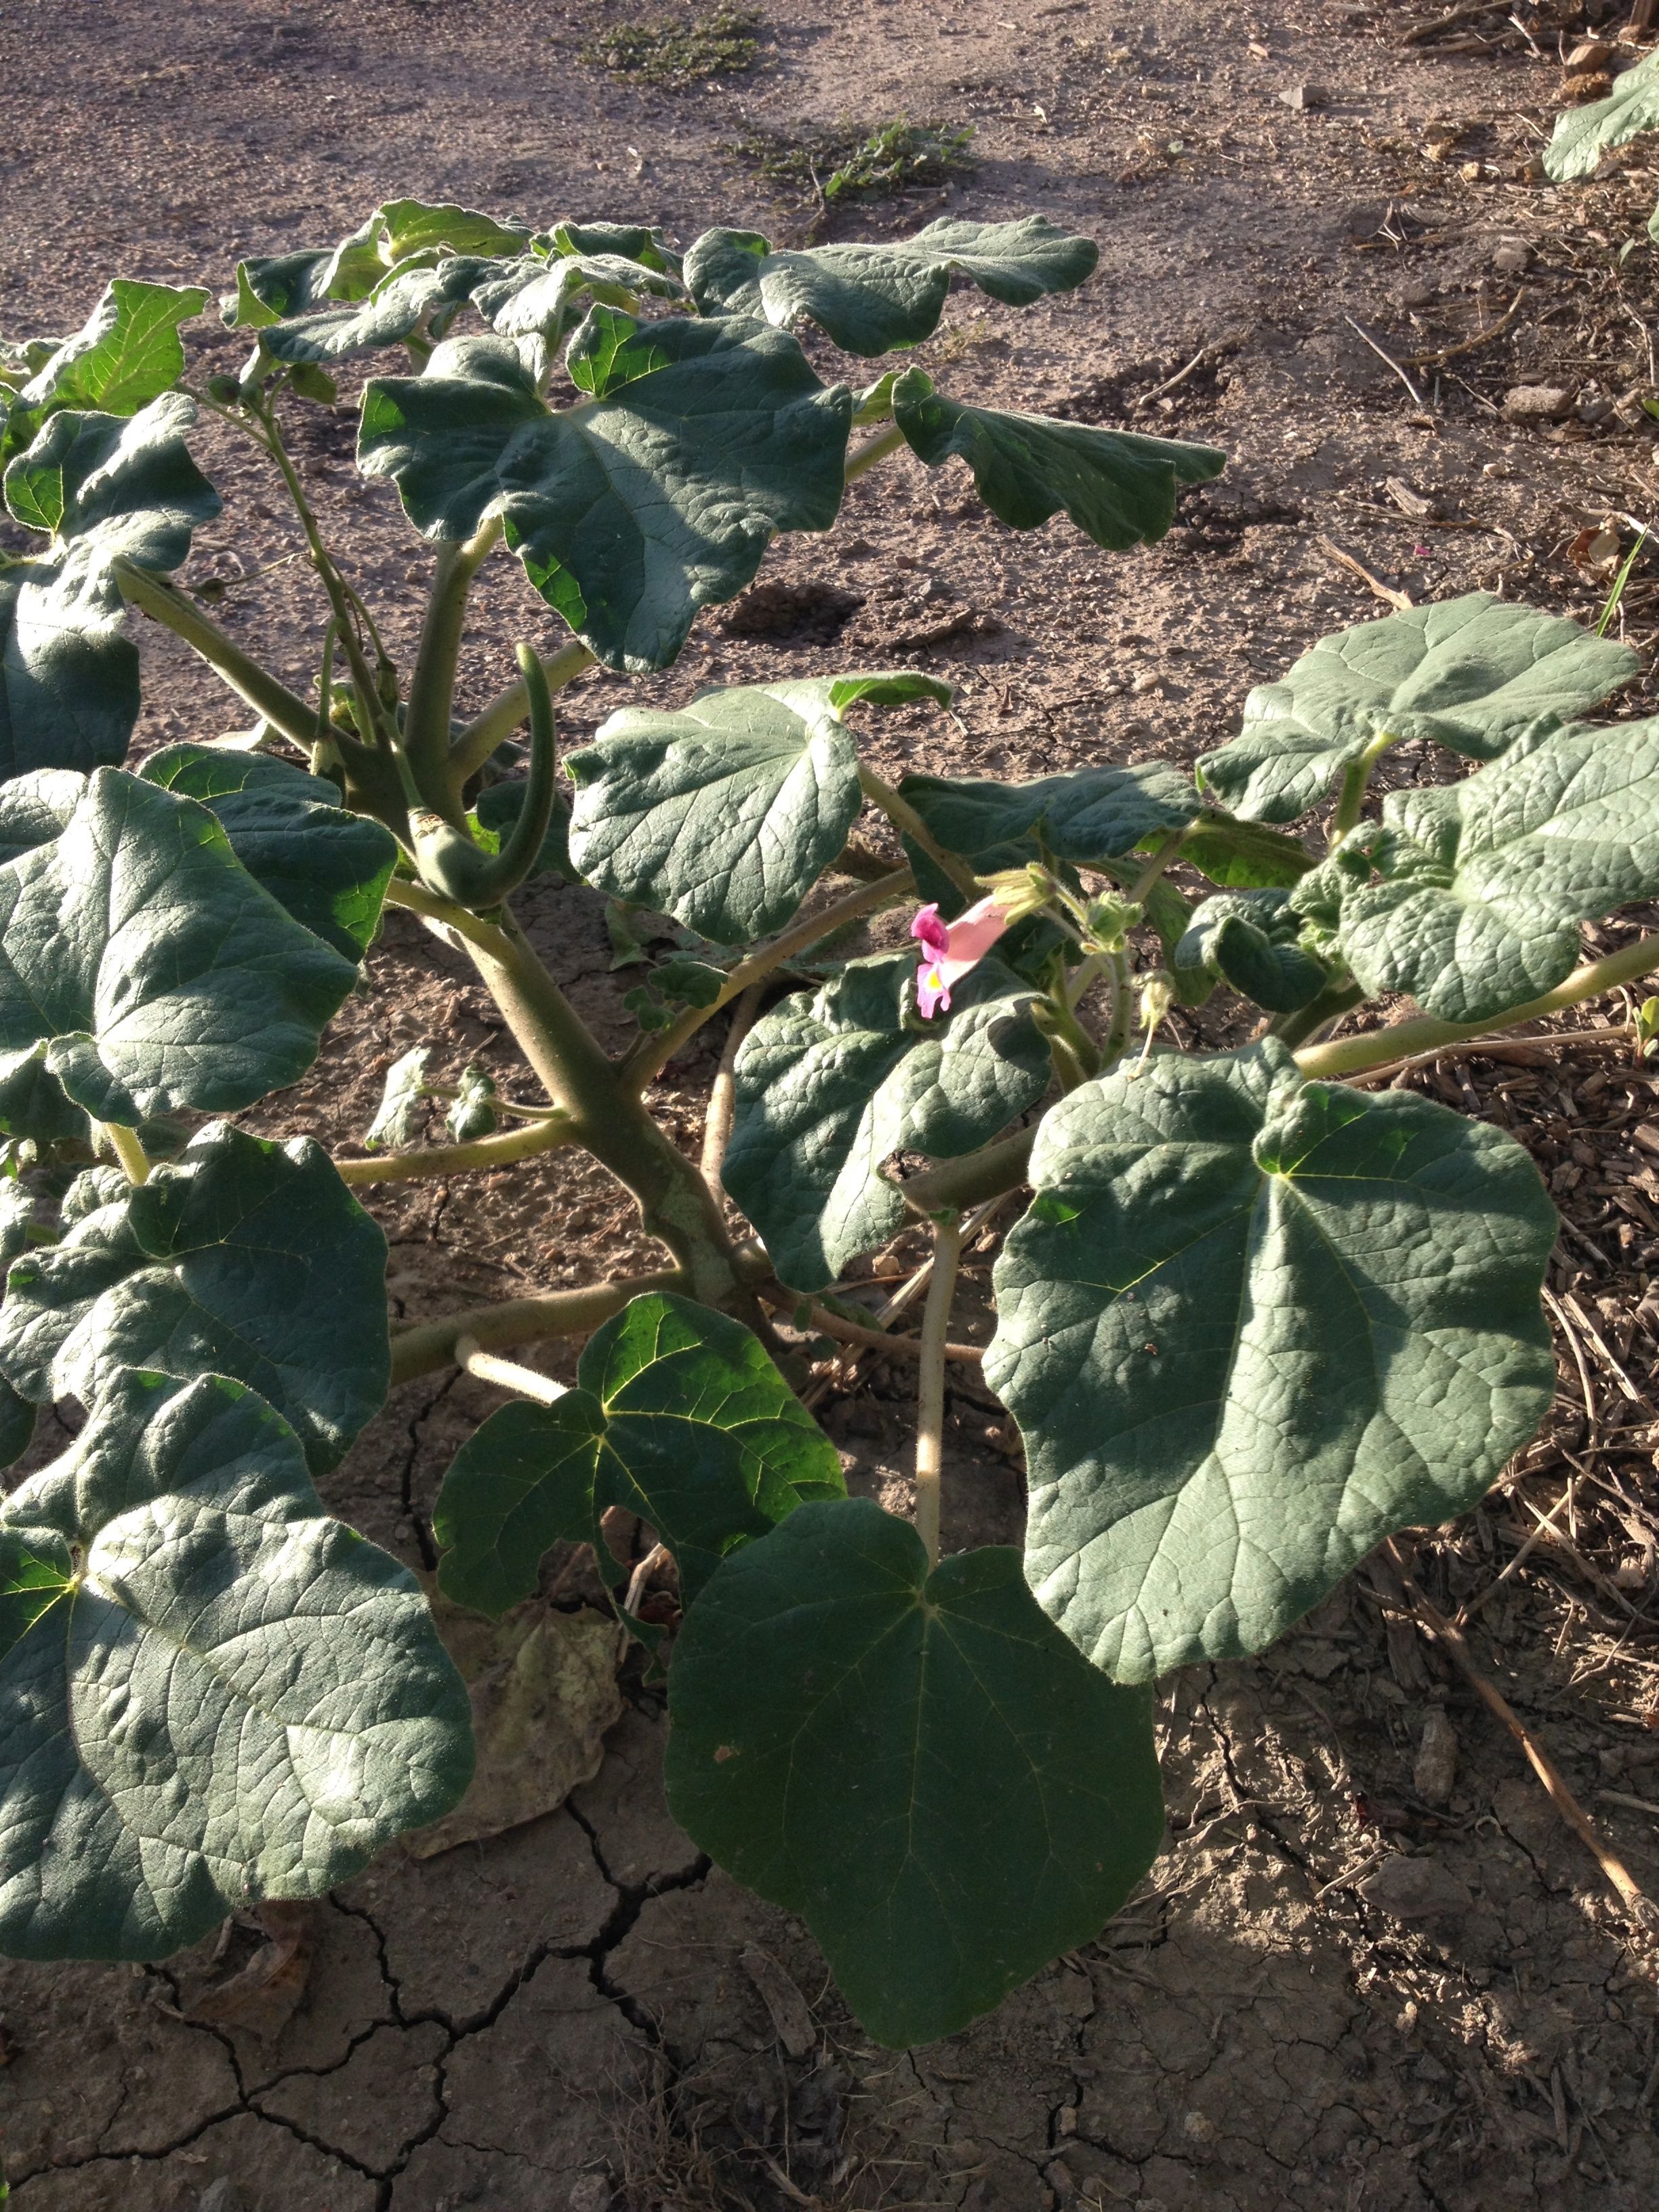
Here in culinarily-exciting Baja Arizona, as we promote the uniqueness of Tucson as an International City of Gastronomy, it is fun to consider another of our unique local food plants, a wild and unlikely weed which pops up with monsoon rains in low places, including at Mission Garden and is respectfully spared there. Known as i:hug by the Tohono O’odham (pronounced eee’hook), devilsclaw or unicorn-plant by Anglos, and Proboscidea spp by taxonomists, ours is not to be confused with the herb devilsclaw of commerce, Harpagophytum procumbens native to South Africa. Our native i:hug (of which there are a few species, some yellow-flowered, some pink) is a weed of many uses.

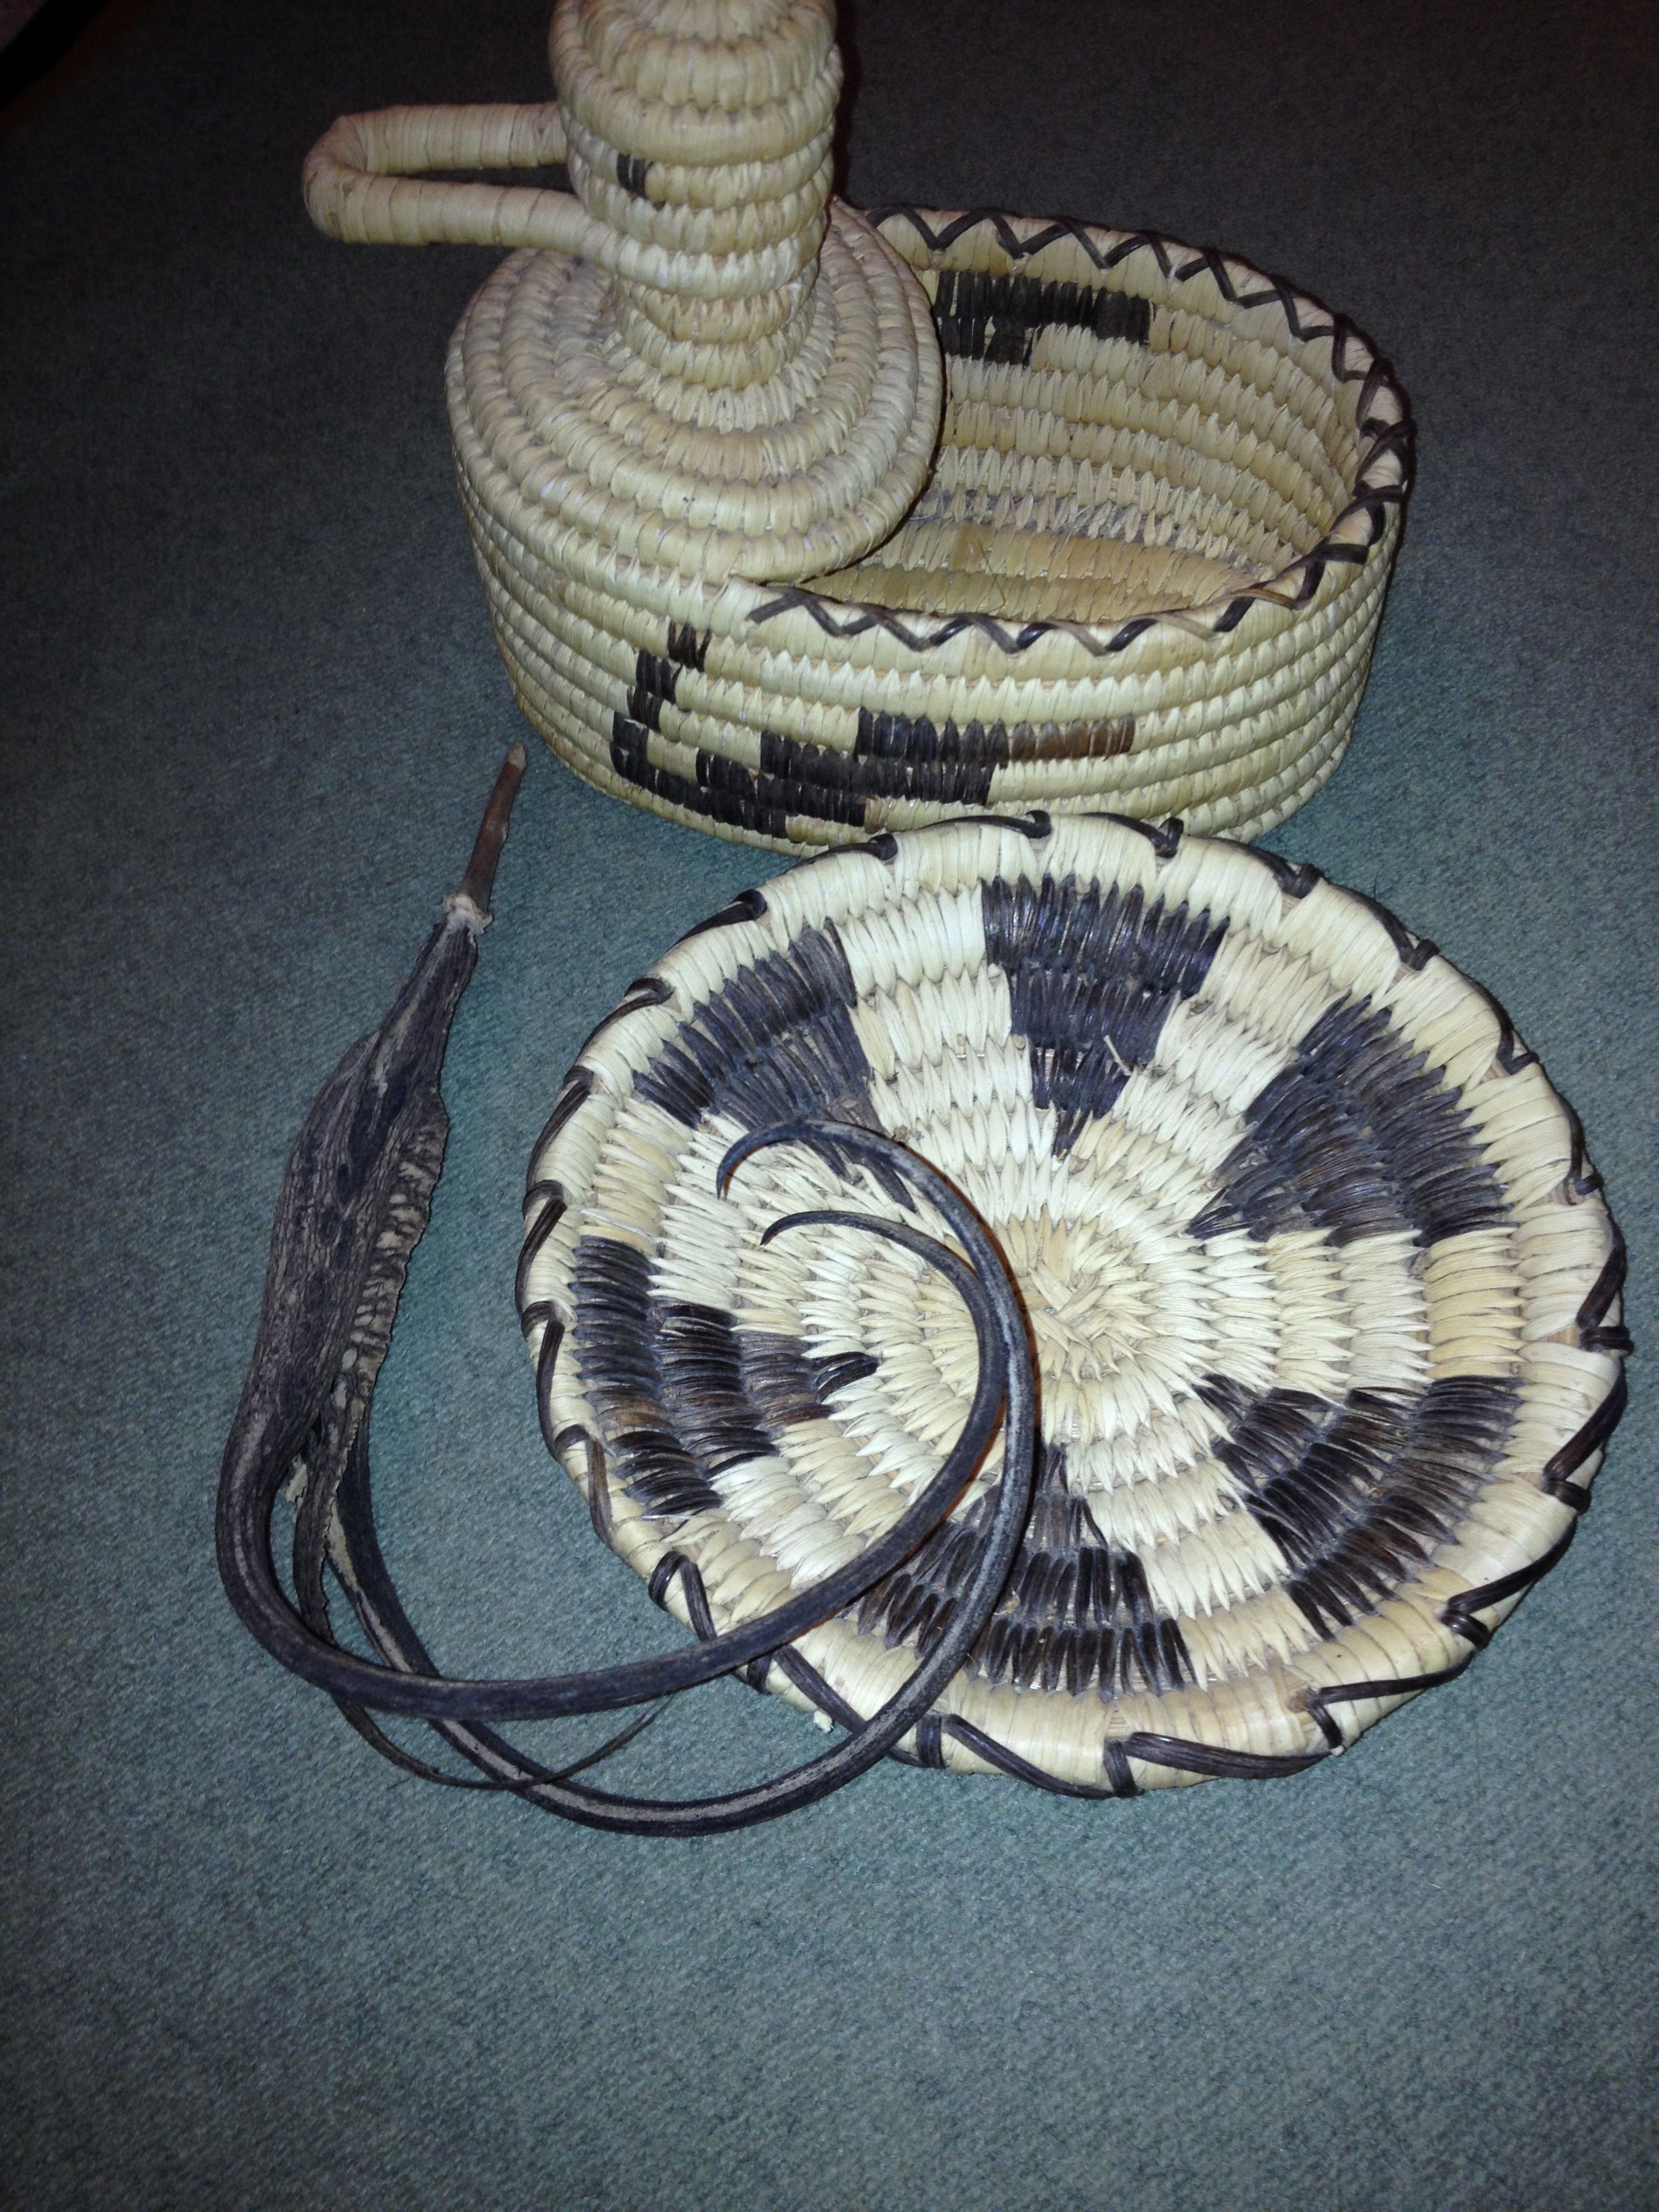
Tohono O'odham coiled basket by Juanita Ahil with domestic long-clawed i:hug (MABurgess photo)

Tohono O’odham coiled basket by Juanita Ahil with domestic long-clawed i:hug (MABurgess photo)

It is primarily known as the fiber used by Tohono O’odham, Akimel O’odham, and N’de weavers to create the striking black designs in their coiled basketry. Otis Tufton Mason’s tome Aboriginal American Indian Basketry, first published by Smithsonian Institution in 1904, shows beautiful specimens of unicorn-plant weaving, and mentions its use by many desert people including Panamint basket-makers of Death Valley.

I have a feeling that the devilsclaws that are volunteering now at Mission Garden are the children of plants that have been grown by Native People in that very place along the Santa Cruz for many centuries.

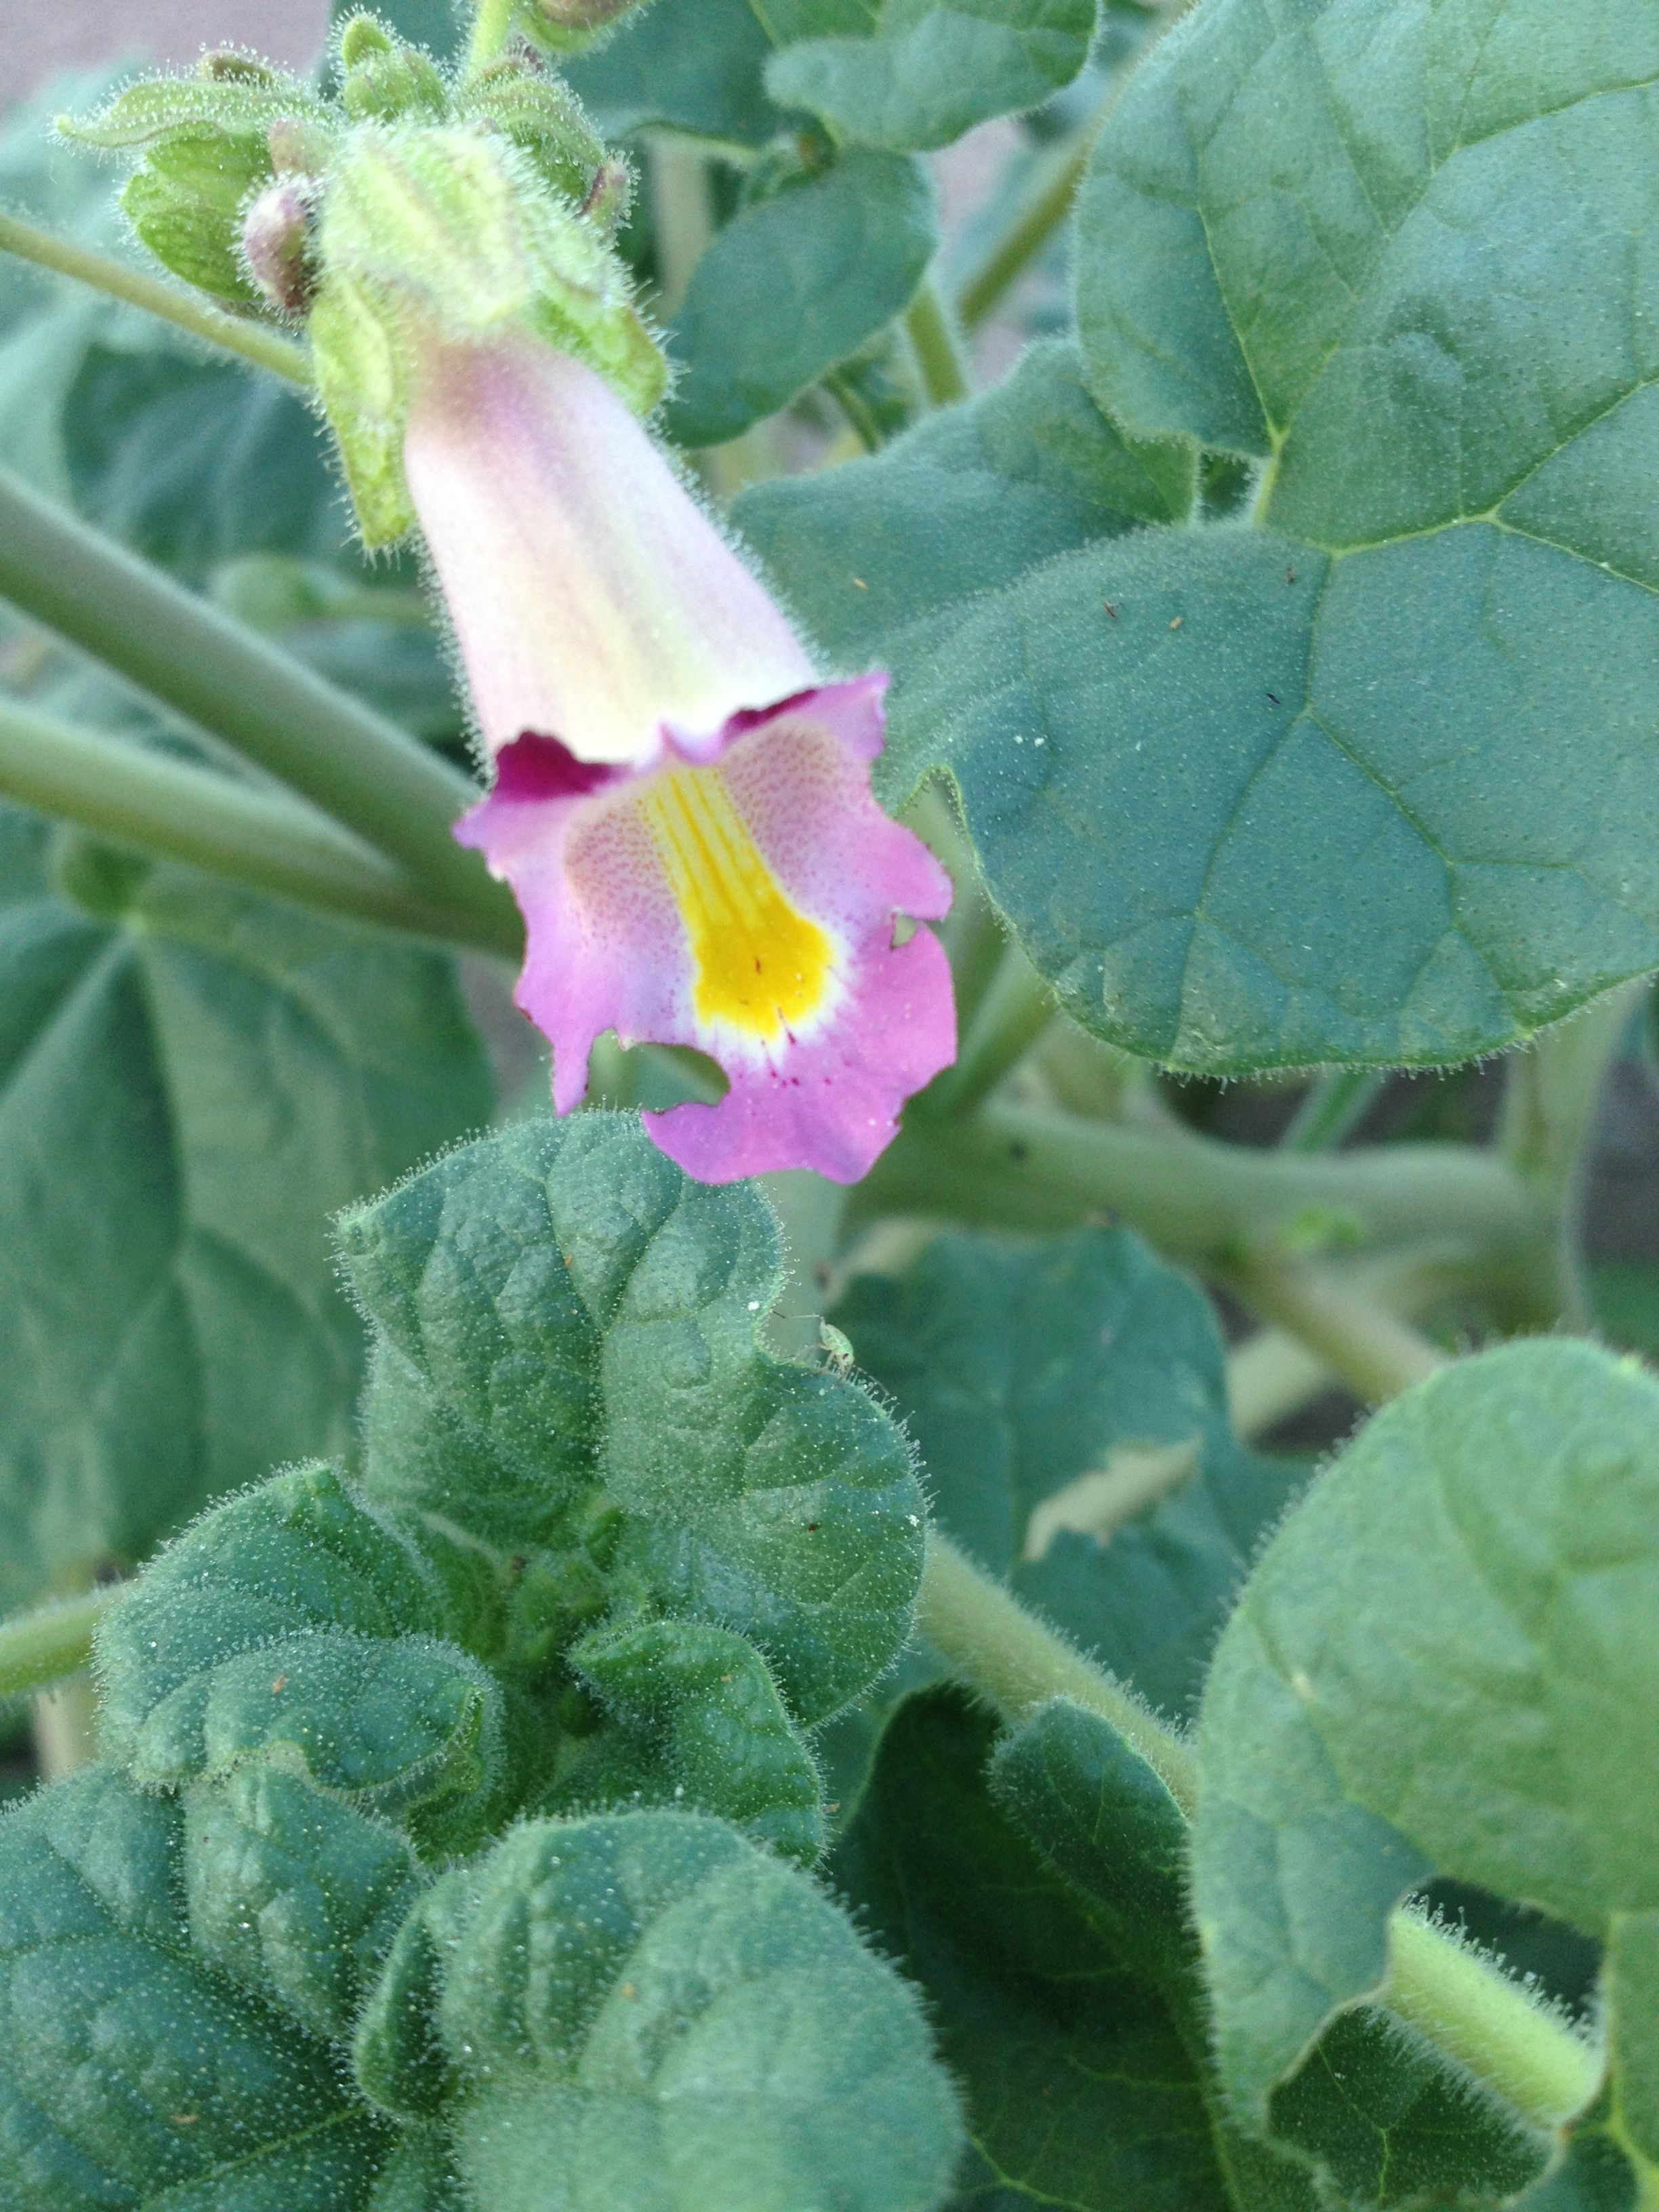
Devilsclaw (Proboscidea) flower close-up (MABurgess photo)

Devilsclaw (Proboscidea) flower close-up (MABurgess photo)

As an ornamental, unicorn-plant or devilsclaw can be a welcome surprise of greenery in late summer into fall, making a mound of large leaves sometimes 2’ high and 3’ wide. Tucked among its spreading fuzzy branches, under velvety maple-leaf-shaped foliage, will appear tubular flowers edged in pink. Should you need a cooling touch on a hot day, just lightly brush one of its big leaves and you are instantly refreshed. The velvety look of devilsclaw foliage is actually one of the plant’s defenses against water-loss. Each leaf is covered with fine hairs. At each hair tip is a gland containing a microscopic bead of moisture. Hair causes wind-drag, slowing evaporation from the leaf surface. What evaporates from the glands acts to cools the leaf—what remains can also cool our skin, should we touch it.

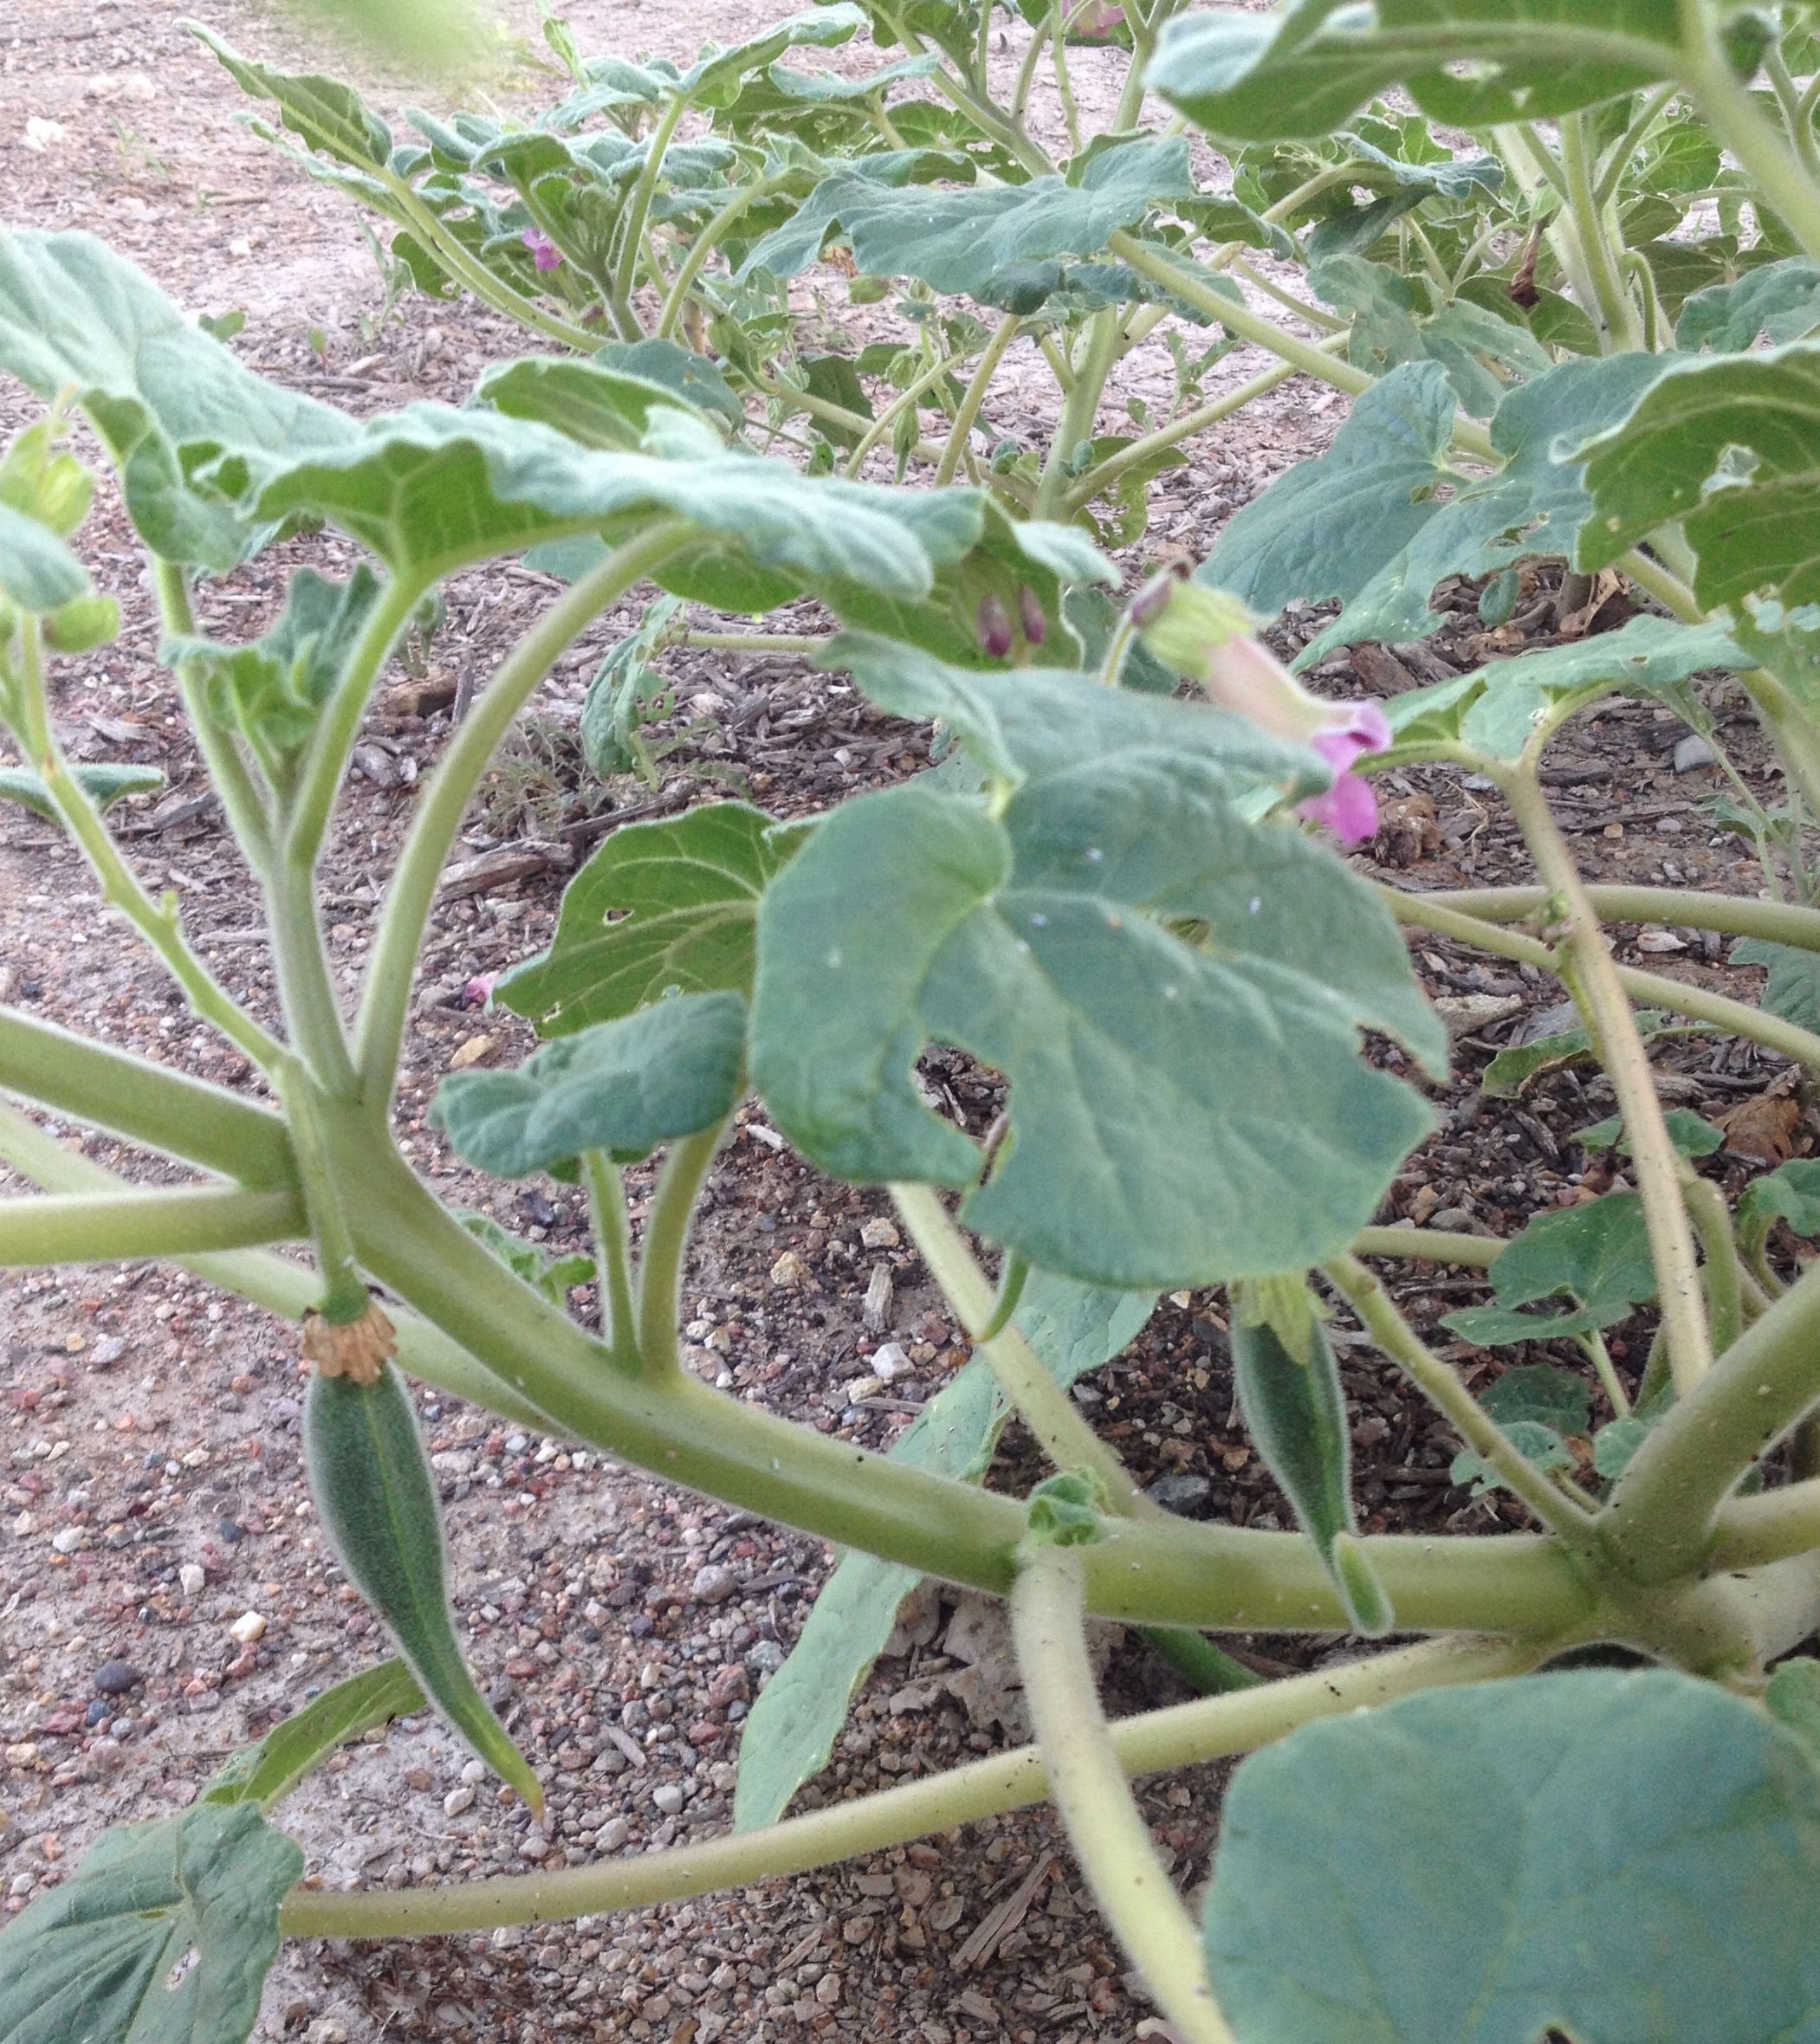
Young, harvestable devilsclaw pods (MABurgess photo)

Young, harvestable devilsclaw pods (MABurgess photo)

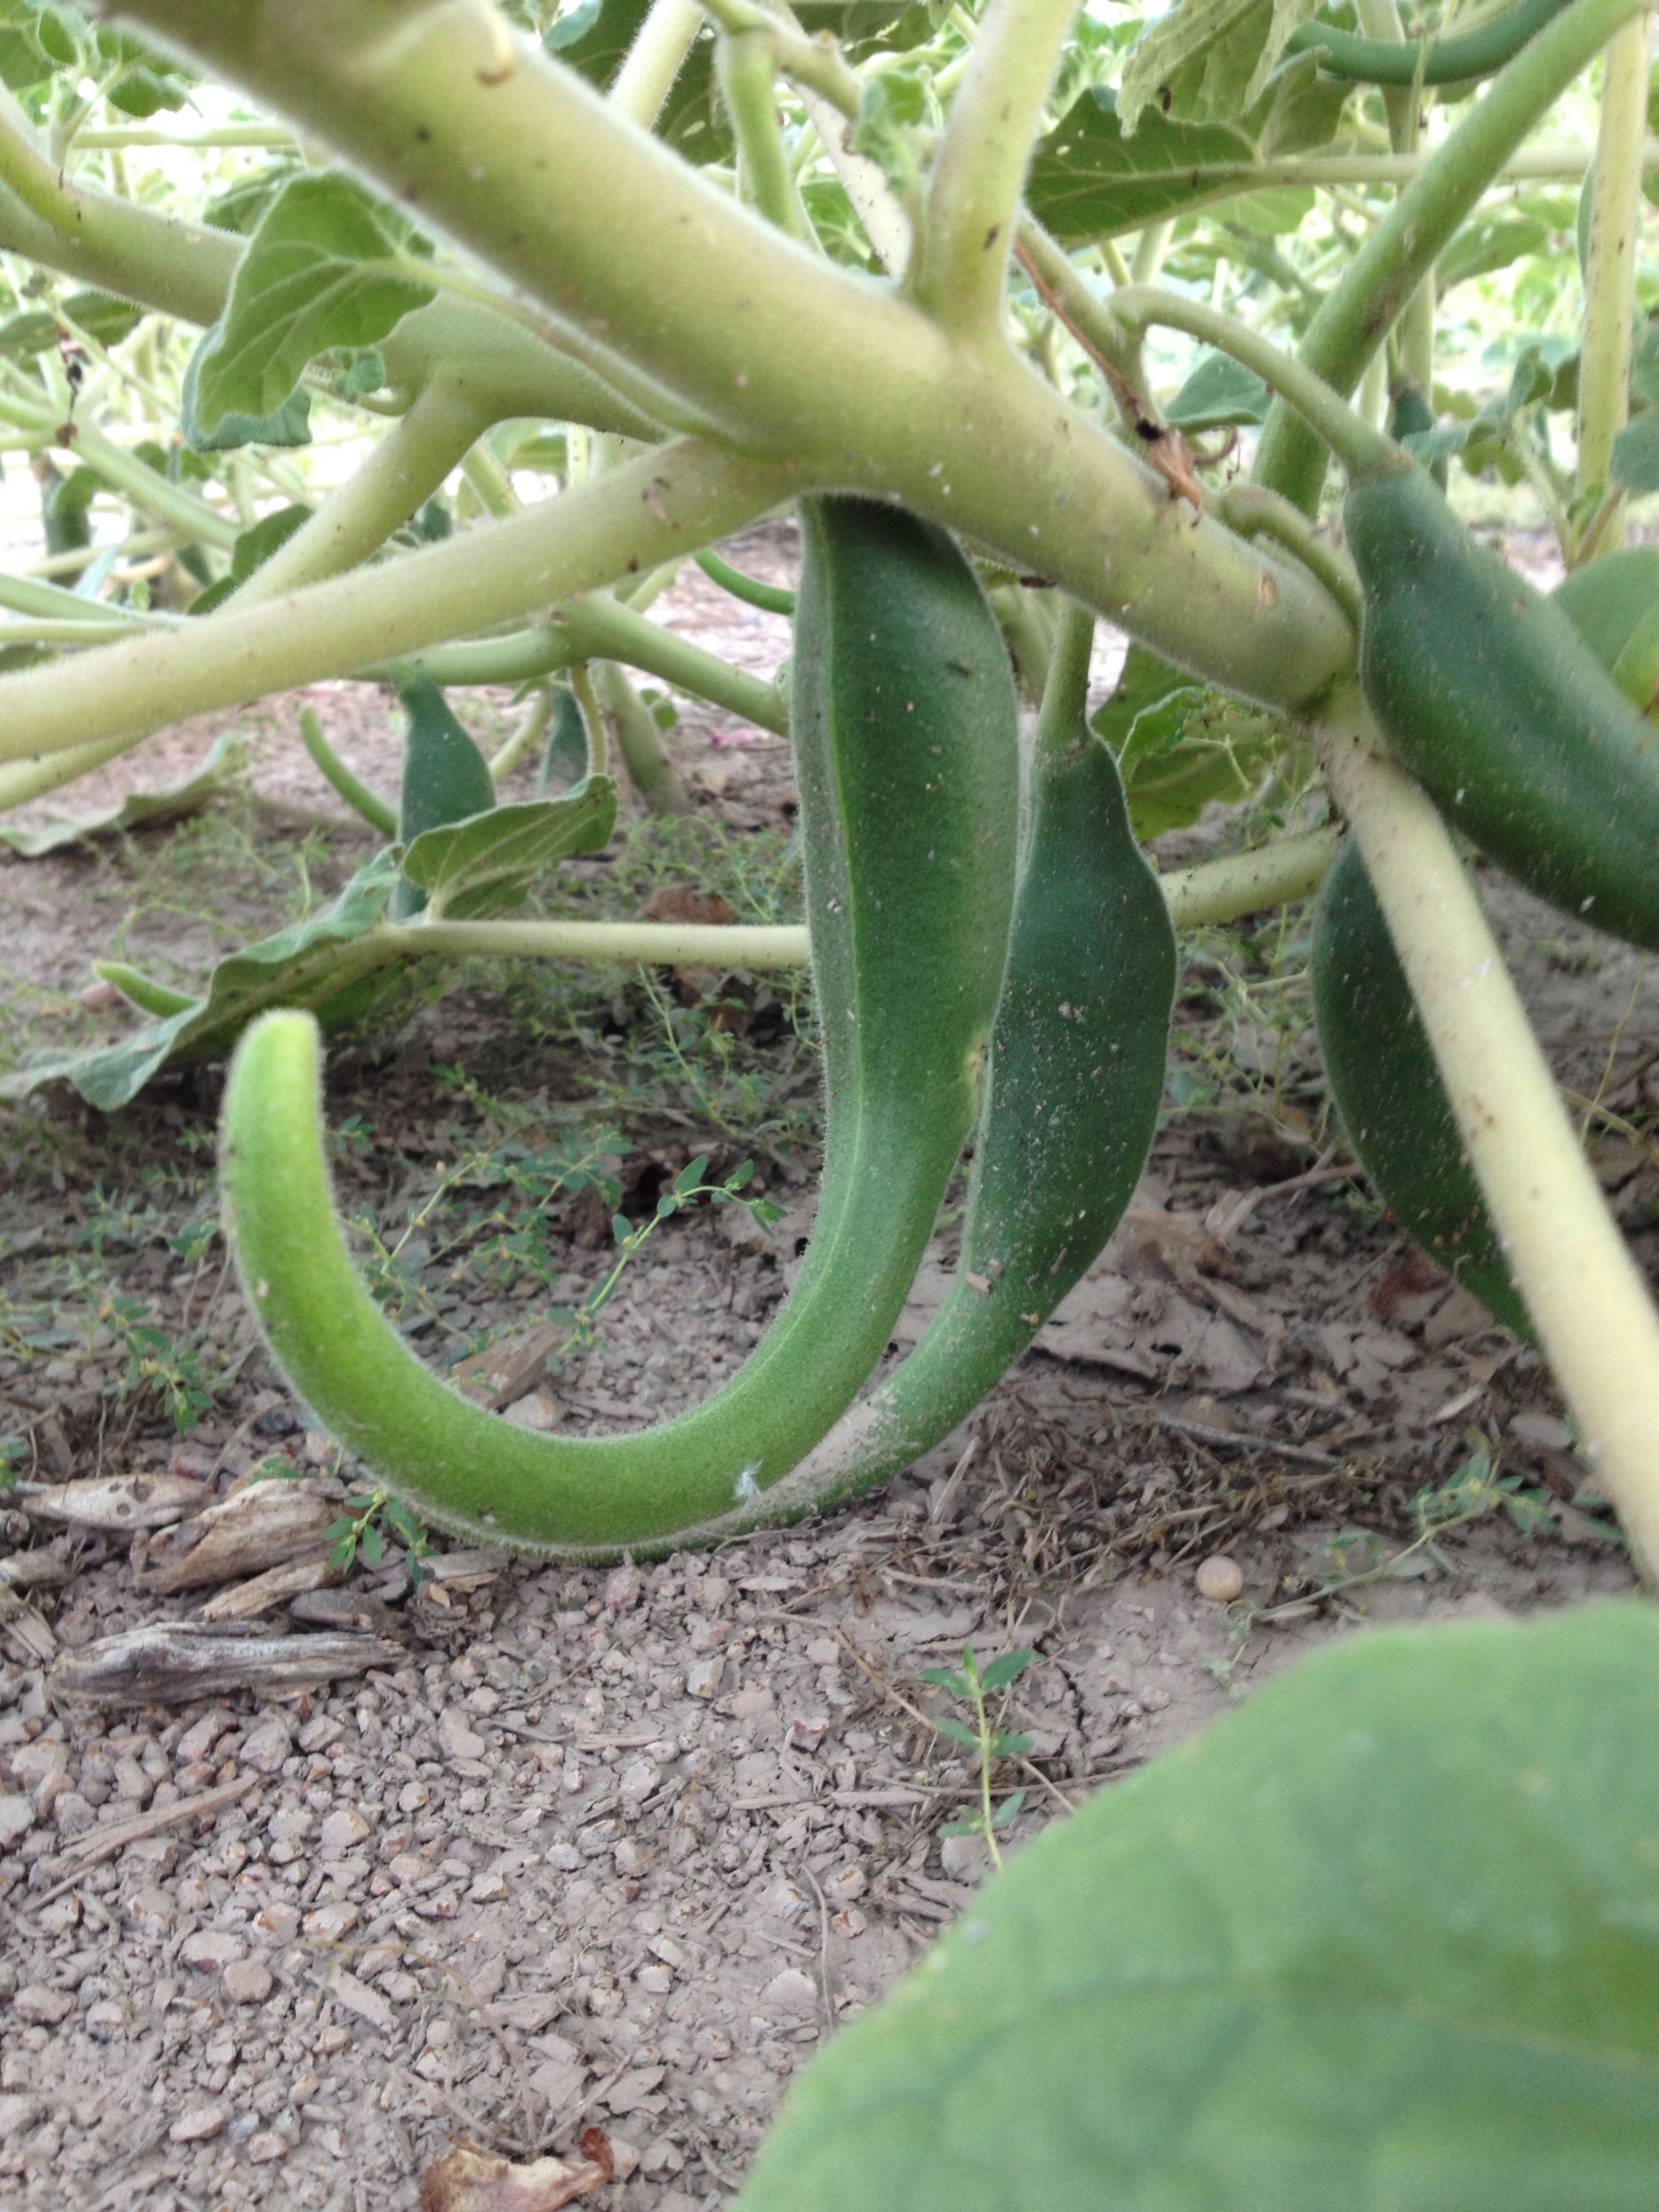
Most interesting of all are the foods that our native devilsclaw can provide. After pollination of the flower, a small green curved pod emerges like a curled, fuzzy okra. When young, that is, under about 2 ½” long, and before the pod develops woody tissue inside, these small green unicorns can be steamed as a hot vegetable, stir-fried with onion, green chile or nopalitos, or pickled for a Baja Arizona snack.

Maturing green devilsclaw pods beyond the food stage (MABurgess)

Maturing green devilsclaw pods beyond the food stage (MABurgess)

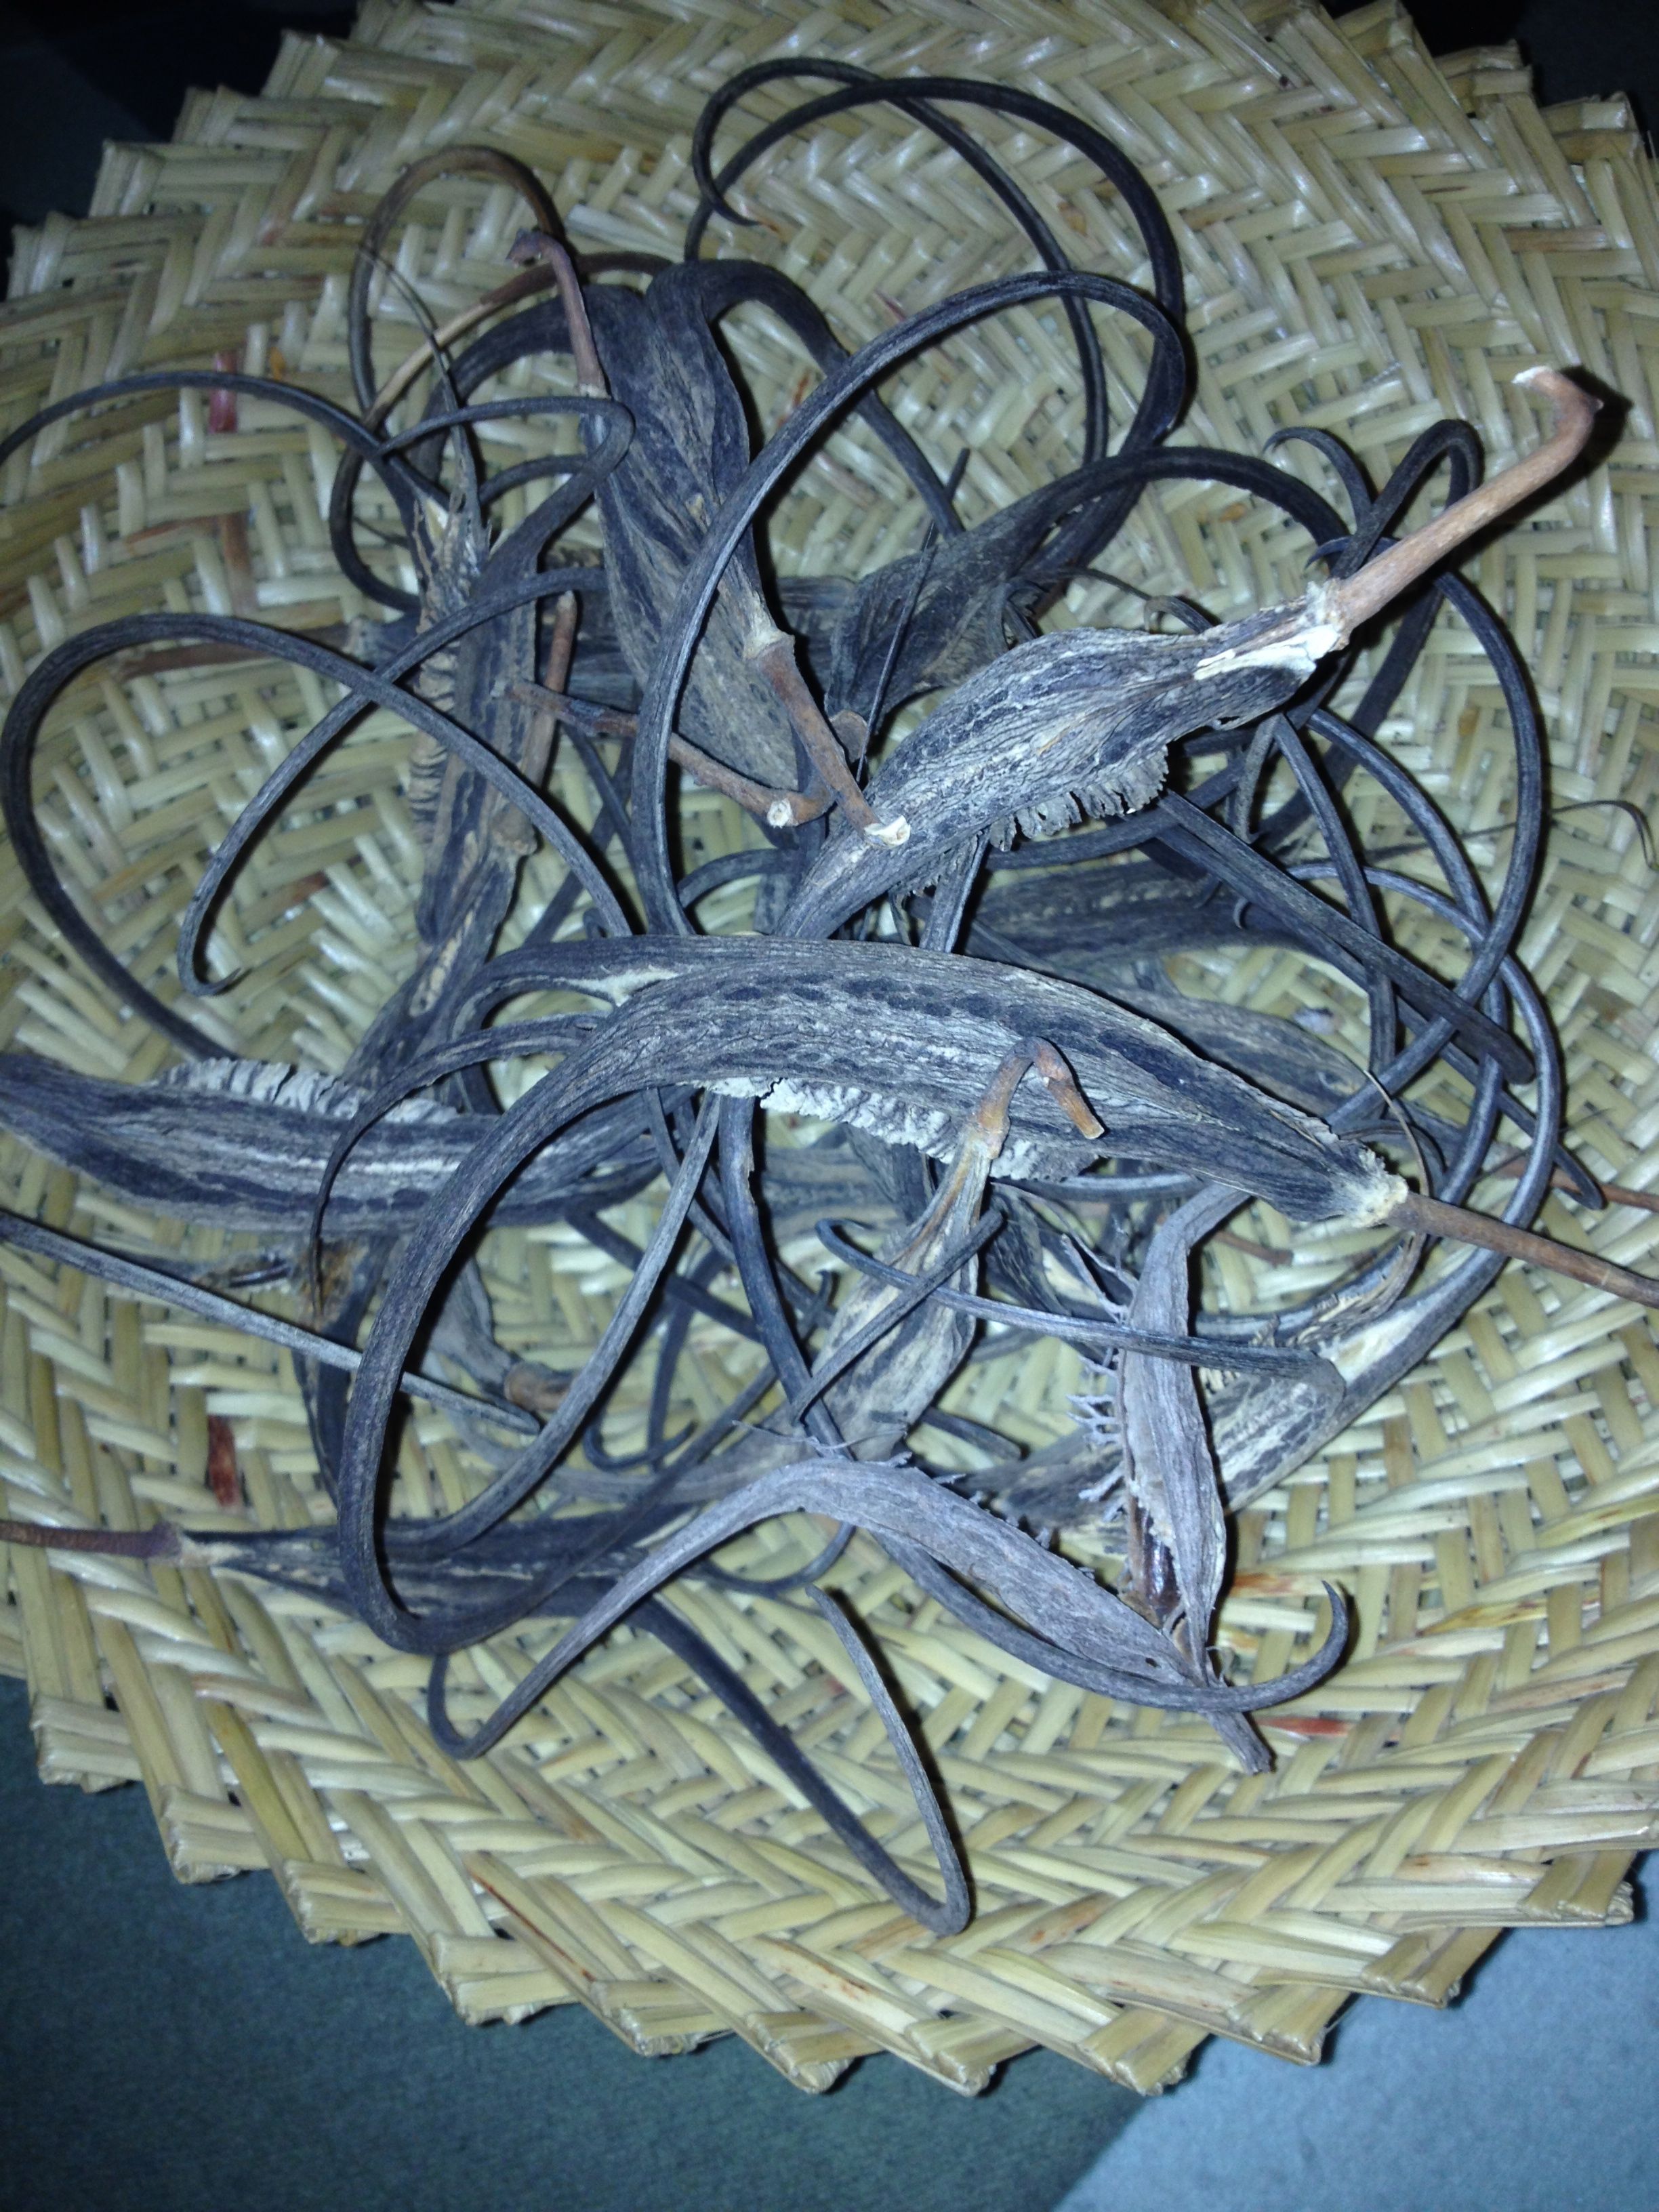
Tangled wild devilsclaw dry pods ready to split for basketry and seed harvesting (MABurgess)

Tangled wild devilsclaw dry pods ready to split for basketry and seed harvesting (MABurgess)

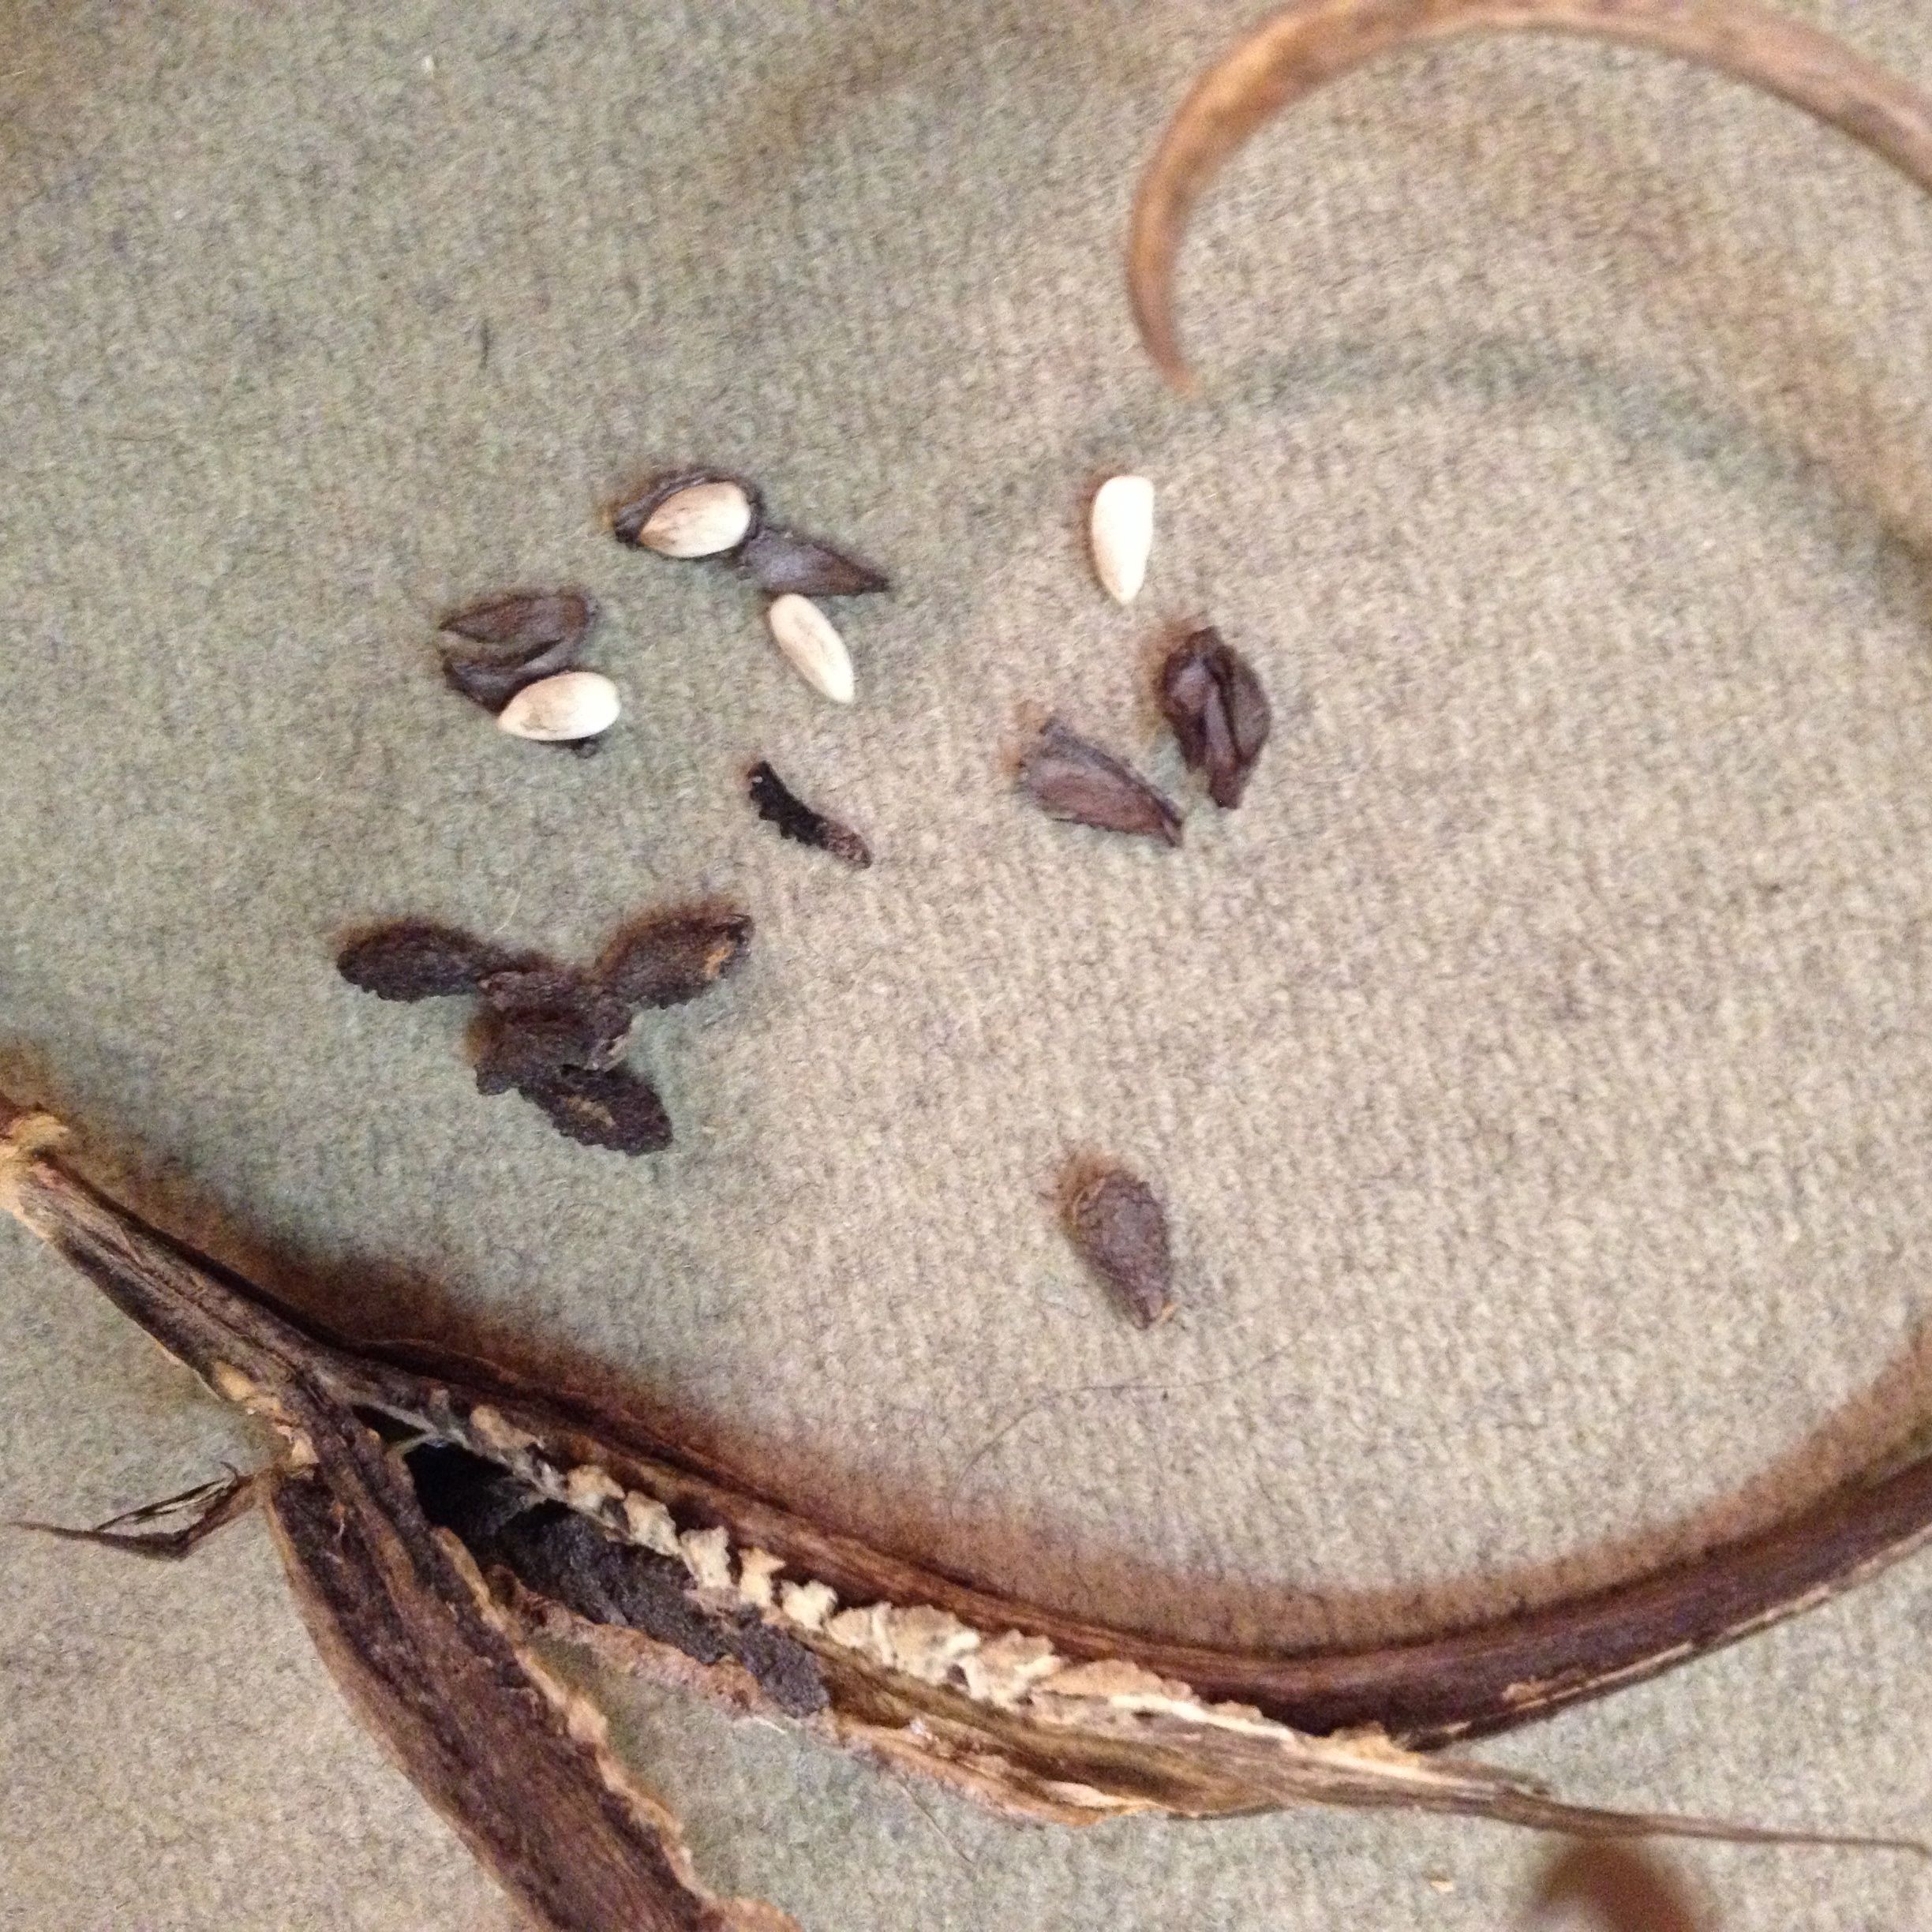
When the long green pods of devilsclaw ripen, the skin will dry and slough off leaving a tough, black, woody seed-pod that splits with very sharp tips. (Beware how they can grab—they were “designed” to hitch a ride on a desert critter’s hoof or fur and thus spread the seed.) With care, and sometimes the need for pliers, open the pod and out will come little rough-surfaced seeds. If your incisors are accurate, and if you have lots of time to get into meditations on i:hug, you can peel off the rough outer seed skin. Inside is a yummy, oil-rich and fiber-rich seed that looks like an overgrown sesame seed. (In fact, scientists at one point had classified Proboscidea in the same taxonomic family as sesame but it now stands in its own.)

Black seeds of wild devilsclaw from split pod.  White inner seeds delish after peeling (MABurgess photo)

Black seeds of wild devilsclaw from split pod. White inner seeds are delish after peeling. (MABurgess photo)

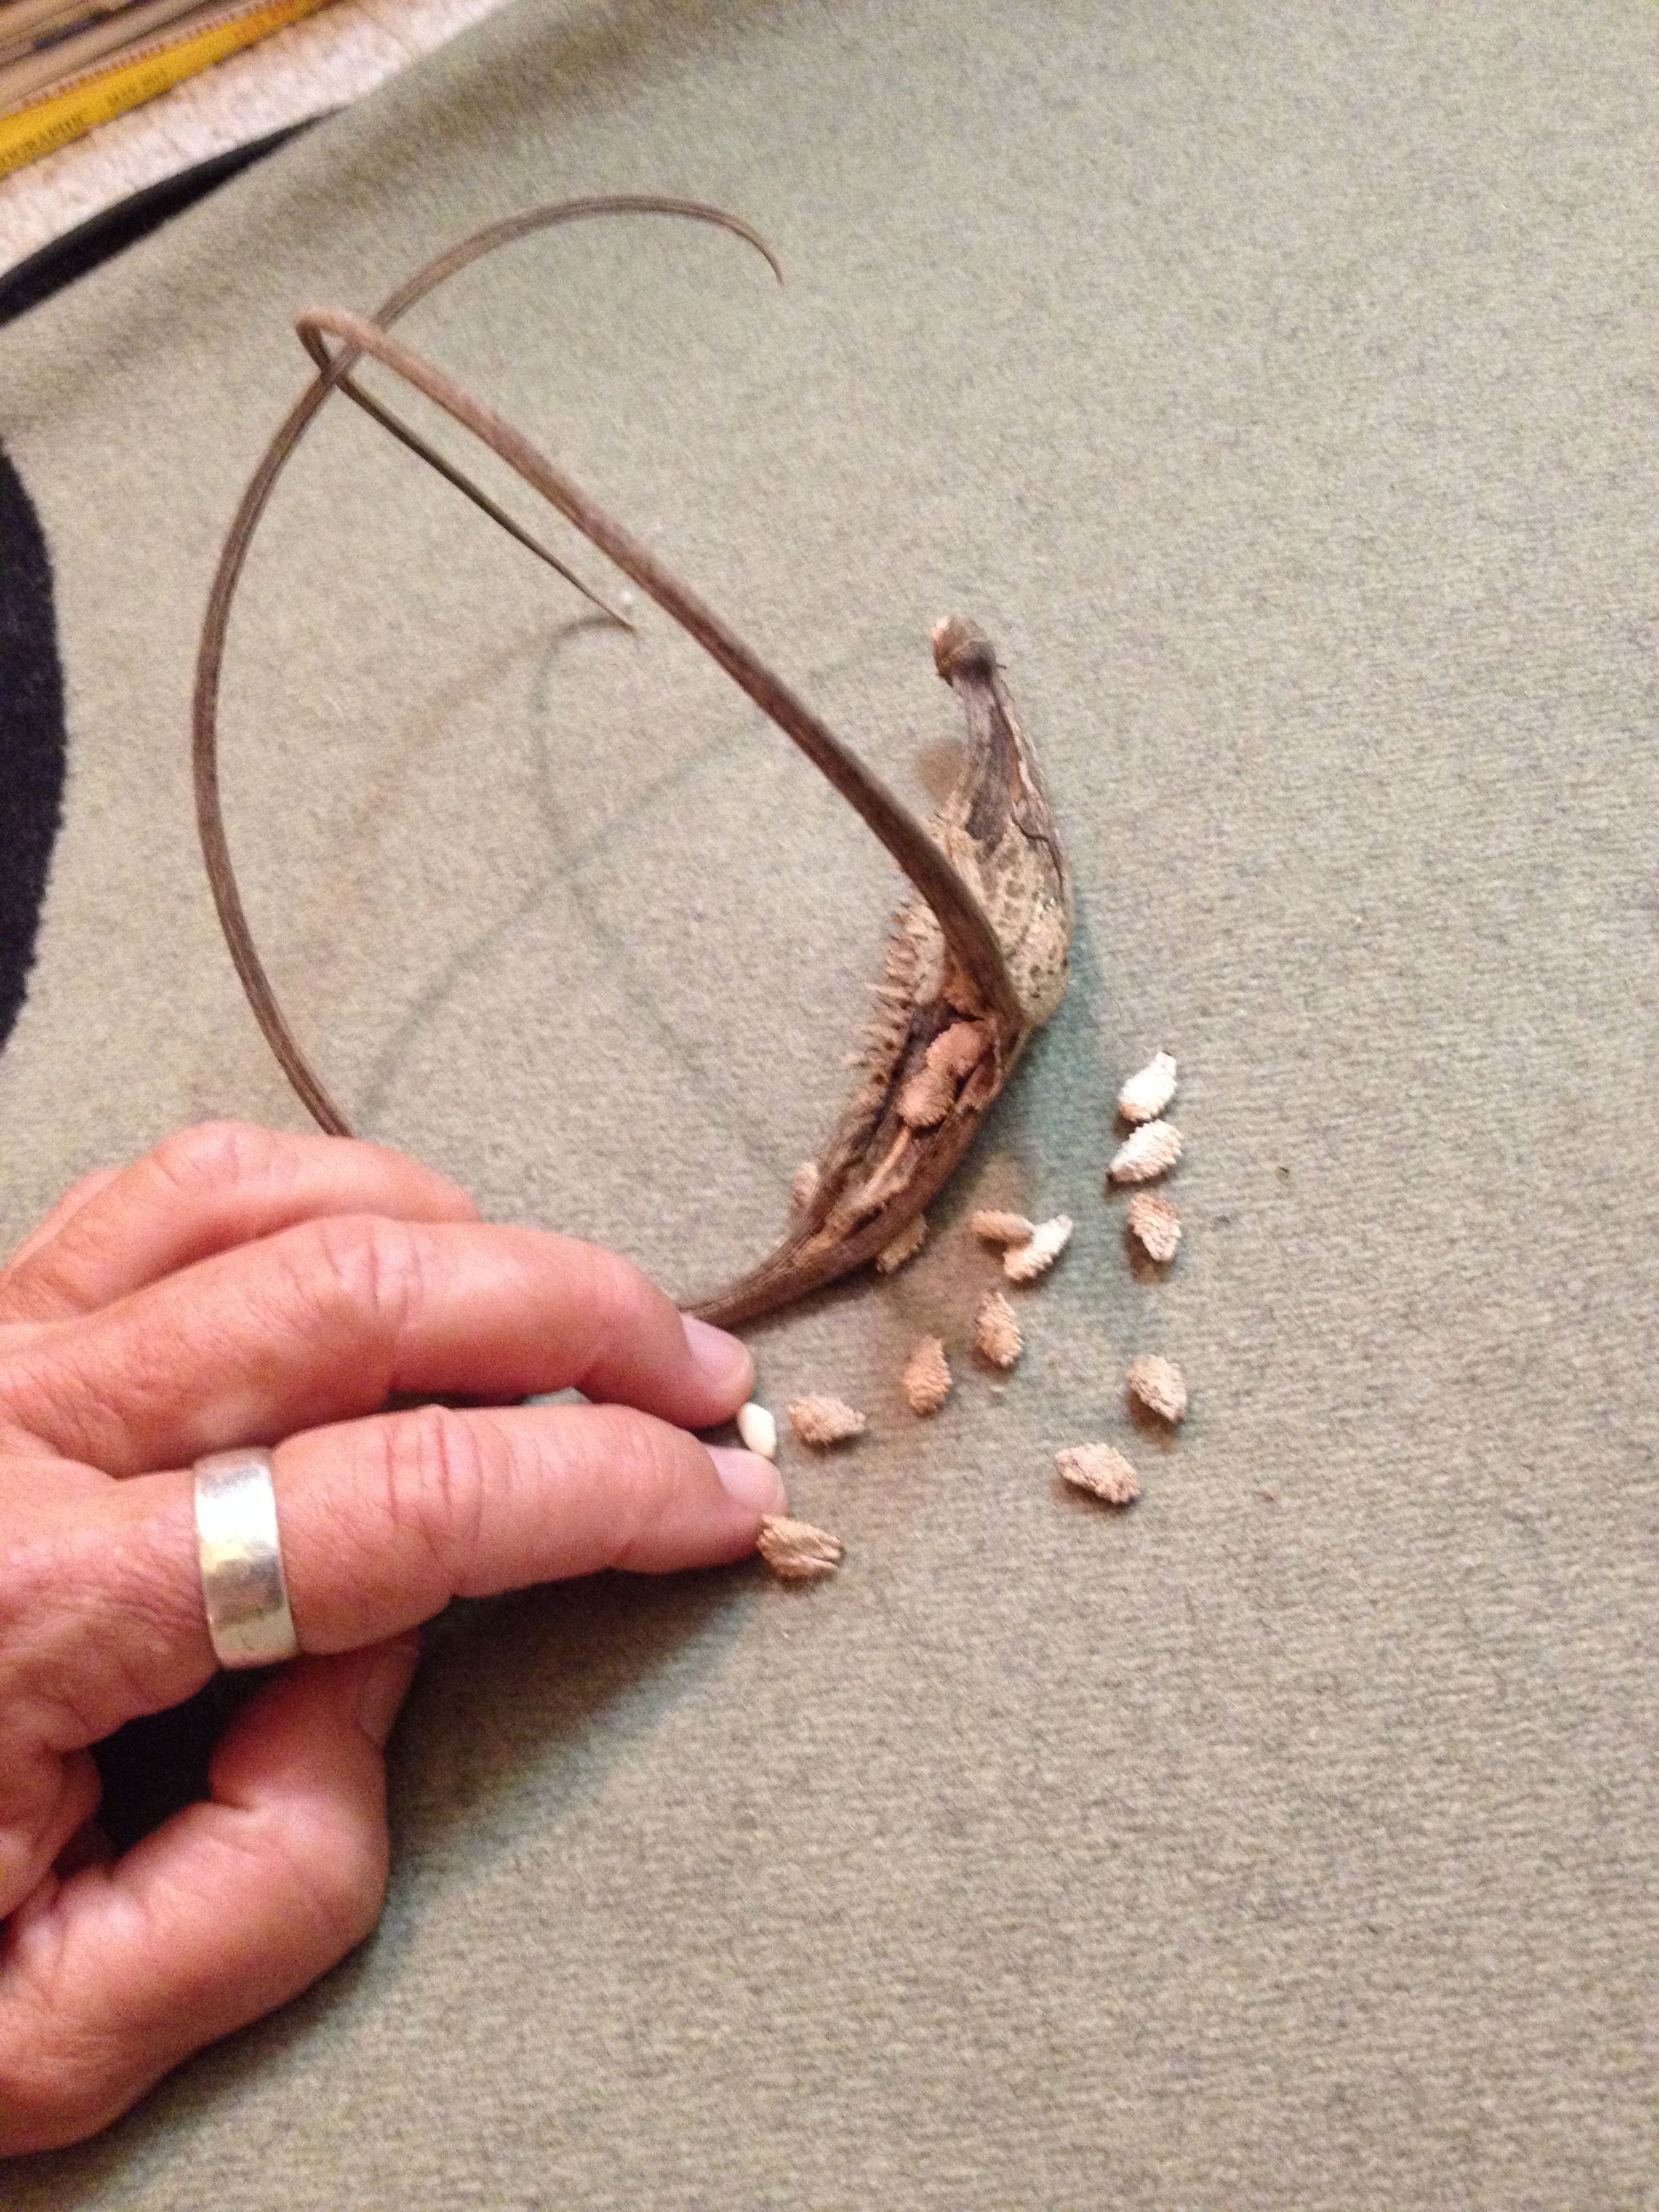
White-seeded domestic devilsclaw has slightly larger seeds like giant sesames (MABurgess photo)

White-seeded domestic devilsclaw has slightly larger seeds like giant sesames.  Peeled inner seed between fingers is ready to eat. (MABurgess photo)

When I see cutesy figurines of roadrunners or Christmas ornaments made with devilsclaw pods, my first thought is, wow, what a waste of a good treat, but then gladly, I realize that this unique plant produces more than enough fresh pods and mature pods to satisfy all the purposes of Nature or hungry and/or creative humans. Give i:hug a try!

Fermented salsas

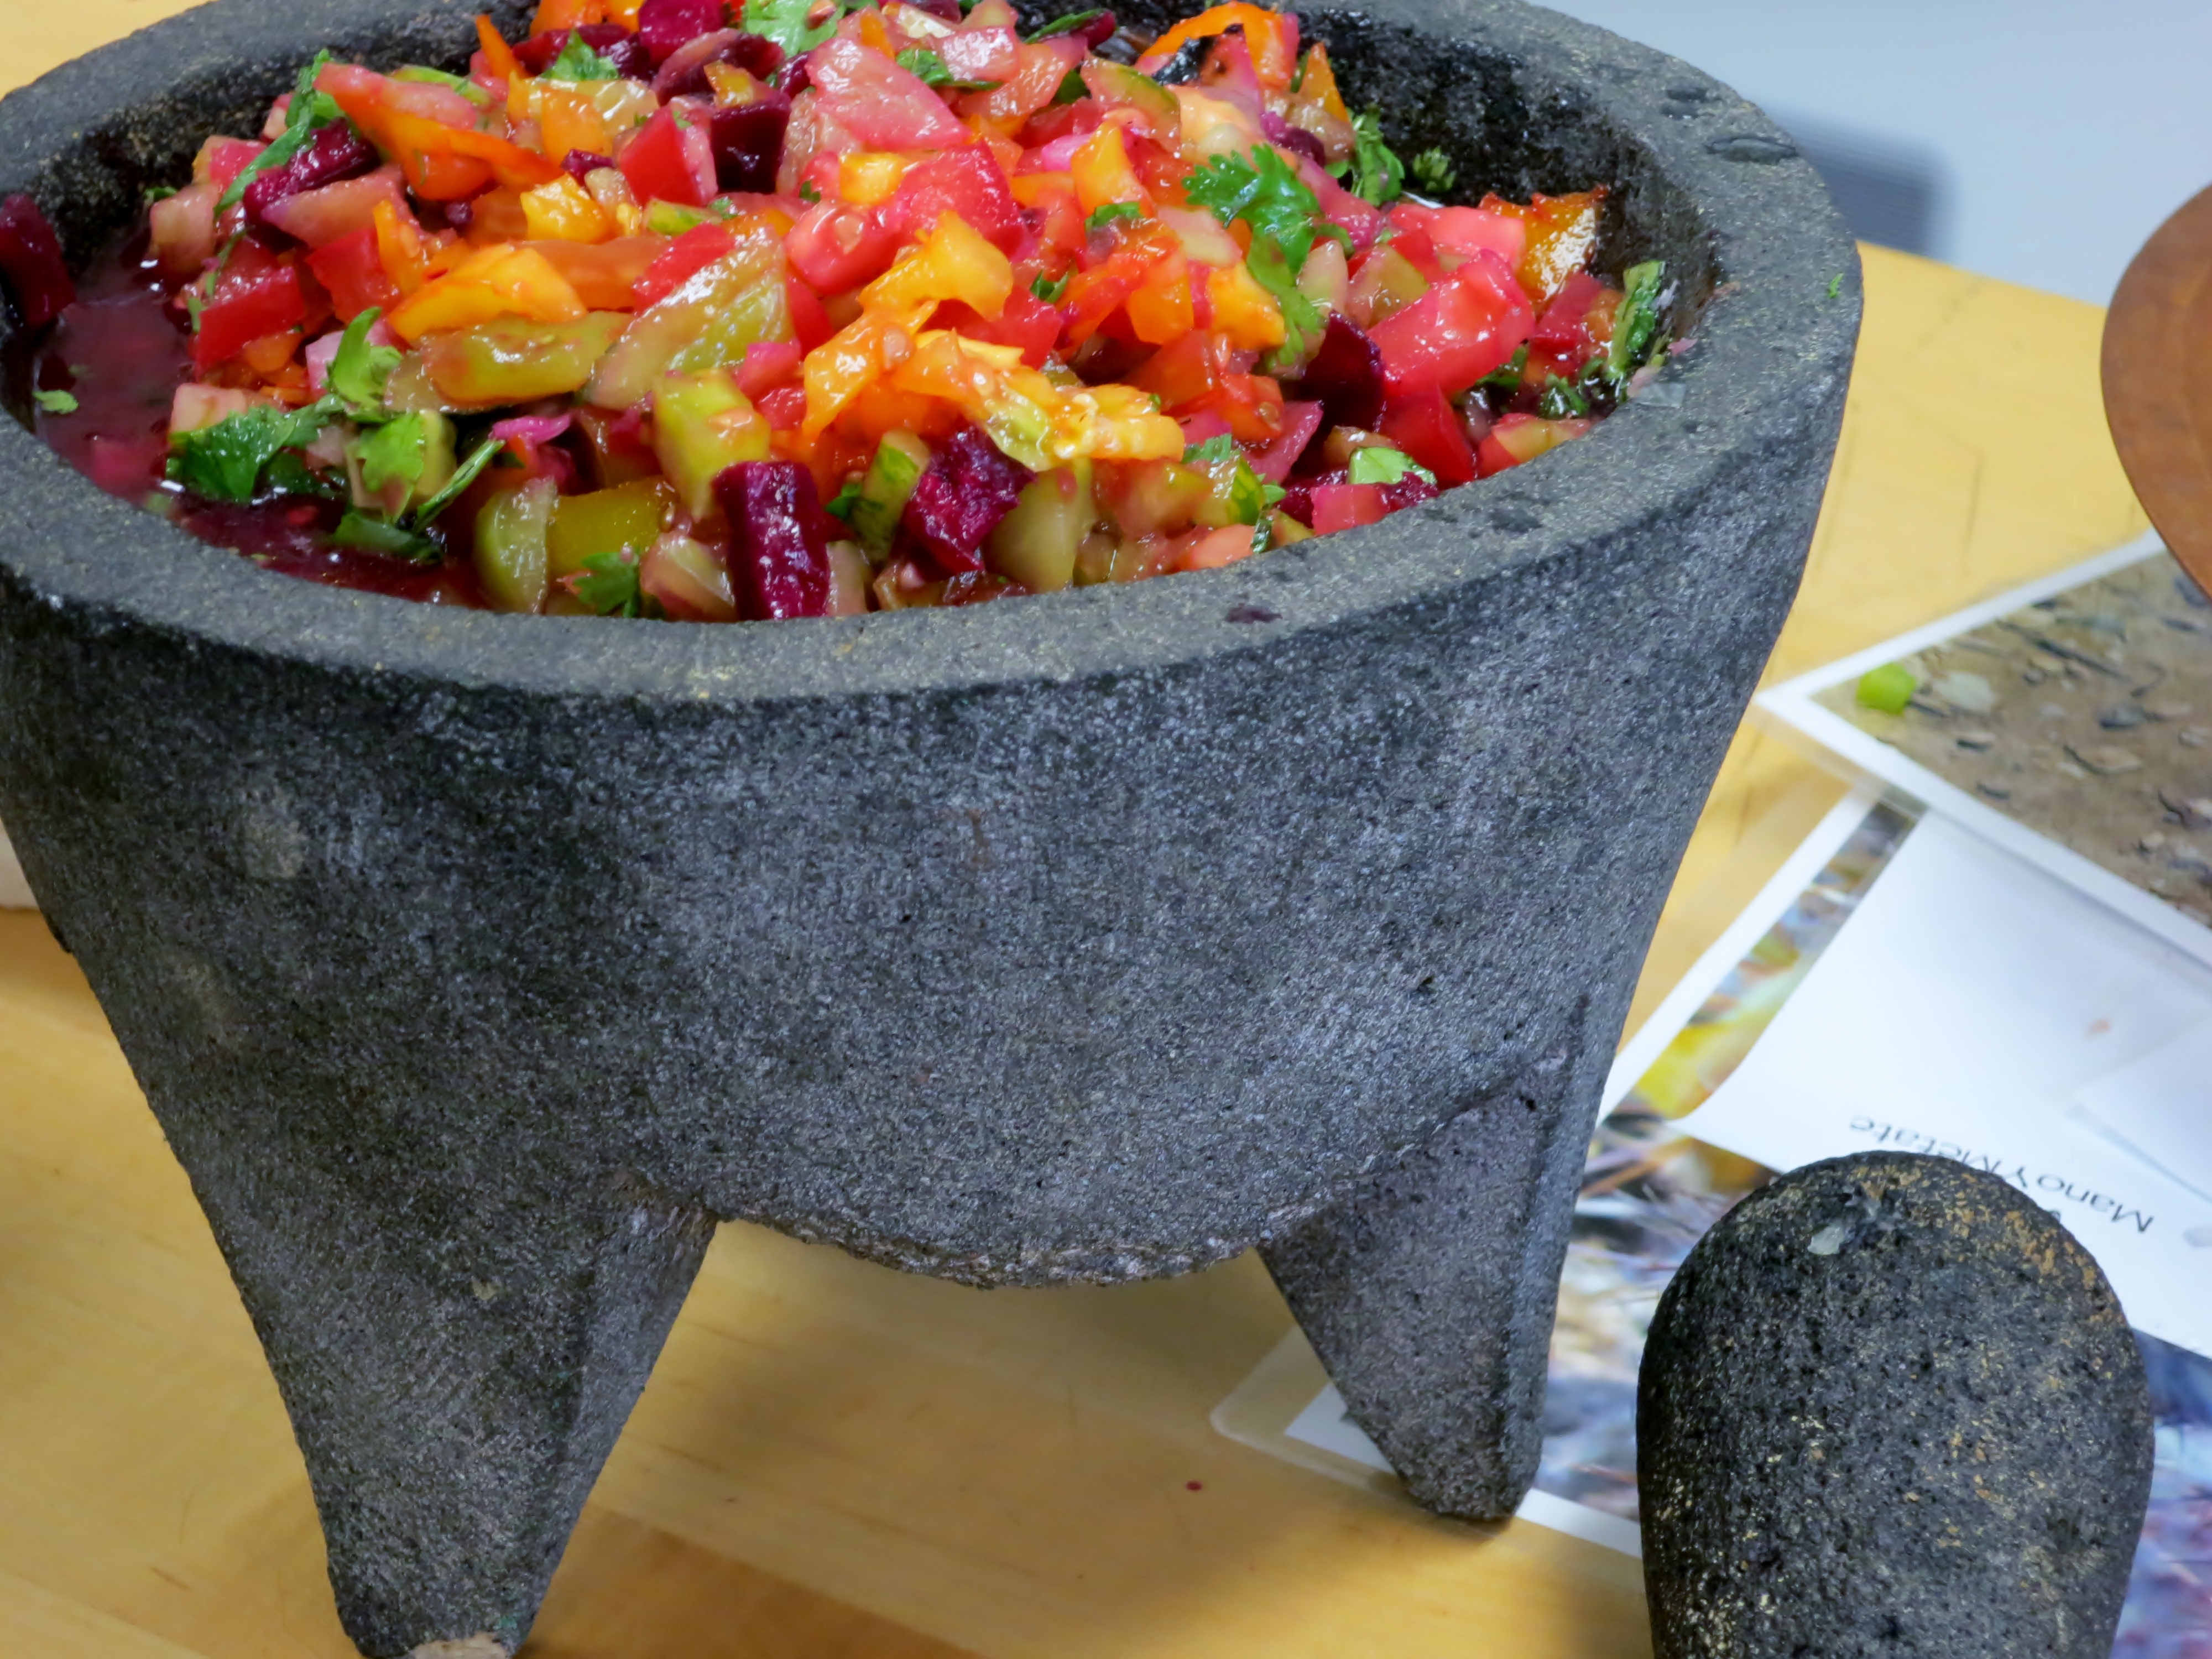
molcajete

fermented salsa,with fresh cilantro and tunas (prickly pear fruit) added before serving

Amy Valdés Schwemm

Amy Valdés Schwemm

Naturally fermenting salsa makes a richer and more complex flavor than simply adding vinegar or lime juice, but it does take a little patience. I love tart salsas and sour foods with a bite. Grandma and Grandpa Schwemm on my dad’s side passed on a tradition of sauerkraut, and my mom’s family loves chile. How could chiles fermented like kraut not be my favorite food?

Fermented salsa is a source of pro-biotic microorganisms, recently rediscovered as essential for the digestive system. Home fermented foods probably provide more active and diverse cultures than what comes in a capsule at great expense.

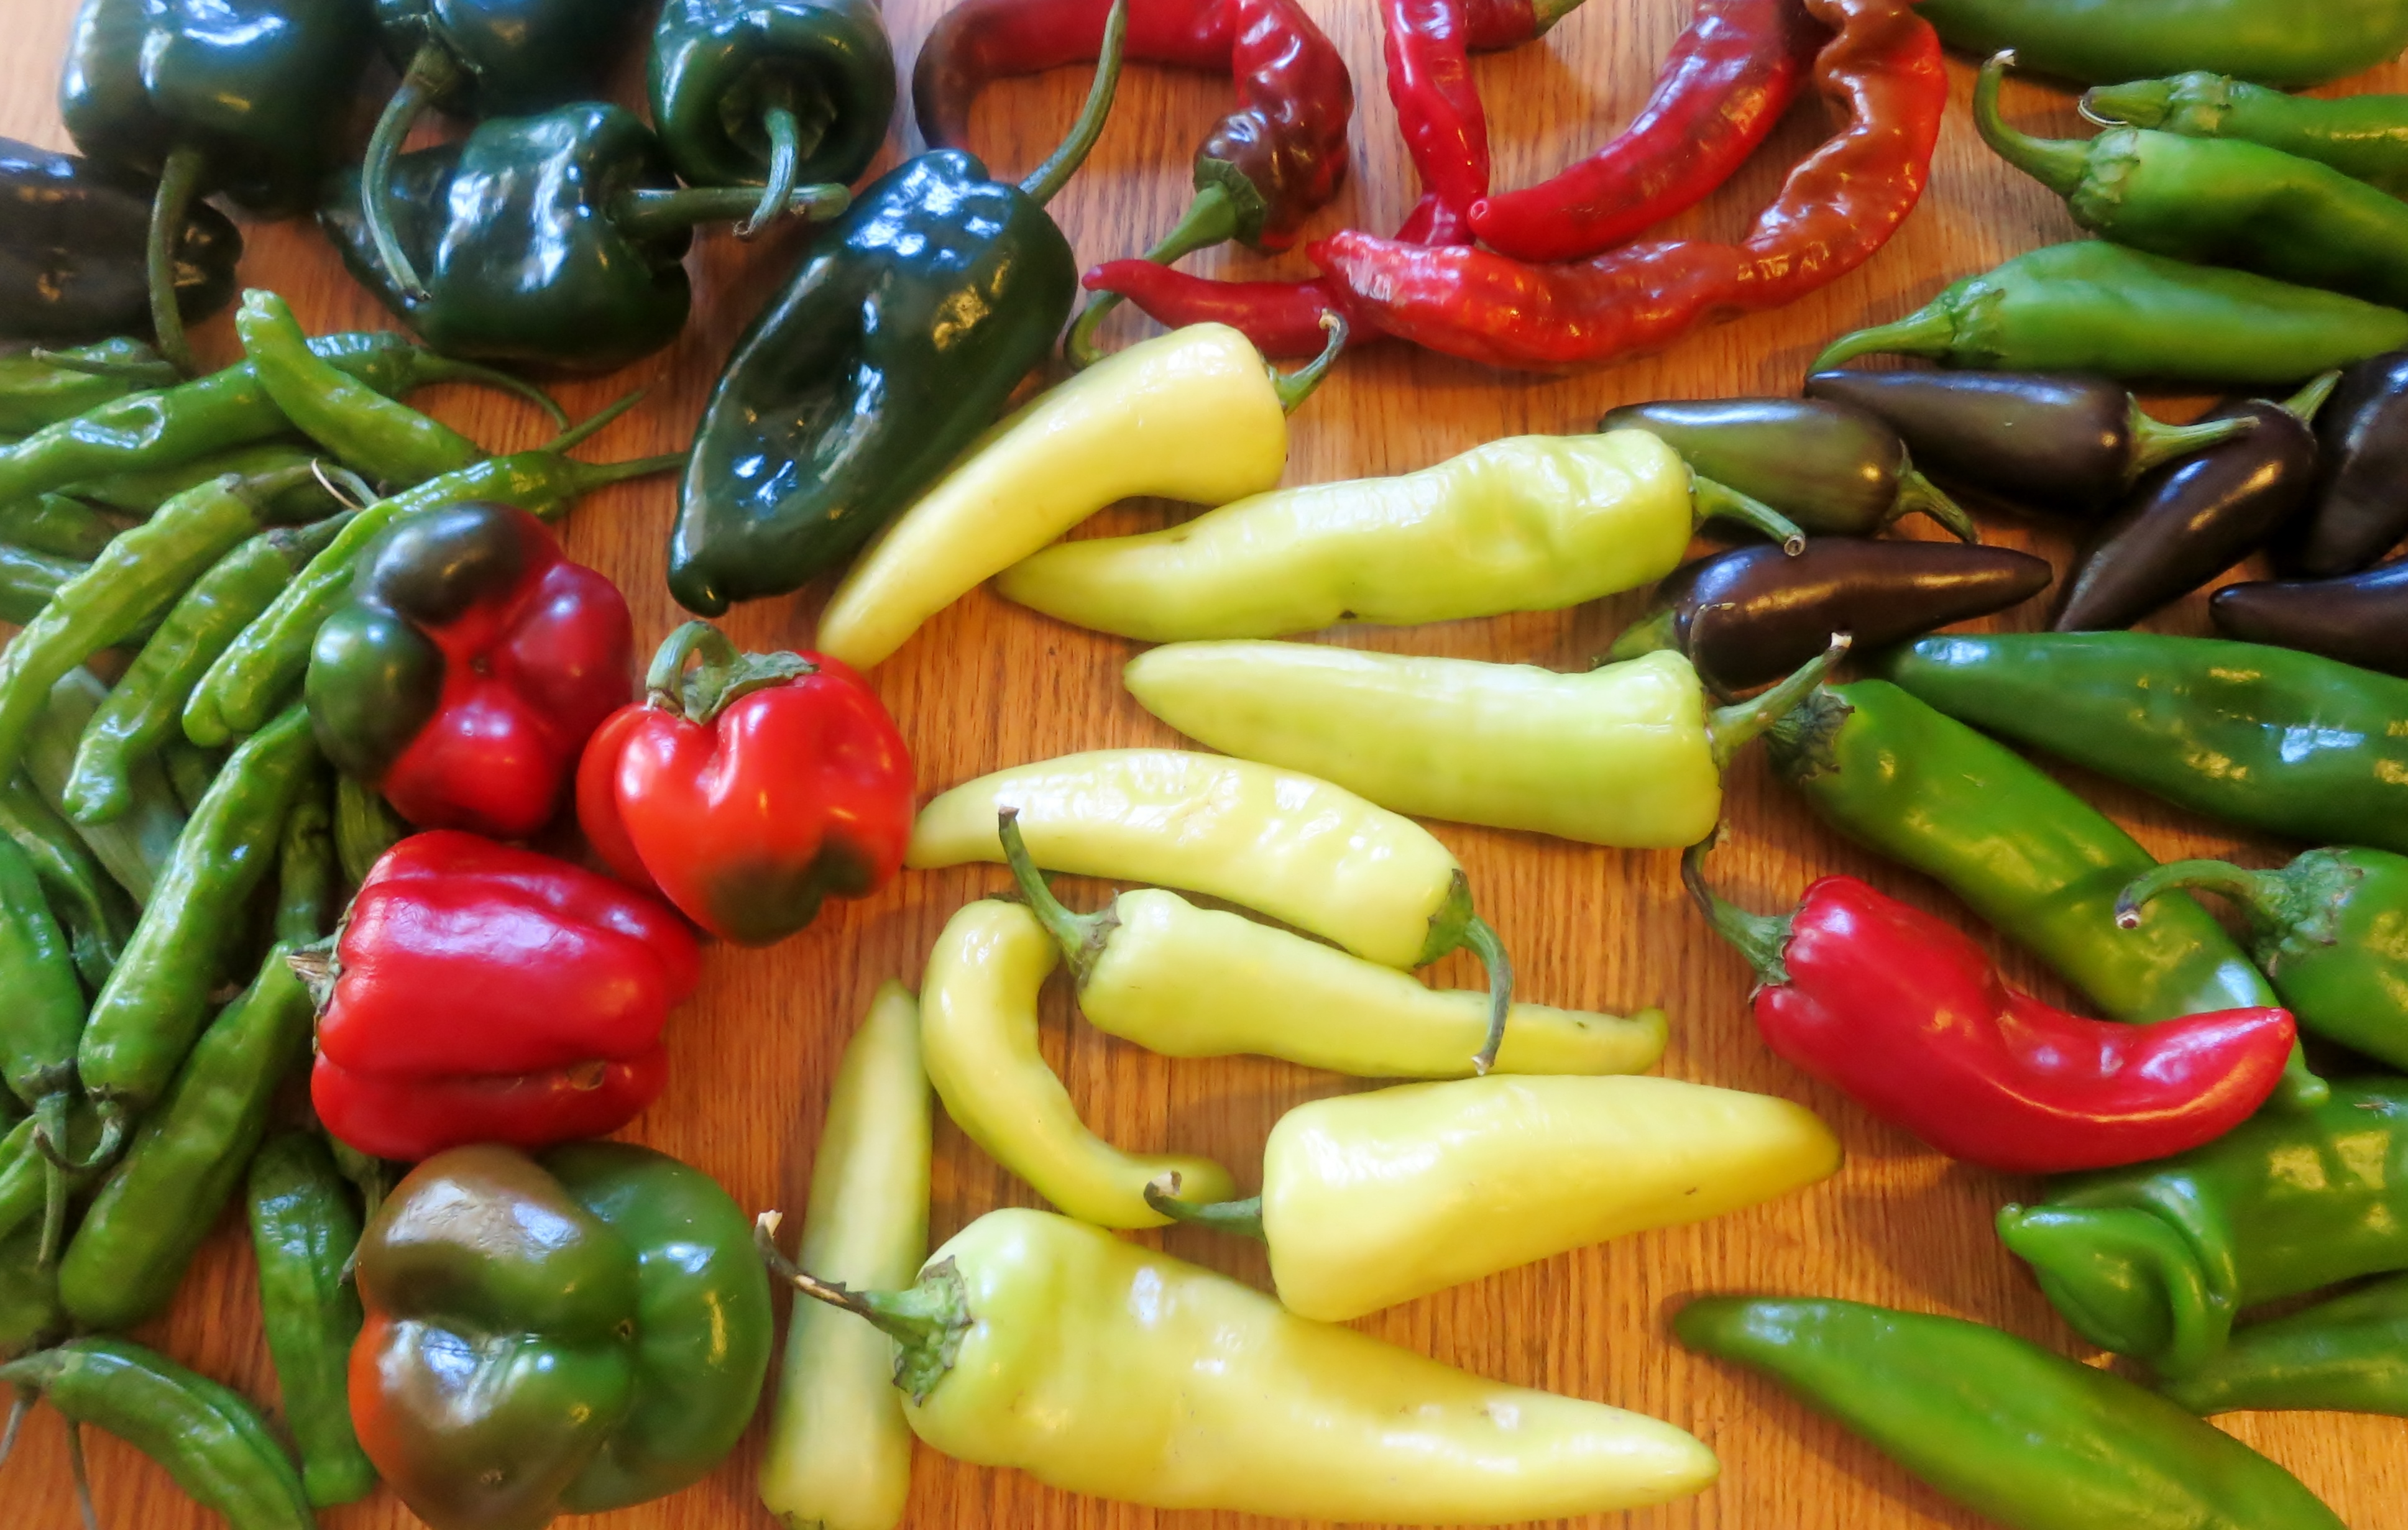
late summer is chile season at Tucson CSA, Walking J, Santa Cruz Farmers' Market Consignment

late summer is chile season at Tucson CSA, Walking J, Santa Cruz Farmers’ Market Consignment

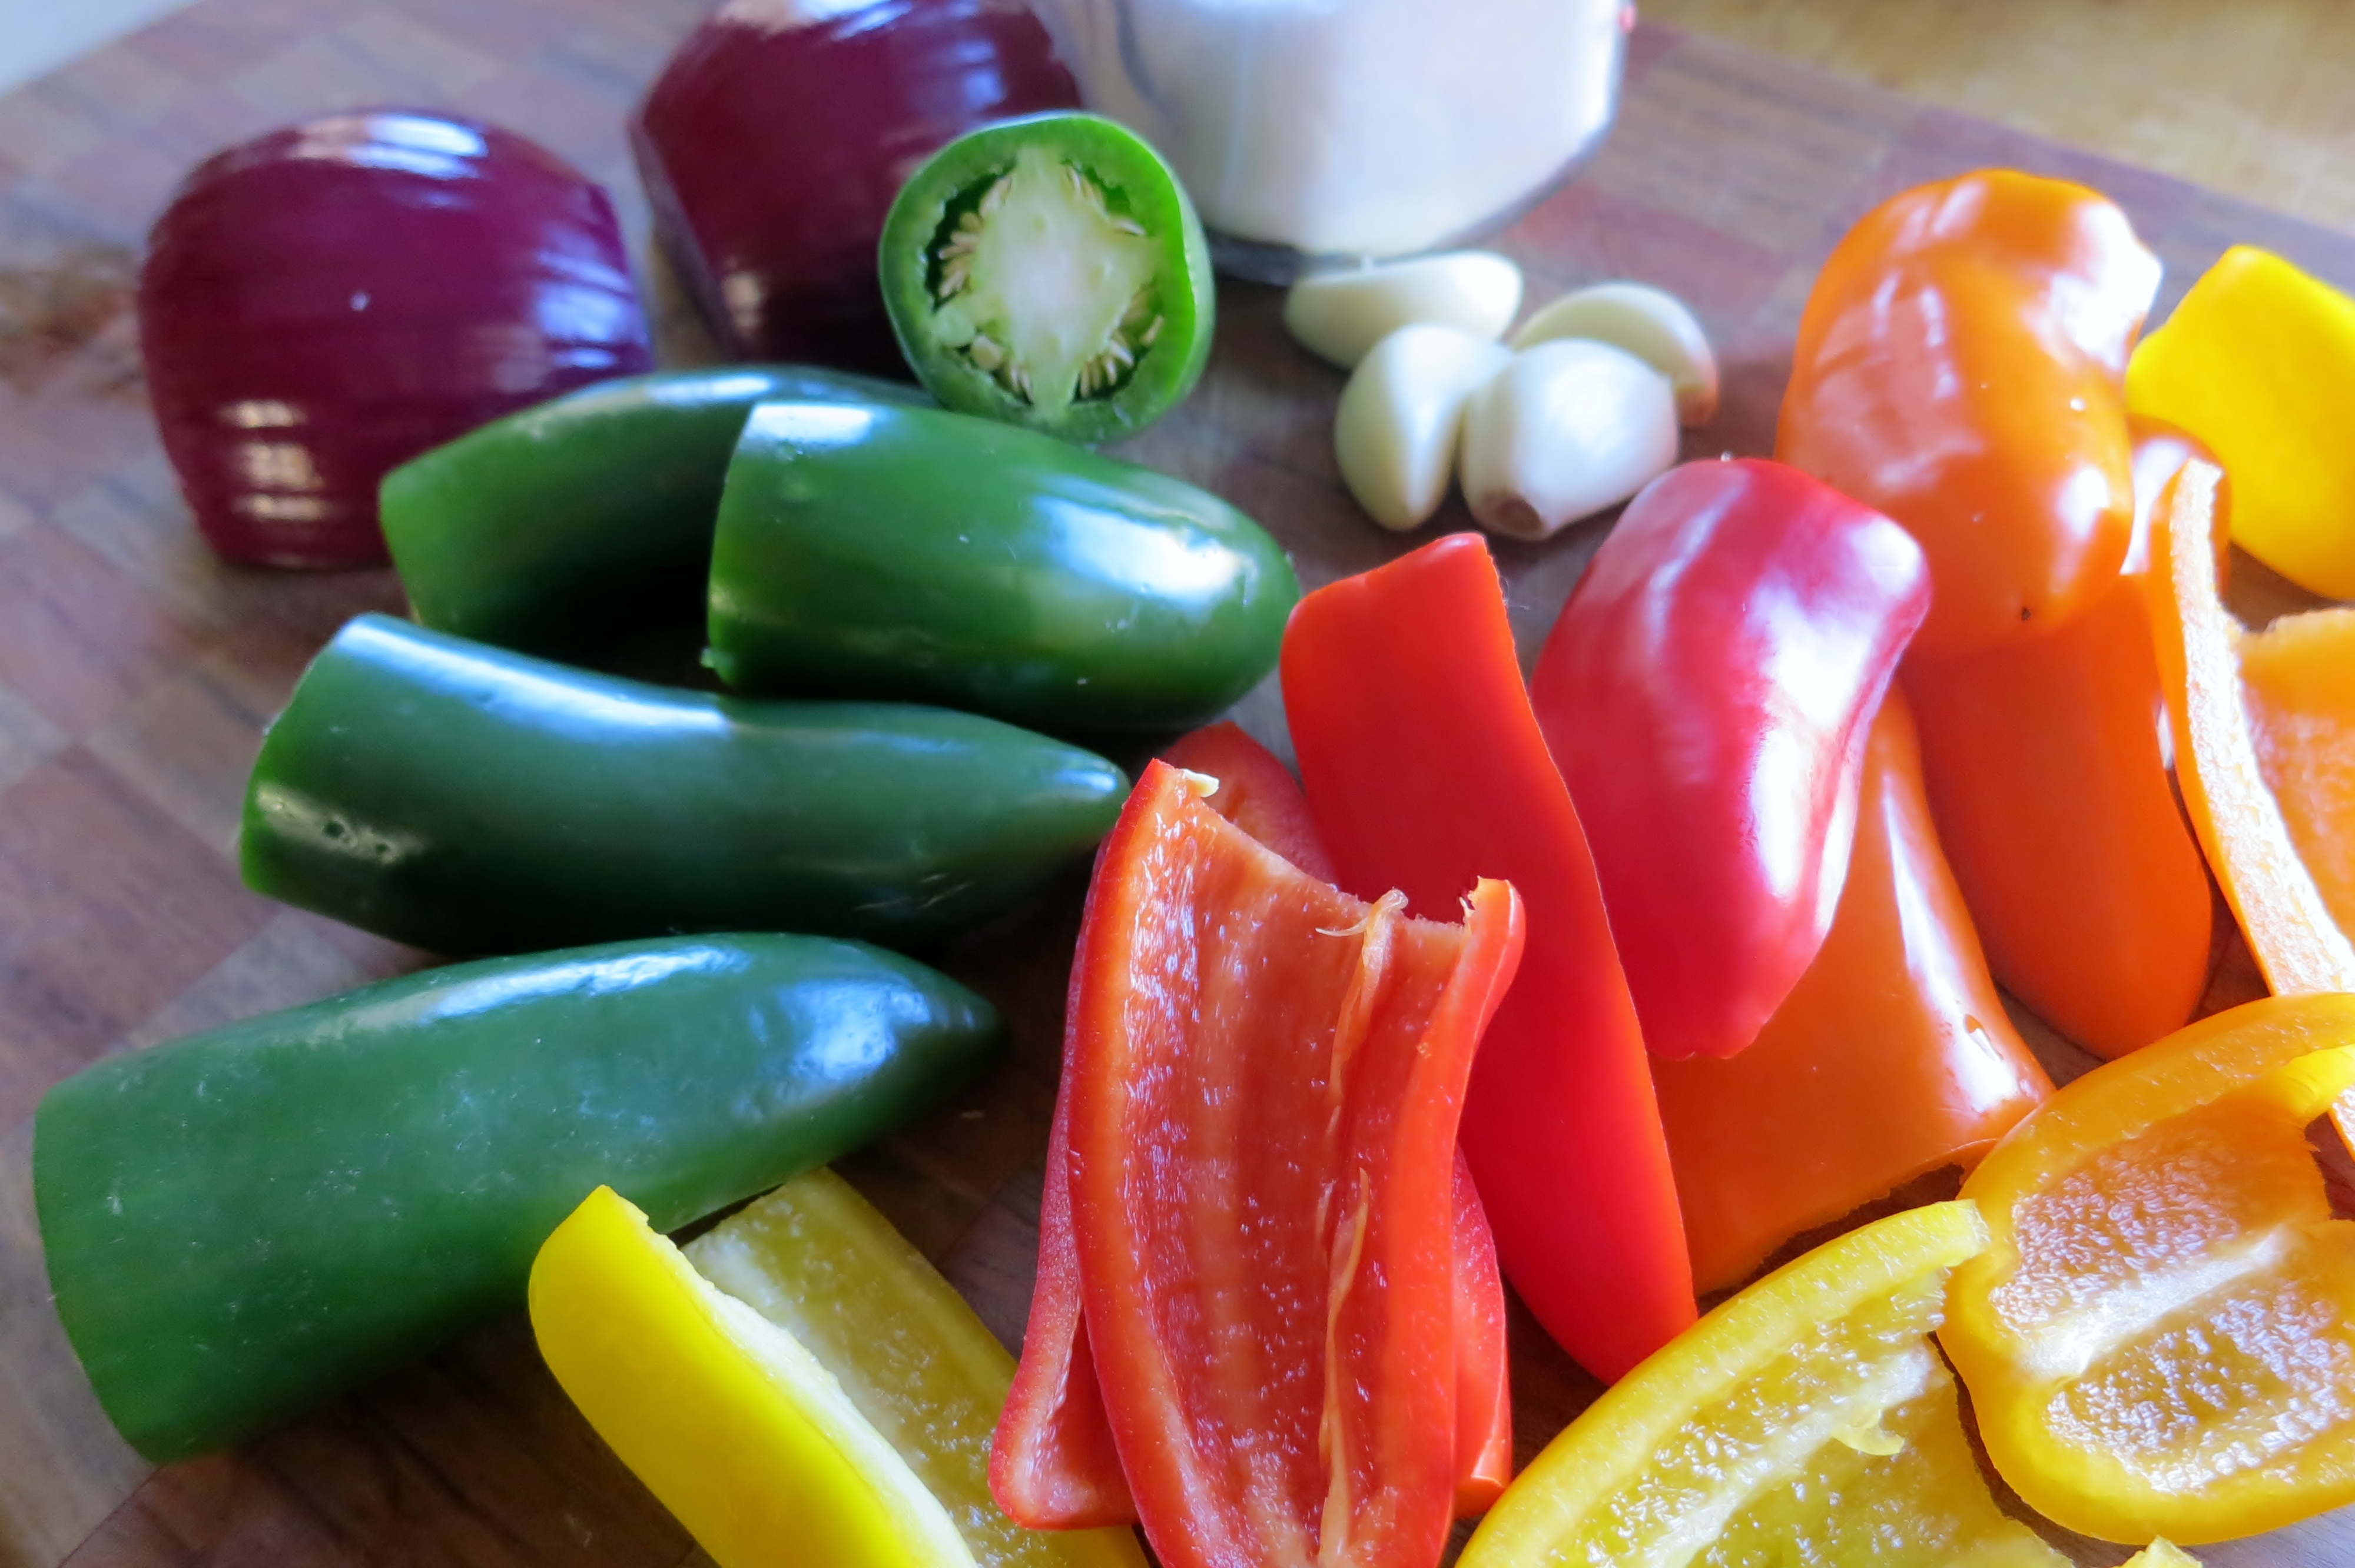
Chiles for this preparation can be fresh or roasted or even dried. I’ve used everything from dried chiltepines to fresh Big Jims and sweet peppers. Hot, fleshy chiles like Jalapeño, Serrano, Guero, Wenks Yellow Hot, and Sinahuisa are ideal.

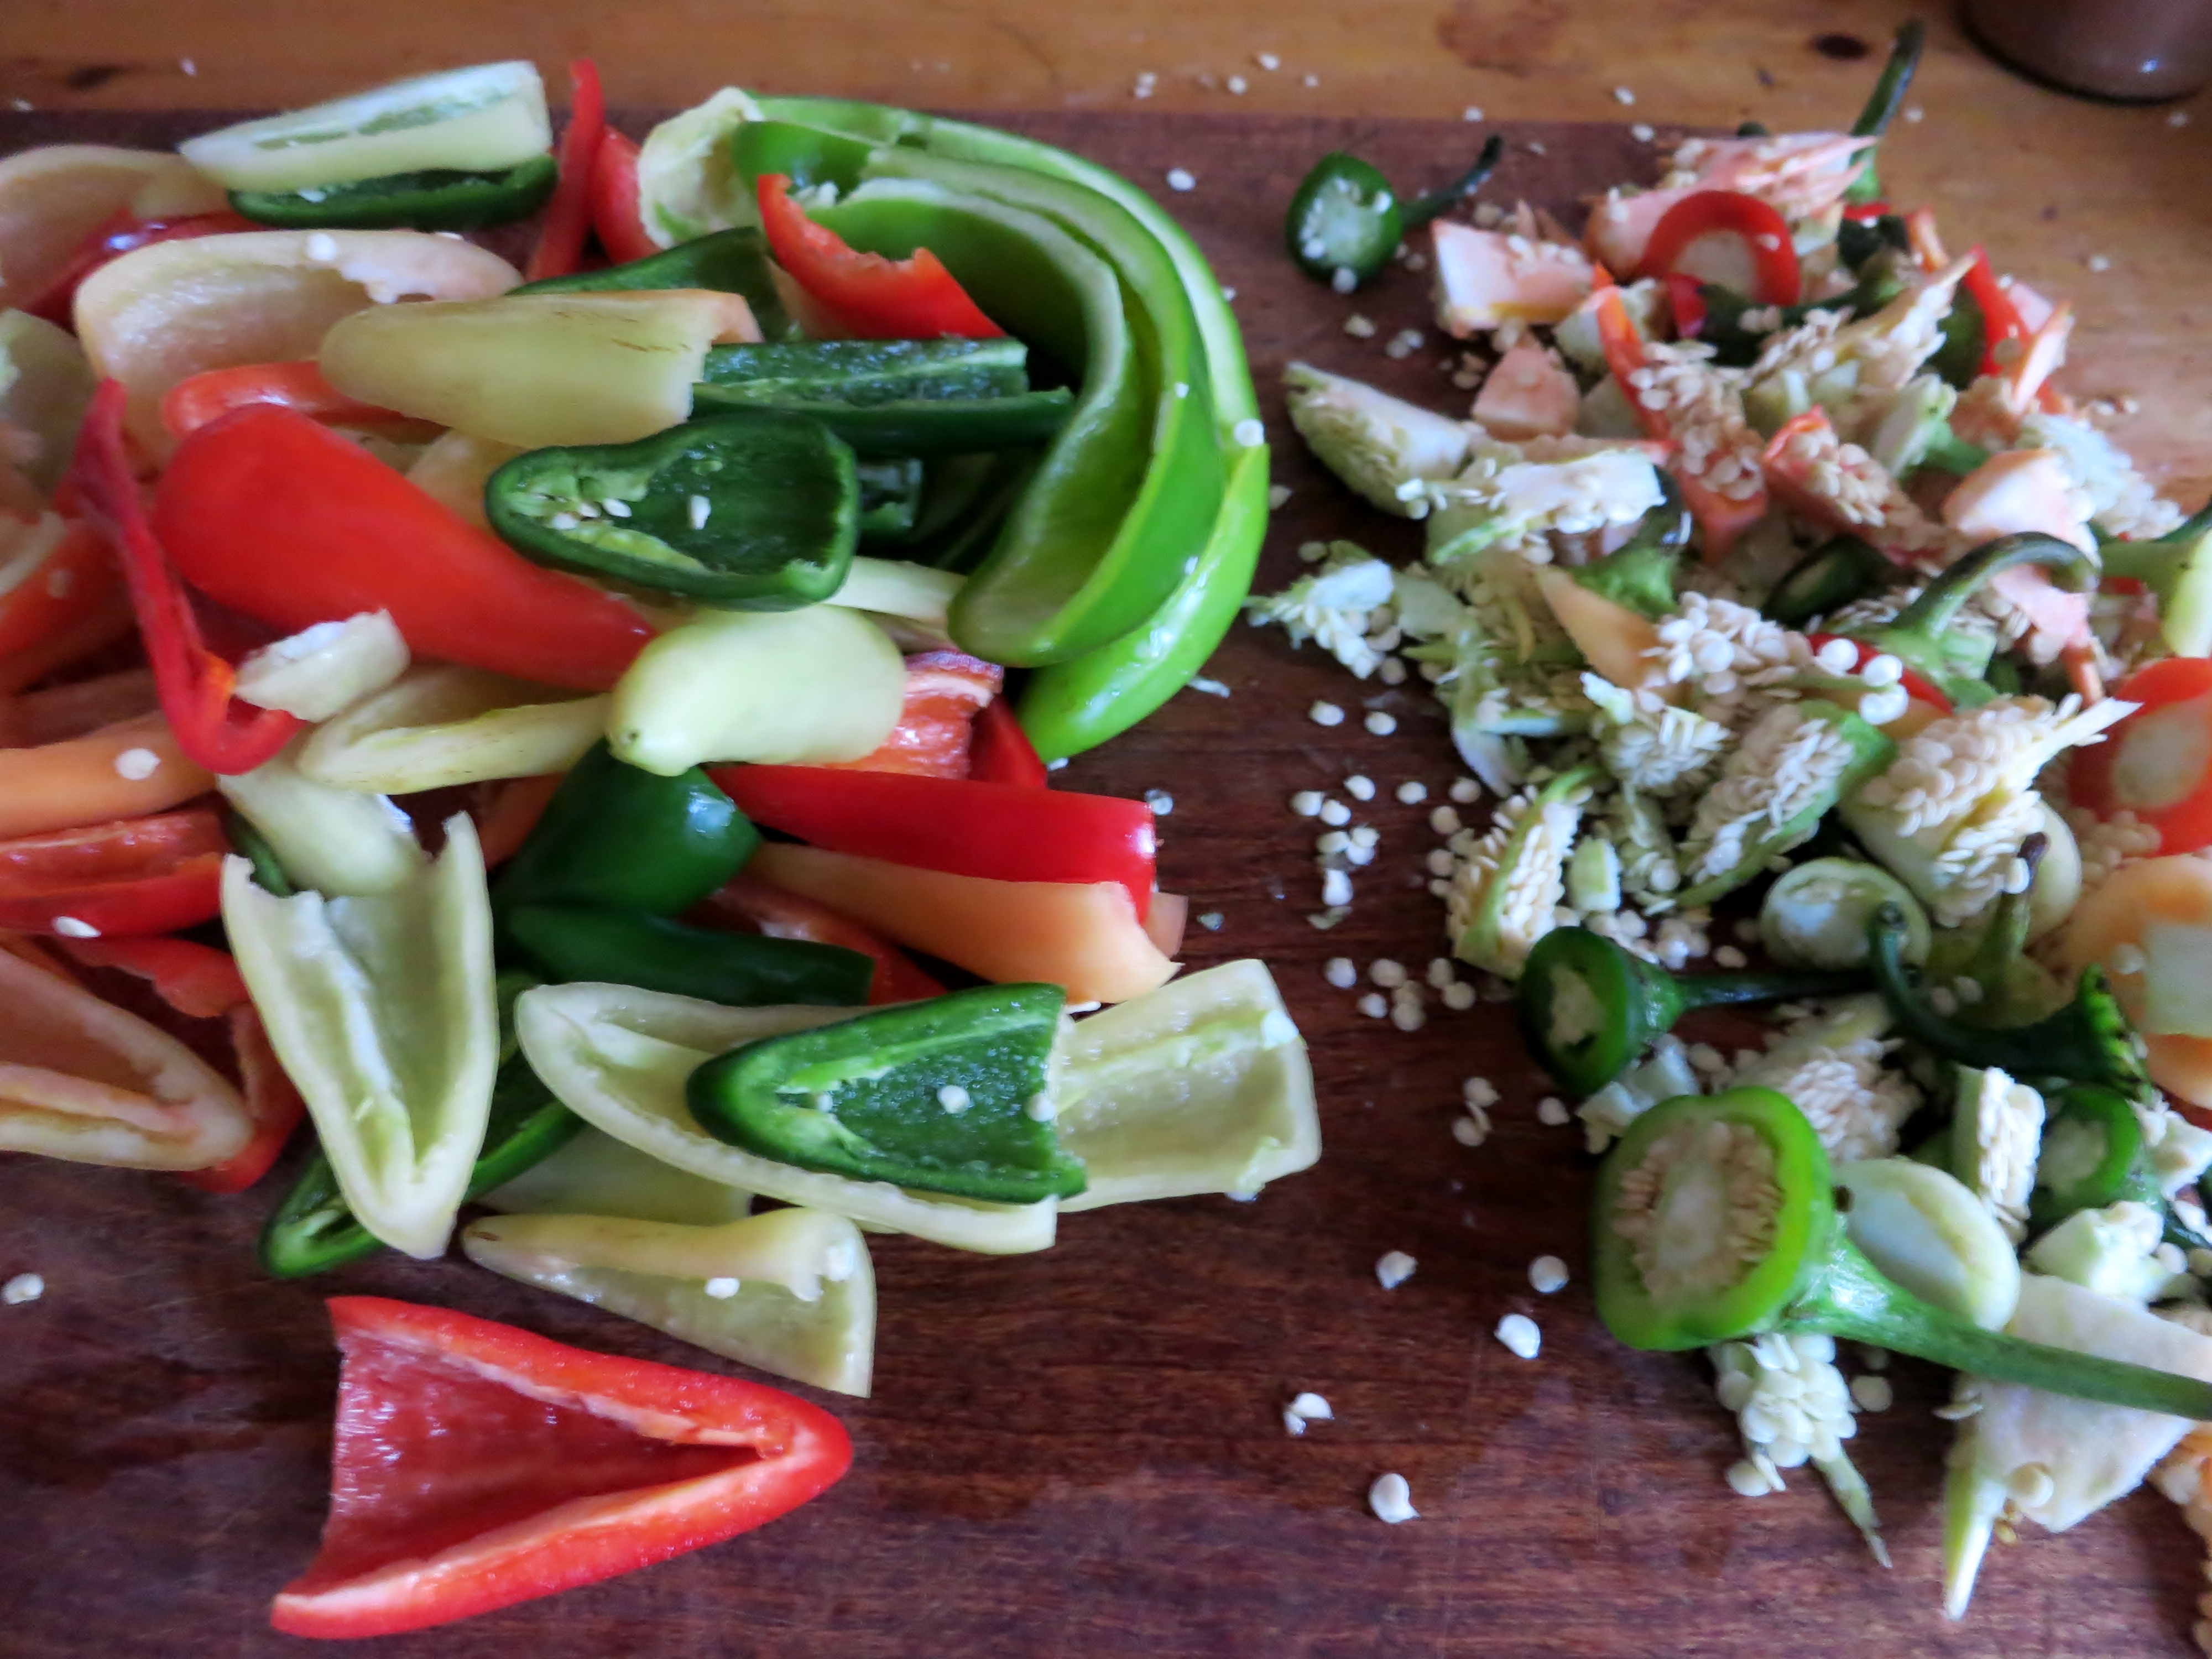
deseeding chiles

deseeding chiles

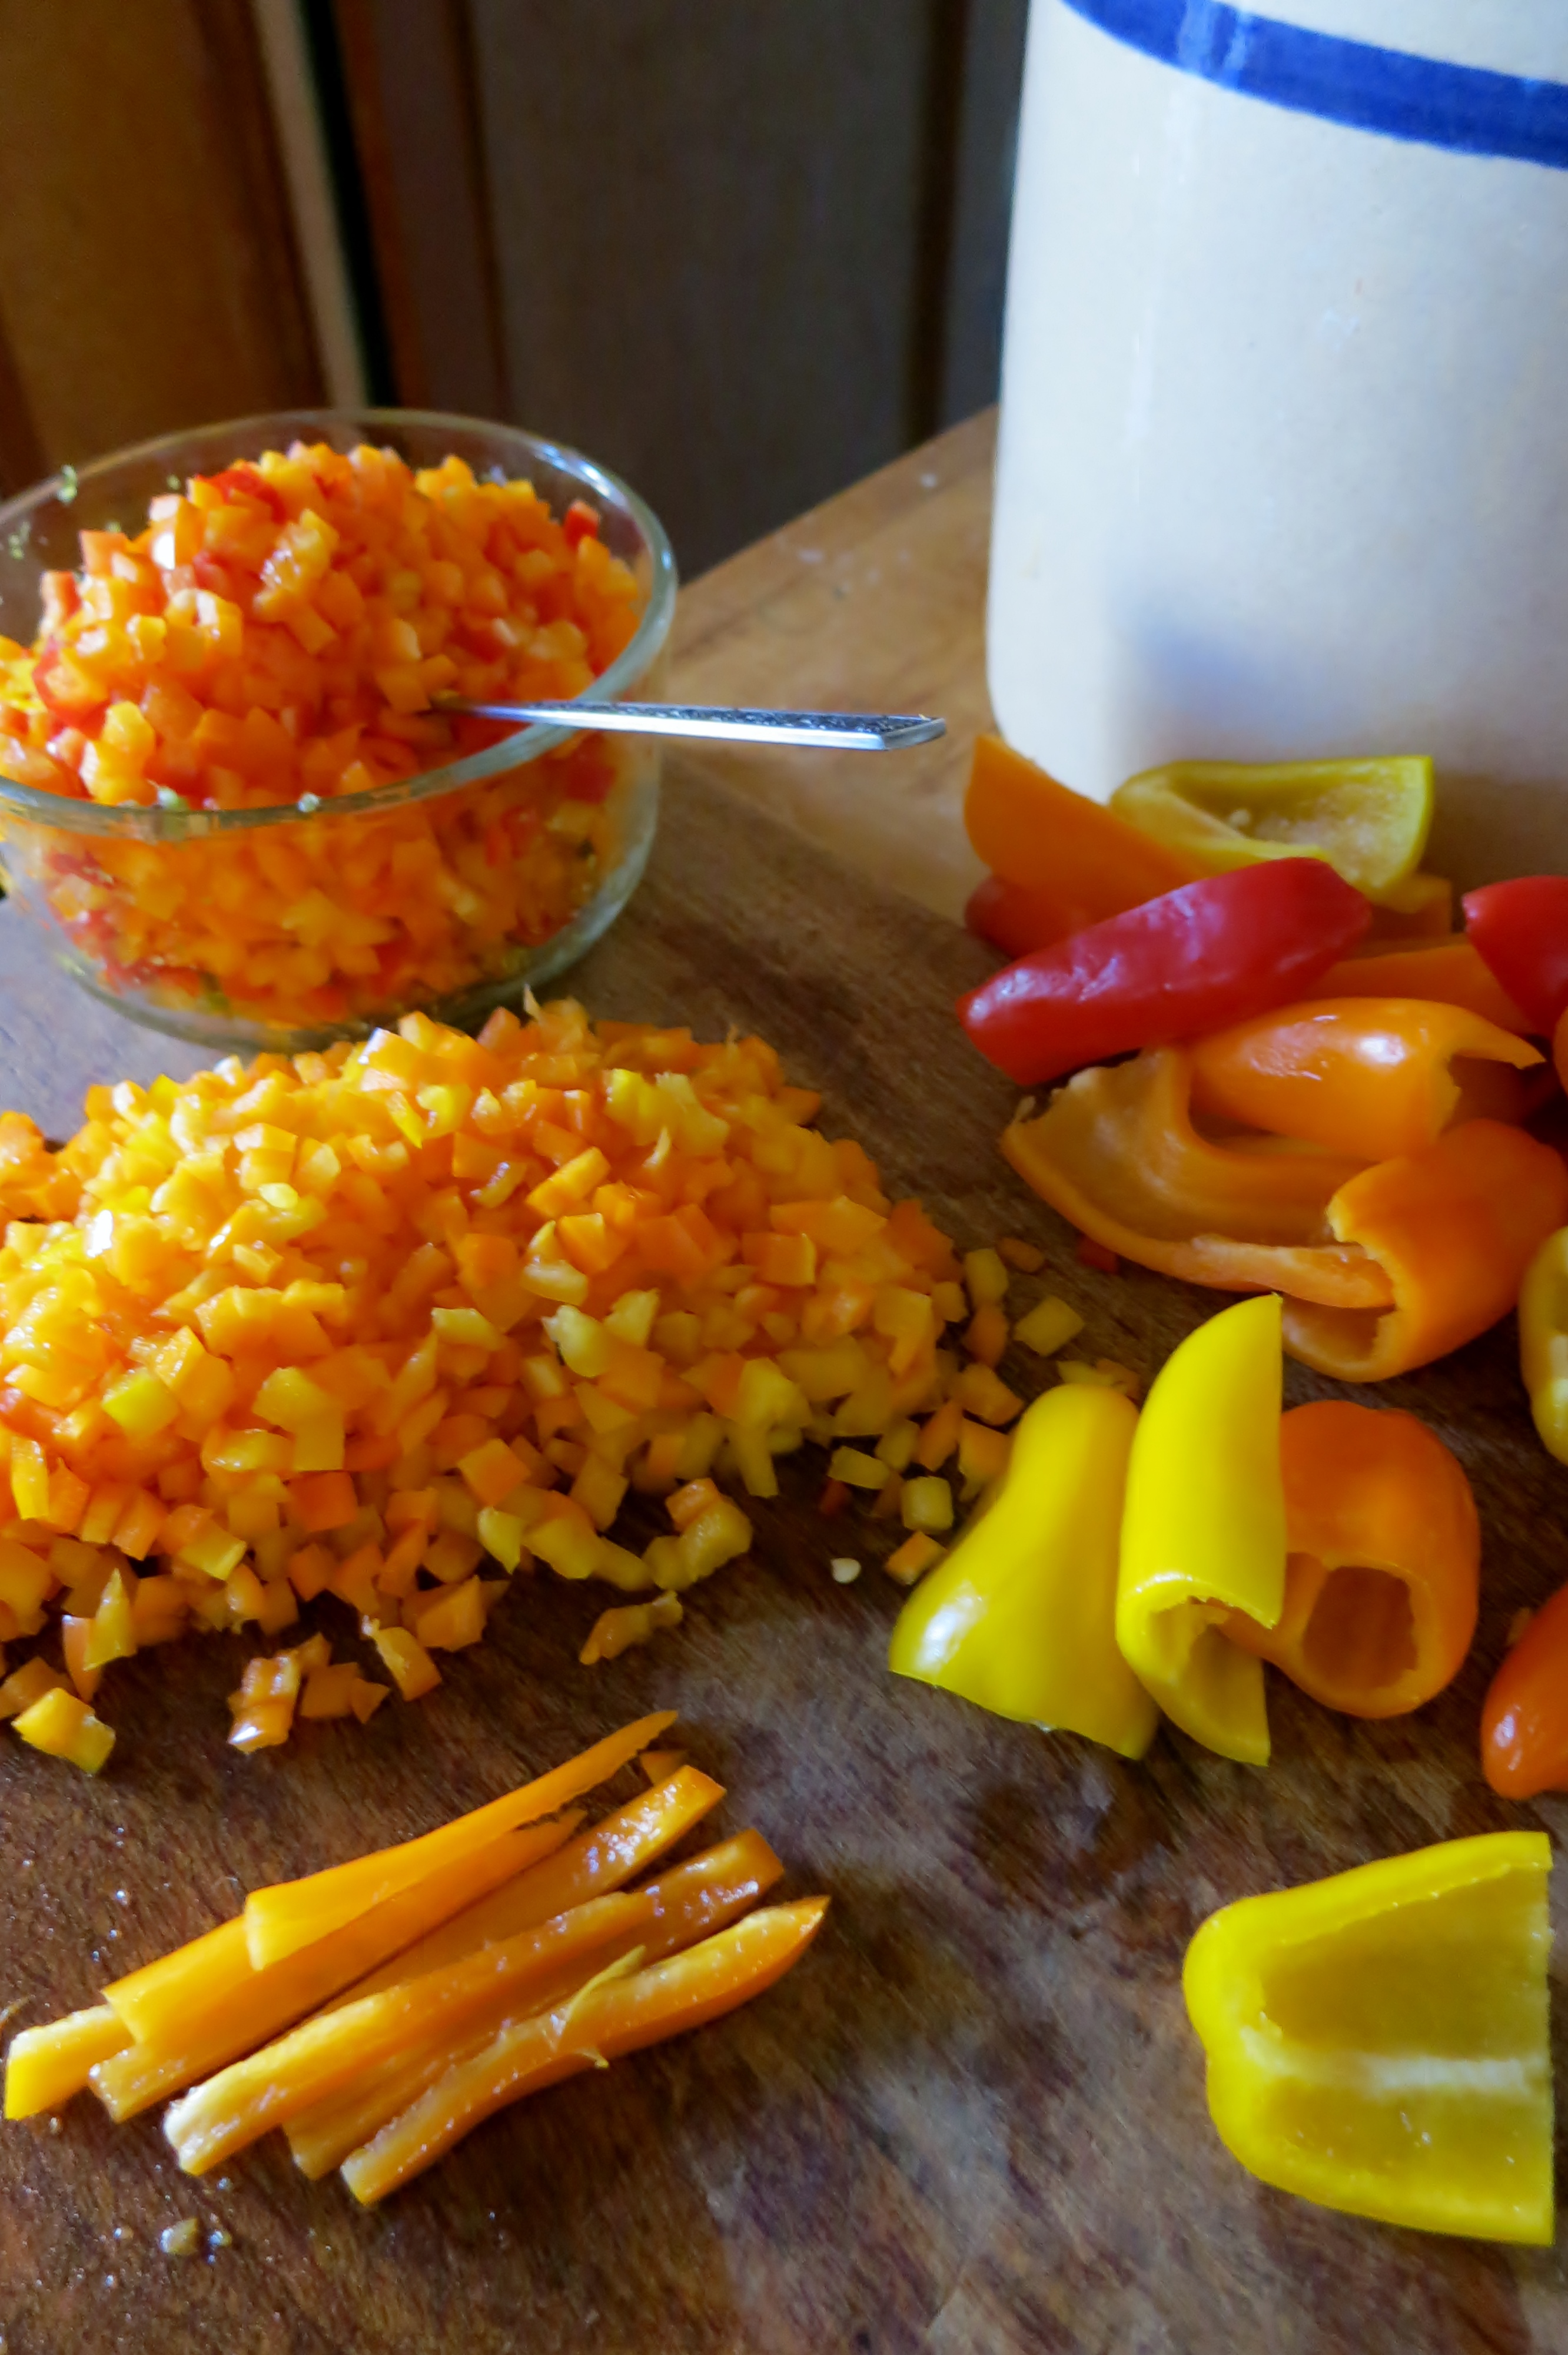
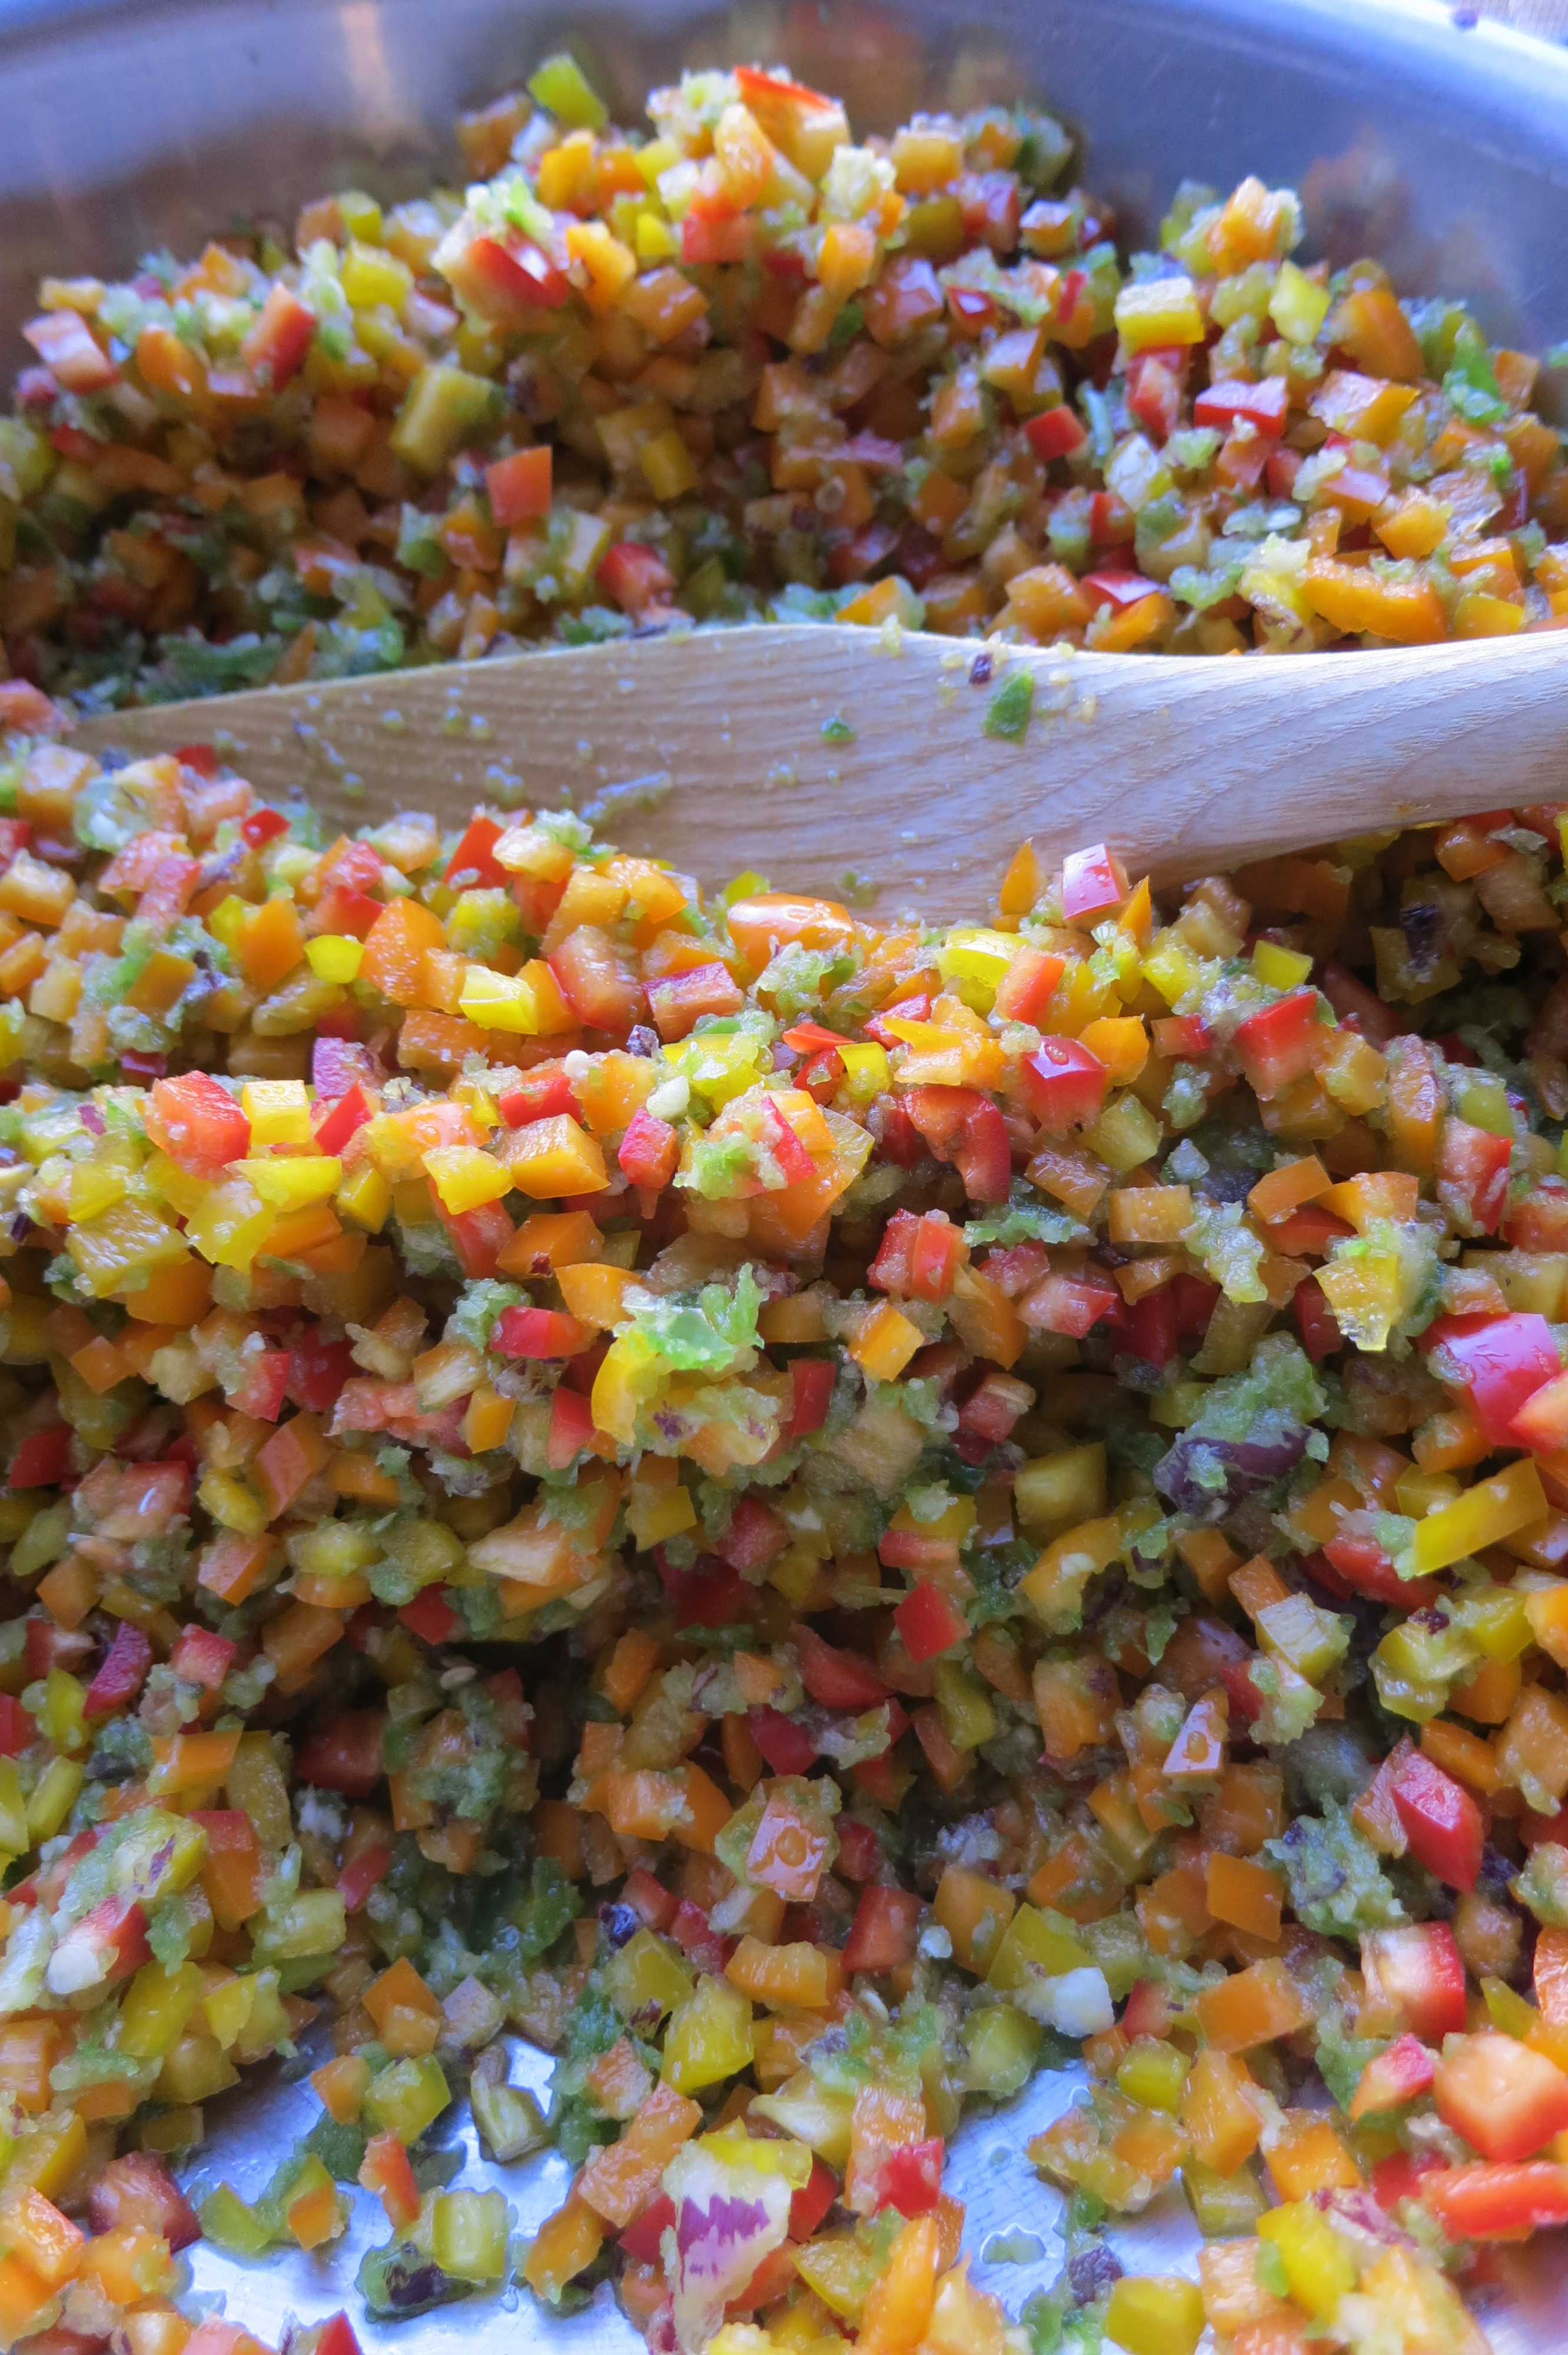
Sometimes I meticulously seed and dice the chiles, sometimes I only cut off the stems and coarsely chop in the food processor.

chiles, onion, garlic and salt

chiles, onion, garlic and salt

I usually add onion, garlic and herbs, as the season and whim direct.

chopping chiles reminds me of Uncle Bob and cousin Doug

chopping chiles reminds me of Uncle Bob and cousin Doug

Add salt to the salsa, 2% of vegetables’ weight. This is roughly 1 teaspoon non-iodized salt per cup of diced vegetables, more or less. Salt slows and directs biological activity to make the food more delicious. Lactobacilli thrive in salty environments where other organisms cannot, and the lactic acid they make further inhibit harmful bacteria. Since this is a condiment, I don’t mind it a little salty. There are enough beneficial bacteria on the fresh produce and in the air, so no starter culture is necessary.

diced chiles

diced chiles

If the chiles are not very fleshy or I want a thinner sauce, I add a little brine made with 2 teaspoons salt per cup of water. Thinning the sauce is a good idea when the chiles are very hot!
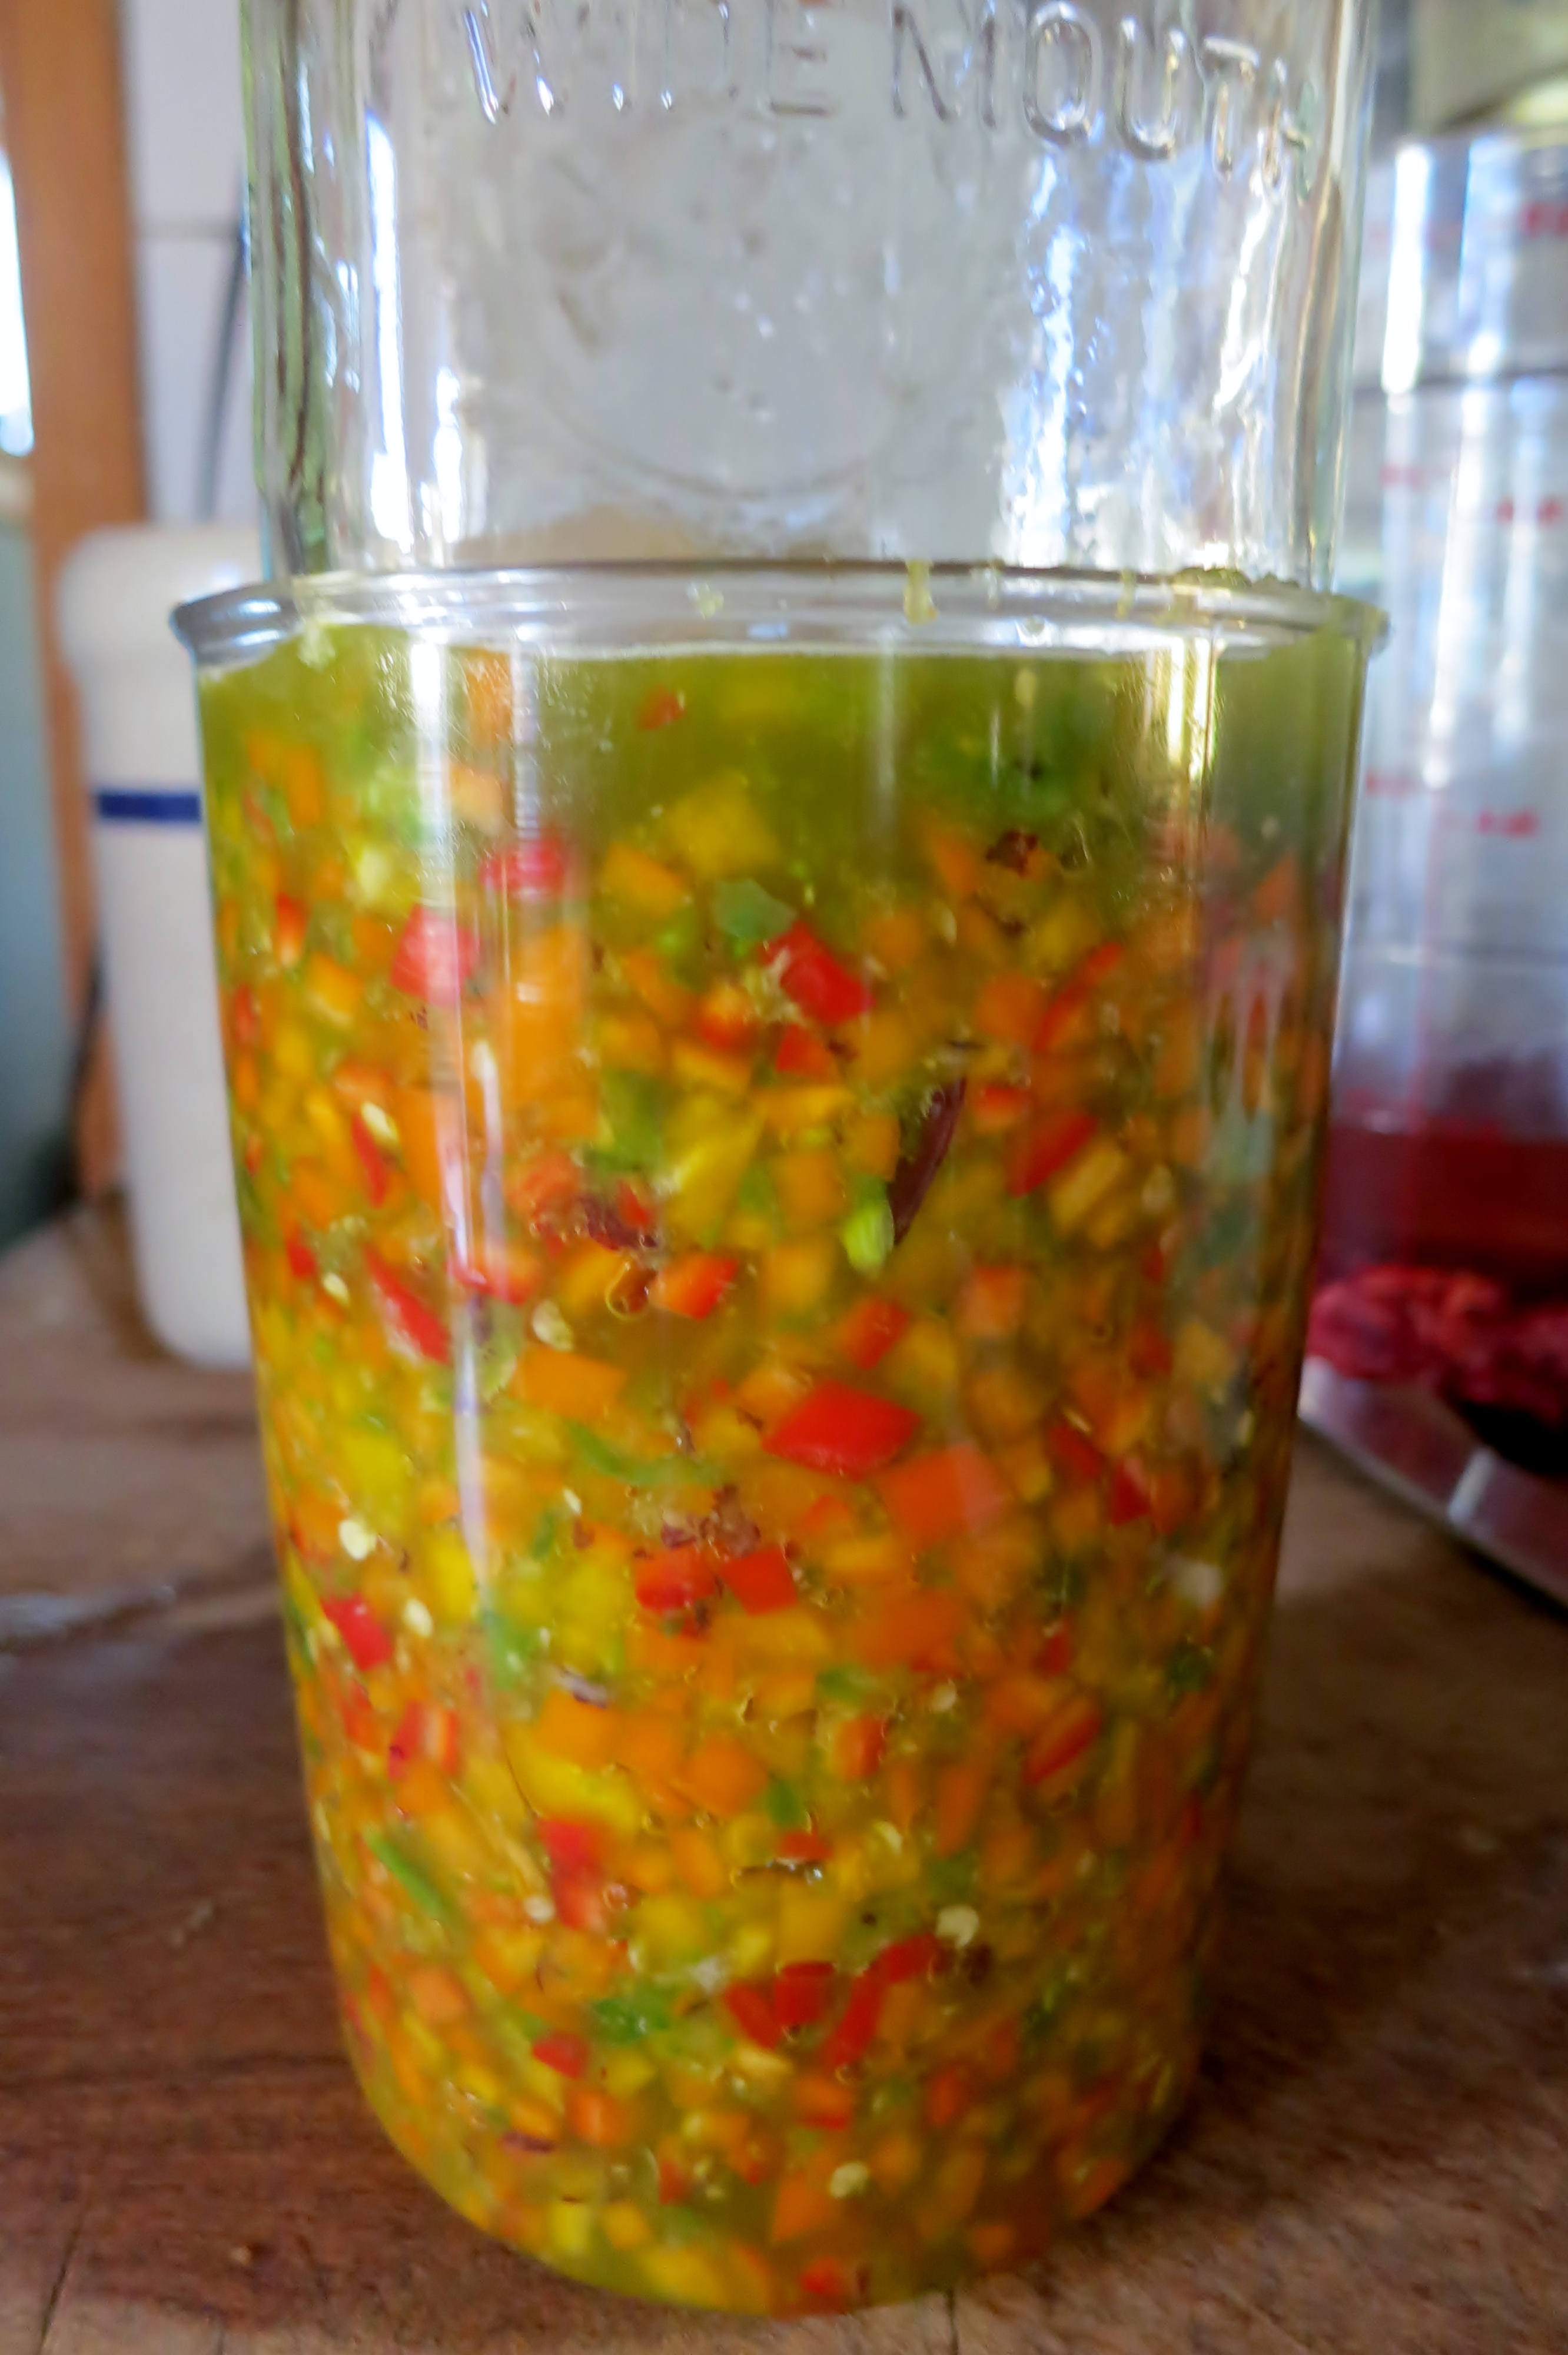
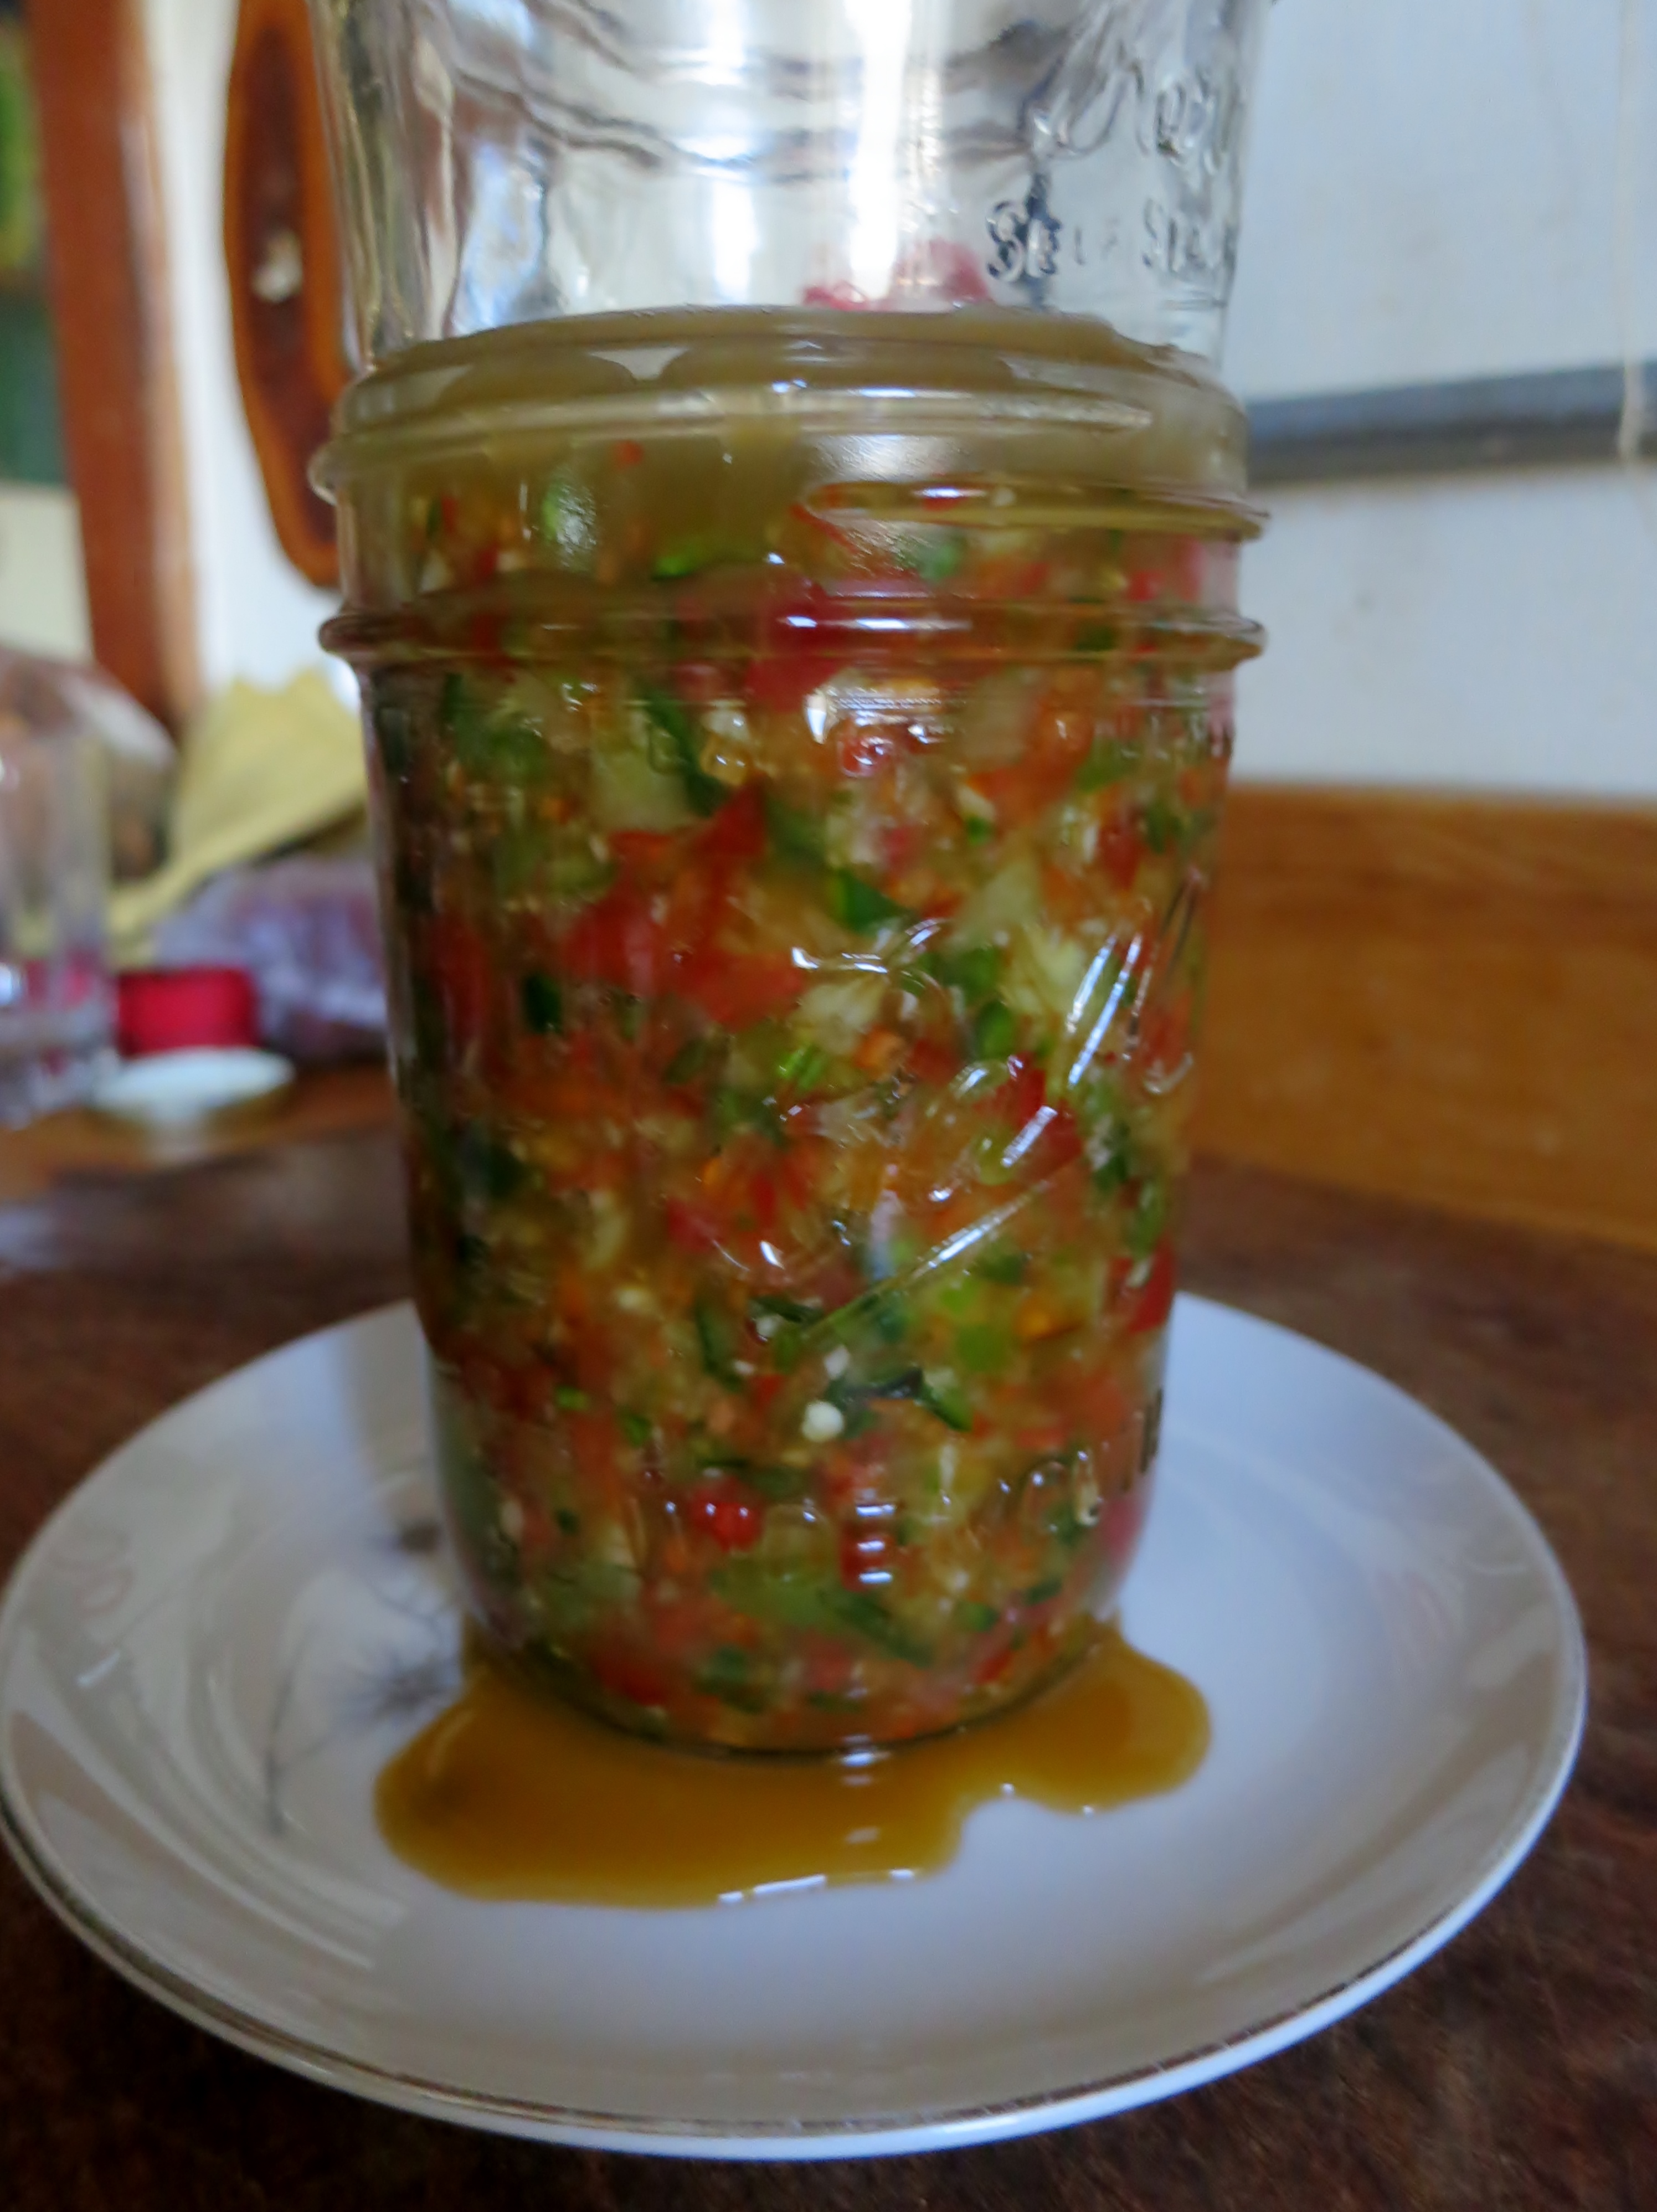
Put the salsa in a jar with a weight on top, keeping the pieces of chile submerged in exuded juice or brine. I use a smaller jar as a weight.

pureed jalapenos with  diced multicolor sweet peppers

pureed jalapenos with diced multicolor sweet peppers

Cover the tower with a tea towel to keep out dust and insects, and keep at room temperature.

fermenting chiles can be messy

fermenting chiles can be messy

How long before it’s ready? Test daily in warm weather to see if it is sour enough for your taste. In winter, the process is slower, taking up to a couple weeks. If white mold forms on the surface, skim off the top. It is harmless. If the mold is any color other than white, or below the surface of the liquid, discard the whole batch. Better safe than sorry.
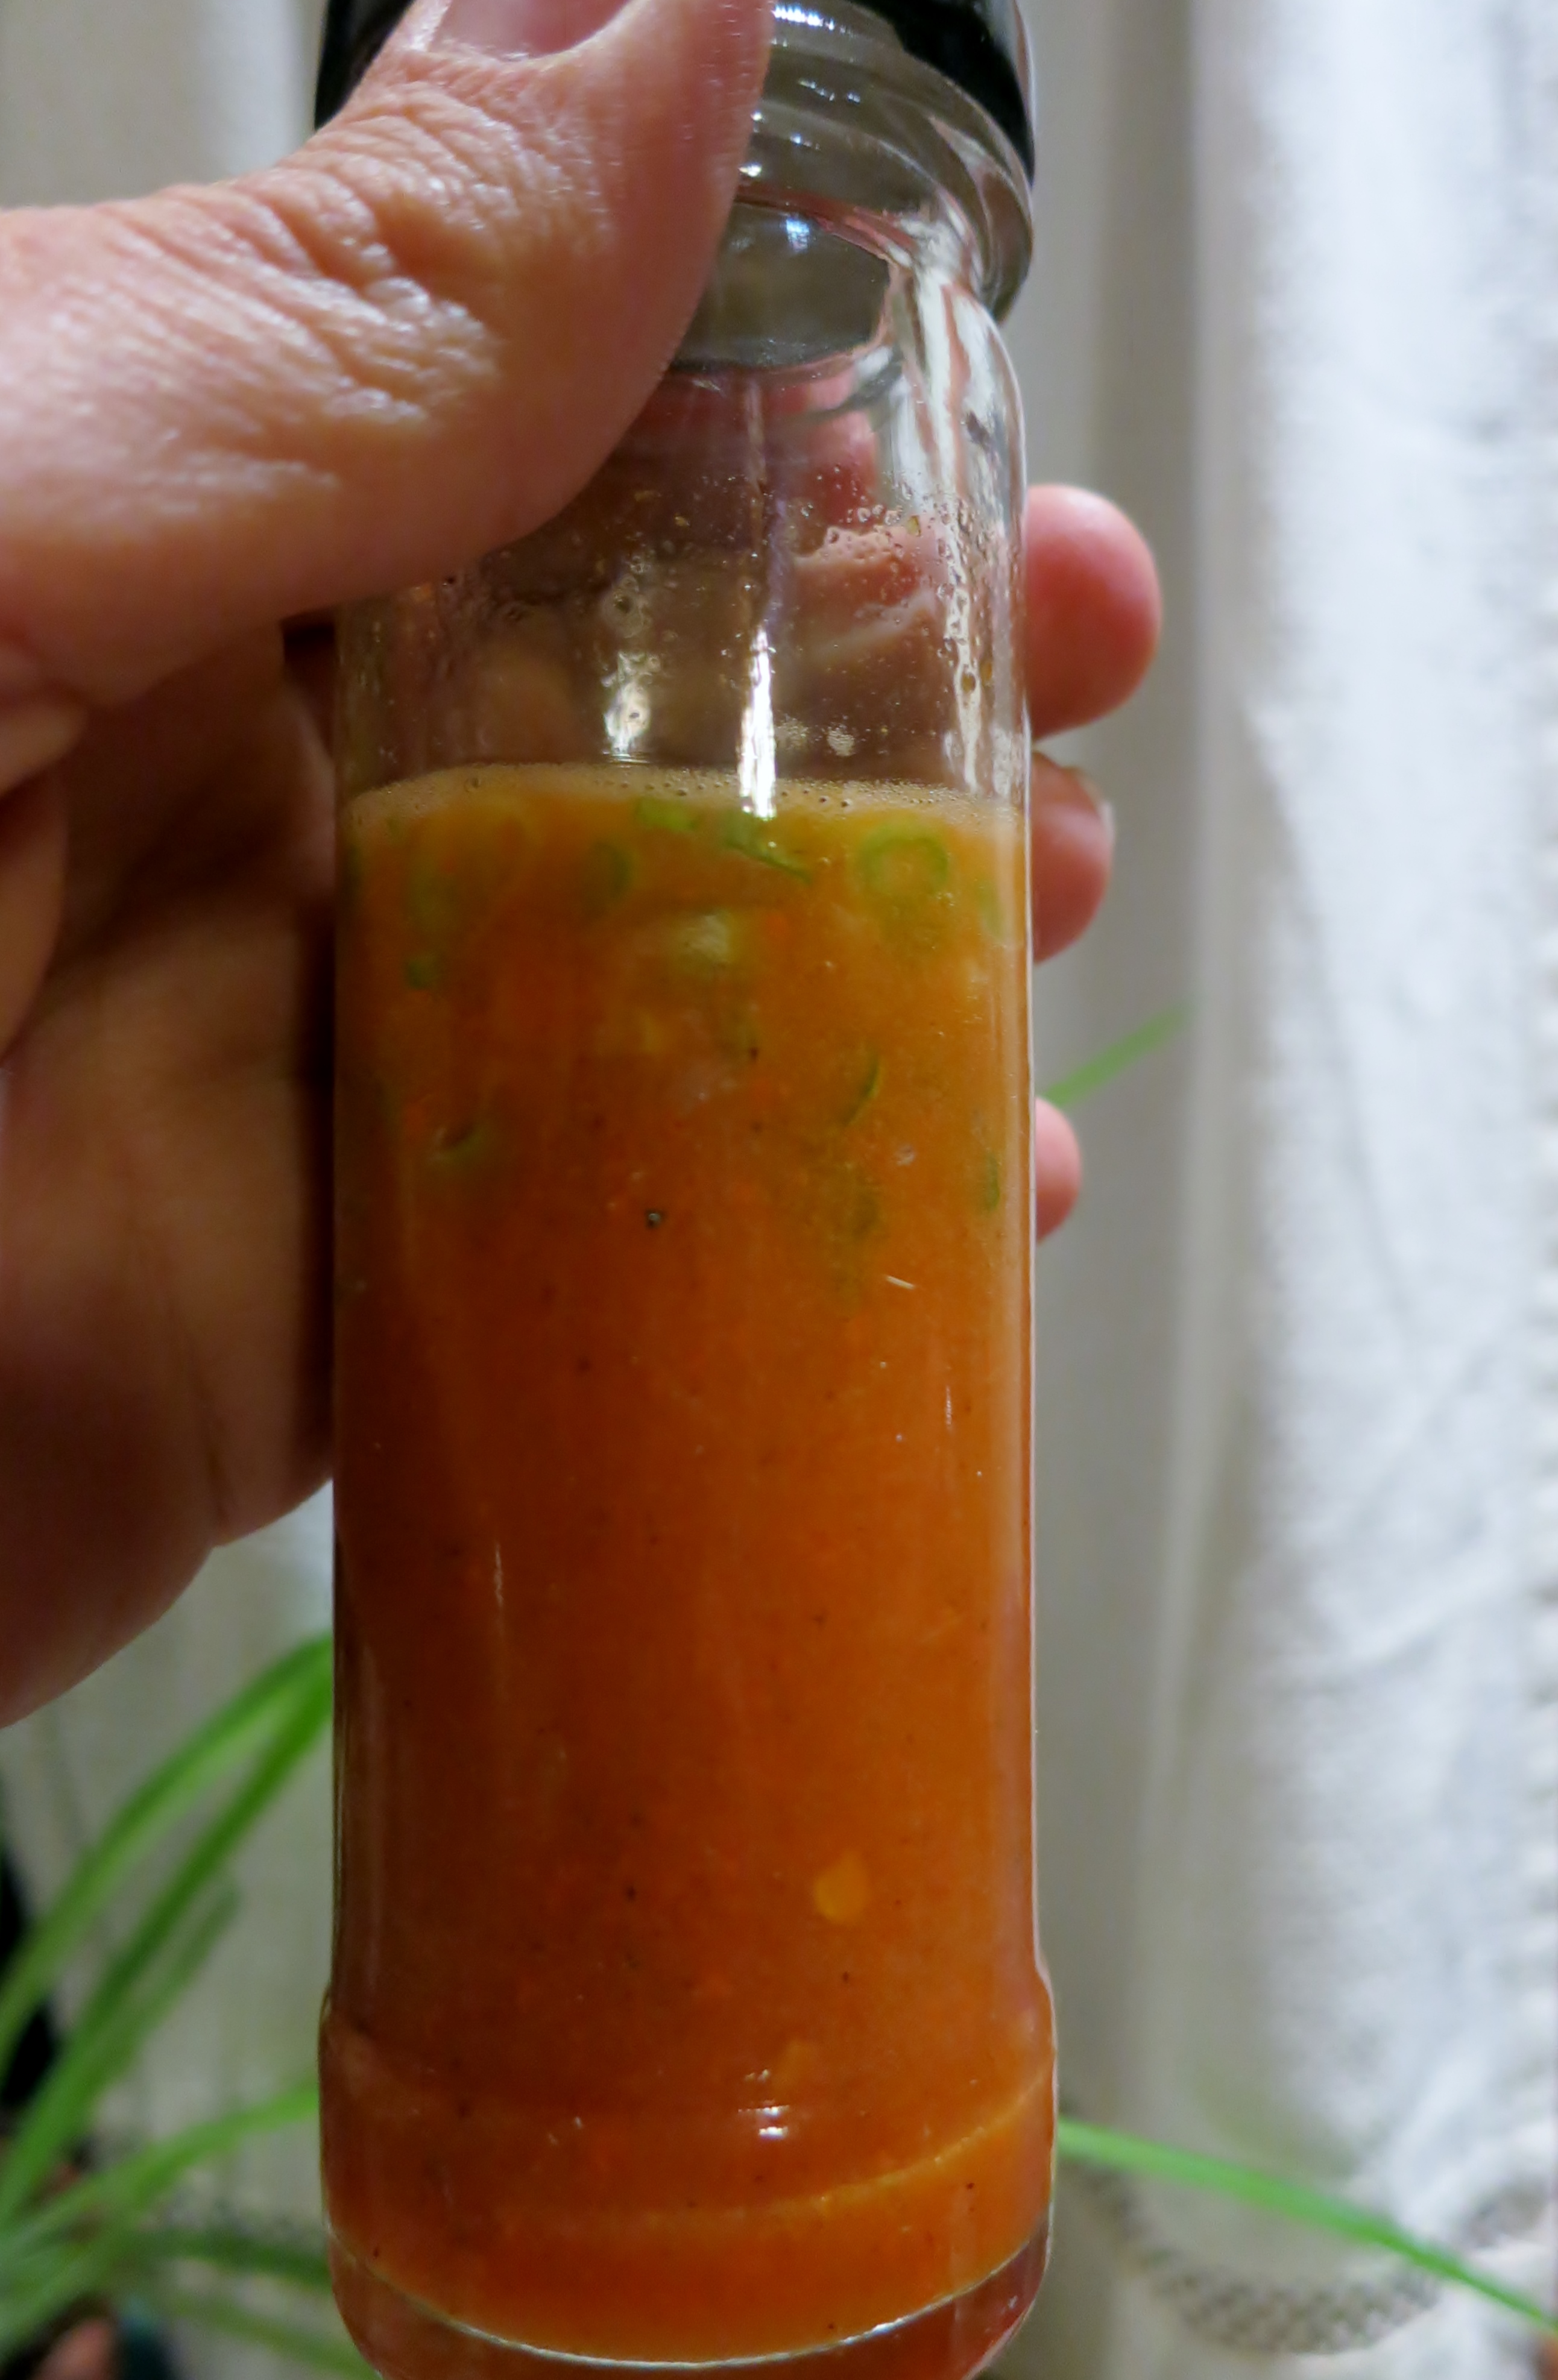
When the salsa is tart and delicious, it can be eaten as is or pureed. For a smooth salsa, it can be strained. Sometimes I add fresh herbs or minced I’itoi onion tops.

pureed salsa with diced I'itoi onion tops

pureed salsa with diced I’itoi onion tops

Store fermented salsa in the refrigerator with an airtight lid.
Chef Molly Beverly from Prescott, Arizona suggested fermenting a sauce from Mano Y Metate Pipian Rojo, so I have some of that going now. I can’t wait to taste it!
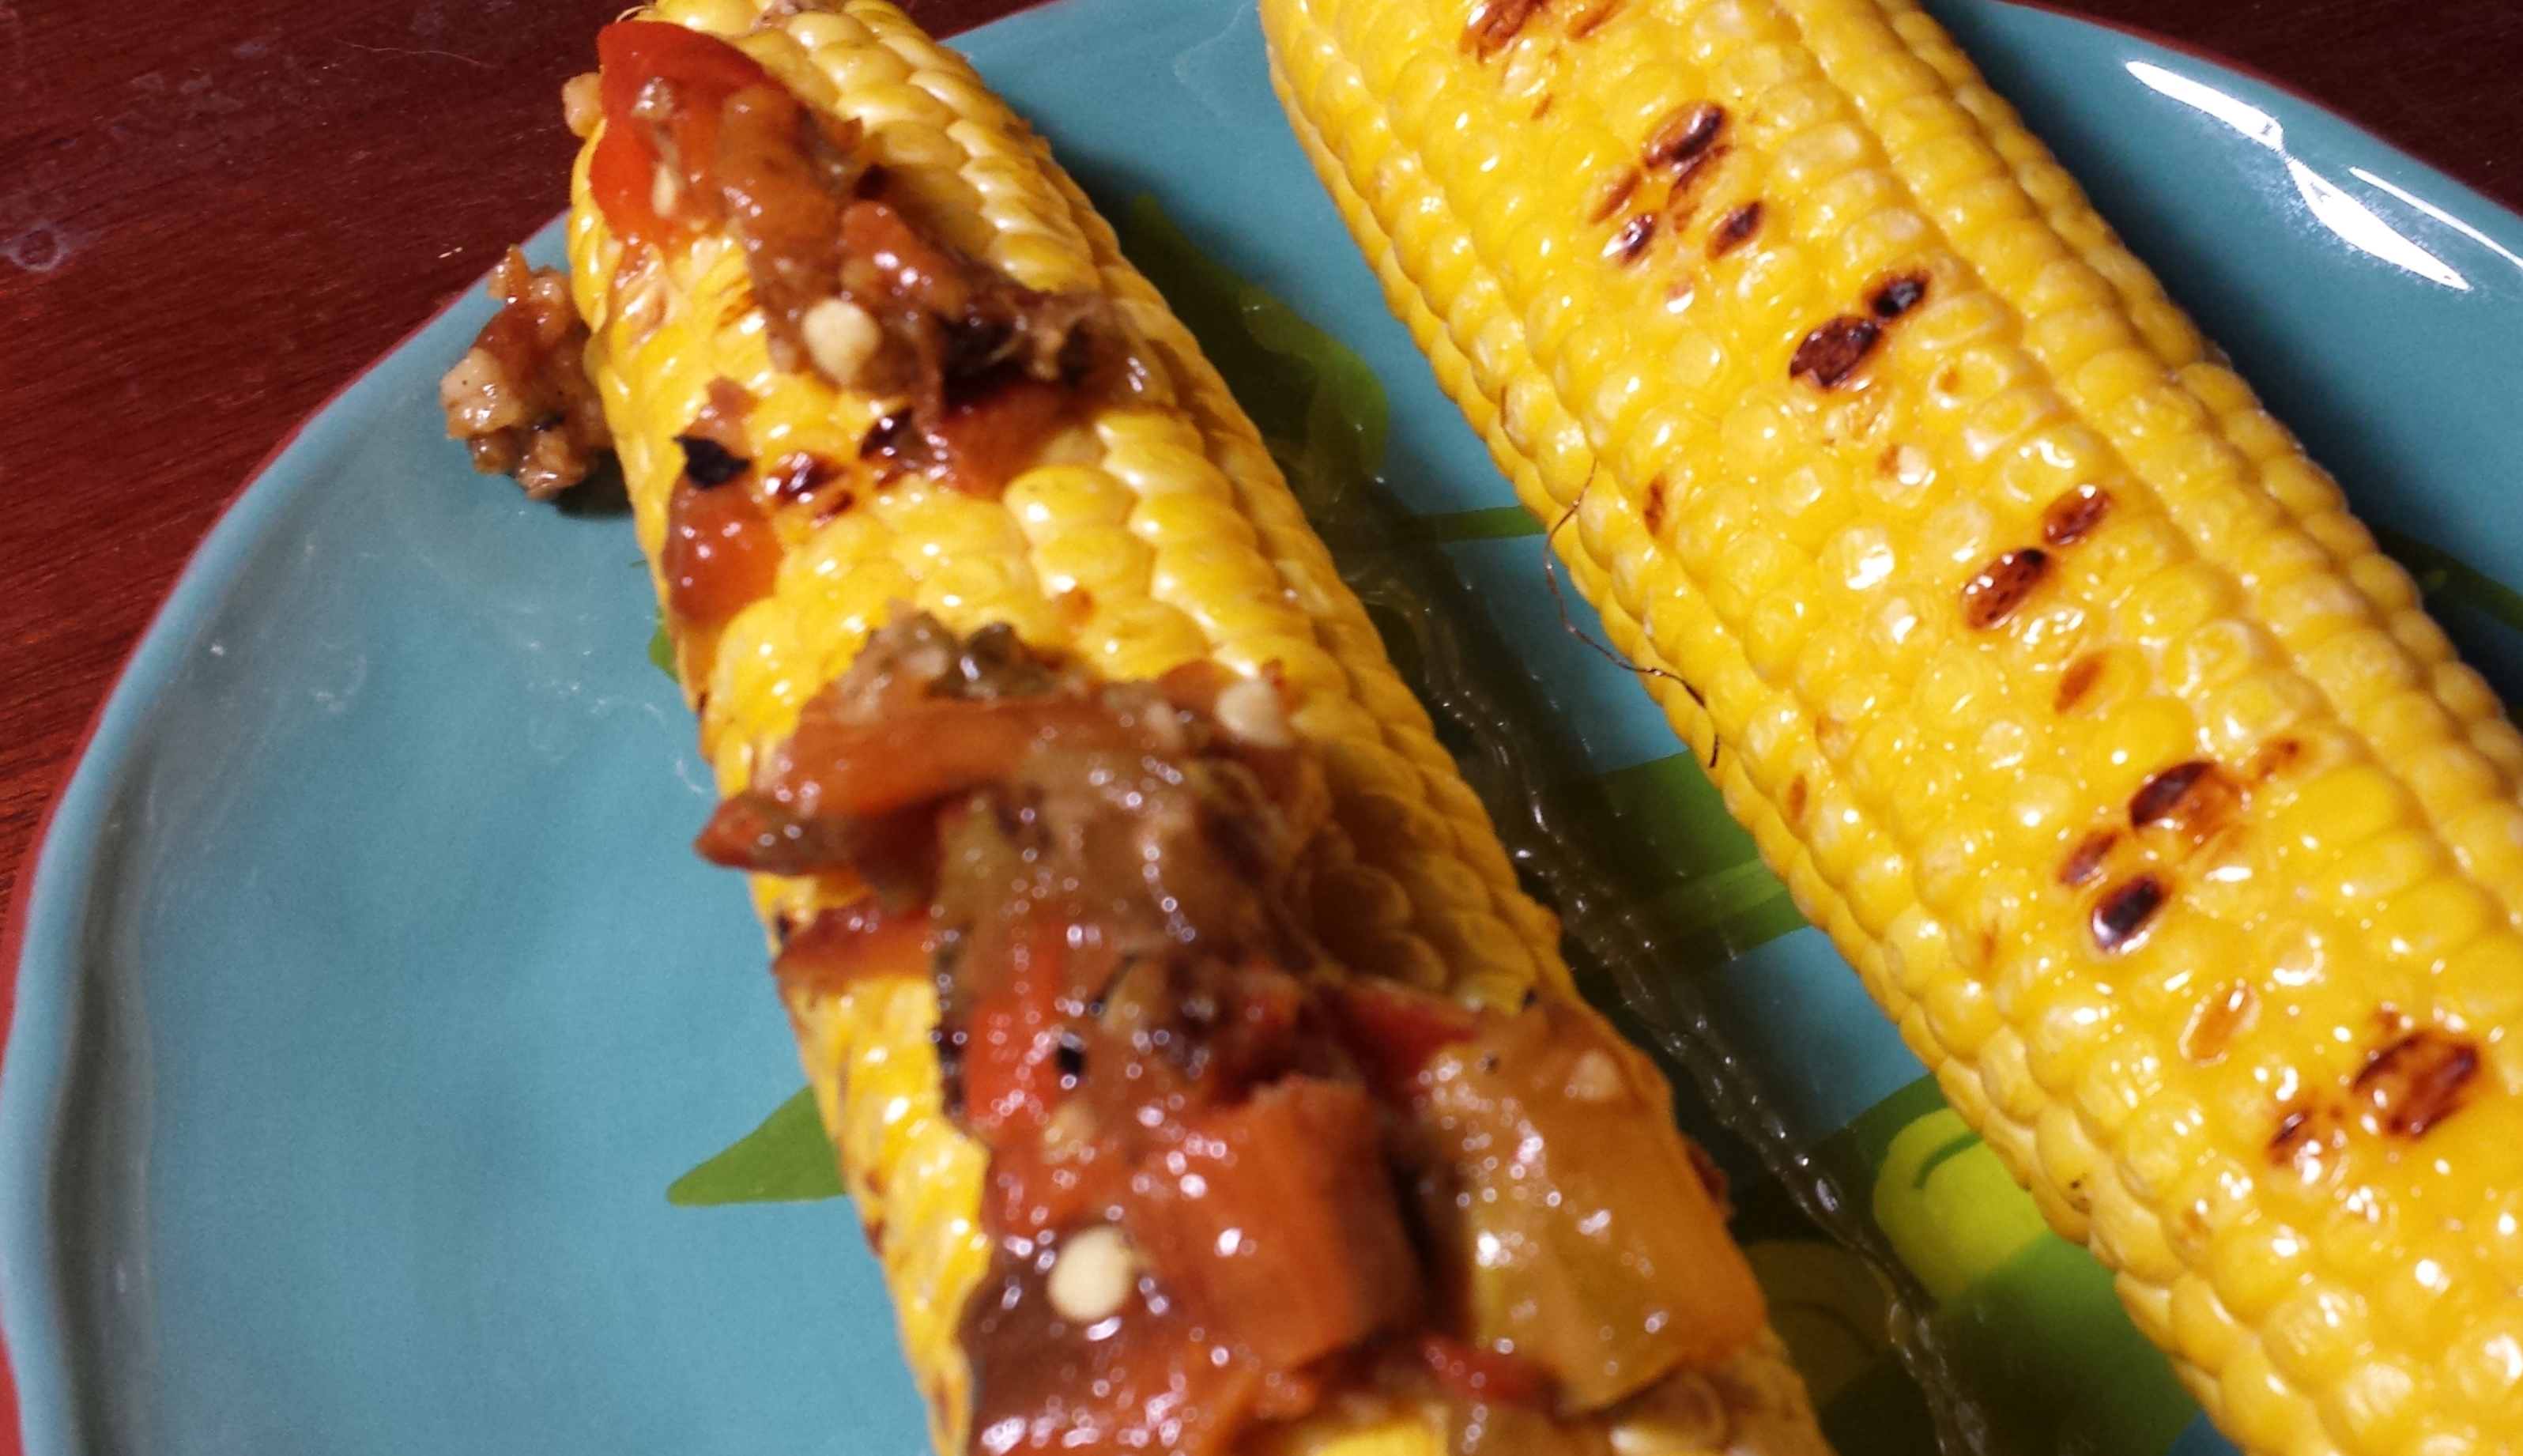
elote salsa
For more details about fermenting food, see Sandor Katz’s The Art of Fermentation. For an encouraging primer on safely fermenting food, find Wild Fermentation also by Katz. This is one of my all time favorite cookbooks.

Hearty Jojoba

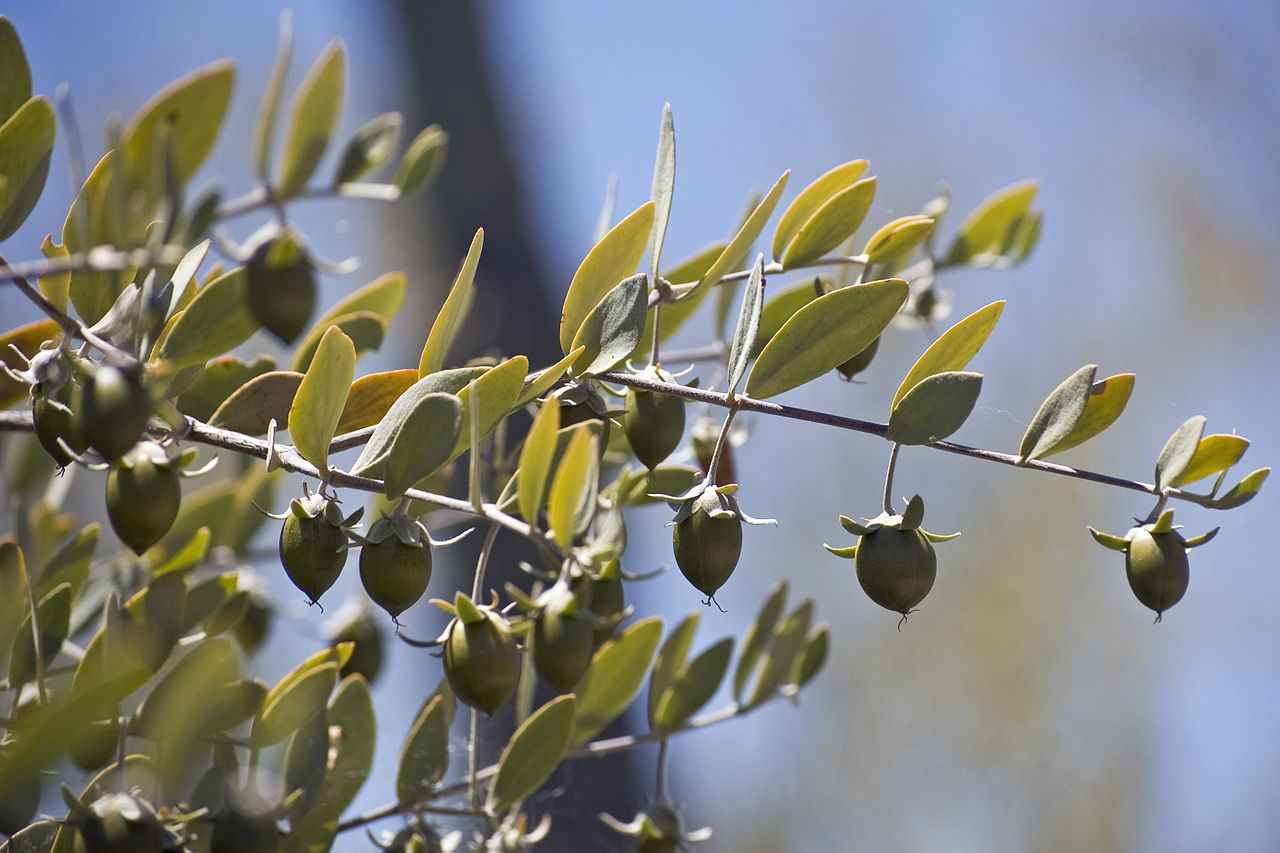
jojoba green fruit

Green jojoba fruit dangle below the branches, slowly ripening in the desert sun.

posted by Jacqueline A. Soule

If you know how I title most of my blogs, you now have a hint on how to pronounce jojoba – it’s pronounced ho-ho-ba. (The “j” is an “h” sound in Spanish. Which reminds me of the time at the busy health clinic when “Hakalina” did not recognize her name called out by the nurse – but that’s another story.)

Jojoba is the O’odham name for the plant (Simmondsia chinensis) and it came into Spanish via the work of Father Kino. Indeed, Father Kino wrote in his journals about the plant. In Bolton’s 1919 translation of Kino’s journals, Kino writes of a visit with “Pima Indians” (pg. 93) and states that, among other items “. . . they also have bezoar, the medicinal fruit called jojoba, blankets, cotton fabrics, curious and very showy baskets or pitchers, macaws . . . and other conveniences.” Later, Kino describes the fruit as “. . . like the almond, and with a very salutary and effective remedy for different kinds of sickness.”

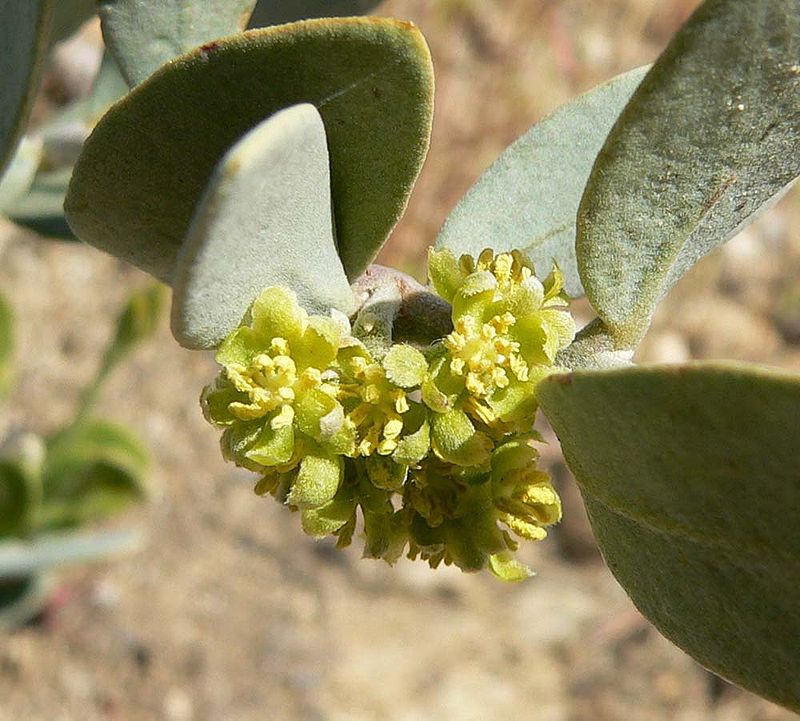
Simmondsia_chinensis_male_flower

Jojoba shrubs are either male or female. Here a male shrub offers it’s pollen filled flowers to passing pollinators.

Other common names for the plant include goat nut, deer nut, pignut, wild hazel, quinine nut, coffeeberry, and gray box bush. Although there are references to jojoba as nuts, they are, botanically speaking, a seed.

Jojoba was used in most areas where it is native. The uses varied with tribe. O’odham would crush the seeds to yield an oily paste useful for dry cracked skin, chapped lips, cuts, scrapes, and burns. Seeds were ground and pressed into cakes, and small portions were eaten in moderation as food. Too much jojoba has a laxative action. Seri used seeds as an emergency food, but more commonly as part of a shampoo process. Seeds can also be made into necklaces.

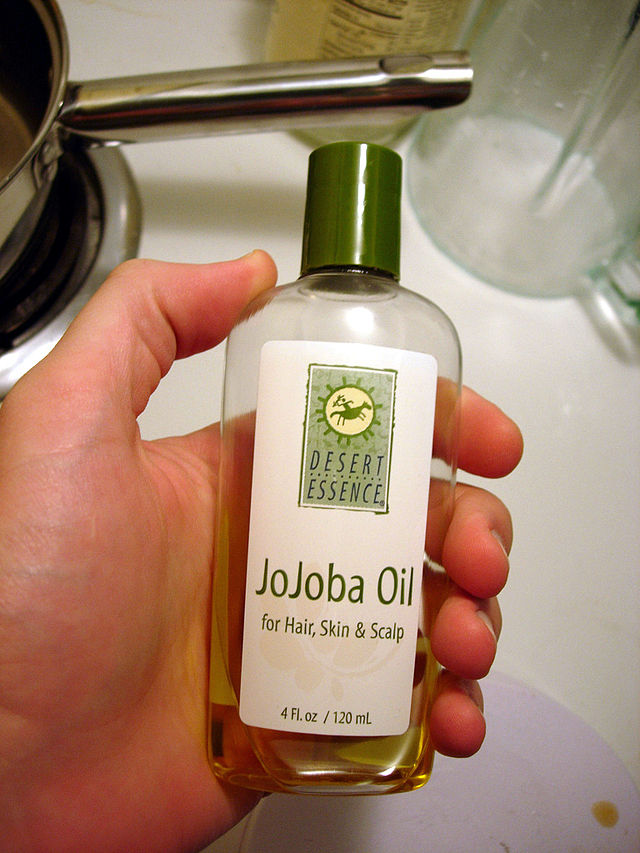
Jojoba-oil

You can purchase pressed jojoba “oil” in many stores. I use the oil in making lotion.


Currently, jojoba is grown commercially for its “oil,” in reality a liquid wax ester, expressed from the seed. This oil is rare in nature. Technically it is an extremely long straight-chain wax ester and not a triglyceride, making jojoba and its derivative jojoba esters more similar to human sebum (body oil) and sperm whale oil than to vegetable oils. Jojoba oil is easily refined to be odorless, colorless and oxidatively stable, and is often used in cosmetics as a moisturizer and as a carrier oil for specialty fragrances. It also has potential use as both a biodiesel fuel for cars and trucks, as well as a biodegradable lubricant. Plantations of jojoba have been established in a number of desert and semi-desert areas.


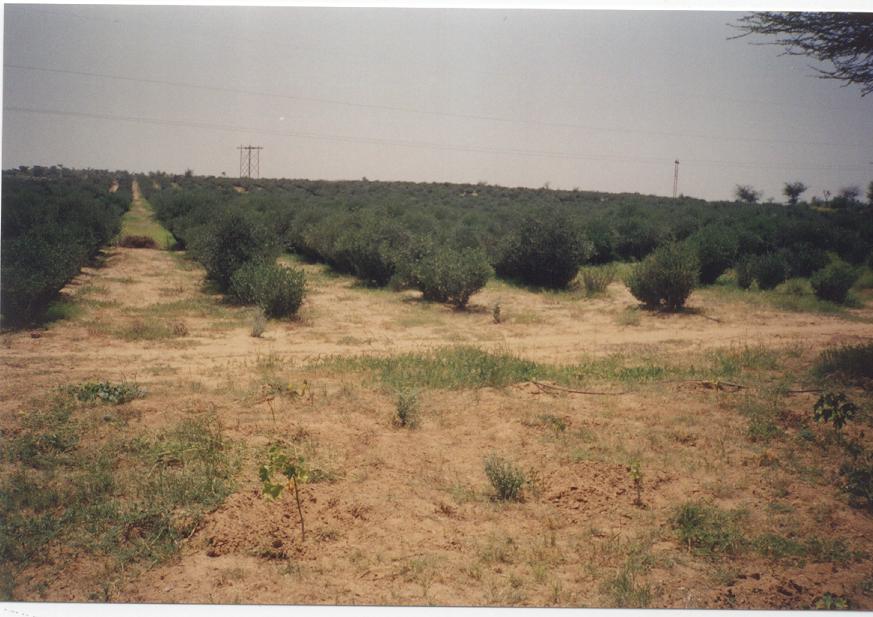
jojoba plantation in India

Jojoba plantation in one of the semi-arid areas of India.

Jojoba is currently the Sonoran Desert’s second most economically valuable native plant (overshadowed only by the Washingtonia palms used in ornamental horticulture). Plant breeders are doing selective breeding to develop plants that produce more seeds, seeds with higher oil content, and characteristics that will facilitate mechanical harvesting.

A few interesting taxonomic notes. Jojoba is the only species in its plant family, making it quite unique among flowering plants. While there are around 400 monotypic genera, this is the only monotypic flowering plant family. The scientific name, Simmondsia chinensis, is an example of the need for good penmanship. Jojoba does not originate in China! Johann Link, the botanist naming the species, misread Nuttall’s collection label “Calif” as “China.”

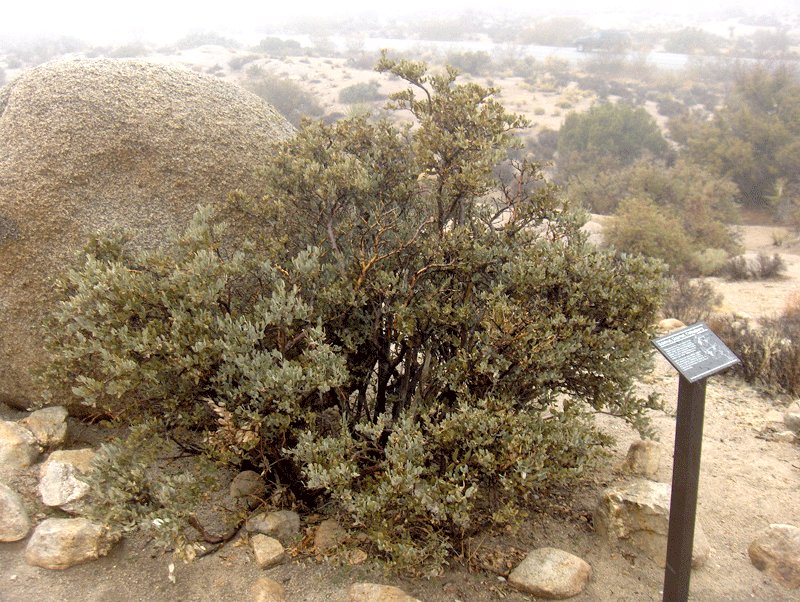
Jojoba habit

Jojoba shrubs live well in the desert.

Harvesting and Use.
Jojoba seed on a single bush will ripen slowly over several months. This is one of the traits breeders are seeking to change. Seed is ready to be harvested when the hulls easily fall off and a slight tug releases it into your hand. If it resists, it isn’t ripe.

Store harvested seed in jars or even in the freezer. Grind jojoba seeds in a mortar and pestle for topical use. Alternatively toast the seeds and munch as an occasional snack.

If you have the technology, you can harvest seeds and press them for the oil. Or simply plant them in your native landscape and let the native wildlife use the seed.

Planting and Care will be covered in a future blog.


To learn more about jojoba and other native plants used as herbs, please come to my free presentation “Father Kino’s Native Herbs” at the Main Library on Saturday Sept 13 at 1:30. More at http://www.library.pima.gov/calendar/?ID=26635

Some of the information in this article is excerpted from my book “Father Kino’s Herbs: Growing and Using Them Today” (2011, Tierra del Sol Press, $15). I hope you will consider purchasing a copy locally at Antigone Books, Arizona Experience Store, Magic Garden, Mostly Books, or Rillito Nursery.

© 2014, Jacqueline Soule.  All rights reserved. I have received many requests to reprint my work. My policy is that you are free to use a very short excerpt which must give proper credit to the author, and must include a link back to the original post on our site. Please use the contact me if you have any questions. JAS avatar

Cool Summer Bean Dishes….with Heirlooms

Sonoran Caviar in Mayo mesquite bowl (MABurgess photo)

Sonoran Caviar in Mayo mesquite bowl (MABurgess photo)

For picnics, barbeques or simple pick-me-ups, here are some fun ideas to bring a variety of heirloom beans into your summer fare.  We usually think of beans as winter food, but in the heat of August these tasty bean treats will help chill you out with gusto.

Tia Marta here to share ways of bringing the original “fast food” into your summertime menus.  Fast–that is, cook ’em first and have them “at the ready” for dressing them to suit any mood or occasion.  I am a founding member of the Heirloom Bean Fan Club, always amazed by the array of bean possibilities we have in the Southwest available to us.  Here in Baja Arizona we are blessed with inherited gifts of delectable, nutritious, desert-adapted beans from Native farmers, traditional Hispanic families, Black, Chinese, Anglo and other newcomers.  They grow well in our backyard gardens, bedecking our tables with colorful goodness.

All American sun oven set up on patio table-available thru Flor de Mayo (MABurgess photo)

All American sun oven set up on patio table-available thru Flor de Mayo (MABurgess photo)

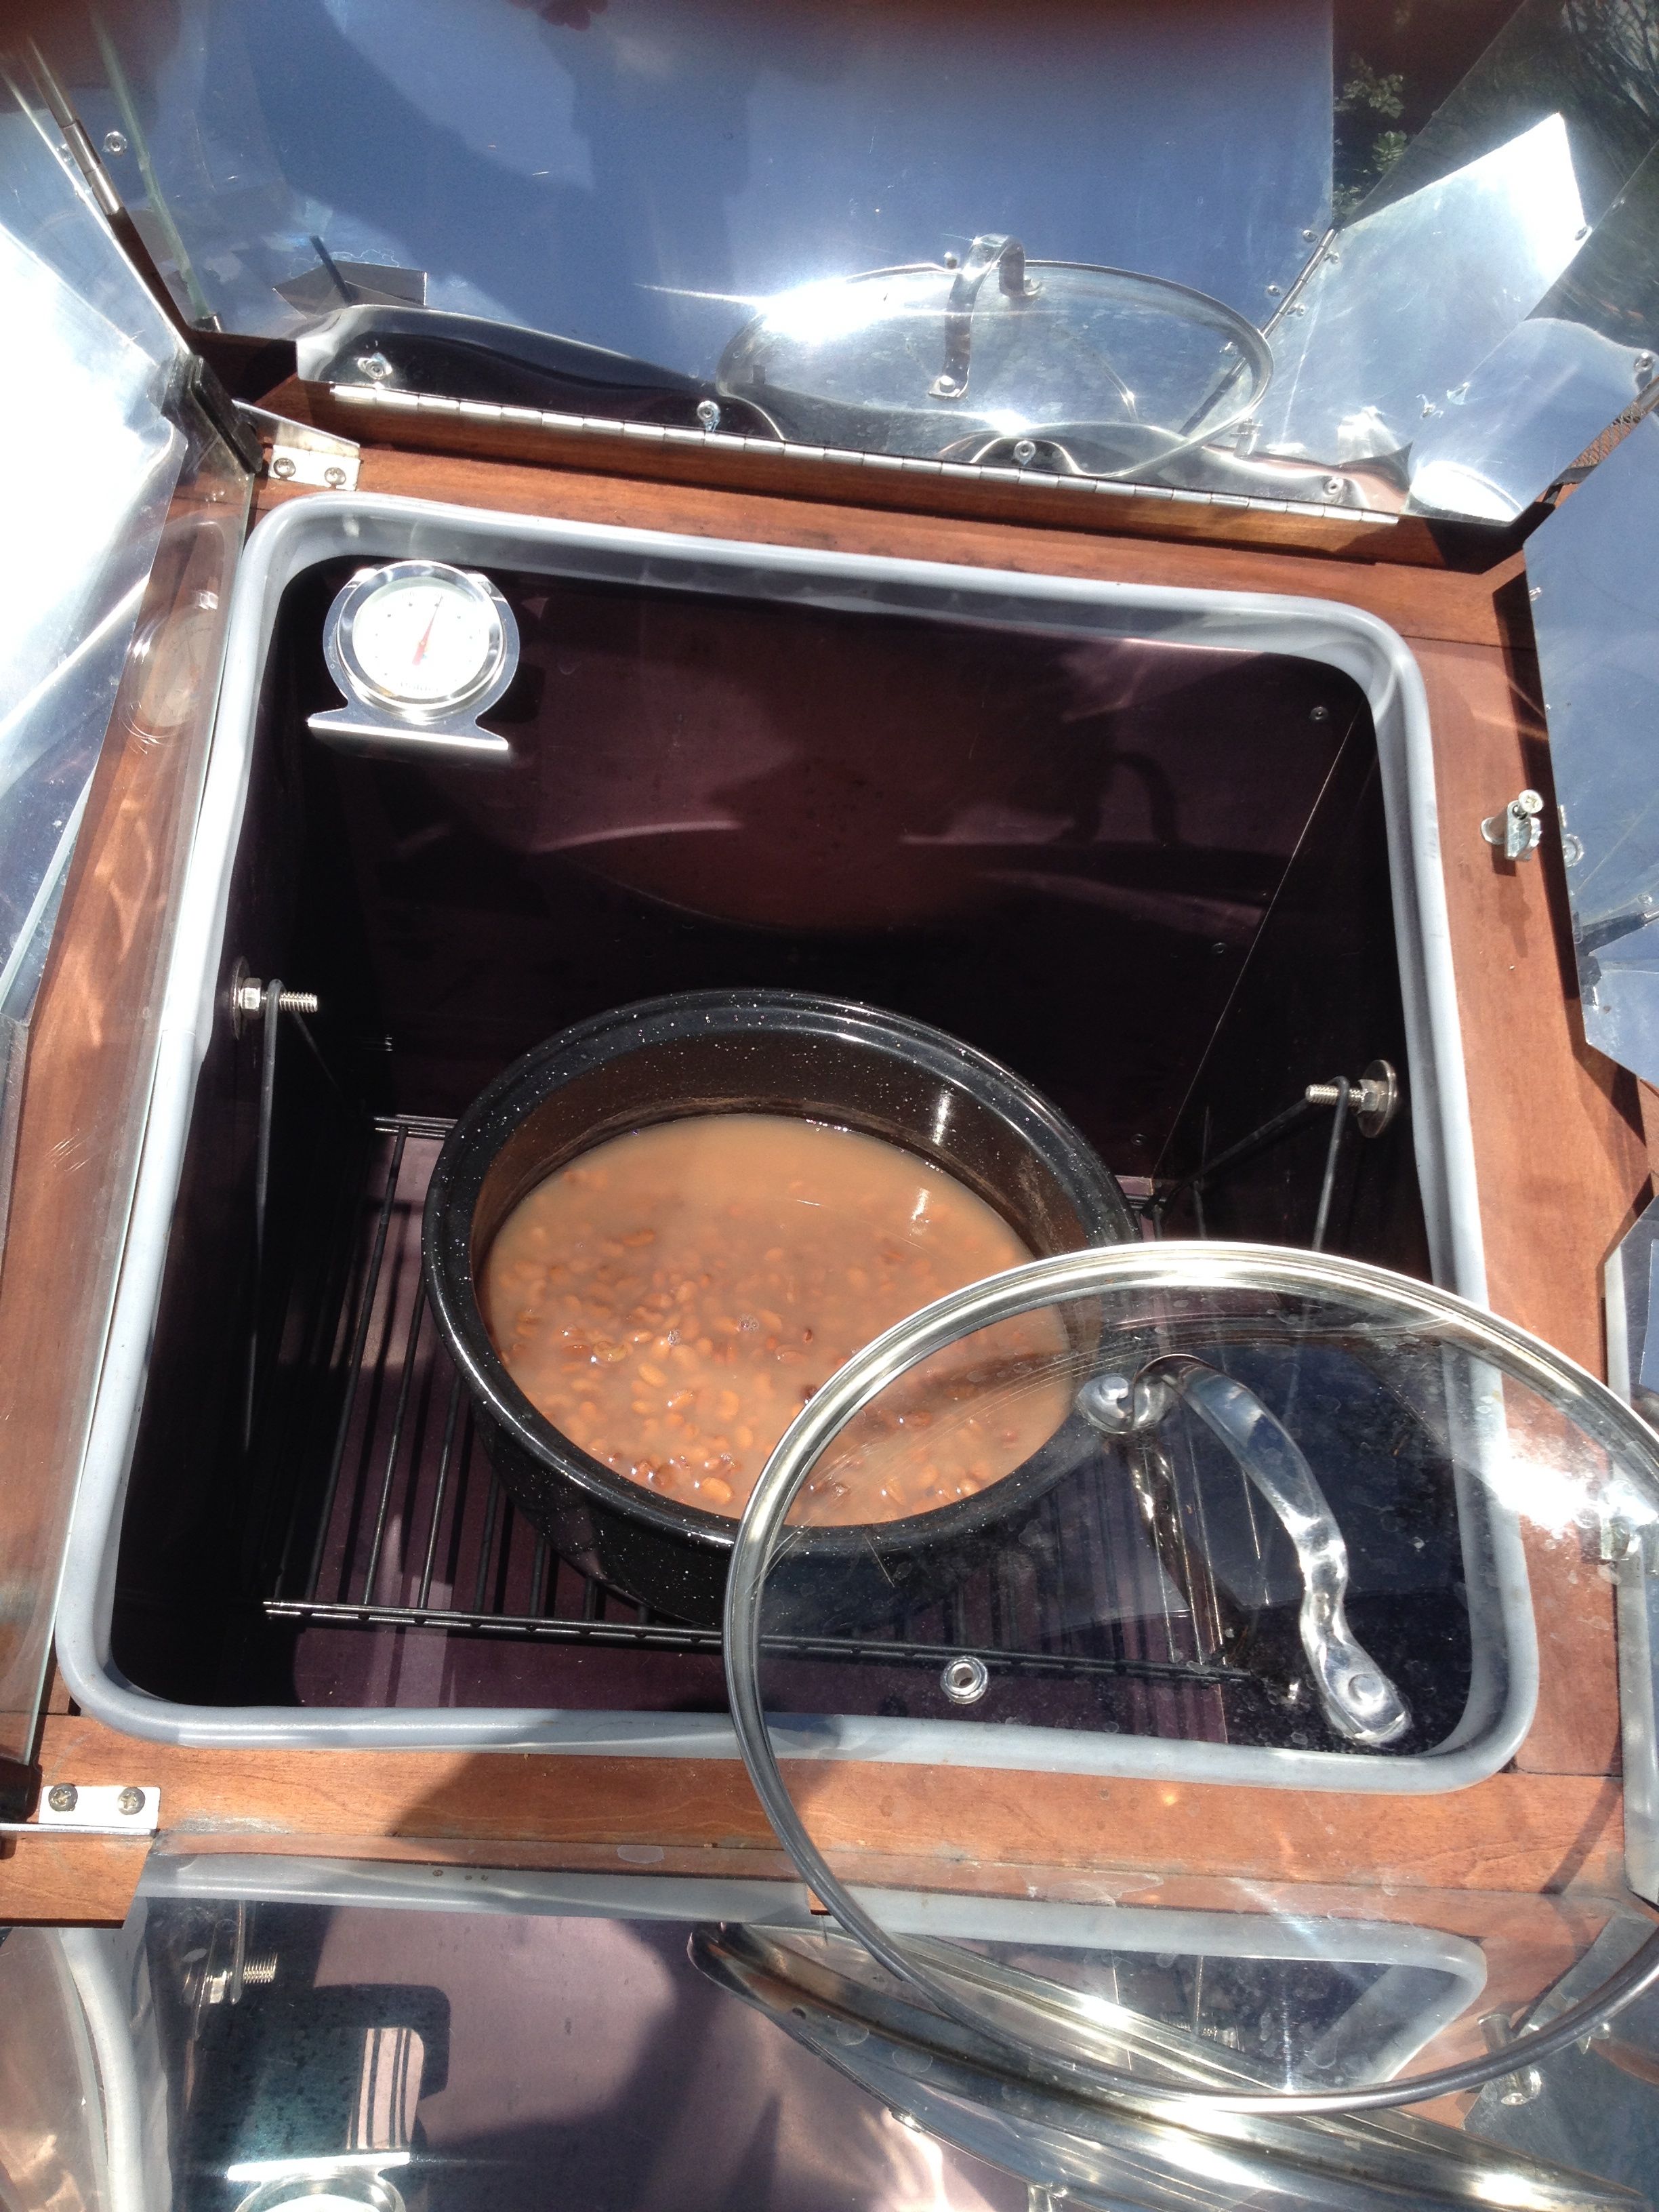
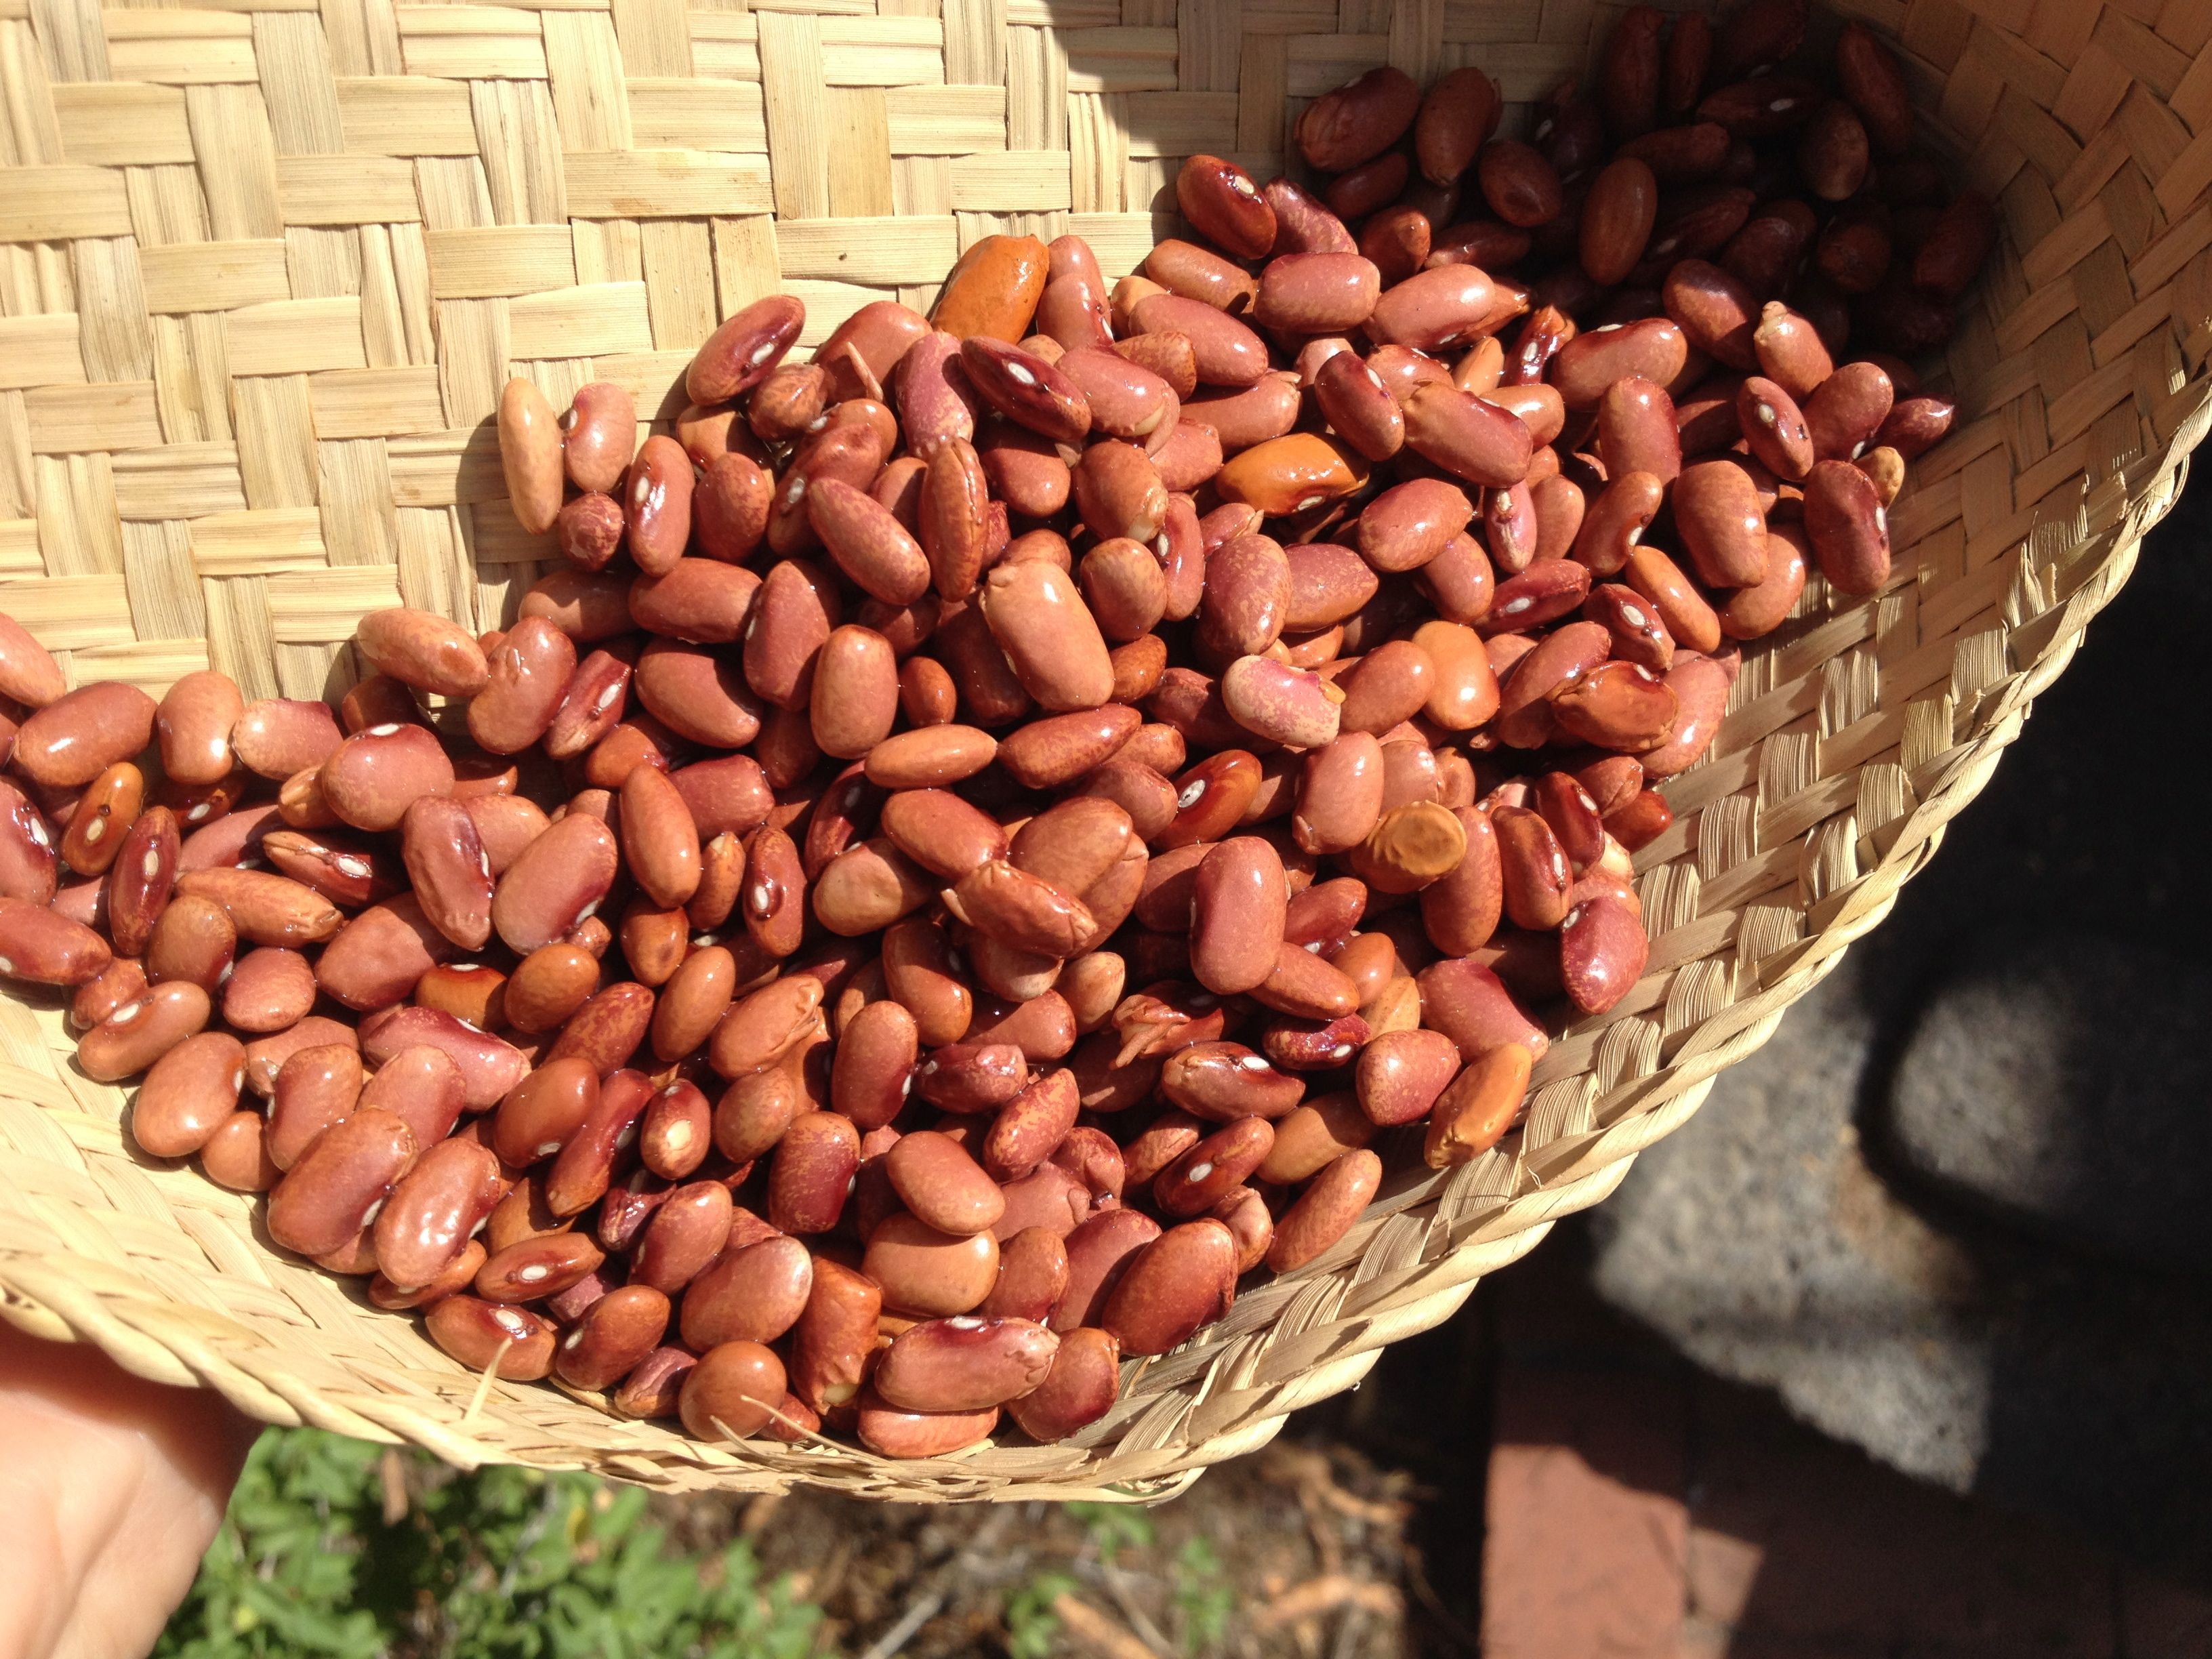
When the summer sun fully hits our porch about 10am, out comes our sun-oven to help us pull the heat of preparation out of the kitchen.  Unfolding its reflector “wings,” I place a saucepan of pre-soaked Native tepary beans–the ones the Tohono O’odham call s-wepegi ba:wi or red tepary–covered by plenty of drinking water, nothing else necessary.  About every half hour or hour (you don’t have to be too regimented if you don’t feel like it), I go out and re-adjust the orientation of the sun-oven, vertically and horizontally, to keep it as close to perpendicular to the sun as possible.  The teps will be smelling good and testing done about 2pm if the sky has remained relatively bright.
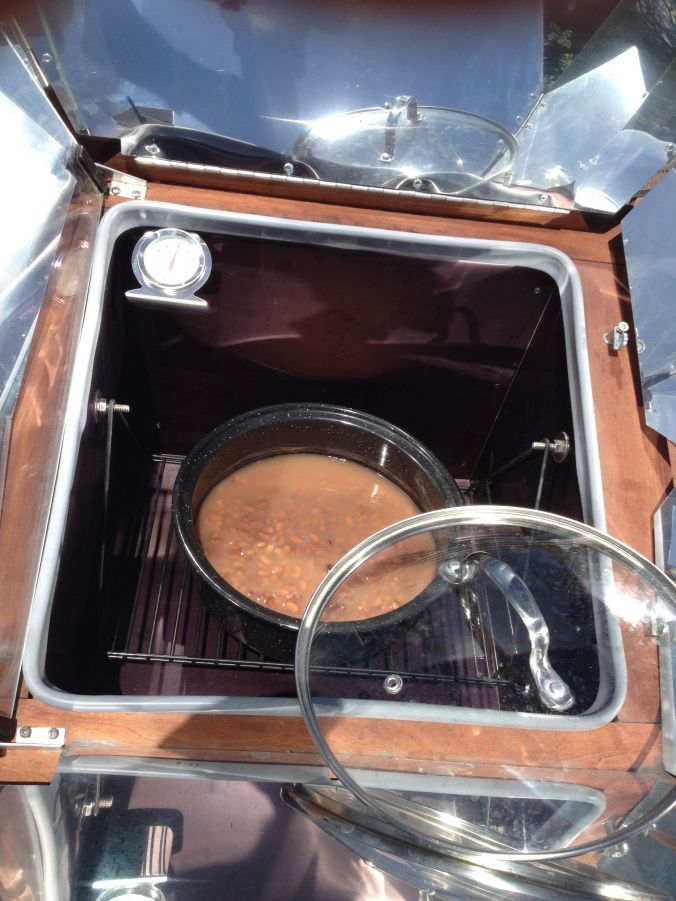
Tepary beans, done by 2pm in solar oven, temp 300 (MABurgess photo)

Tepary beans, done by 2pm in solar oven, temp 300 (MABurgess photo)

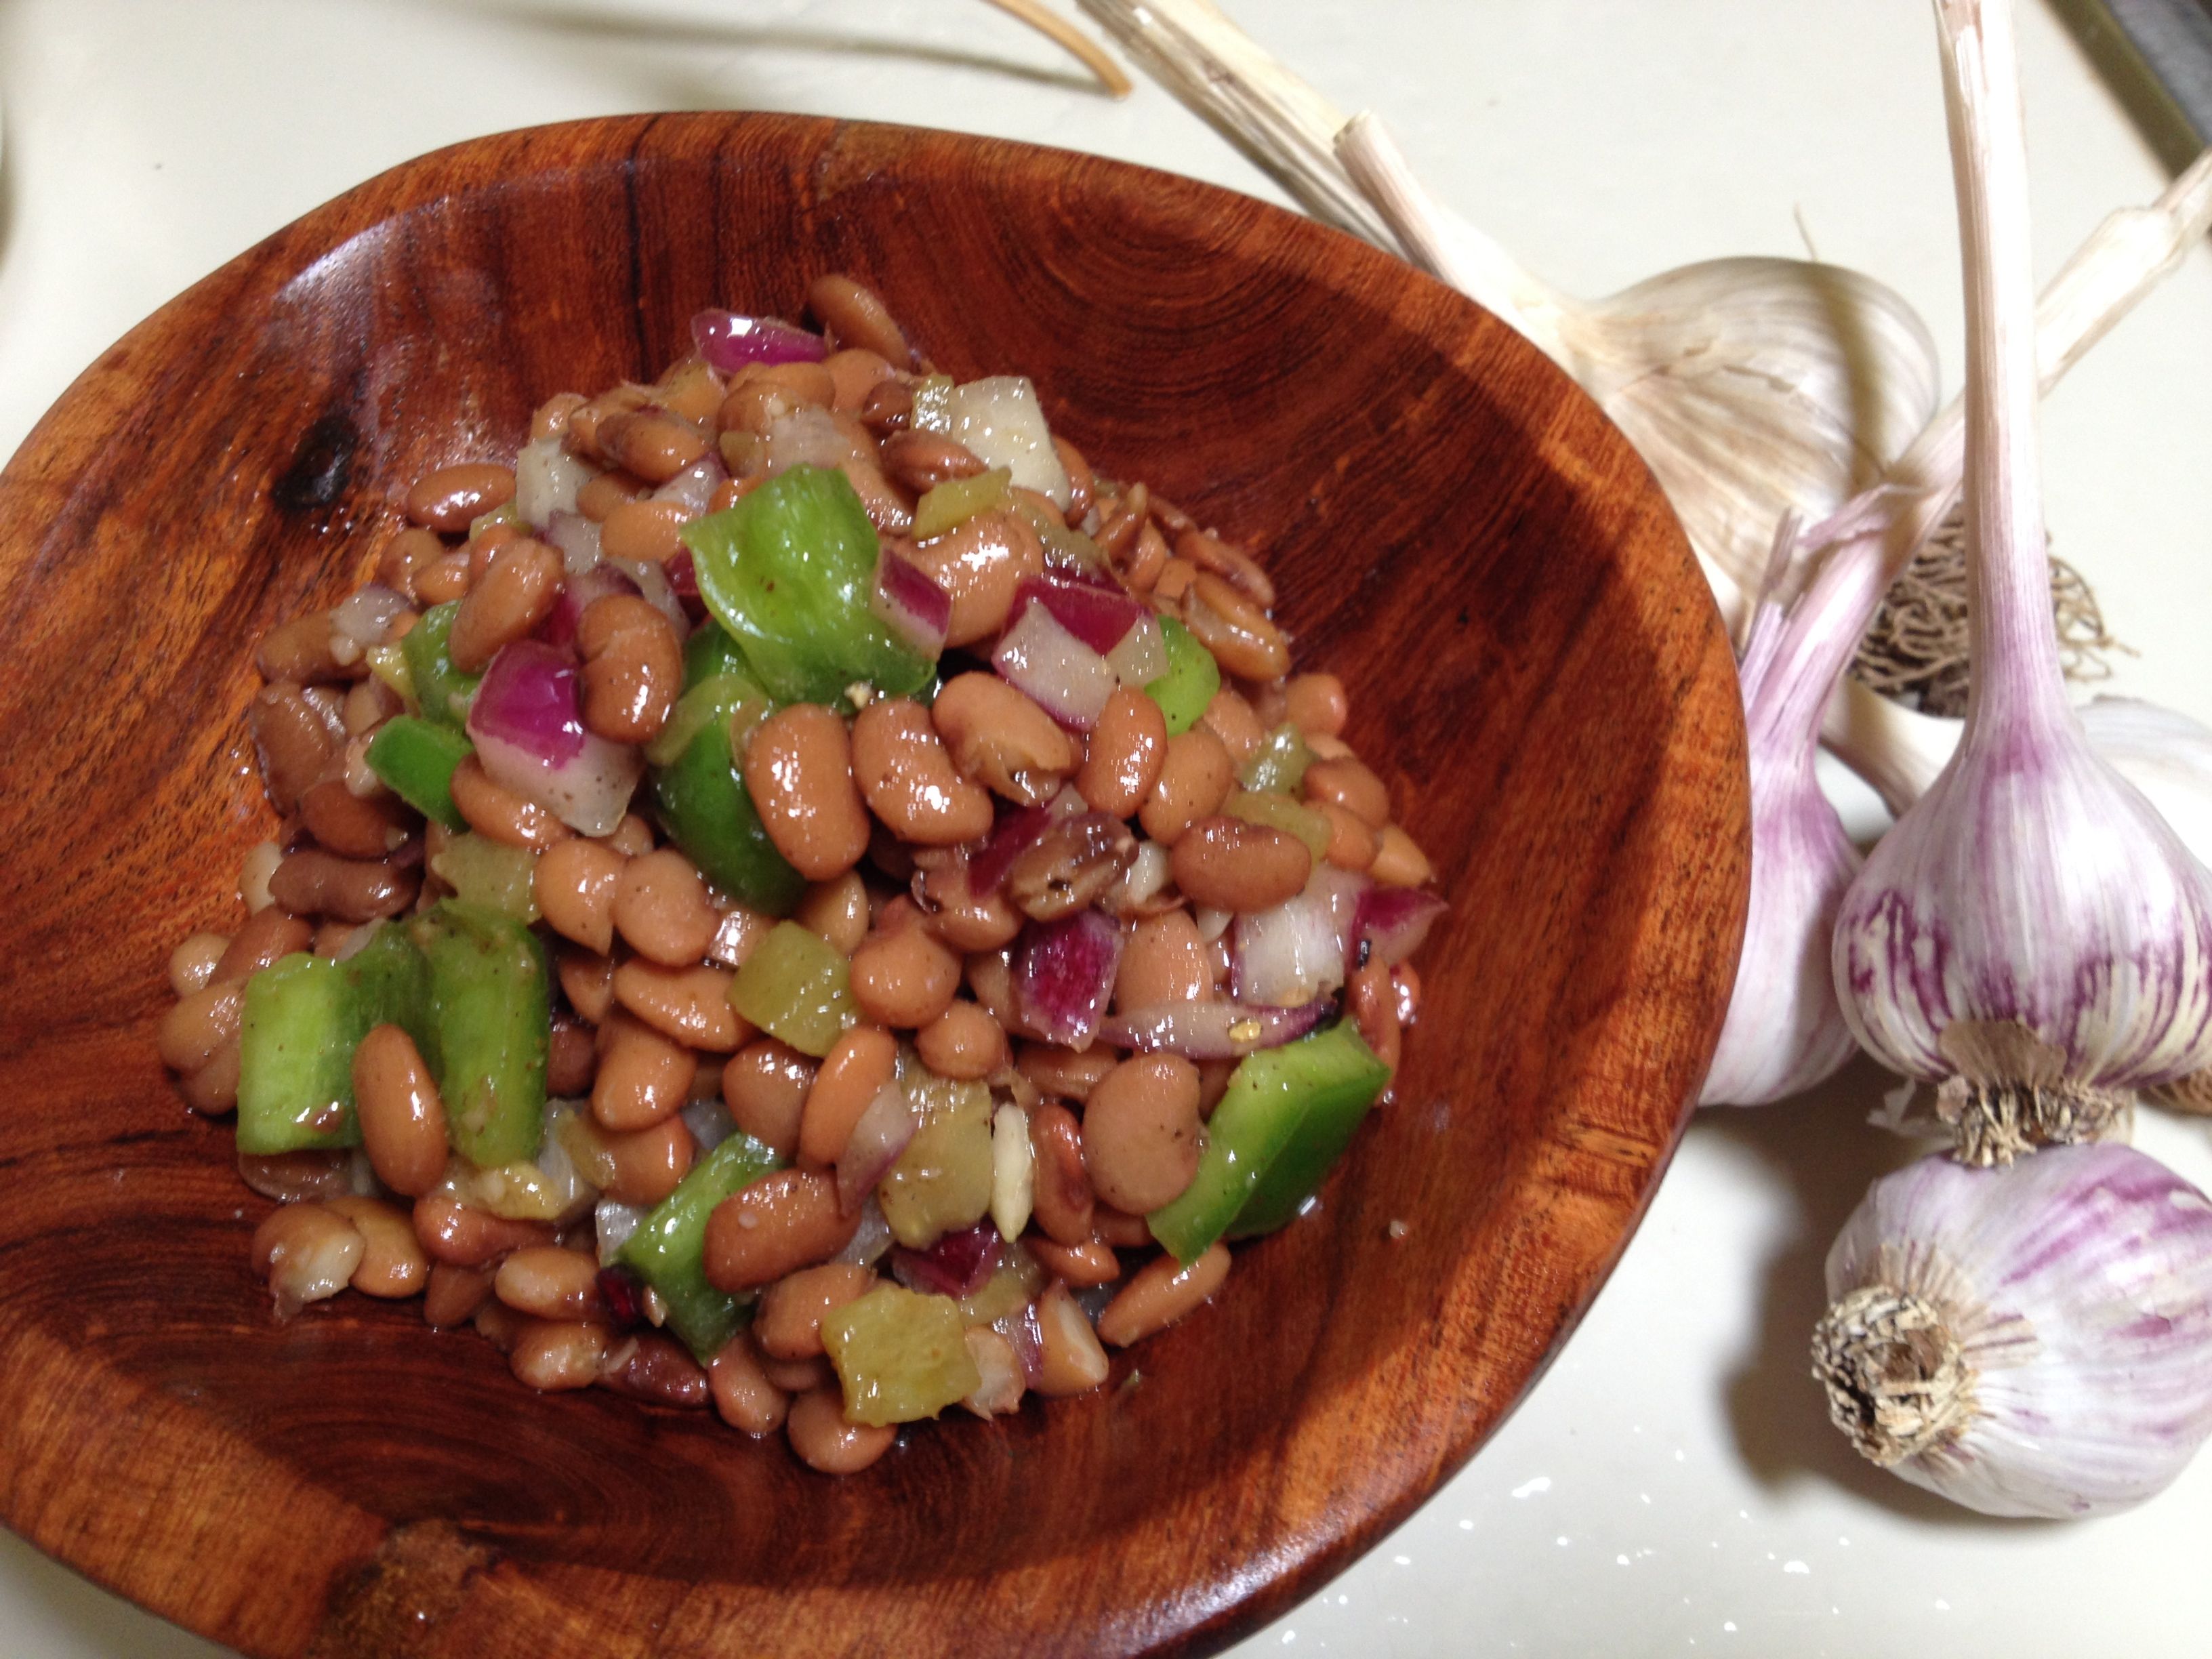
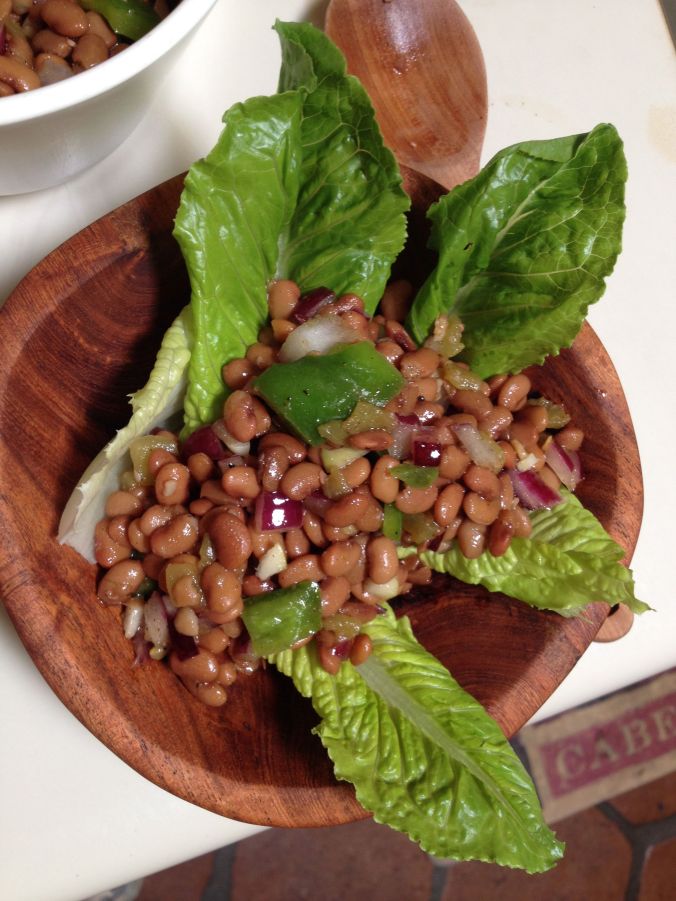
Now, with my well-cooked teparies, if I’m not ready for kitchen cookery action I let them cool down then store them labeled in the frig or freezer.  If I am in cook mode, I drain them, reserving the liquid for soup, and let them cool while I chop veggies.  My plan–“Sonoran Caviar”–the best salad ever invented for desert rats in need of a pinch of picante.  This is the culinary creation of desert survival instructor, raconteur, and one-of-a-kind character George Price, and my thanks go to him for bringing even more excitement out of teparies!  Give it a try.
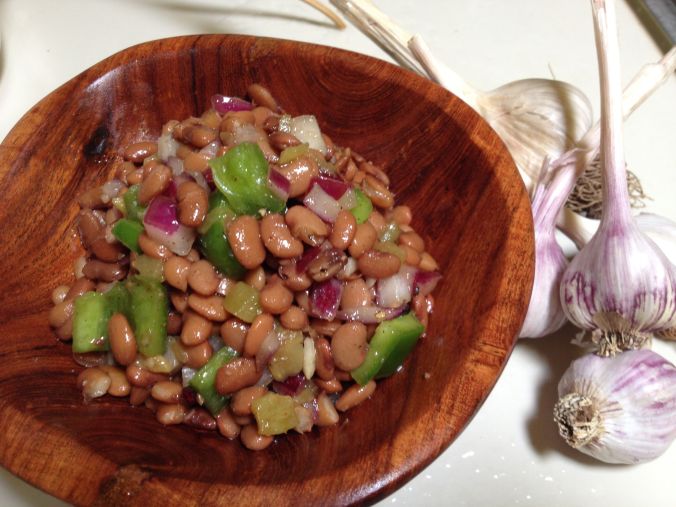
George's Sonoran Caviar--teparies with NSS heirloom garlic (both available at St Phillips Sunday farmers market)

George’s Sonoran Caviar–teparies with NSS heirloom garlic (both available at St Phillips Sunday farmers market)

Sonoran Caviar recipe:

Ingredients:

4 cups cooked brown tepary beans, drained and cooled (from less than 1 lb dry beans)

1 cup diced red onion

1 red bell pepper, diced

2 crisp Anaheim Chiles, diced, skinned, and de-seeded

1 Tbsp crushed garlic

1 Tbsp Tony Chacere’s Original Creole Seasoning (to taste)

1/3 cup olive oil

1/3 cup red wine vinegar

1 tsp black pepper ground

Mix all ingredients thoroughly in a large bowl.  Chill in refrigerator for 24 hours, stirring occasionally.  Stir again before serving.  Buen provecho, George (Be advised that this one serves 6 hungry folks including teenage boys.)

[His Sonoran Caviar will get rave reviews at any pot luck or picnic.]
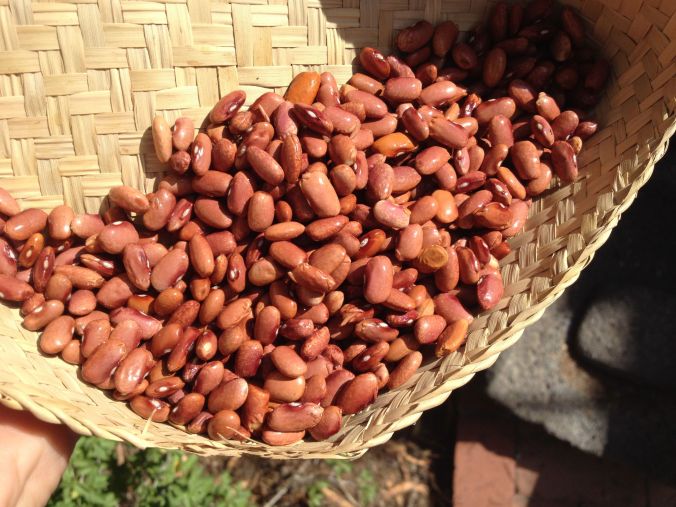
Flor de Mayo beans in Mayo palm basket (beans and baskets from Sunday St Phillips market)

Flor de Mayo beans in Mayo palm basket (beans and baskets from Sunday St Phillips market)

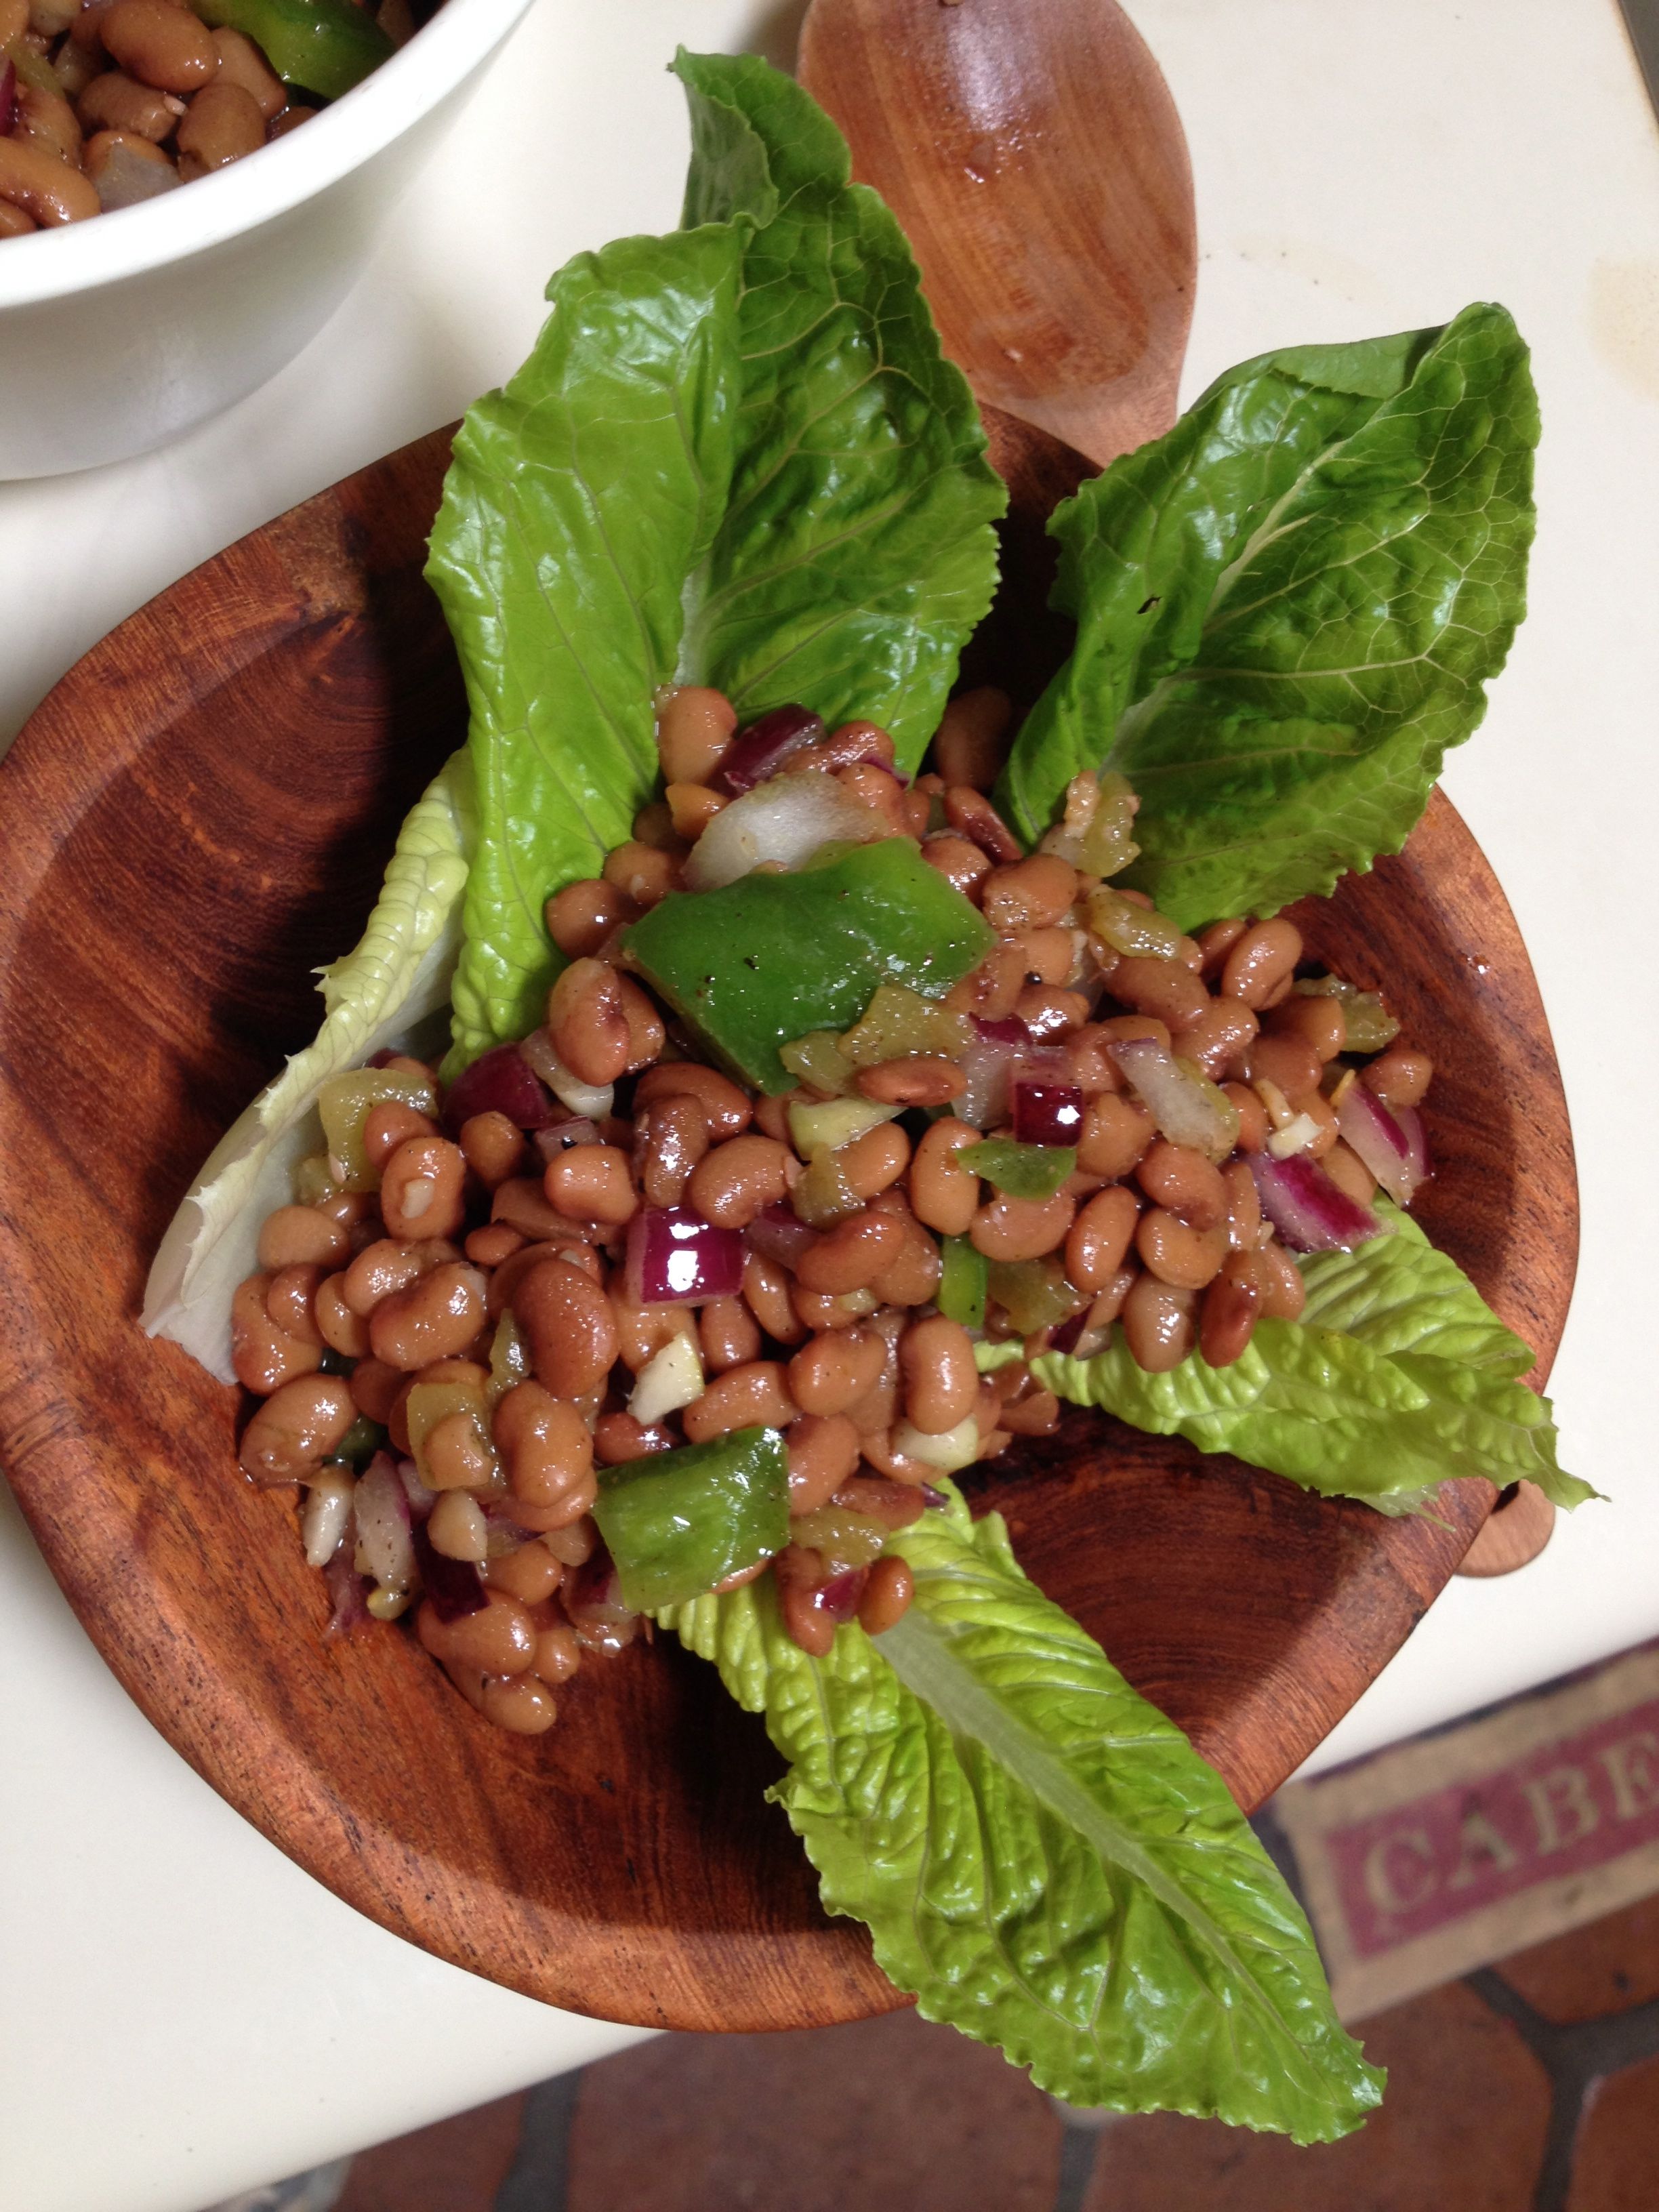
In the realm of cool summer dishes, I can always count on Heirloom Flor de Mayo Mixed Bean Salad (my namesake!).  When I was in college, Mother sent me a little book by Barbara Goodfellow, Make it Now Bake it Later from the ’60s.  It has inspired my hostessing ever since, especially my adaptation for this sweet recipe which delights in everything from your garden:
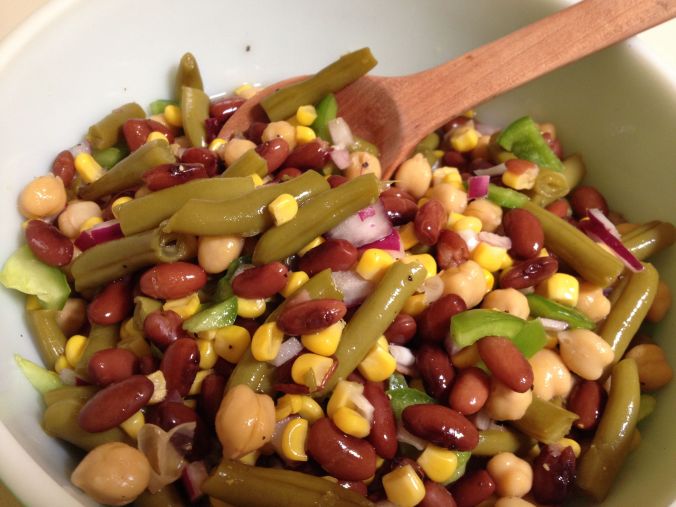
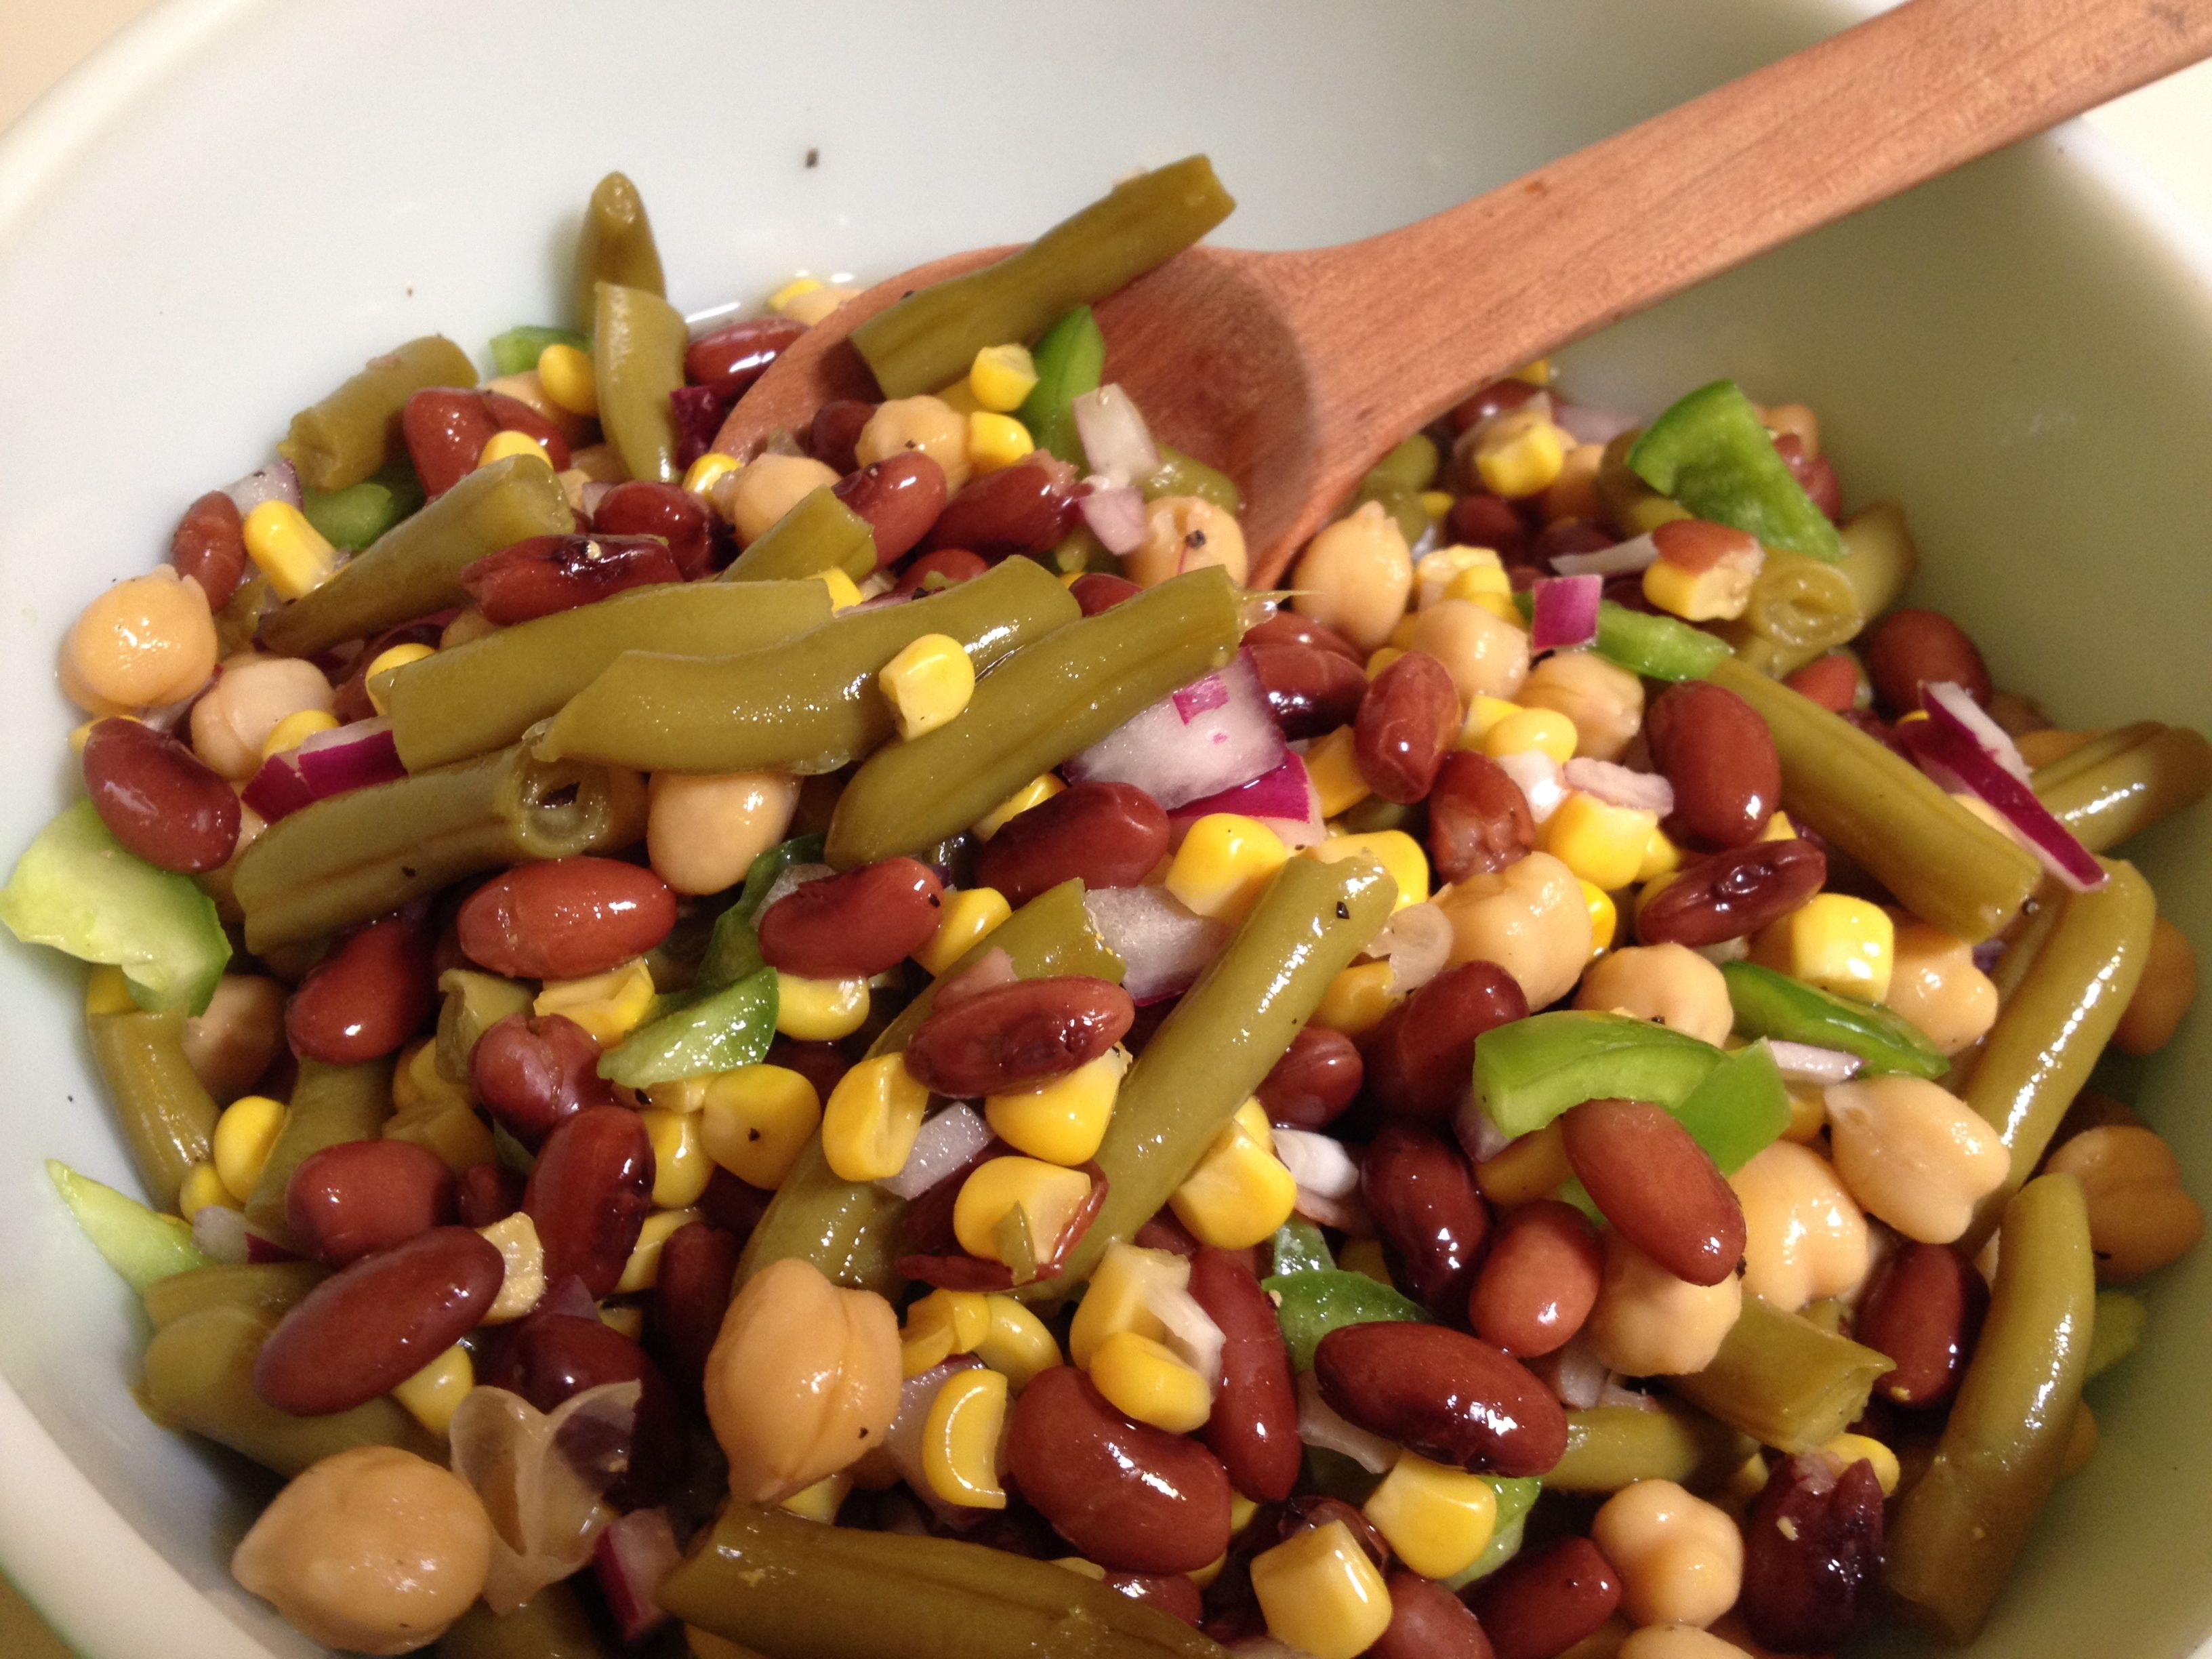
Marinated Mixed Bean Salad with Flor de Mayo heirlooms (MABurgess photo)

Marinated Mixed Bean Salad with Flor de Mayo heirlooms (MABurgess photo)

Heirloom Flor de Mayo Mixed Bean Salad Recipe:

(Fool-proof for picnics and barbeques–and it keeps well for days in the frig)

1 cup (or more) cooked heirloom Flor de Mayo beans for bright color (or another SW heirloom such as Ojo de Cabra, Rio Zape, Bolita, Cannellini–all taste wonderful in this marinated salad)

1 cup cooked green beans or snap beans from your garden (or organic canned)

1 cup cooked garbanzo beans (organic canned garbanzos/chickpeas) from your winter garden

1 cup cooked GMO-free corn kernels (off the cob or canned)

1/2 cup chopped green pepper

1 Tbsp chopped shallots, chives,  sweet onion, or I’itoi’s onion from the garden

1/2 cup organic sugar or agave nectar

1 cup organic cider vinegar

1/2 cup extra virgin olive oil

1 tsp sea salt

Drain cooked beans.  In mixing bowl dissolve sweetener and spices in liquid.  Add beans, chopped green pepper and onion, then mix.  Let stand in refrigerator overnight, mix again.  When serving, reserve liquid for other marinades.  Serves 6 generously.
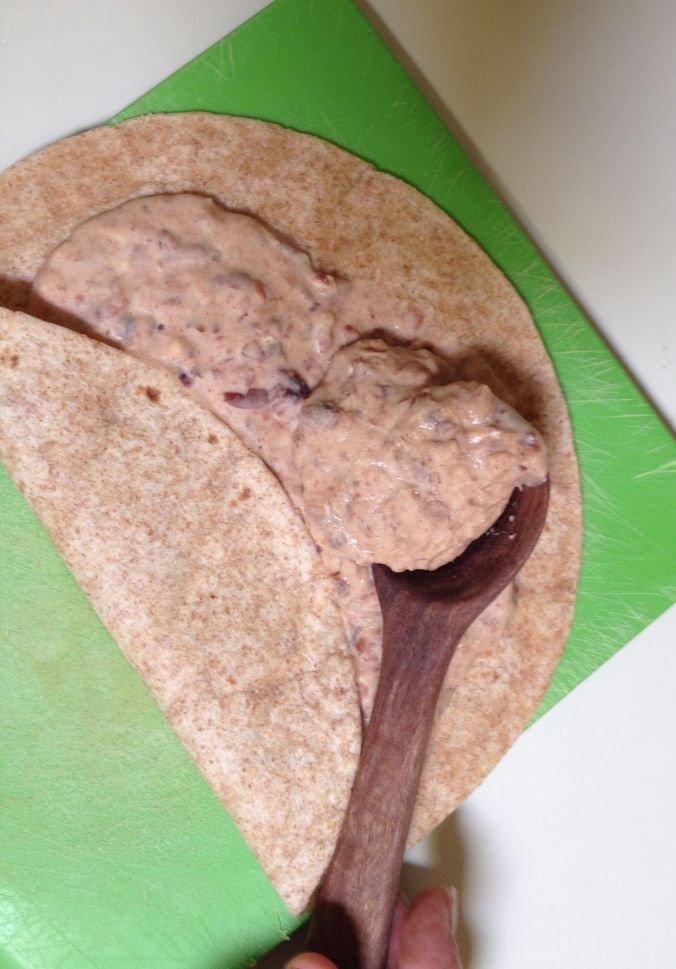
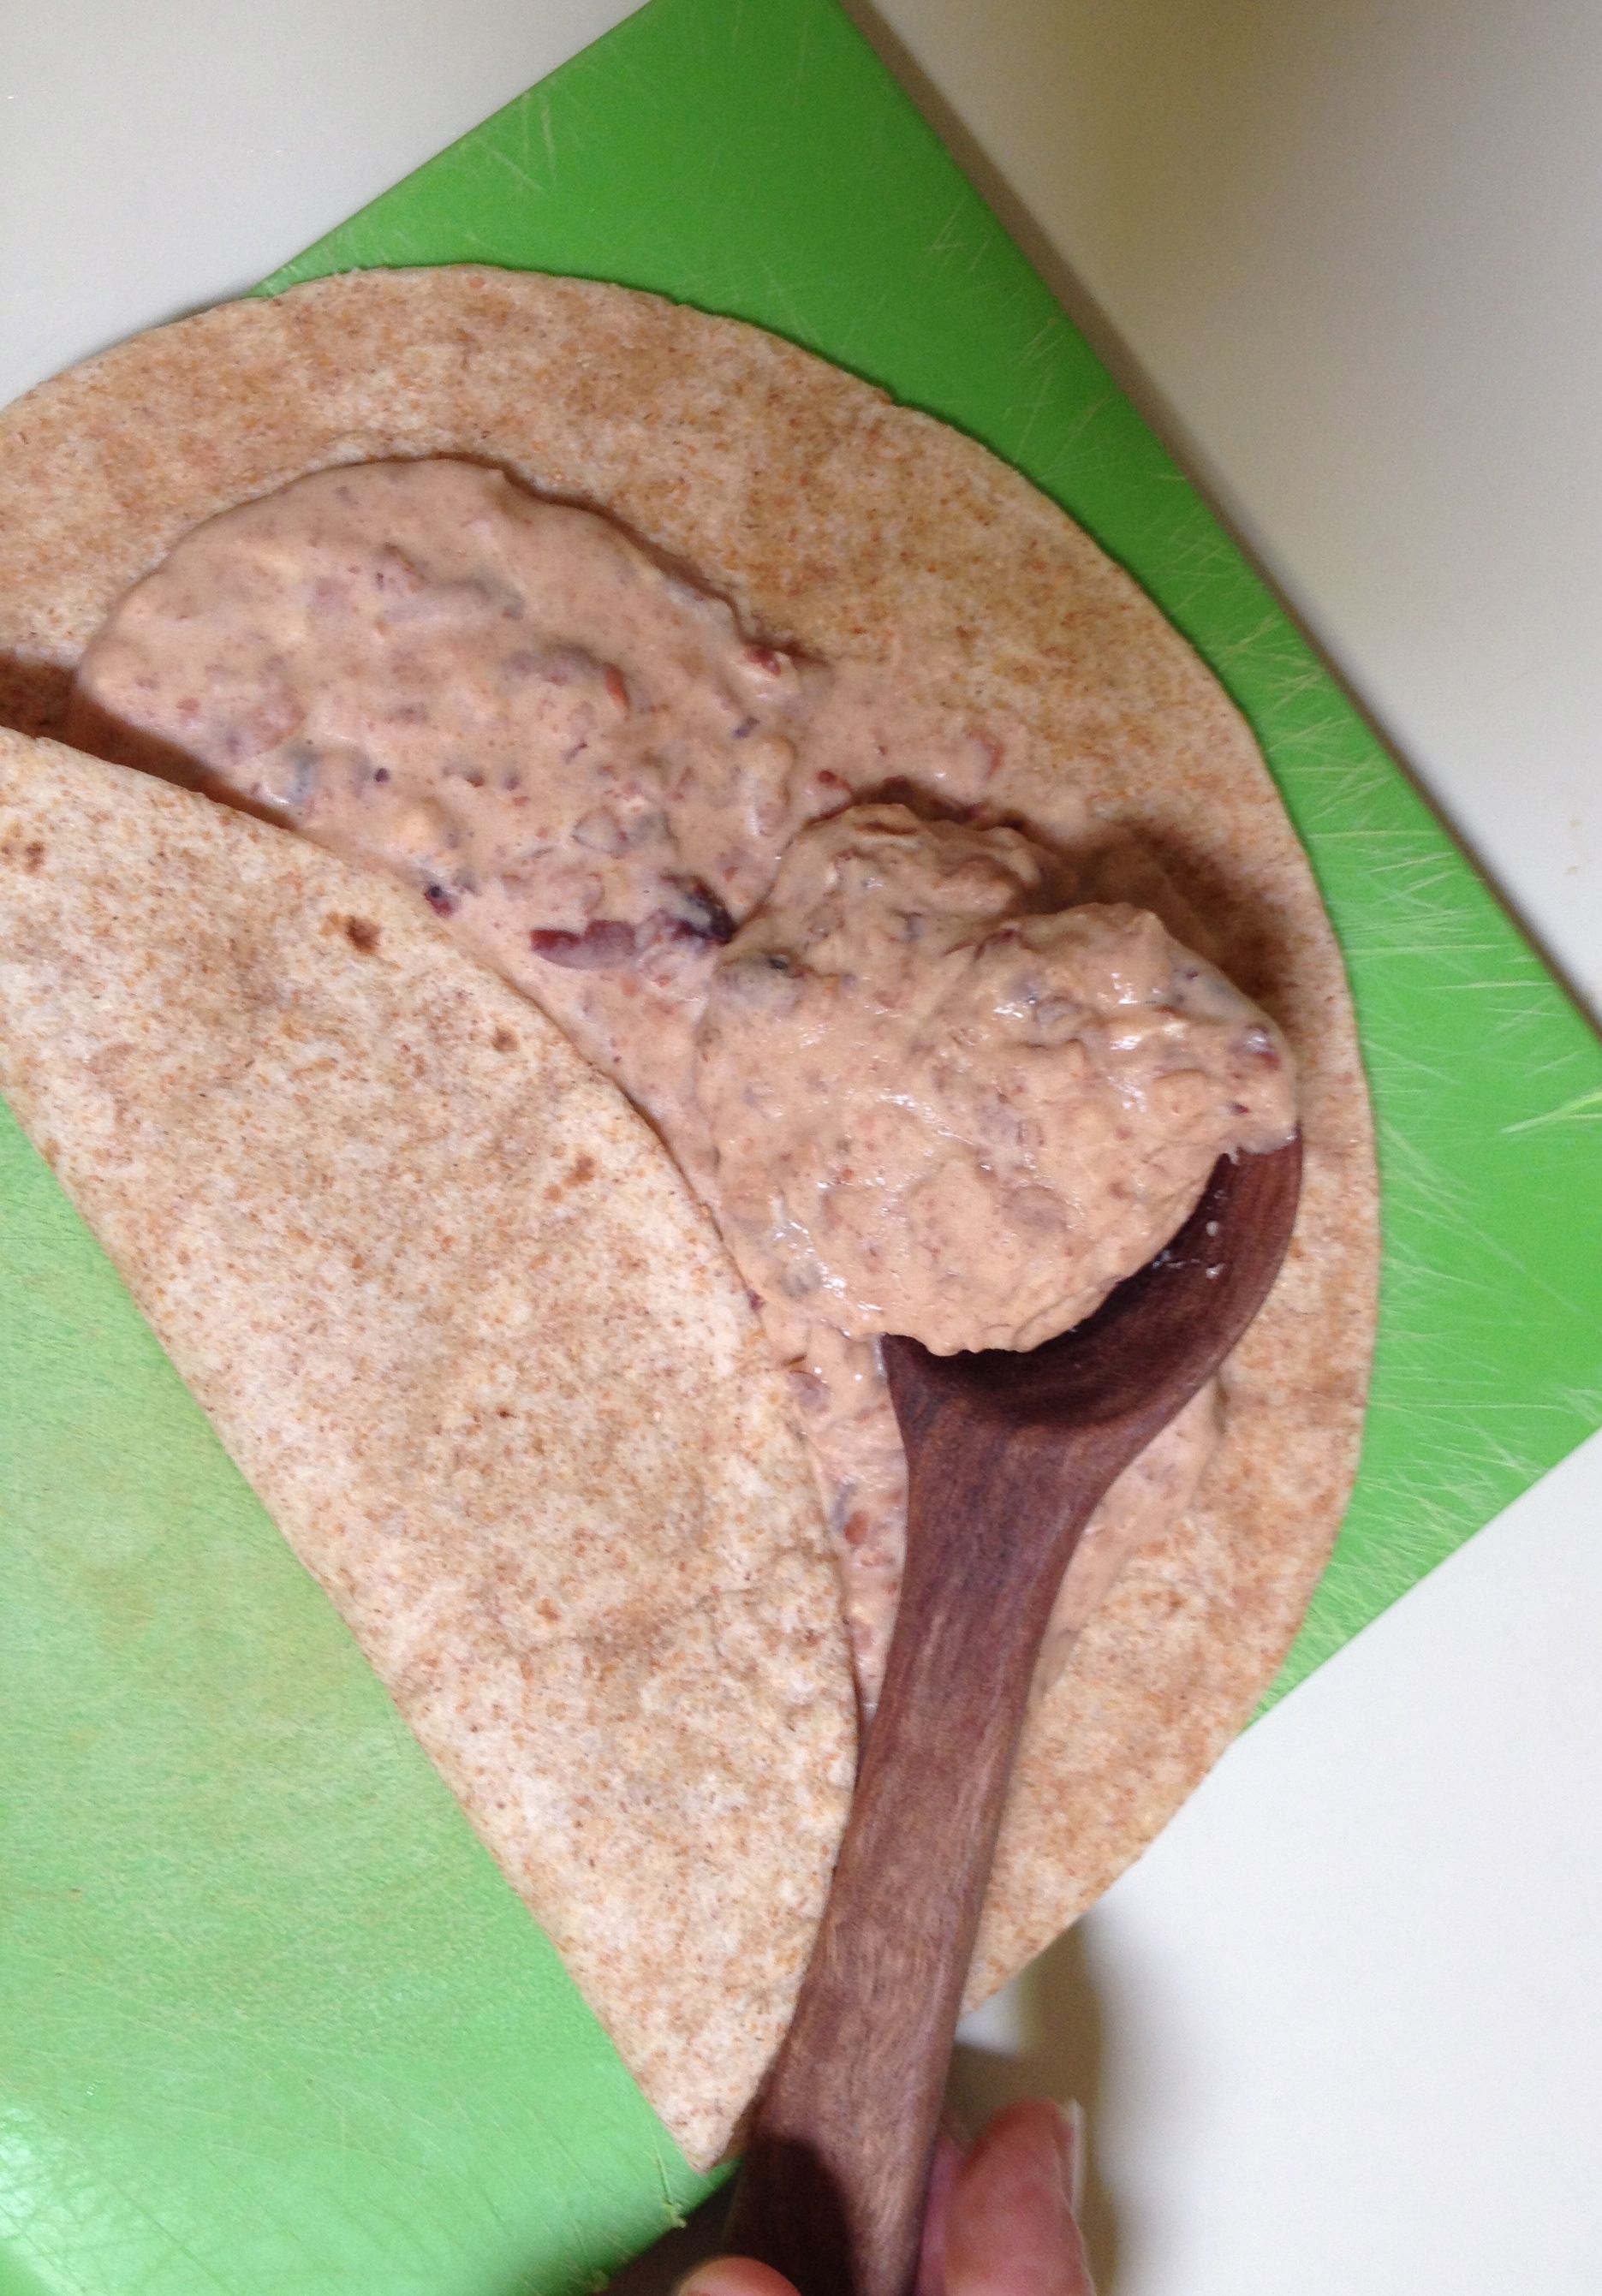
Mortgage Lifter burrito in whole wheat tortilla--first step for making heirloom bean roll-up appetizers

Anasazi Bean burrito in whole wheat tortilla–preliminary for making heirloom bean roll-up appetizers

Another fun way to get your complex carbs and vegetable protein is to make heirloom bean dips– then to get fancier using the dip, the next step is Easy Heirloom Bean Roll-ups.  For the fastest, most crowd-pleasing bean-spread, I use either Mortgage Lifter beans or Anasazi beans–both great.  Mortgage Lifter is a giant white runner bean, also known as Aztec white runner or Bordal.  Grown in your garden, it will vine over itself and its neighbor plants with big white flowers that attract hummingbirds.

Easy Heirloom Bean Roll-up Appetizers Recipe:

Ingredients:

2 cups cooked Mortgage Lifter beans, or purple & white Anasazi beans

4 oz low-fat cream cheese (1/2 block of neuchatel)

1 Tbsp Red Devil hot sauce

1 tsp ground cumin seed

pinches of sea salt, to taste

3 or 4 medium whole wheat tortillas

Drain cooked beans (reserving liquid if you need to make a thinner texture after mashing).  Mash beans and cream cheese together with pastry cutter or bean masher.  Mash in all other ingredients. [You can sometimes find traditional Tarahumara madrone-wood bean mashers at NativeSeeds/SEARCH or at Flor de Mayo.]  At this point you have the best dip ever, and also the filling for instant burritos ready to feed to drop-in visitors.  Read on for further Roll-up directions…..
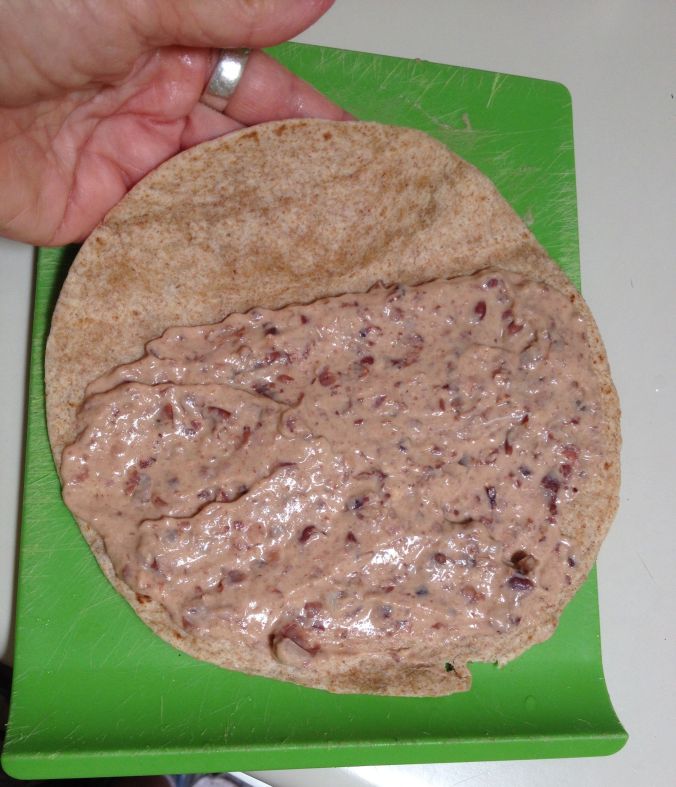
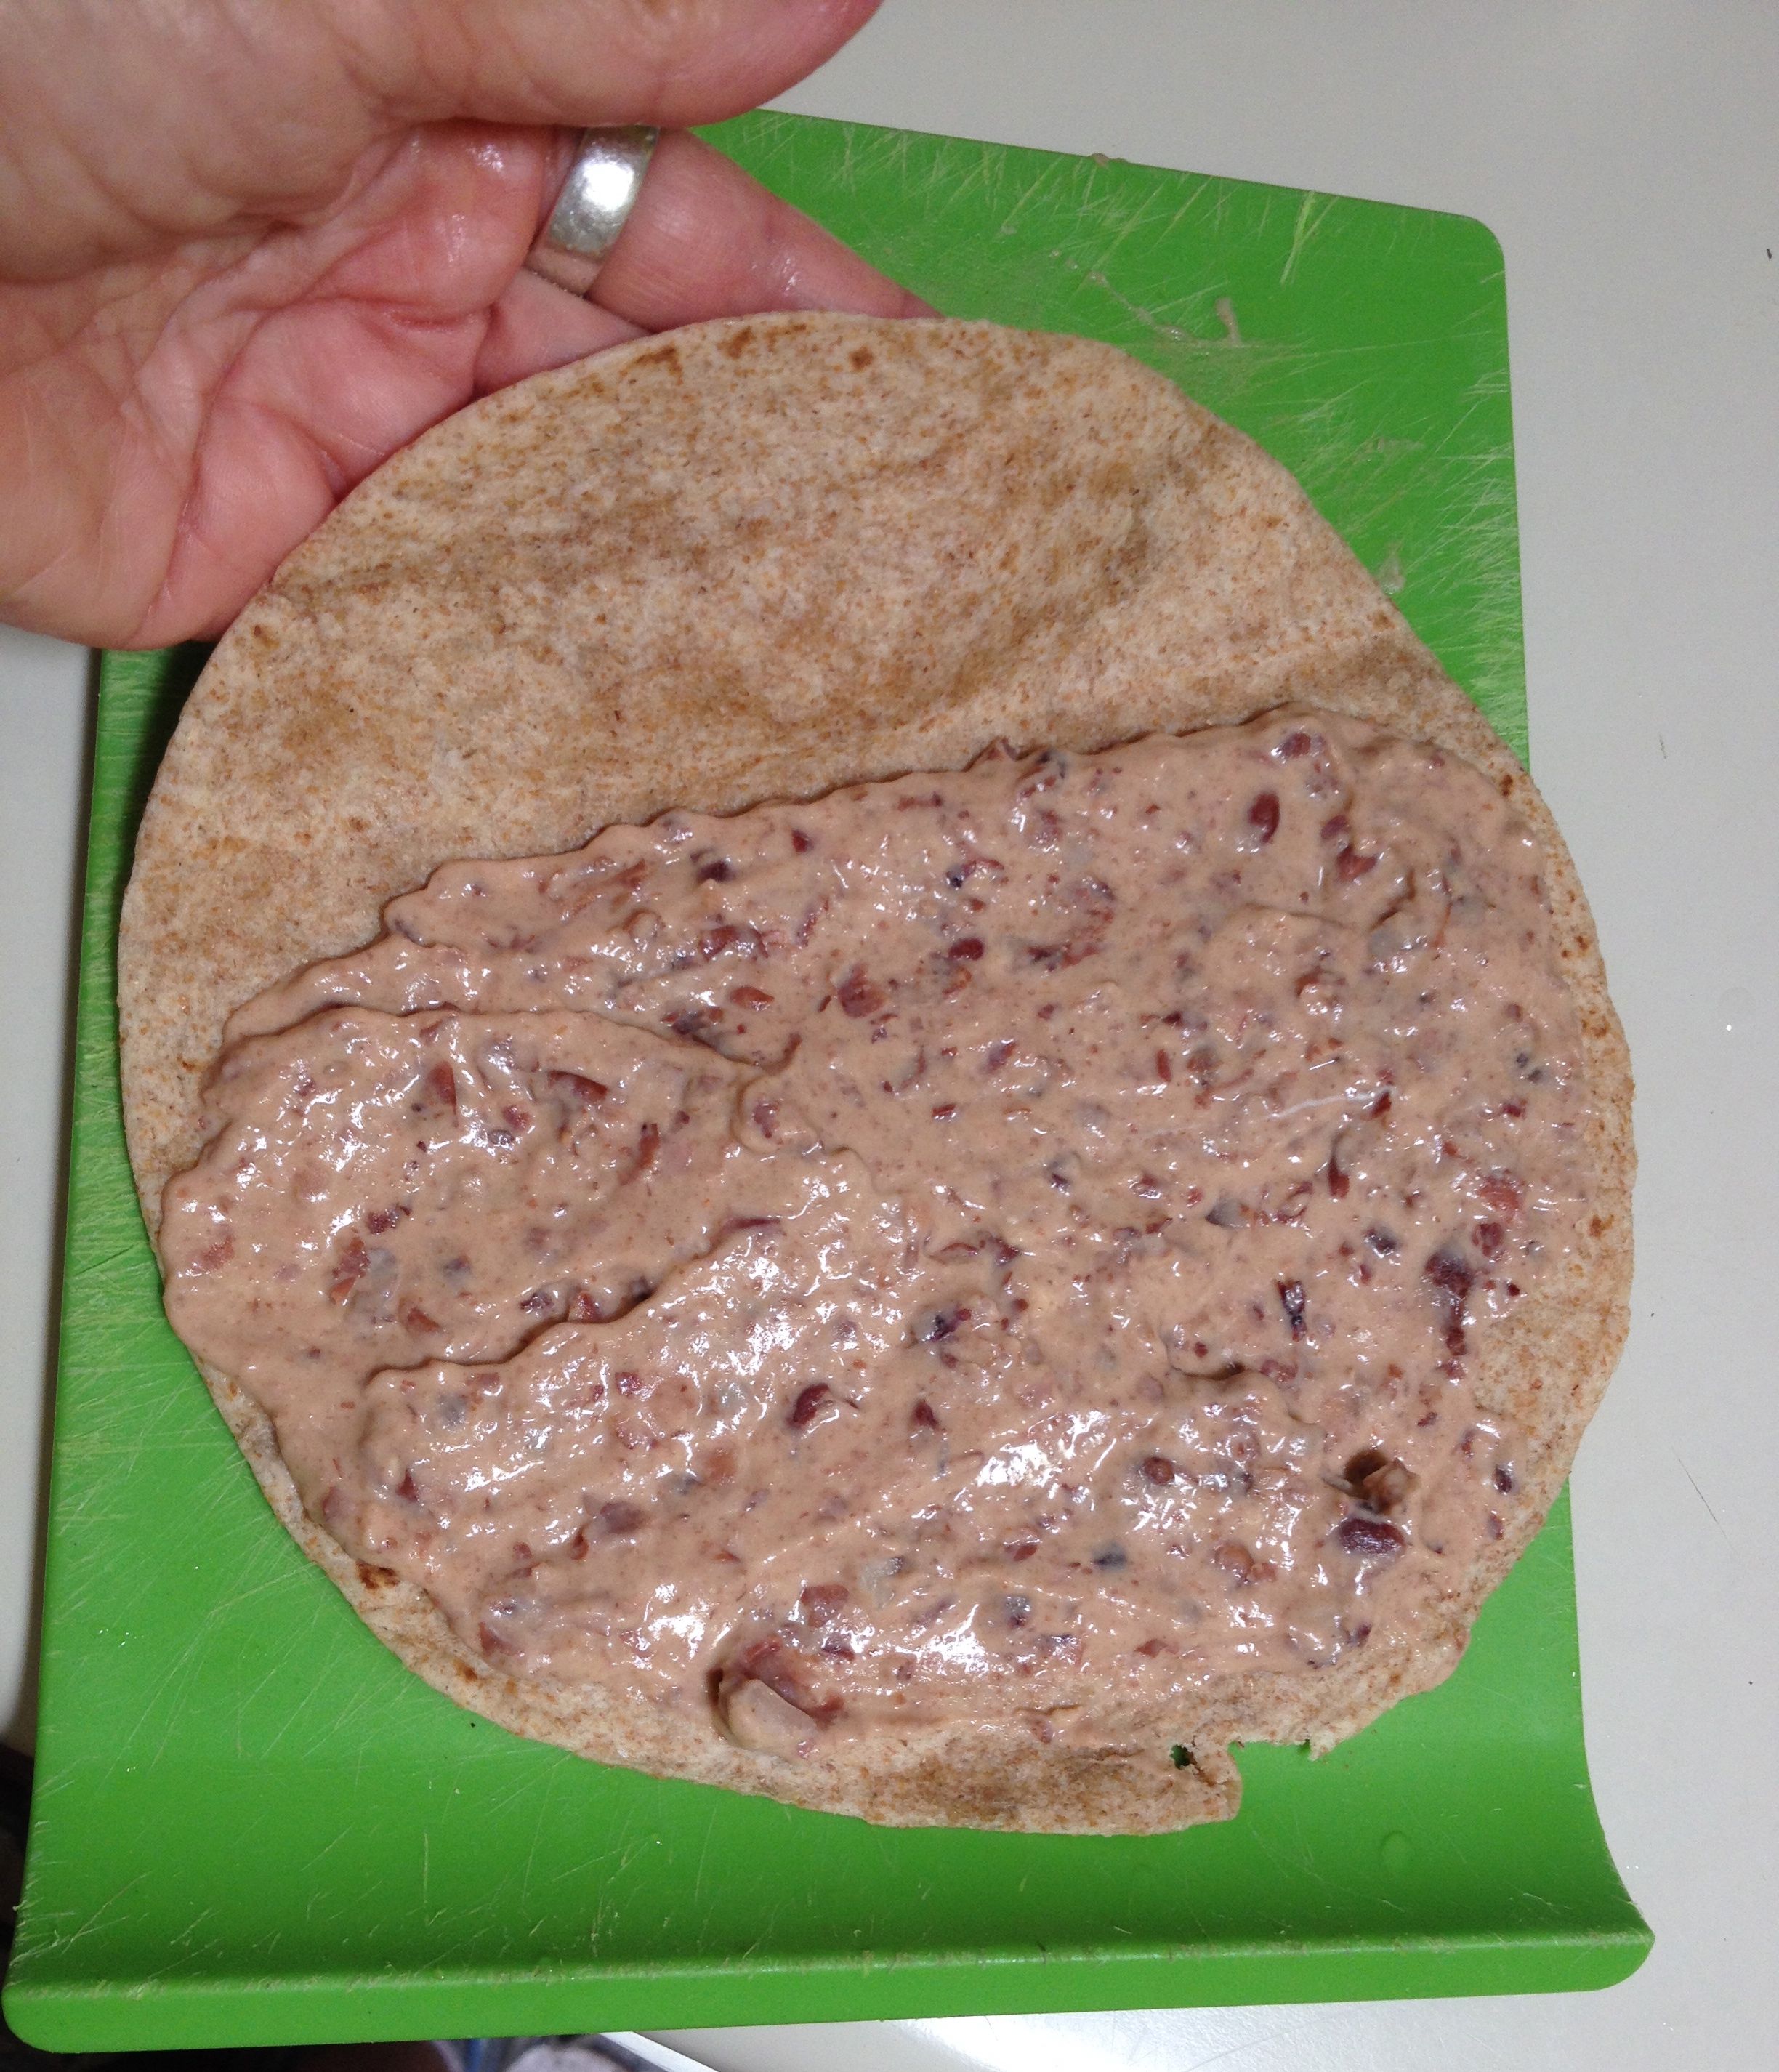
Heirloom bean "roll-ups" Step 1--with Anasazi beans

Heirloom bean “roll-ups” Step 1–with Anasazi beans
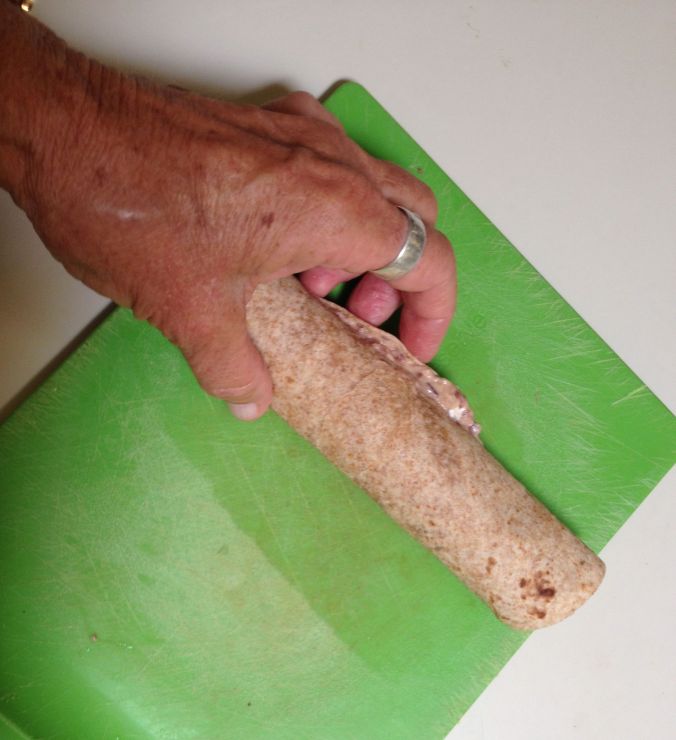
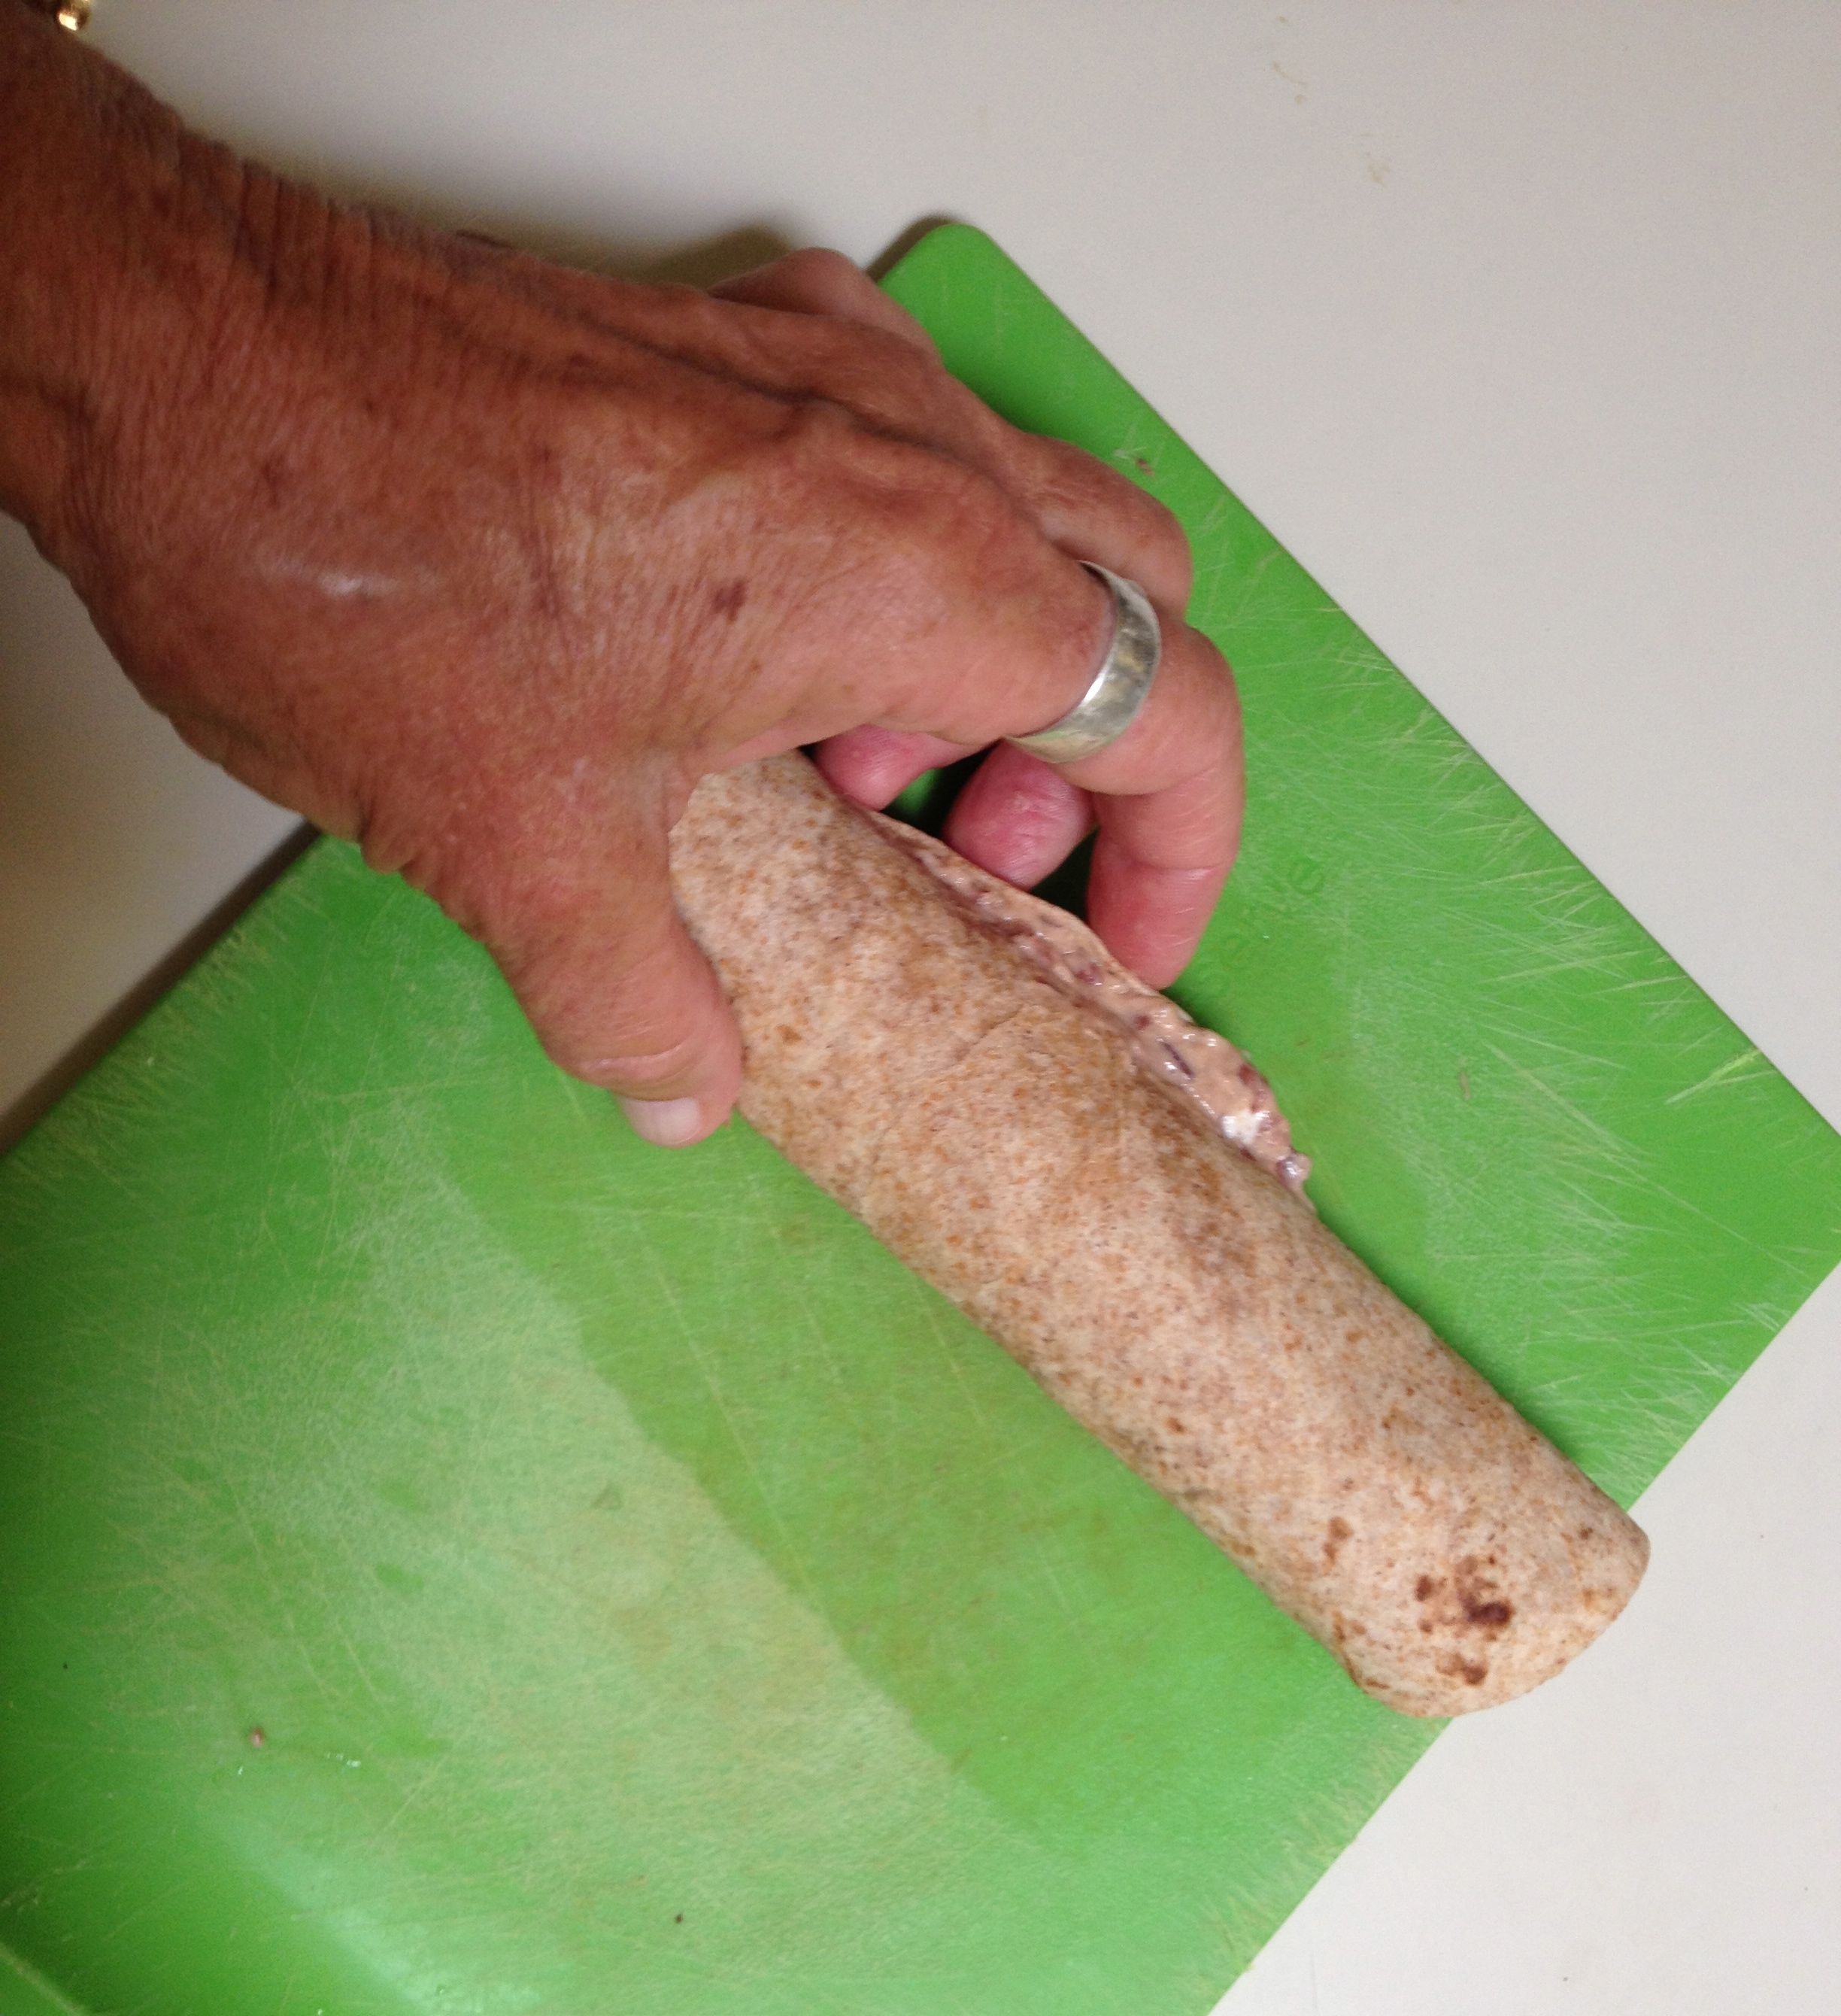
Rolling up heirloom bean hors d'oeuvres--Step 2 before cutting

Rolling up heirloom bean hors d’oeuvres–Step 2 before cutting

To finish these festive heirloom bean appetizers…spread the bean mixture onto 3/4 of one tortilla leaving a chord of the circle uncovered.  You will see why when you roll it up.  Begin rolling the tortilla tightly from the bean-covered edge and continue to roll snugly.  The bean spread will squeeze toward the unrolled edge, filling it.  The rolled tortilla will be held together by the bean spread.  Repeat with remaining tortillas and dip.

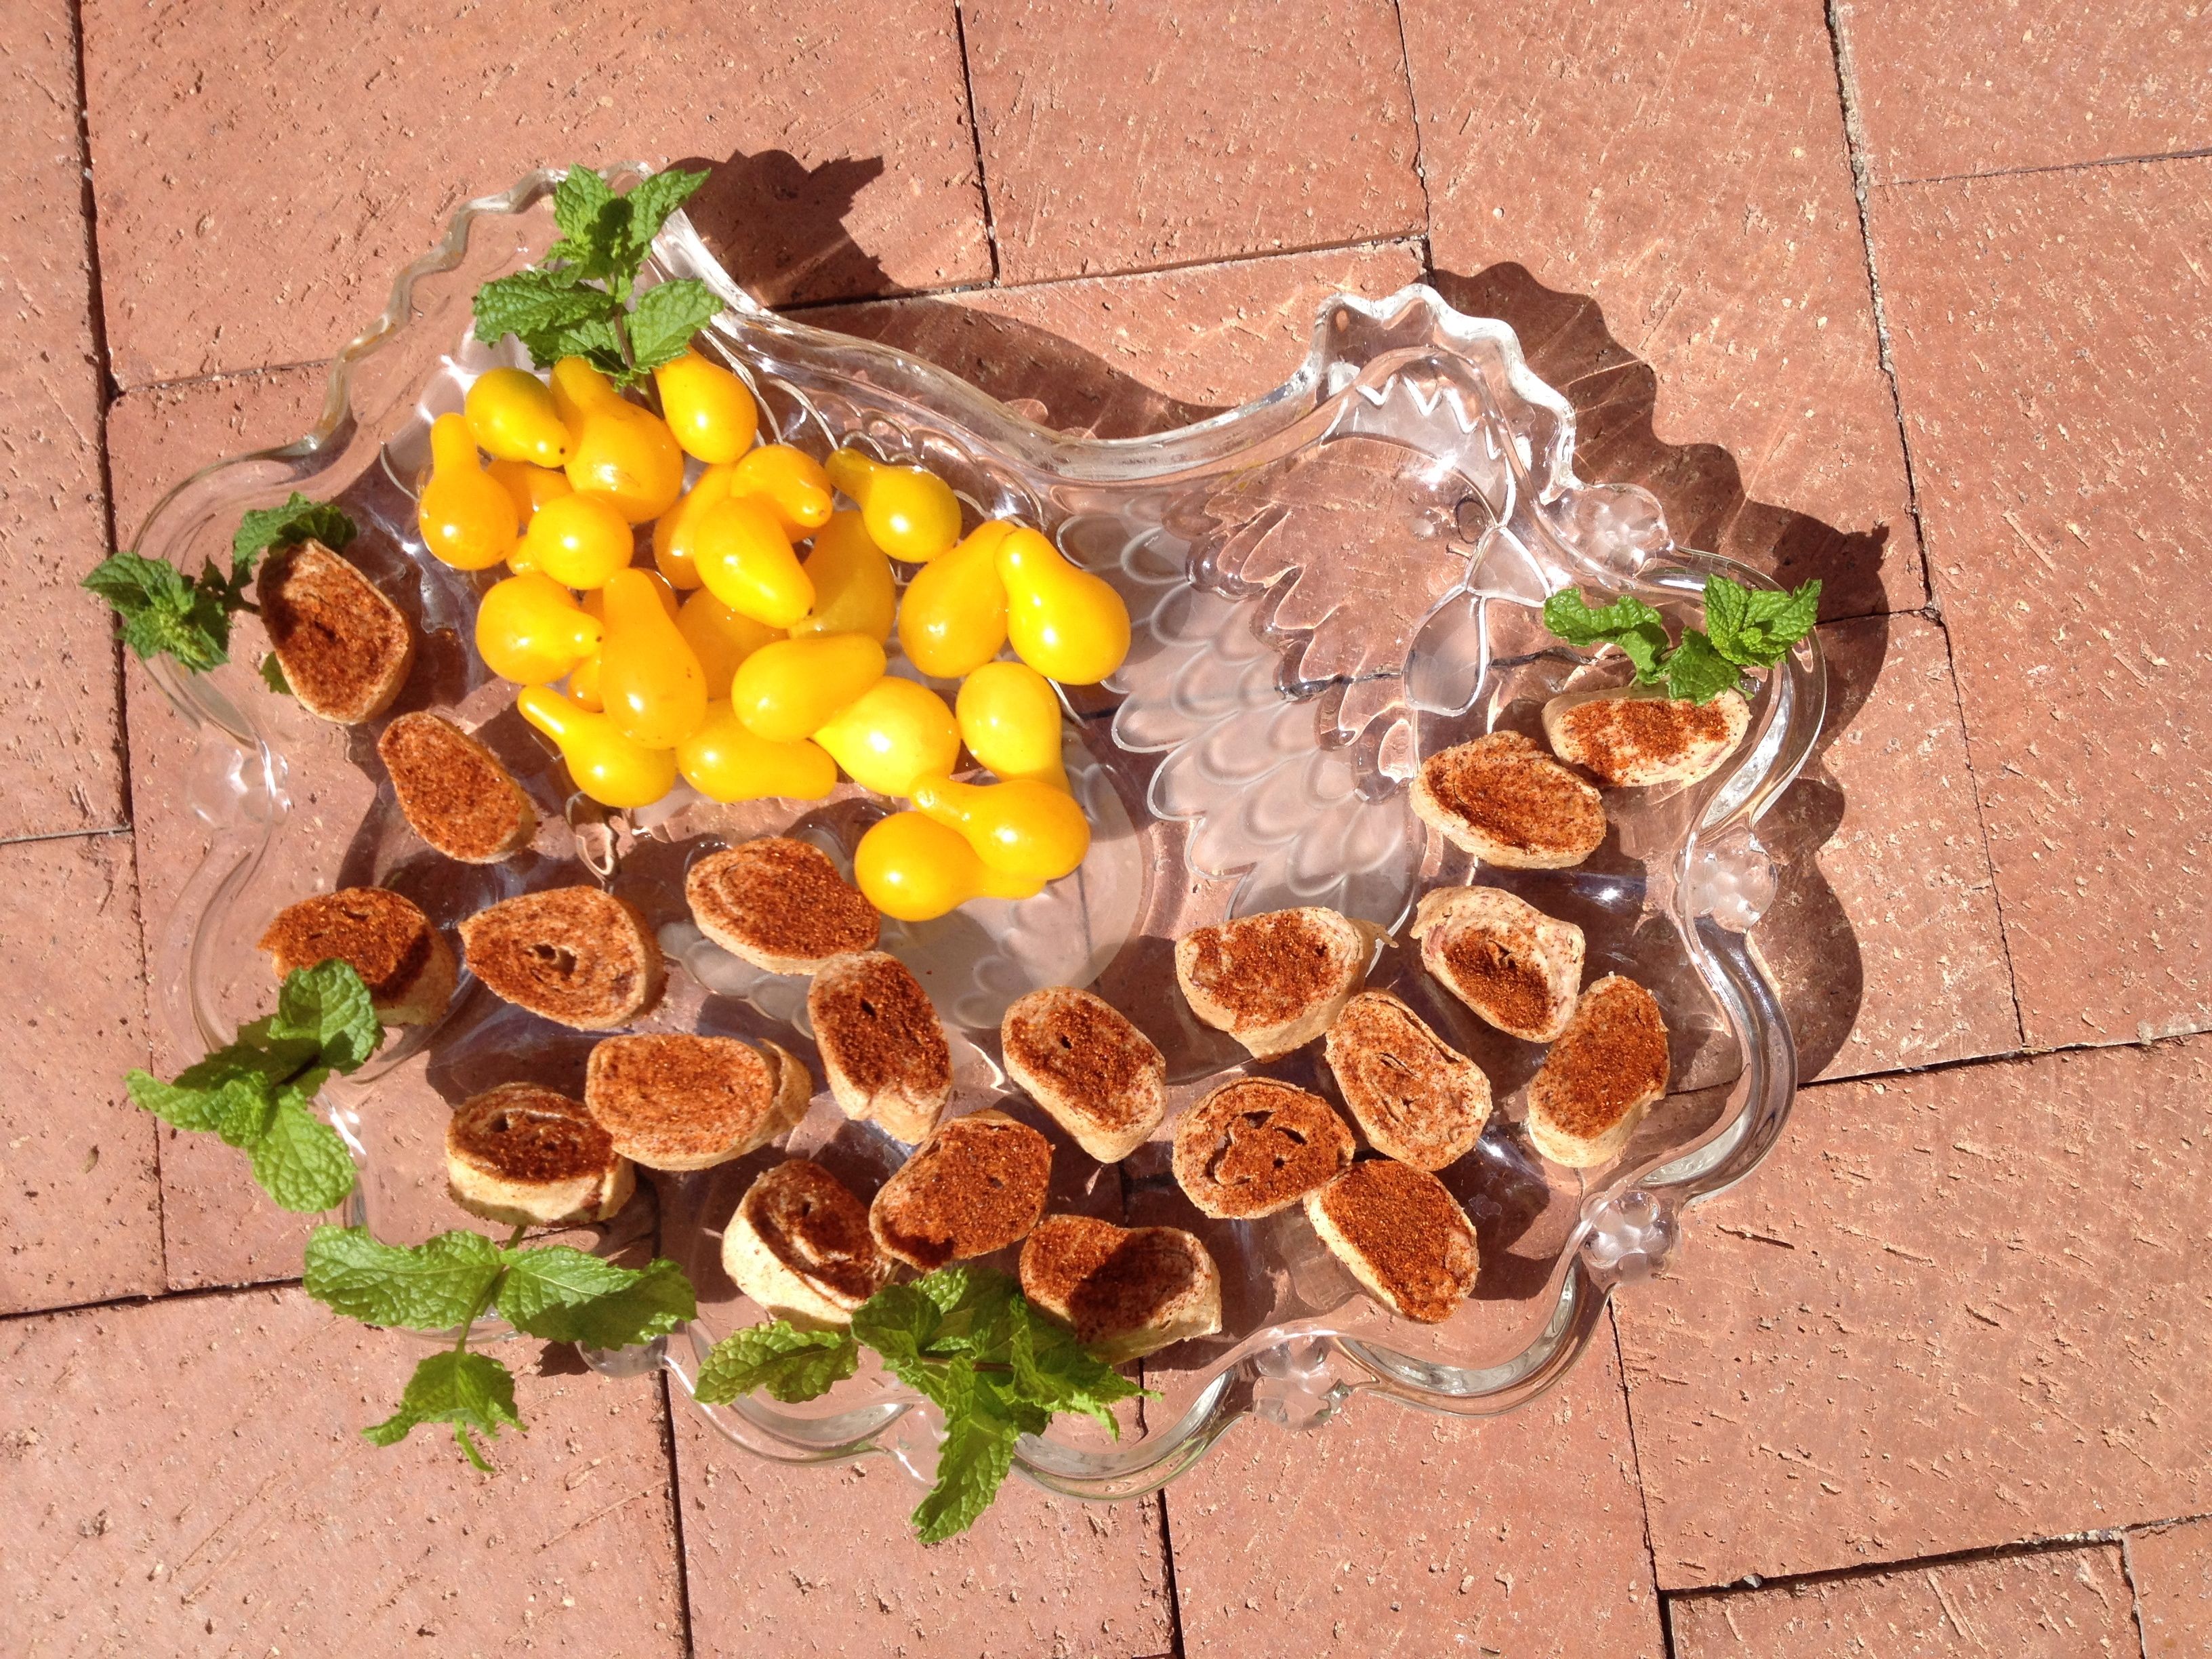
Place tortilla rolls on wax paper and chill in freezer or frig long enough to become firm for cutting.  Place chilled rolled tortillas on cutting board one at a time.  Slice in 1/2-inch rounds and place the disc-shaped spirals on a serving tray.  Chill until served.  Bedeck each Heirloom Bean Roll-up with a sprinkle of paprika or a cilantro leaf.  Each tortilla should produce about 6-8 roll-ups.  (With any leftover bean mixture, enjoy it as dip or in a burrito.)  These appetizers are a tasty celebration–and a tacit bow to Southwestern farming traditions.
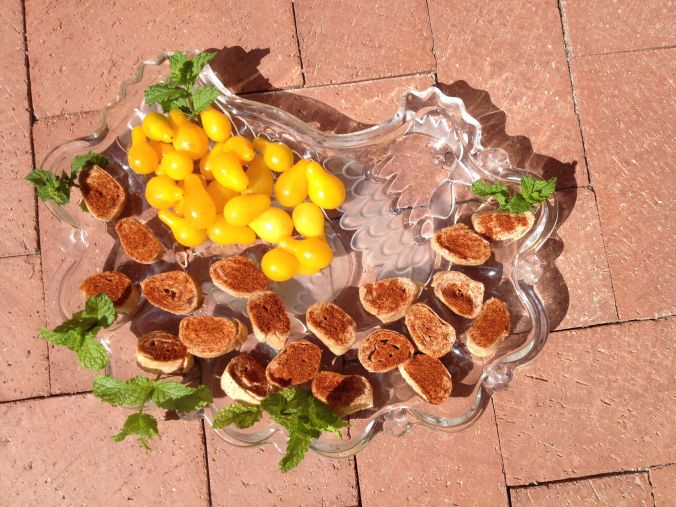
Heirloom Bean Roll-up Appetizers and yellow pear tomatoes in chicken hors d'oeuvre tray (MABurgess photo)

Heirloom Bean Roll-up Appetizers and yellow pear tomatoes in chicken hors d’oeuvre tray (MABurgess photo)

By the way, you can find all of the wonderful Southwest heirloom beans to use in these recipes either at the NativeSeeds/SEARCH store, 3061 N Campbell Ave, Tucson, or at our Flor de Mayo booth at the charming St Phillips farmers market on Sundays in the shade of spreading sycamores and mesquites.
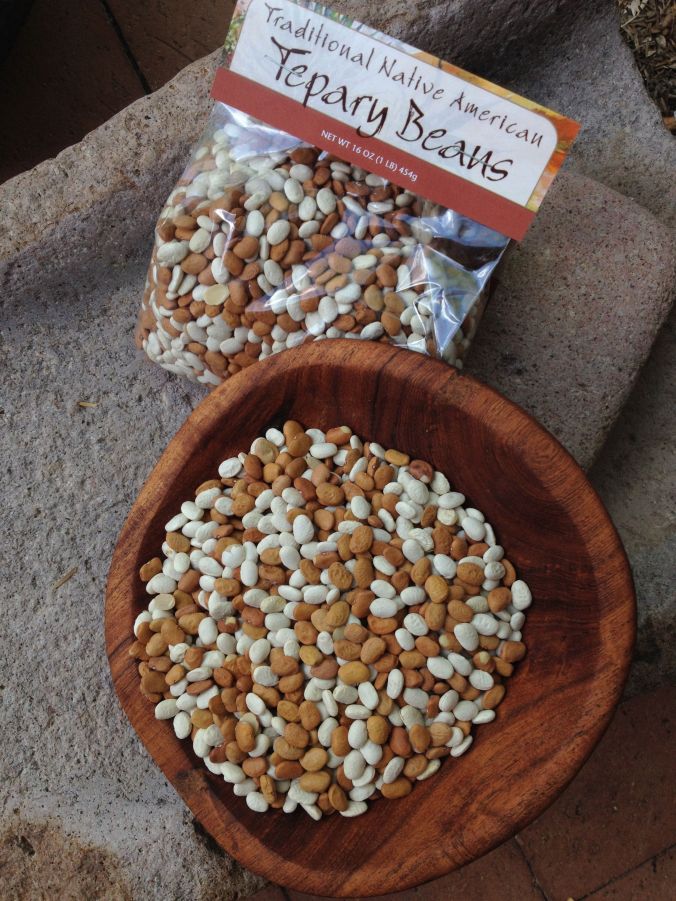
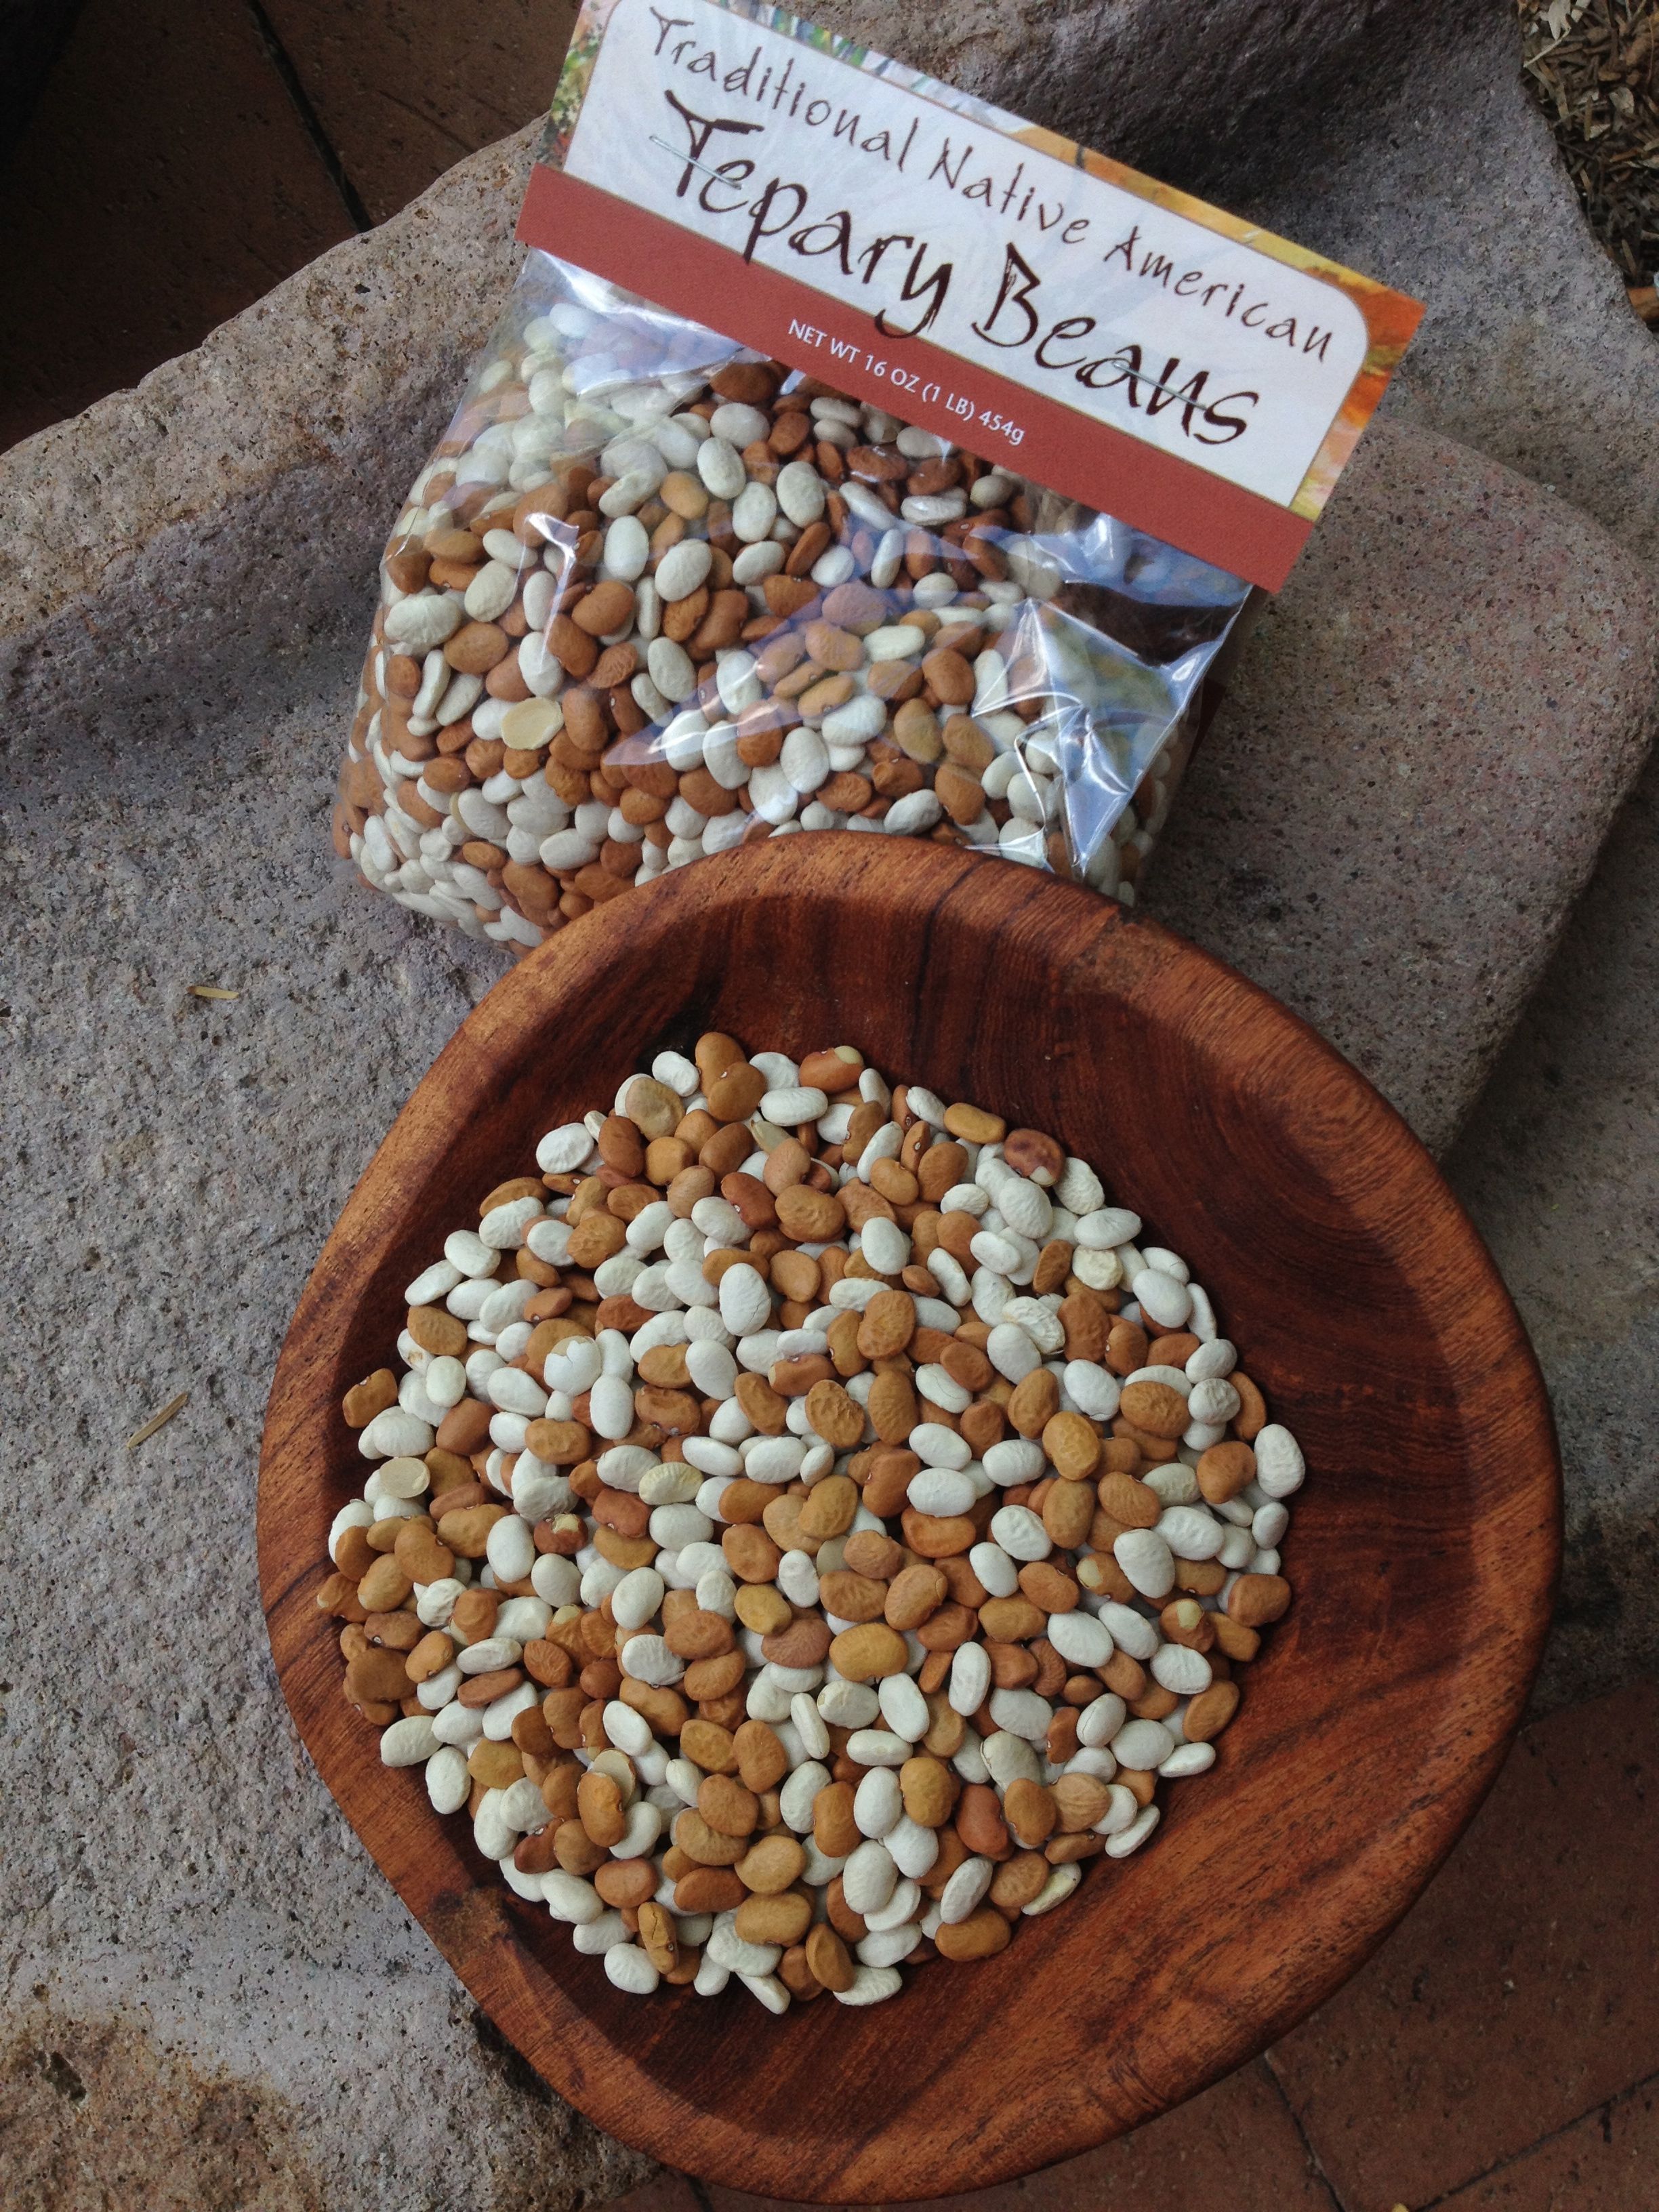
Traditional Native tepary beans--colorful mix available at Tohono Chul Park gift shop, NativeSeeds/SEARCH and Flor de Mayo booth at farmers market

Traditional Native tepary beans–colorful mix available at Tohono Chul Park gift shop, NativeSeeds/SEARCH and Flor de Mayo booth at farmers market

For the experienced or the novice desert gardener, now is the time to do the last planting in your monsoon garden.  One of my Tohono O’odham mentors taught me that the second week in August is really the last opportunity to put bean, corn, melon, or squash seed in the ground.  Even better to give your garden a jump-start by planting starts!  Right now at the NativeSeeds/SEARCH store you will find a variety of healthy seedlings hungry to be in the soil–and on sale.  Come give them a future–and a delectable future for your palette in the months to come….
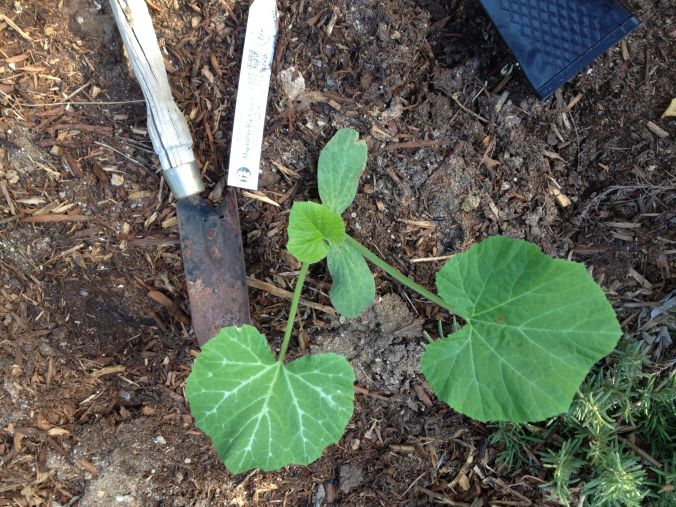
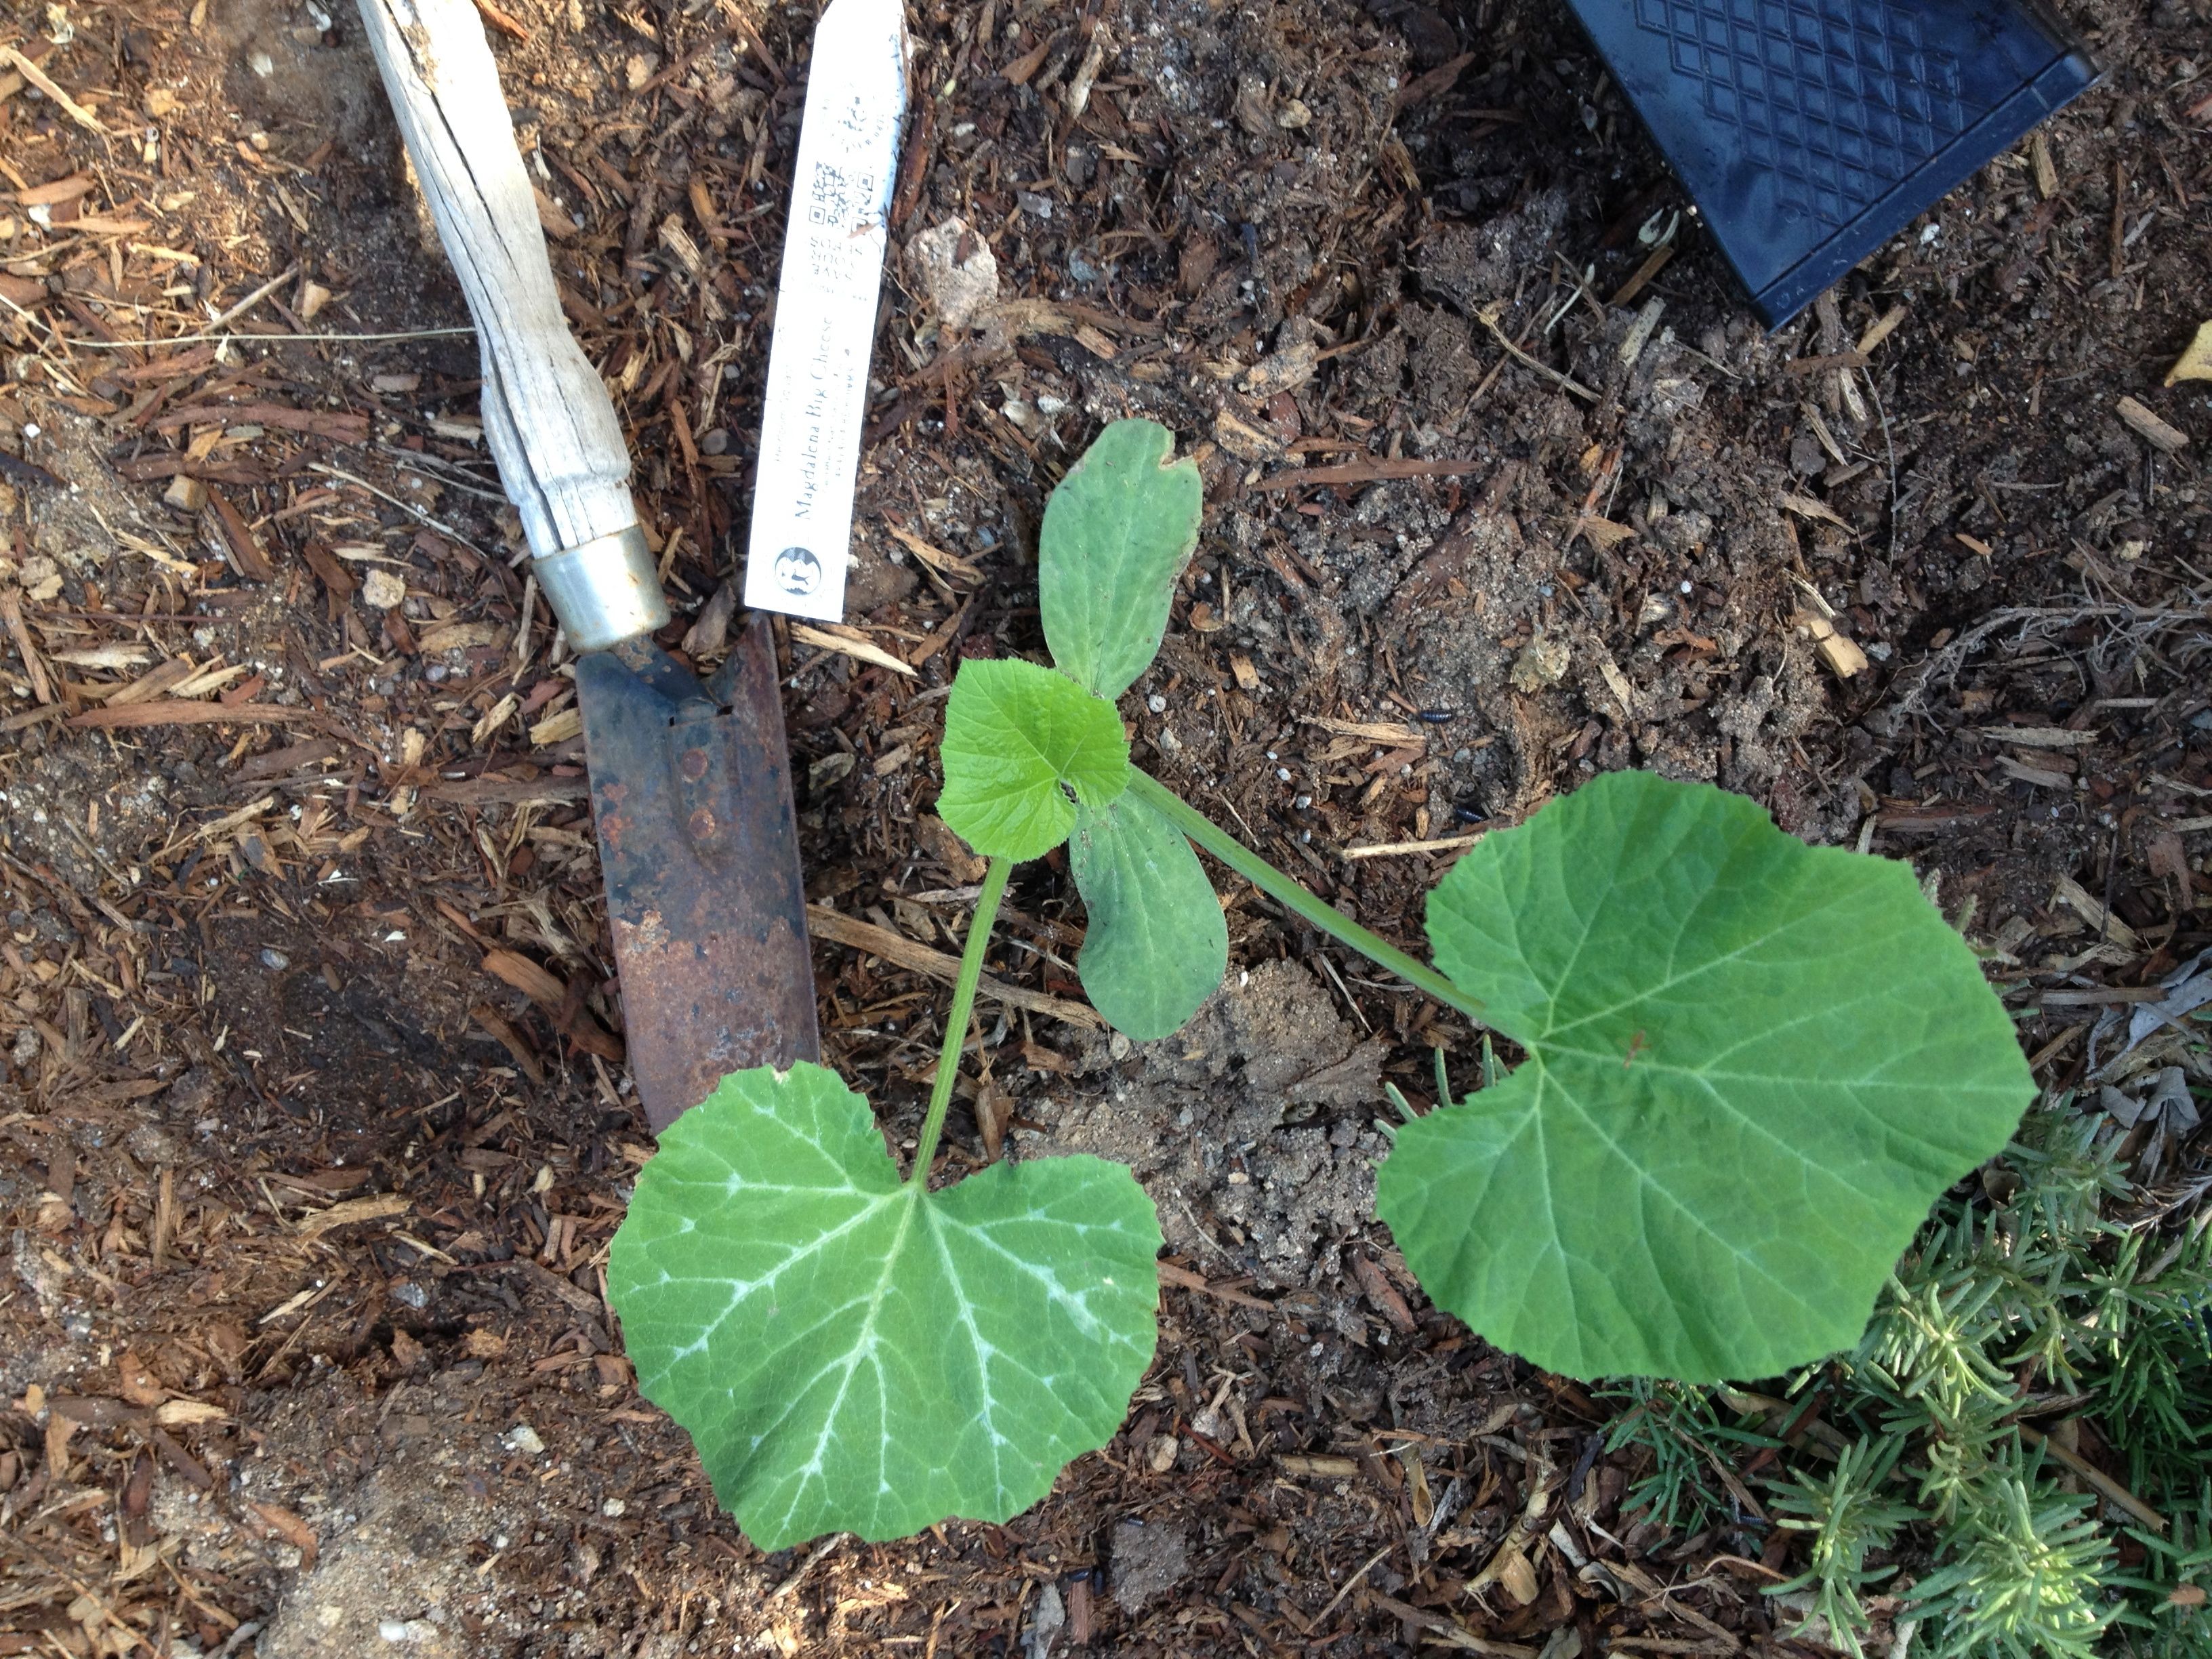
Happily planted--seedling Magdalena Big Cheese Squash seedling from NativeSeeds/SEARCH monsoon plant sale still on!

Happily planted–Magdalena Big Cheese Squash seedling from NativeSeeds/SEARCH monsoon plant sale (still going)

Happy gardening–and healthy eating to you from Tia Marta!

Wild Greens and Mole Enchiladas

blog1Hello, this is Amy Valdés Schwem, and I’m honored to be here with such esteemed plant and cooking women!
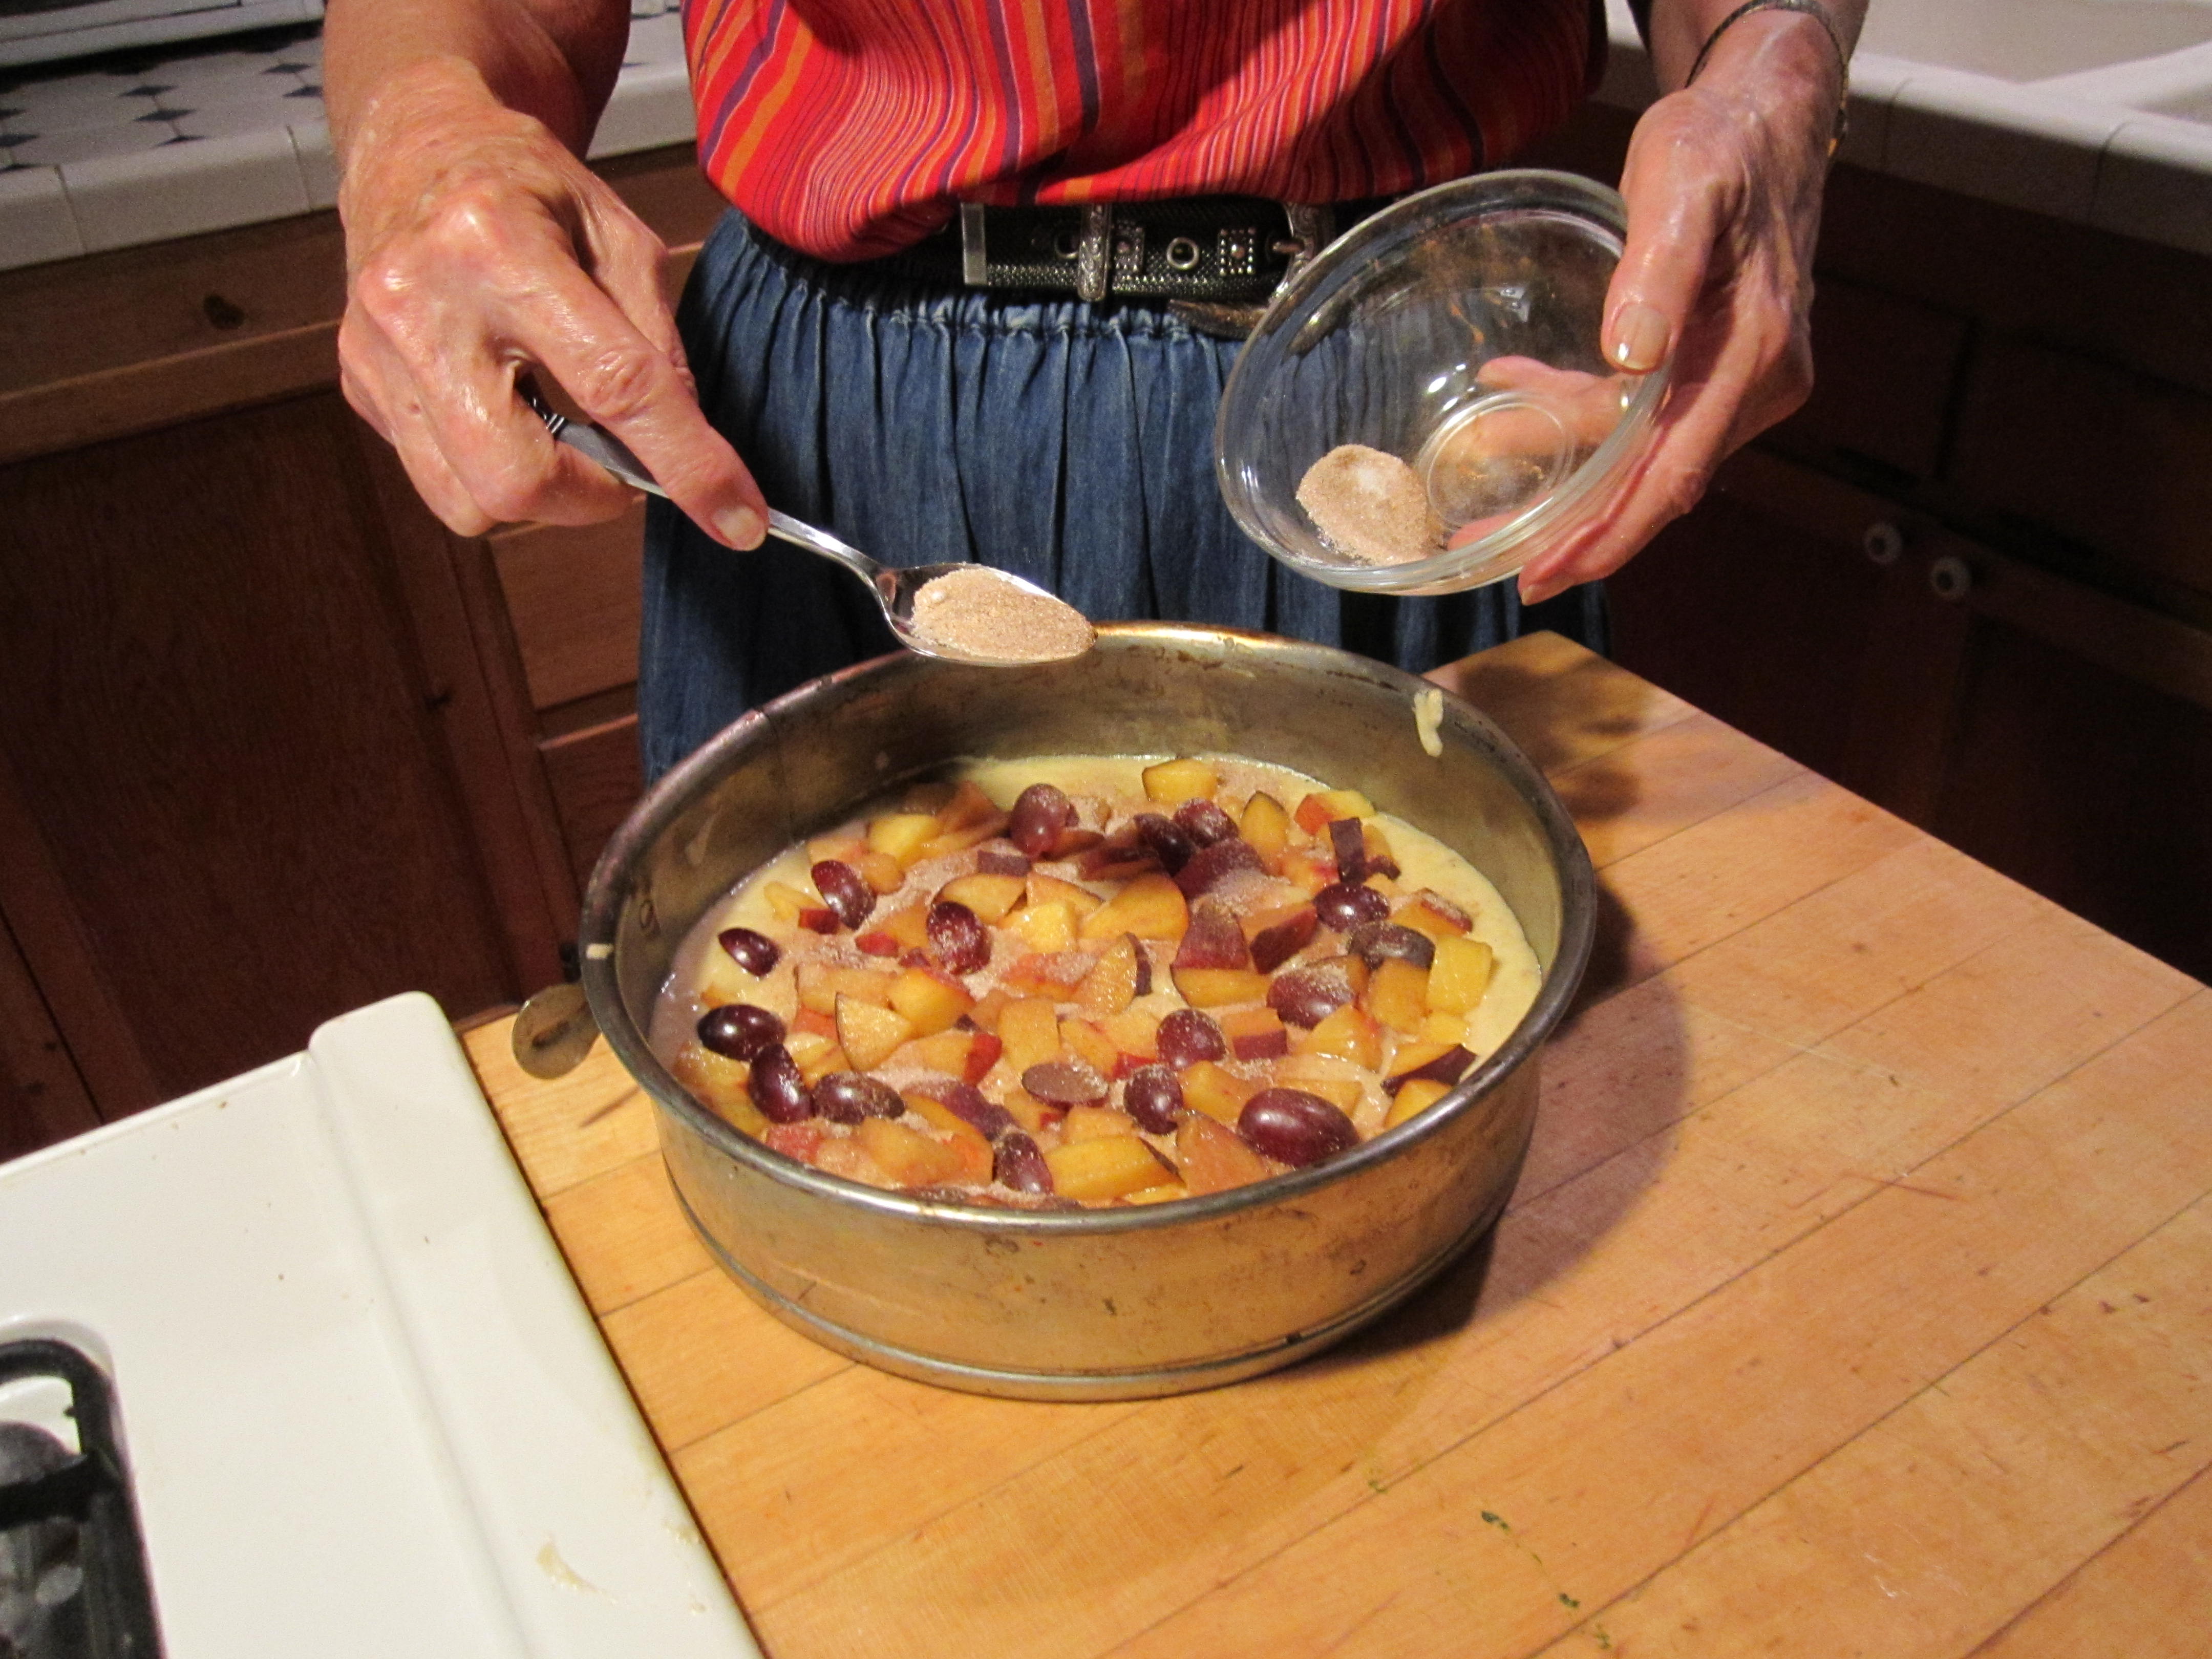
I love harvesting wild greens, but my day job is making mole as Mano Y Metate. Today I’m going to make enchiladas made with Mole Dulce and fill them with wild greens and summer squash. It won’t heat up the house, if you take the toaster oven outside! Enchiladas made with tomato sauce instead of chile are called entomatados, and those made with mole are enmoladas. So the menu can read: Enmoladas de Mole Dulce con Quelites y Calabacitas.

Quelites can refer to several unrelated wild greens, but to me they are wild amaranth greens, Amaranthus palmeri, also known as pigweed.

I grew up eating quelites with my maternal grandfather, and he knew no shame jumping fences to pick weeds. They make a few tiny black seeds, unlike its Mexican domesticated relatives that make enough blond seed to fill bulk bins at the health food store.

It is native to the southwest US and northwest Mexico, and its wild and domesticated relatives are enjoyed around the world both as a green and for its grain-like seed. It easily out-competes summer garden and field crops and is becoming resistant to glyposphate (Roundup). But you wouldn’t want to harvest from those over fertilized fields anyway, since it can absorb too much nitrate, making it unsafe for humans and animals. However, grown in native desert soil, they are safe and nutritious, high in vitamin A, vitamin C, and folate, among other vitamins and valuable minerals.

Some species and cultivars available at Native Seeds/SEARCH are used for dye and have red leaves, and some make a huge red inflorescence pretty enough to grow as an ornamental, even if the birds eat all the seed. I’ve never had much luck popping the seed I grew, but you can buy commercially popped seed, like miniature popped corn.

blog2 blog4

I just visited my closest community garden, Las Milpitas de Cottonwood, and found these beauties in the irrigated beds already in flower. If this was all I had, I would pick the smallest leaves from the stalks and use those.

blog5Hopefully you find quelites before flowering, shorter than a foot tall. I found a few plants in my yard where other things get watered. Many more will sprout with the summer rains.

blog7a


Last year I had so many from my Tucson Community Supported Agriculture share that I dried some, just like my great aunt Tia Lucy told me they used to do. I just plucked leaves from the stems and air dried them in the house. To use, I soaked in water overnight, then sauteed with the others. I’ll dry more this summer, for sure.

blog7b blog8


To prepare the fresh quelites, wash, chop tender stems and all, and saute with a little onion and garlic in oil. My grandfather always used bacon grease, so that’s what I did.

blog6


It’s also prime season for calabacitas, so use them if you don’t have any fresh or dried quelites. My grandfather also collected and cooked verdolagas for us, which would work here, too.


blog9a


Calabacitas, sauteed with onion and garlic. This filling with mushrooms and queso fresco, inside mole dulce enchiladas, is my brother’s signature dish. Well, one of his signature dishes.


blog9b blog9c


Now for the mole! For a half dozen enchiladas, to serve two people, I used about half of a tin of Mano Y Metate Mole Dulce powder, cooked in mild olive oil to make paste.

blog9d

Then I added about half a cup homemade chicken stock and a dash of salt, but veggie stock is great, too. Water doesn’t quite do it. Simmer until you have a nice sauce, adding more broth as necessary. There will be steam and good smells.


blog9f blog9g


The secret to enchiladas: start with thin corn tortillas and fry briefly in oil hot enough to sizzle, but not hot enough to make them crispy!!! DO NOT skip this step!

If the tortilla cooks too much, or if it breaks, just turn up the heat and make that one into a corn chip.

Dip the flexible tortilla in the mole dulce.

blog9h blog9i


Put quelites or calabacitas in the tortilla and roll.

blog9j blog9l


Top with homemade queso fresco and bake until heated though. My grandfather used the toaster oven outside on the patio in the summer to make enchiladas. No need to heat the house!

Depending on your oven, you may need to cover them with foil, but I didn’t. I like crispy edges. Serve with a cucumber, tomato salad dressed with a squeeze of lime, beans, and prickly pear grapefruit-ade.

Leftovers are best fried in a cast iron pan until crispy.

Mano Y Metate moles can be purchased from Martha Burgess of Flor de Mayo Arts at the Sunday Heirloom Farmers’ Market at St. Philip’s Plaza, Native Seeds/SEARCH, and ManoYMetate.com.


Savor the Southwest Portable Pies

Aunt Linda here….

Image

It is predawn in the Old Pueblo, summer constellations flicker overhead, the early morning mating songs of birds twirl their way to my ears. Right now the air cool and dry. In a matter of hours it will heat up to triple digits. Those who live in the desert a resilient sort. We live with significant temperatures swings all year long, fascinating animals (I saw a Gila Monster June 1st), and lots of spiny cacti, all of which we find beauty in.

I like my food to be resilient as well. Which makes me think of pie. It can be savory or sweet., or both. It can be served hot or cold. It is forgiving in what it allows the pie maker to do. It can be frivolous or serious; nutritious or not. Its flavors can reflect family and cultural identities and preferences. Pie does it all.

Which makes me curious about who the First Pie Maker might have been. The particular “who” remains a mystery. After reading up on pie, it seems to me that there were likely many many many First Pie Makers in nearly every culture known to cook and experiment with food. It is, after all, quite simple: the creating of dough, or pastry, and then filling it with regional, seasonal foods.

Image

“New World Resiliency Pie”   Being inspired by the prickly pear pads that radiate with that fresh spring green color, (photo) right now. I decided to make a pie, ancient and not from this continent, with a New World Flare. New World Pie Fillers:  nopalitos (fresh prickly pear pad), chiltepin, chocolate. (Talk about Resiliency, each of the foods above have survived centuries. One example: Coprolites (human droppings) found in caves reveal that humans have been the relatives of the chiltepin for thousands of years! )


The First Pie Maker was not a Southern American, despite many Americans strong cultural identity about pie. Read even a little bit about pie and you quickly find intensely personal accolades about it. For those who “get” pie, there is a love for it that is both reverential and sensuous. It includes a deep feeling of being “nurtured”, pie often being equated with Grandma’s Love. It is clear that human beings have been feeling nurtured by what we now refer to as pie, for a lot longer than the United States has been a country.

One first version of pie, came from Egypt, around 9500 B.C.  That surprised me.  It places the first pies all the way back to the Neolithic Period. The rustic pies were made from dough made from oat, rye, barley, and wheat – and then filled them with honey! The pies were then baked over hot coals. There is no doubt in my mind that their flavor was fabulous – what with the sweet of the honey and the smoky taste of having been naked in coals. By the time the Pharoh’s bakers got into the action (by 1300 BC-1200-something BC) nuts and fruits were added to the honey “pies”. Ramsey the II’s tomb shows etchings of this.   The beekeeper in me loves this! Remember that the Egyptians were prolific beekeepers, floating their hives up and down the Nile to follow the honey flows.

Image


“The Pharohs’ Honey Nut Pie” (add fruit of your choice)

As epochs continued, and cultures evolved the fillings included meats of all kind, as well fish, muscles, and oysters; dairy products became another beloved filler.   Human are creative and the number and variety of pies world wide is enormous. They include Indonesia’s “panada”;, Jamaica’s “patty” Malasia’s Keripap (curry puff), Nigeria’s “meat pie” and on and it goes. Throughout Latin America and Mexico you find the Empanada. Sweet meat emapanadas are made for Christmas in Mexican tradition.. At the ranch, we make Calabasa (squash) with Pilloncillo (a brown cane sugar) Calabasas.

As much as I value a good, slow cooked meal, it is just too hot in Tucson presently to  be near heat for very long. So I decided to try to create a version of pie that was smaller and thus quicker to bake. It is also more portable. And infinitely flexible: you can eat them warm or cool, pack them for a hike, lunch, bike or car trip, kids lunch. They can be fancy, humble, or decadent.  Create great tasting pies from foods you are most passionate about. Create them from leftovers. The two photos above show you how versatile the ingredients can be.

Savor the Southwest Portable Pies

INGREDIENTS: for 9 to 12 portable pies

All you need in the way of equipment for these joyous little pies is a standard 12 cup, muffin pan and some parchment cupcake-paper inserts for your muffin pan.

+++  Pie Dough or Pie Crust of your choice.

Make the favorite family recipe. Investigate a new one. There are a plethora of recipes available in these food savy days, vegan options, full fat ones, raw ones. I used a store bought crust for these tiny pies. While I have made crust in the past, and value making it, I needed something quicker this week. There are a number of buying options these days. I found one at my local health food store, whose ingredients I felt comfortable with.

I feel dough-headed (brain fog) and lethargic if I eat a lot of dough, so I minimized it in these recipes – but you can and should use as much or as little as your would like.  Fill the sides! Cover the tops (remember to slice air holes). Add decorations with the left over dough.  Remember resilience, and you can practice it in the act of making pies. I used the equivalent of 1, 9″ pie crust; but if you would like to have more pie crust to the pies, make enough for two 9″. Also, using the parchment is completely optional. I used it because I travel a lot and I thought the pies would travel better, too. I think the tiny pies might be more beautiful for your table if you don’t use the paper, and if you use dough for the whole pie, including sides and top. In that case, after unrolling your dough (you’ll do this whether you make it yourself or buy it), place it on a lightly flowered surface, and roll with a rolling pin, to about 1/8′. Using a biscuit or cookie cutter cut 12, 4” circles for the bottom of the pie and 12, 3″ circles for the top, or for as many pies as you would like to make.

+++  3 eggs

+++  Imagination and Play-full-ness as you select your Other Ingredients.  We humans can be a tad on the serious side. Too much seriousness undermines resiliency. A spirit of play help us strengthen resilience.  So allow your spark to guide you, as I did in the New World Pie above.

Image

Fresh egg yolks.


The Basic Recipe/How to:

Place the muffin parchment papers in the muffin tins, or gently handling the dough, press dough into the muffin cups. Break the 3 eggs into a small bowl (preferably one with a pouring spout) and beat with a fork until combined.

Divide your ingredients to the bottom crusts, and then pour about two tablespoons of the egg to the pie. Add the top crust, or weave a top crust. Once you have the pies filled, and topped with crust, refrigerate the muffin tin for 30 minutes. Preheat Your oven to 375 F – and when the small pies have sufficiently chilled, bake them for 20-30 minutes. The time will vary from oven to oven, and from the types of pies.

For the New World  Resiliency Pie, I added prickly pear, chilpetin cheese (see my January post for the recipe), and the 2 T of beaten egg.

Image

I then tried a New World Dessert Pie – and filled the pie with  Chocolate and  Chiltpein Cheese (like a French pastry, but with the chile cheese). Note there is crust just at the bottom.

Image

Then the 2 T of egg was added, and the crust on top. I did this with the Pharohs’ Honey Nut Pie. As well


Image

The “before” baking Portable Pies – you can see the pirckly pear pads peeking through. The “after” photo is at the top of this post.


I was surprised how VERY fun it was to think up names for pies!

Here are a few:

Bye Bye Mrs. Neolithic Pie

Pico de Gallo Pie (hmm there goes the rooster – rooster pie?)

Portable, Picante, Prickly Pear Pad Pies

New World Resilience Pies


Feel free and post some of your pie variations and names!