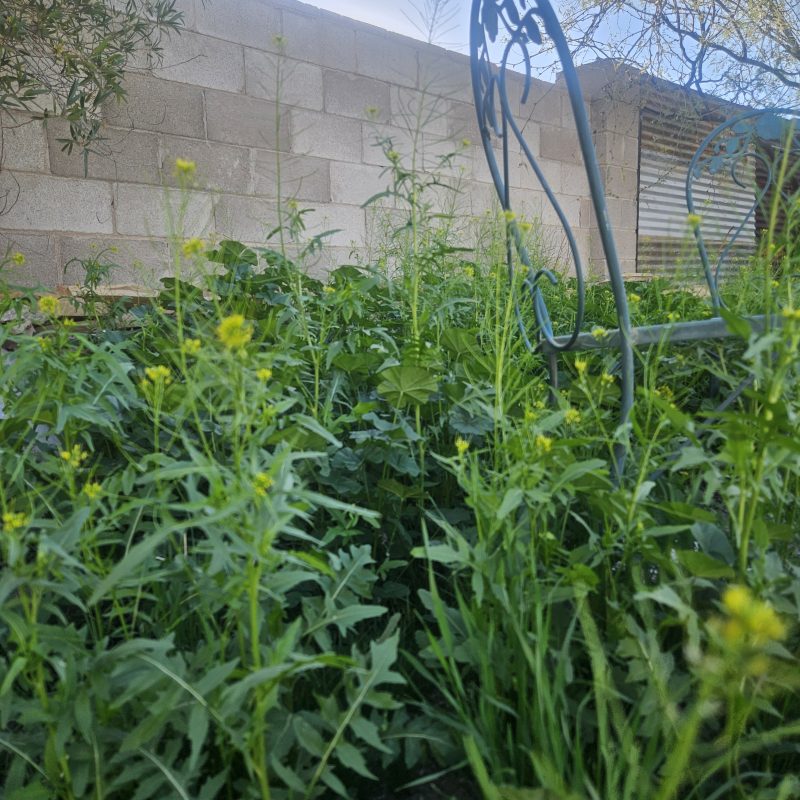
Indeed we’ve been blessed this cool season by some good rains in the Sonoran Desert–and everywhere there is greenery popping up. Weeds, you say? Let’s take a closer look! As our SavorSister Amy shared earlier this month in her tasty “rocket post”, what may LOOK like weeds are actually the gift of wild greens! Tia Marta here to share more ideas for wondrous weed-collecting.
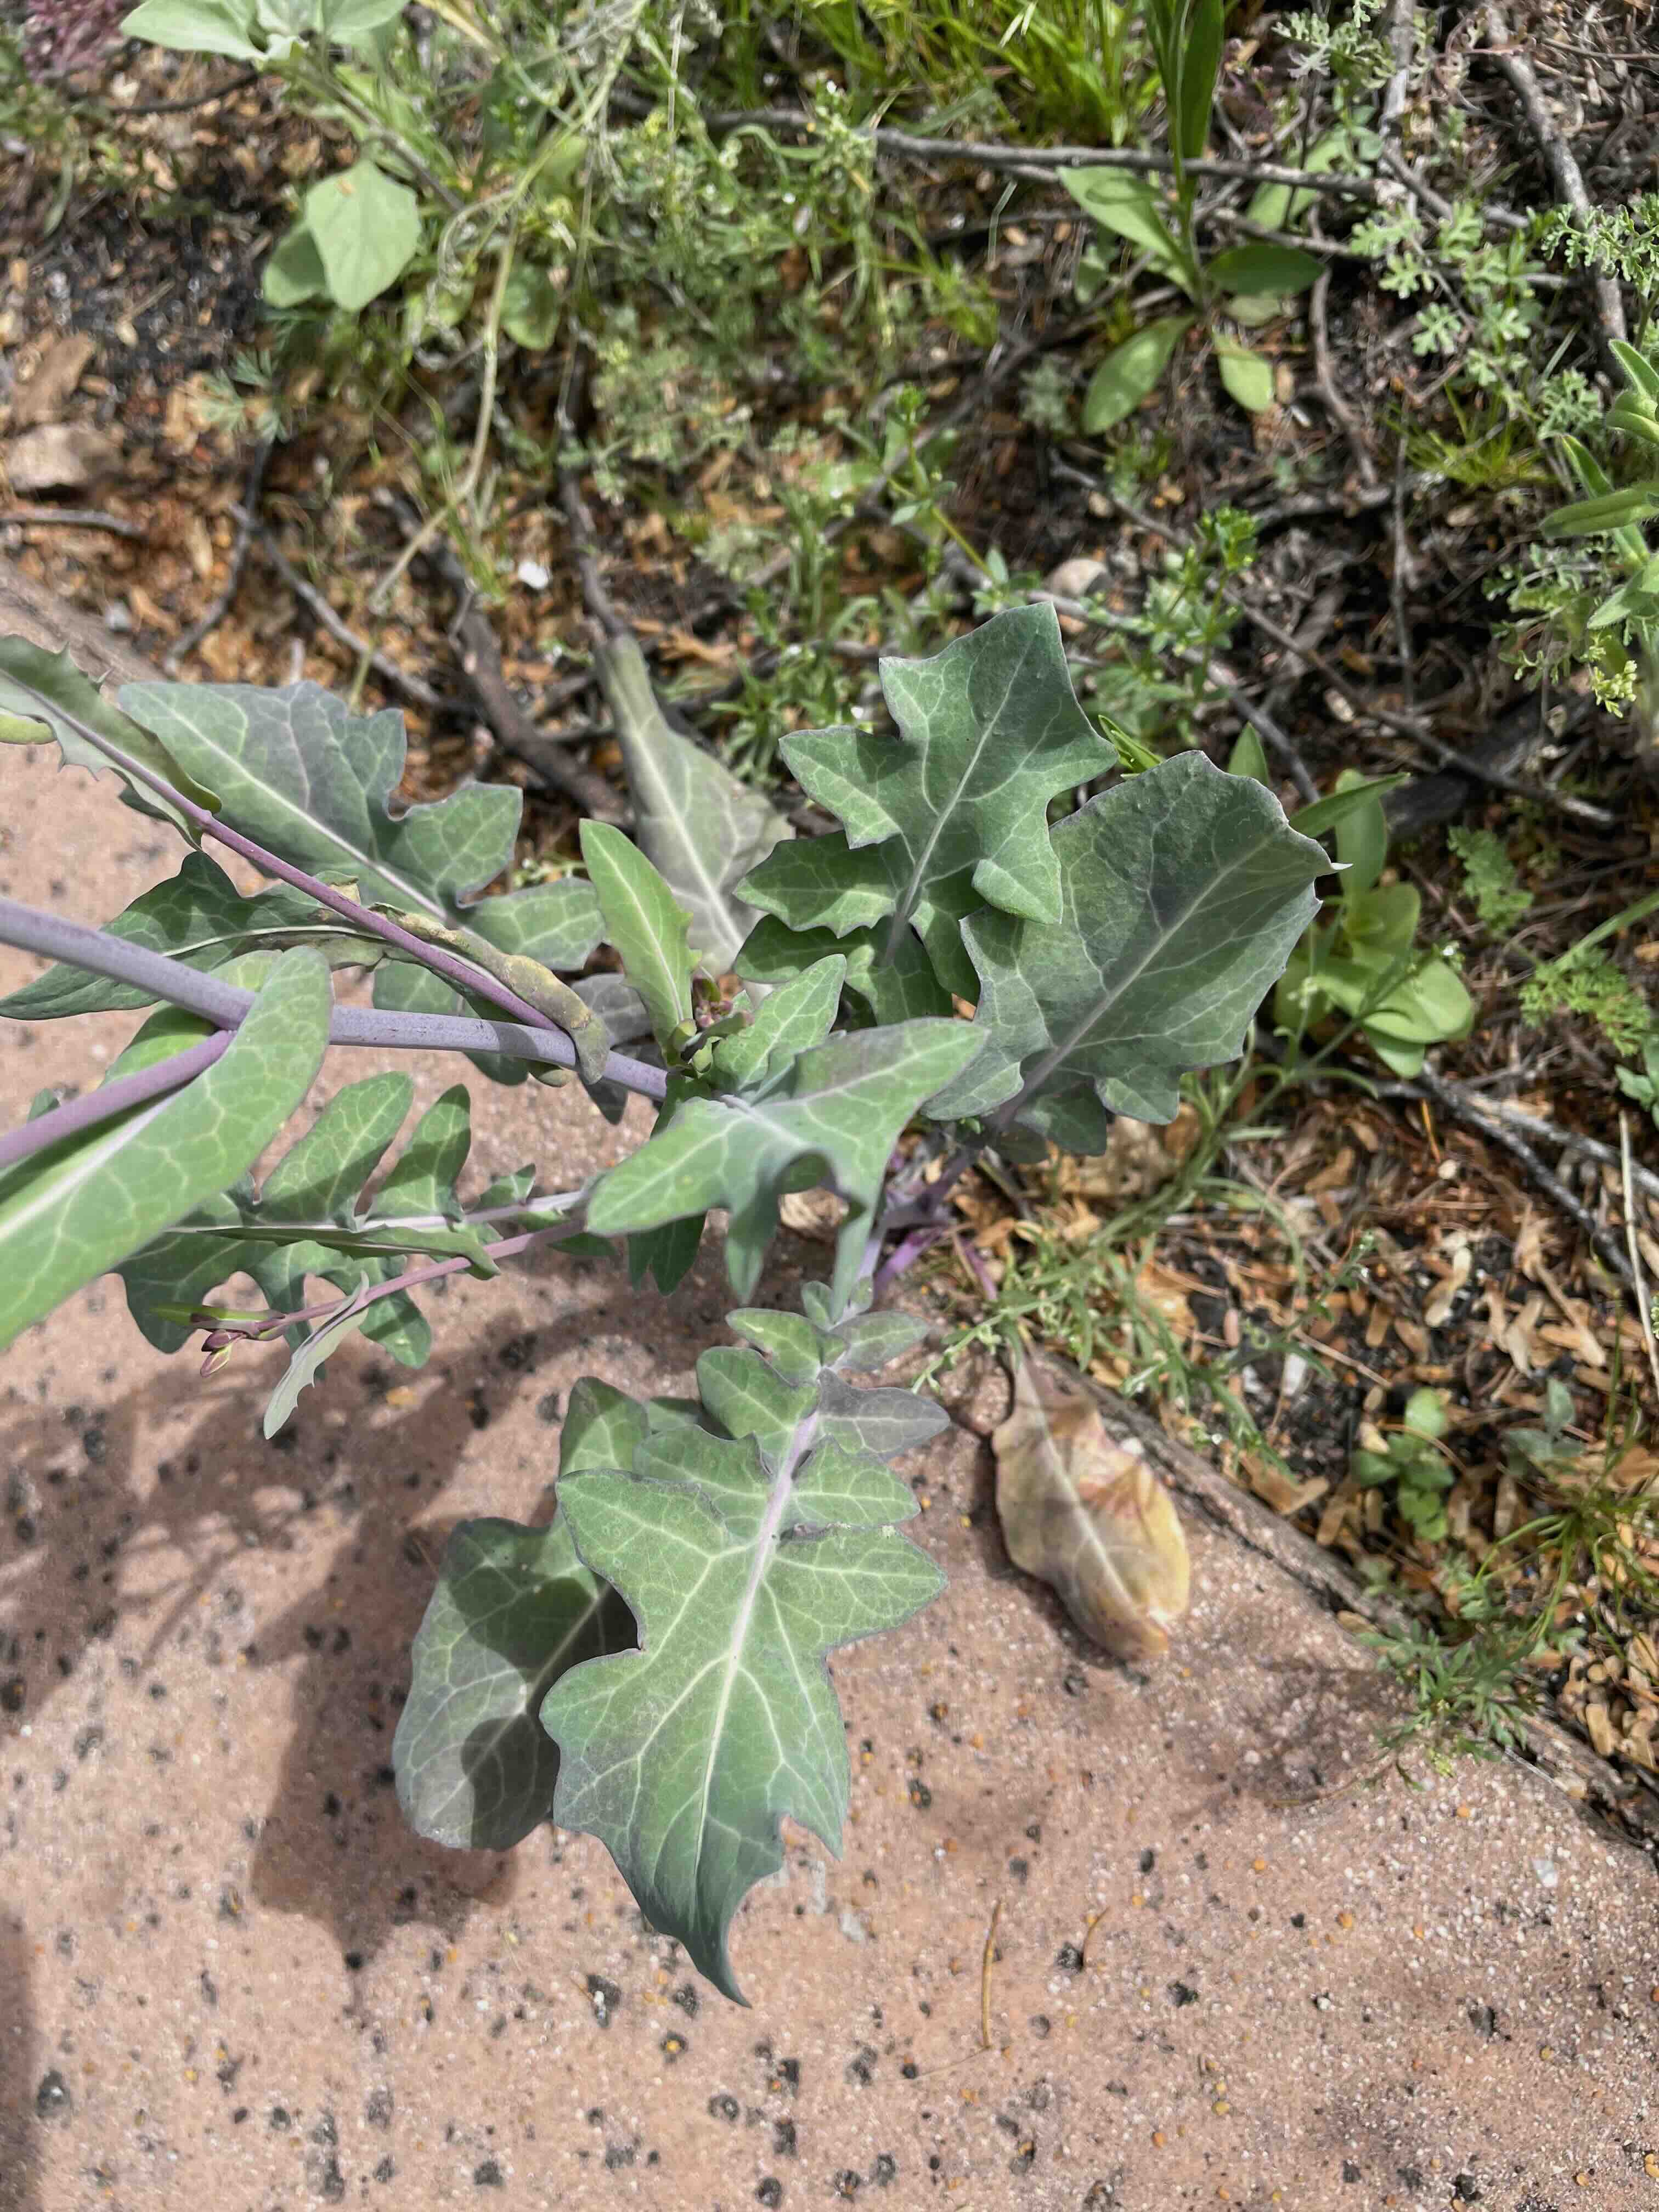
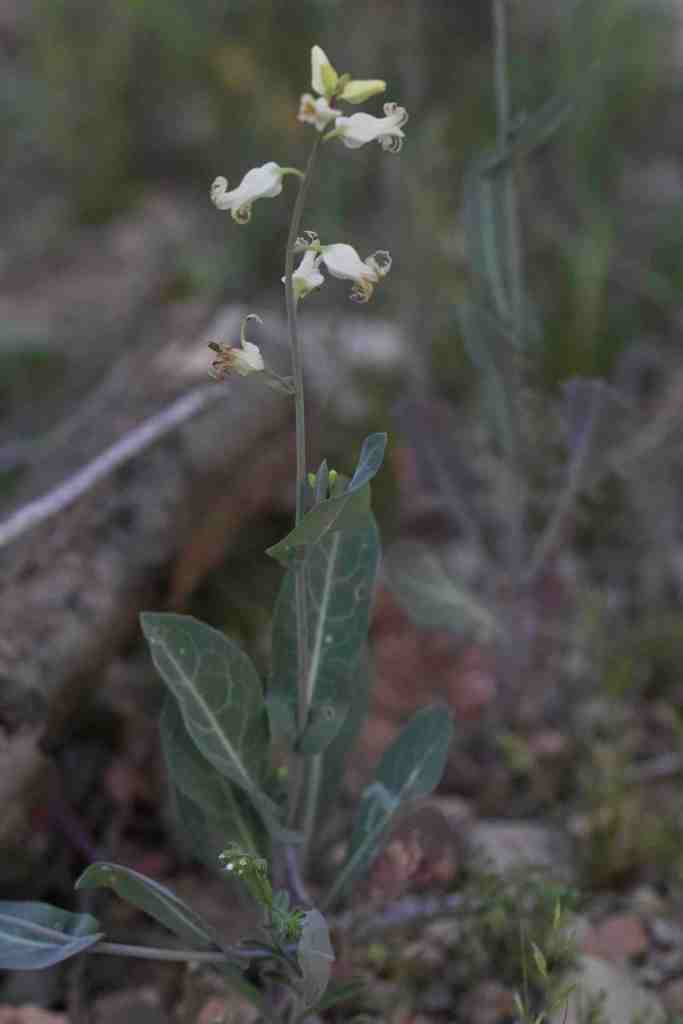
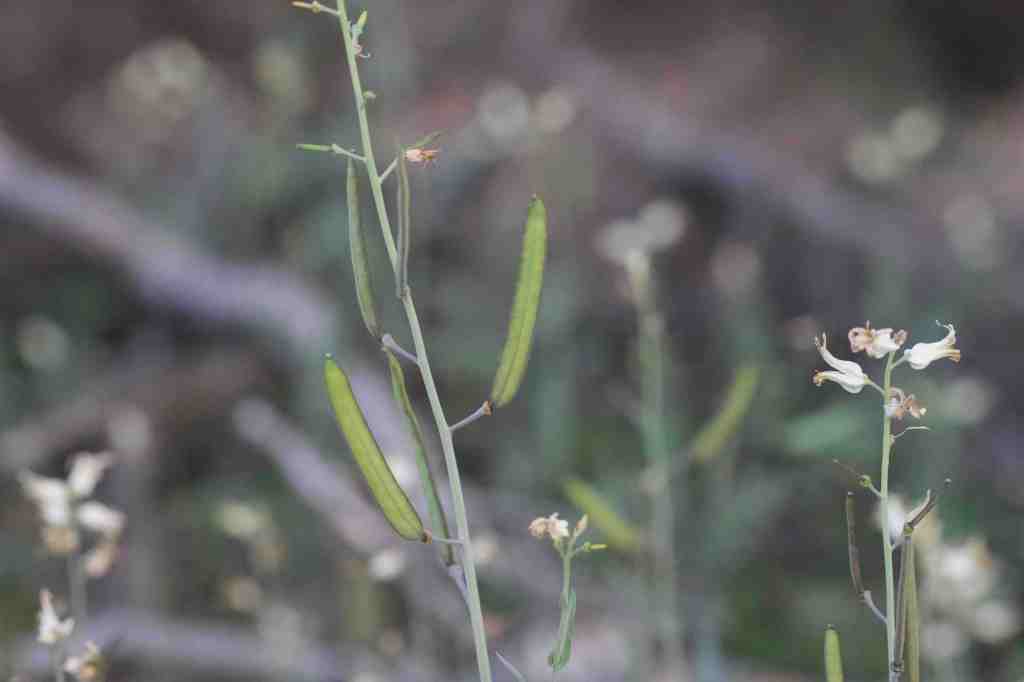
This sweet 4-petaled “Arizona jewel plant” also known as “silverbells” (Streptanthus carinatus), is an endearing wild native mustard with delightfully good taste and nutrition. Planting silverbells seeds can also make a delicate addition to your own edible landscaping.
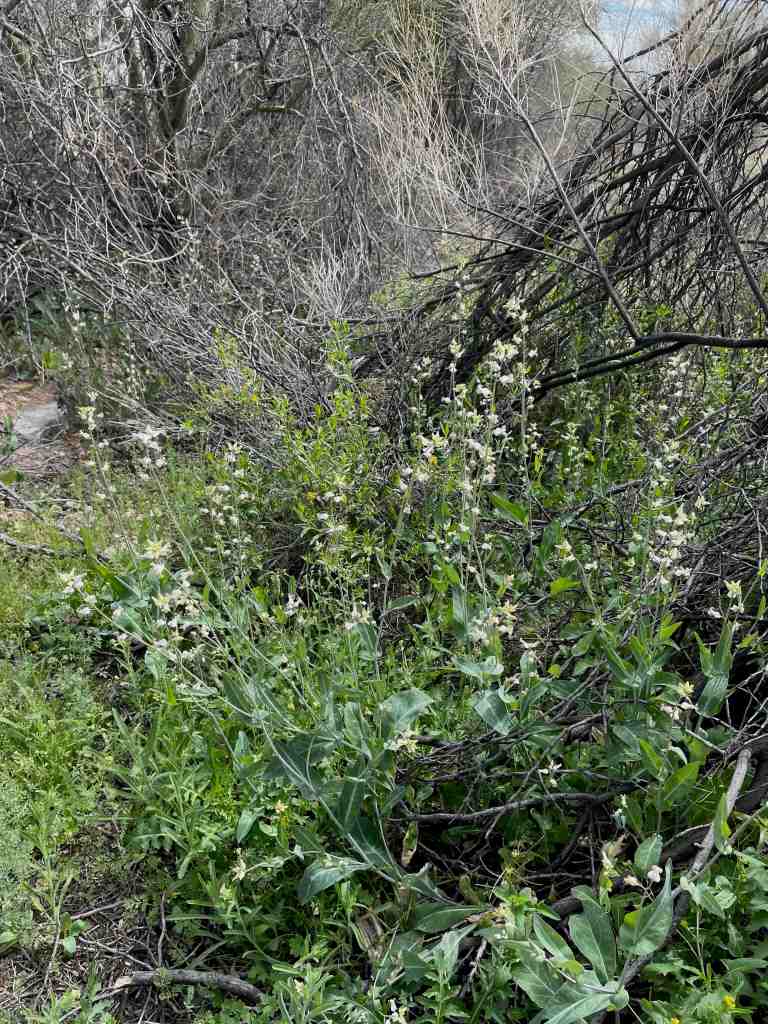
Out in the desert and in town you can find great patches of silverbells right now, especially in the shade of other desert shrubs. At times like these when there is such plenty (with thanks on our lips for these edibles), we can feel some assurance that harvesting a little for our family will still leave lots for other desert creatures and seeds for a future winter.
Silverbells isn’t spicy–no picante bite like the introduced London rocket or mature arugala–…and every above-ground part is flavorful —fresh right off the plant!
To my palate, its symmetrical little urn-shaped flowers even have a slight sweetness.,..
A taste of its flower can be like a communion.
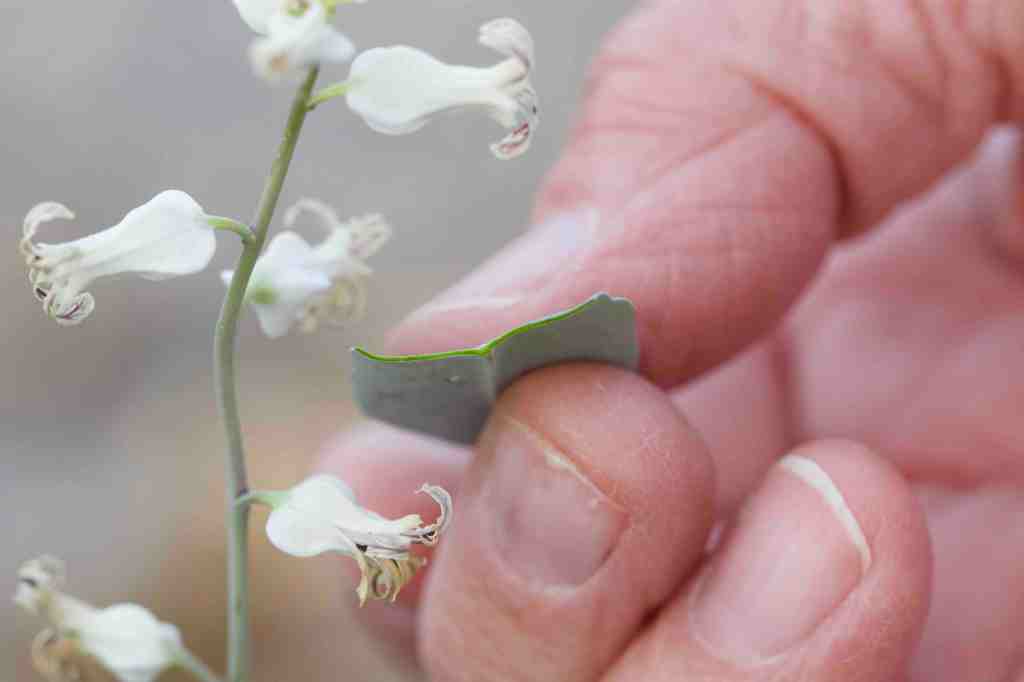
Silverbells’ near-succulent leaf is a perfect addition tossed fresh in a salad. You can see the thickness of the juicy leaf in this cross-section view.
….And silverbells’ young green pods are delectably, “vegetally sweet.” Enjoy them fresh and raw, because, (alert!), with stir-frying the pods suddenly become bitter. They’re best used fresh to bedeck a salad.
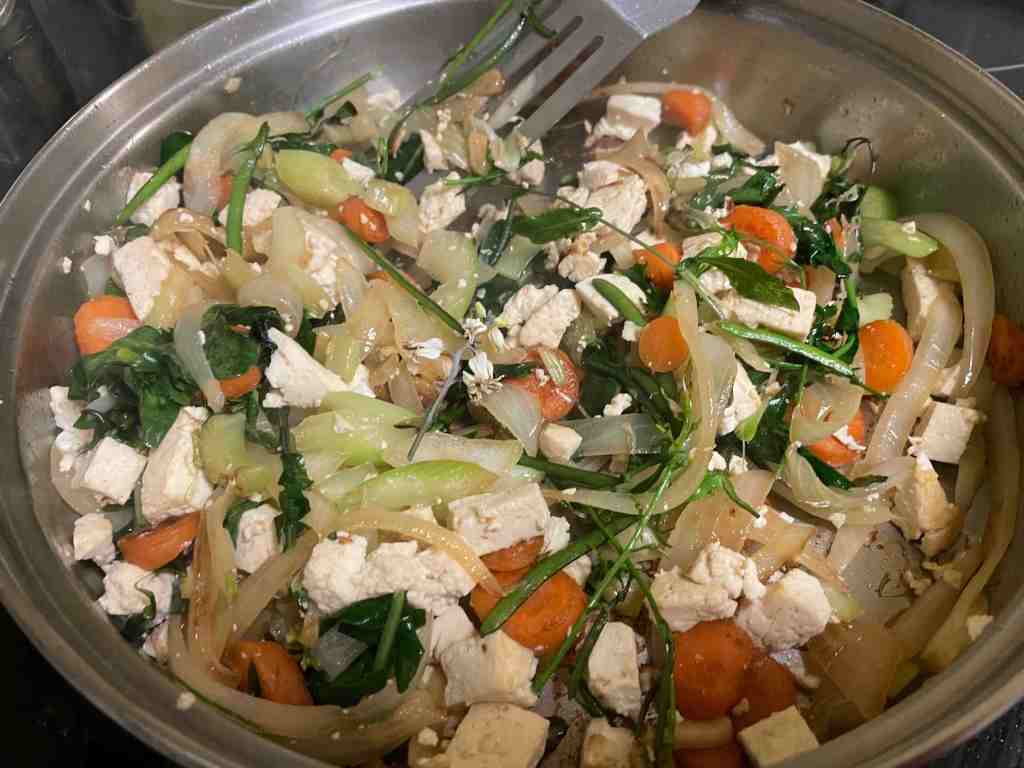
Silverbells is a Brassica, that is, in the cole-family of highly nutritious vegetables. Besides in a fresh mixed salad, my favorite way to enjoy their nutrition (high Ca, vit.A and C, folates) is in a veggie stir-fry. I have added the greens last in this tofu stir-fry. Can you spot the silverbell flowers I topped this dish with?
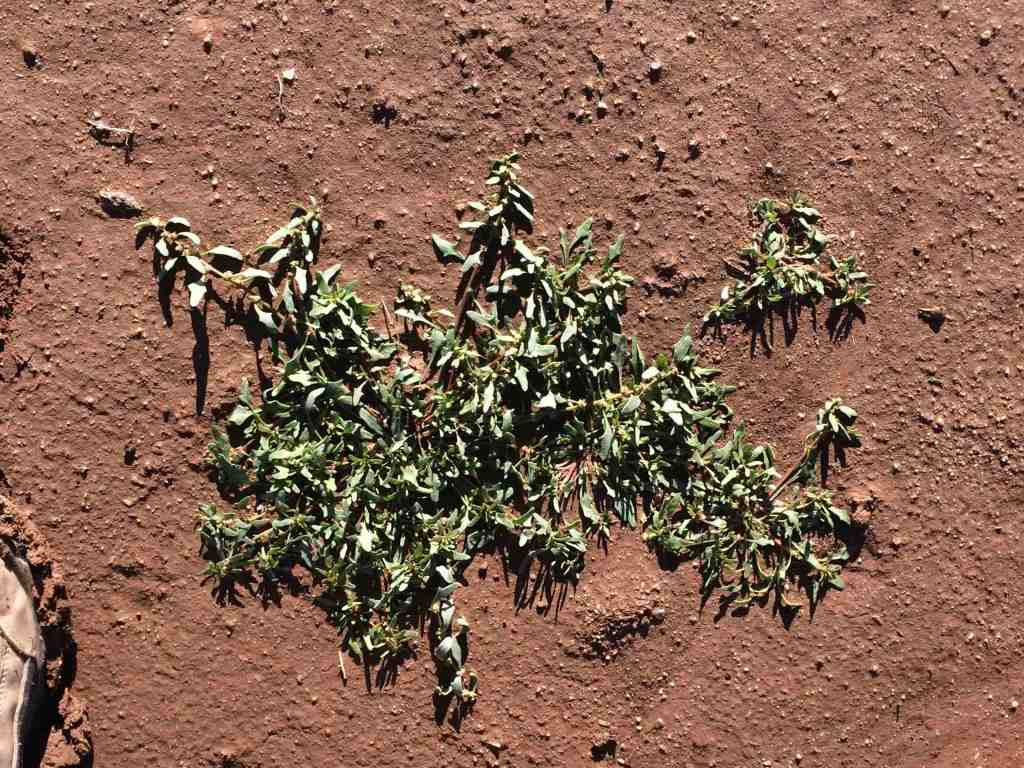
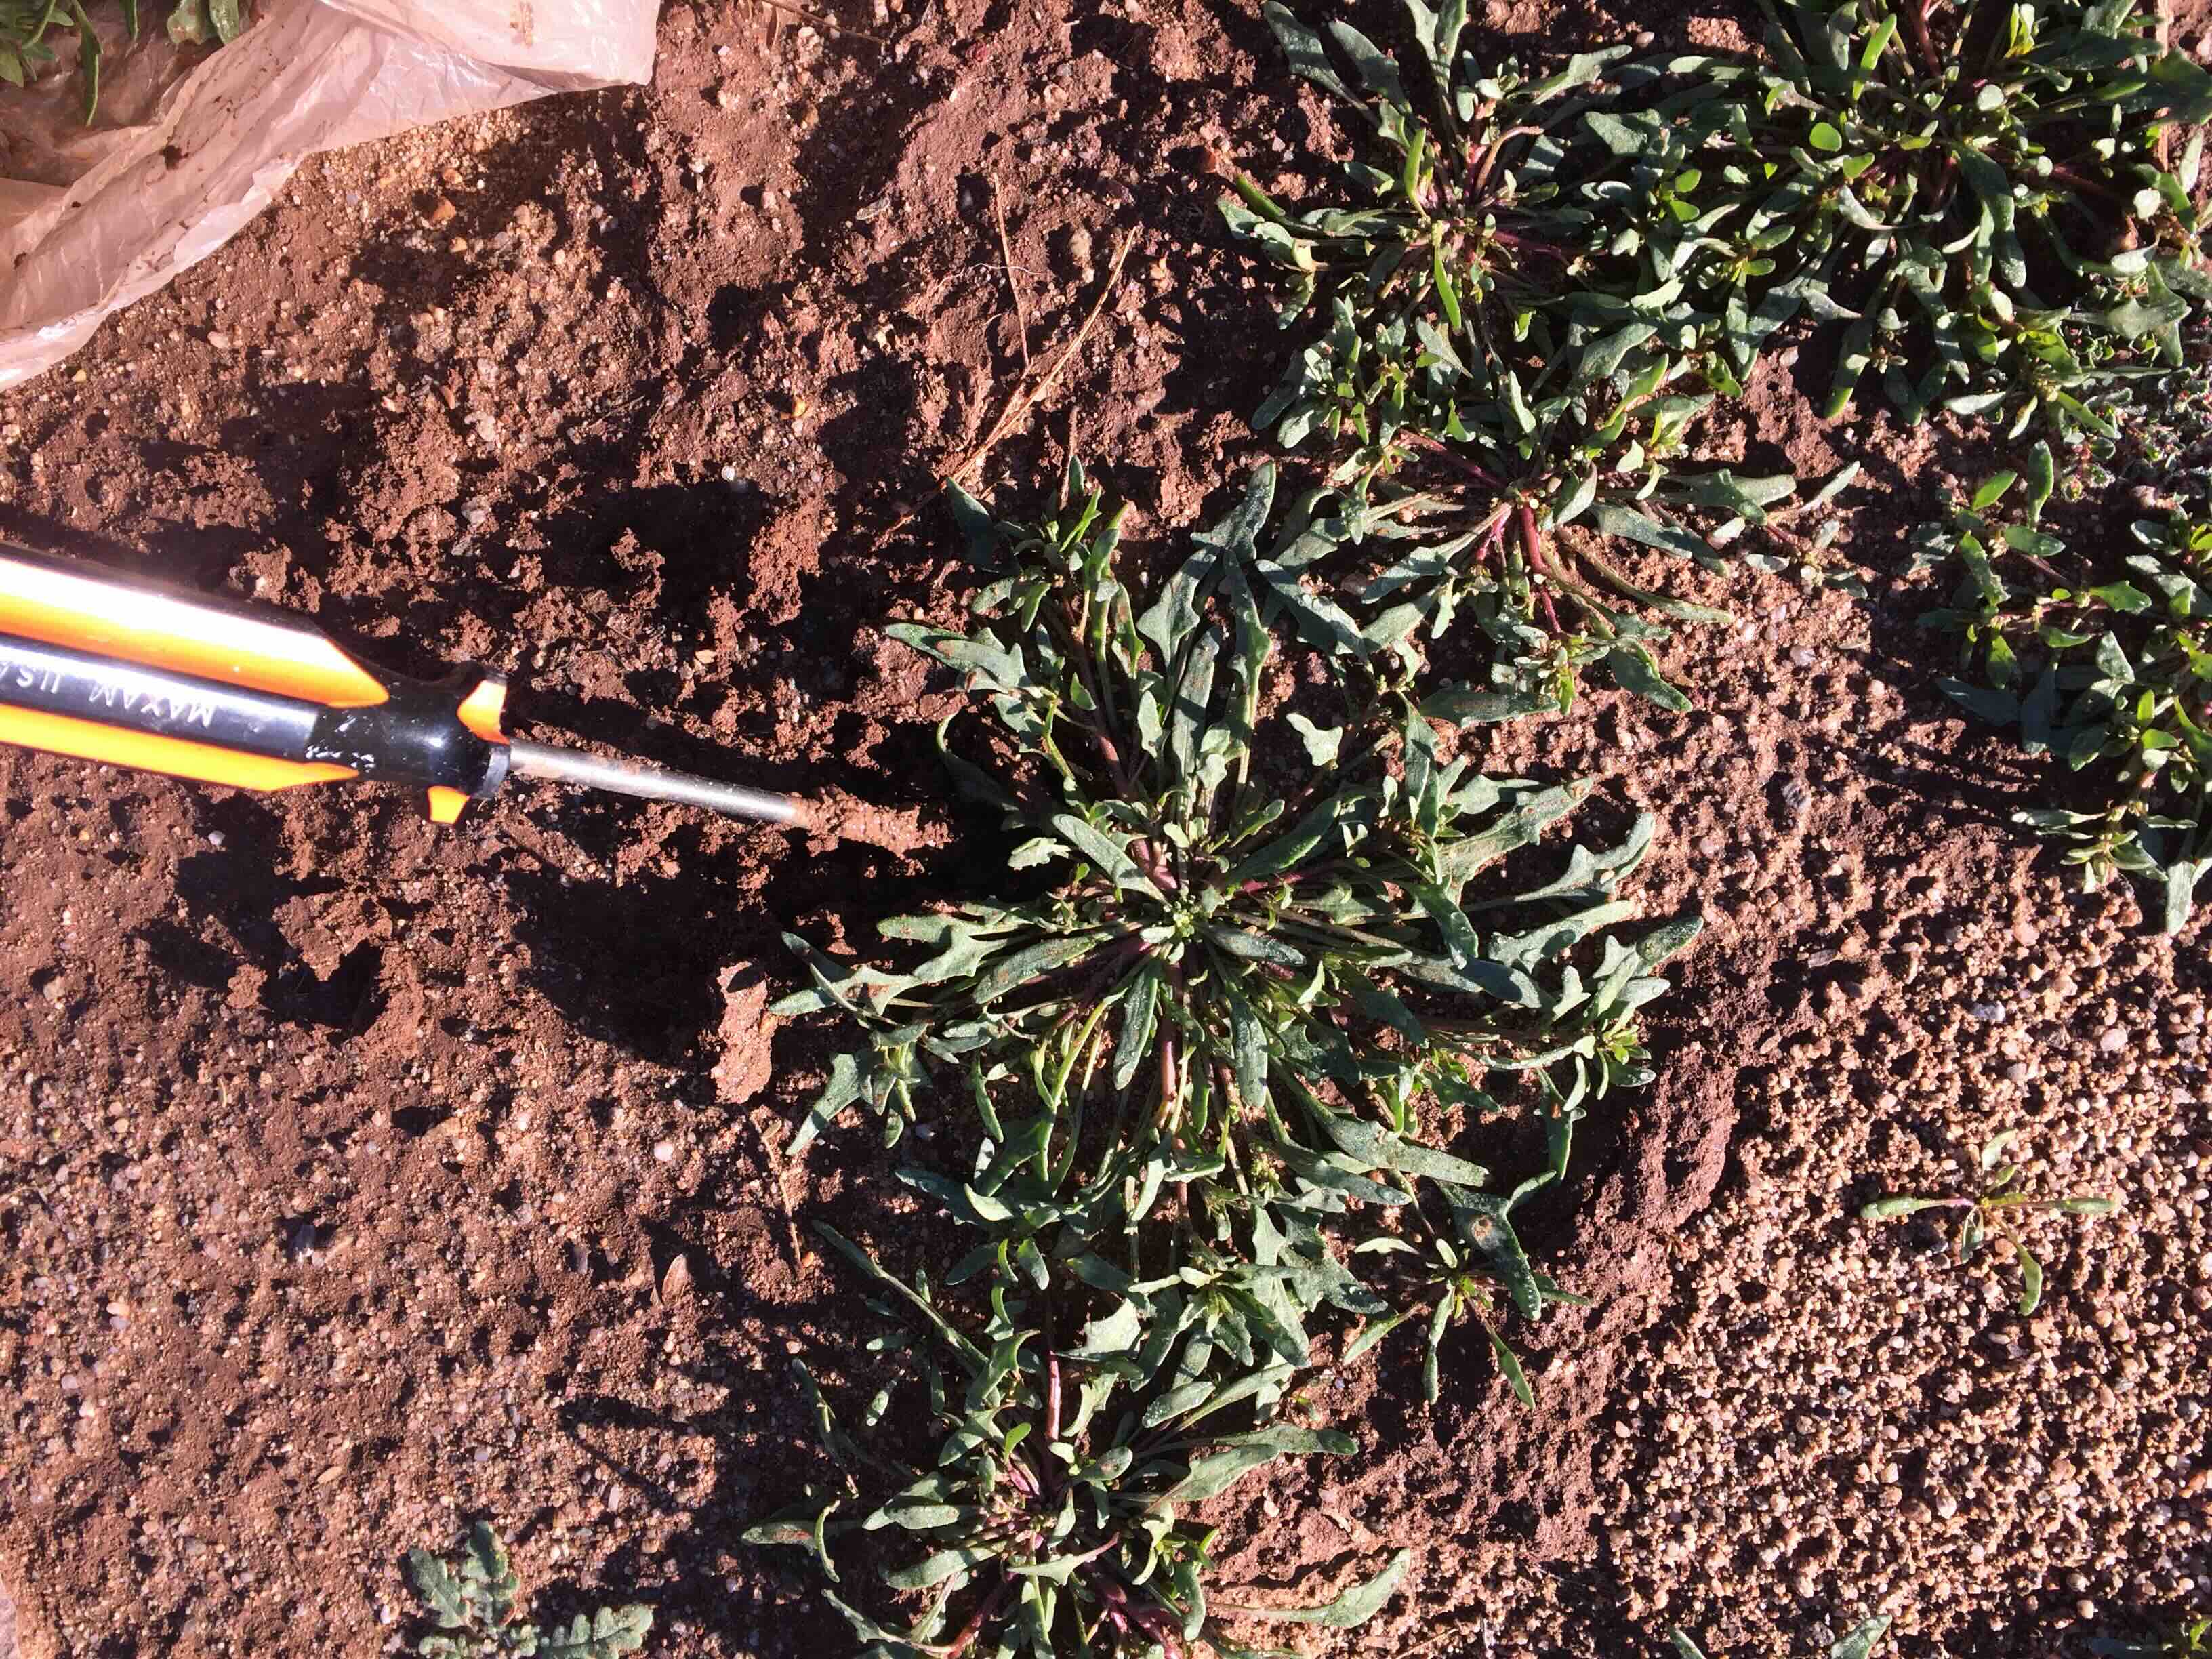
Here’s another “weed”–my very favorite, but very rare–which my O’odham mentor showed me years ago–opon i:wagĭ. Known in Spanish as patota, and in English by the truly misleading term “poverty weed,” it only comes up in certain years with winter rains at just the right times and in right amounts. She led me to harvest in corrals and roadsides on the poorest soils, and there appeared these patches of flat-lying rosettes of small thick leaves, so unassuming. Not very noticeable but worth noticing!
This season, see if you can find some opon i:wagĭ out there in degraded sandy soils! It is easy to dig up the whole plant. Cut off its tap root and steam the little green spinach-like leaves. The best dish my teacher ever cooked for us was opon i:wagĭ fried with i’itoi’s onions in a little bacon drippings. I thank her in my heart for sharing her desert knowledge, to alert us to keep looking and watching for the next surprising desert rain-gifts.
Wonderful! Amy here, celebrating the yellow flowered wild mustards growing my yard and in the desert. Sisymbrium irio grows in dry, disturbed soil around the world but is orginally from the Middle East, southern Europe and northen Africa. One of its names, London Rocket, supposedly refers to how it uncharacteristically took over there after the Great Fire of 1666. (It loves disturbed soil, in my garden or elsewhere!) Arugula, another mustard family plant also known as rocket, has big white flowers and is actually classified as different genius.
Of course the leaves are edible and tender on the short, young basal rosettes. But the small leaves on the tall, flowering plants are suprisingly tender. The flavor of the leaves from mature plants is spicier, but I think it has more to do with the warming weather of the season as the plants mature. The seeds are edible too but are much smaller than commercial mustard seeds and are difficult to harvest.
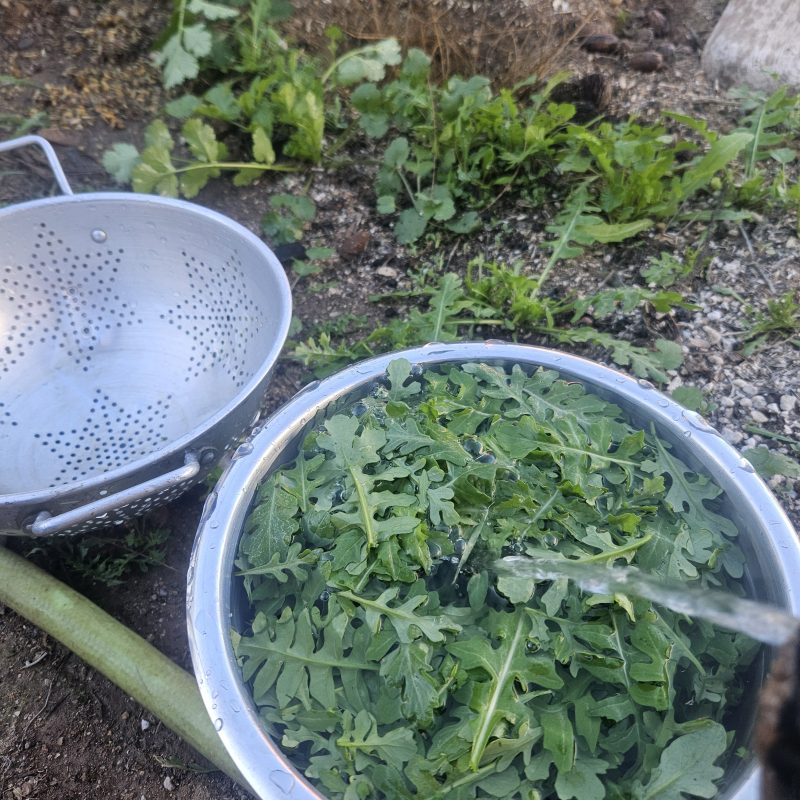
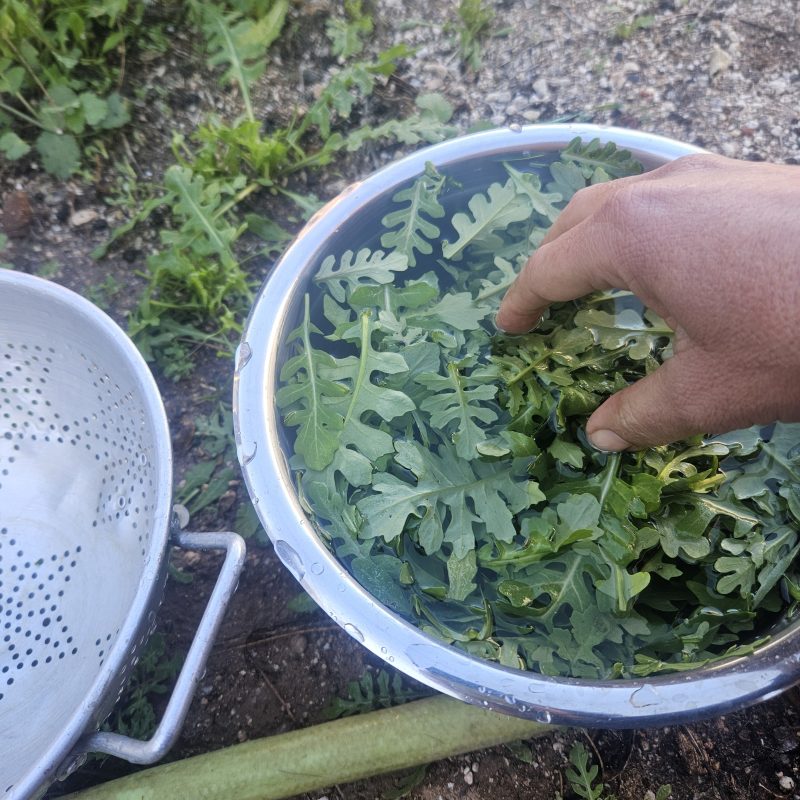
Instead of triple washing, I like to wash once really well, where the wash water going to the garden. After swirling in plenty of water, I lift the leaves out of the water by hand and drain.
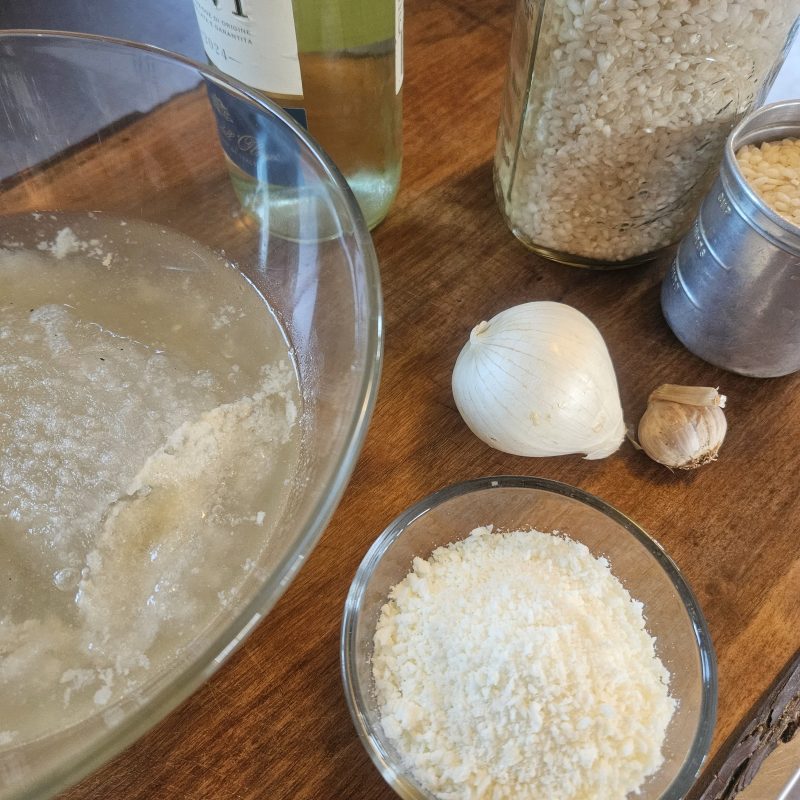
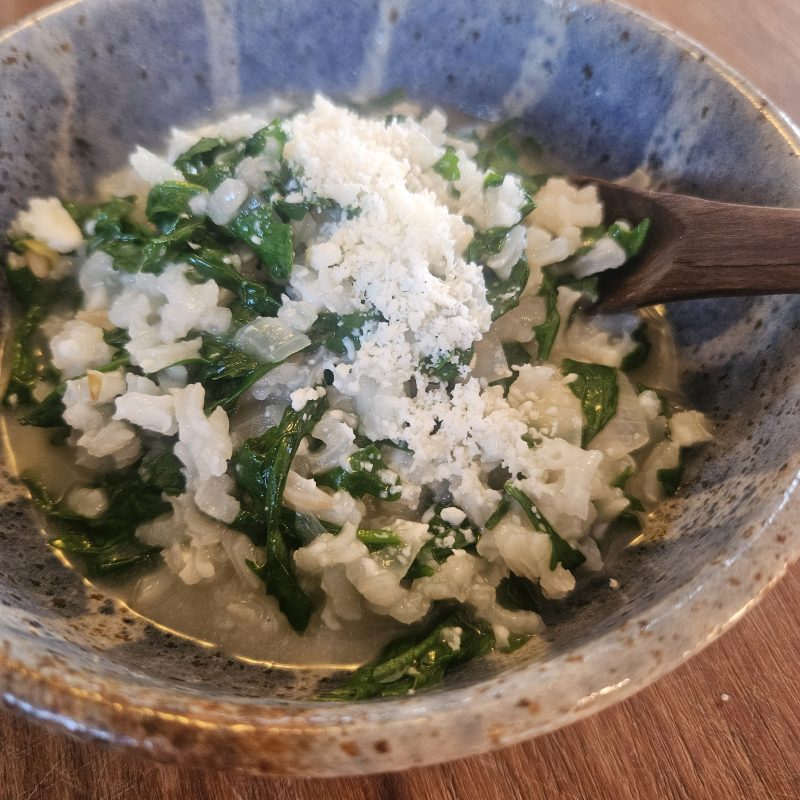
Wild rocket has countless possibilities in the kitchen. The leaves make a spicy salad or garnish on a sandwich, like arugula. My favorite way to enjoy it is wilted into a risotto. Homemade chicken broth (from the freezer) and a splash of wine make it special.
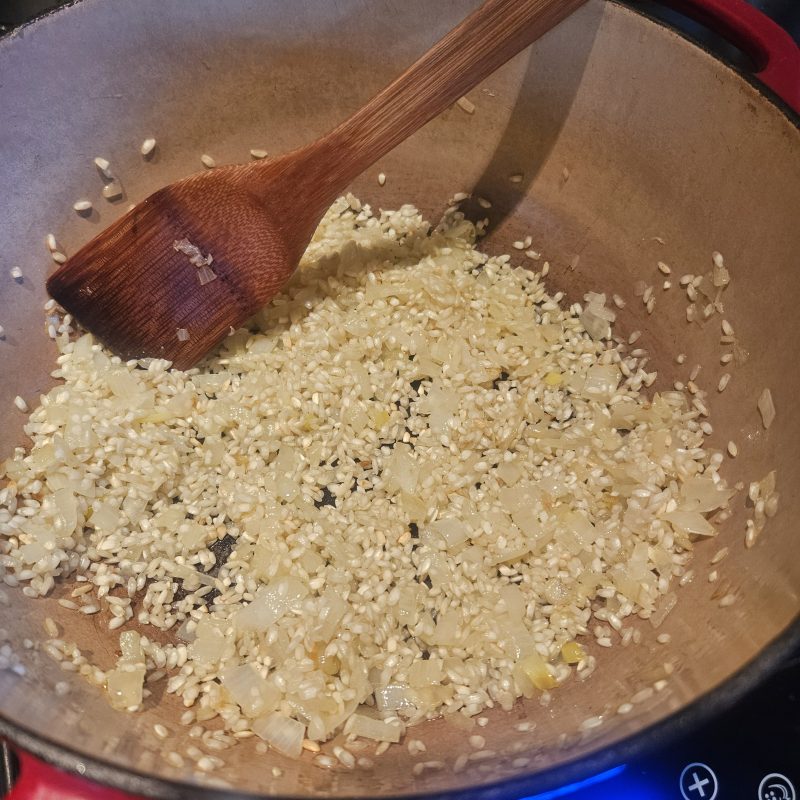
I start by browning rinsed aborio rice, onion and garlic in olive oil.
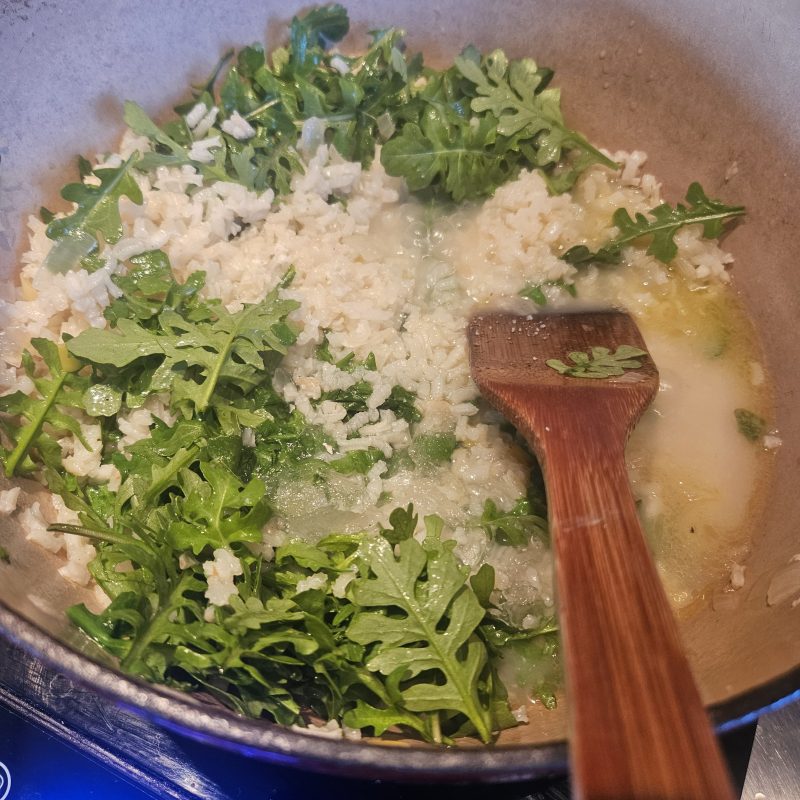
For traditional risotto with the creamiest texture, add hot broth a little at a time and stir constantly. For the easiest risotto, I just add plenty of broth and simmer slowly in a heavy pot with a lid. Three times the volume of liquid to rice is usually where I start.
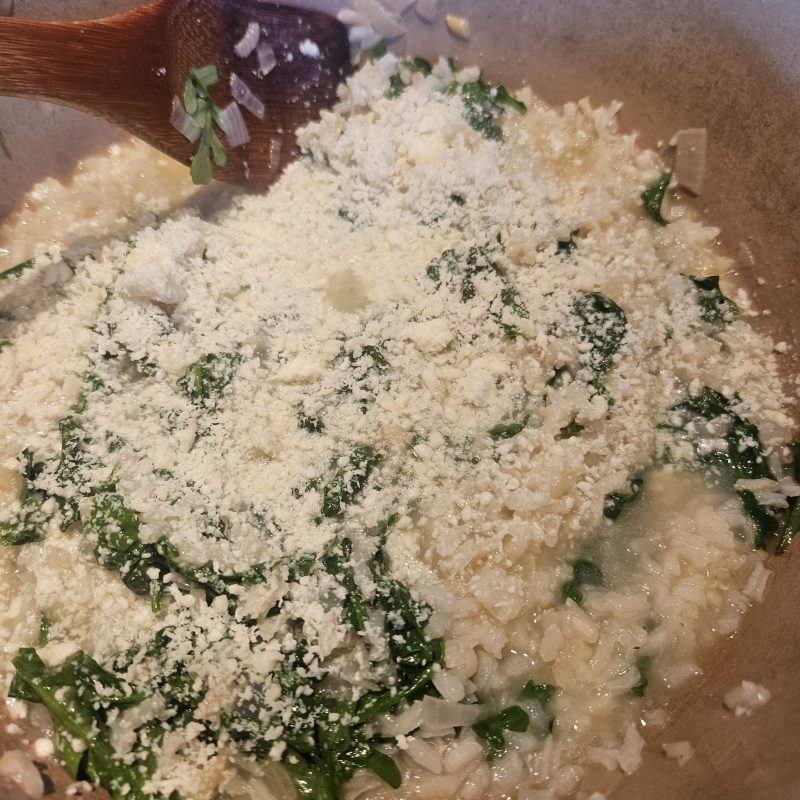
When the rice is tender, I remove the pot from the heat and fold in the whole little leaves. Sprinkle with any cheese, in this case a dry and salty fresh goat cheese. Enjoy right away or at room temperature on a picnic.
Depending on temperature and moisture, we might be eating wild rocket for a couple more months into the spring. What other dishes do you like to make with wild rocket?
Have you noticed that a box of crackers is costing a whole lot more these days than it used to?–especially if you’re wanting specialized grains or herbed flavors? Why not “save” and make my own? Right! I’ve had a hankering for cracker flavors you just can’t find at the grocery, a lust for crackers made with our super-nutritious Southwest flours and herbs. So…fortified with locally-sourced materials, I searched cracker recipes to guide me, but I batted almost zero–so few recipes are out there. I took this dearth as a challenge. Tia Marta here to share some of my cracker experiments–and to challenge YOU to invent your own holiday crackers!
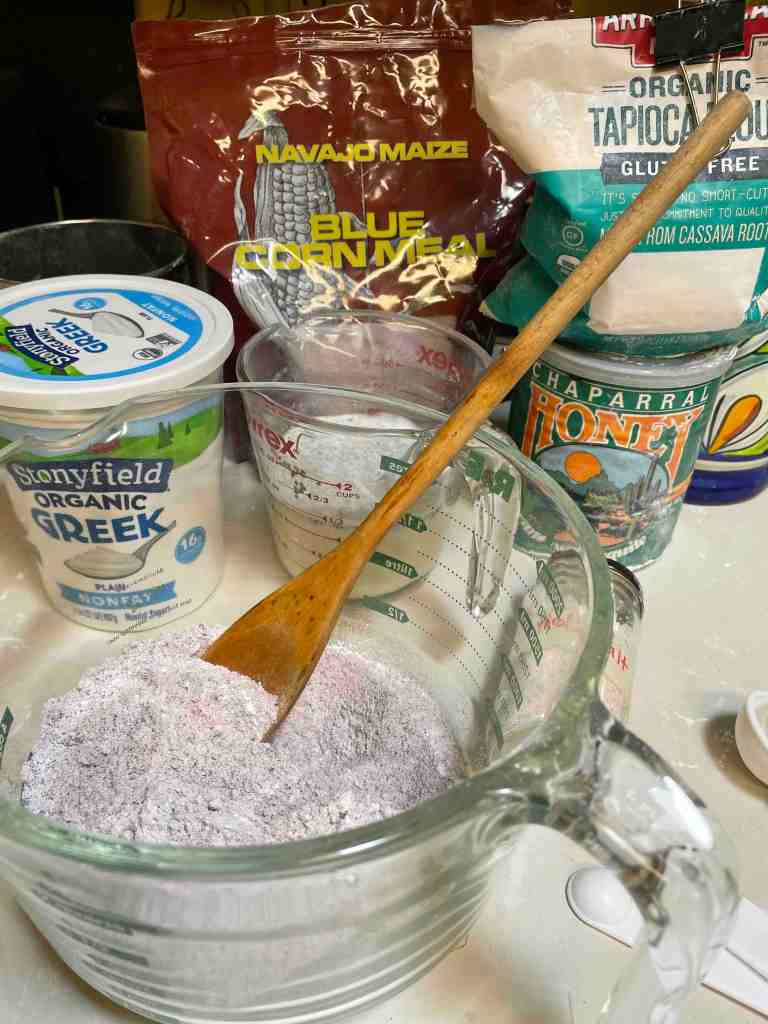
This is fun new territory. First with the goal of a gluten-free Southwest cracker, I took on Native blue cornmeal as the major delicious ingredient, with tapioca flour and chia seed as “binders”.
Recipe for Gluten-free BlueCorn-Amaranth-Chia Crackers:
1/2 tsp sea salt (I used salt from Baja California)
2 Tbsp non-fat plain yogurt (Greek yogurt can be a no-fat substitute for butter)
3/4 Cup lowfat buttermilk
1 Tbsp. chia seed
1 Tbsp mesquite honey (optional, amaranth flour can be a little bitter) (or a generous glob of honey on a teaspoon)
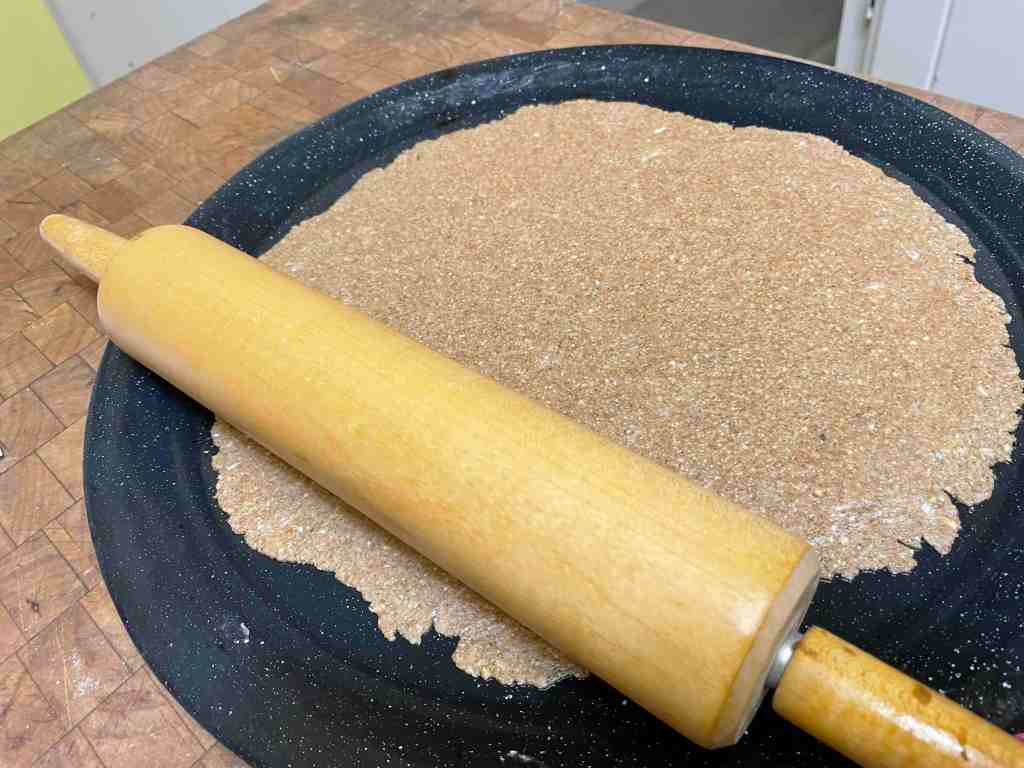
You’ll need a greased pizza pan and a greased rolling pin.
Place half the dough in center of a greased pizza pan. With your fingers press the dough down and outward. Your goal is to create a thin 1/8″ layer of dough on the pan. Using a greased rolling pin, flatten the dough out from the center. Use fingers to push the the thinnest edges back to a uniform thickness, or edges will scorch in the baking. Carefully cut the thinned dough with a sharp knife into squares, and make holes with a fork to even the heat. Bake 8-10 minutes or until you see a toastiness. With a metal spatula, lift the hot crackers off the pan right away to cool.
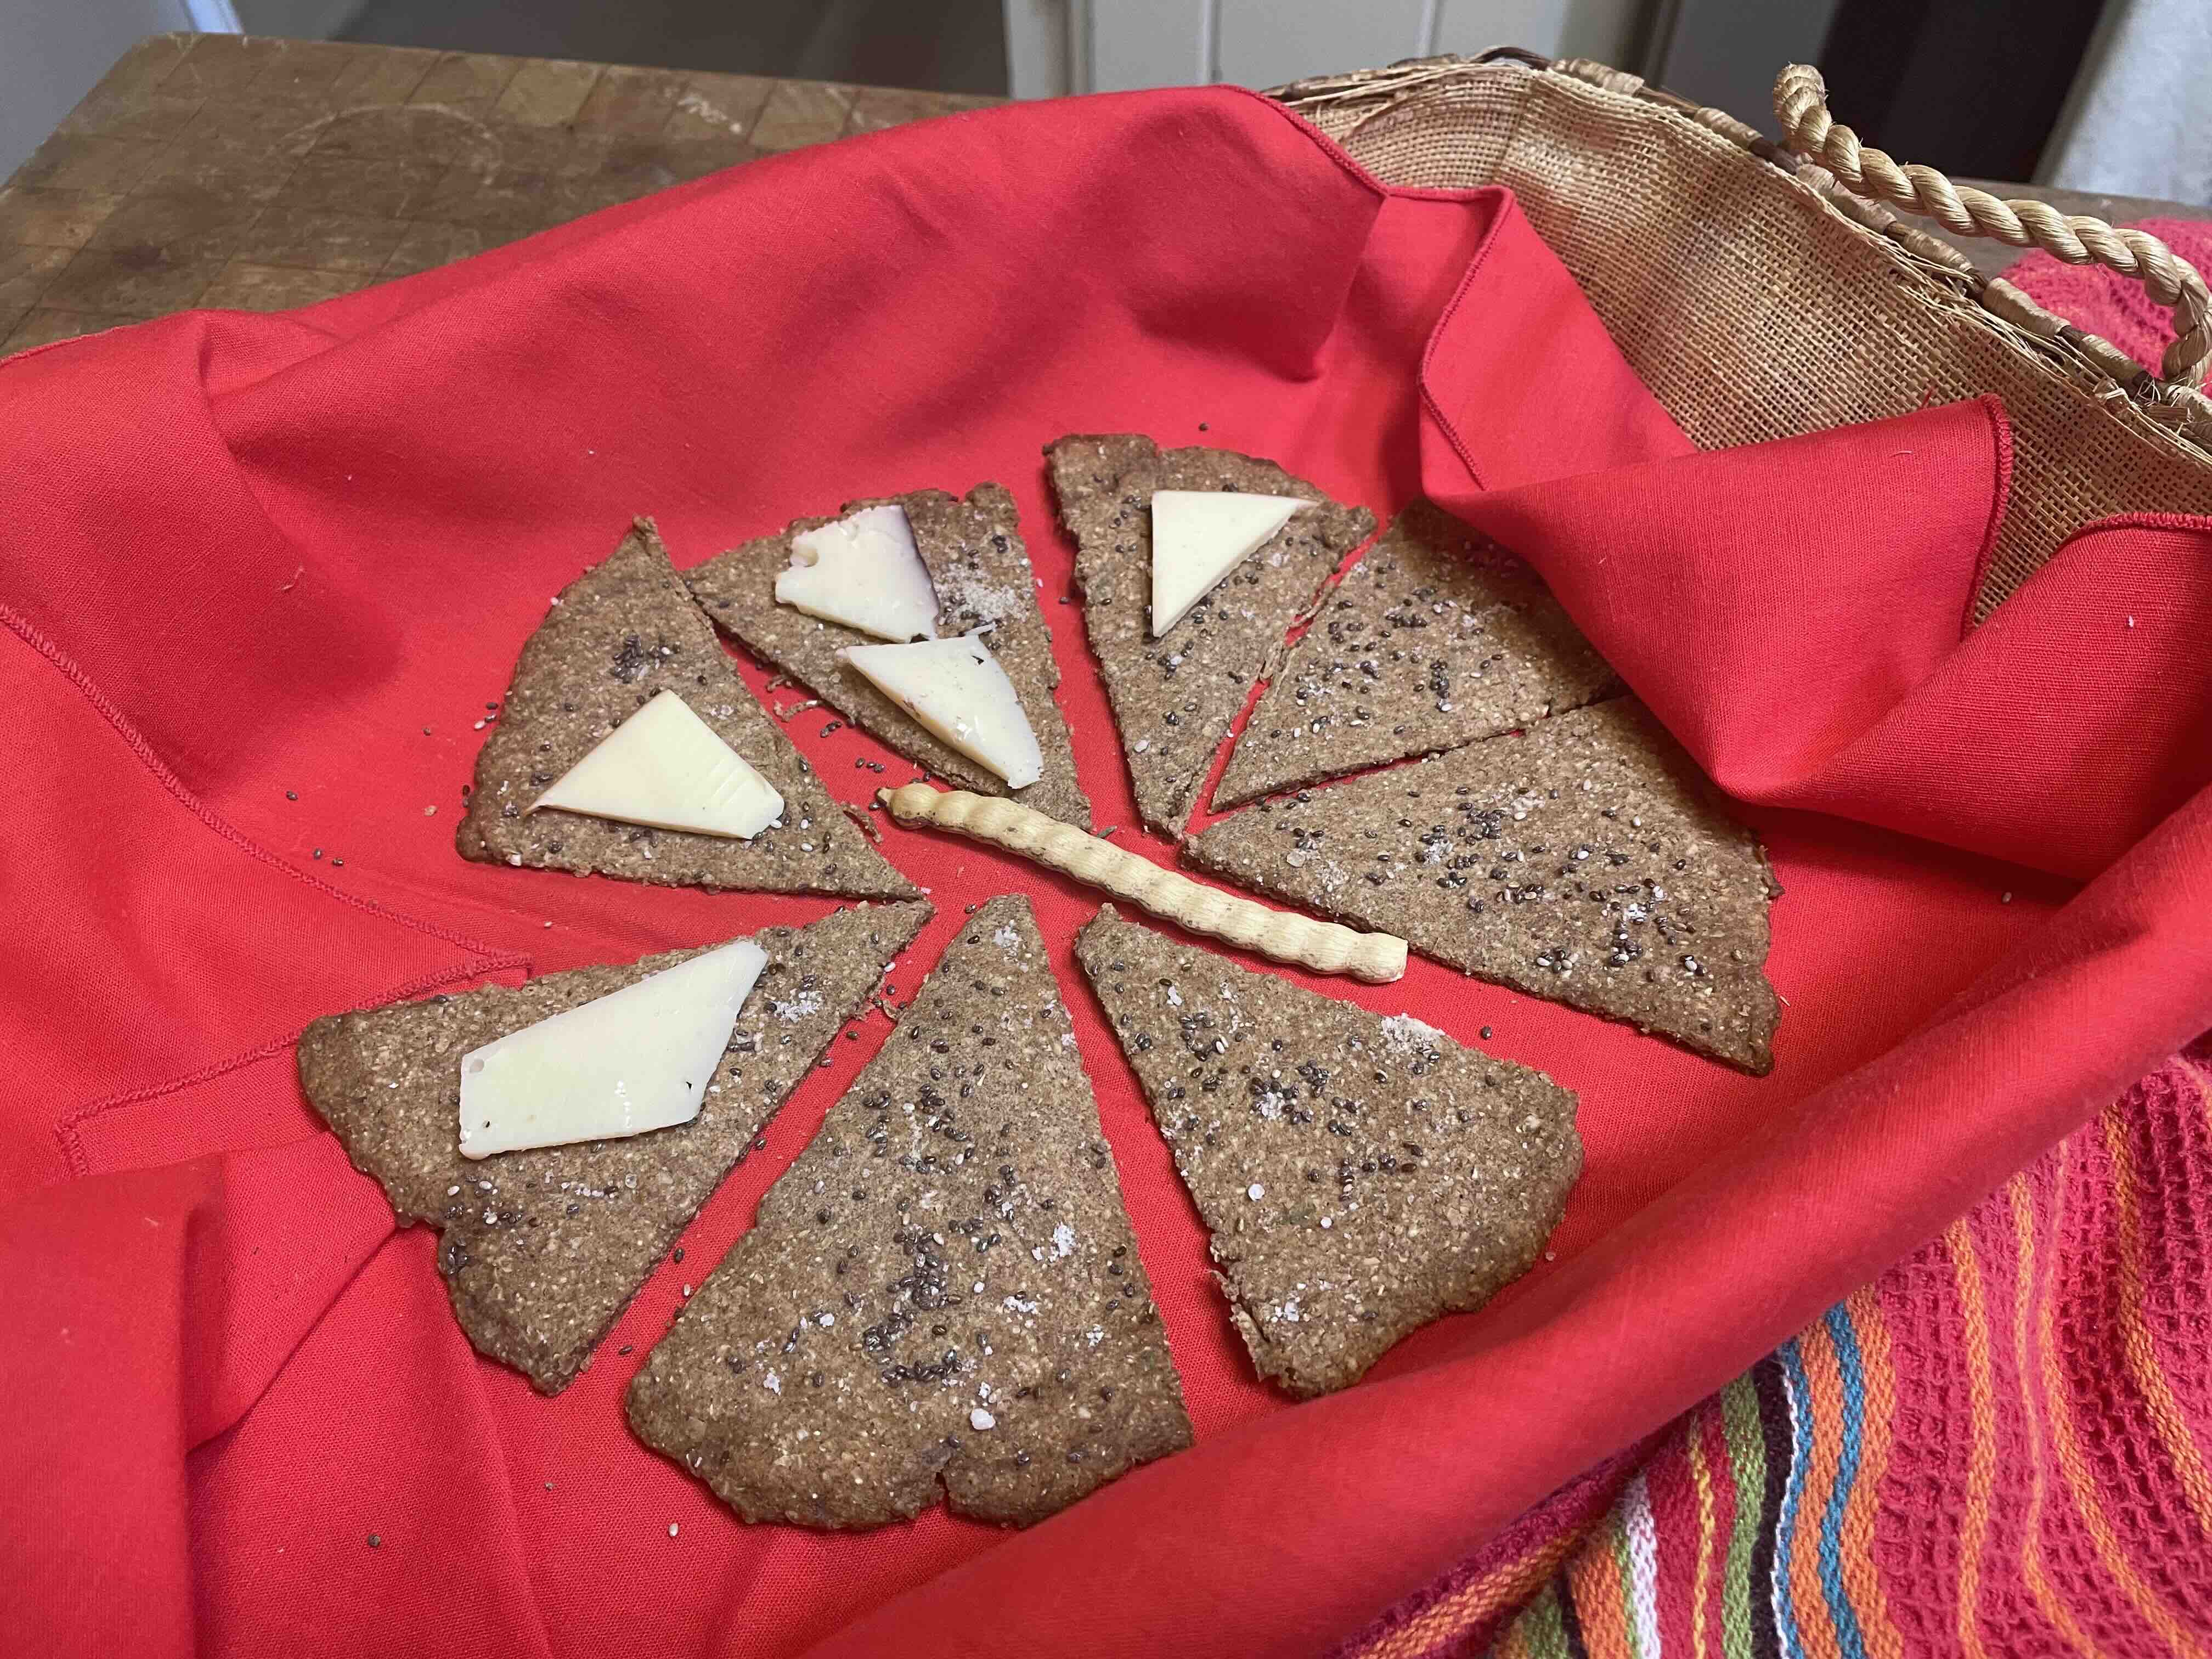
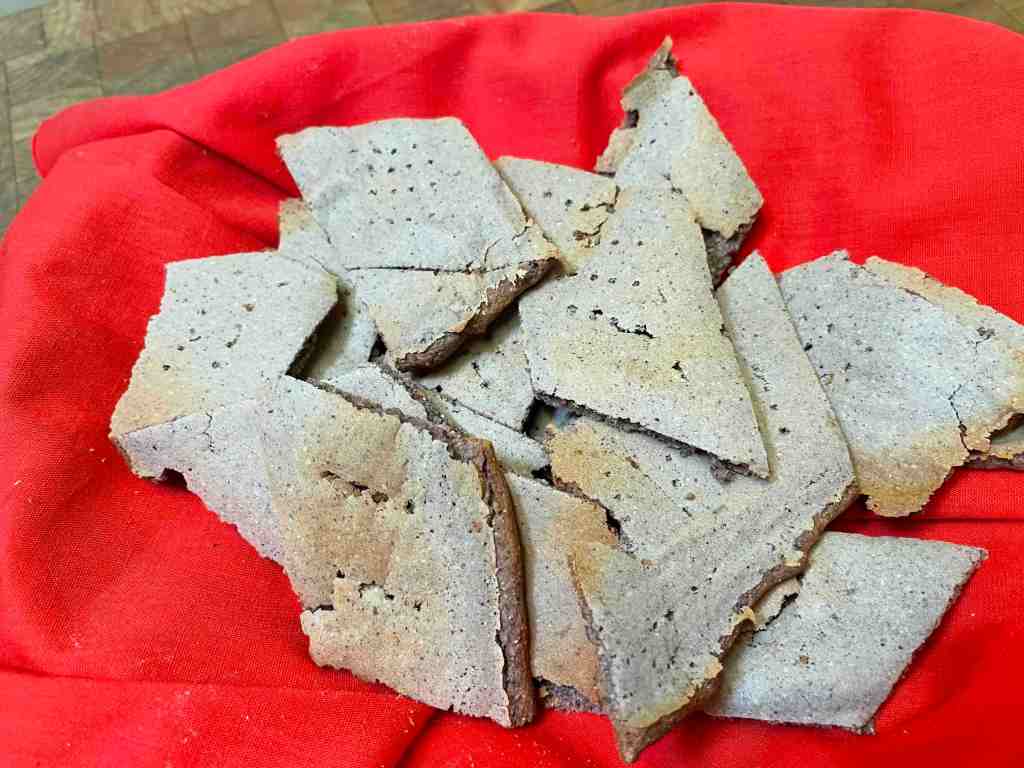
Enjoy nutritious gluten-free BlueCorn-Amaranth crackers with thin slices of membrillo, or with a creamy cheese–a new taste treat with a hint of sweetness.
You’ll see more pictures of the cracker dough prep-process below.
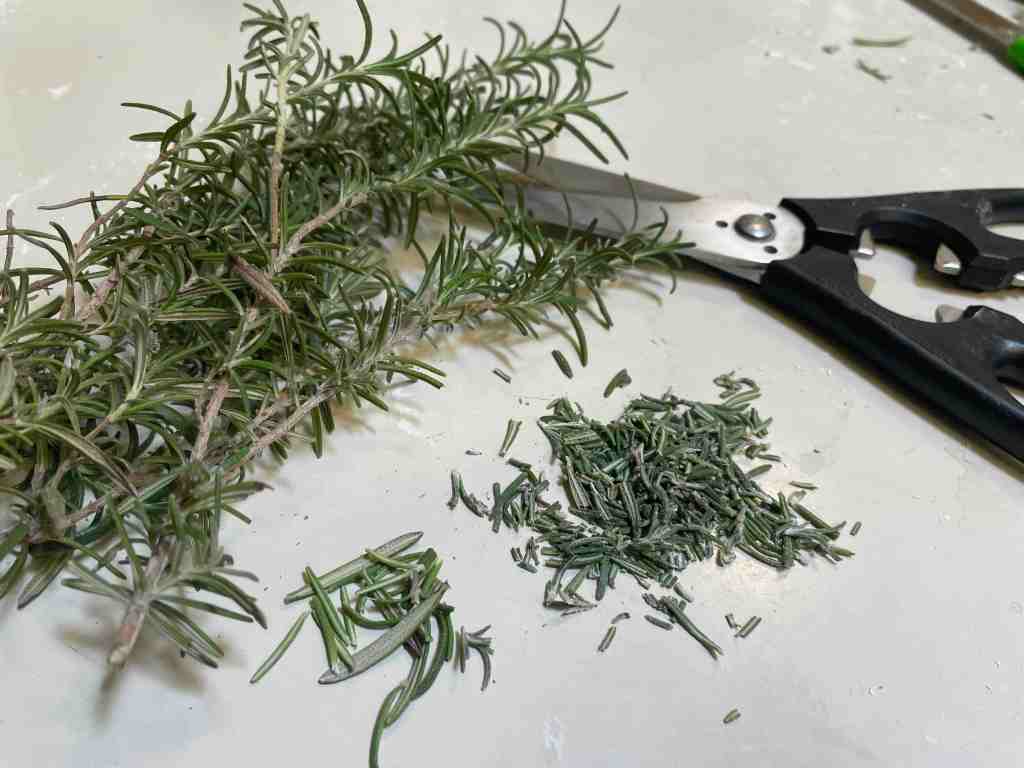
Inspired by rosemary-flavored flatbreads, I decided to try making a rosemary mesquite cracker with local heirloom wheat. Our garden supplied the fresh rosemary to cut into edible bits…. This local combination came out great:
Recipe: ROSEMARY-MESQUITE-PIMACLUB WHEAT Crackers
Ingredients:
3/4 Cup barley flour
1/2 Cup Pima Club wheat flour (from Ramona Farms, Sacaton, AZ)
1/4 Cup mesquite pod flour (any more than this will become too strong a flavor)
1/2 tsp baking soda
1/2 tsp fine sea salt (I used Sea of Cortez pilgrimage salt crystals collected by a friend)
You’ll need a greased pizza pan or baking sheet, and a greased rolling pin.
Directions (similar to previous recipe):
Preheat oven to 350F. Pre-soak rosemary bits in buttermilk to enhance flavor. Sift together all dry ingredients except the oat bran. Add oat bran separately as it will not pass thru sifter easily. Cut yogurt into dry ingredient mixture. Add buttermilk mixture gradually until dough is firm–not liquidy.
Place half the dough in center of greased pan and roll outwards until very thin and even (approx 1/8″ thickness). Be sure to tuck edges back to be equal thickness as center.
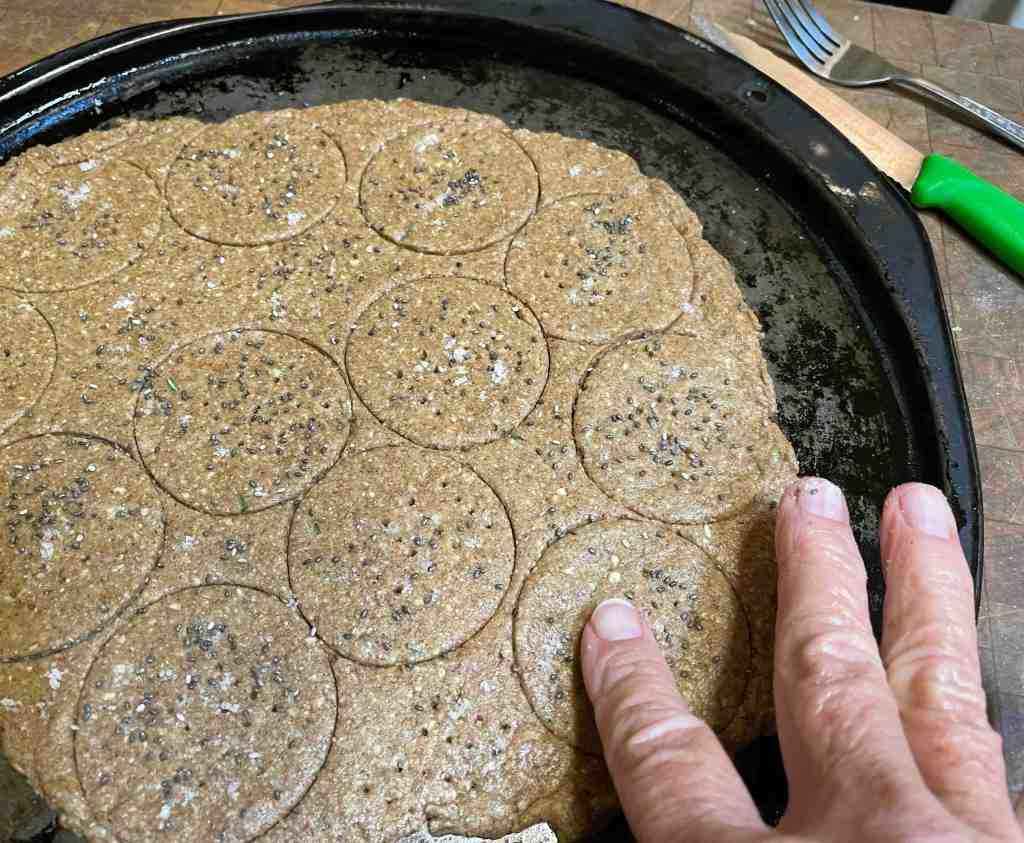
Sprinkle top of thinned dough with your desired topping. Here I’ve used rosemary bits, crystals of sea salt, and a sprinkle of chia. Pat the “topping” into the dough with your fingers so it will stick when baked. For this batch I used a cookie cutter through the rolled dough to make round crackers.
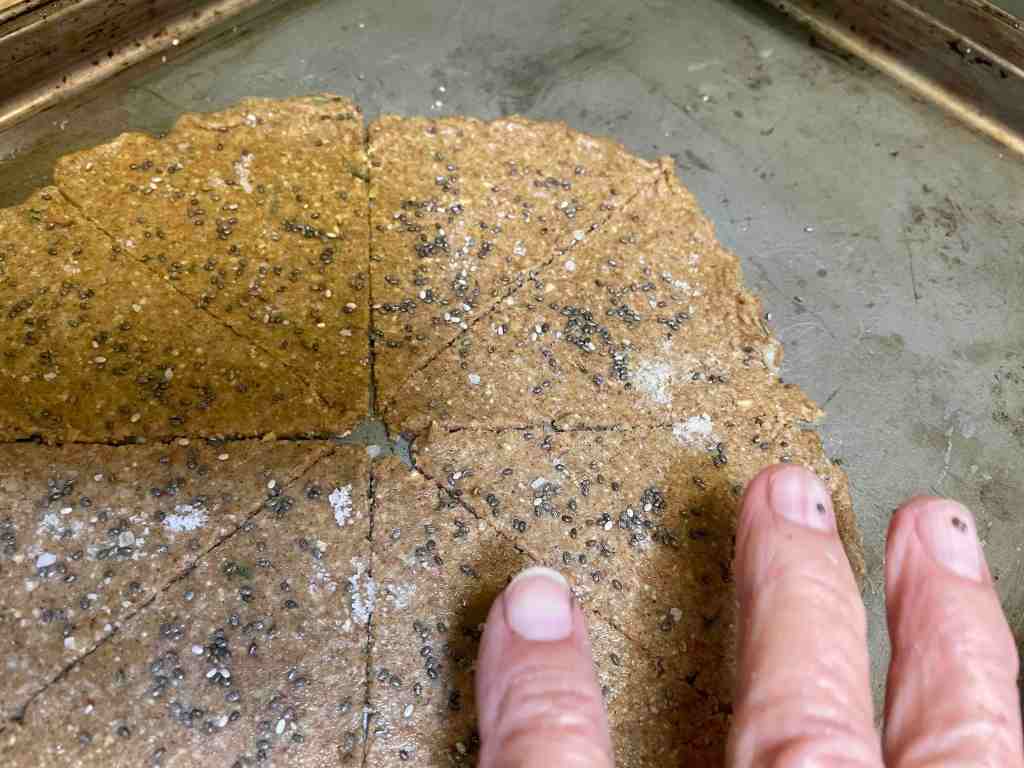
With the other half of the dough I used a greased rectangular pan which confined the rolling pin action to only two directions. Here I formed the dough into a thin circle to make “pie” wedge crackers.
Bake 8-10 minutes and check to see that the crackers have crisped. With metal spatula lift them from pan immediately to cool.
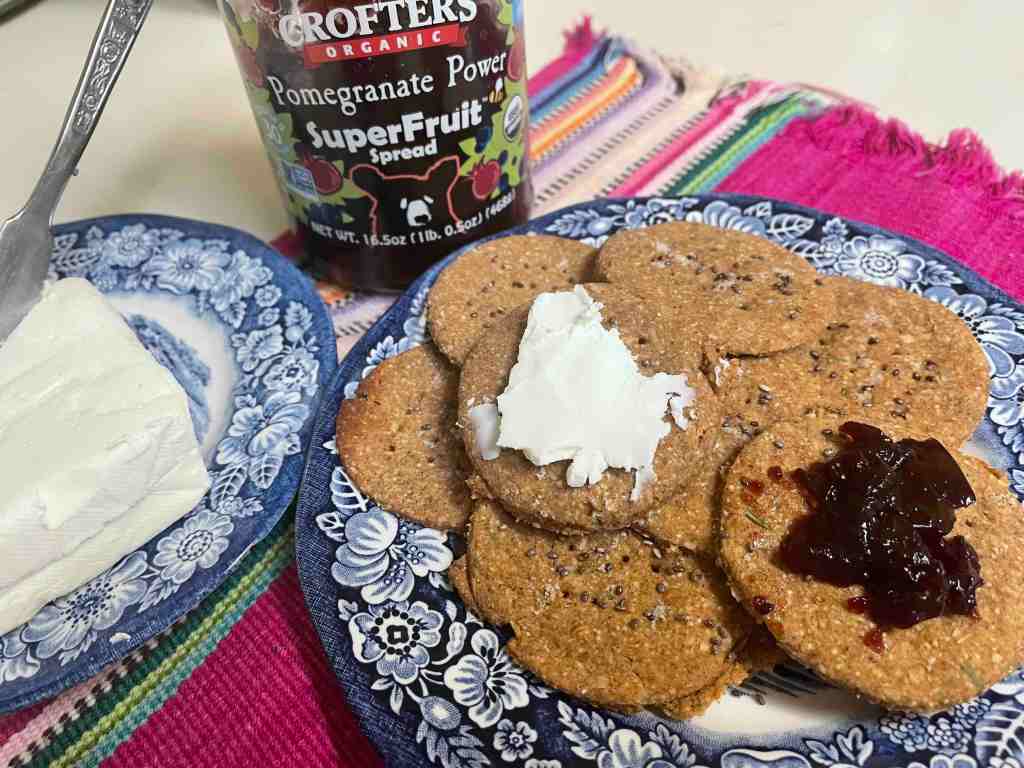
These Rosemary-Mesquite-PimaClub Wheat crackers are savory and pair well with cream cheese and jam, or as a foundation for colorful holiday canapes.
Lots of work goes into making crackers! But if our wonderful local desert grains aren’t available as crackers commercially, this is the only way to go. I challenge you to give them a try–to experiment with your own local grain combos!
Crackers are best made in greater quantity–not piecemeal. I’ve had this vision of an Indigenous-owned and -operated enterprise, with ingredients sourced sustainably from the desert, someday filling this “cracker niche,” making good revenues and providing us all with nutritious, appropriate Southwest-flavored crackers….
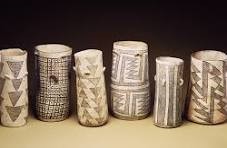
Chocolate drinking vessels found in Pueblo Bonito.
It may seem a stretch to discuss chocolate in a blog on Southwest food. But chocolate has been in the area since the 9th century. It’s Carolyn writing today and as a chocolate addict, I find the history of chocolate in our area fascinating. In the late 1800s, rancher Richard Wetherill was poking around in Pueblo Bonito in Chaco Canyon in the Four Corners area and excavated 111 cylinder jars. Archaeological technology has advanced greatly since then and researchers have dated the strata in which they were discovered to 1000 CE. Even more interesting, substances inside the jars and in pieces of broken jars indicate that the jars contained chocolate. Since the jars were all found in one room, scientists speculate that the chocolate was being used ritually. Archaeologist Dorothy Washburn also found residue that appears to be from chocolate in bowls from the site of Alkali Ridge, Utah, that date to 780 CE, even earlier.
Consider that the closest place chocolate was grown was 1,200 miles south in Mexico. This was before draft animals were used, so a trader or a series of traders carried chocolate all that way on their back, along with macaw feathers and copper bells. With all that travelling, chocolate must have required quite a bit of turquoise and other goods in exchange.
The Spanish Bring Chocolate to the Southwest
When the Spanish missionaries and soldiers came north to what we call the Southwest, they brought chocolate, one of their very few luxuries. Chocolate, being a New World crop, was much less expensive than tea, which had to come by a months-long trip across the Pacific Ocean from Asia. Their drink wasn’t the creamy concoction we now savor. Then chocolate was mixed with water and sometimes honey to sweeten it.
Father Phillip Segesser, one of the earliest priests at San Xavier Mission in Tucson, complained in a letter to his Swiss relatives that every non-Native visitor expected to be served chocolate. Father Segesser lived a very humble life, and he found this presumptuous. It is also interesting that provision orders from the day for both soldiers and priests listed both ordinary chocolate and fine chocolate, the later of which cost twice as much. We can guess what Segesser served his visitors.
During the 1781 Yuma uprising near modern day Yuma, Franciscan priest Fray Francisco Garces requested that he be allowed to finish drinking his chocolate before being beaten to death by the Quechans.
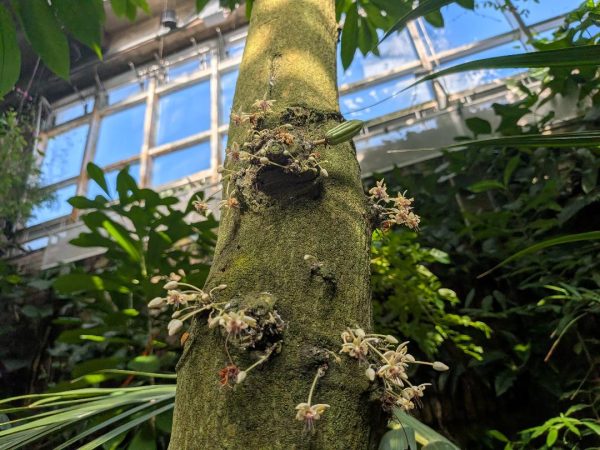
I was happy in two recent trips to learn more about my obsession. In the large green house at the Atlanta Botanical Garden, I saw a cacao tree up close and was amazed to learn that the flowers grow right from the trunk.
Cacao tree in flower in the Atlanta Botanical Garden. See a small green chocolate pod in the upper right.
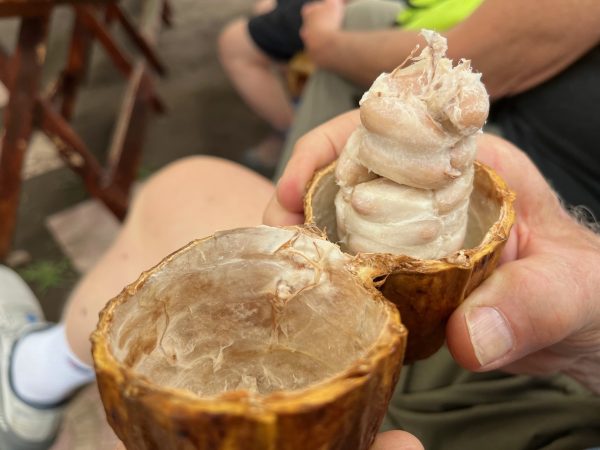
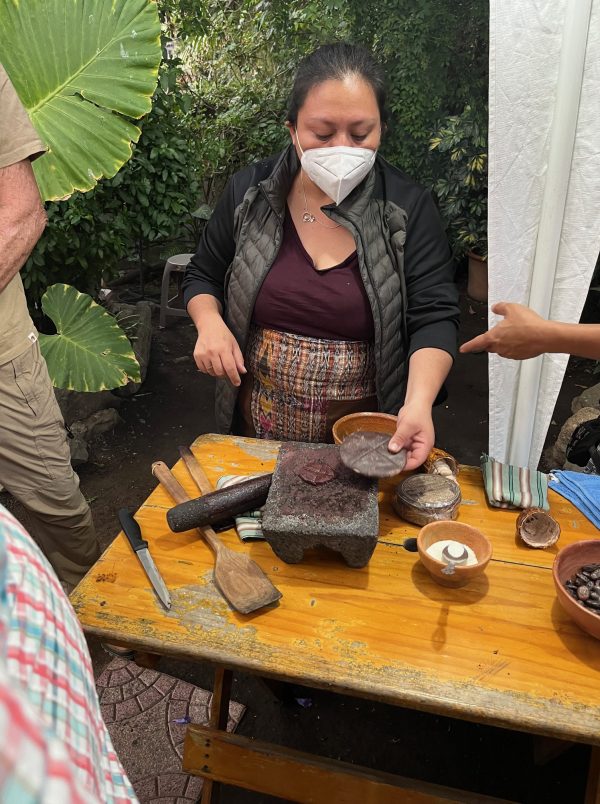
In Guatemala, I visited an artisanal chocolate maker. I got to see all aspects of converting a cacao bean into a chocolate bar, from opening the pod, to cleaning the beans, then roasting them on a comal before grinding them to a paste and adding sugar.
Just opened cacao pod. The seeds are inside the white covering.
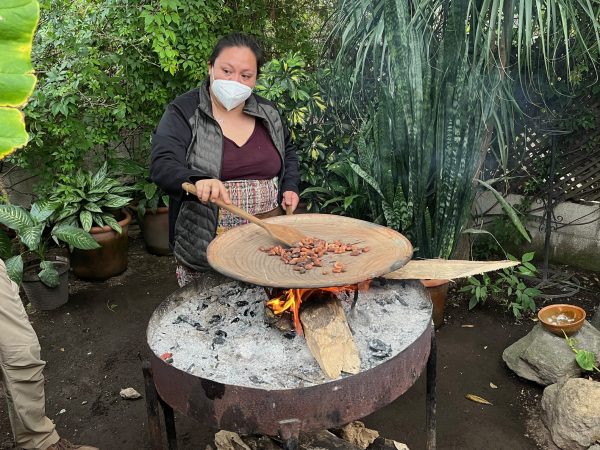
Guatemalan artisan chocolate maker roasts cacao beans over coals.
The roasted beans are ground, combined with sugar, and formed into a patty. They are surprisingly oily. Perhaps patties like this were what the early traders brought to Pueblo Bonito in Chaco Canyon.
Chocolate pairs so well with our mesquite meal–a perfect blend of tropics and desert. These waffles will make a holiday breakfast treat.
Chocolate Mesquite Waffles
½ cup all-purpose flour
½ cup whole wheat flour
½ cup mesquite meal plus 1 tablespoon
3 tablespoons cocoa
1 tablespoon baking powder
½ teaspoon salt
2 egg yolks
1 ¼ cup milk of choice
½ cup oil
2 egg whites beaten stiff
In a large bowl, sift together dry ingredients. In a small bowl, combine egg yolk, milk and oil. Stir the wet mixture into the dry ingredients. Fold in egg white, leaving some fluffs. Do not over mix. Pour batter into hot waffle maker and follow manufacturer’s directions.
Makes about 8 waffles.
Recipe adapted from Eat Mesquite (2011) by Desert Harvesters
You can learn more about the history of food in Southern Arizona in my latest book A Desert Feast, the story of the last 4,000 years of food in the Sonoran Desert. Want more recipes using foods of the Southwest? You’d find ideas for collecting and using 23 easily recognized and gathered desert foods in Cooking the Wild Southwest: Delicious Recipes for Desert Foods. . Recipes from top Southwest chefs are collected in The New Southwest Cookbook. Just click on the titles for more information. You can learn more about me on my website.
It’s Carolyn today and I’m out in my garden to pick some delicious and healthy vegetables to bring you a season-spanning recipe. If your Ficus Indica prickly pear (the Mexican tall kind) sent out its leaves a little late this spring, you probably have a few smaller pads that are still tender enough to cook. Combine those with the purslane in your summer garden for a delicious vegetable side dish or taco filling. If you don’t have your own cactus. you can always pick up some nopal pads at any Mexican grocery store. If you buy the kind already cleaned, you’ll need to use them right away as once they are scraped, they go bad quickly. We have previously discussed how to clean prickly pear pads here.
We’ve also discussed purslane previously in this blog here, but I’ll copy the nutritional information because it is so important:
It’s sad but true that right now people are out in their yards pulling these plants out and tossing them in the garbage (or compost for the more enlightened). They should be tossing them in the wok or frying pan (see recipe below.) Purslane provides six times more vitamin E than spinach and seven times more beta carotene than carrots. It’s also rich in vitamin C, magnesium, riboflavin, potassium and phosphorus. One cup of cooked purslane has 25 milligrams (20 percent of the recommended daily intake) of vitamin C.
Especially important to those of us eating a modern diet, purslane is very high in an essential omega-3 fatty acid called alpha-linolenic acid (ALA). Omega-3s are a class of polyunsaturated essential fatty acids. Your body cannot manufacture essential fatty acids, so you must get them from food. Certain fibers also help in controlling blood sugar.
If your aren’t familiar with purslane or verdolagas, here’s a closeup photo:
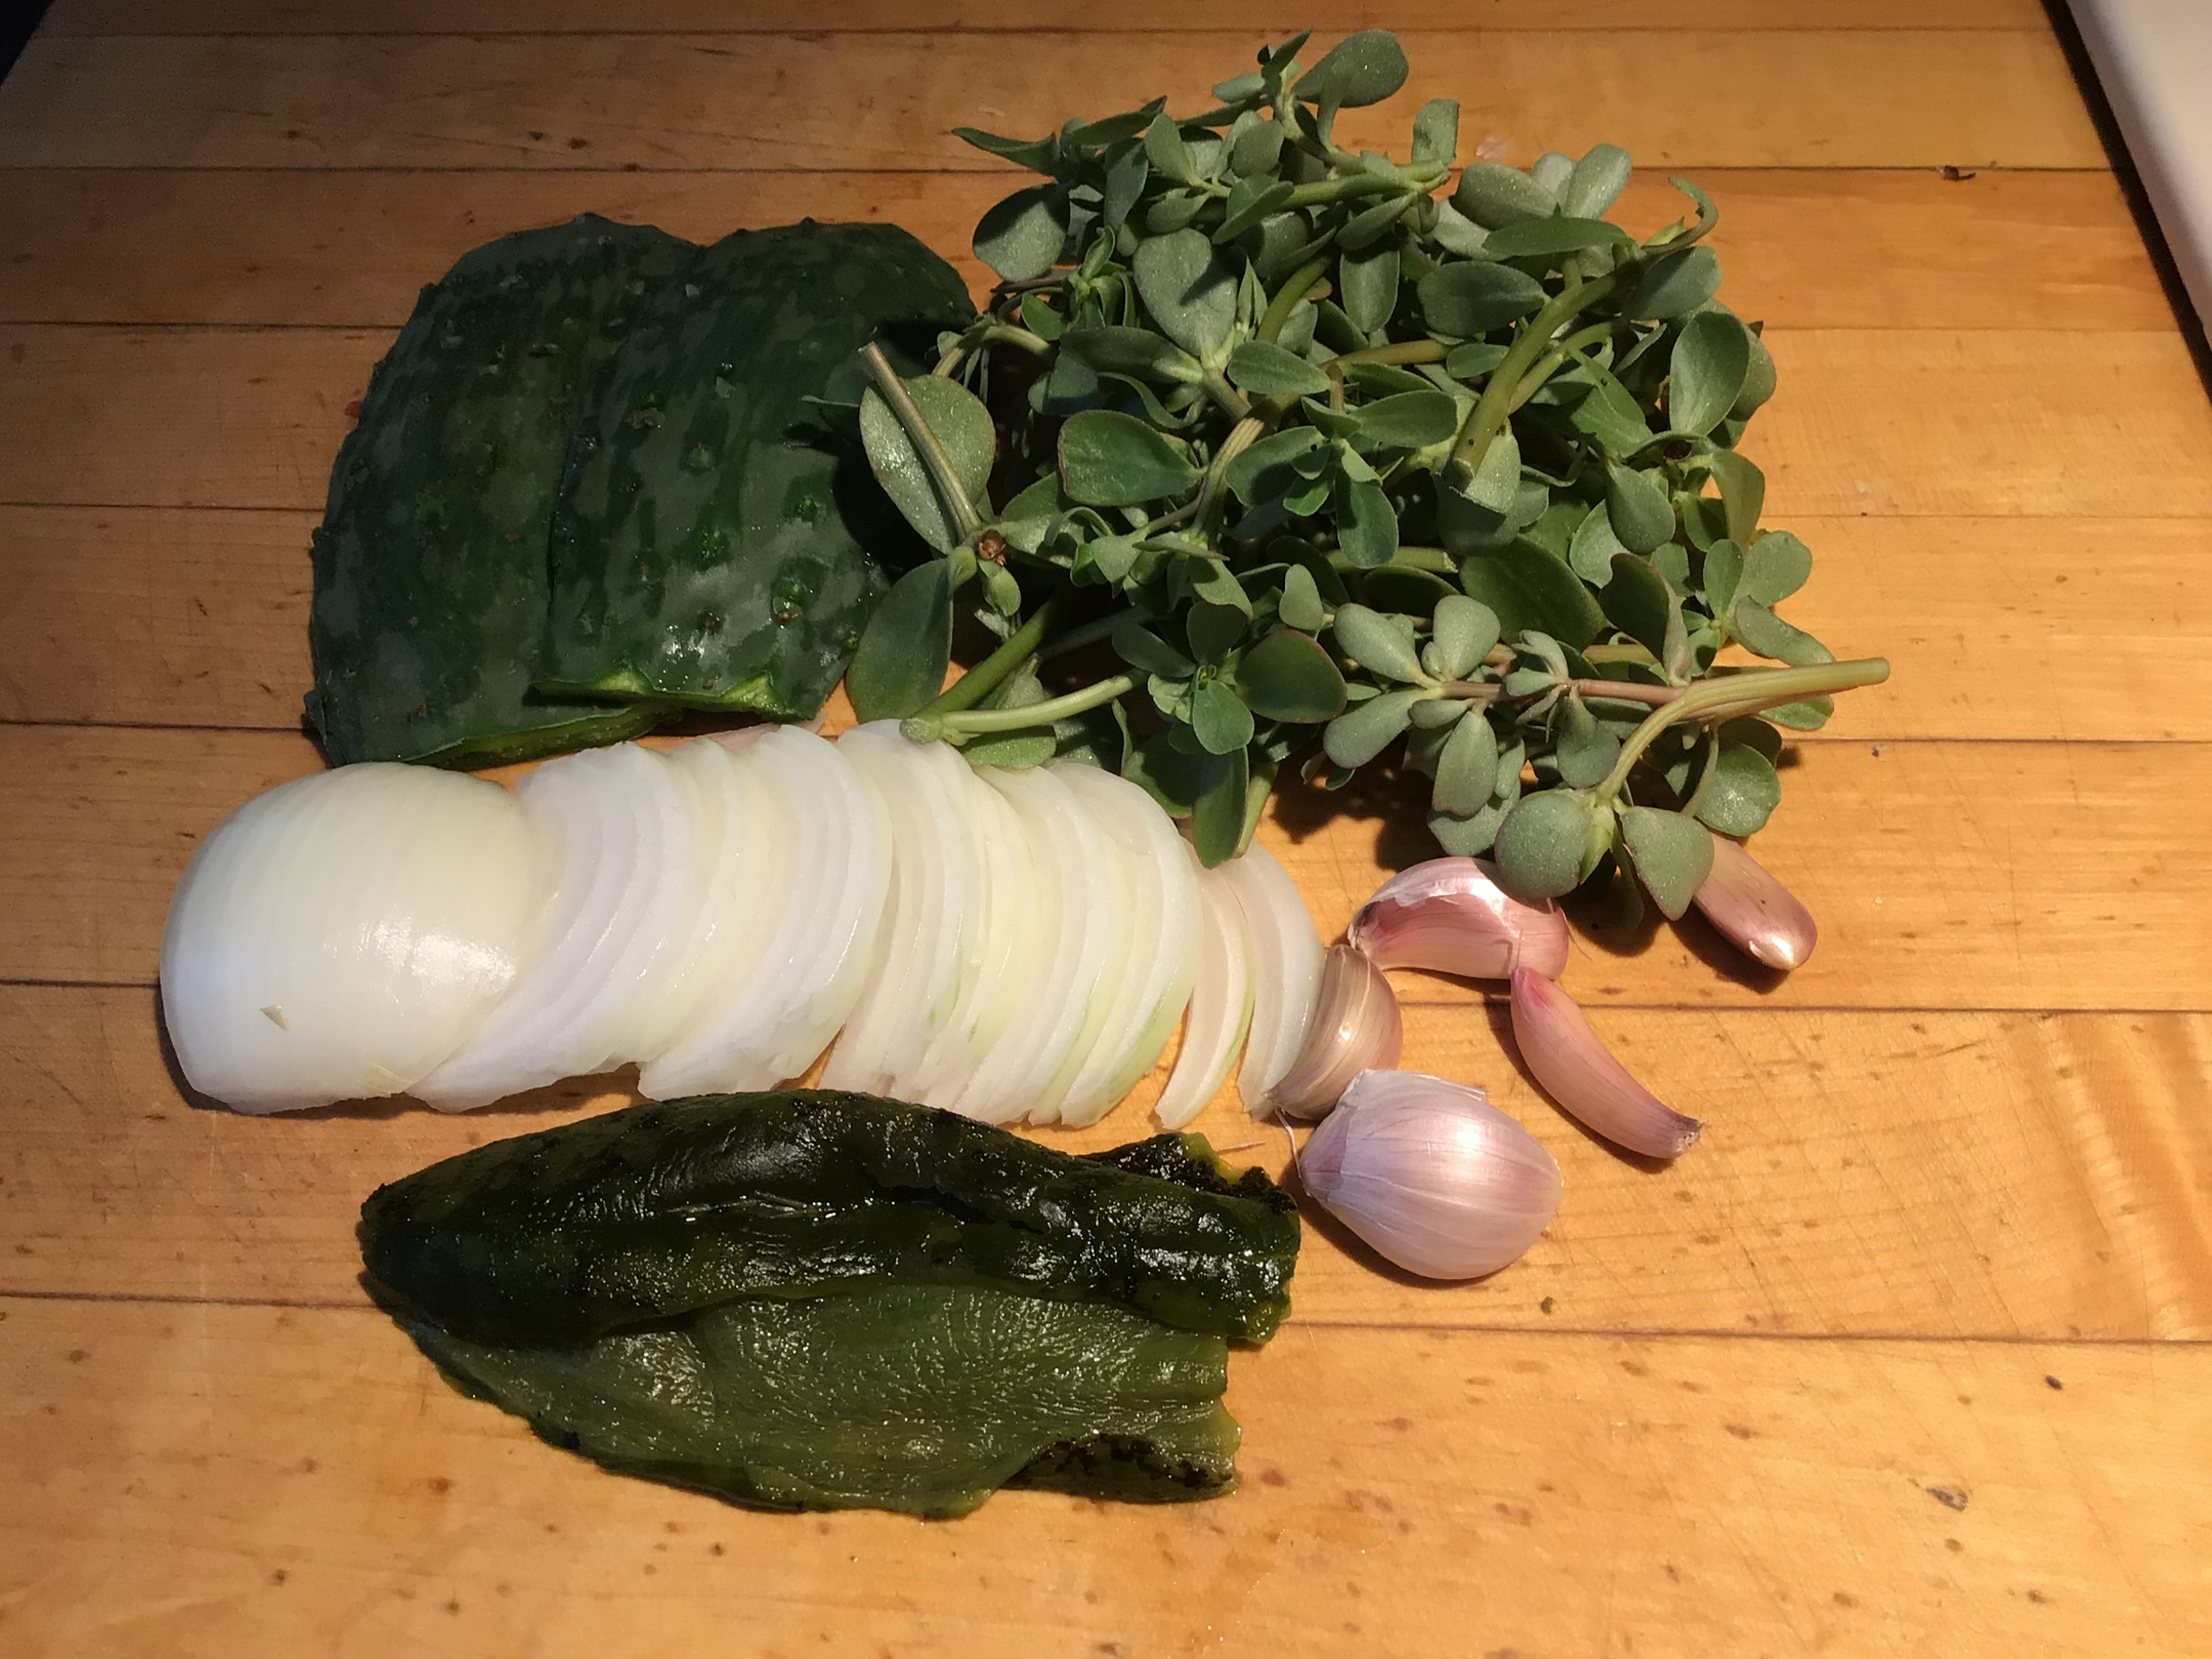
Here are all your ingredients for the tacos: (top) prickly pear leaves and purslane, (bottom) onion slices, garlic and poblano chile.
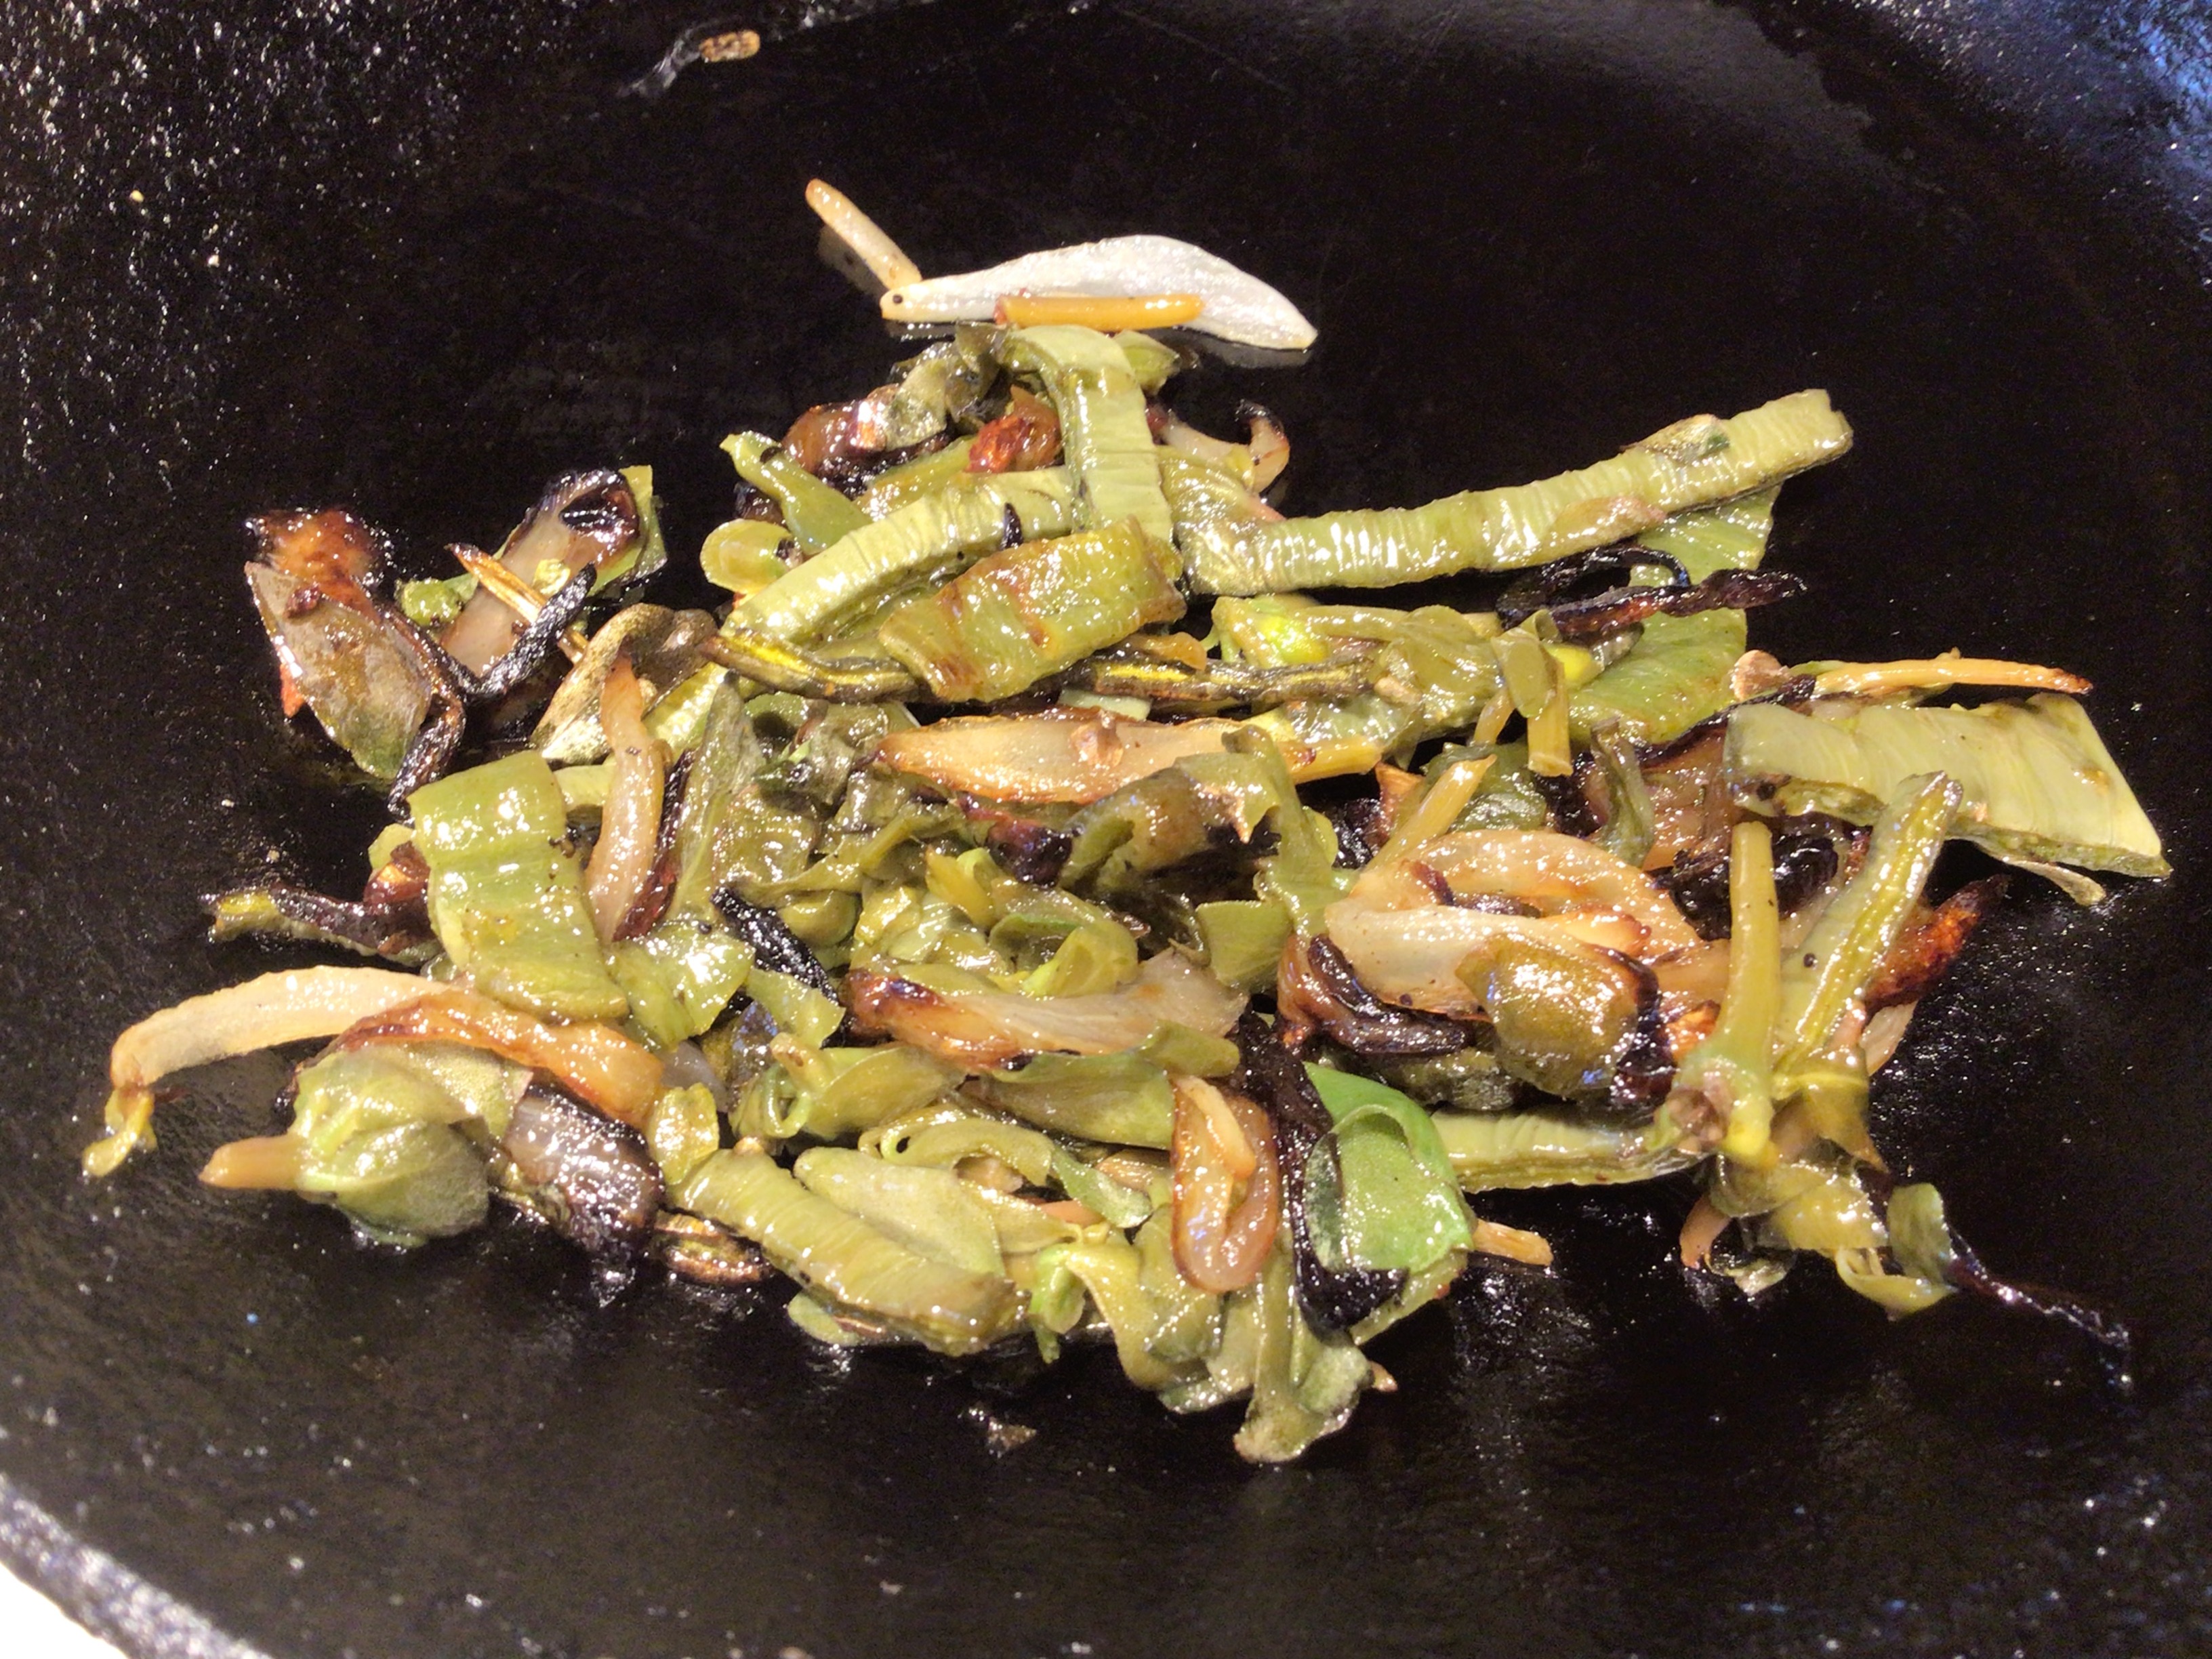
This is what the ingredients will look like cooked.
Sonoran Summer Tacos
2 2×4-inch prickly pear pads or equivalent
½ white or yellow onion
2 cloves garlic, minced (1 teaspoon)
2 tablespoons neutral vegetable oil
1 cup verdolaga (purslane), packed
1 roasted, peeled, cleaned Anaheim or poblano chile, cut into pieces
(or 2 tablespoons chopped canned green chiles)
4 corn tortillas or small flour tortillas
2-4 tablespoons crumbled cotija cheese or cheese of choice
Using rubber gloves, clean the stickers from the prickly pear pads. Rinse and cut into pieces 2 inches by 1/8 inch (roughly the size of a wood matchstick.) Set aside.
Cut the onion into thin strands by cutting from the root to the stem (not crosswise). Add the oil to a heavy frying pan and begin sautéing the onion over low medium heat. You want it to cook slowly until soft and light brown. After about 10 minutes, add the garlic. While that is happening, you can prep the rest of the ingredients.
Cut the fresh chile into pieces about 1 inch by 1/8 inch. Chop the verdolagas (purslane) roughly. After 10-15 minutes when the onions are ready, stir in the greens and chile and continue to cook.
Coat a heavy frying pan with a light spray of oil and soften the tortillas. Divide the vegetables among the tortillas. Sprinkle with cheese and fold over.
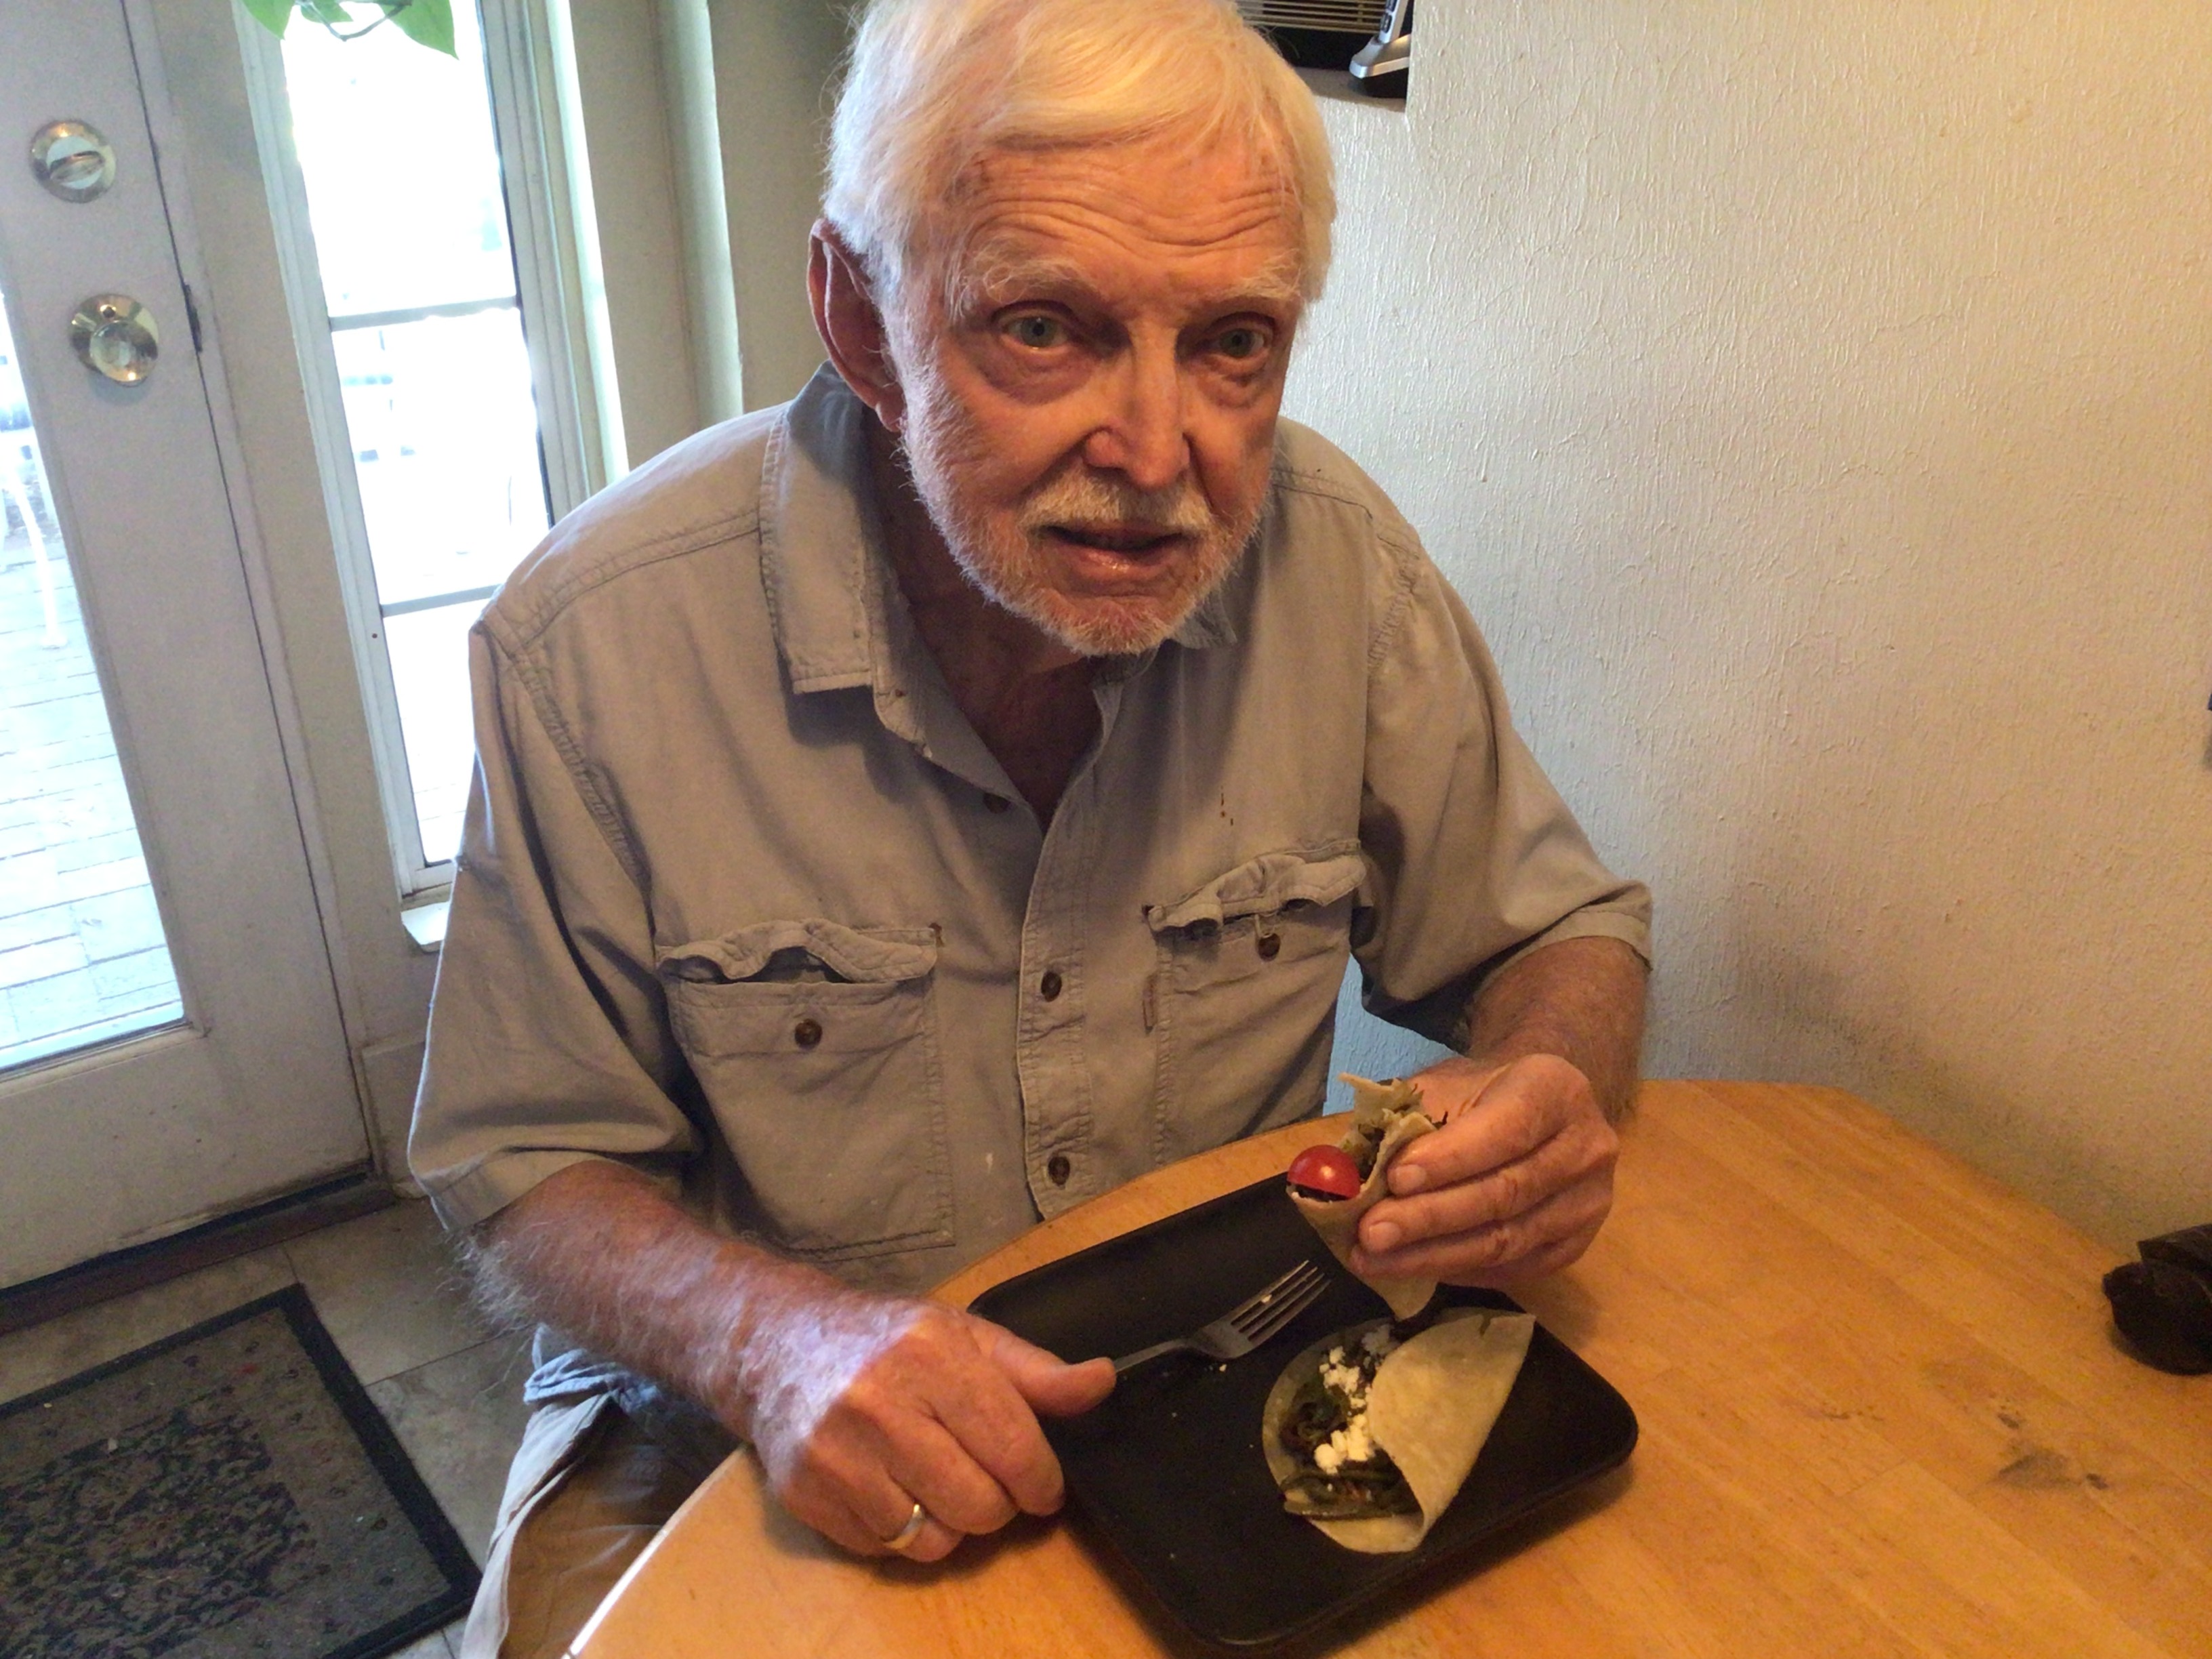
Every recipe writer whether for a blog or cookbook, needs a taste tester. Is it good? Would you eat it again? Here is my taste tester who has eaten his way through five cookbooks and dozens of these blog posts over forty years.
Chief taste tester Ford Burkhart works his way through the Sonoran Summer Tacos for lunch. He gave them the thumbs up.
____________________________________
You can learn more about the history of food in Southern Arizona in my latest book A Desert Feast, the story of the last 4,000 years of food in the Sonoran Desert. Want more recipes using foods of the Southwest? You’d find ideas for collecting and using 23 easily recognized and gathered desert foods in Cooking the Wild Southwest: Delicious Recipes for Desert Foods. . Recipes from top Southwest chefs are collected in The New Southwest Cookbook. Just click on the titles for more information. You can learn more about me on my website.
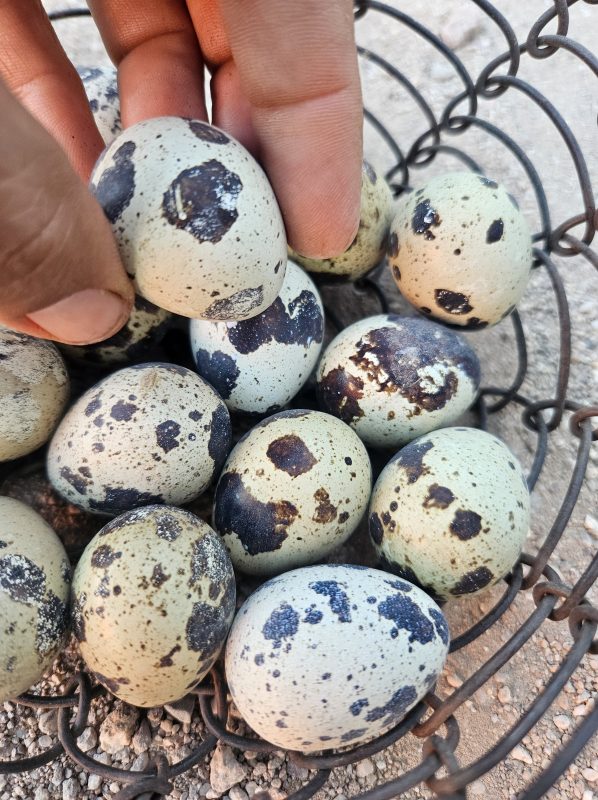
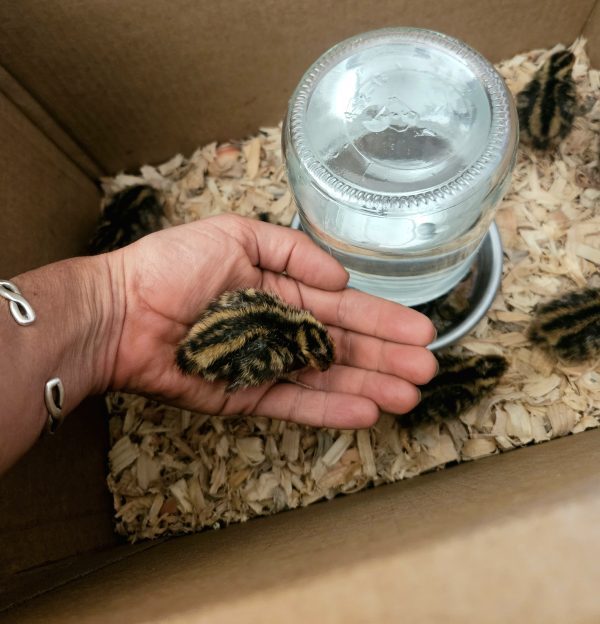
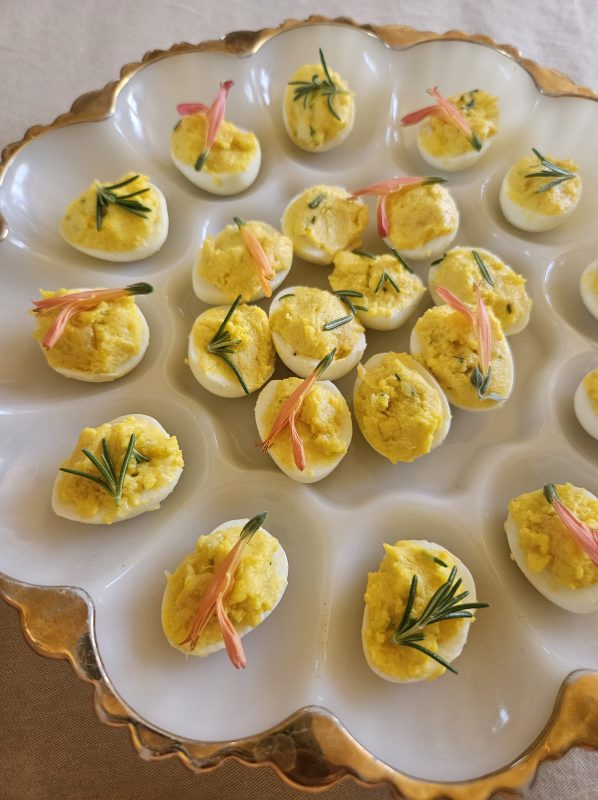
Hi friends, Amy here. Years ago, chickens free ranged my entire backyard and roosted in the trees. However, my current neighborhood has red tailed hawks and striped skunks so I knew any domesticated birds here would need a fortress. Instead of making an enormous chicken enclosure, I opted to try smaller birds that wouldn’t feel so cramped in an aviary. Coturnix quail, Eurasian domesticated birds, are often raised for eggs and meat in tiny cages like rabbit hutches. So in my 100 square foot and six foot tall enclosure, a dozen of them scurry under plants, bathe in the dust and fly as well as they can. Also, since the rooster’s crow is not very loud, they don’t bother sleeping human neighbors. City dwelling roosters!
I started in late winter/early spring with two week old chicks raised locally. When the days grew long enough (almost 14 hours) at 11 weeks old, they stated laying.
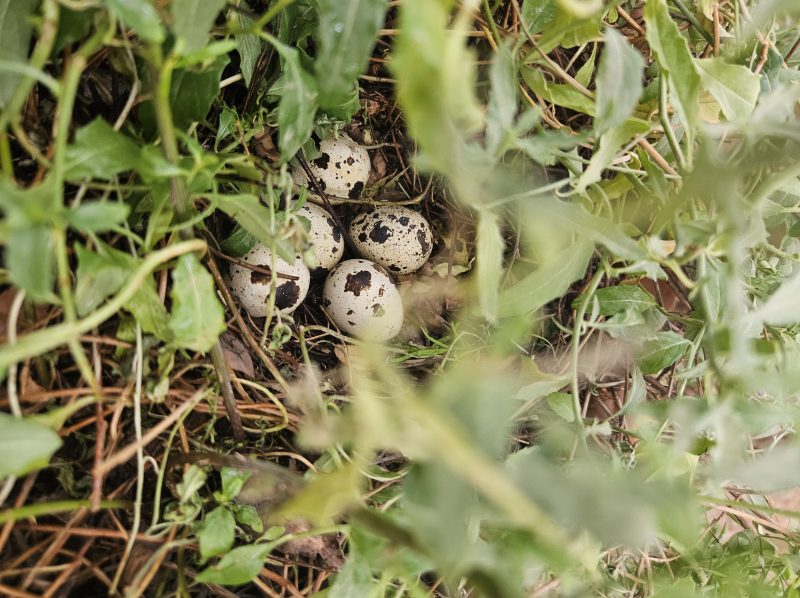
Just like with free range chickens, every day is an egg hunt.
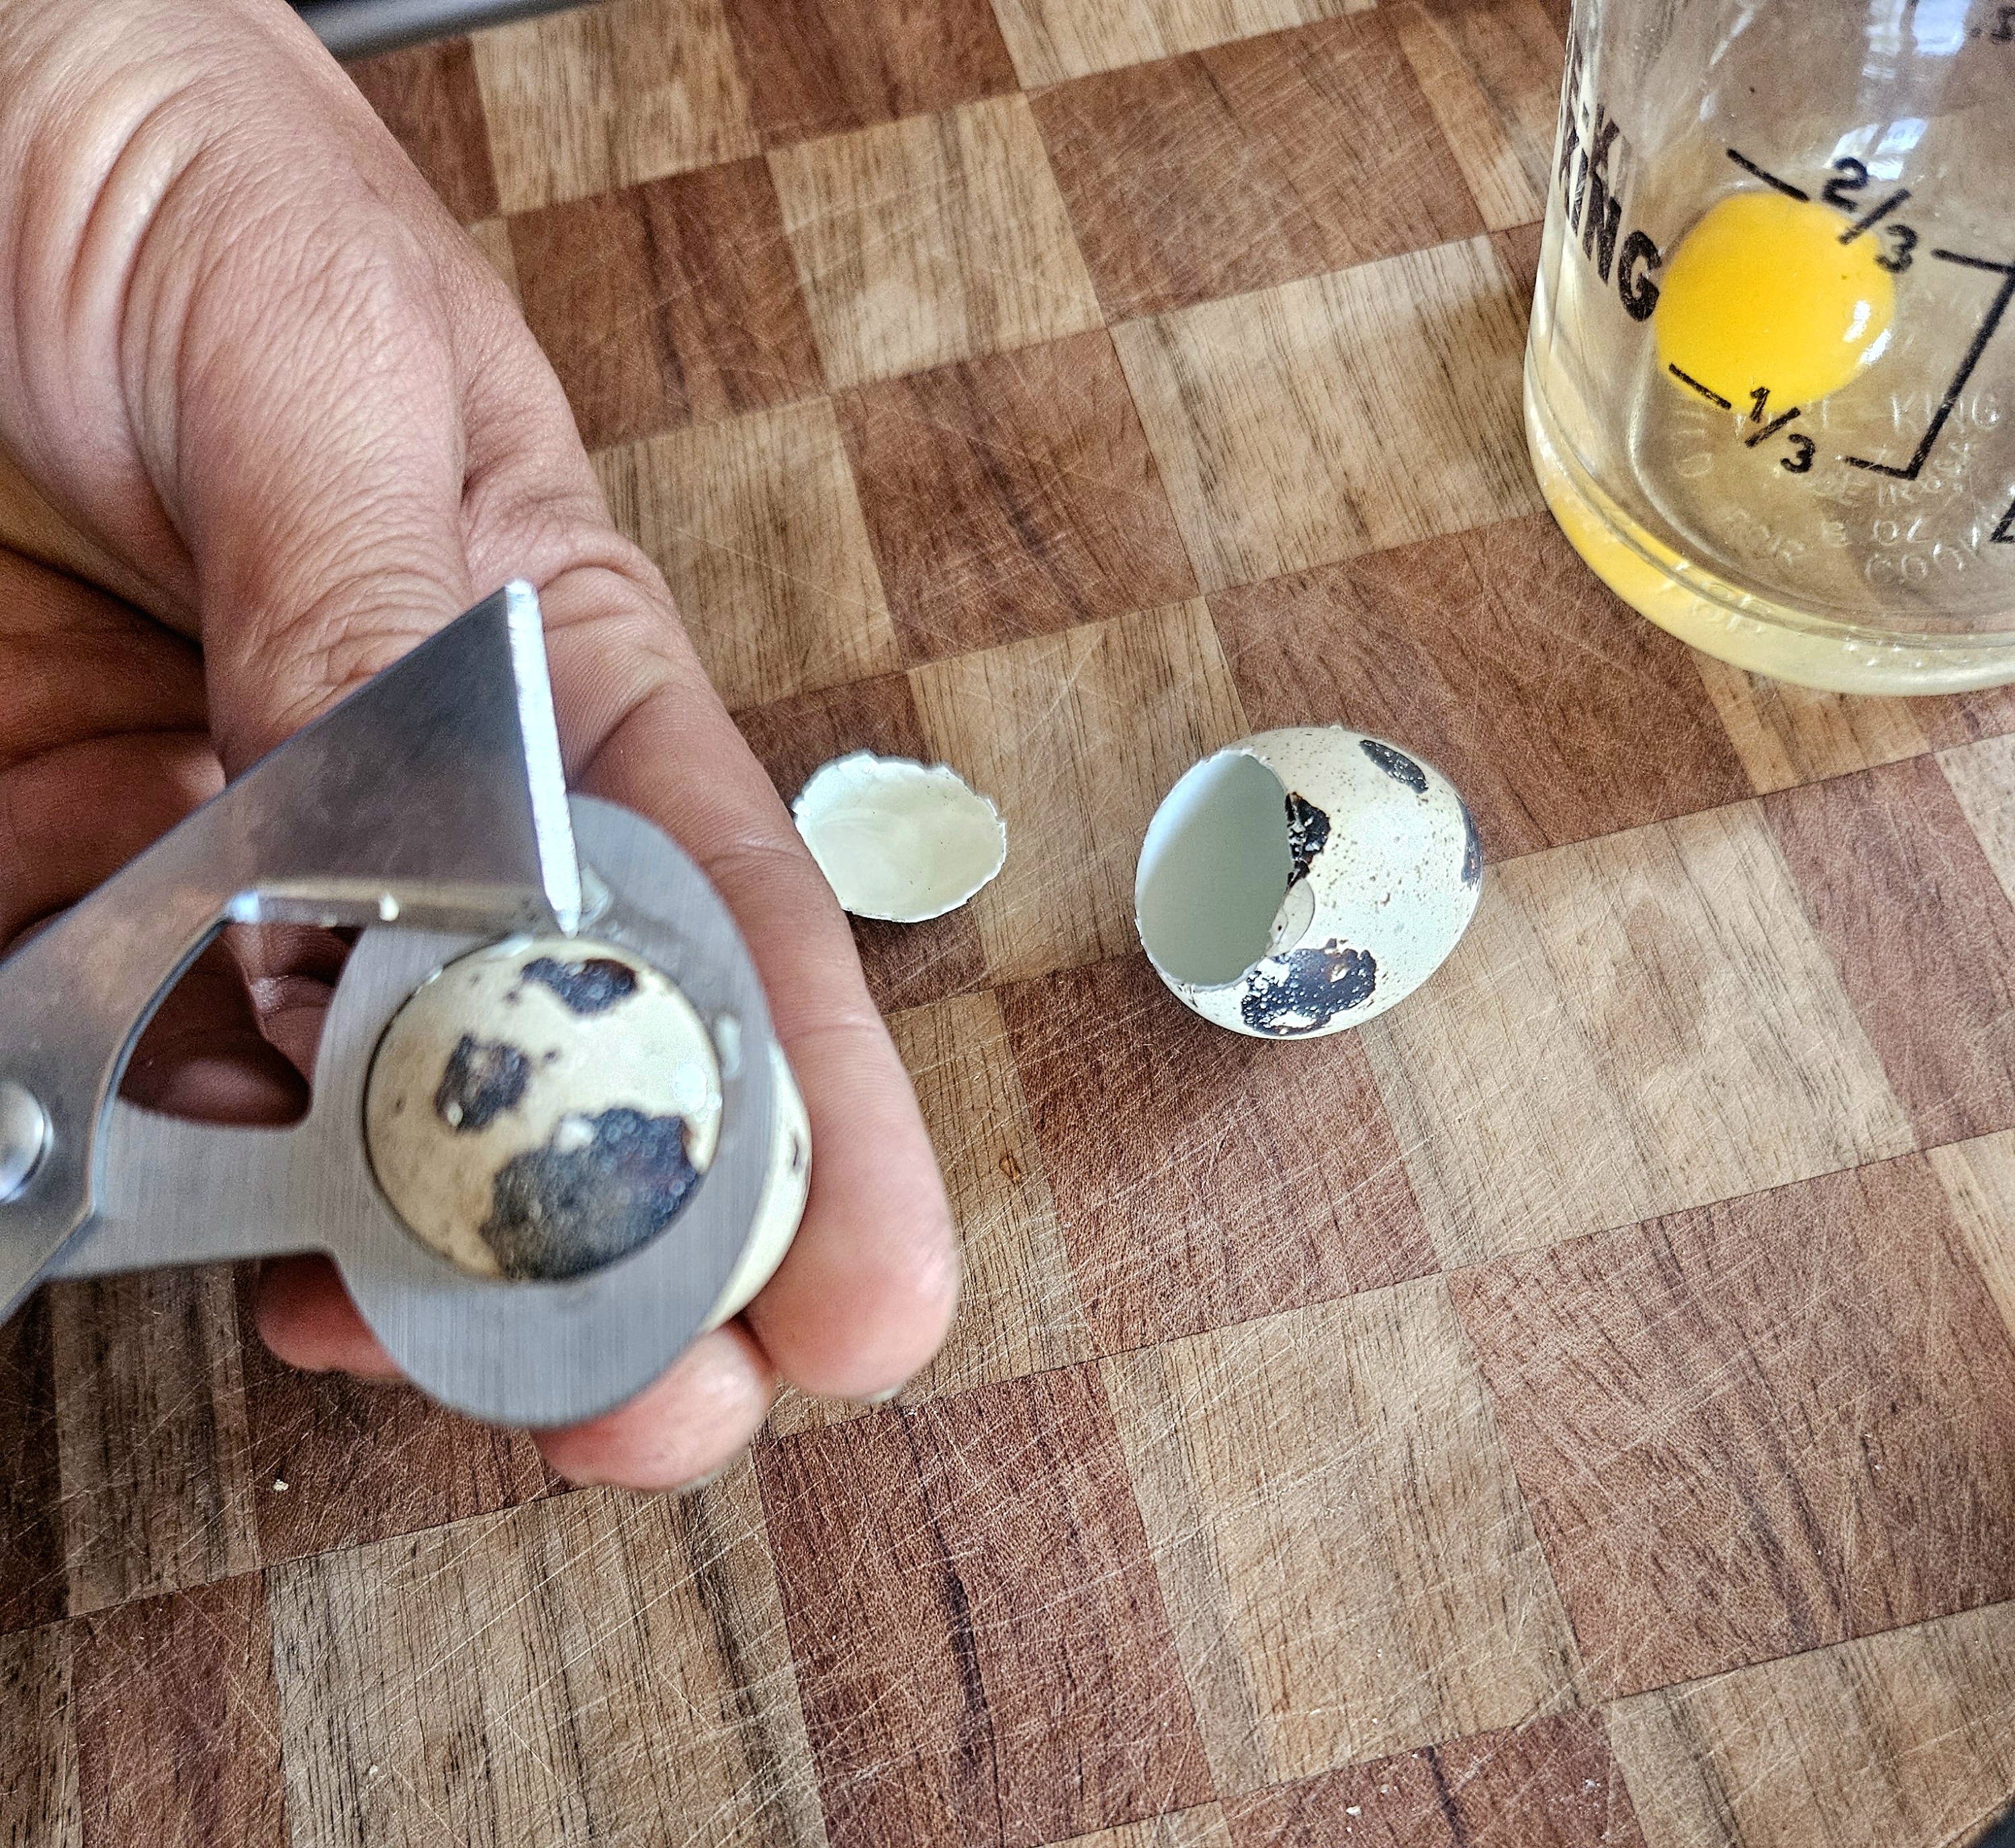
The shells are brittle but the membrane below is very tough. Quail egg scissors help make a clean break and keep frustrating fragments out of the dish.
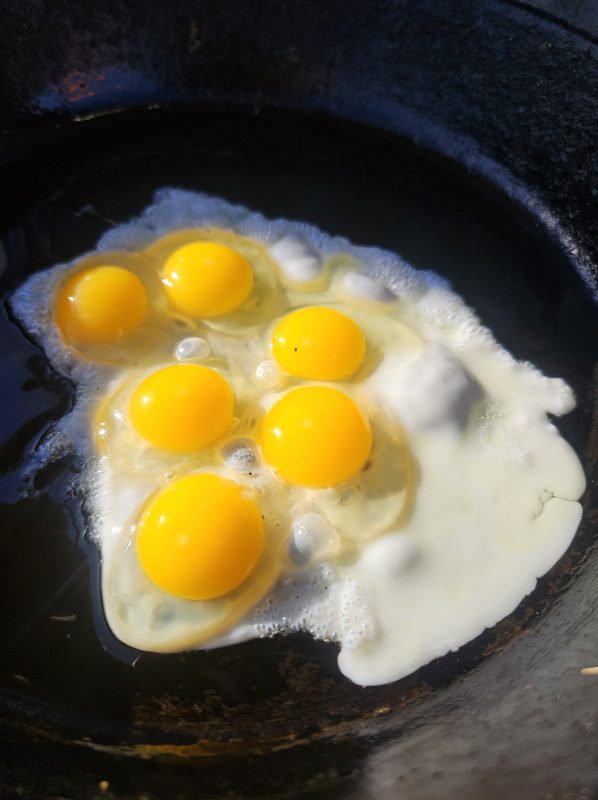
About 4 quail eggs equal a large chicken egg.
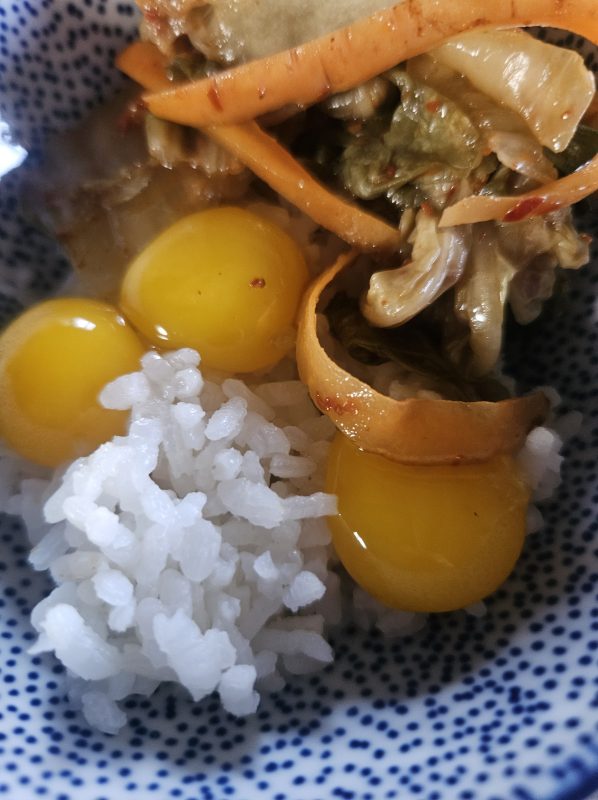
They taste the same but definitely have more yolk to white than a chicken egg. Sometimes I enjoy the raw yolks with homemade kimchi and rice.
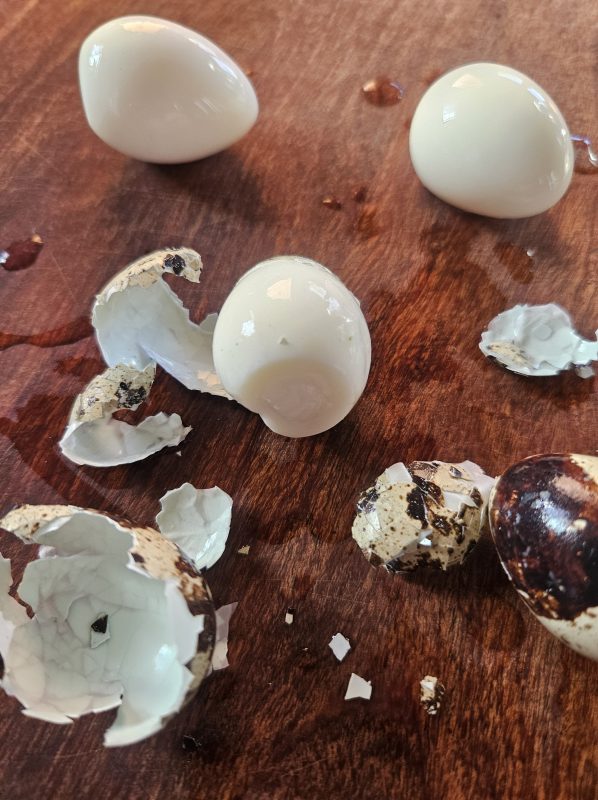
Hard boiling only takes 4 minutes!
That tough membrane under the shell makes them easy to peel.
These deviled eggs are topped with rosemary leaves and chuparosa (Justicia californica) flowers. I don’t bother to make mayonnaise, I just mix the yolks with olive oil, Dijon mustard, and salty preserved lemon.
Raising these birds was a long time coming for me. Here’s hoping some of your dreams come true!
Grilled Chicken with Nopalito and Pineapple Salsa (from The Prickly Pear Cookbook)
(Note: I will be teaching a class on cooking with nopales at the Presidio of Tucson on April 3. You can sign up on their website.)
The new prickly pear pads (nopales) that we cook and use for nopalitos are usually ready in from March to early May. It’s Carolyn here today tempting you with two recipes for a delicious salsas made with nopalitos. (Definition of nopalito: a nopal, or cactus pad, cut into little pieces).
Why bother to learn how to use prickly pear pads? For hundreds of years, both the fruit and pads were considered folk medicine in Mexico and early research showed that the fibers in nopales were helpful in curbing blood sugar. Today, researchers in the US and Europe are using sophisticated laboratory techniques and specially bred mouse models (that would be transgenic mice, not transgender mice) to investigate prickly pear fruits, pads, flowers, and seeds as a cure for a wide array variety of ills.
Investigators are looking into prickly pear compounds as antioxidant, antiviral, anti tumor, anti diabetic, and antiparasite. It may be useful in combating a range of cancers including leukemia, lung, gastric, colon, and ovarian. Studies have considered its use in the treatment of ulcers and alcoholism and a possible role in boosting memory and energy metabolism. Many research labs are investigating prickly pear for cancer prevention.
The many varieties of prickly pear put out their new growth when the spring warms up. All prickly pear pads are edible (meaning they not only won’t kill you but in this case are very nutritious), but they are only appropriate for food when they are new. After about six weeks, they develop a fibrous infrastructure. The easiest kind of pads to prepare are those from the large Mexican variety of prickly pear that do not grow wild north of Mexico. You can grow them in your yard if your winter doesn’t bring much freezing. Or you can get them at a Mexican grocery story. They are called Ficus indica or sometimes Burbank because Luther Burbank did some breeding work on them. The wild cactus pads are also delicious, but harder to prepare because of the abundance of spines.
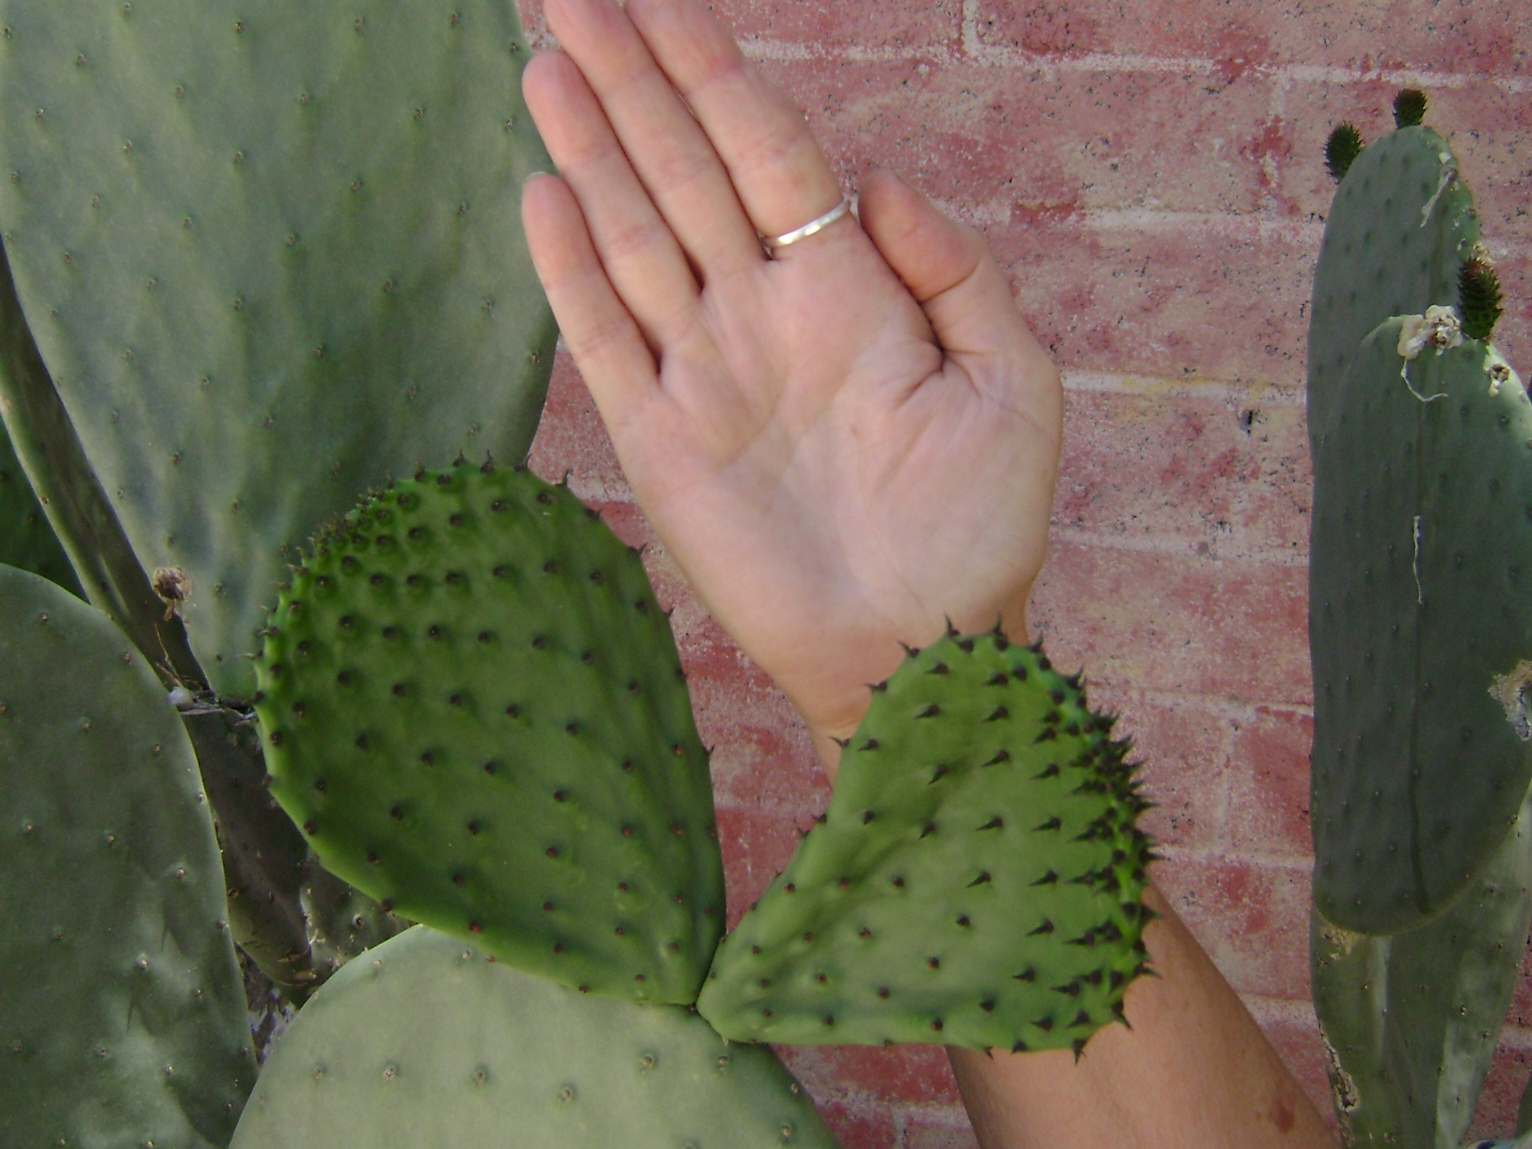
You can do a rough estimate of when a pad is ready to pick if it is about the size of your hand. The nopales available in Mexican grocery stores are grown by farmers who know how to manipulate the plant to keep fresh pads coming year ’round.
Pick nopales in the spring when the size of your hand.
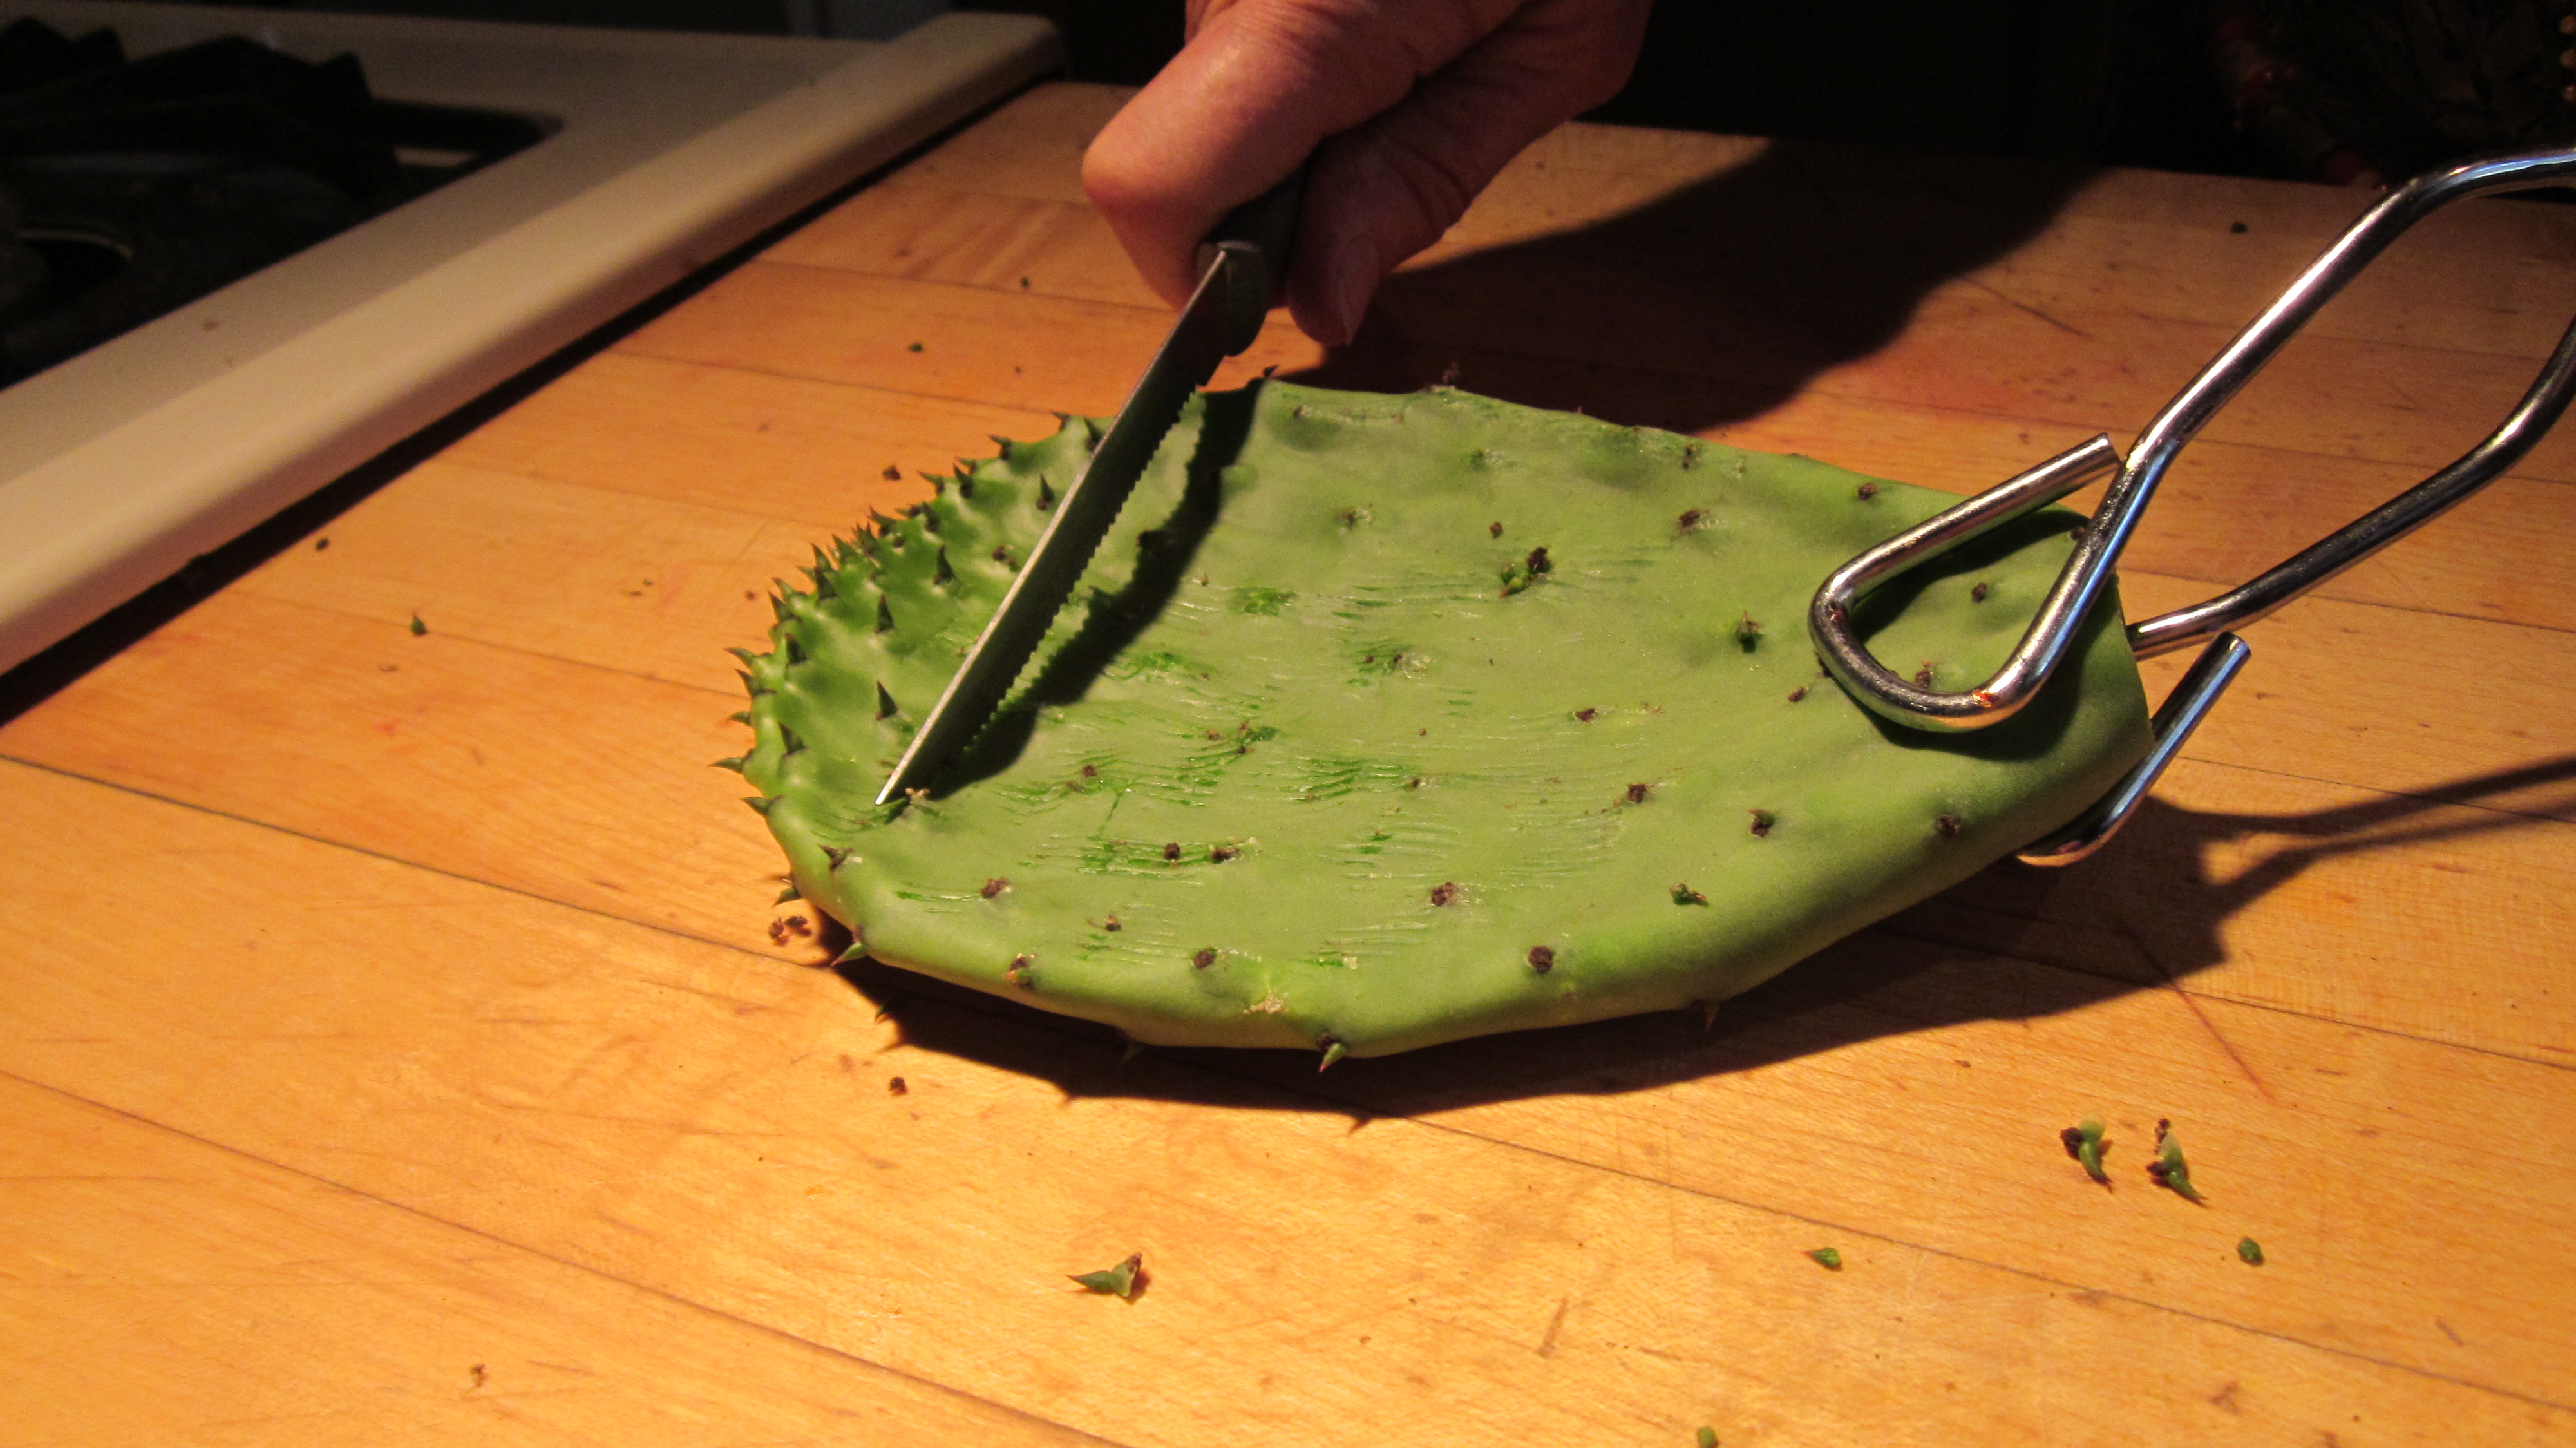
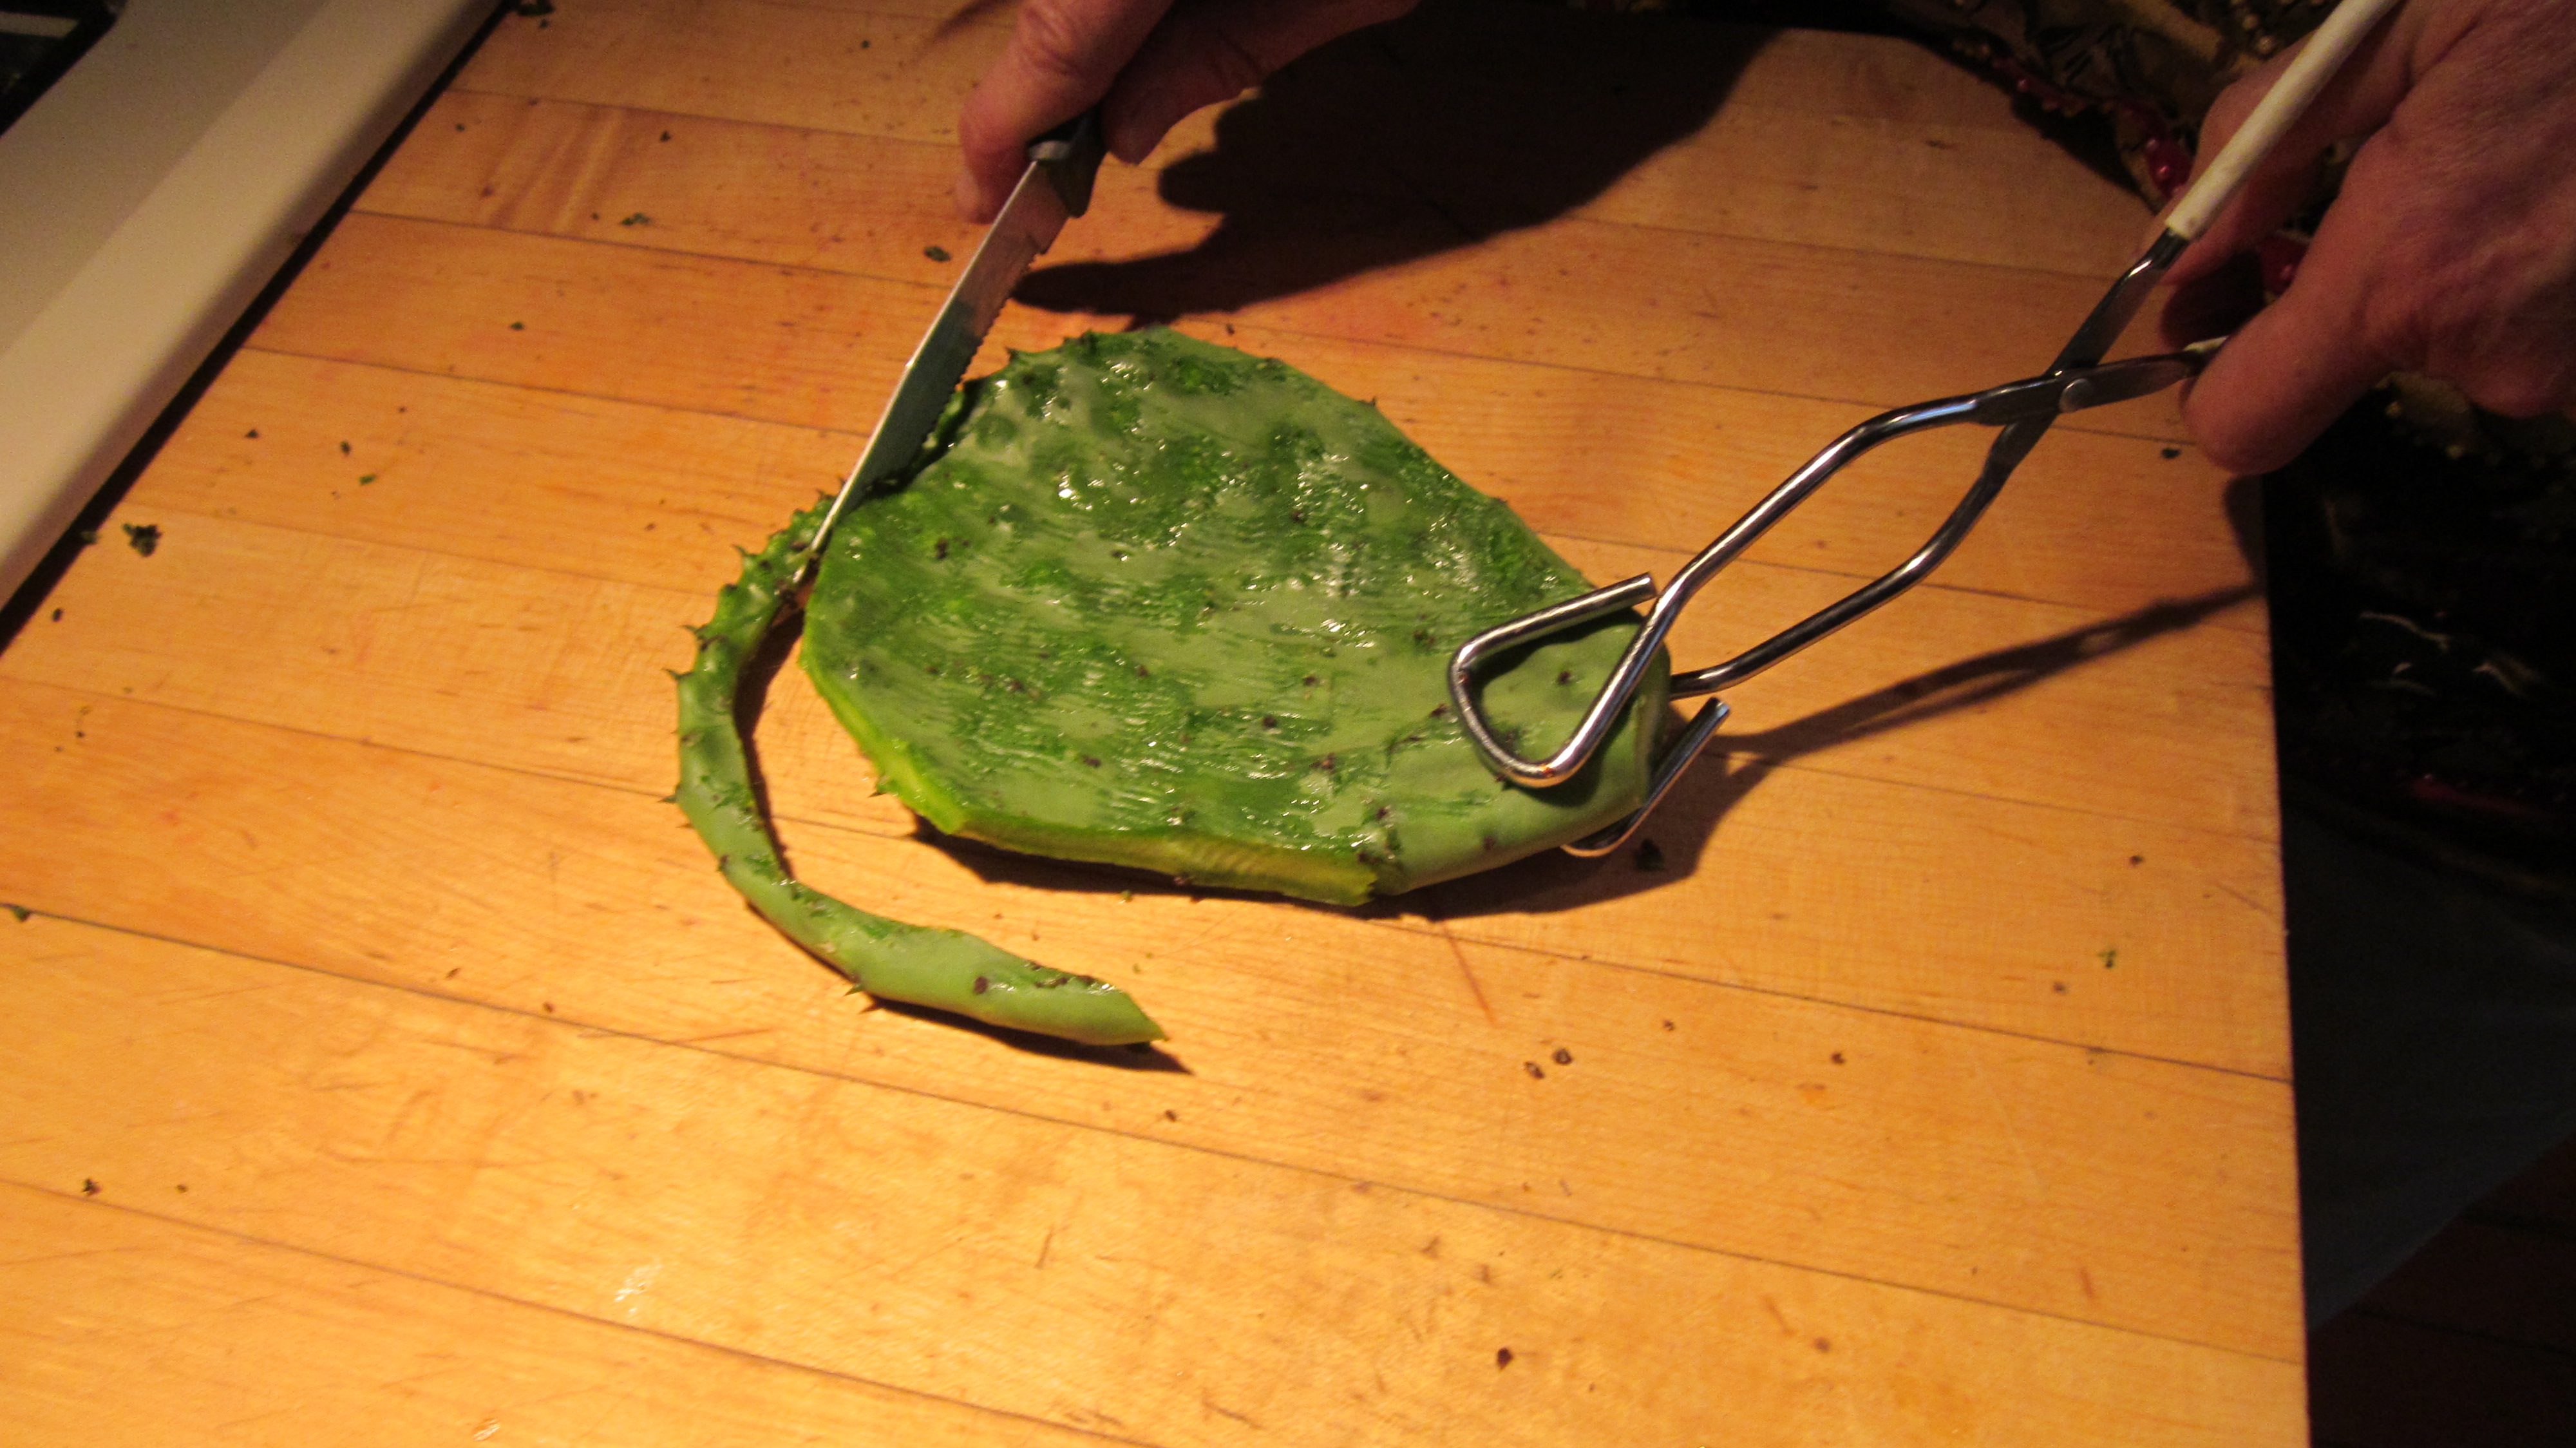
To prepare the nopales, you’ll use tongs, of course, and then don rubber kitchen gloves to protect your hands as you get rid of the stickers. You don’t need industrial strength gloves, just good quality ones from the grocery store will do. Using a common steak knife, scrape vigorously against the growth (from outer edge to stem) to remove the stickers.
Scrape the thorns vigorously in the direction of the stem.
The edge has lots of stickers so just trim it off.
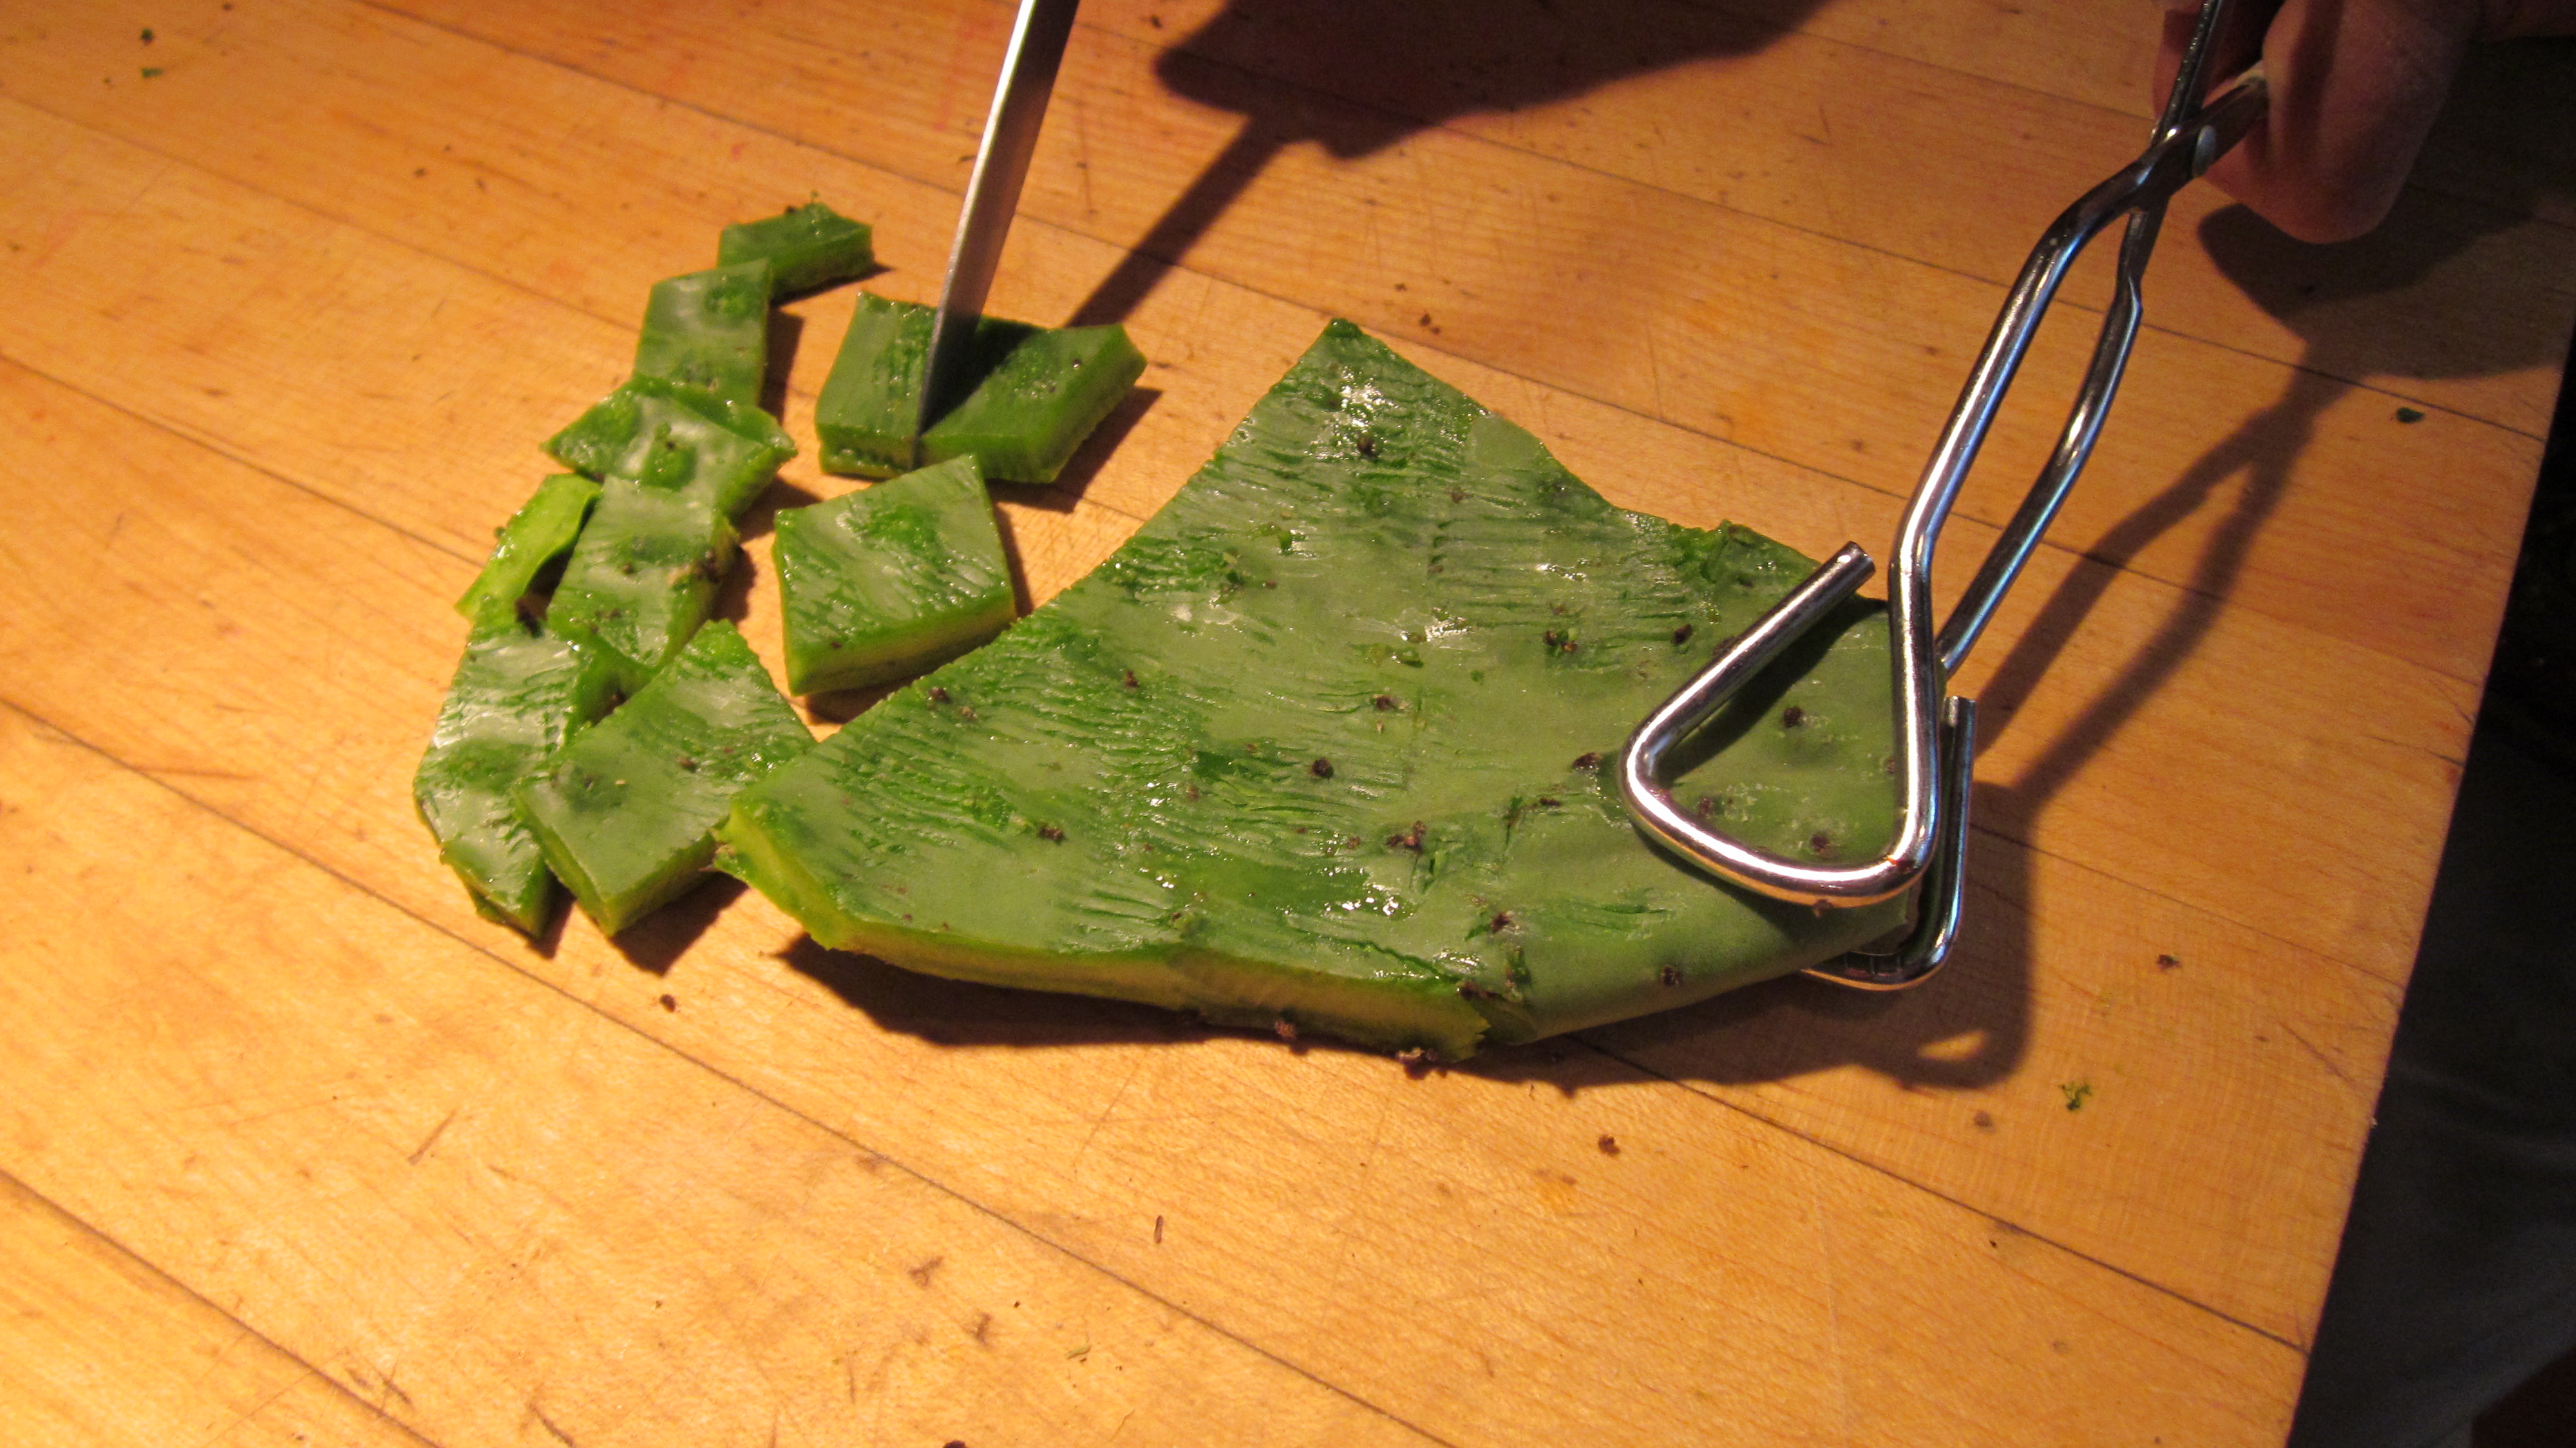
At this point, you can cut it into small pieces to cook or leave it whole and cut it up later. You can cook them in a frying pan filmed with oil, or use the Rick Bayless method (of TV show fame) and toss them with a little oil, sprinkle with sale, put on a cookie sheet and roast in a 375 degree oven for 20 minutes. In any case, you should check them and turn them over as they cook.
Cut into small pieces to cook.
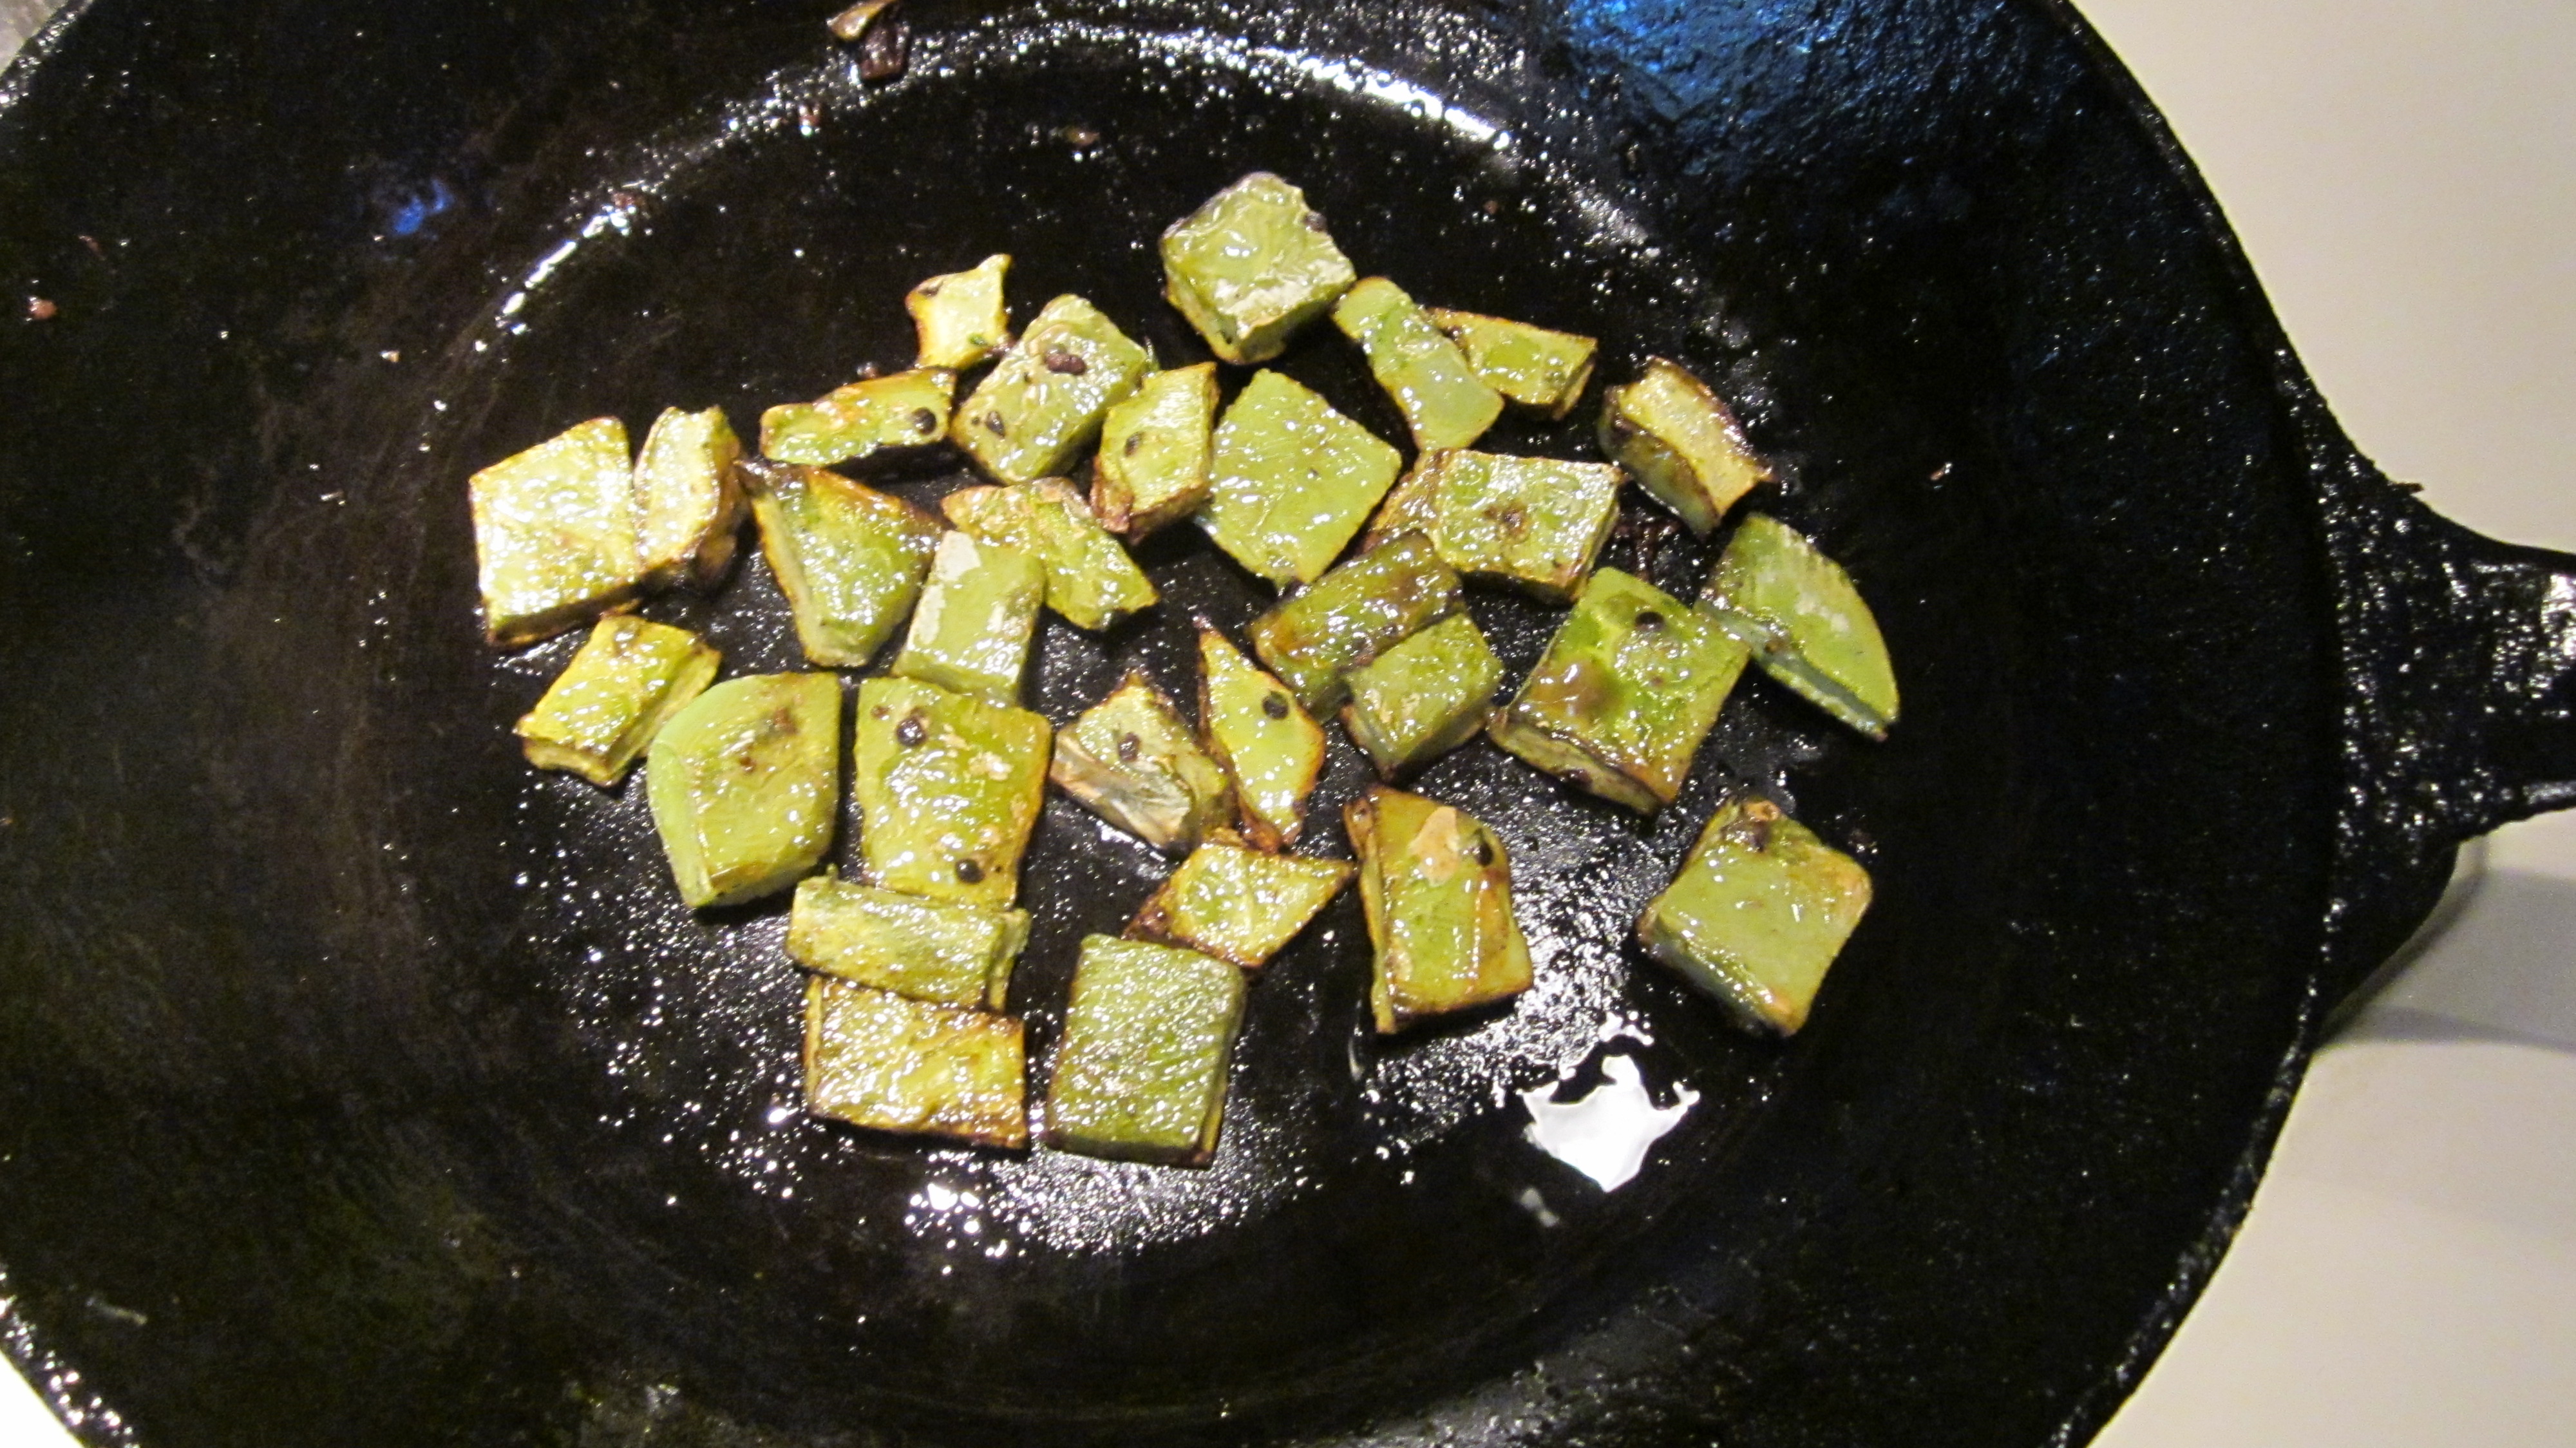
The nopales will turn from bright green to a more olive color as they cook. The gummy sap that some people find objectionable will dry up and become less noticeable.
The cooked nopalitos turn from bright green to olive.
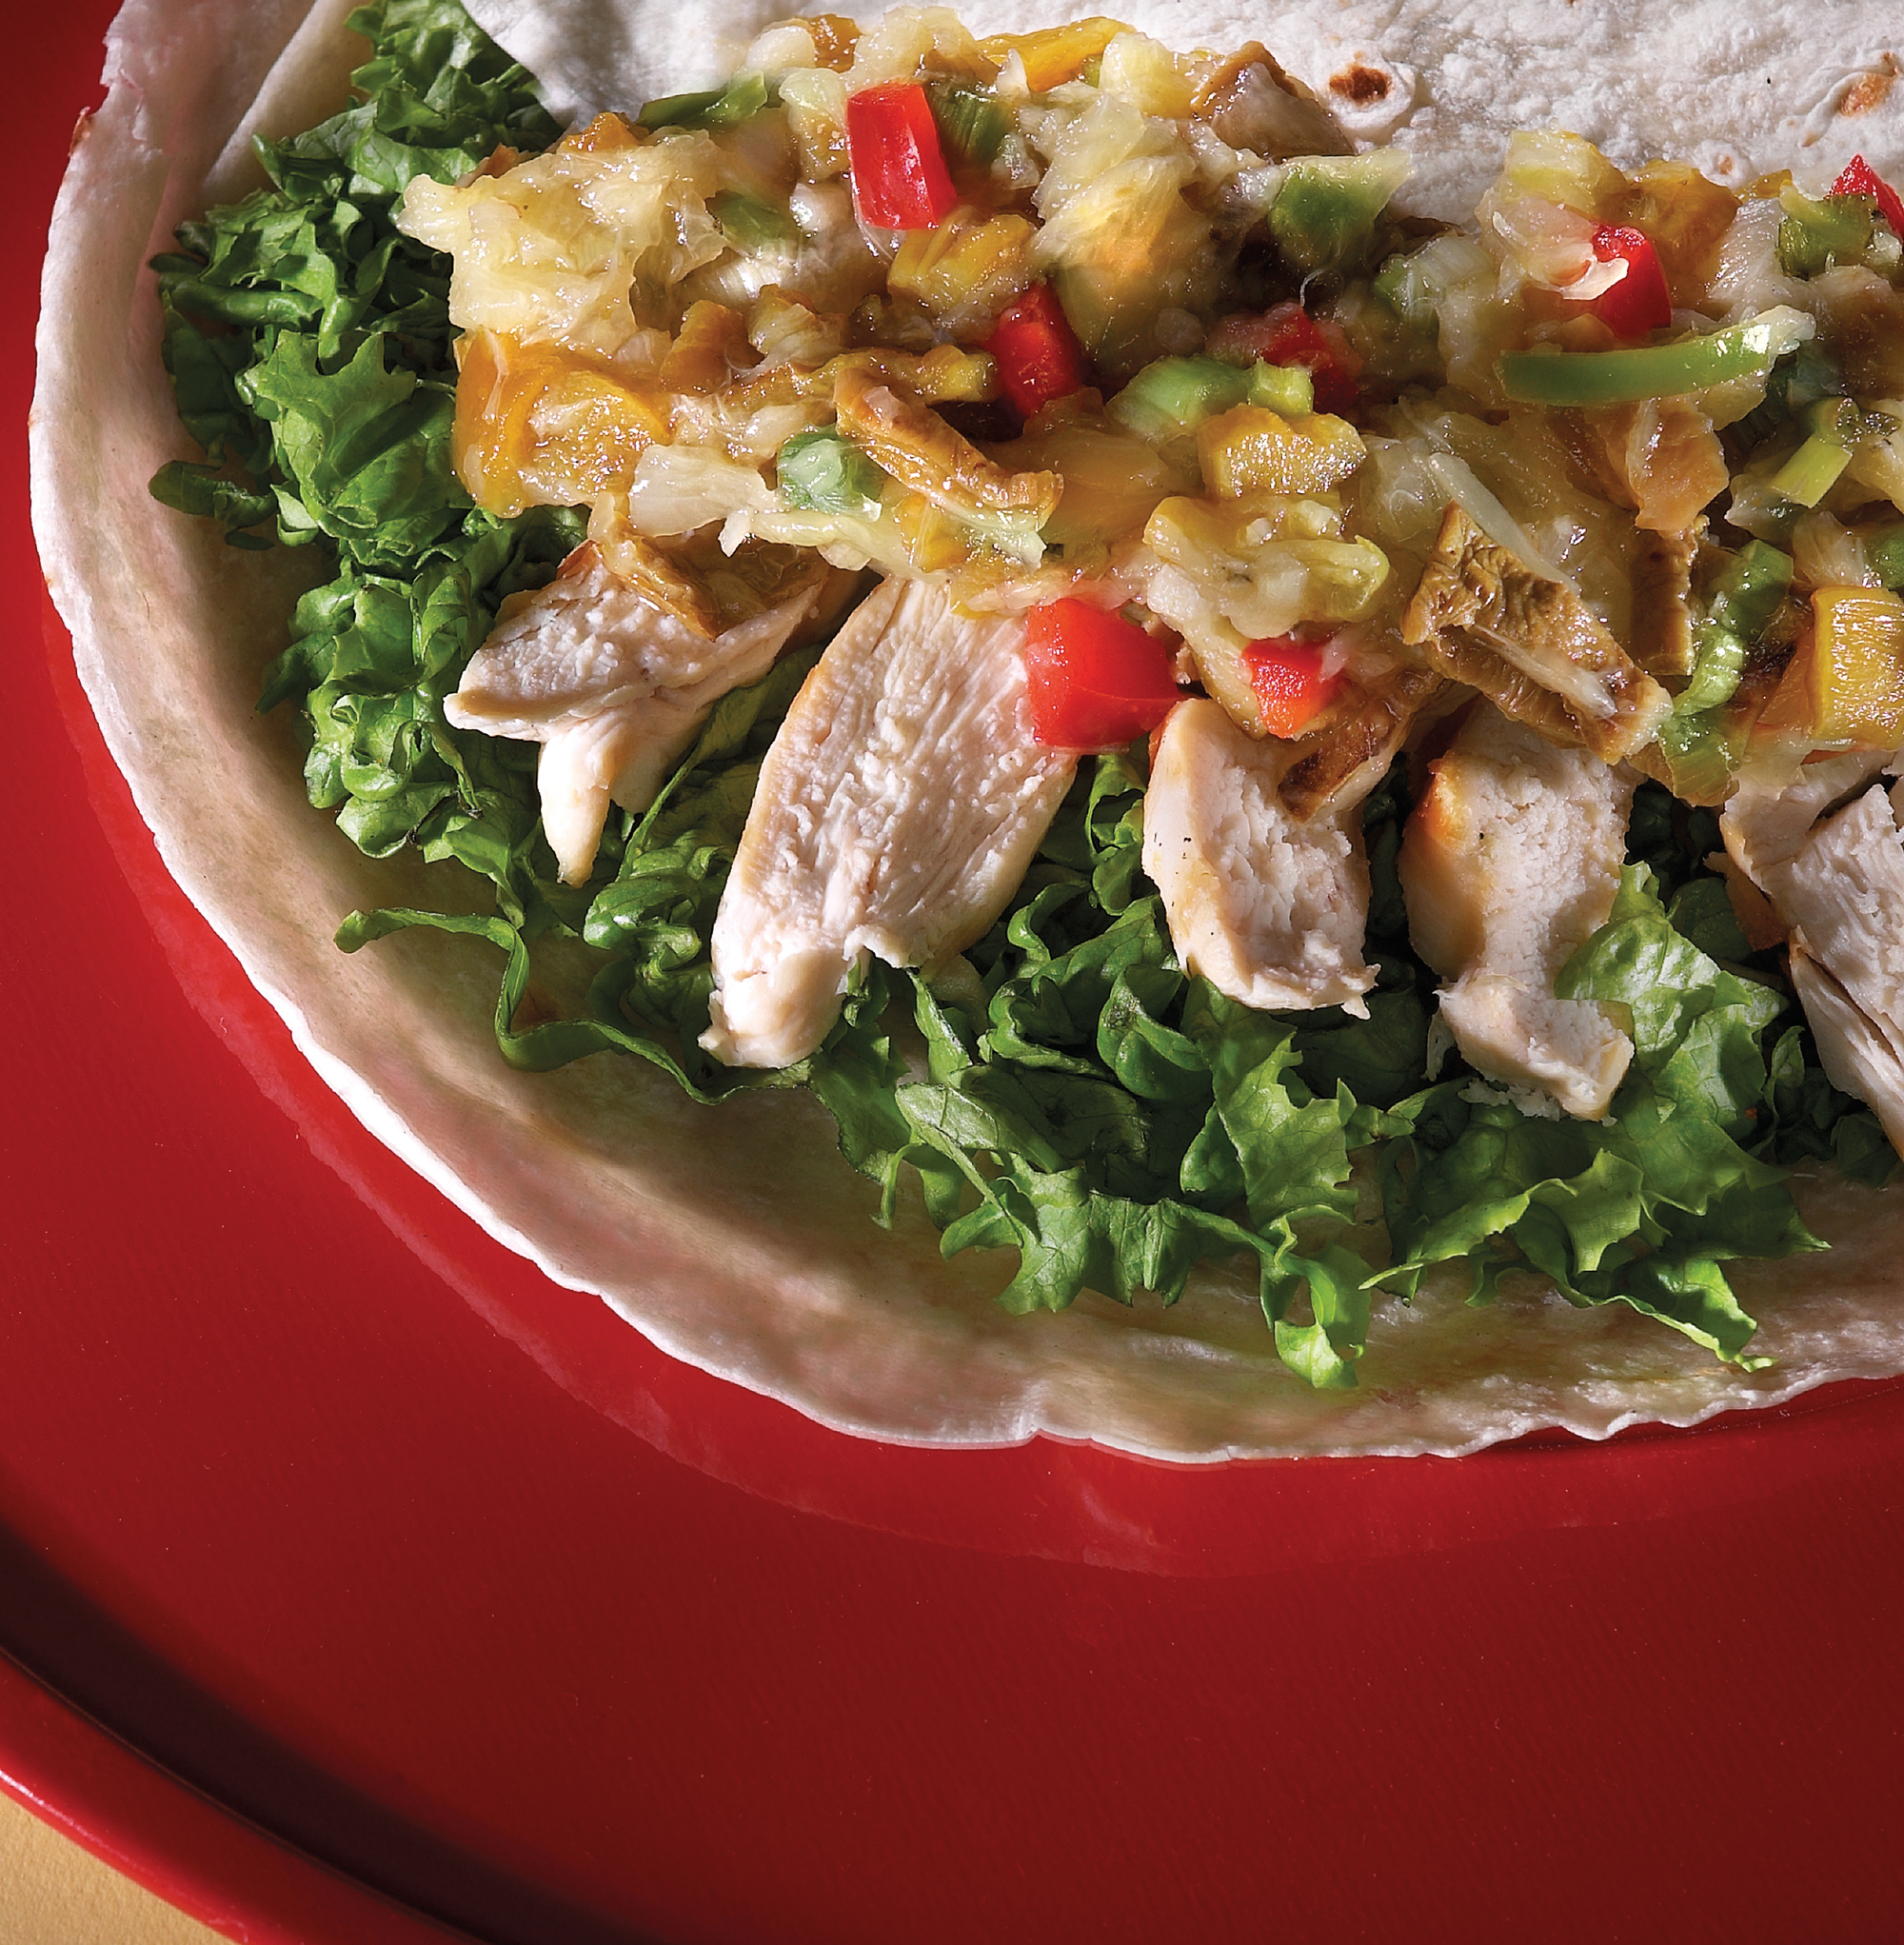
You can also cook nopales on the barbecue alongside some chicken to make a delicious taco.
Here’s the recipe for the sauce in the picture at the top of the blog:
Nopalito and Pineapple Salsa
1 raw, cleaned prickly pear pad
1 tablespoon vegetable oil
1 cup canned crushed pineapple packed in it’s own juice
¼ cup finely chopped red bell pepper
¼ cup thinly sliced green onions, including some tops
1 tablespoon canned green chiles
1 finely minced serrano chile (optional)
½ teaspoon finely minced garlic
2 tablespoons lime juice
¼ teaspoon salt
1 tablespoon finely minced cilantro (optional)
Cut prickly pear pad in 1 ½ inch squares. Film a heavy frying pan with the oil and add the prickly pear pads. Cook over low heat, turning occasionally, until pieces have given up much of their juice and are slightly brown. Remove from pan, cool, and chop into pieces as wide as a matchstick and about ¼-inch long.
Transfer to medium bowl. Add remaining ingredients, stir to combine and set aside for flavors to mingle.
Nopalito and Bean Salsa
Here’s an even easier recipe and you might have everything except the nopales in your pantry.
1 1/2 cups commercial red salsa
1/2 cup canned black beans, rinsed
1/2 cup cooked nopalitos
1 tablespoon lime juice
1-2 tablespoons chopped cilantro
Combine all ingredients in a bowl. Serve with chips.
______________________
You can learn more about the history of food in Southern Arizona in my latest book A Desert Feast, the story of the last 4,000 years of food in the Sonoran Desert. Want more recipes using foods of the Southwest? You’d find ideas for collecting and using 23 easily recognized and gathered desert foods in Cooking the Wild Southwest: Delicious Recipes for Desert Foods. . Recipes from top Southwest chefs are collected in The New Southwest Cookbook. Just click on the titles for more information. You can learn more about me on my website.
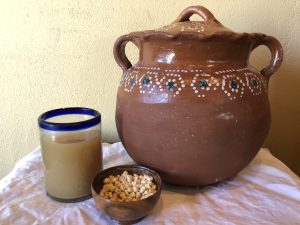
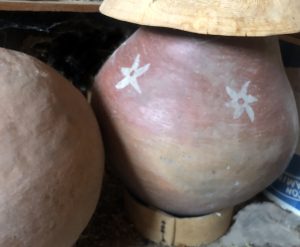
Clay Olla with Tohono O’odham 60-day corn, and tesgiüino corn beverage
Greetings from Tucson, it’s Savor Sister Emily here with my first official post! I am excited to be here, and am looking forward to hearing from you in the comments below. I first encountered tesgüino (tes-WEEN-oh) while learning about the traditions of the Rarámuri people at Mission Garden’s Rancheria (Beterachi) exhibit in Tucson, Arizona. I only knew a bit about the Tarahumara people who have lived since time immemorial in the rugged and beautiful mountains of Chihuahua in northern Mexico, called the Sierra Tarahumara. I soon learned to call them by their tribe’s own name for themselves: Rarámuri, as opposed to “Tarahumara” which was introduced by the Spanish. Many people have heard of the Rarámuri tradition of running long distances, but perhaps fewer people are familiar with another unique aspect of their culture which is found in a beverage called tesgüino.
Tesgüino is the Spanish name for a fermented corn beverage, primarily made from corn and water. The written observations of ethnographer John Kennedy in 1959 describe the important role that the beverage plays in the spiritual and ceremonial traditions of the Rarámuri people. It is also commonly enjoyed in social and community life. Known in the Rarámuri language as batàri and suguí, tesgüino is so integral to the culture that the average Rarámuri family might use 200 pounds of corn annually just for making tesgüino (Kennedy 634).
Clay olla tesgüineras with star pattern.
At least 4,500 years ago, corn became a vital crop for indigenous peoples in the Southwest, including the Rarámuri who developed and care-take many different corn varieties. Similarly, here in the neighboring Sonoran Desert, the Tohono O’odham have cultivated a fast growing 60-day corn for thousands of years and it still thrives today. I wondered if the 60-day corn indigenous to Cuk Shon could be made into tesgüino?
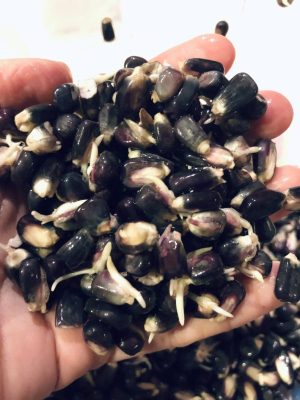
I reached out to my fermentation-obsessed researcher and friend Cesar Ojeda Linares in Mexico City who described to me the thick, distinctive beverage he tasted on his journeys and exploration in northern Mexico. He provided an excellent guide on how to make tesgüino according to what he learned in the community there. He found it similar to a type of atole, but thicker and with a stronger aroma. It is possible to find recipes for making tesgüino (including in Sandor Elix Katz’s book, The Art of Fermentation). Here is a fun short video on Vimeo of Señora Chenta from Alamos, Sonora making tesgüino using her traditional methods. Variations between recipes are part of the fun–diversity is where it’s at! But the basic recipe for this corn beverage always begins with dry corn kernels which are sprouted and grow roots, a simple process known as malting. This malting produces sweet sugars which can then be naturally fermented in water with the aid of healthful microbes. Natural yeasts and bacteria are present on the corn, in the air, or in a trusty heirloom tesguinera vessel, but wild plants can also be added to introduce the preferred microbes which catalyze the process. Brome grass seed (Bromus arizonicus) and sweet stevia (Stevia serrata) are among the plants that could be used to inoculate the brew, according to Fermentaciones tradicionales indígenas de México. After brewing for three to five days, the tesgüino is a mildly alcoholic, mildly sweet, refreshing and healthful beverage, best enjoyed when shared amongst family and friends.
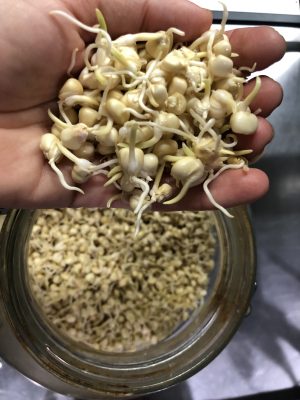
Roots emerge from kernels of blue corn after three days.
I made the beverage with O’odham 60-day corn in a clay olla following the directions below, and once again using Navajo Blue corn fermented in a ceramic salt glazed crock.
An important note on sugar. Sugar cane came to the America’s in the 15th century. Piloncillo (raw brown sugar cone) is thus not a truly “traditional” ingredient, but it has been common in the region for a long time. Including it certainly excites the hungry microbes, and the resulting beverage is not very sweet. In a traditional Rarámuri tesgüino, the tesguinera pot instead carries the inoculating microbes that kickstart the process (much like yogurt).
Recipe and Directions for Tesgüino Makes about 3 gallons tesgüino
3 pounds dry heirloom corn, preferably dent or flour varieties, organic and non-GMO. 3 gallons water, ideally filtered and de-chlorinated, *see note. 3-4 cones or bricks piloncillo (unrefined pure cane sugar from international markets) 1-3 sticks cinnamon 0.5-1 teaspoon brewers yeast (ale yeast or similar- not baking yeast), optional but recommended. Palmful organic sweet stevia leaves, optional but recommended. Ask local farmers/gardeners.
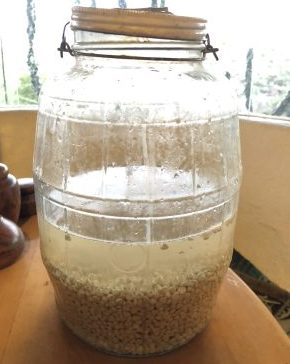
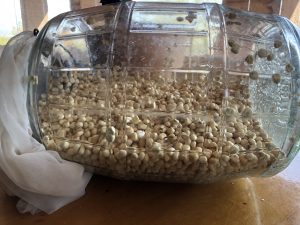
Dry corn first soaks in waterCorn seeds sprout in a large vessel after soaking and repeated rinsing.
1. Place dry corn in a large glass or plastic container (6+ quart size) such as a Cambro.
When corn seeds grow substantial roots, it is ready for grinding.
2. Cover with water and allow to soak overnight.
3. The next day, strain off the water, then cover opening with a breathable cloth or mesh lid and lay on its side, just like when sprouting seeds for eating. Store in a well lit, warm spot, avoiding direct sun.
4. Rinse and drain the corn in its container at least 2 times a day–more often is better, especially in warmer conditions.
5. After a couple days, the corn will grow a little radical (root) and first shoot. This is very exciting! In three or four days, when nearly all the corn’s roots are about ½–1 inch long, it’s ready to grind.
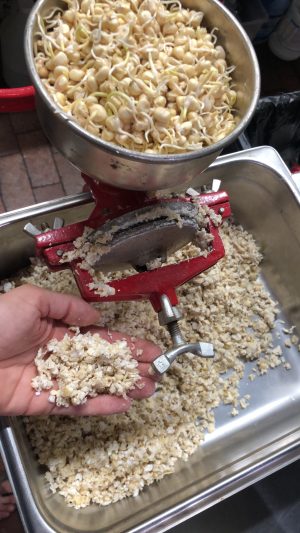
60-day corn ground in a molino, in preparation for cooking and fermentation.
6. Pass the sprouted corn through a hand mill molino grinder on a coarse setting, so it resembles very coarse grits, or about the texture of cooked quinoa. If you don’t own a molino, pulse small batches in a food processor.
7. Place the ground corn in a large pot, ideally large enough to hold three (3) gallons of water and the corn together. Otherwise, you’ll need to work in two smaller batches (half the mixture at a time). Add the cinnamon, and gently boil the corn in water for 1-1.5 hours to extract its natural sweetness and flavor. Stir occasionally to prevent burning. After the time has passed, add the piloncillo sugar and simmer to dissolve.
Ground corn boiling in water with piloncillo
8. Cool the mixture and carefully strain to keep all the liquid in a 3+ gallon non-reactive fermentation vessel, *see note. The strained liquid will be thick and smooth in texture. Cover lightly with a tea towel, cloth napkin, or cheesecloth. (Compost the strained corn at this point, or feed to chickens.)
9. Once the liquid is completely cool (or the next day), add ½ to 1 teaspoon dry ale yeast, and fresh stevia leaves. Stir to dissolve. Keep covered with cloth.
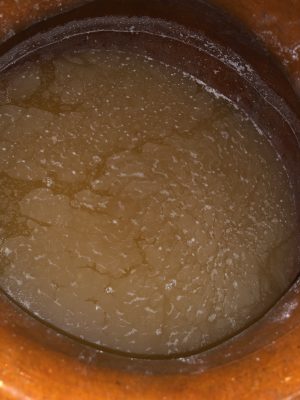
Tesgüino fermenting, with the natural yeast visible on the surface (harmless).
10. Each day, wash your hands and visit your tesgüino, stirring well with a clean spoon. You will find increasing effervescence. Delight in the unique texture, aroma, and color.
11. On the fourth day, it should be ready to drink. Strain if desired to remove stevia leaves (if using). It’s time to taste and enjoy! Try both chilled and at room temperature to your liking.
Invite many friends to partake in the celebration, and raise a glass of appreciation to our Rarámuri neighbors who created this beautiful beverage.
Please write in the comments below about your experiences with fermenting corn, travel in Rarámuri lands, and tesgüino!
-Savor Sister Emily Rockey
Clay Olla with Tohono O’odham 60-day corn, and tesgiüino corn beverage
*Notes:
Water- Tap water can contain chlorine which can be counterproductive to fermentation (chlorine kills good beneficial microbes). Dechlorinating is easy: simply draw the water in a vessel and allow it to sit open at room temperature for a few hours. The chlorine naturally evaporates. Or boil water for 20 minutes and let it cool. Water is now ready to use for fermentation.
Vessels- This can be glass, ceramic, a clay olla, stainless steel, or food-safe plastic. Natural materials like clay will impart an earthy flavor on the tesgüino, while glass or ceramic does not.
Storage- Although it is best to enjoy all the tesgüino amongst friends at once, it is possible to refrigerate the drink for several days, or even freeze with good results.
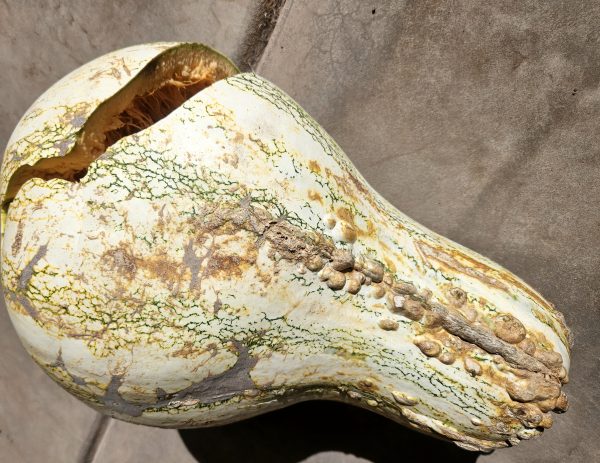
Hello friends, Amy here, with a BIG cushaw winter squash. For starters, it’s beautiful. Farmer Frank of Crooked Sky Farms has been sending Tucson CSA huge and tiny pumpkins and winter squashes for 20 years. People often ask us what to do with them. Well, twelve months a year I always have frozen winter squash in the freezer, ready for soup, pie, pumpkin bread and now ravioli.
Start by dropping on the patio until it cracks open. Big ones break more easily but sometimes little ones need to be slammed. This is much safer and easier than taking a cleaver to it.
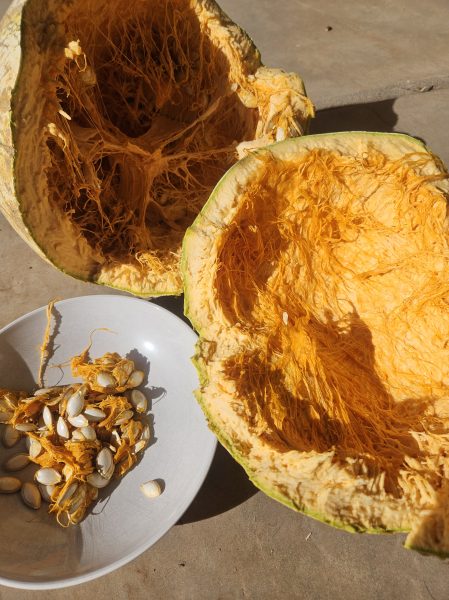
Then I pry it open with my hands and scoop out the seeds, saving them for planting or eating.
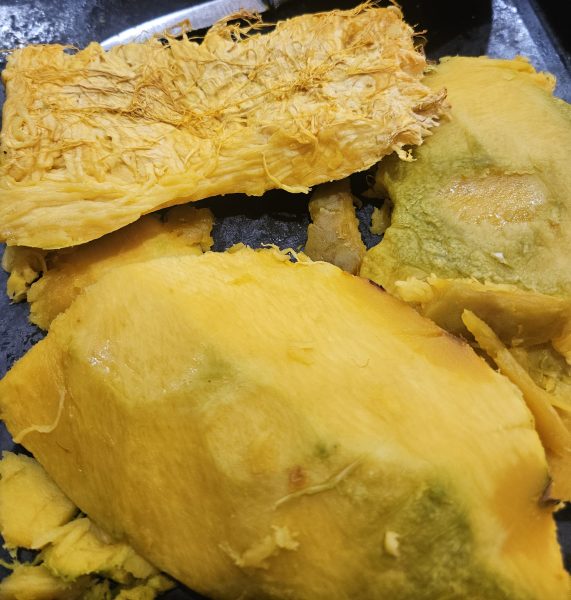
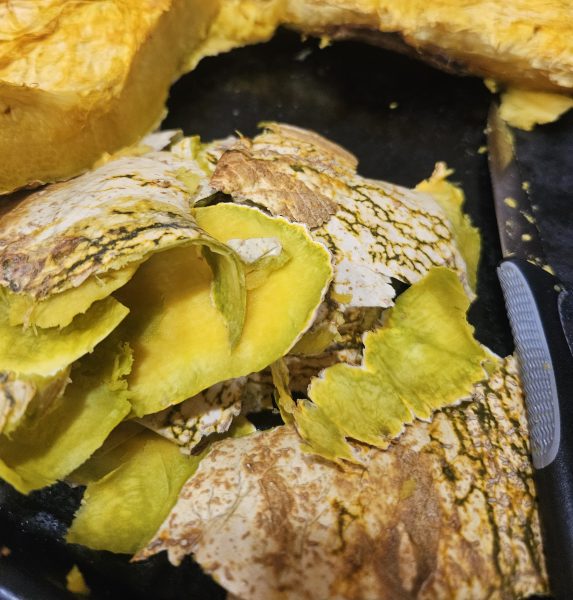
Place the pieces on a cookie sheet and bake uncovered at 350 F until a fork pierces the flesh easily and some of the moisture in the fruit evaporates. The flesh can be scooped out of the hard skin varieties with a big spoon or the skin can sometimes be trimmed off with a knife.
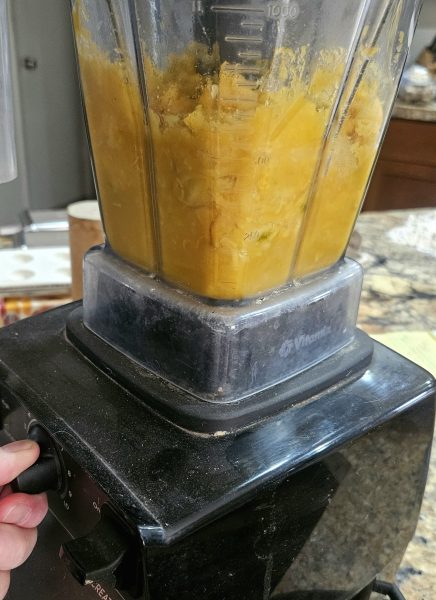
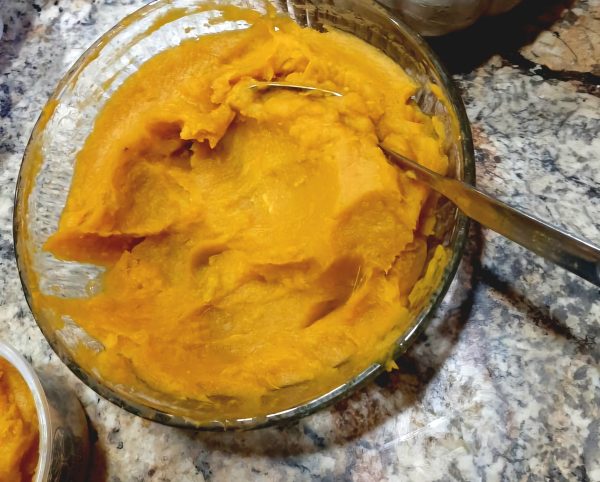
The flesh whizzed in a food processor or blender is pleasantly smooth. If I want texture, I add nuts to sweet creations or sautéed onion to savory concoctions. Stringy mashed squash turns many people away from the “mushy” vegetable entirely.
This cushaw squash was SO sweet and flavorful! If it wasn’t, I’d add a bit of sugar and salt to taste. This squash puree was thicker than normal, so I did not need to drain it. (It is critical to drain squash destined for pie or empanadas. Squash is very perishable, so I place the colander full of puree and bowl catching the liquid in the refrigerator. Don’t toss the liquid! It’s so good in a squash or vegetable soup.)
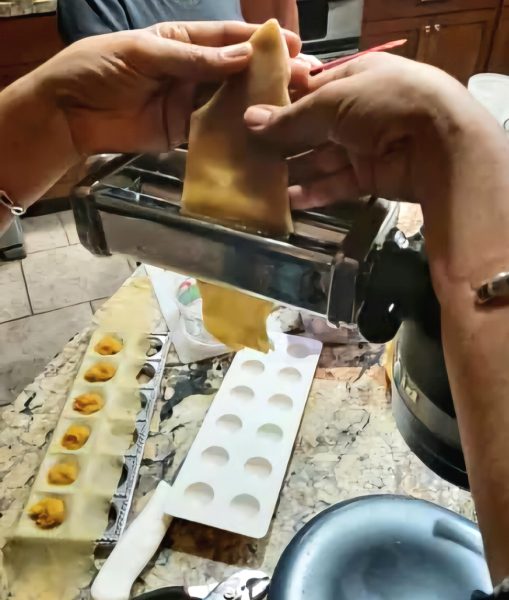
My uncle recently gave me a pasta roller attachment for the stand mixer and a ravioli press. I already own a hand crank roller that requires 3 hands to operate, and hasn’t been used in years. But inspired by the new toys, I wanted to put sweet, plentiful winter squash puree in ravioli.
Plus, I love food cooked in tiny edible parcels, like empanadas, stuffed grape leaves, cabbage rolls, spring rolls, pot stickers, samosas and floutas (taquitos)… What are your favorites?
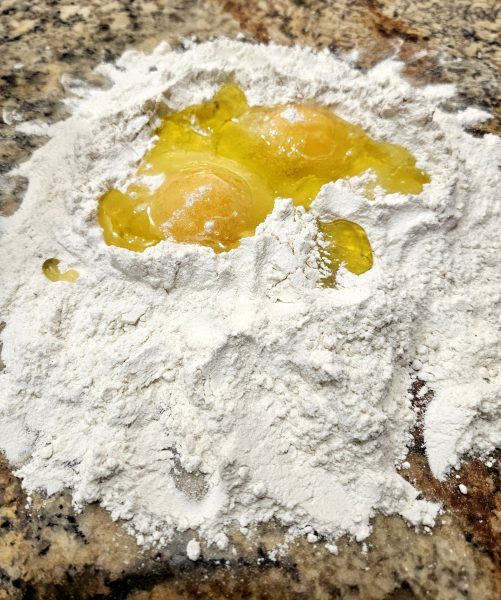
I tried different ravioli dough recipes with varying amounts of egg, water and olive oil, and everything I tried worked. It’s forgiving! But I liked the logic in this one, using a cup of all purpose flour, half a teaspoon salt, and egg and two yolks. I worked it on the countertop by hand and after an hour rest, I started to roll.
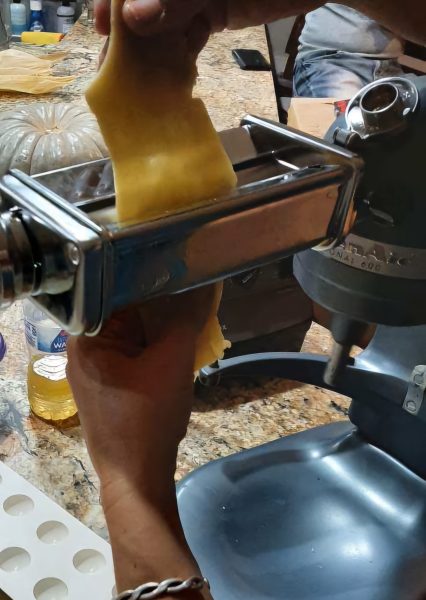
Apparently some home cooks use a machine to knead the dough, and some roll it out by hand. It’s forgiving! Basically, start the thickest roller setting and roll the dough through a few times before adjusting the setting a notch thinner.
This is easy but not fast!
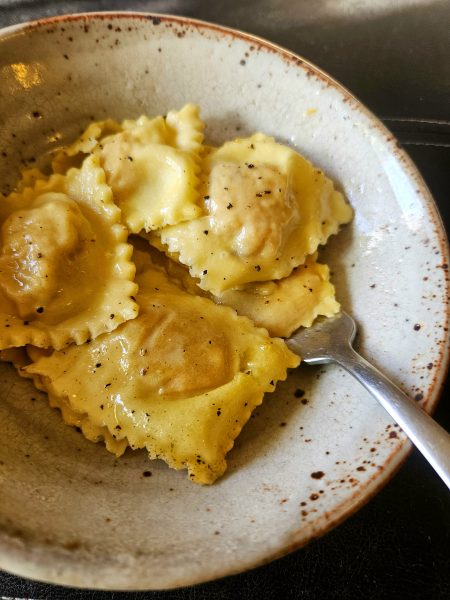
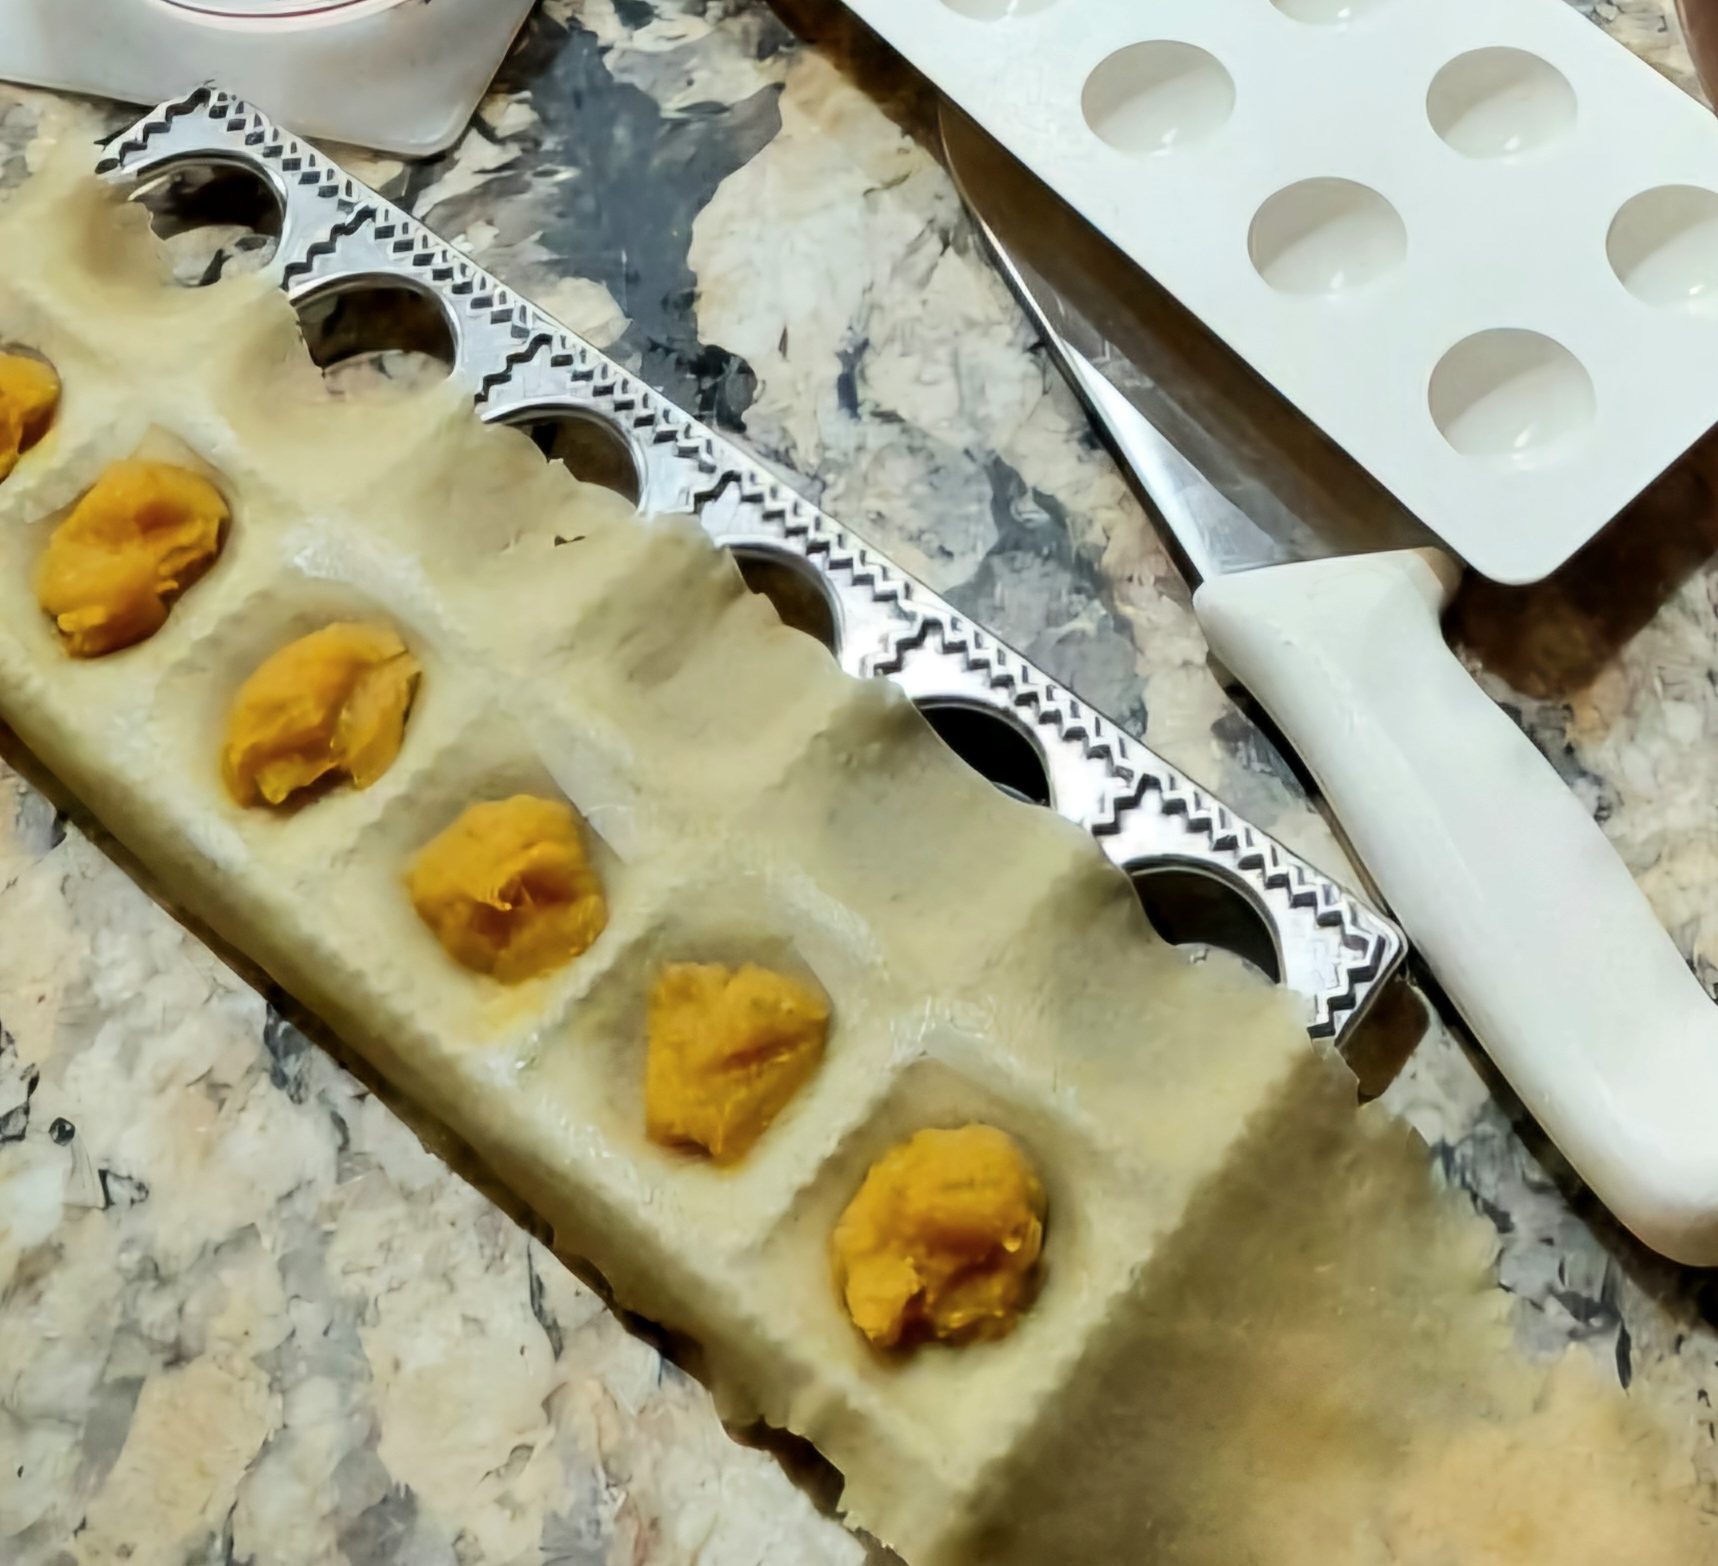
The form presses the thin dough into wells to hold a tablespoon of filling. I dabbed water along the seams to encourage better sealing, just in case. With the top sheet of dough covering the filling, it was easy to seal and perforate by using a rolling pin over the top.
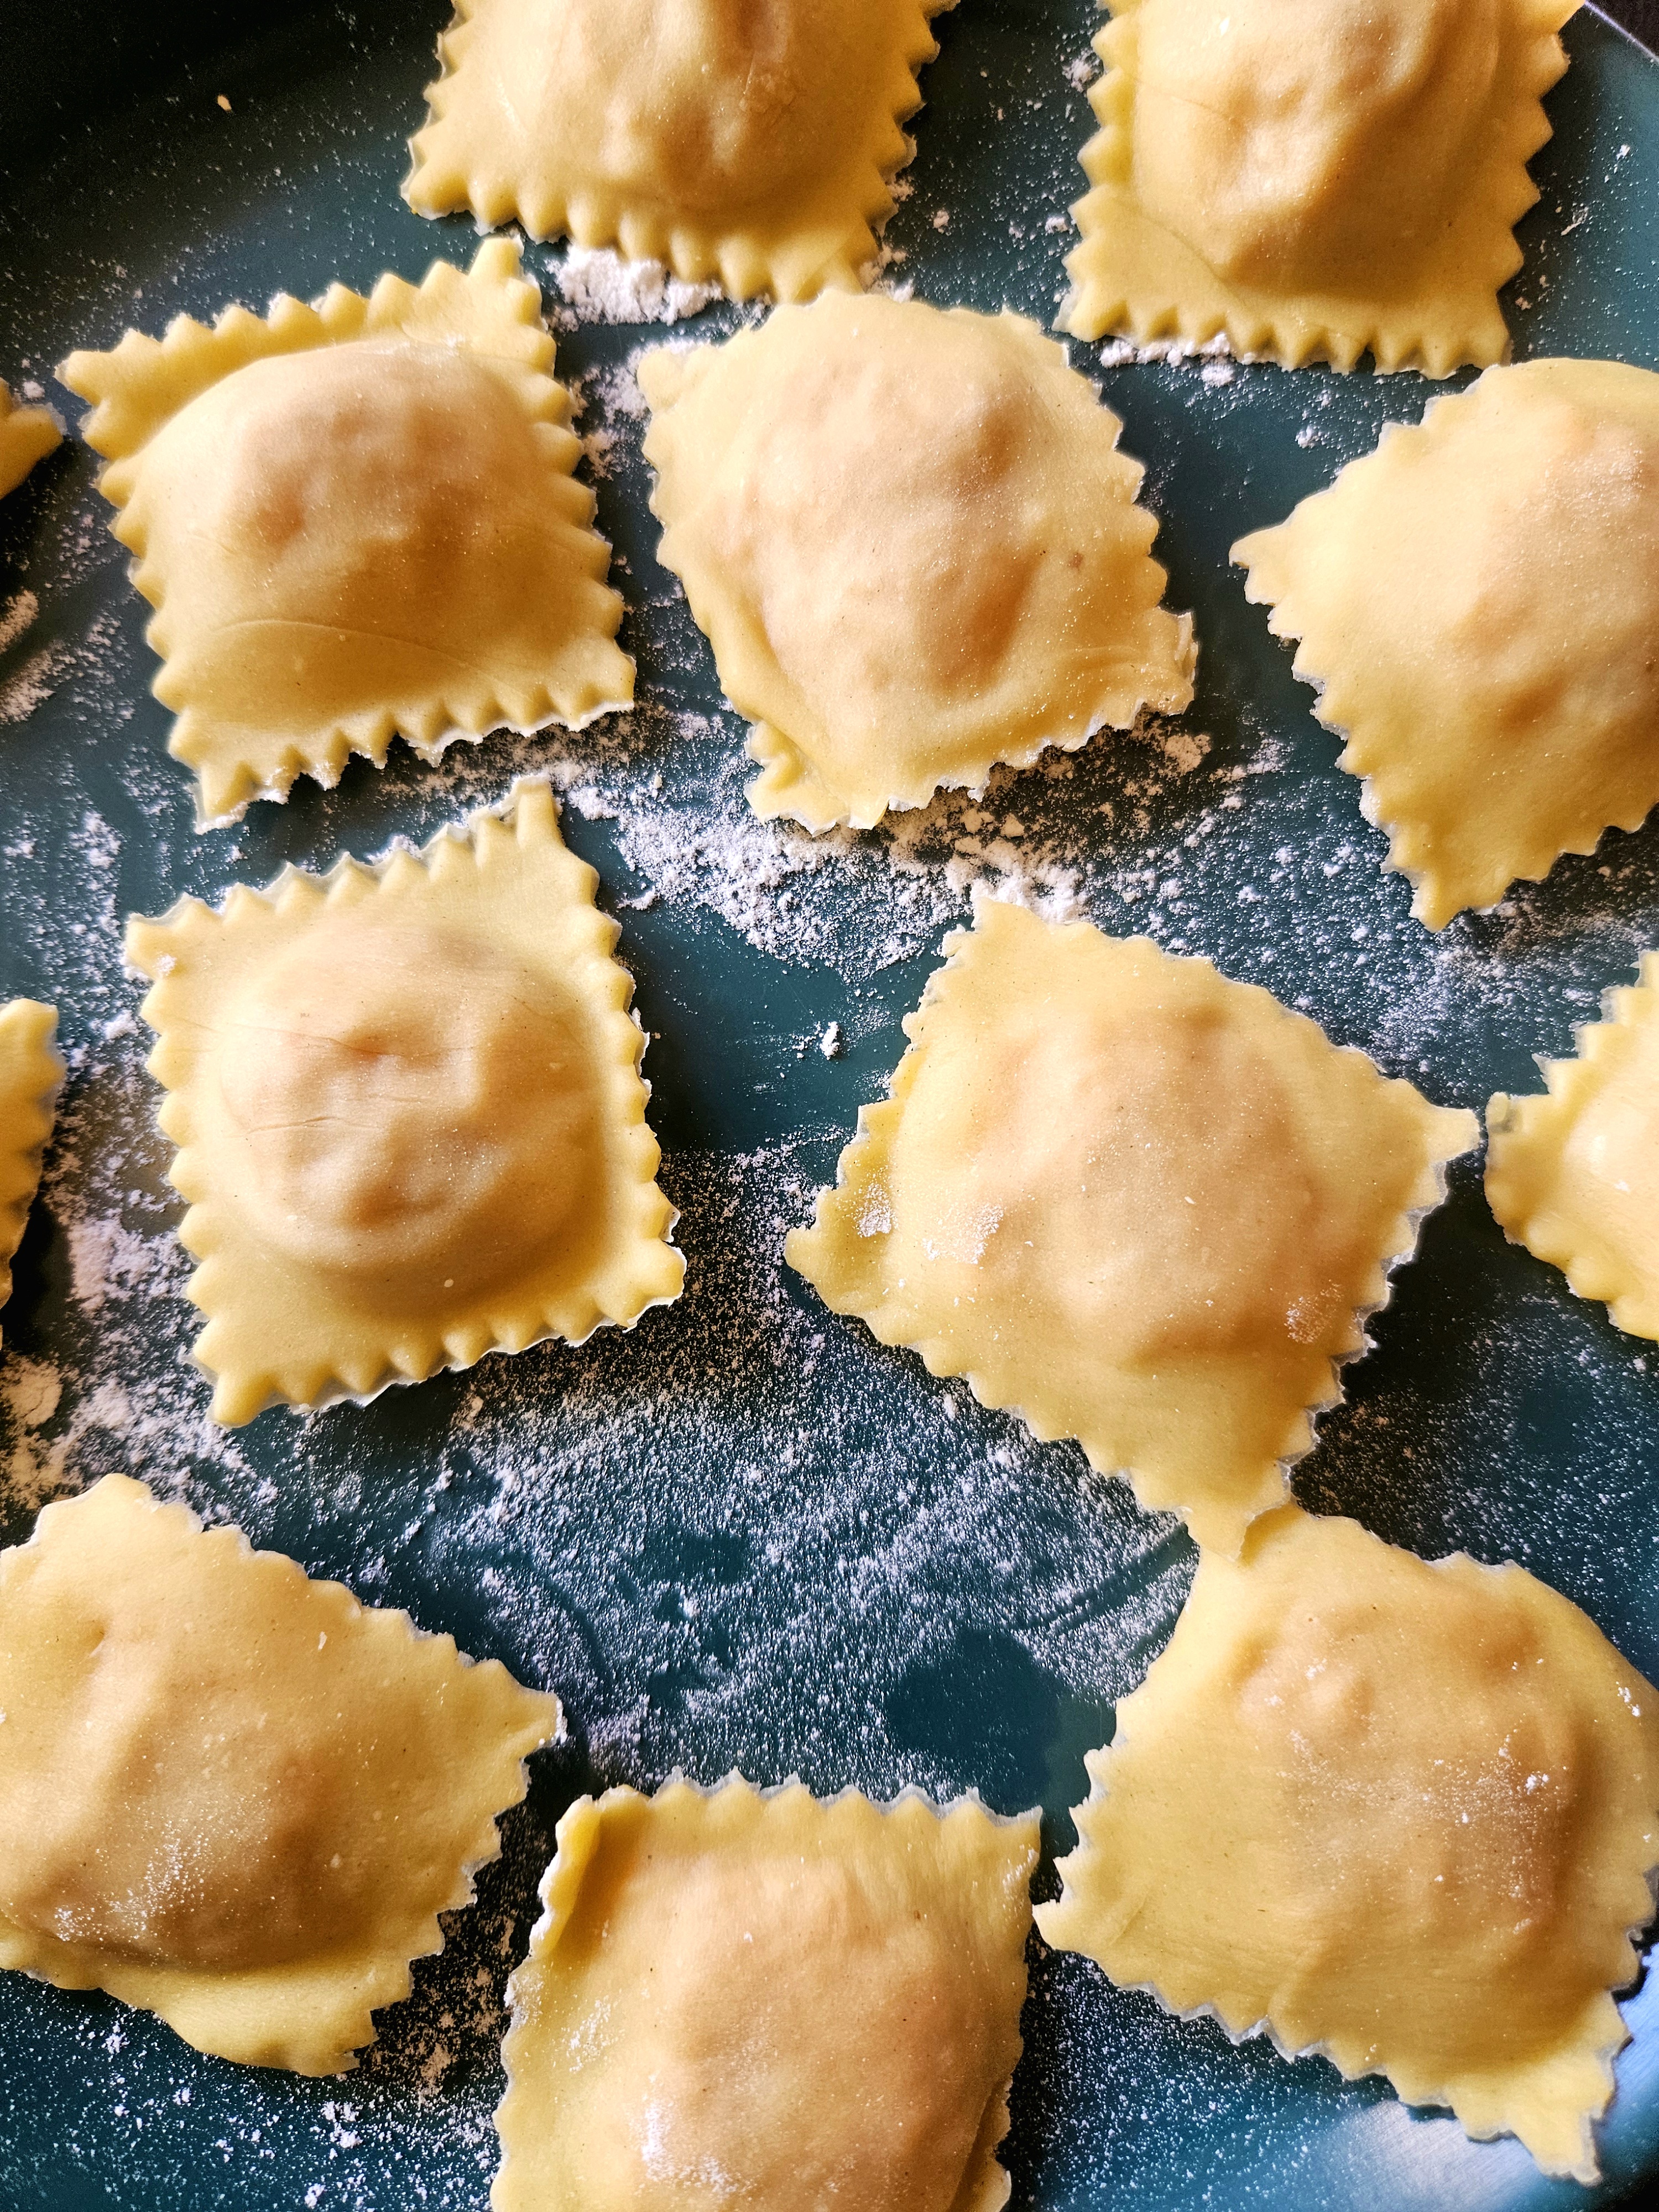
This gimmicky looking tool is efficient! Dusted with flour and resting in a single layer, they are tidy, symmetrical and well sealed.
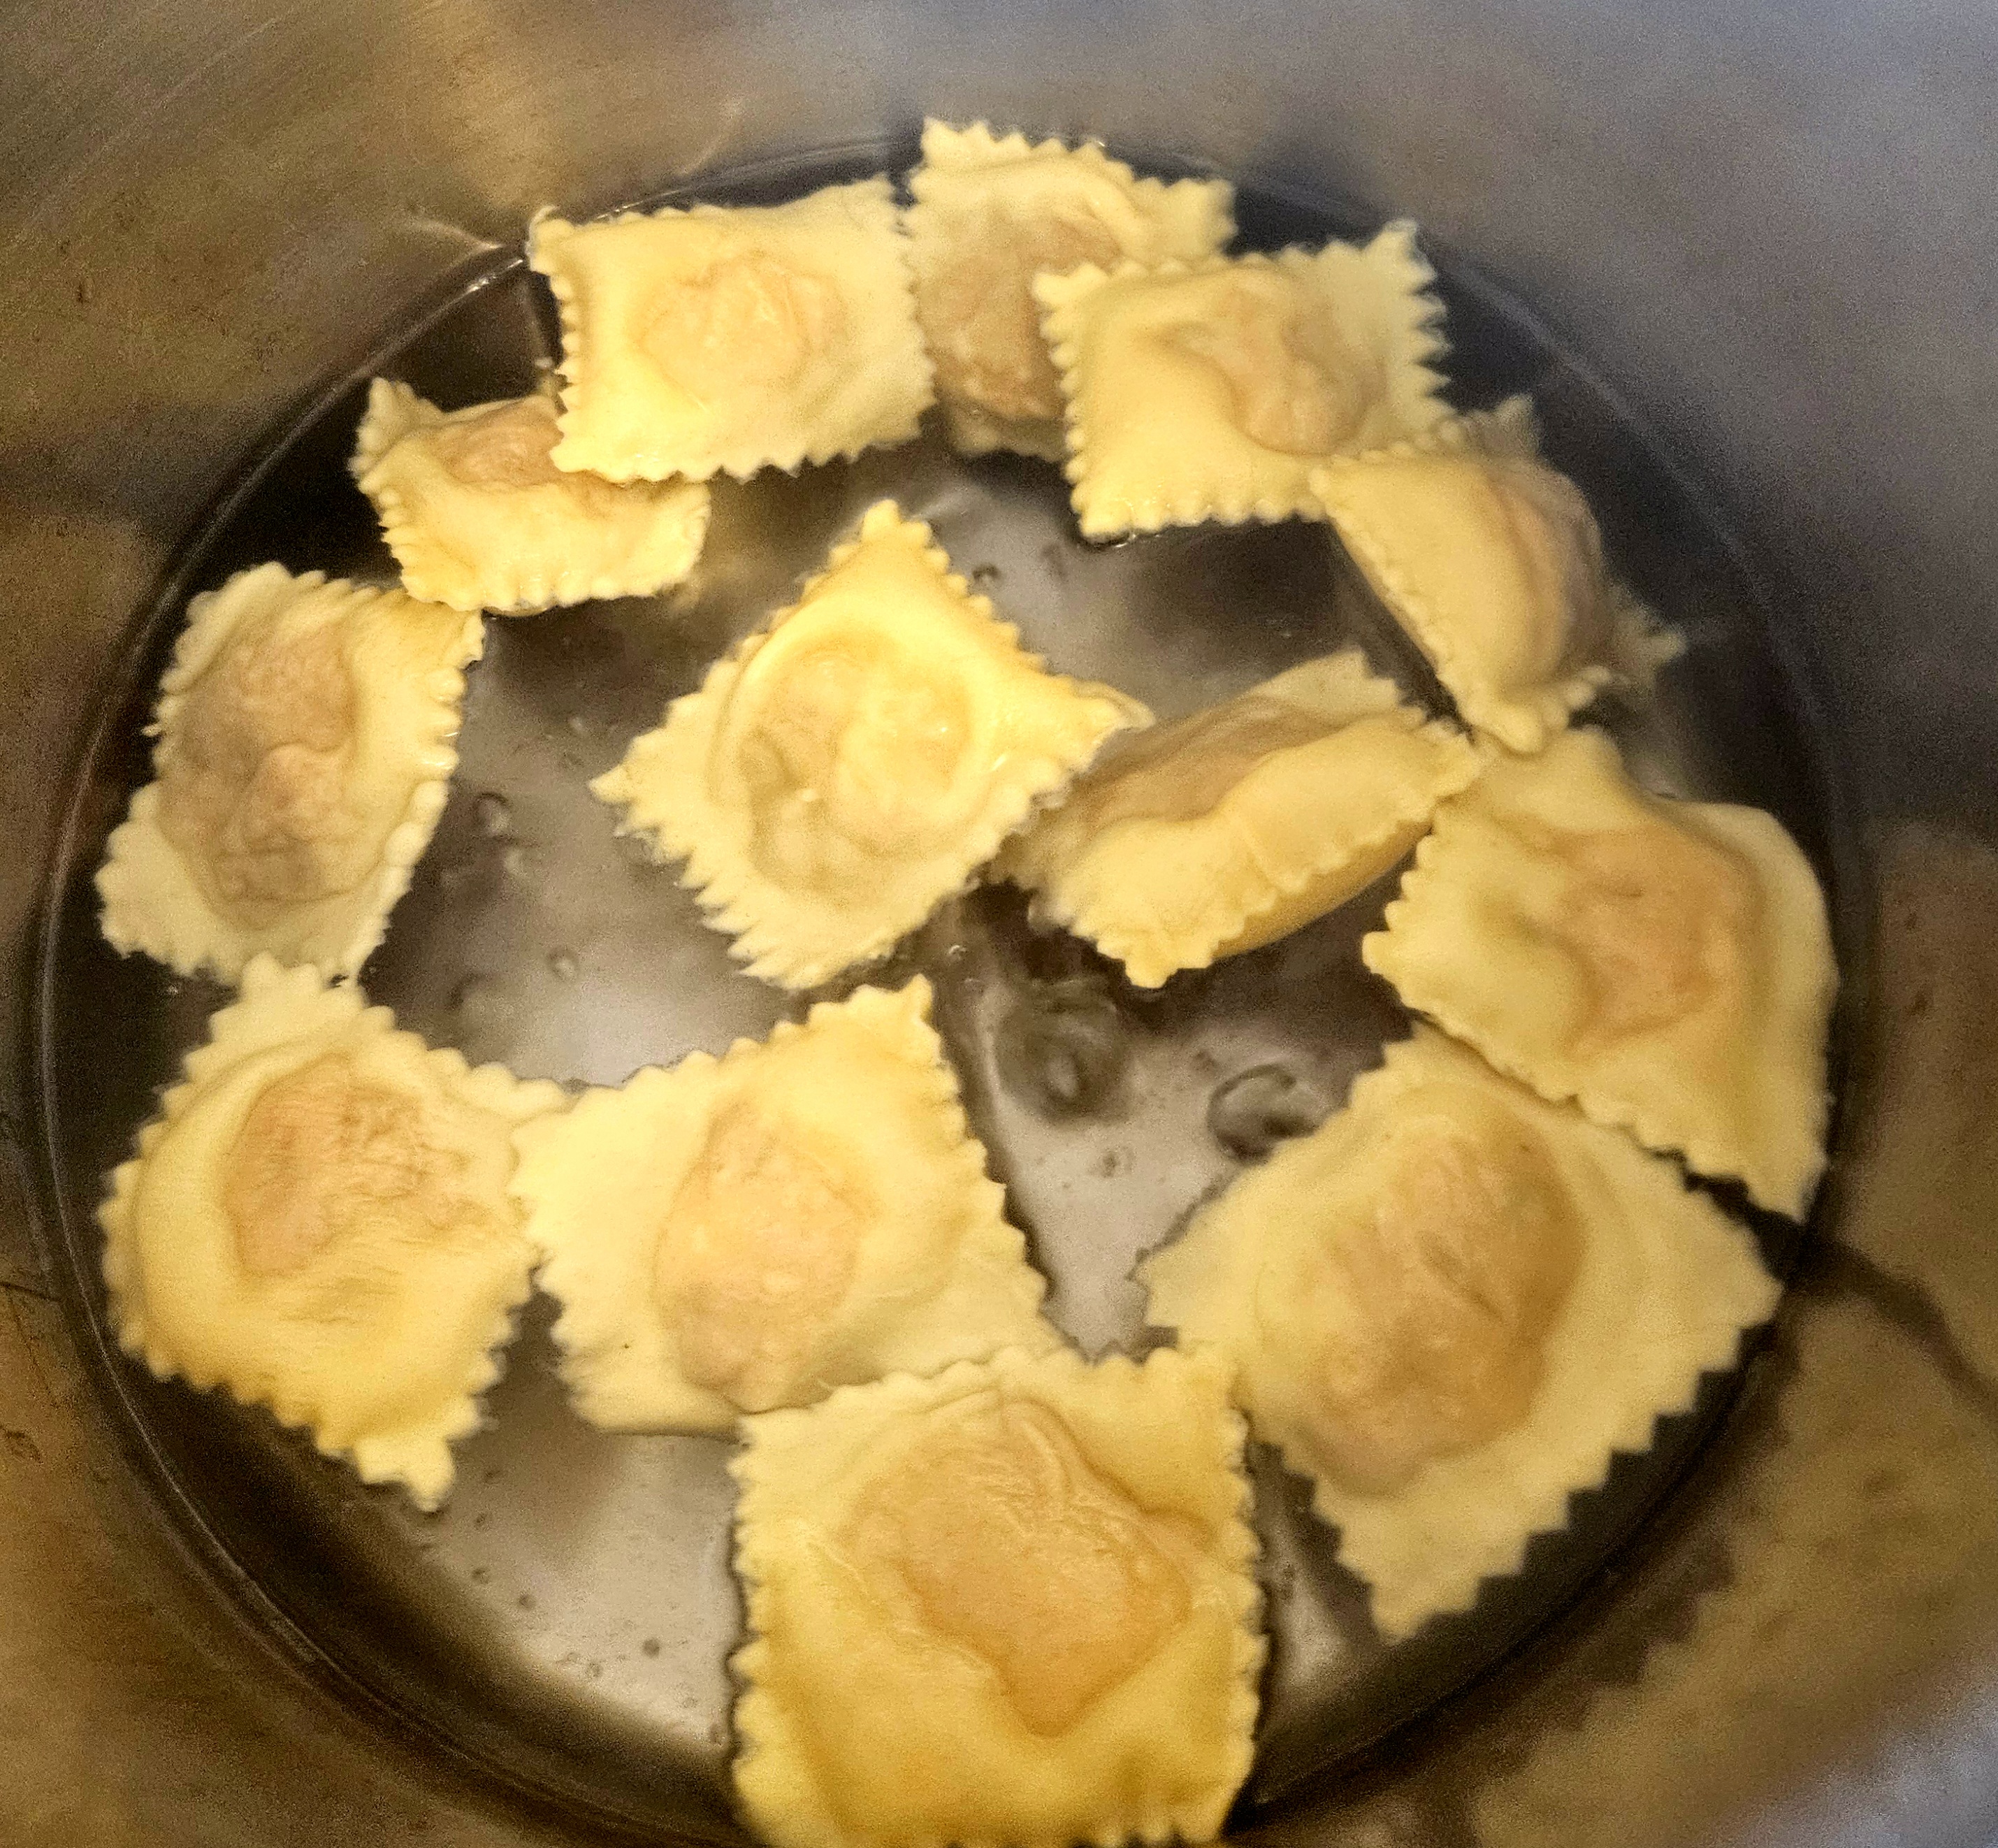
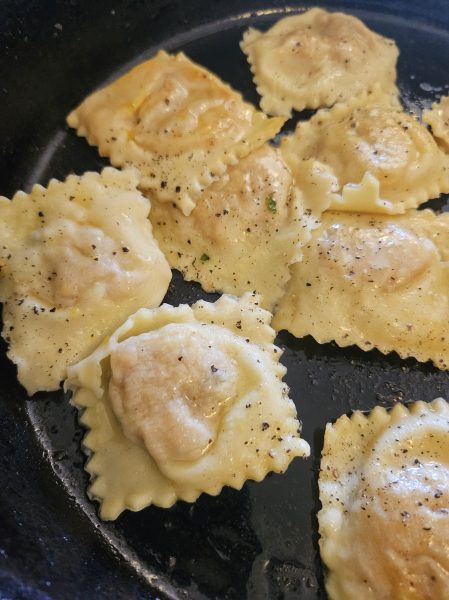
Cooking for three minutes in gently boiling water, it’s amazing they stay sealed.
With the filling of unadorned sweet cushaw squash, dressing the finished product in various combinations of butter, olive oil, garlic, thyme, black pepper and hard cheese was delicious. My aunt fried some with tons of garlic until browned… oh my.
But my favorite way was just butter, salt and pepper, letting the sweet cushaw shine.
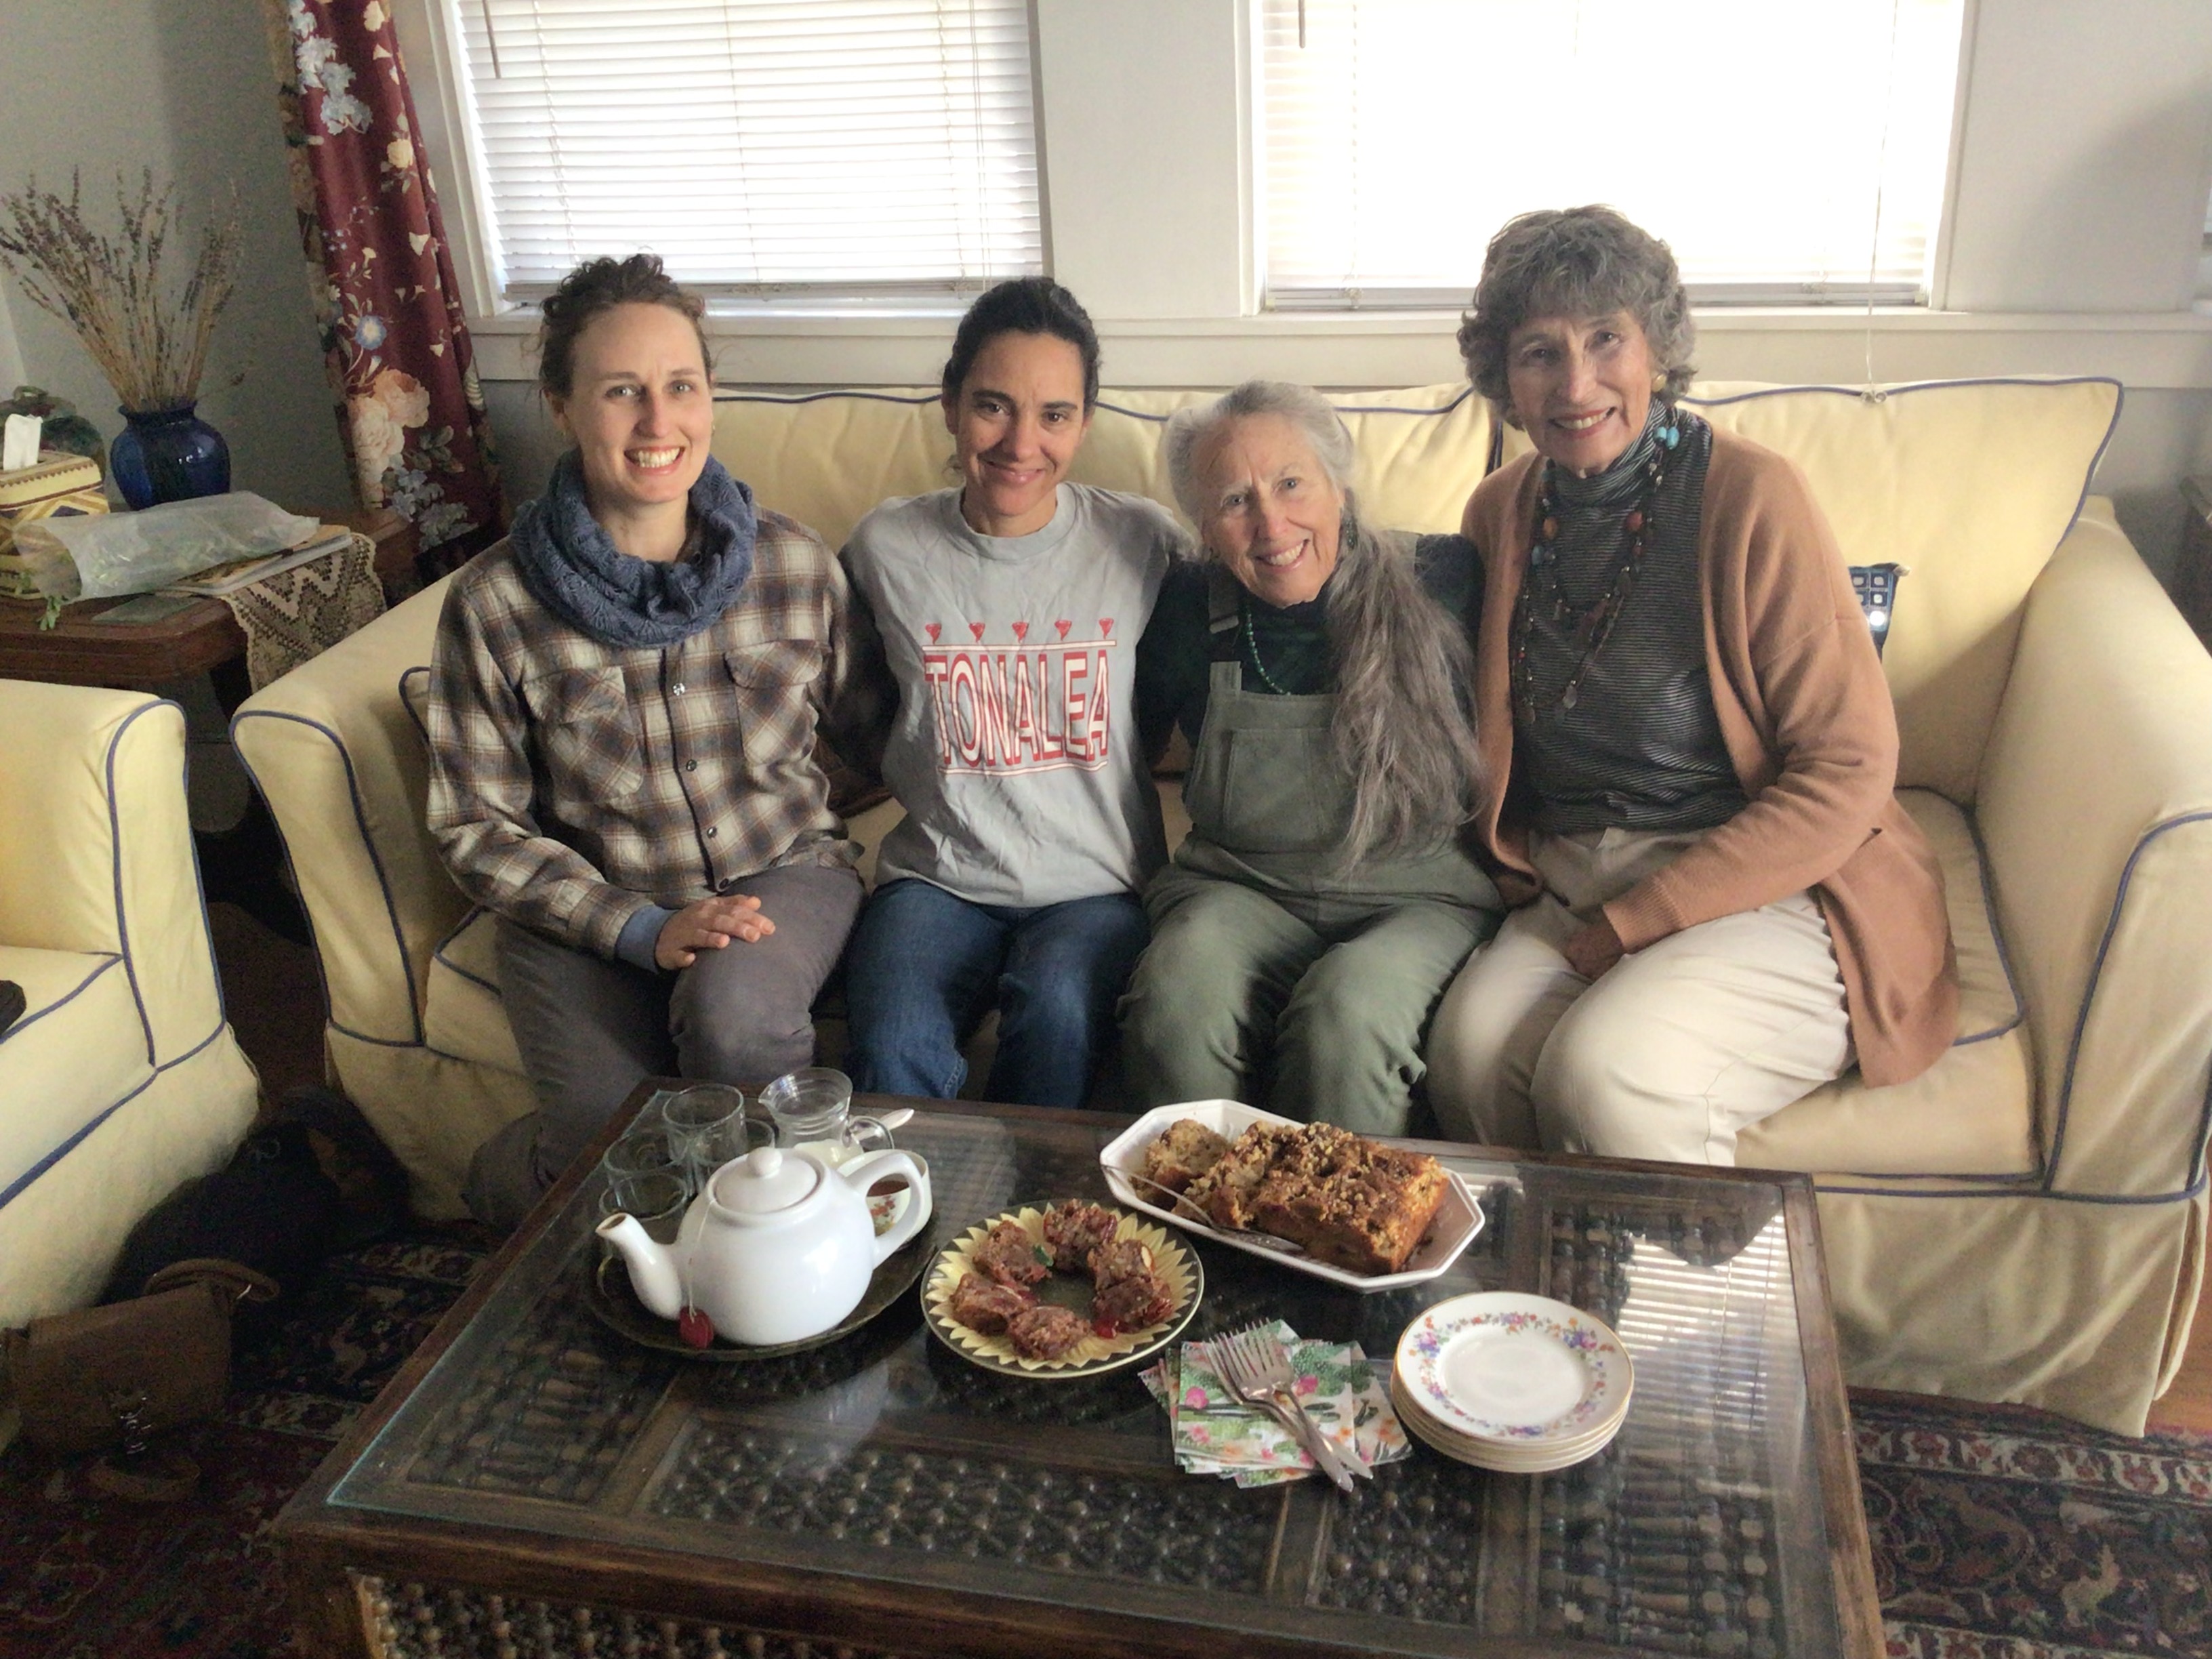
Savor Sisters (from left) Emily Rockey, Amy Valdes Schwemm, Martha Burgess, and Carolyn Niethammer gather to plan out the Savor year. We sampled a mesquite apple cake that may show up in a post.
As the Savor the Southwest blog enters its 13th year, we are so grateful to you, our readers, for following along and indulging us as we share our love of the flavors of the Southwest using both wild and cultivated plants. During those years we have entered 370 posts sharing recipes for everything from Christmas cookies (mesquite gingerfolk, anyone?) to how to cook quince. Our readers hail from nine foreign countries as well as the United States.
This year, we are thrilled to welcome a new Savor Sister, Emily Rockey. Emily has worked as a professional gardener for public gardens including most recently Tucson’s historic Mission Garden. Now as she returns to the university to learn even more about the soil that supports both wild and cultivated plants, she has time to share with us her expertise and creativity. Read her full bio on the Authors page. She has already shared her method for making prickly pear wine in a guest post last year. From now on she will be a regular and we are thrilled to welcome her.