Cushaw Ravioli

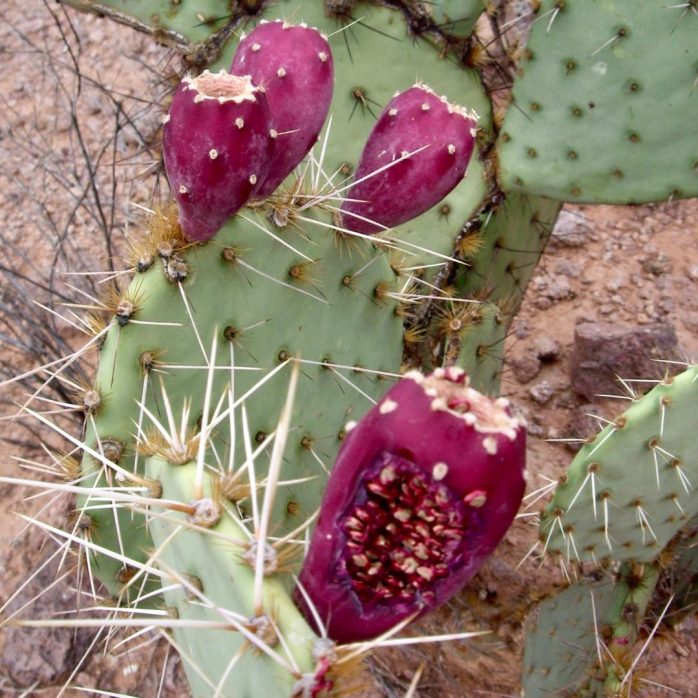
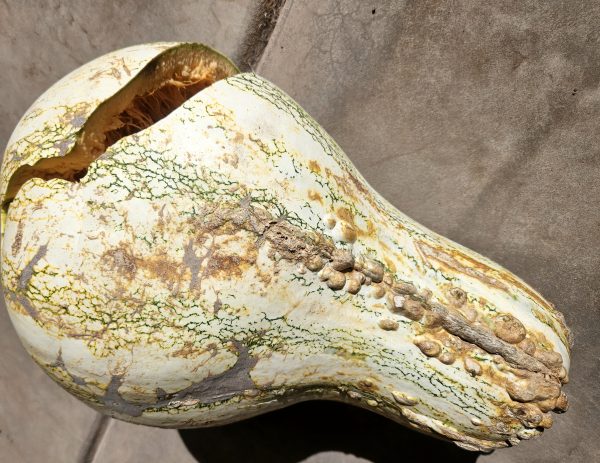
Hello friends, Amy here, with a BIG cushaw winter squash. For starters, it’s beautiful. Farmer Frank of Crooked Sky Farms has been sending Tucson CSA huge and tiny pumpkins and winter squashes for 20 years. People often ask us what to do with them. Well, twelve months a year I always have frozen winter squash in the freezer, ready for soup, pie, pumpkin bread and now ravioli.

Start by dropping on the patio until it cracks open. Big ones break more easily but sometimes little ones need to be slammed. This is much safer and easier than taking a cleaver to it.

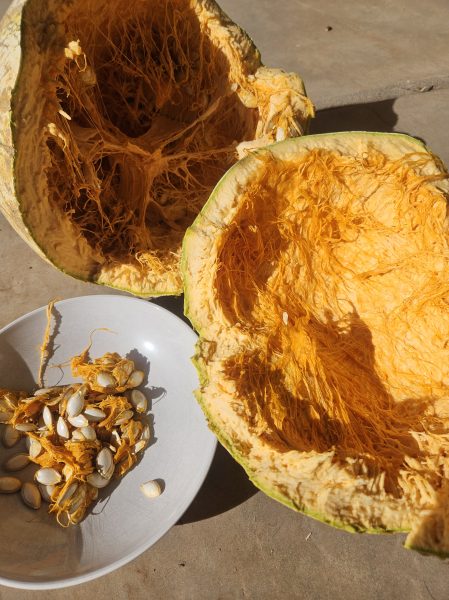
Then I pry it open with my hands and scoop out the seeds, saving them for planting or eating.

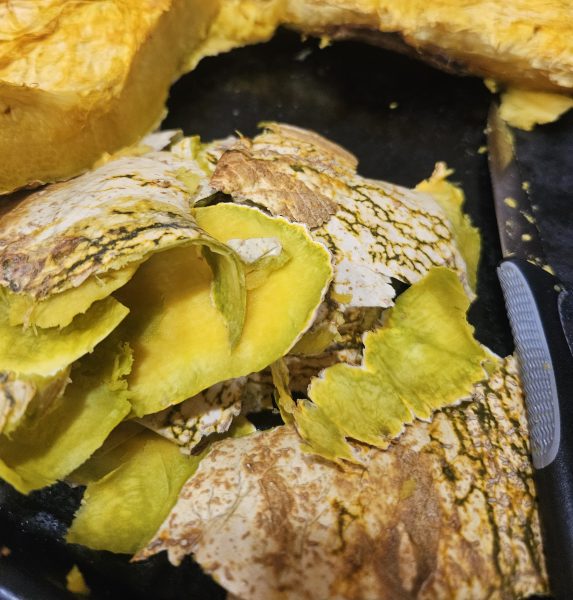
Place the pieces on a cookie sheet and bake uncovered at 350 F until a fork pierces the flesh easily and some of the moisture in the fruit evaporates. The flesh can be scooped out of the hard skin varieties with a big spoon or the skin can sometimes be trimmed off with a knife.

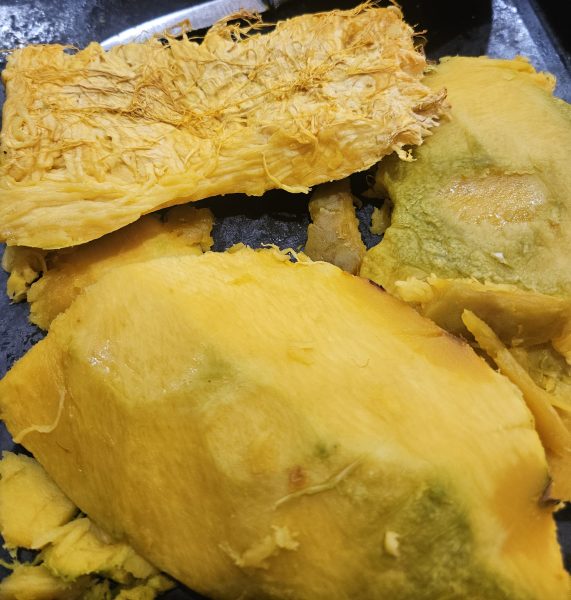
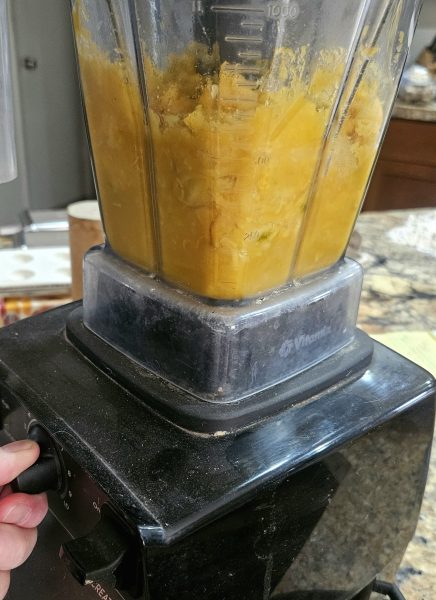
The flesh whizzed in a food processor or blender is pleasantly smooth. If I want texture, I add nuts to sweet creations or sautéed onion to savory concoctions. Stringy mashed squash turns many people away from the “mushy” vegetable entirely.

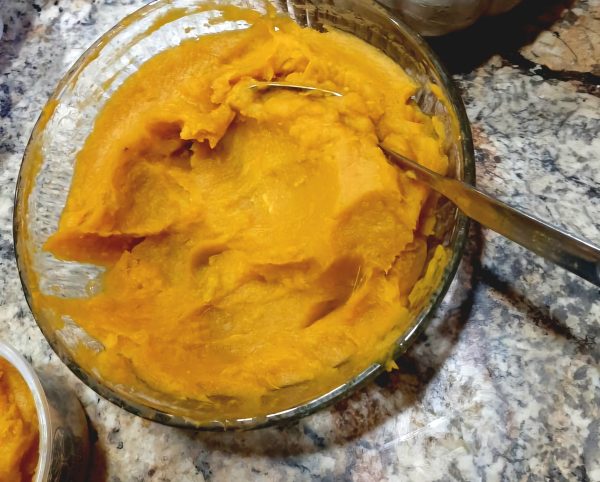
This cushaw squash was SO sweet and flavorful! If it wasn’t, I’d add a bit of sugar and salt to taste. This squash puree was thicker than normal, so I did not need to drain it. (It is critical to drain squash destined for pie or empanadas. Squash is very perishable, so I place the colander full of puree and bowl catching the liquid in the refrigerator. Don’t toss the liquid! It’s so good in a squash or vegetable soup.)

My uncle recently gave me a pasta roller attachment for the stand mixer and a ravioli press. I already own a hand crank roller that requires 3 hands to operate, and hasn’t been used in years. But inspired by the new toys, I wanted to put sweet, plentiful winter squash puree in ravioli.

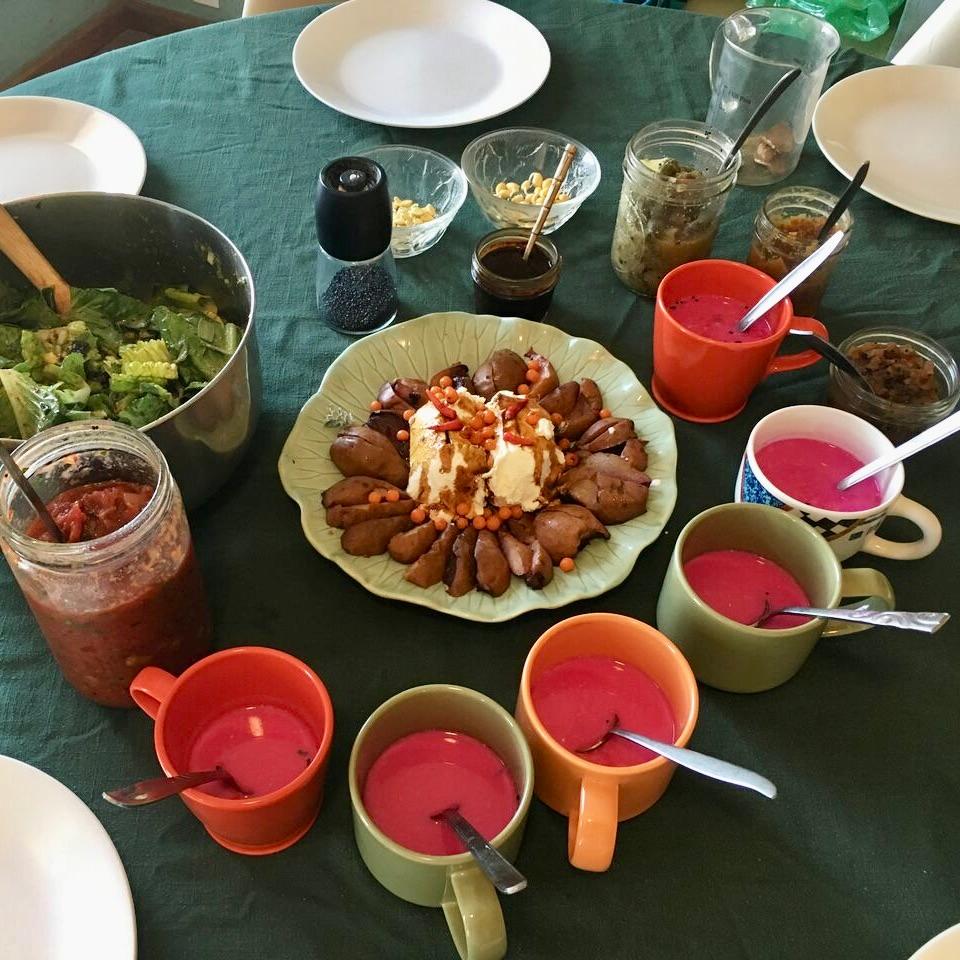
Plus, I love food cooked in tiny edible parcels, like empanadas, stuffed grape leaves, cabbage rolls, spring rolls, pot stickers, samosas and floutas (taquitos)… What are your favorites?

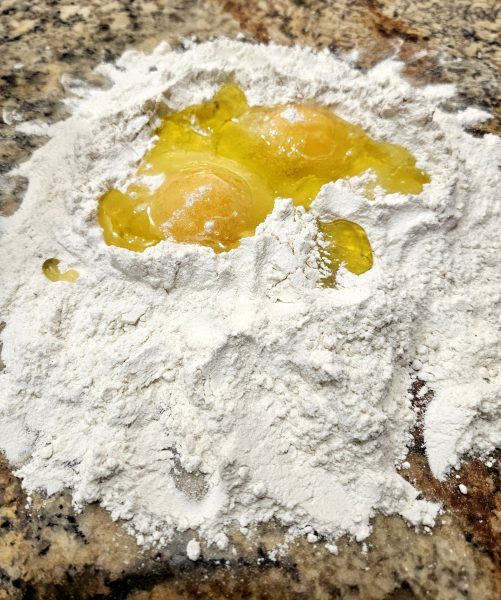
I tried different ravioli dough recipes with varying amounts of egg, water and olive oil, and everything I tried worked. It’s forgiving! But I liked the logic in this one, using a cup of all purpose flour, half a teaspoon salt, and egg and two yolks. I worked it on the countertop by hand and after an hour rest, I started to roll.

Apparently some home cooks use a machine to knead the dough, and some roll it out by hand. It’s forgiving! Basically, start the thickest roller setting and roll the dough through a few times before adjusting the setting a notch thinner.

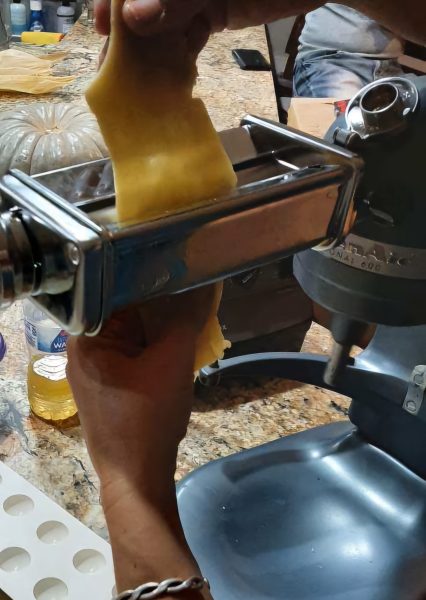
This is easy but not fast!

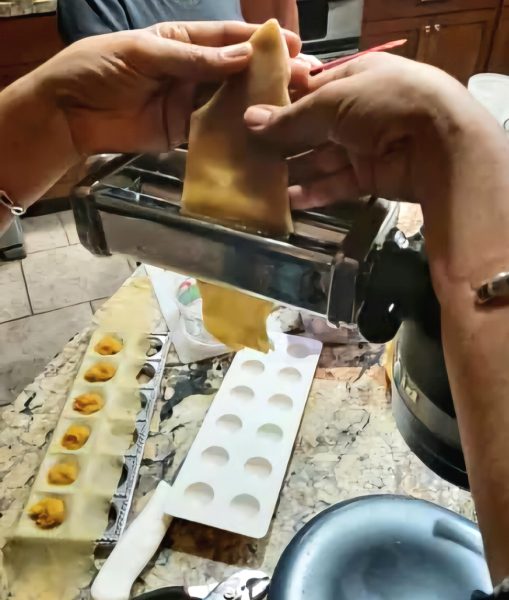
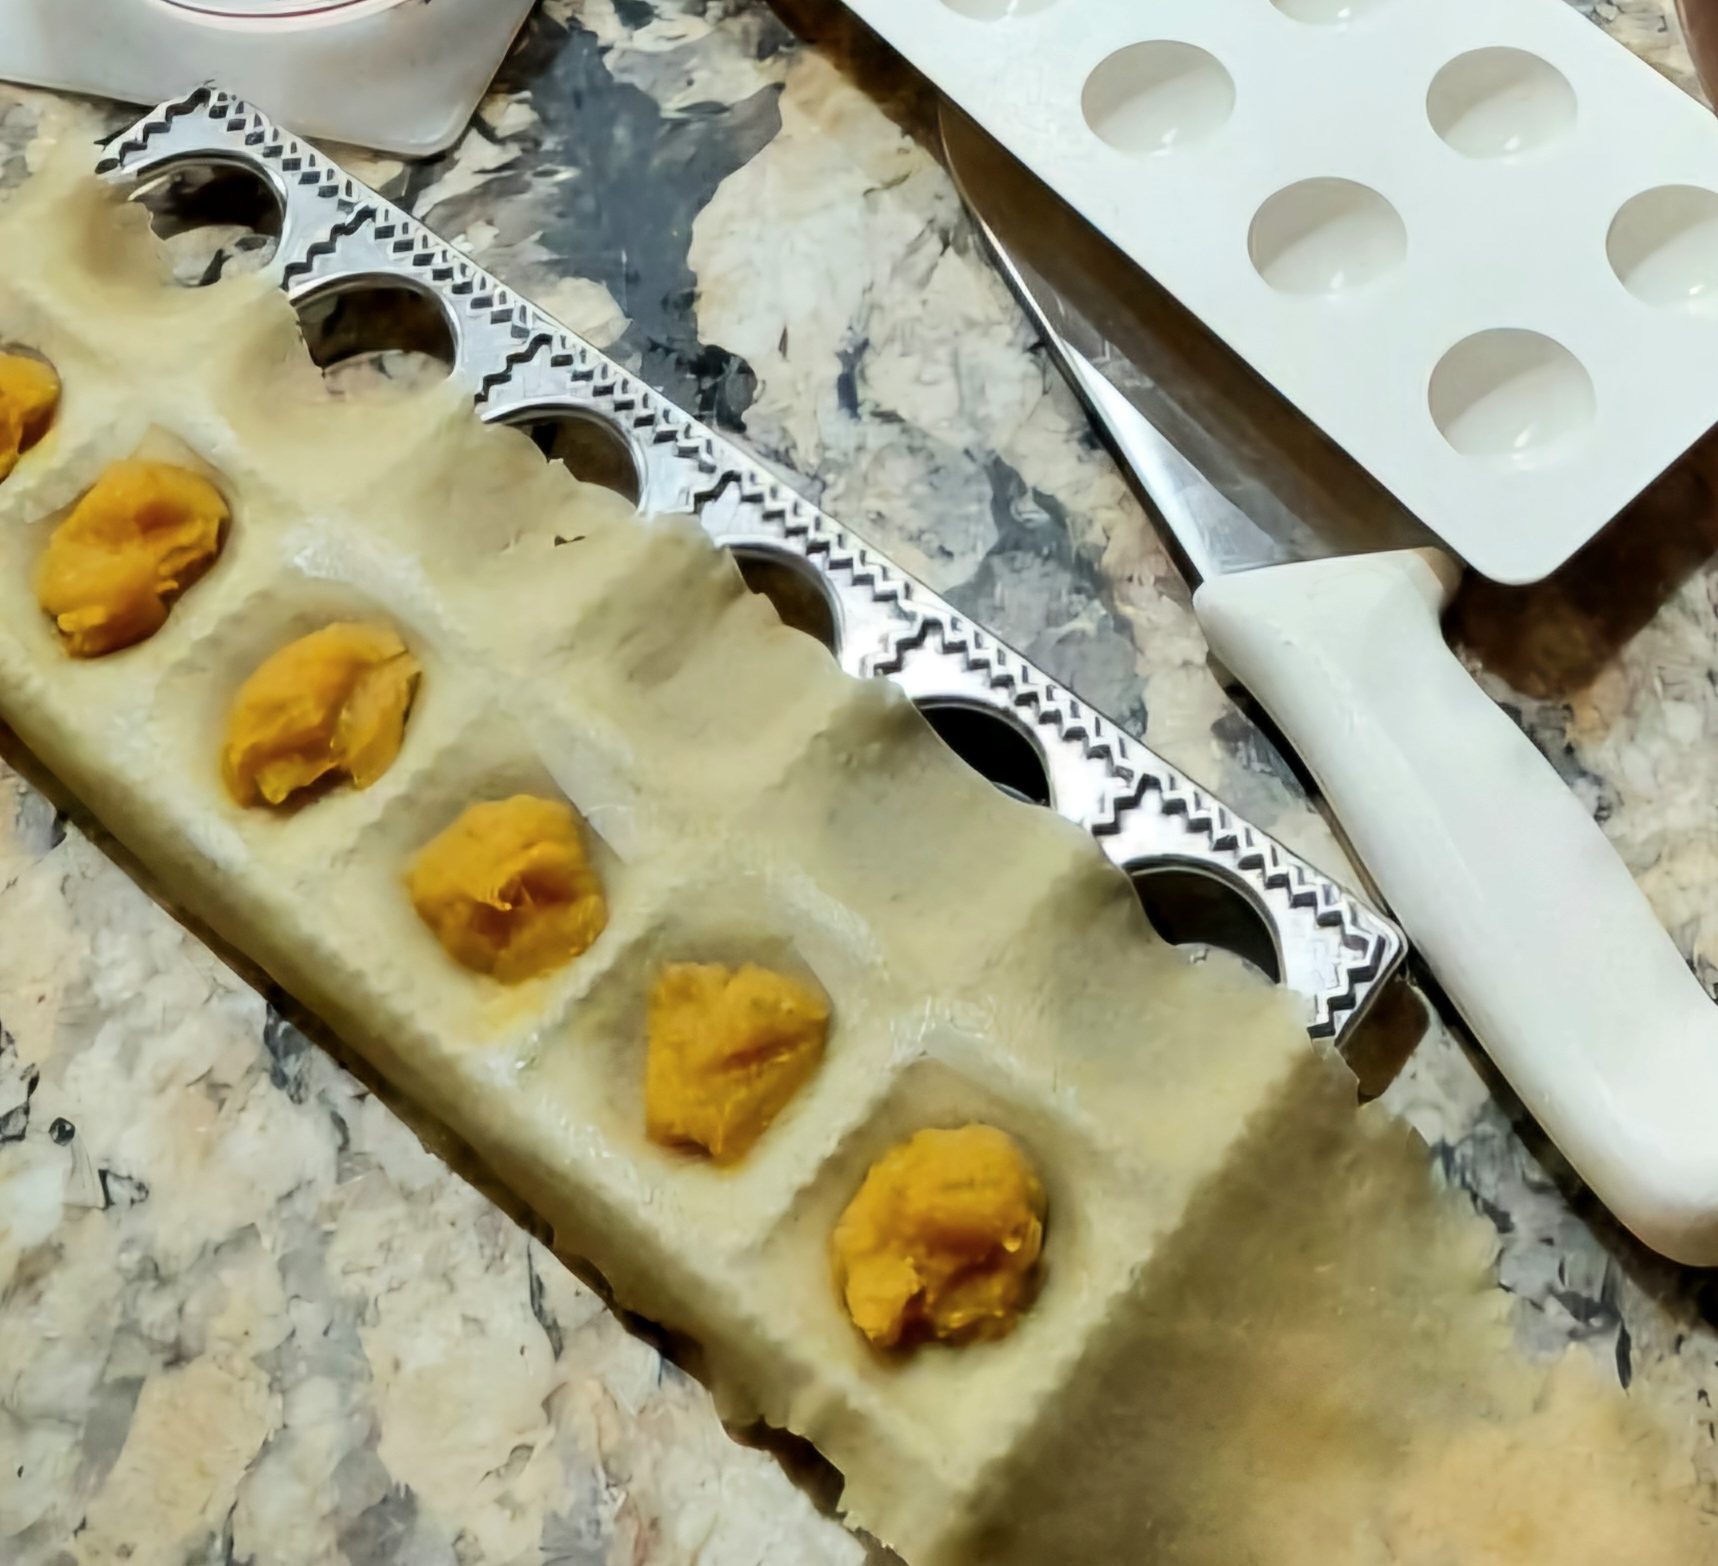
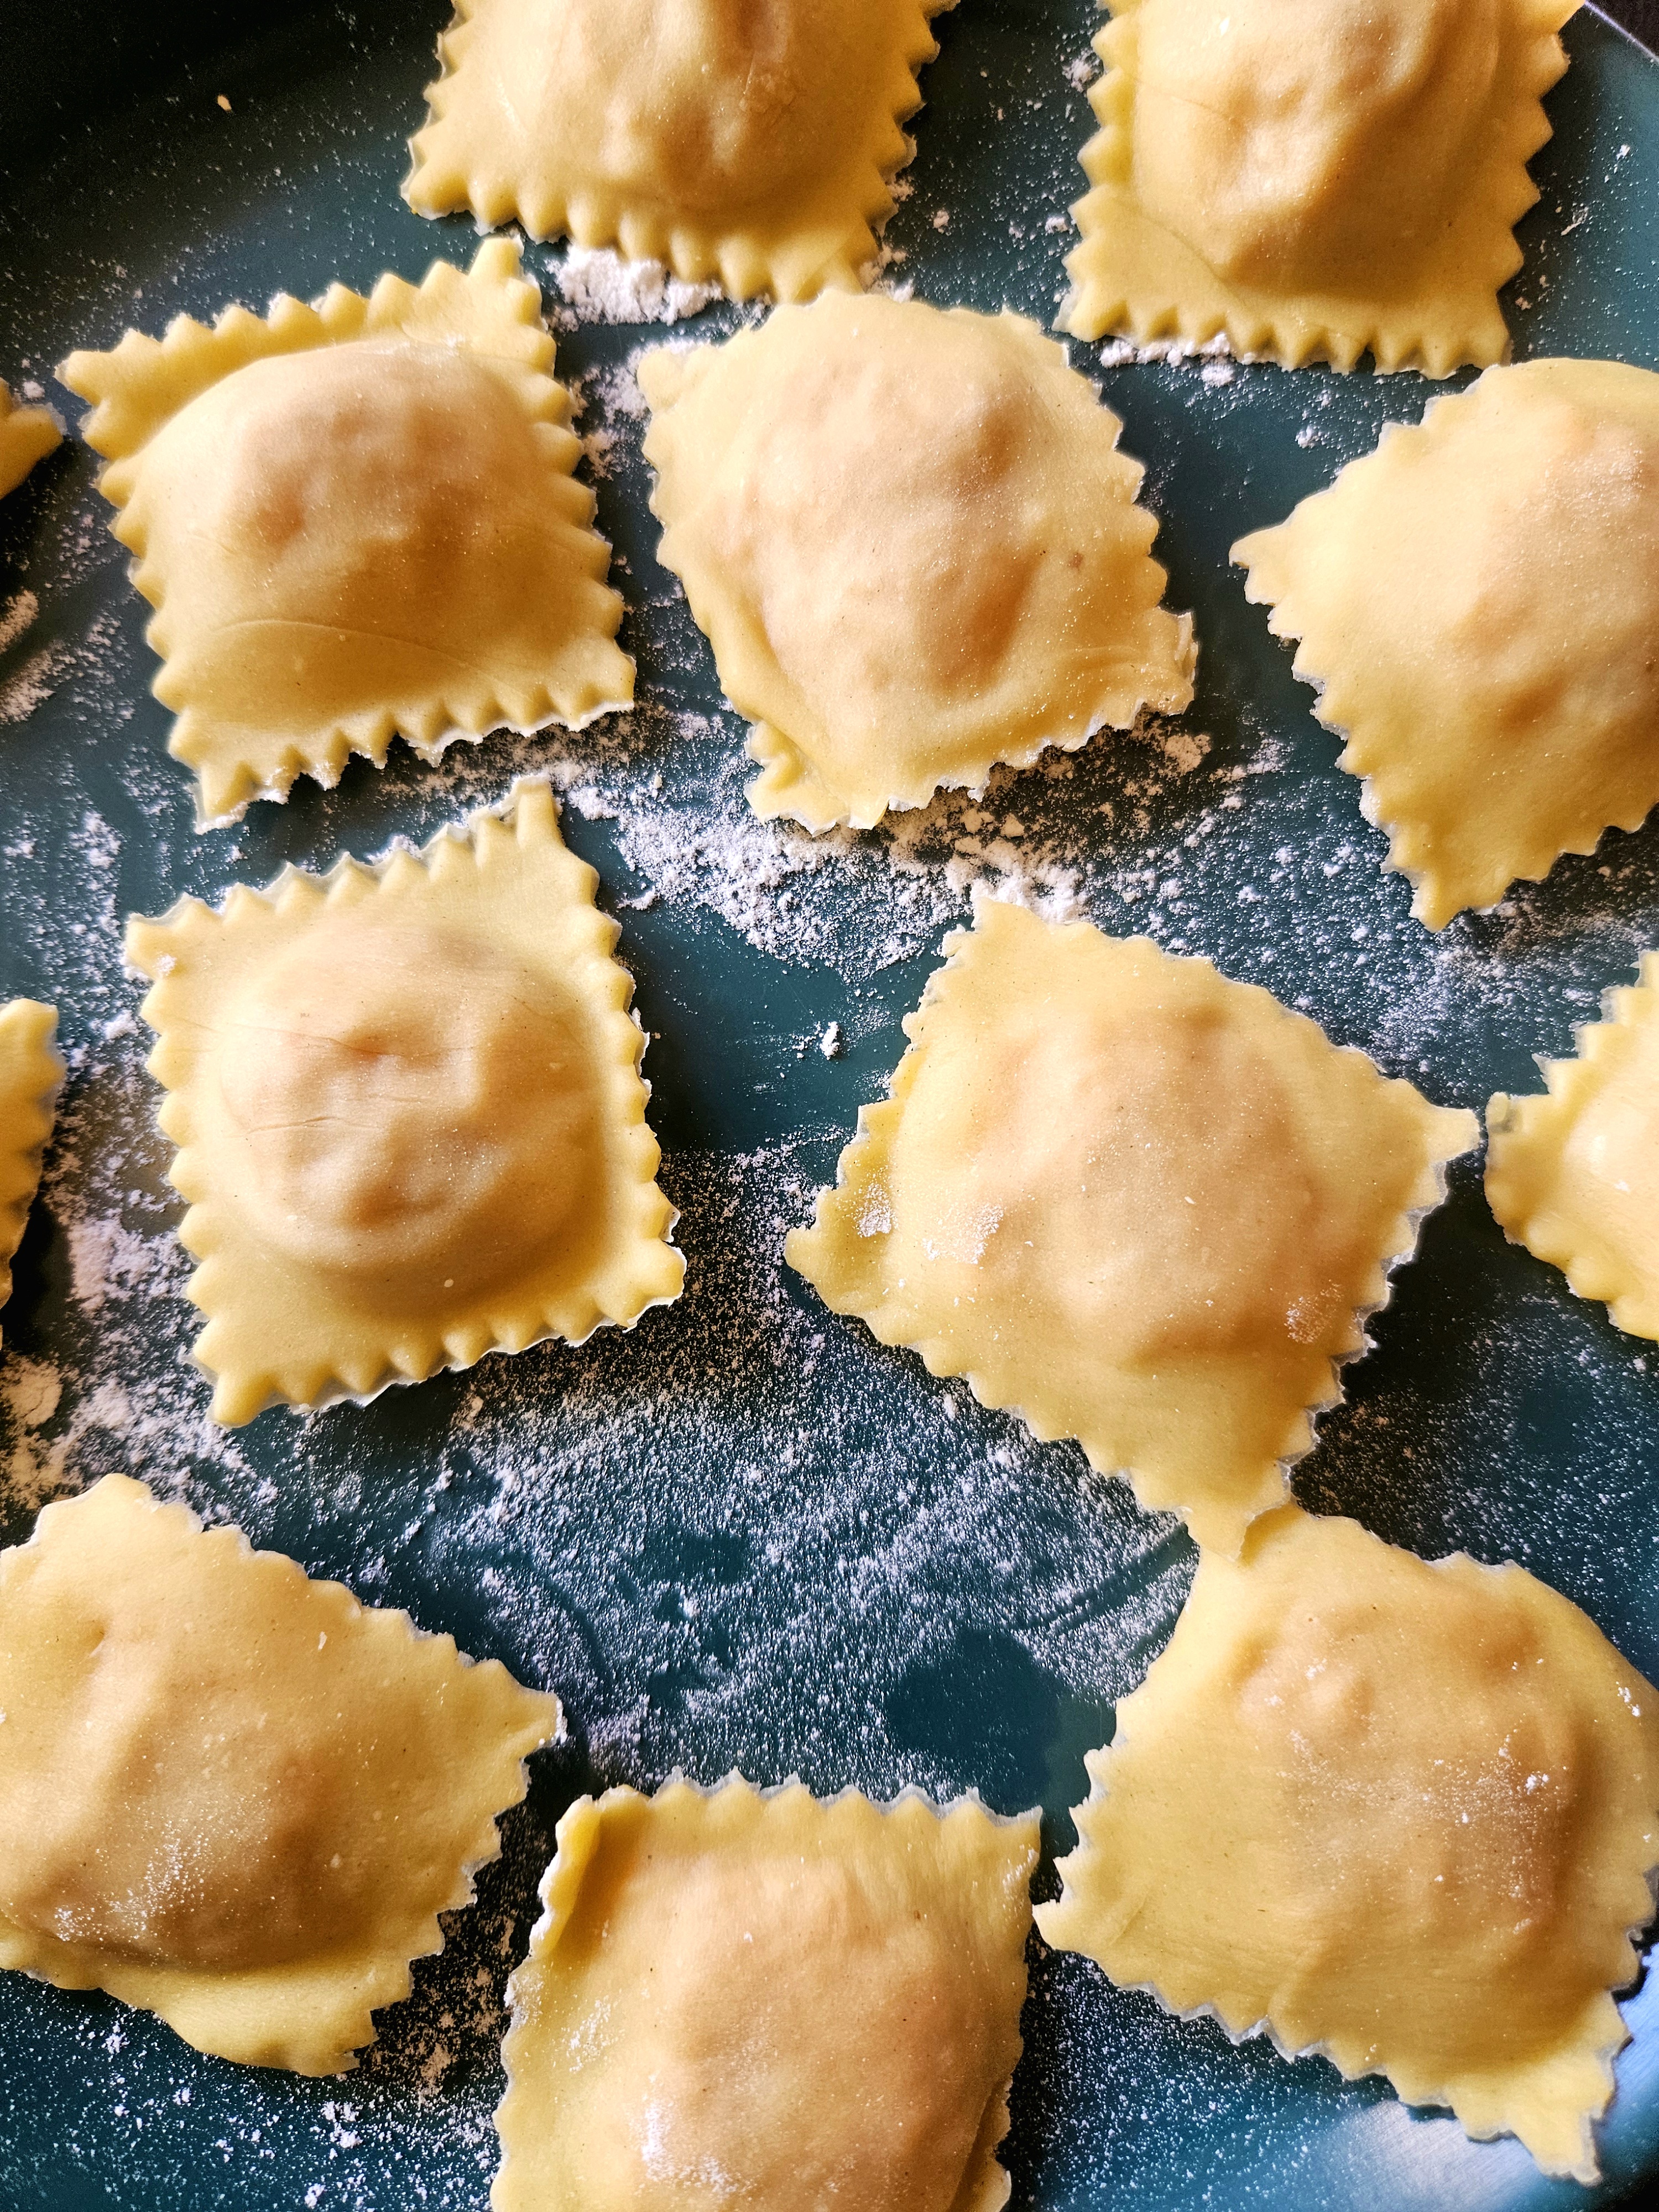
The form presses the thin dough into wells to hold a tablespoon of filling. I dabbed water along the seams to encourage better sealing, just in case. With the top sheet of dough covering the filling, it was easy to seal and perforate by using a rolling pin over the top.

This gimmicky looking tool is efficient! Dusted with flour and resting in a single layer, they are tidy, symmetrical and well sealed.

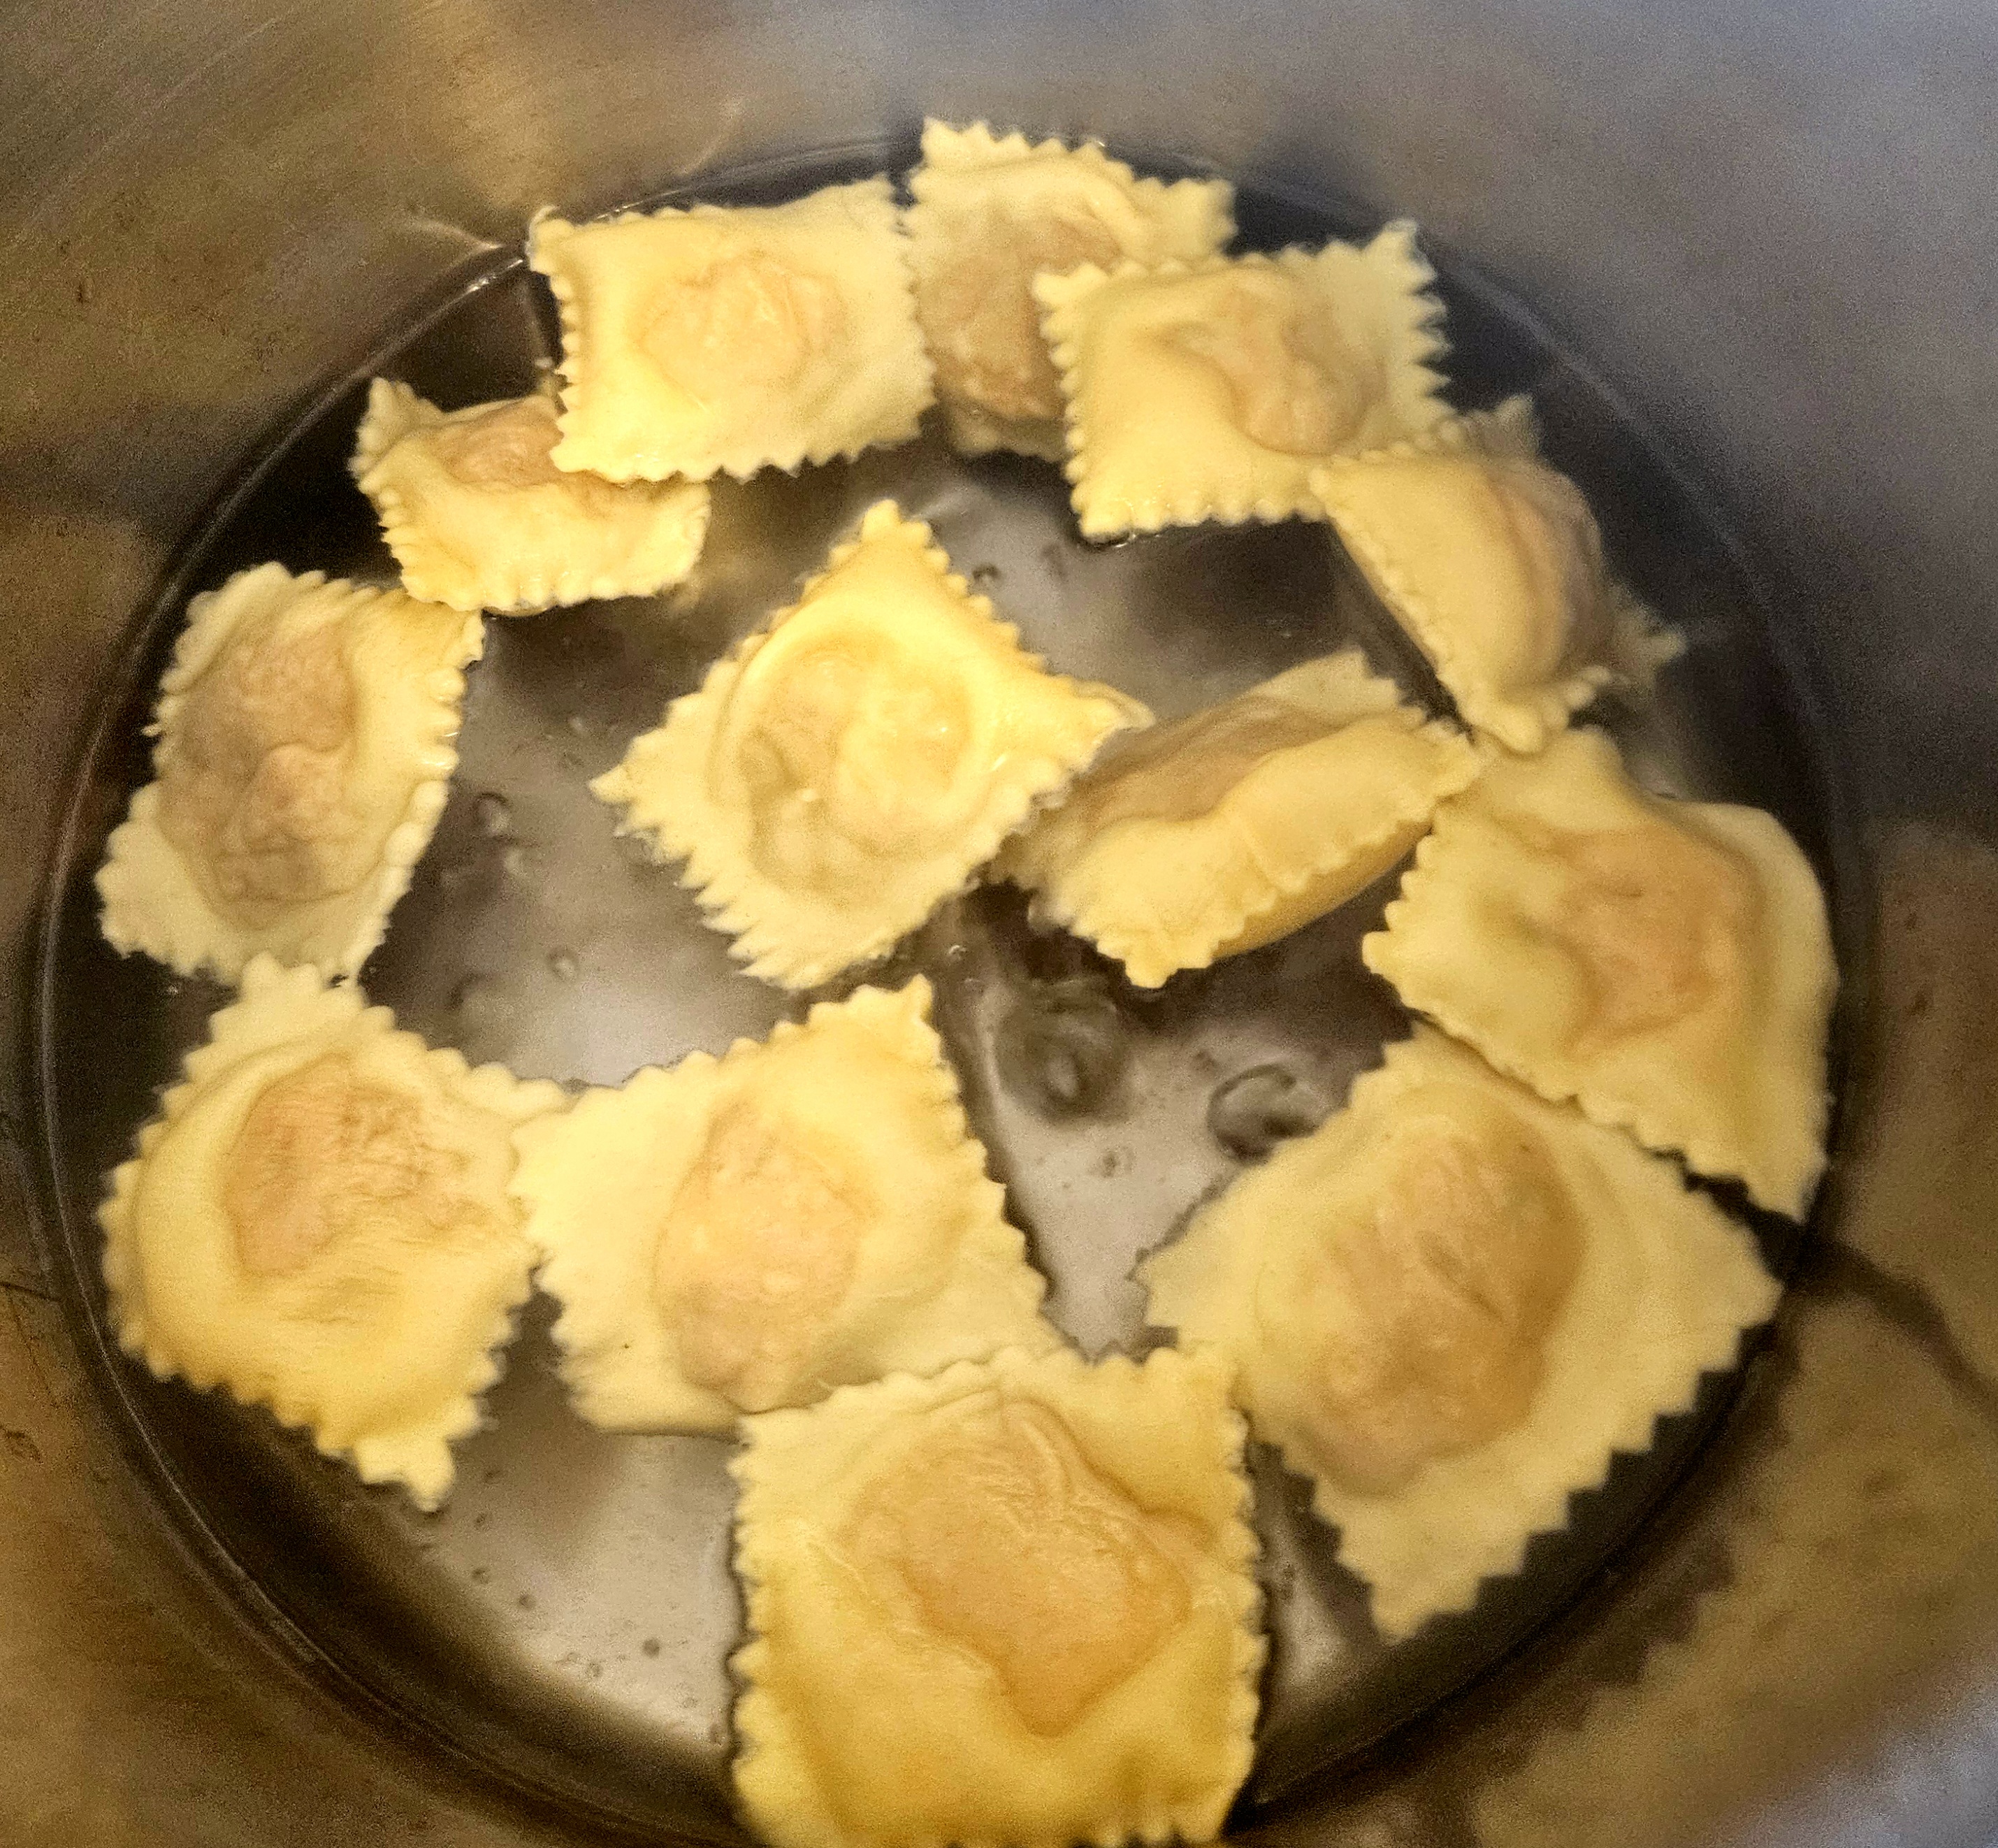
Cooking for three minutes in gently boiling water, it’s amazing they stay sealed.

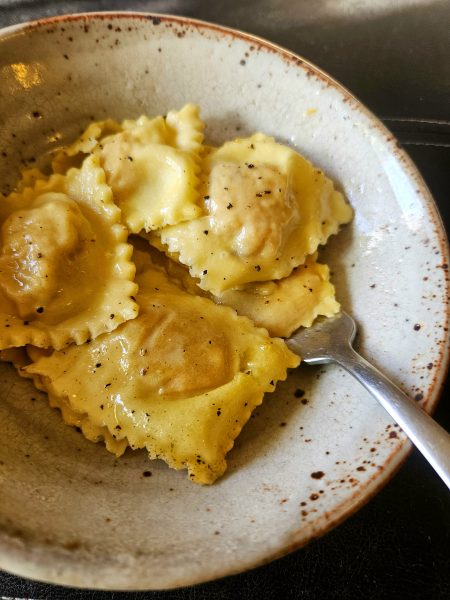
With the filling of unadorned sweet cushaw squash, dressing the finished product in various combinations of butter, olive oil, garlic, thyme, black pepper and hard cheese was delicious. My aunt fried some with tons of garlic until browned… oh my.

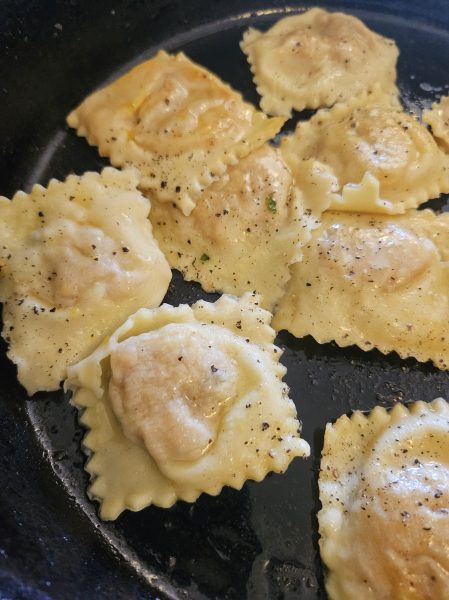
But my favorite way was just butter, salt and pepper, letting the sweet cushaw shine.

Lime Marmalade-Make It Spicy and Boozy

This is the season for small Mexican limes. Trees are usually very prolific and owners are happy to share the harvest. They are also available in produce sections of some store, particularly in the Southwest.

I live a five-hour drive from some glorious Mexican beaches along the Gulf of California. When I was younger, we often headed there on camping trips. As soon as we crossed the border, we’d buy a bag of Mexican limones from kids hawking them on the street and a bottle of tequila. A few sucks on the limes and a few swigs of the tequila and our vacation had begun. It’s Carolyn with you today. My days of crashing on the beach in a sleeping bag are over, but the love of the flavors that evoke our earlier adventures remains. Today I’ll show you how to combine those flavors into an adults-only marmalade.

This is the best season for the small limes called limones in Mexico or Mexican or Key limes elsewhere. If you live in a warm climate and have a friend with a tree, they will probably be happy to give you some. They are also widely available in grocery stores. Spike them with tequila or mescal and maybe jalapeño and you’ve got a treat made for gift giving. But keep some for yourself.  This is an adaptation of a recipe from the 1965 version of “Joy of Cooking” that I have used for all my citrus marmalades for decades.

This is all you need to make a delicious lime marmalade: limes, sugar, some tequila or mescal, and a jalapeno

While tequila will work just fine, I prefer mescal for the smoky distinctive flavor. The soaking steps are to make sure the the rinds are very soft and almost melt into the rest of the marmalade.

Here’s the marmalade happily boiling and getting thick.

The thermometer registered 220 degrees but had risen another degree in the time it took me to focus the camera. Moves fast at this point.

Boozy Spicy Lime Marmalade

(Makes 3 cups)

1 cup ground Mexican limes (11-12)

3 cups water

3 cups sugar

1 small jalapeño (optional)

1/4 -1/2 cup tequila or mescal

Quarter the limes and remove any seeds. Slit the jalapeno lengthwise and remove seeds and ribs. If you are using a food processor, add the quartered limes and jalapeno and process until all pieces are very fine. If you are using a blender, add the quartered limes and jalapeno and one cup of the water. Whirl until all rind pieces are fine.

Add fruit mixture to a large pot and add three cups of water or just two if you already used one cup in the blender. If any larger pieces of rind made it through, take them out and chop or slice finely. Let this sit for at least 12 hours. This softens the rind. (No, don’t get up at 2 a.m. if this is when the 12 hours are up. Proceed when convenient.) Bring the mixture to a boil and let sit for at least another six hours.

During the wait time, you can collect your jars. You will need enough jars for 3 cups. Sterilize them by covering with water and bringing to a boil or run them through a hot dishwasher cycle. If you use standard jars with two-part lids, they will seal. If you use recycled jars that don’t seal, you will need to store the marmalade in the refrigerator. Place the clean jars on clean newspaper or a kitchen towel.

When ready to proceed, add the sugar to the fruit, stir to combine, and bring the mixture to a slow simmer. Cook until it registers 220 degrees on a thermometer. This will take about 30 minutes. If you don’t have a cooking thermometer, take out a little and put it on a saucer in the freezer. (Turn the heat off under the marmalade while doing this.) If it firms up after 5 minutes, it’s done. If not, keep cooking. Watch closely. Once the temperature is reached, pour in the tequila or mescal. It will bubble furiously while the alcohol burns off. You’ll have to cook a little while longer to bring the temperature back up. At the end the temperature goes up quickly. Stir, scraping the bottom, very frequently to keep it from sticking and burning.

Ladle into jars. The marmalade will firm up as it cools over the next day.

(Note: If you’d like to make this quite spicy, add either more jalapeno or a small serrano chile.)

_________________________________________

_____________________________________________________________________

Carolyn Niethammer is a cookbook writer and cooking teacher. Find more Southwestern recipes in The New Southwest Cookbook and Cooking the Wild Southwest on-line or ask your favorite bookstore to order for you. Discover why Tucson was named a UNESCO City of Gastronomy in her book A Desert Feast: Celebrating Tucson’s Culinary Heritage.

Prickly Pear Borscht: A Novel Way to Mix Cultures

(The Savor the Southwest guest poster today is Barbara Rose. She has lived and worked at Bean Tree Farm since 1985. She is an enthusiastic expert in all things Sonoran Desert and has taught hundreds of students how to live in and appreciate this fragile and glorious ecosystem. We thank her for her knowledge and years of inspiration.)

My grandma Evie was born in Brooklyn in 1900 to Ukrainian immigrants, and she moved to southwest Florida in the 1920s. Her back yard was a forest of avocado and citrus trees, and her kitchen was fragrant with crocks of garlicky green tomatoes, cucumber pickles and pots of simmering chicken soup “with the feet” (her way of saying the whole chicken). She smeared onion-infused chicken fat on slices of dense black pumpernickel, and served up bowls of cold, sweet-sour beet borscht, with a hot boiled potato and big dollop of sour cream. I am so grateful that she shared with me a treasure of food and family stories.

Beets have been pickled and soured by lactic acid fermentation for ages. I love beets, but I’m not so good at growing them. Prickly pear cactus thrive, and the ripe fruits are delicious, nutritious, and a gorgeous color.

The animals know when prickly pears are ripe. If they have been nibbling, it is time to pick.


I’ve developed a way to make borscht with fermented prickly pears- red desert fruits that sour nicely, have a sweet earthy flavor, and carry far away family food traditions into the desert food forest I love and care for!

I hope you enjoy the recipe, expand on it, and make it your own.


Mash the fruit. It is easier if you freeze first as this helps break down the cell walls.


Be sure to strain the liquid through a fine mesh strainer to catch every last glochid (those are the tiny thorns).


Simmering the juice and broth helps meld the flavors.

SONORAN DESERT BORSCHT

Makes 2 quarts

1 quart fermented, sweet-sour prickly pear fruit juice (see method below)

1 quart broth, strained and chilled (chicken, vegetable, bone, mesquite, or combo, flavored with herbs, alliums, chiles, or whatever you have.)

1 hot boiled potato per serving

Sour cream, crema, yogurt

Combine prickly pear mixture and broth. Simmer with salt, pepper, chile, and your choice of herbs to taste to blend flavors. Chill if serving cold.

To each bowl of borscht add a boiled potato. Garnish with sour cream, and serve with sides of hard-boiled eggs, green onion, and sliced cucumbers.. Borscht turns a gorgeous magenta-pink when the cream is stirred in. Enjoy!

How to ferment prickly pear juice:

Add 1/2 cup of kombucha or whey (liquid strained from yogurt or cheese-making) to 1 quart of prickly pear juice a day or so ahead of making your borscht. Cover with a cloth and taste on occasion. It will develop a sweet-sour flavor as it ferments. When it has that “tang” but still retains some sweetness, it’s ready to use. Sometimes I combine citrus juice with the prickly pear and ferment both. This juice will store in your  fridge for some time, becoming more sour from fermentation. It can also be frozen.

Final step: Serve for lunch. Goes well with other desert delicacies. Find recipes in the Desert Harvesters’ cookbook  Eat Mesquite, a Cookbook for Sonoran Desert Foods.

_______________________________________

You can find more recipes for prickly pear and other wild desert foods  in Eat Mesquite and More: a Cookbook for Sonoran Desert Foods and Living, available at Food Conspiracy Co-op, EXO, Crisol, Mission Garden, Desert Museum, and online at desertharvesters.org. More recipes can be found in Cooking the Wild Southwest: Delicious Recipes for Desert Plants. 

Savory Wolfberry Amaranth Balls

Hello friends, Amy here enjoying another great year for the wolfberry bush (Lycium fremontii …I think) in my yard. Tucson’s native species of the Chinese goji berry, they are similarly packed with antioxidants and health benefits. In the tomato family, it’s called tomatillo in Spanish, not to be confused in size, shape, color or taste to the garden variety of husked ground cherries that go by that name. Wolfberries taste somewhat like tomatoes and work well in sweet and savory dishes, when I manage to harvest more than I eat raw from the bush. Thriving on only rainwater, one huge plant produces plenty of fruit for me and the resident phainopeplas.

Inspired by this recipe for millet balls, I used fresh wolfberries in place of dried Turkish barberries.

It was delicious! It reminded me of falafel, crispy on the outside and grainy on the inside. A simple cilantro, garlic, lemon juice, olive oil chutney complimented them perfectly.

So the next time, I decided to use amaranth seeds. I bought this from the store, but you can harvest your own from wild or cultivated plants in the late summer if you’re ambitious.

I toasted them in oil until they became a shade darker and a few of them popped open.

I added water, three times the volume of amaranth seed, and cooked in the solar oven until it was creamy. Then I mixed in fresh wolfberries and enough flour to make a soft dough.

The dough was muuuuch stickier, so I added significantly more flour than for the millet balls and still they looked shaggy. (I used all purpose wheat flour but next time will try amaranth flour).

The toasted flavor came though and I’m glad the only seasoning I used was salt and wolfberries. The dough certainly didn’t need any egg or flax egg to hold together! They baked up just as well as the millet version, but with the texture of a cookie. Next I’ll try them sweetened!

I served them with a lemon pickle but that tomatillo salsa would be good. I took the rest to a picnic among the wildflowers. Happy spring!

processed by AtomJPEG 1.5.0n