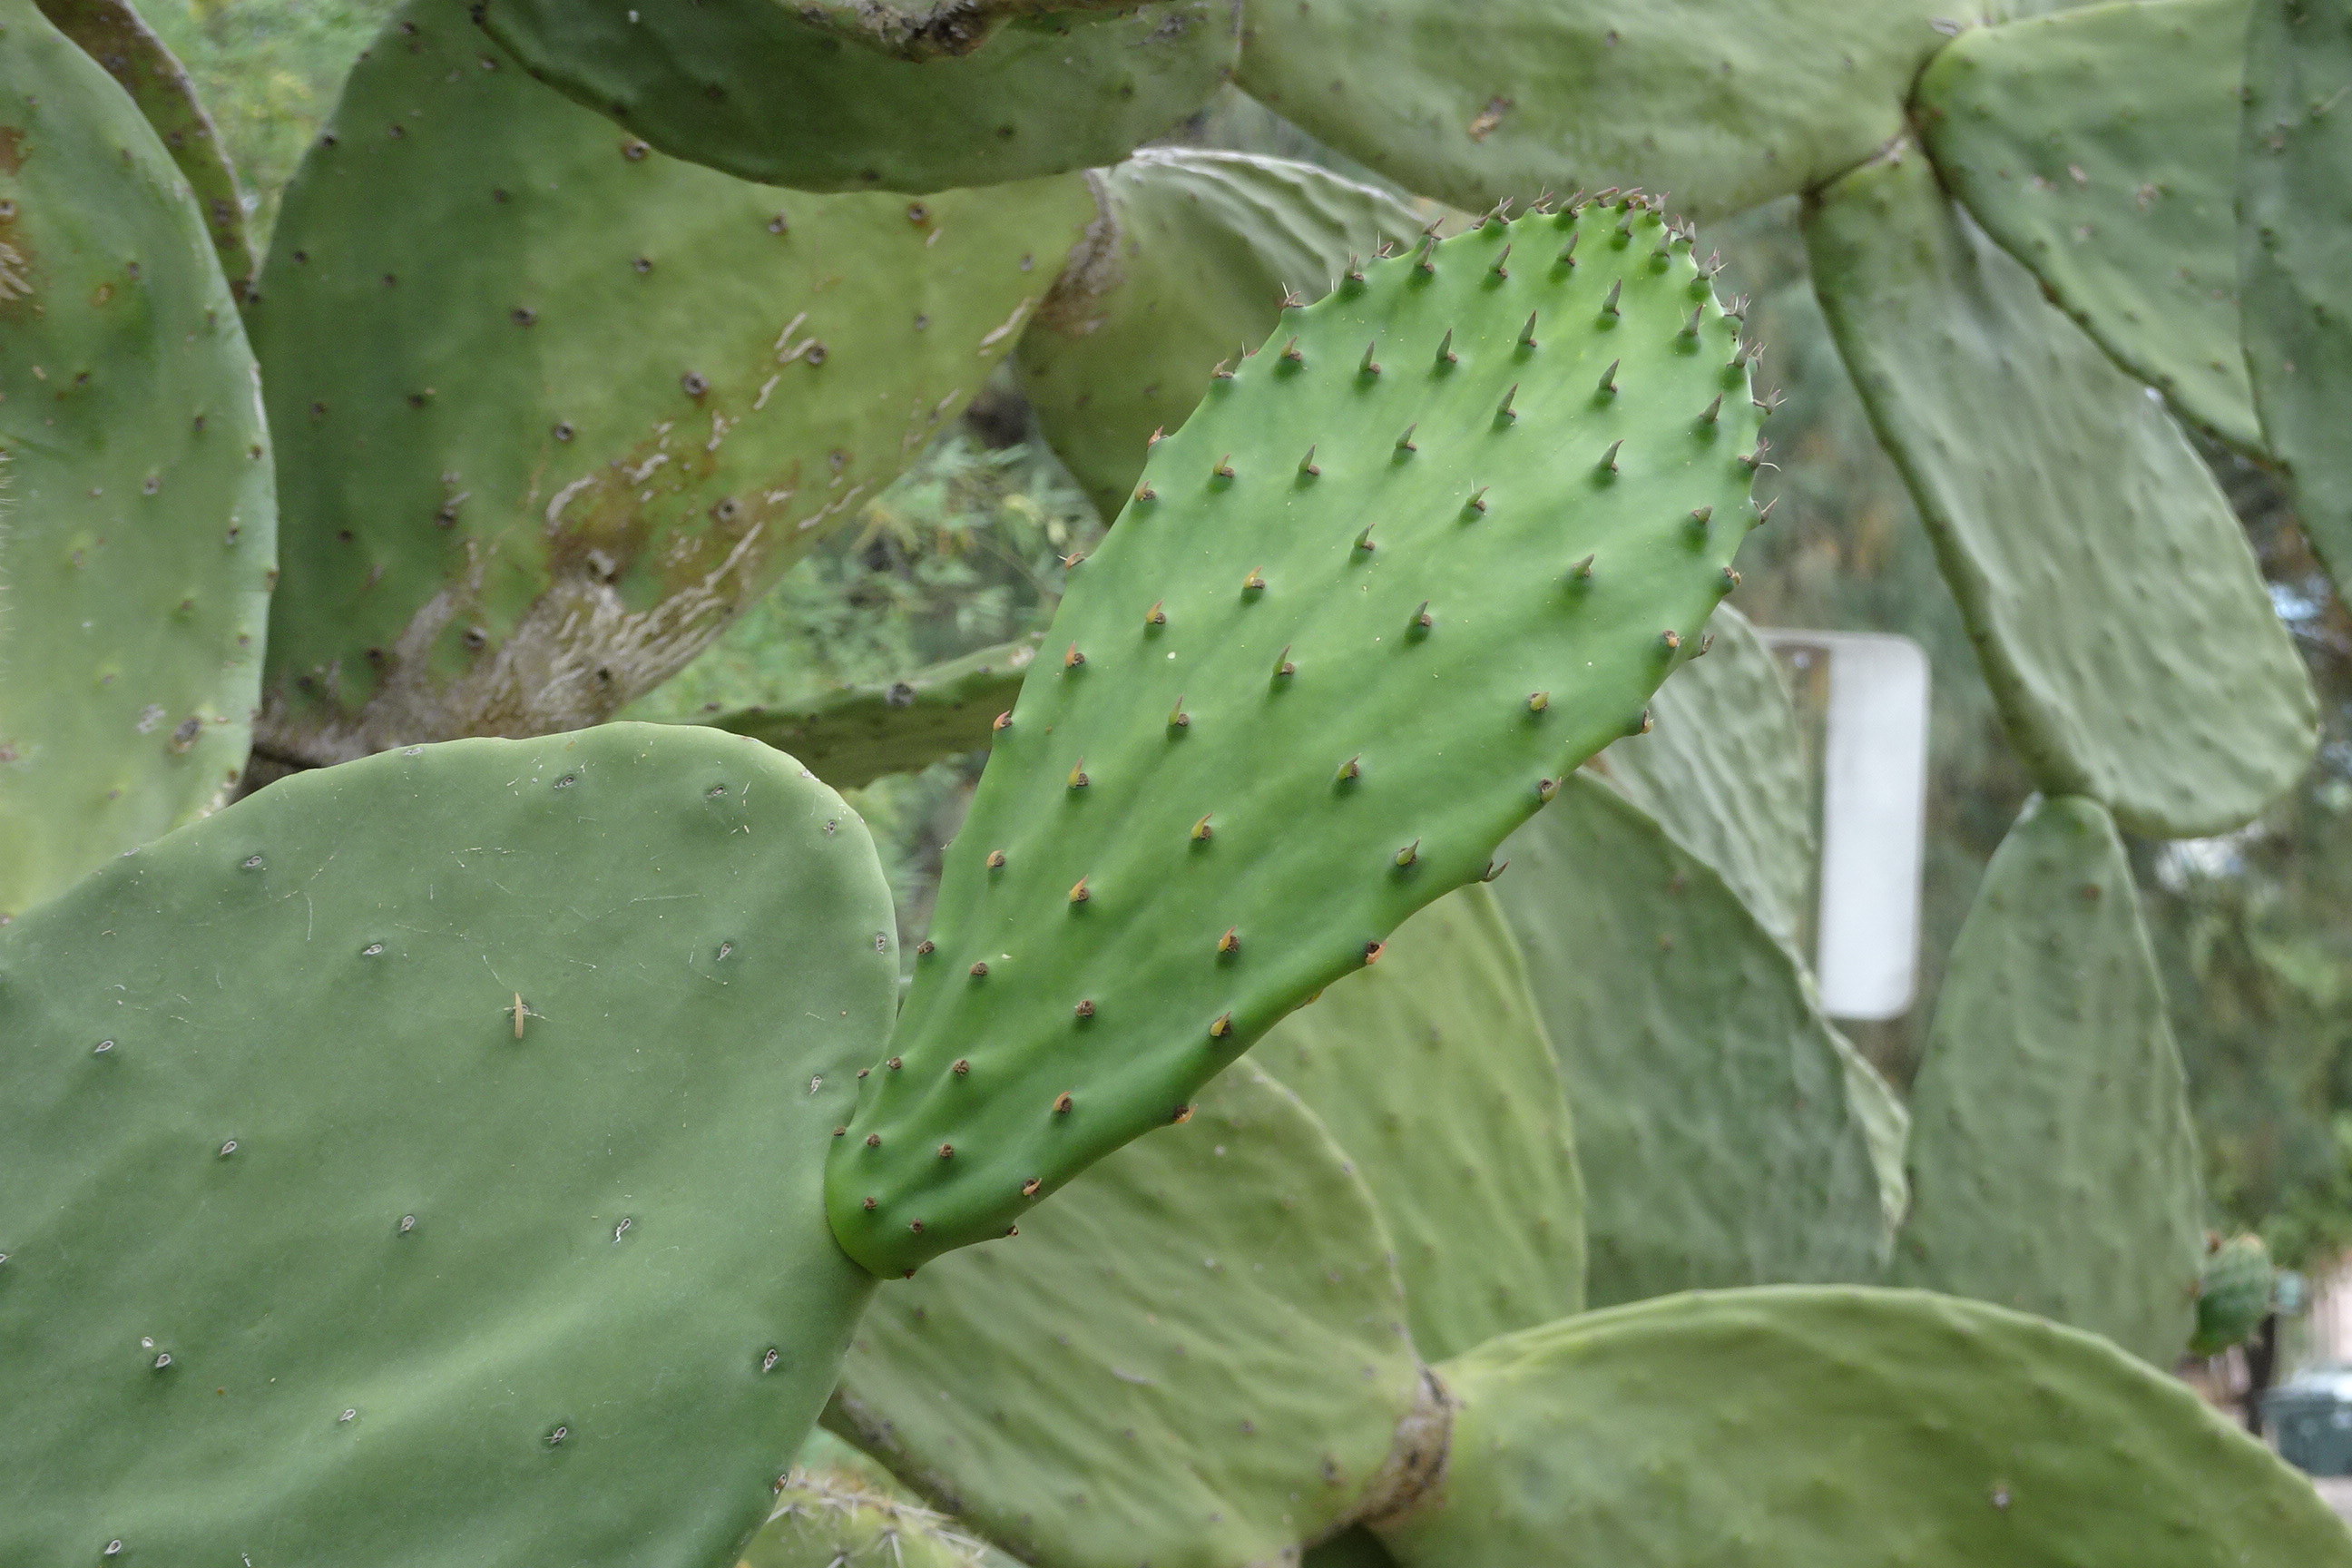
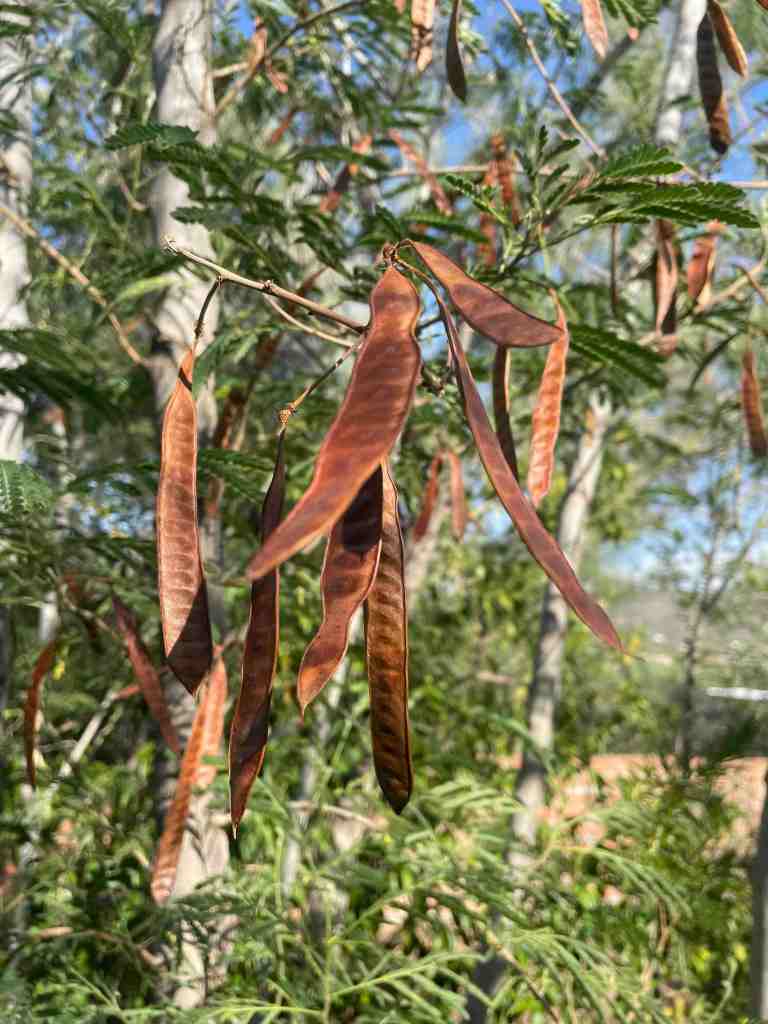
New spring growth on a Opuntia ficus indica prickly pear cactus in my yard.
When spring comes to the desert it’s time for the prickly pear cactus to send out their new pads, in Mexico called nopales or pencas. This is when they are are tender and perfect to harvest for food. Later in their lives, they develop a woody interior structure.
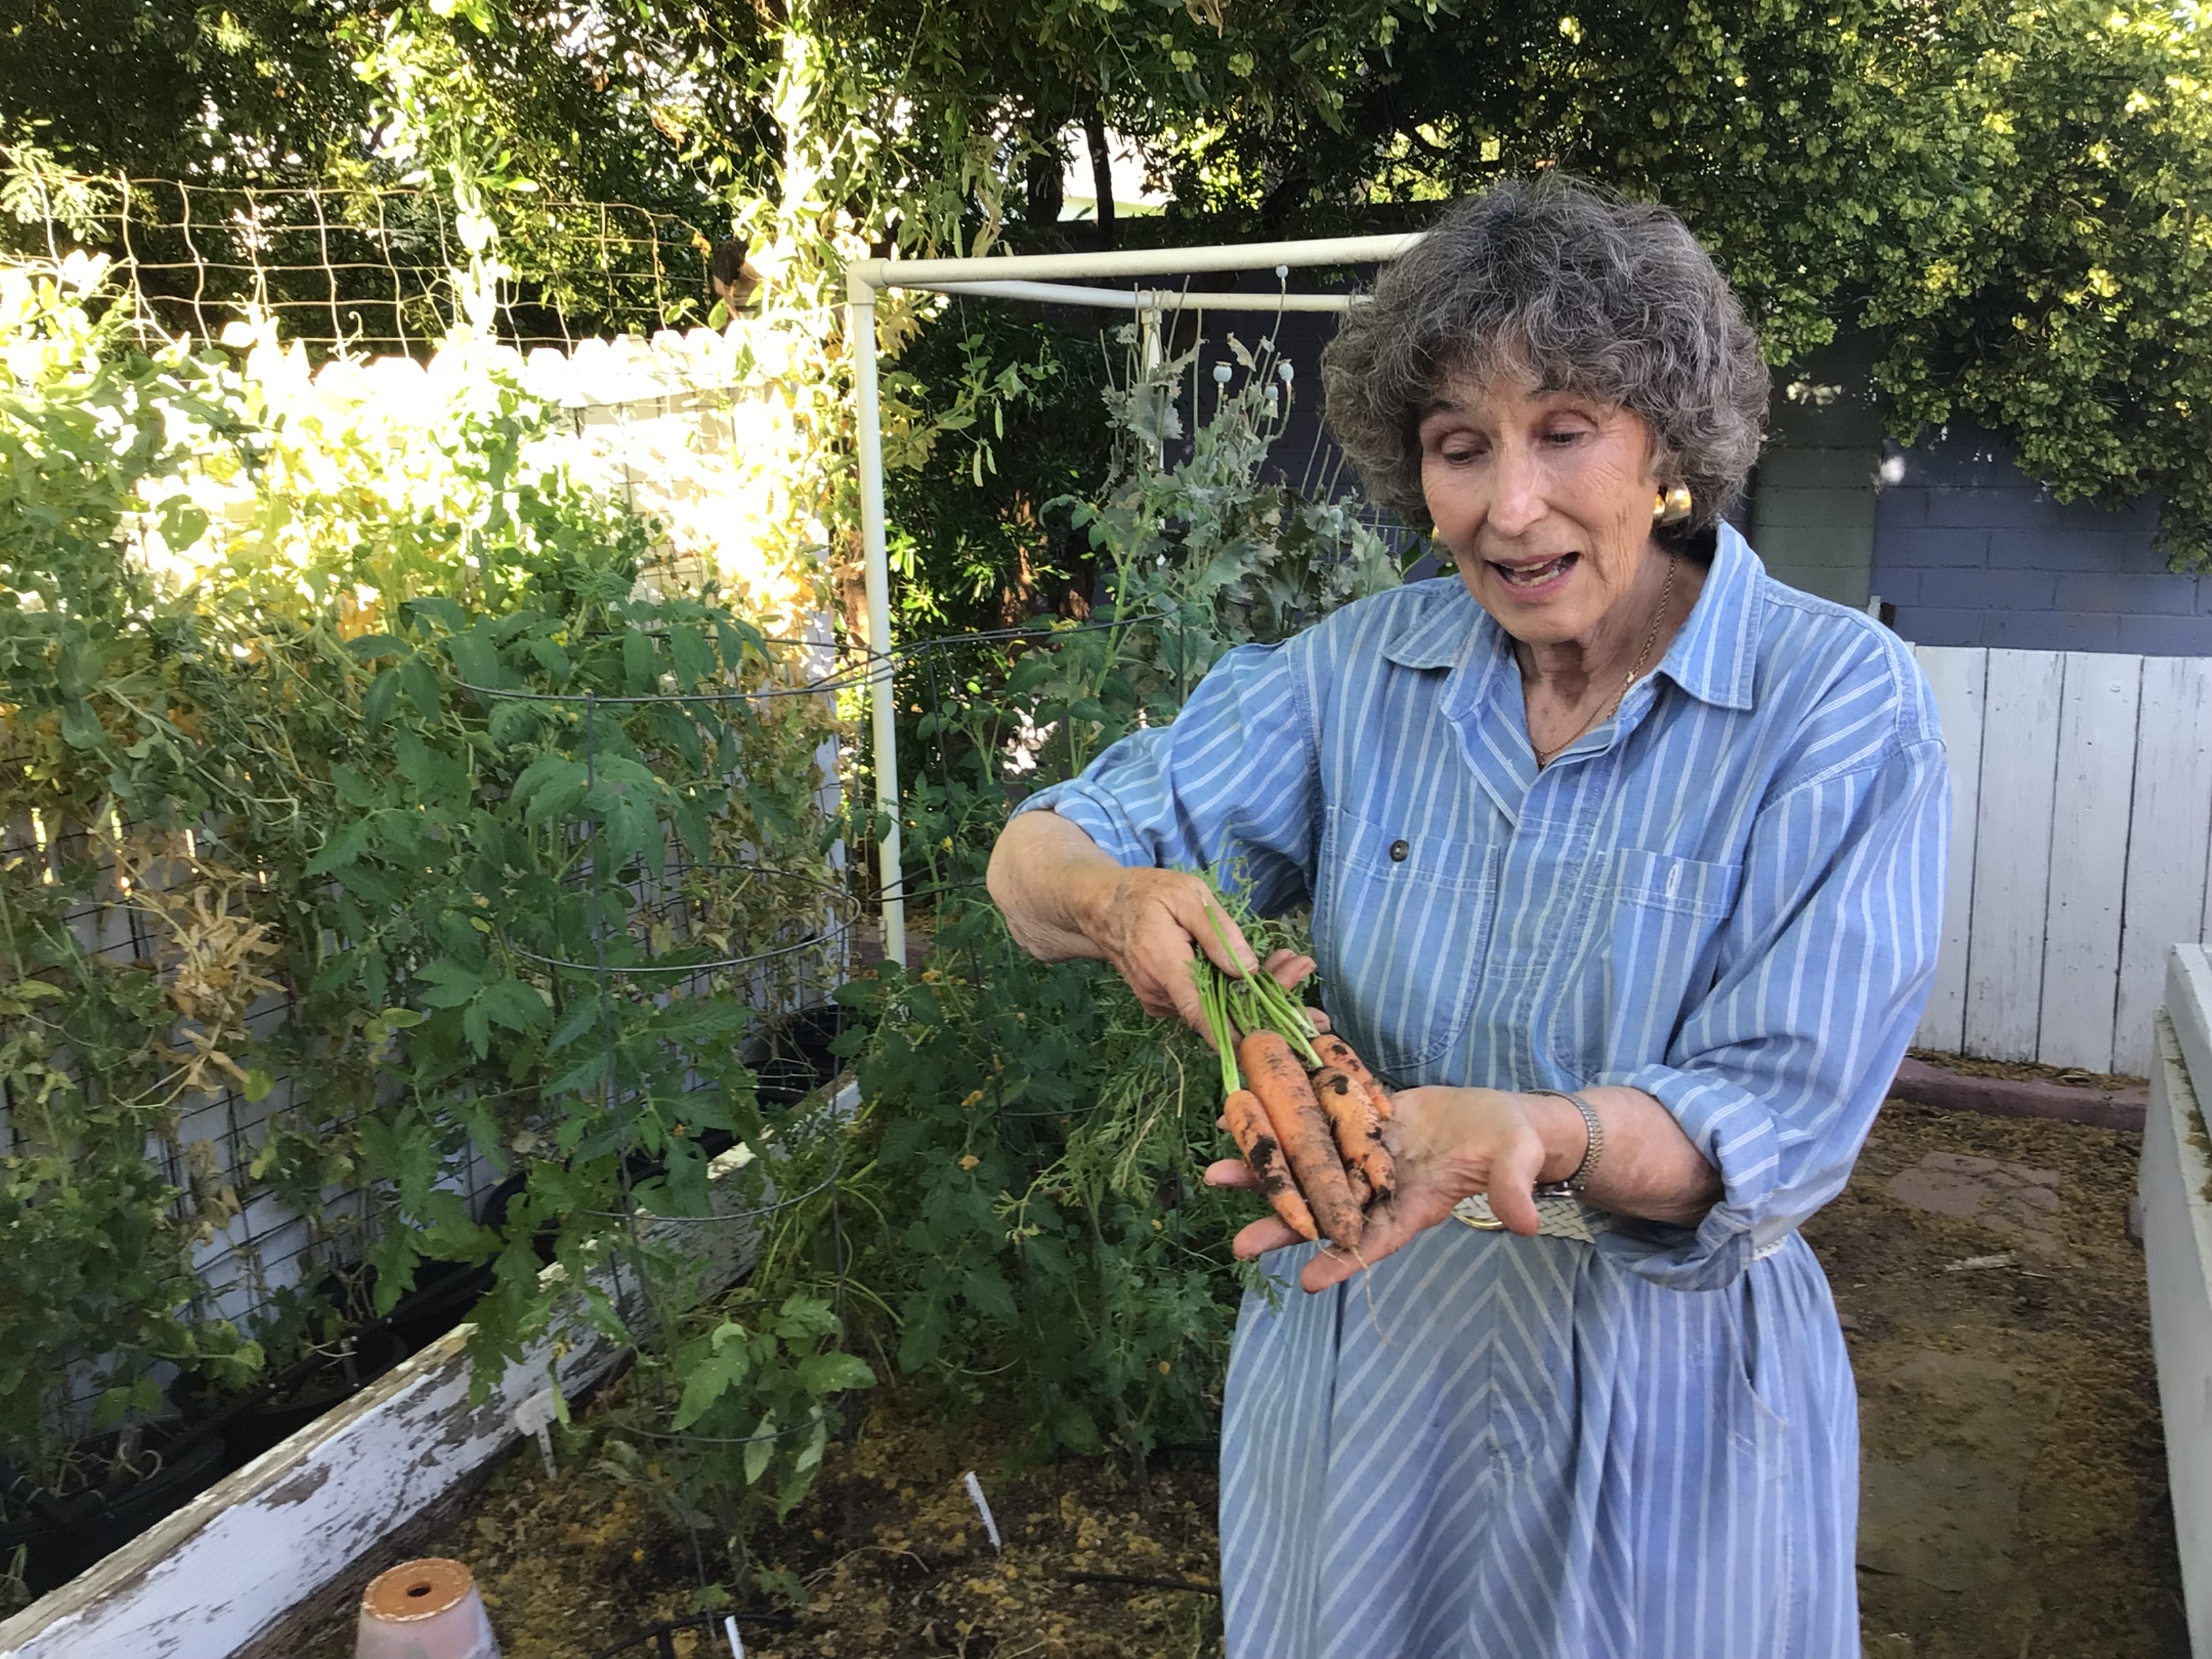
It’s Carolyn today. Although I have loved gathering wild foods for half a century, I also deeply enjoy my garden. This year was a fabulous carrot year for me. So my thoughts went to combining carrots and nopales.
This was a really good year for carrots in my garden.
Although all prickly pear pads are edible, the easiest to clean are the tall Mexican type called Opuntia ficus indica. These don’t grow wild in the US, preferring the comfort of a garden where they can be watered and protected from the occasional freezing night.
The nopales (or nopalitos when cut up small) are a common vegetable in Mexico and found frequently in Mexican restaurants. They are a long-time Mexican folk remedy for cholesterol and blood sugar issues.When a team of medical investigators did some experiments about 20 years ago, they found that the traditional knowledge was true!
Now researchers in the US and Europe are using sophisticated laboratory techniques to investigate prickly pear fruits, pads, flowers and seeds as a cure for a wide array of ills. They think they have properties that are antioxidant, antiviral, anti-tumor, anti-diabetic, anti-parasitic, and anti-cancer. Good reasons to include them in your diet!
If you love trying new foods, you’ll want to share them with family and friends. It’s best to introduce something unusual in the context of something familiar. This easy recipe fills the bill and is delicious as well.
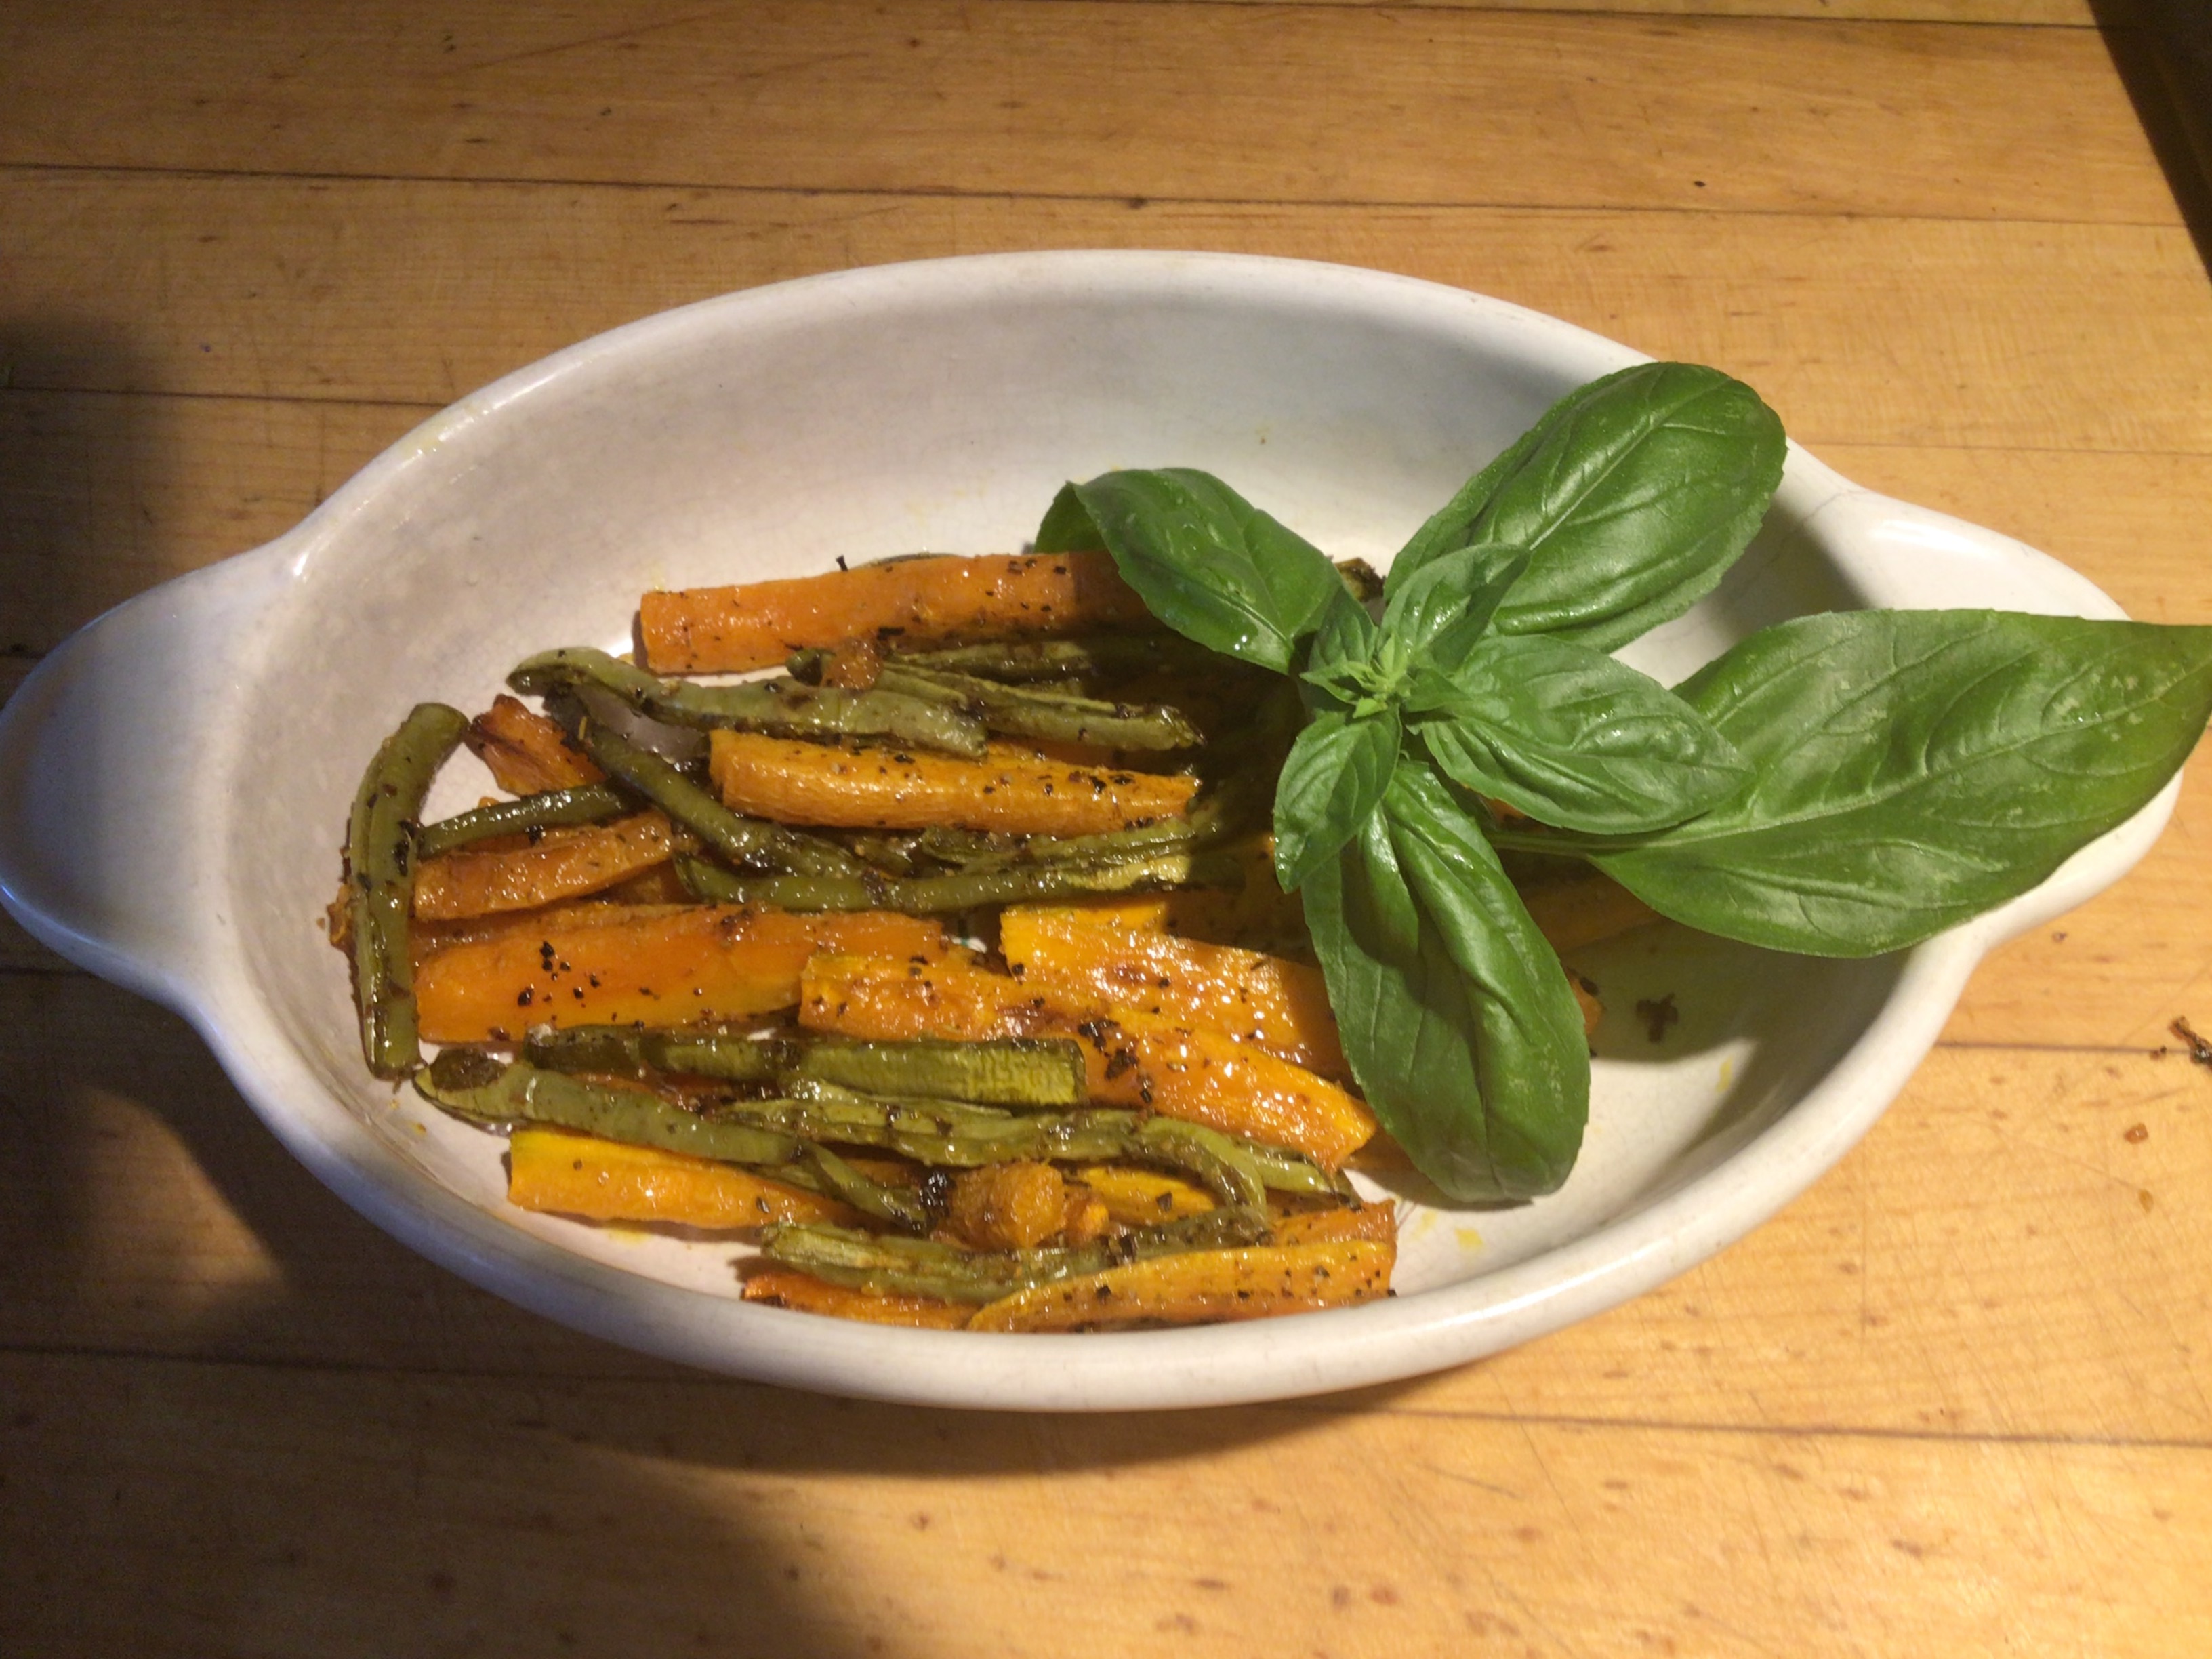
Roasted Nopales and Carrots
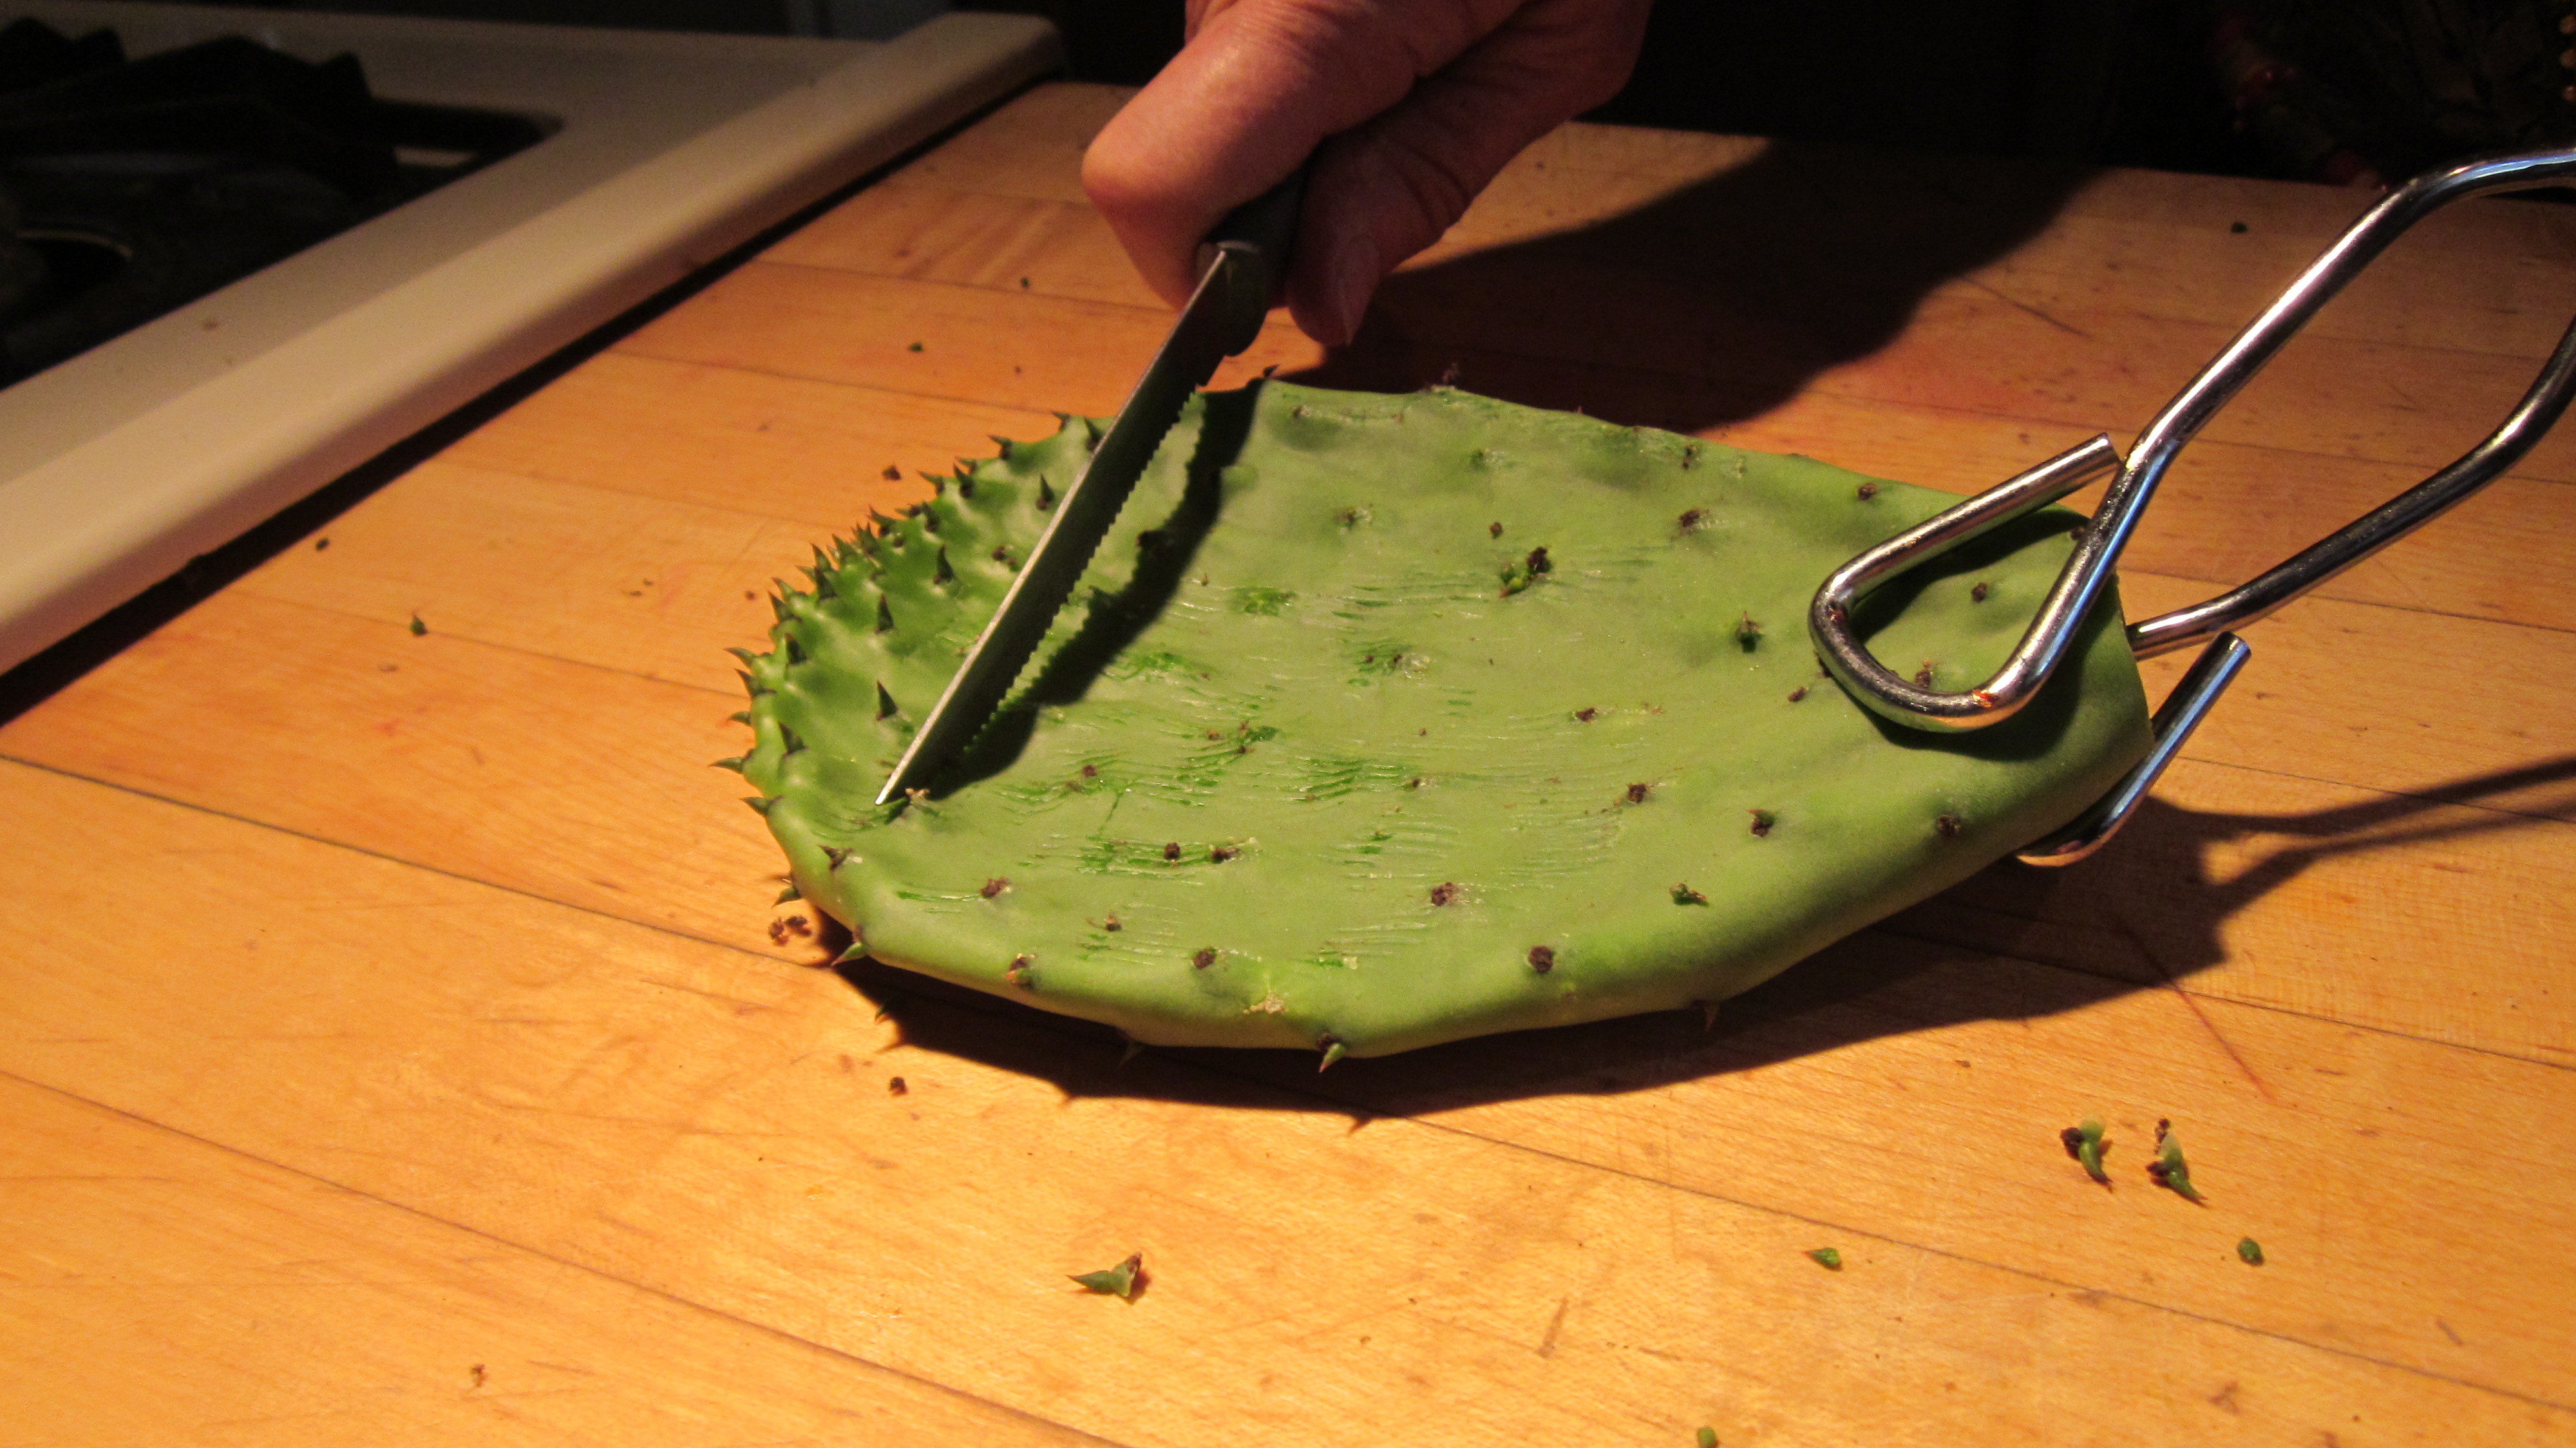
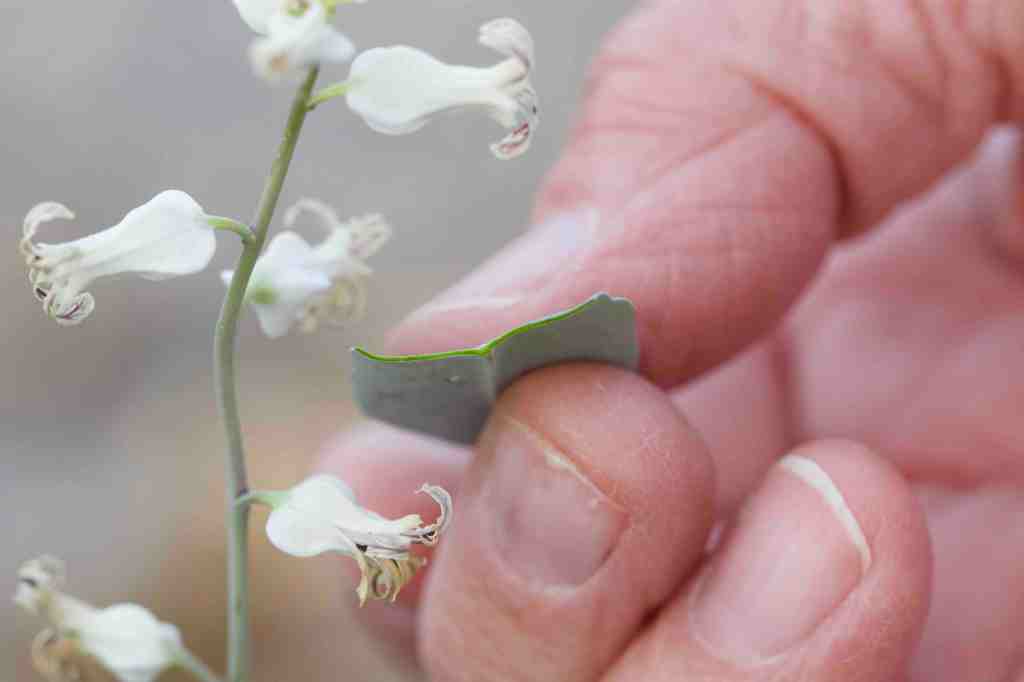
First, you’ll have to clean the prickly pear pad. Using gloves, scrape against the stickers using a steak knive and rinse to made sure they are clean.
Scrape against the stickers until the pad is clean.
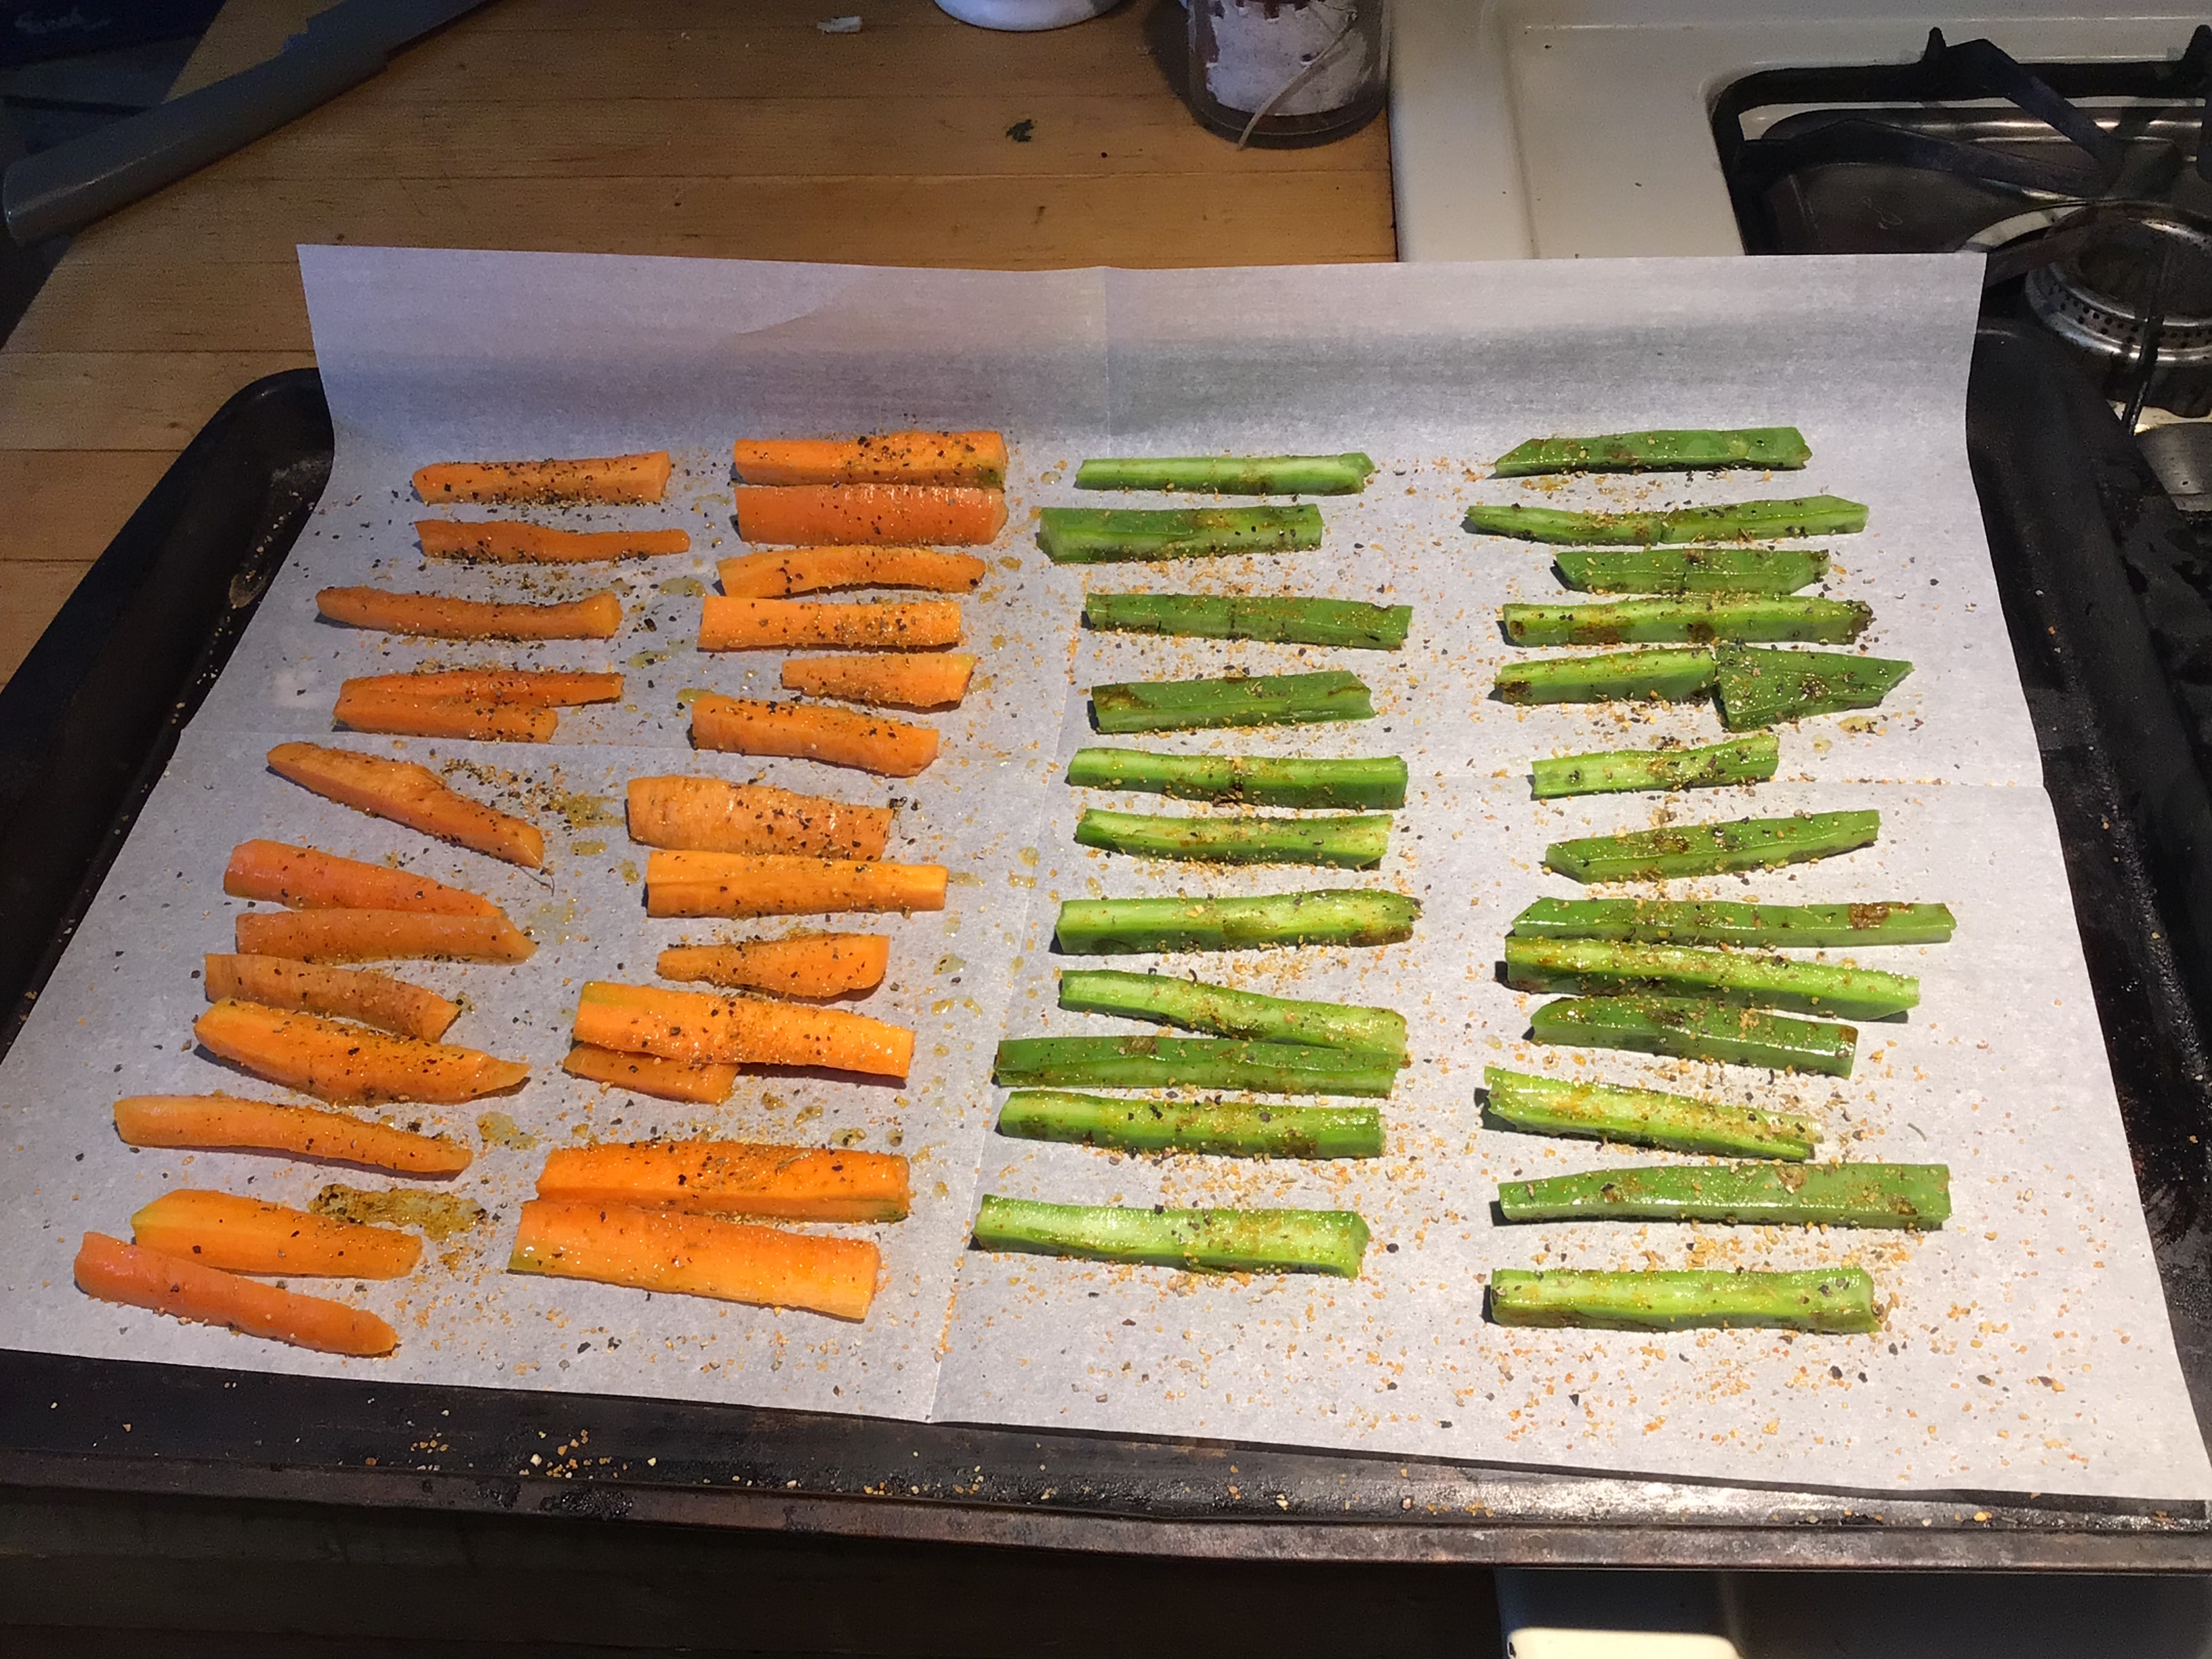
This recipe does not use exact amounts because it is very flexible. Use what you have. From one medium prickly pear pad, I cut about 24 match-stick size pieces. I used three medium-sized carrots to make 24 small pieces. You can also add other vegetables such pencil-thin asparagus, rutabaga, or beets.
Put the cut vegetables in a small bowl and drizzle in a little olive oil and toss to cover. Arrange on a cookie sheet lined with parchment paper or aluminum foil. Sprinkle with your favorite spices. I used seasoned salt, pepper, and Trader Joe’s citrus-garlic mix. Be generous as this will give your finished dish vibrant flavor. Bake in a 400 degree oven for 20 minutes.
Vegetables ready for roasting.
Tip: After roasting, I realized that the cactus pieces had shrunk to half the size of the carrots, changing the proportions of the dish. I suggest using twice the amount of cactus to other vegetables.
Transfer to serving dish. If you have seasoned generously you won’t need to add any dressing. If you wish more flavor, a simple homemade herb-heavy vinaigrette will work fine.
Tasty vegetable dish ready for the table.
You can learn more about the history of food in Southern Arizona in my latest book A Desert Feast, the story of the last 4,000 years of food in the Sonoran Desert. Want more recipes using foods of the Southwest? You’d find ideas for collecting and using 23 easily recognized and gathered desert foods in Cooking the Wild Southwest: Delicious Recipes for Desert Foods. . Recipes from top Southwest chefs are collected in The New Southwest Cookbook. Just click on the titles for more information. You can learn more about me on my website.
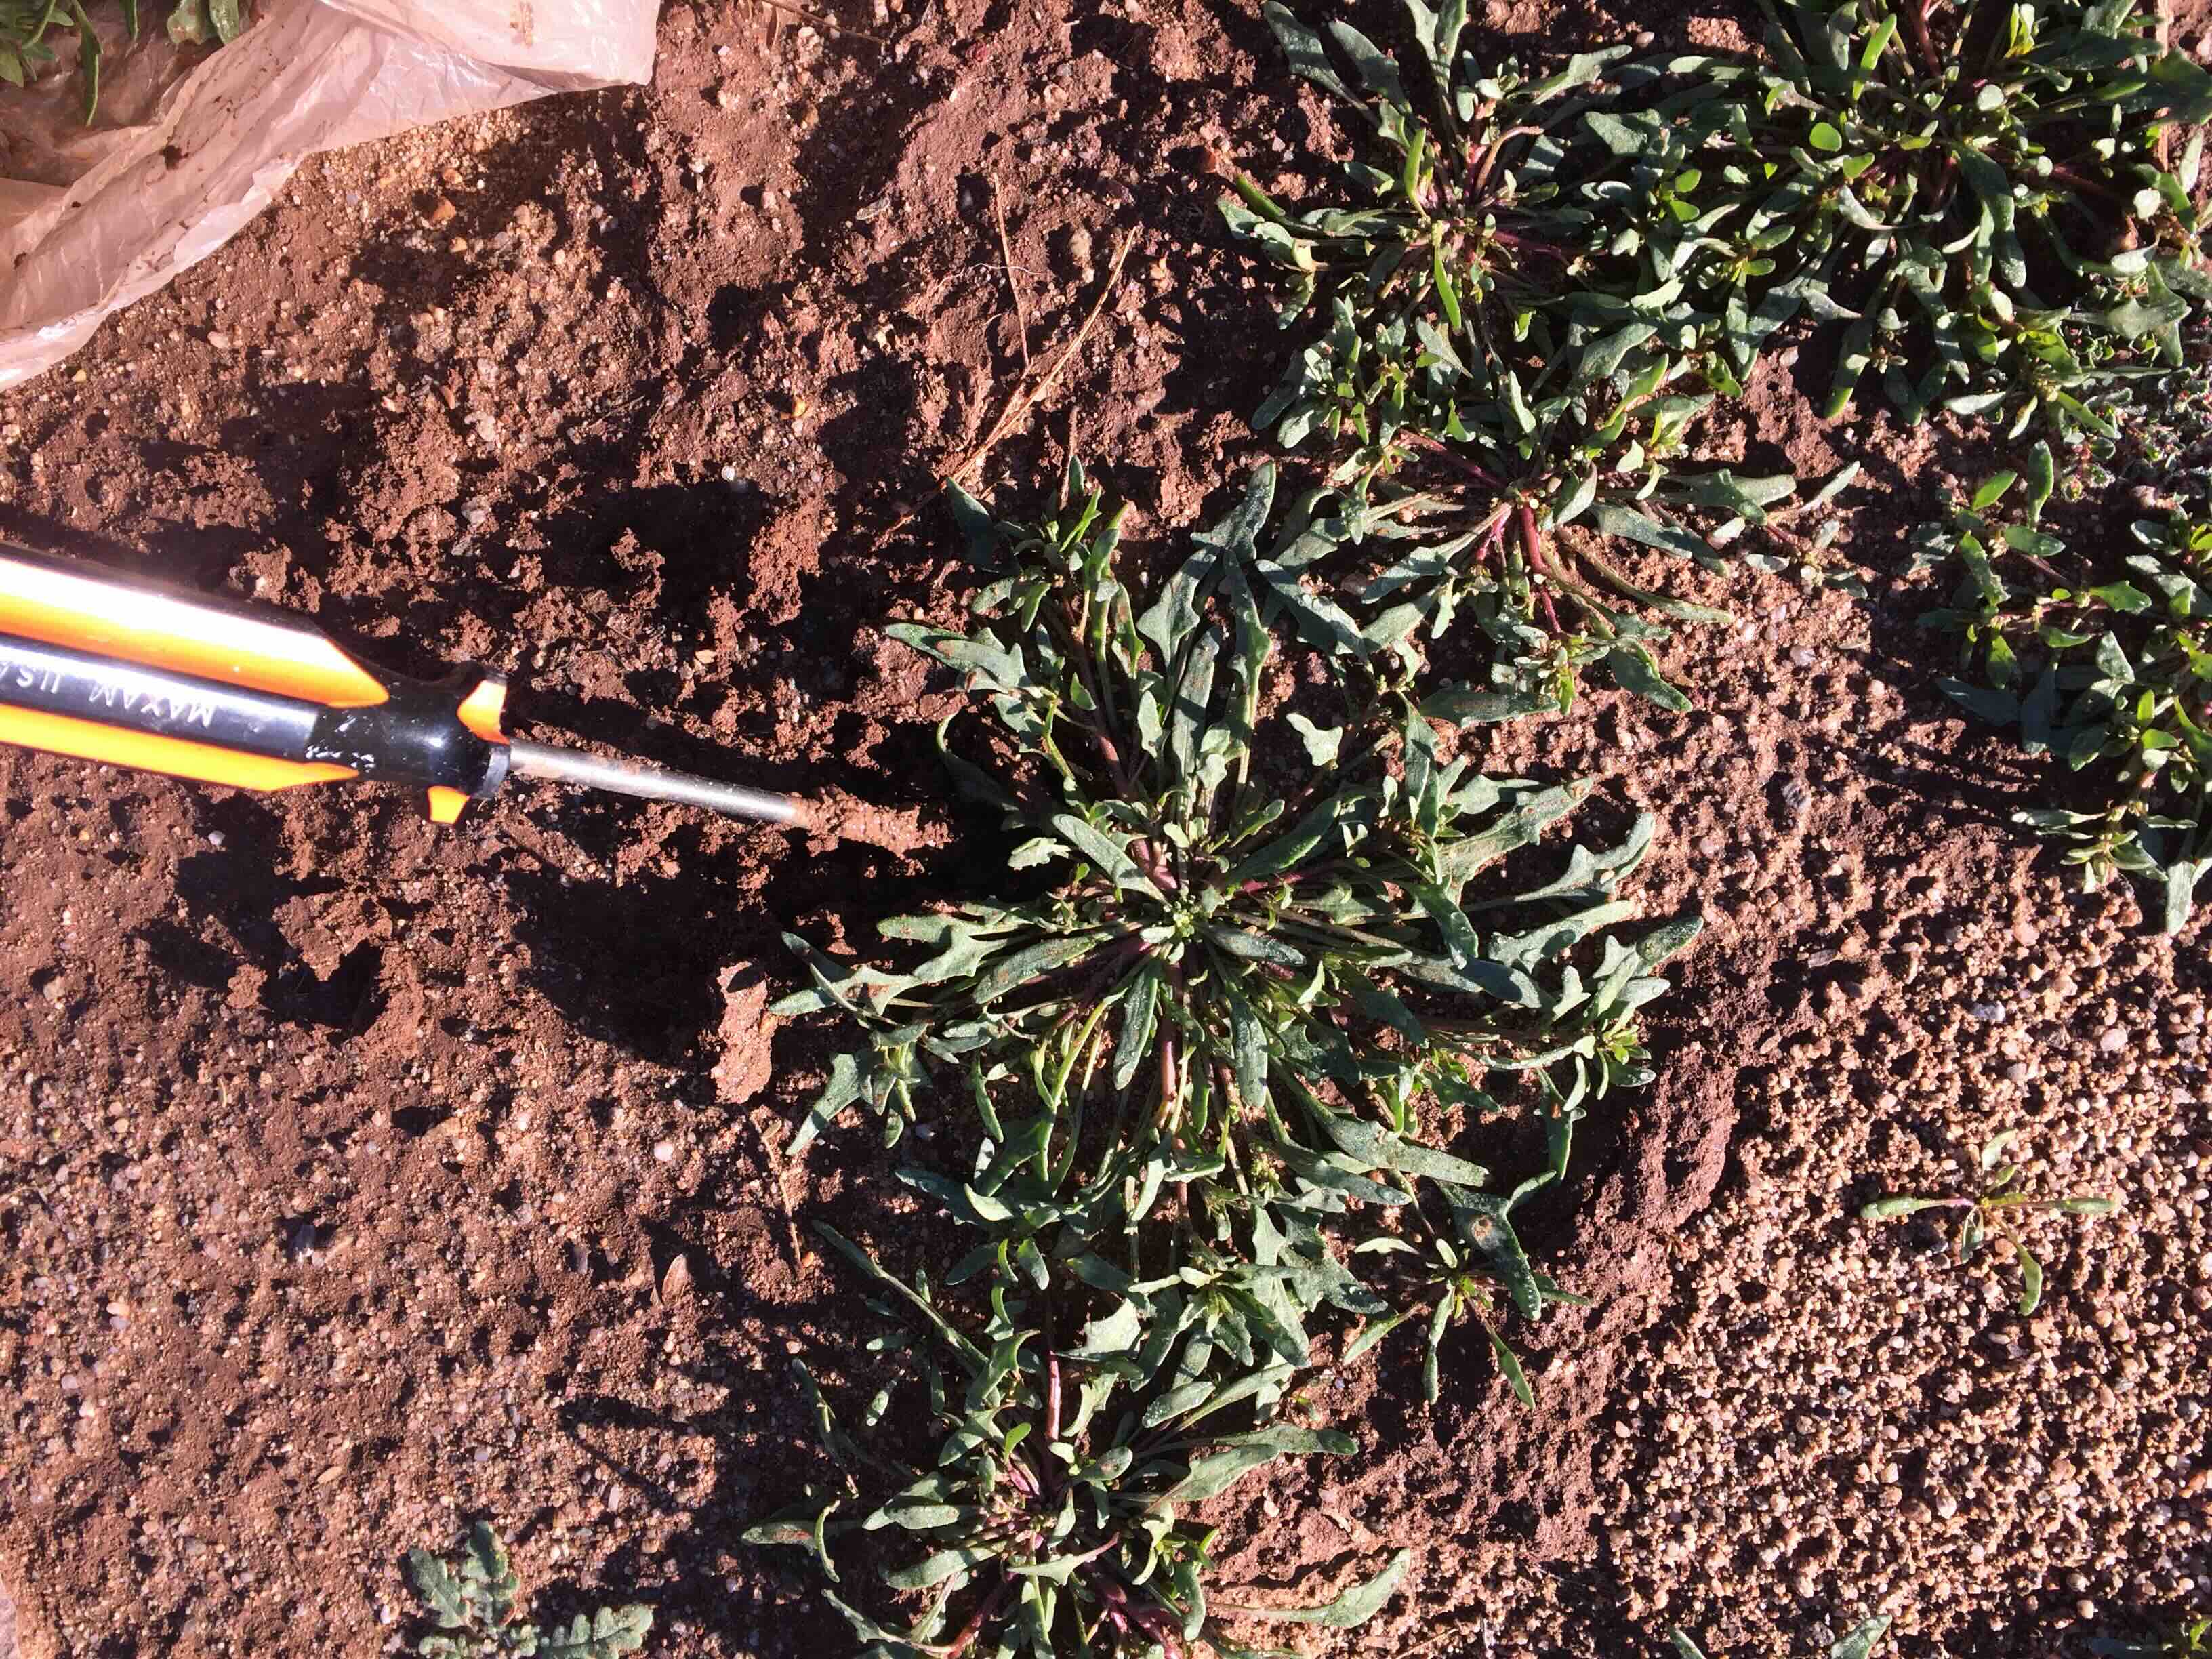
Indeed we’ve been blessed this cool season by some good rains in the Sonoran Desert–and everywhere there is greenery popping up. Weeds, you say? Let’s take a closer look! As our SavorSister Amy shared earlier this month in her tasty “rocket post”, what may LOOK like weeds are actually the gift of wild greens! Tia Marta here to share more ideas for wondrous weed-collecting.
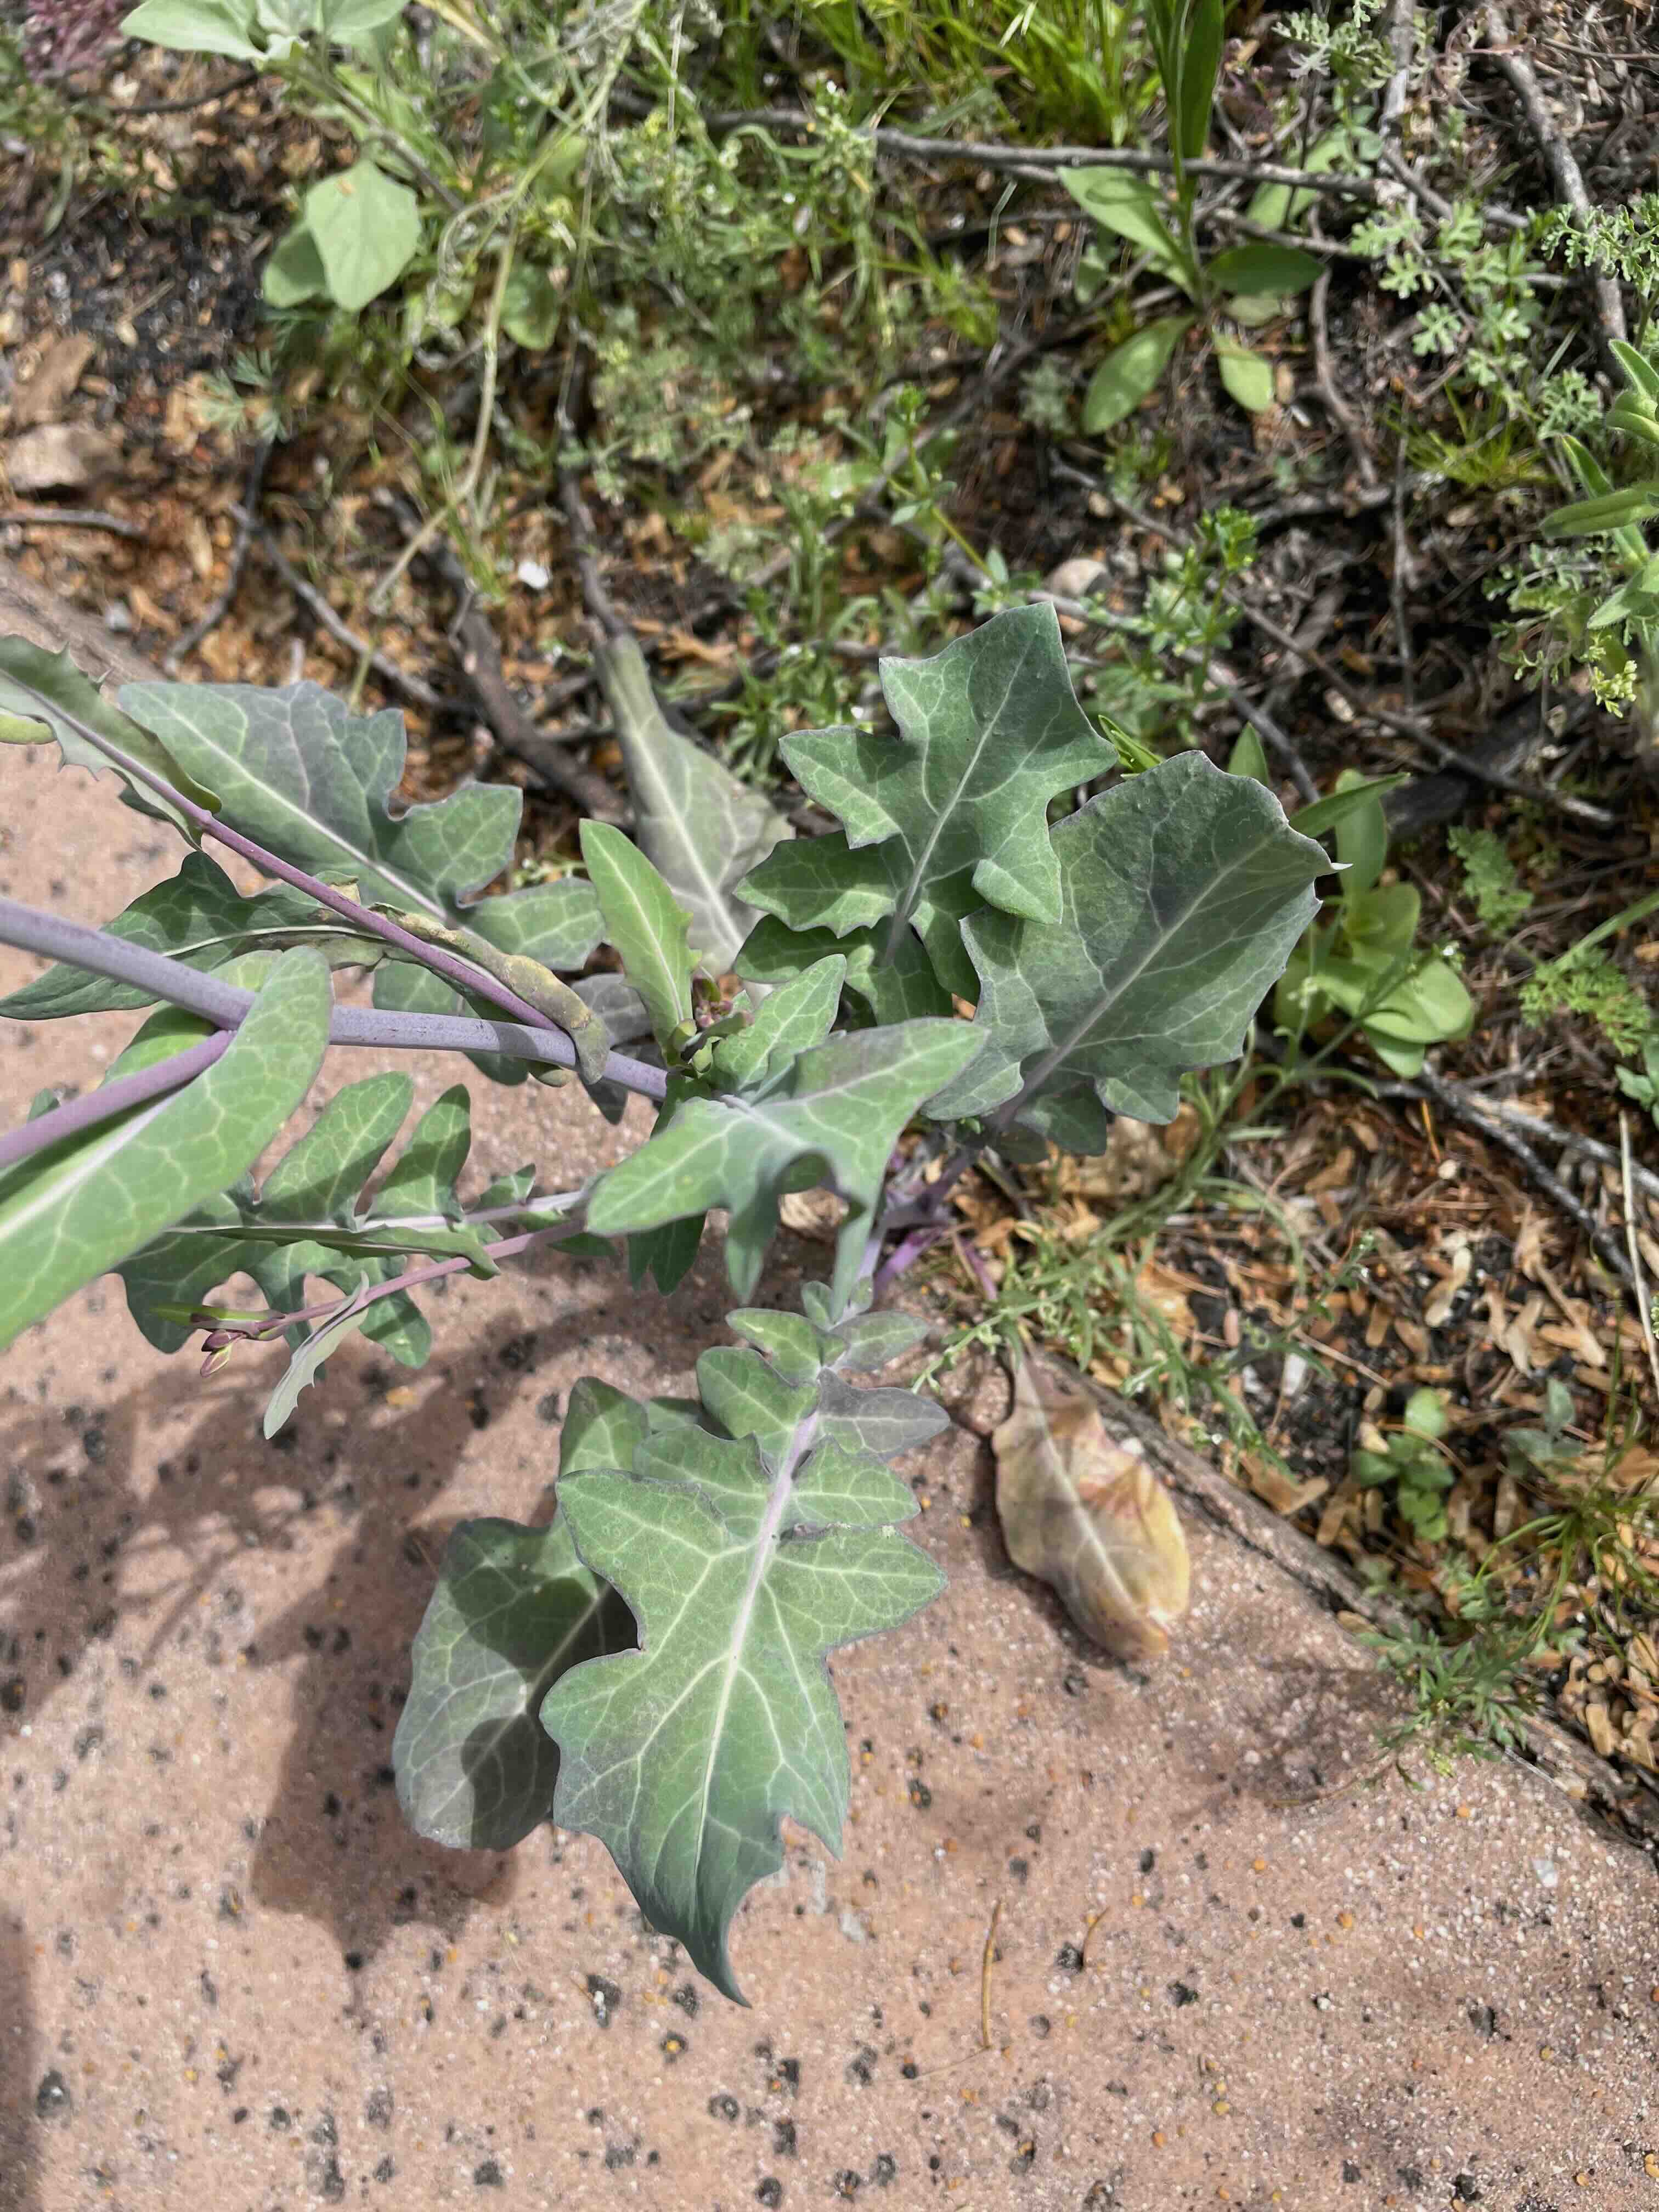
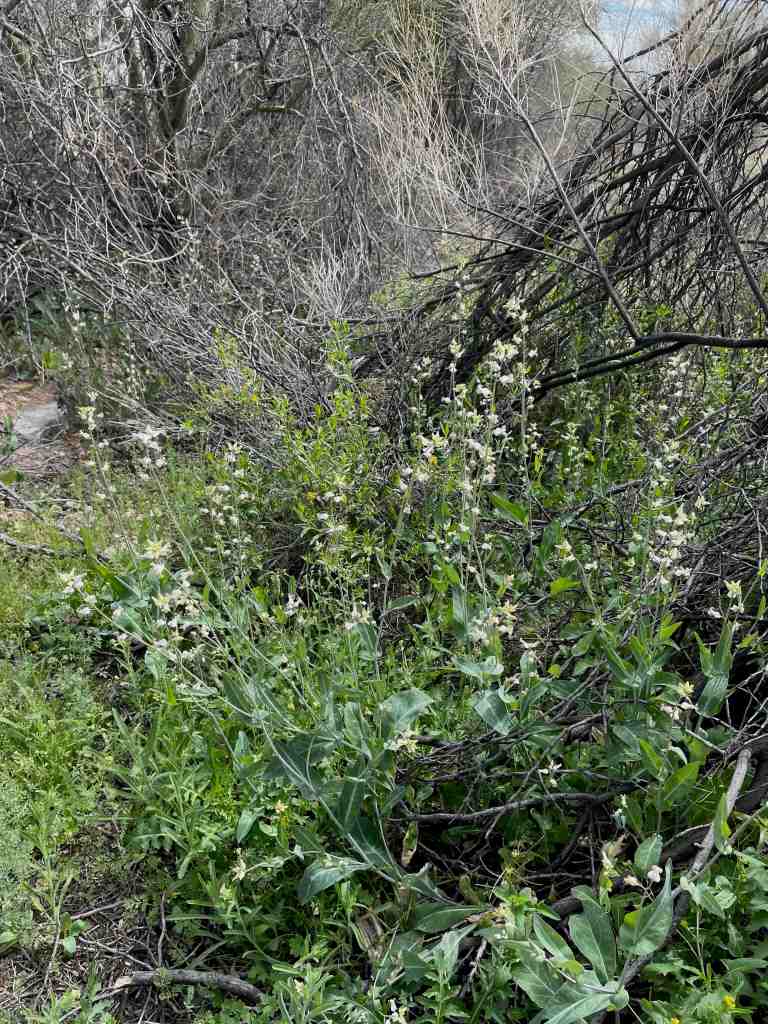
This sweet 4-petaled “Arizona jewel plant” also known as “silverbells” (Streptanthus carinatus), is an endearing wild native mustard with delightfully good taste and nutrition. Planting silverbells seeds can also make a delicate addition to your own edible landscaping.
Out in the desert and in town you can find great patches of silverbells right now, especially in the shade of other desert shrubs. At times like these when there is such plenty (with thanks on our lips for these edibles), we can feel some assurance that harvesting a little for our family will still leave lots for other desert creatures and seeds for a future winter.
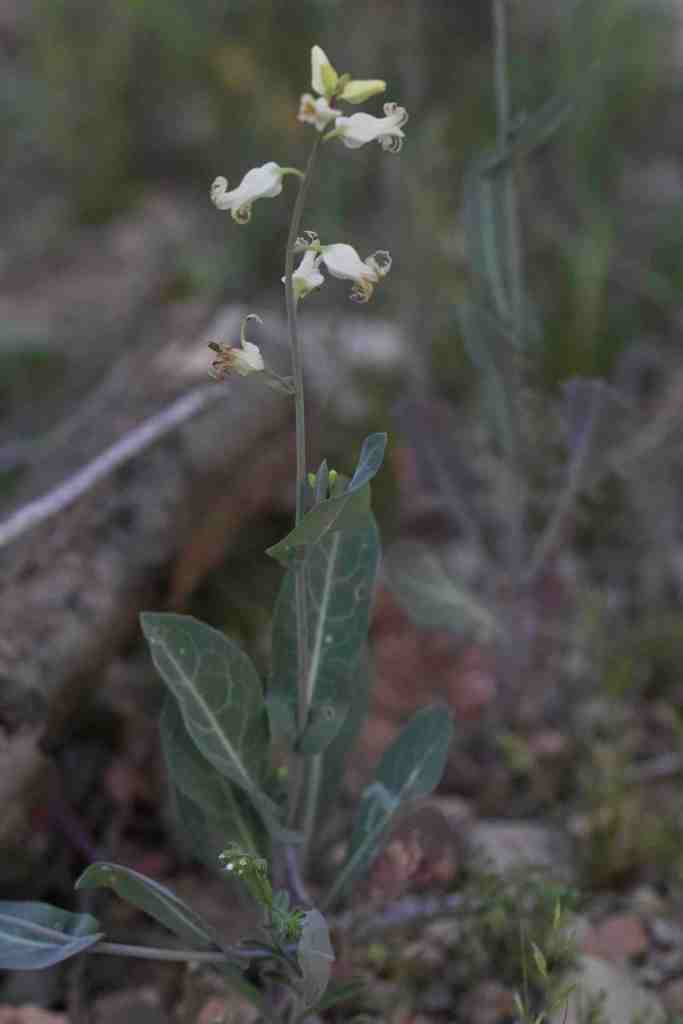
Silverbells isn’t spicy–no picante bite like the introduced London rocket or mature arugala–…and every above-ground part is flavorful —fresh right off the plant!
To my palate, its symmetrical little urn-shaped flowers even have a slight sweetness.,..
A taste of its flower can be like a communion.
Silverbells’ near-succulent leaf is a perfect addition tossed fresh in a salad. You can see the thickness of the juicy leaf in this cross-section view.
….And silverbells’ young green pods are delectably, “vegetally sweet.” Enjoy them fresh and raw, because, (alert!), with stir-frying the pods suddenly become bitter. They’re best used fresh to bedeck a salad.
Silverbells is a Brassica, that is, in the cole-family of highly nutritious vegetables. Besides in a fresh mixed salad, my favorite way to enjoy their nutrition (high Ca, vit.A and C, folates) is in a veggie stir-fry. I have added the greens last in this tofu stir-fry. Can you spot the silverbell flowers I topped this dish with?
Here’s another “weed”–my very favorite, but very rare–which my O’odham mentor showed me years ago–opon i:wagĭ. Known in Spanish as patota, and in English by the truly misleading term “poverty weed,” it only comes up in certain years with winter rains at just the right times and in right amounts. She led me to harvest in corrals and roadsides on the poorest soils, and there appeared these patches of flat-lying rosettes of small thick leaves, so unassuming. Not very noticeable but worth noticing!
This season, see if you can find some opon i:wagĭ out there in degraded sandy soils! It is easy to dig up the whole plant. Cut off its tap root and steam the little green spinach-like leaves. The best dish my teacher ever cooked for us was opon i:wagĭ fried with i’itoi’s onions in a little bacon drippings. I thank her in my heart for sharing her desert knowledge, to alert us to keep looking and watching for the next surprising desert rain-gifts.
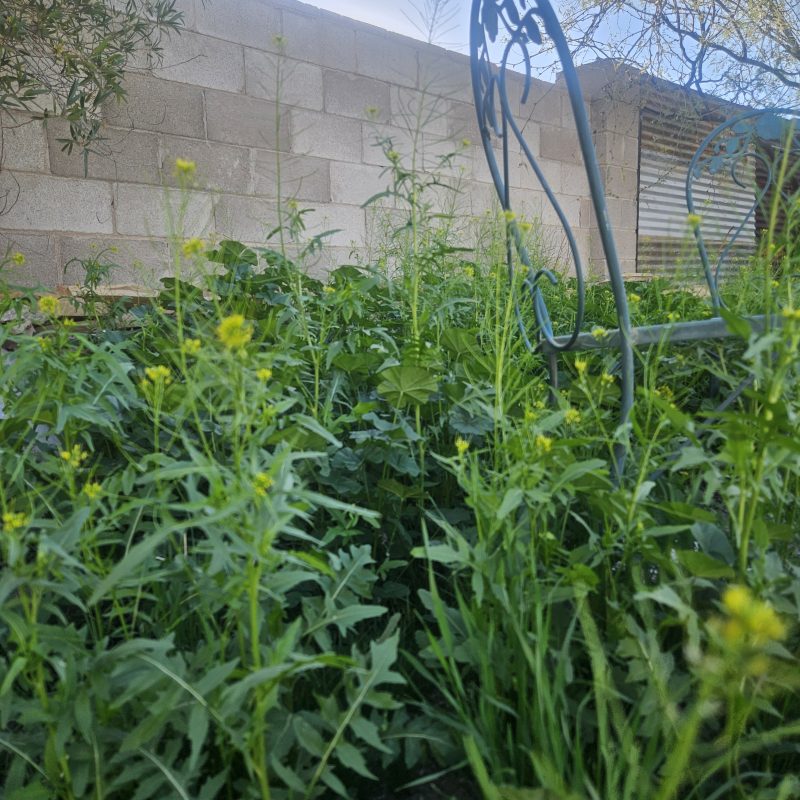
Wonderful! Amy here, celebrating the yellow flowered wild mustards growing my yard and in the desert. Sisymbrium irio grows in dry, disturbed soil around the world but is orginally from the Middle East, southern Europe and northen Africa. One of its names, London Rocket, supposedly refers to how it uncharacteristically took over there after the Great Fire of 1666. (It loves disturbed soil, in my garden or elsewhere!) Arugula, another mustard family plant also known as rocket, has big white flowers and is actually classified as different genius.
Of course the leaves are edible and tender on the short, young basal rosettes. But the small leaves on the tall, flowering plants are suprisingly tender. The flavor of the leaves from mature plants is spicier, but I think it has more to do with the warming weather of the season as the plants mature. The seeds are edible too but are much smaller than commercial mustard seeds and are difficult to harvest.
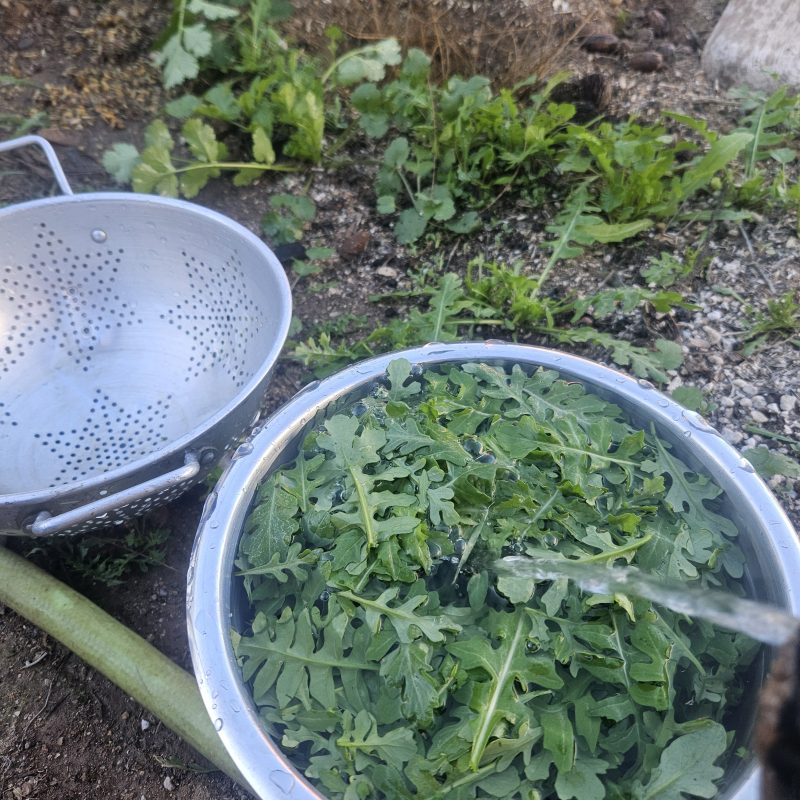
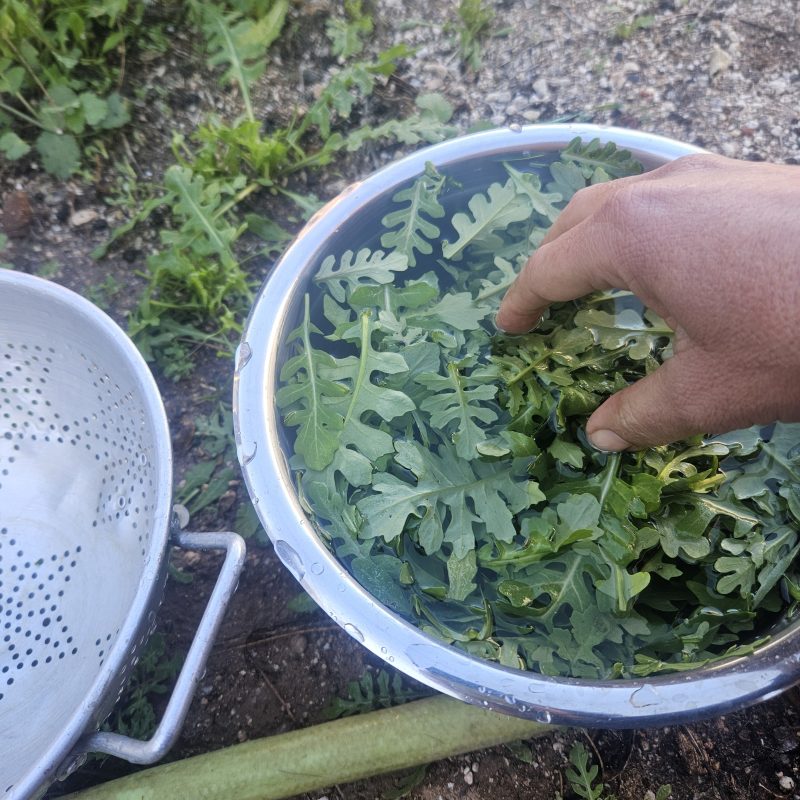
Instead of triple washing, I like to wash once really well, where the wash water going to the garden. After swirling in plenty of water, I lift the leaves out of the water by hand and drain.
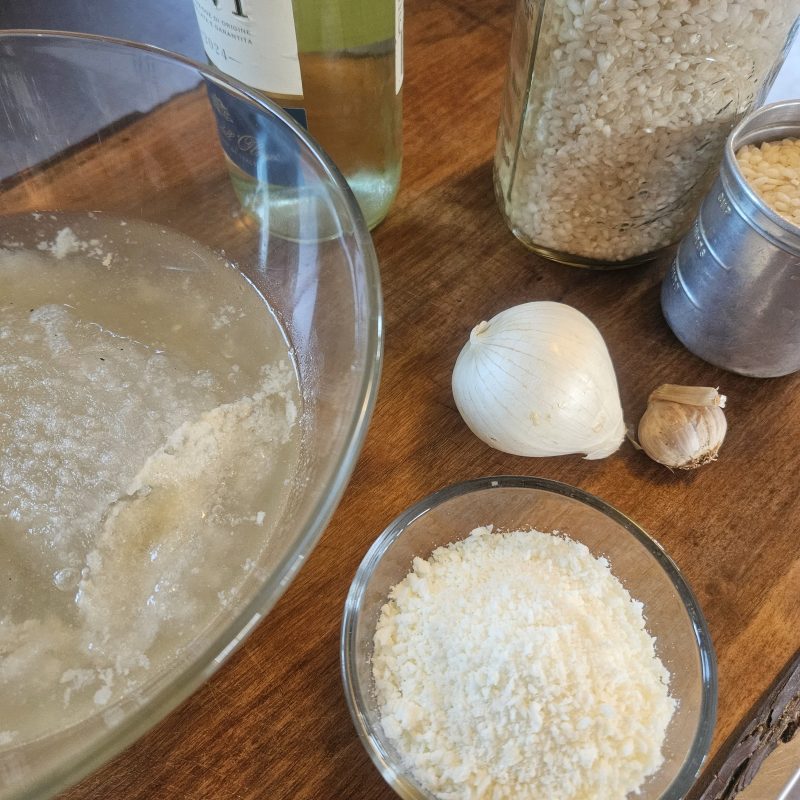
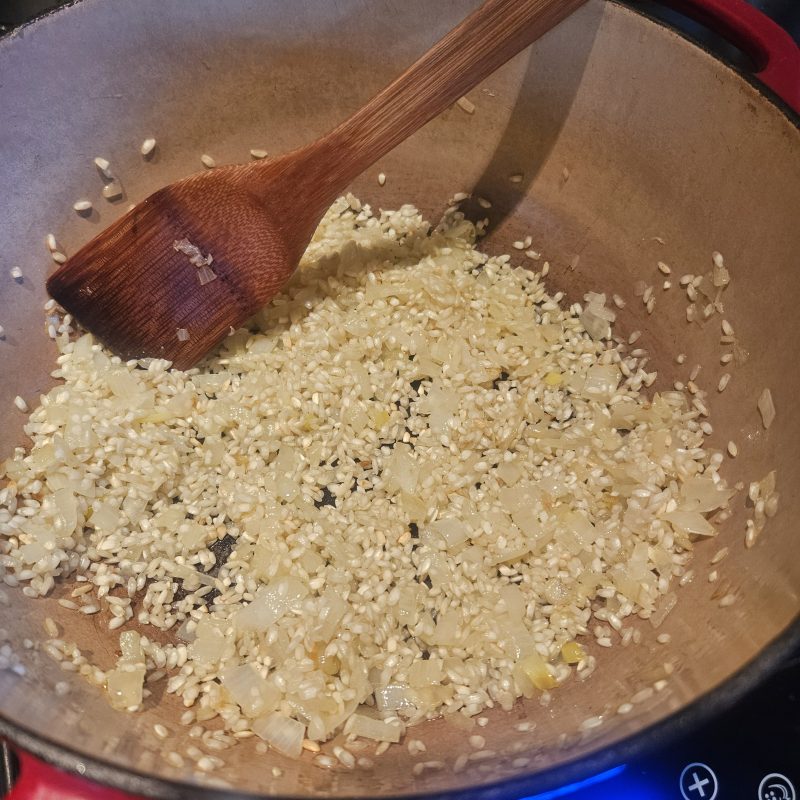
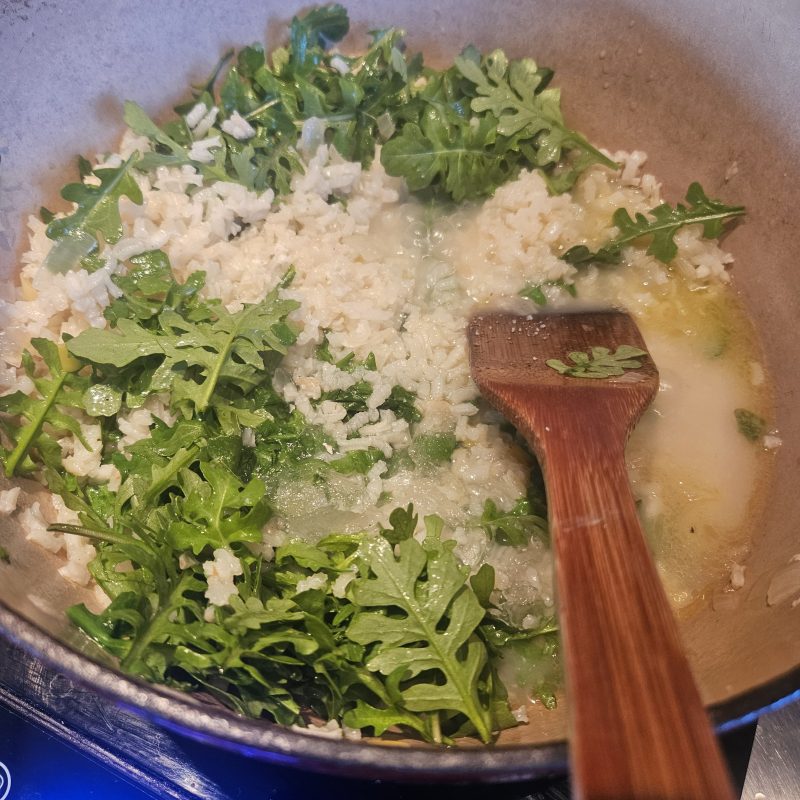
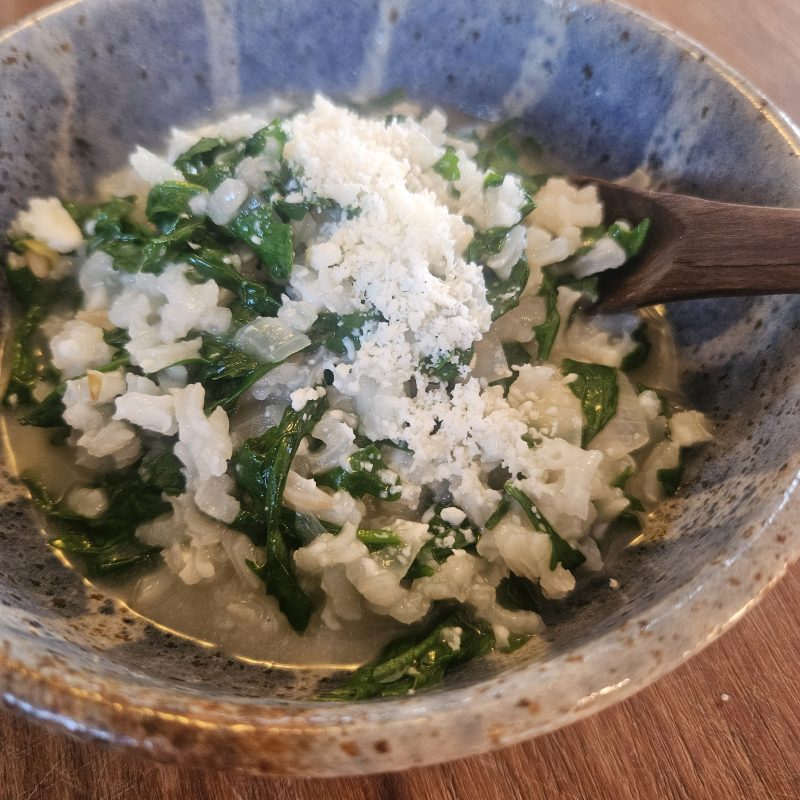
Wild rocket has countless possibilities in the kitchen. The leaves make a spicy salad or garnish on a sandwich, like arugula. My favorite way to enjoy it is wilted into a risotto. Homemade chicken broth (from the freezer) and a splash of wine make it special.
I start by browning rinsed aborio rice, onion and garlic in olive oil.
For traditional risotto with the creamiest texture, add hot broth a little at a time and stir constantly. For the easiest risotto, I just add plenty of broth and simmer slowly in a heavy pot with a lid. Three times the volume of liquid to rice is usually where I start.
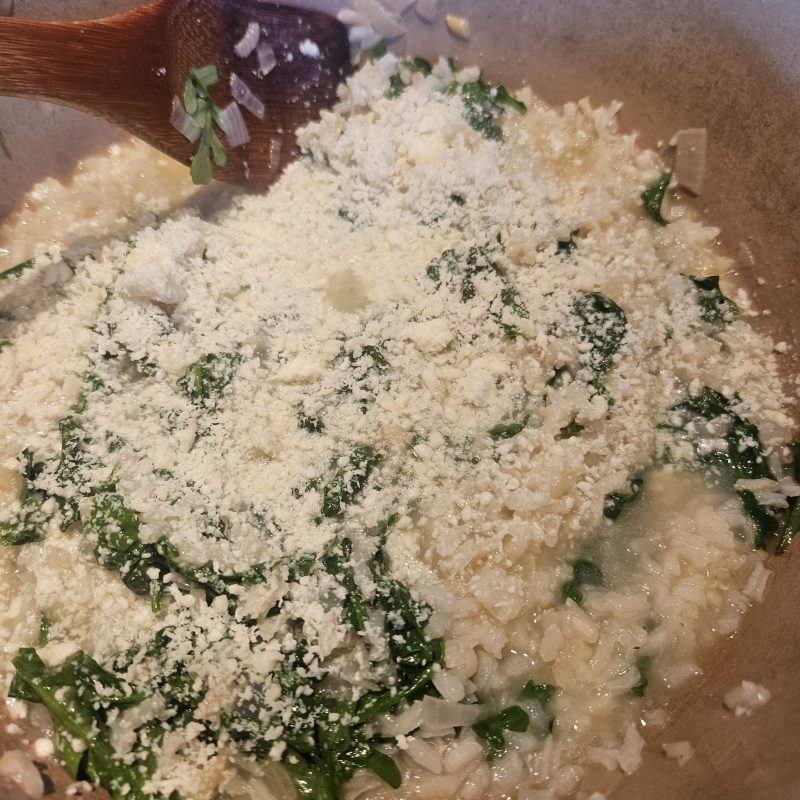
When the rice is tender, I remove the pot from the heat and fold in the whole little leaves. Sprinkle with any cheese, in this case a dry and salty fresh goat cheese. Enjoy right away or at room temperature on a picnic.
Depending on temperature and moisture, we might be eating wild rocket for a couple more months into the spring. What other dishes do you like to make with wild rocket?
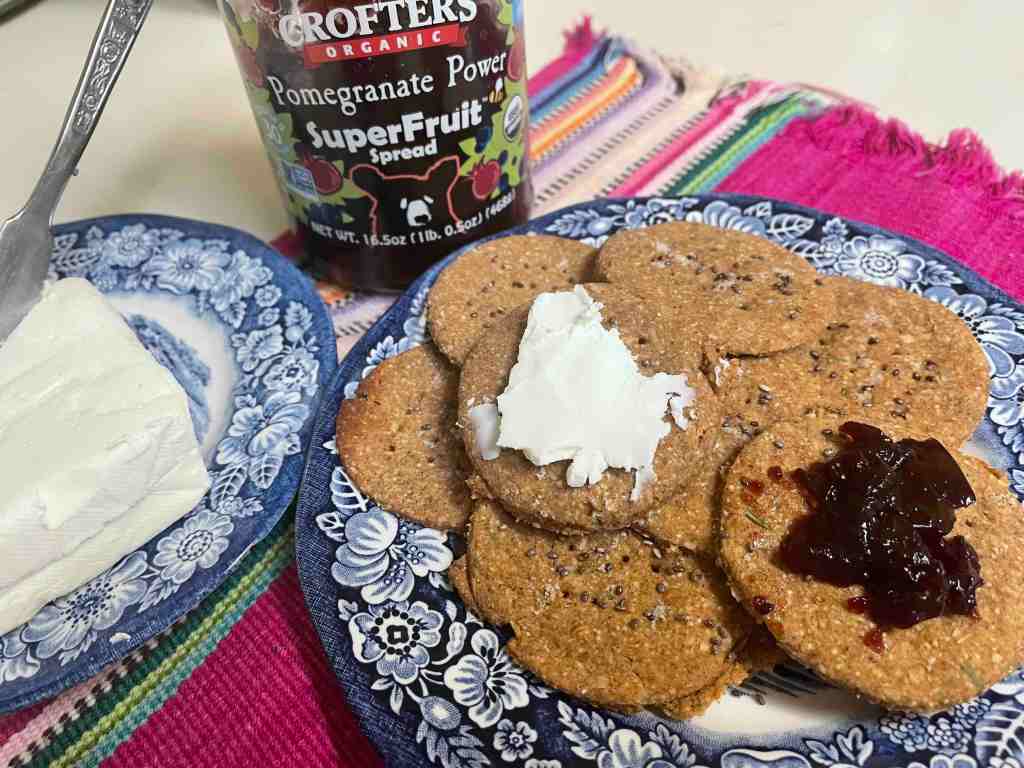
Have you noticed that a box of crackers is costing a whole lot more these days than it used to?–especially if you’re wanting specialized grains or herbed flavors? Why not “save” and make my own? Right! I’ve had a hankering for cracker flavors you just can’t find at the grocery, a lust for crackers made with our super-nutritious Southwest flours and herbs. So…fortified with locally-sourced materials, I searched cracker recipes to guide me, but I batted almost zero–so few recipes are out there. I took this dearth as a challenge. Tia Marta here to share some of my cracker experiments–and to challenge YOU to invent your own holiday crackers!
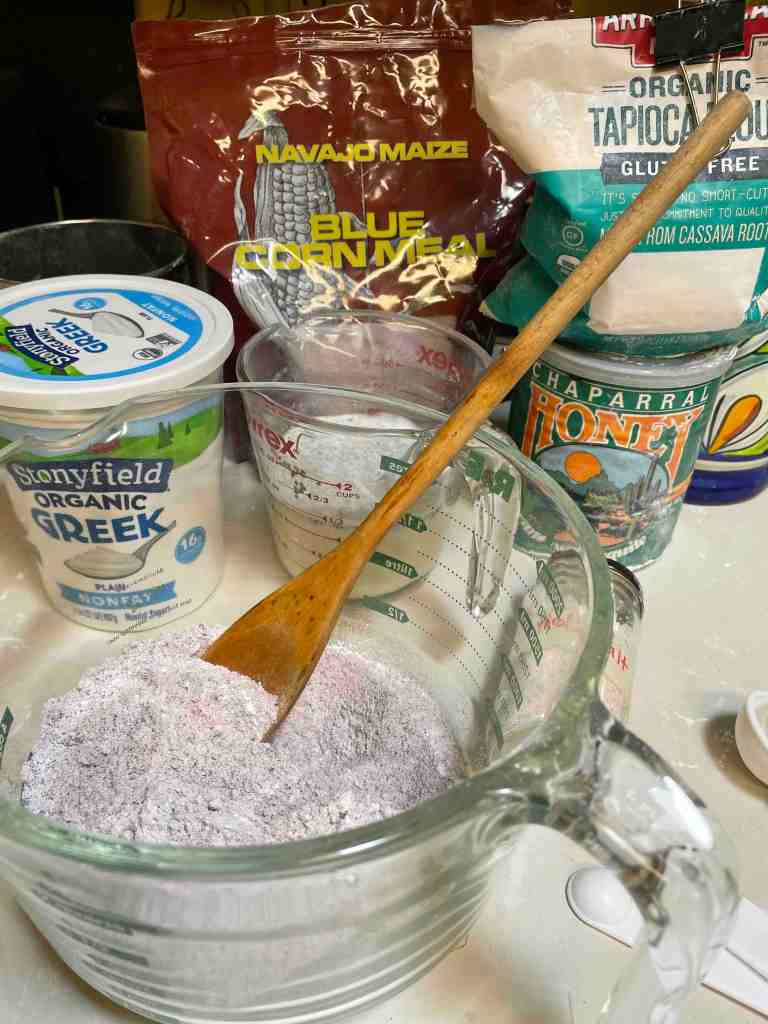
This is fun new territory. First with the goal of a gluten-free Southwest cracker, I took on Native blue cornmeal as the major delicious ingredient, with tapioca flour and chia seed as “binders”.
Recipe for Gluten-free BlueCorn-Amaranth-Chia Crackers:
1/2 tsp sea salt (I used salt from Baja California)
2 Tbsp non-fat plain yogurt (Greek yogurt can be a no-fat substitute for butter)
3/4 Cup lowfat buttermilk
1 Tbsp. chia seed
1 Tbsp mesquite honey (optional, amaranth flour can be a little bitter) (or a generous glob of honey on a teaspoon)
You’ll need a greased pizza pan and a greased rolling pin.
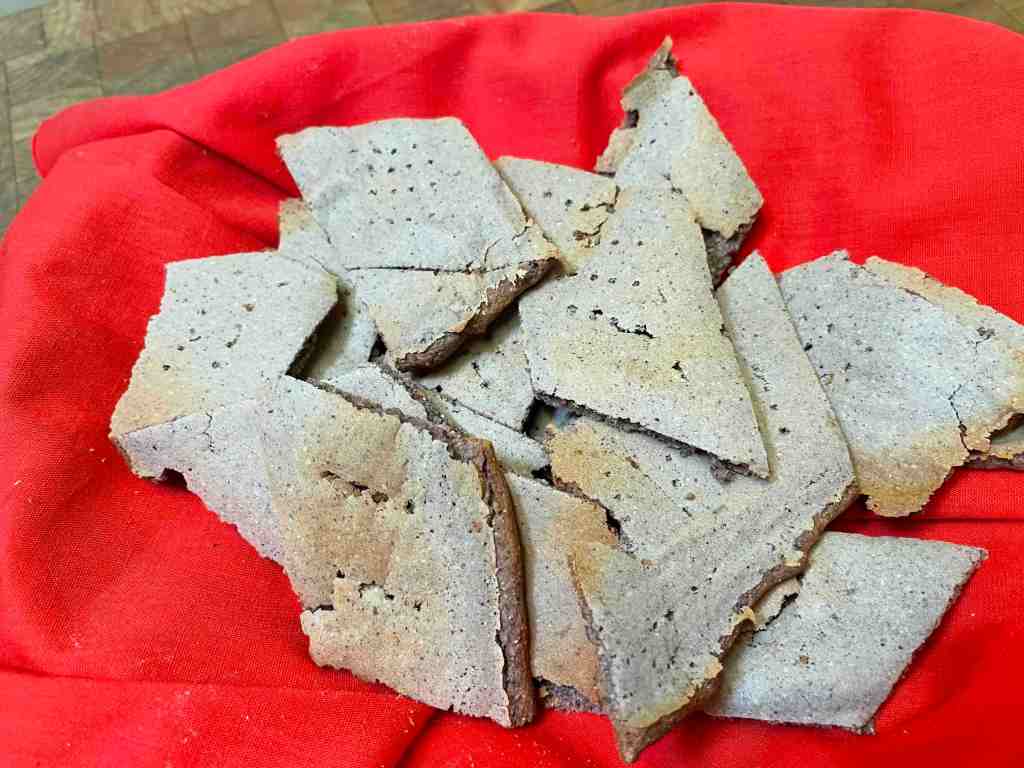
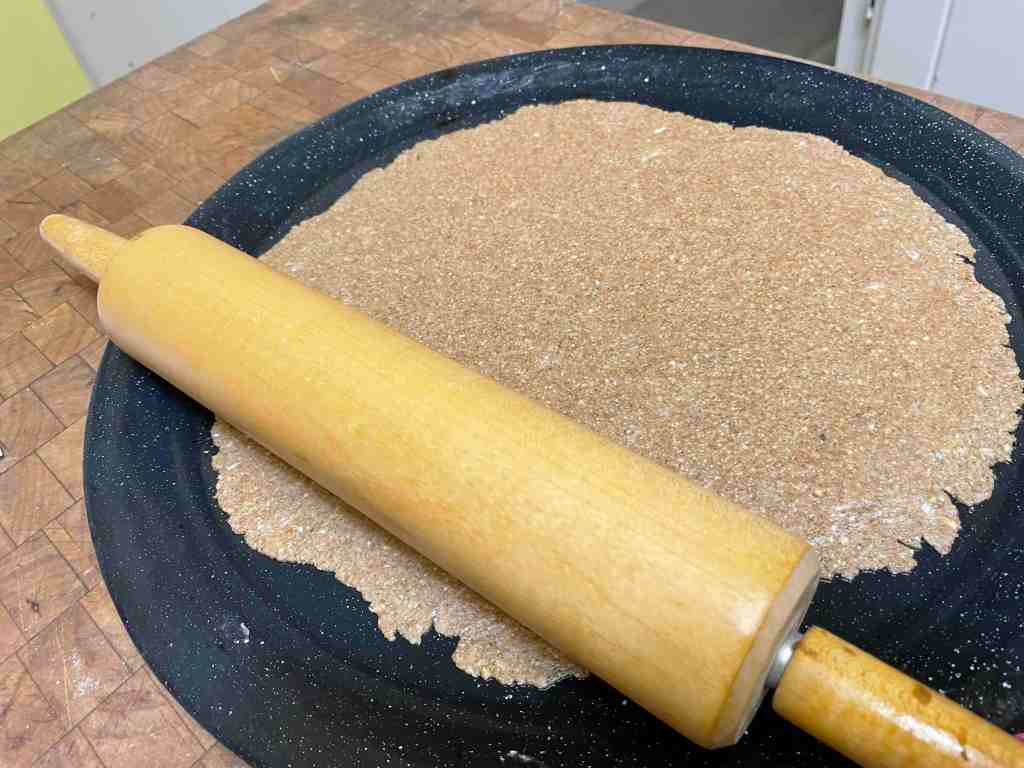
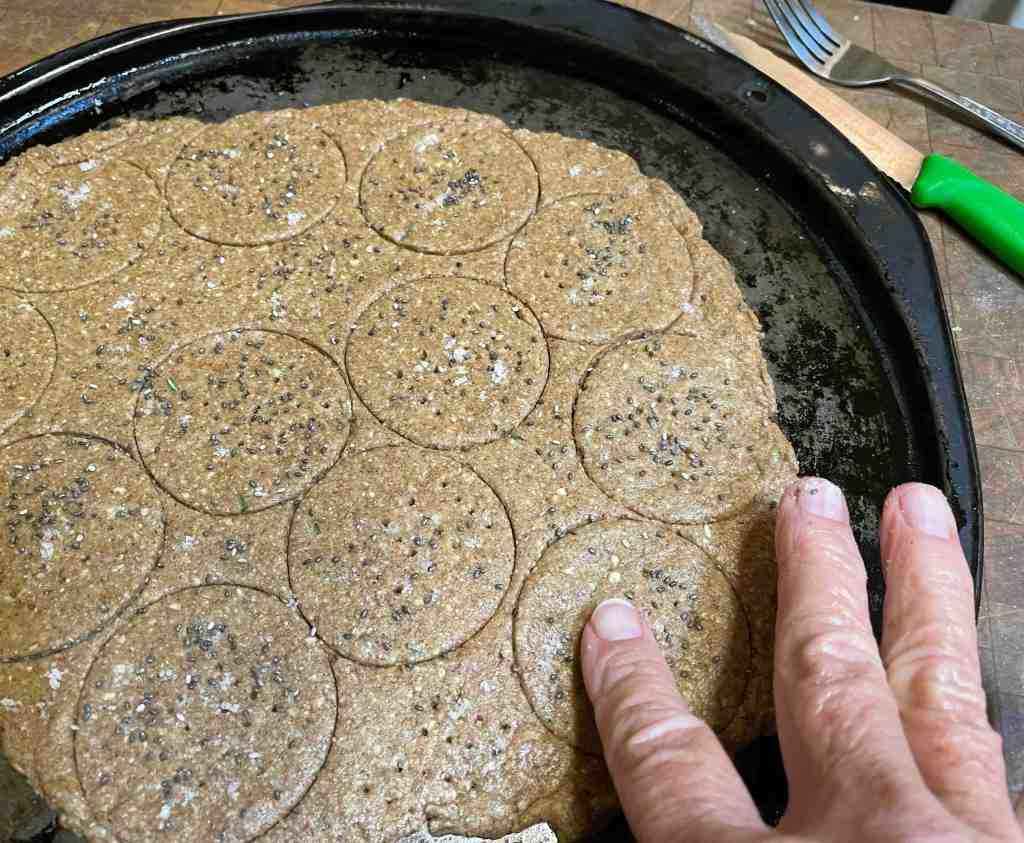
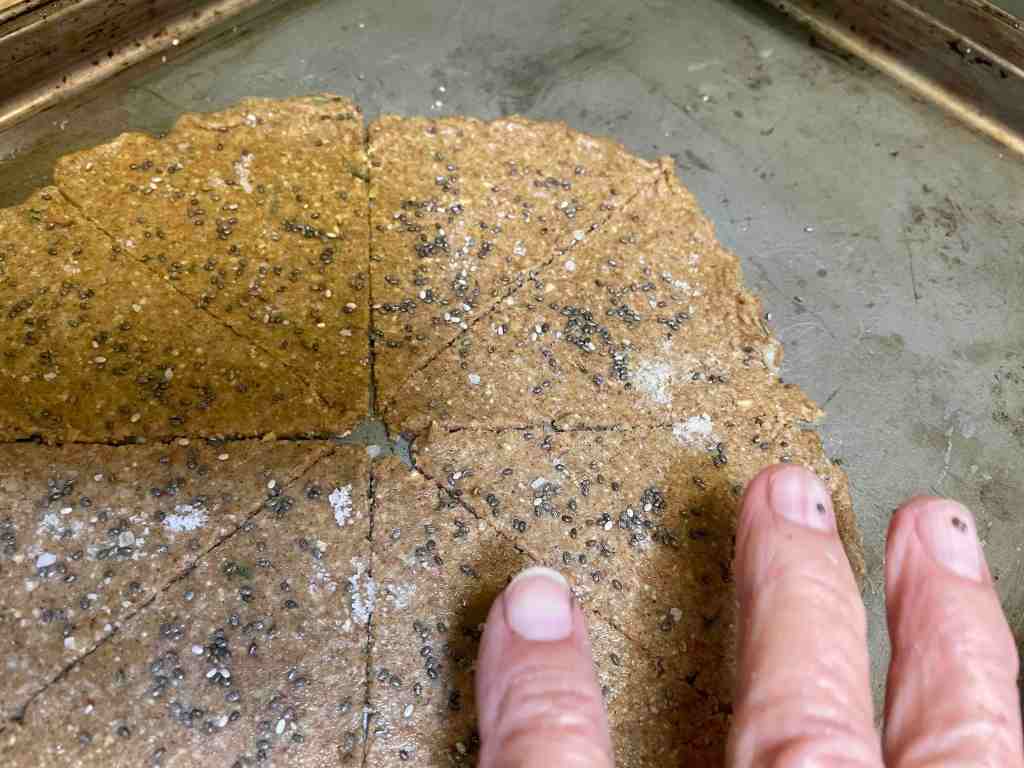
Place half the dough in center of a greased pizza pan. With your fingers press the dough down and outward. Your goal is to create a thin 1/8″ layer of dough on the pan. Using a greased rolling pin, flatten the dough out from the center. Use fingers to push the the thinnest edges back to a uniform thickness, or edges will scorch in the baking. Carefully cut the thinned dough with a sharp knife into squares, and make holes with a fork to even the heat. Bake 8-10 minutes or until you see a toastiness. With a metal spatula, lift the hot crackers off the pan right away to cool.
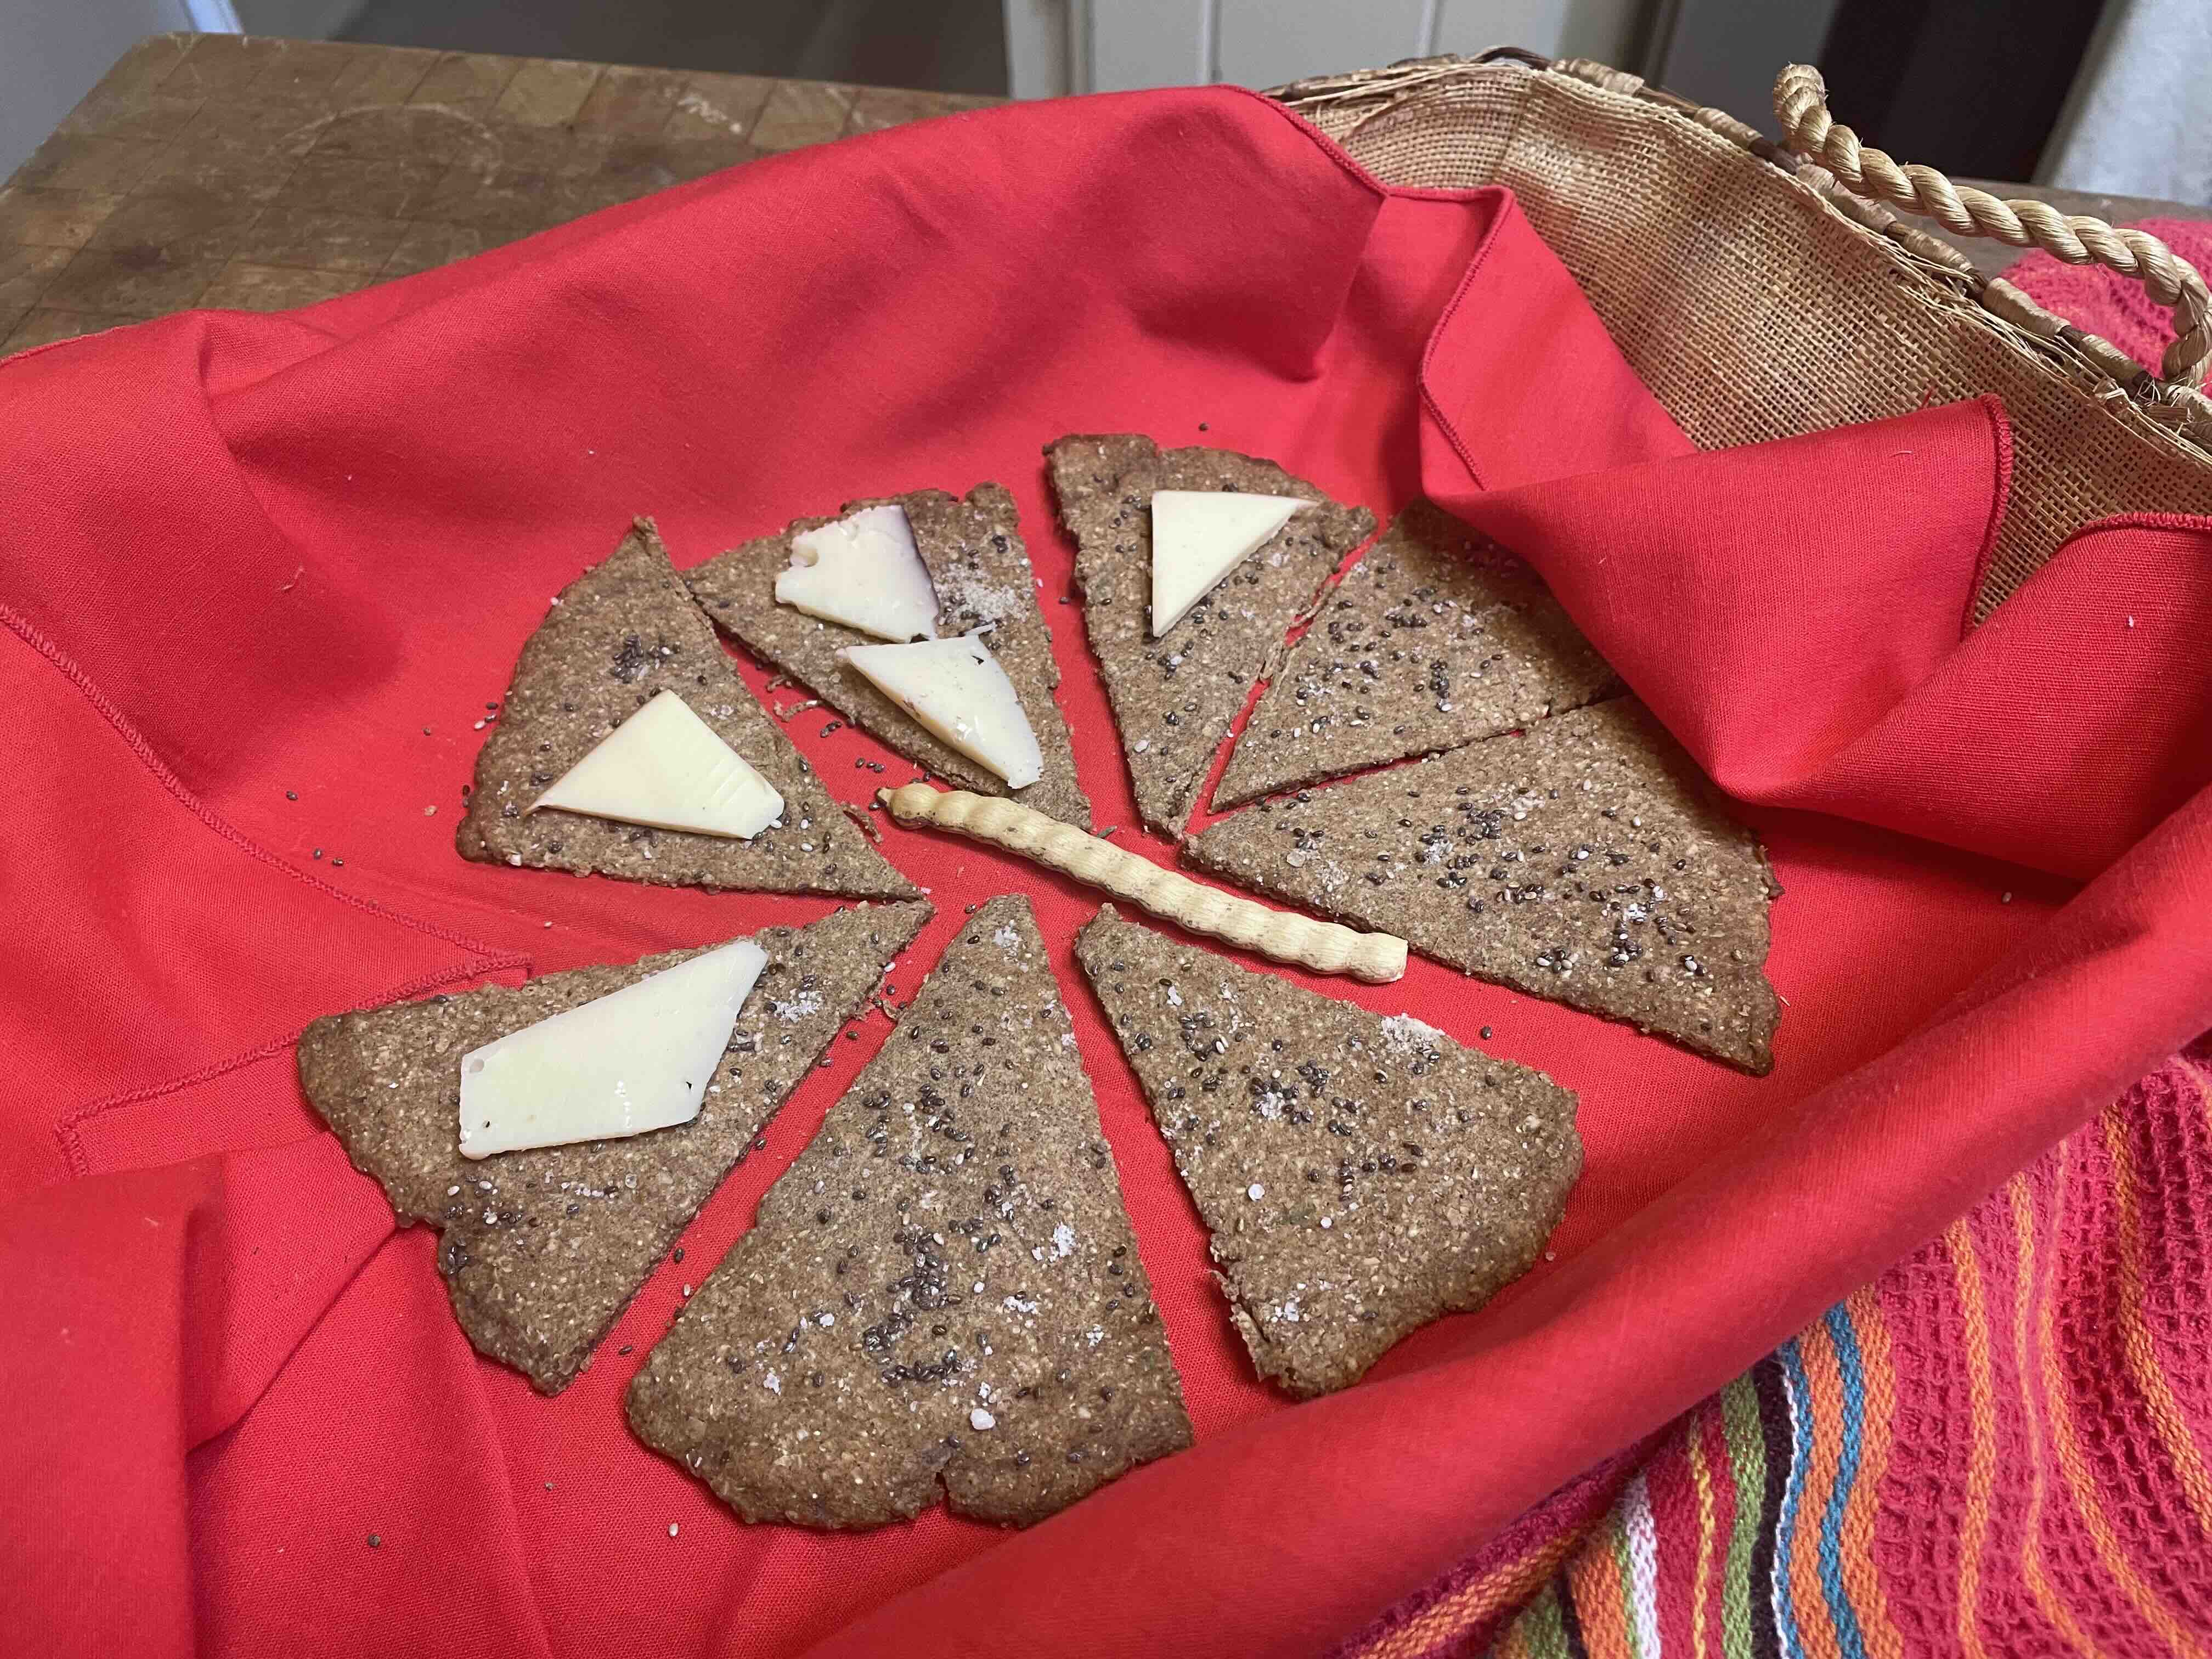
Enjoy nutritious gluten-free BlueCorn-Amaranth crackers with thin slices of membrillo, or with a creamy cheese–a new taste treat with a hint of sweetness.
You’ll see more pictures of the cracker dough prep-process below.
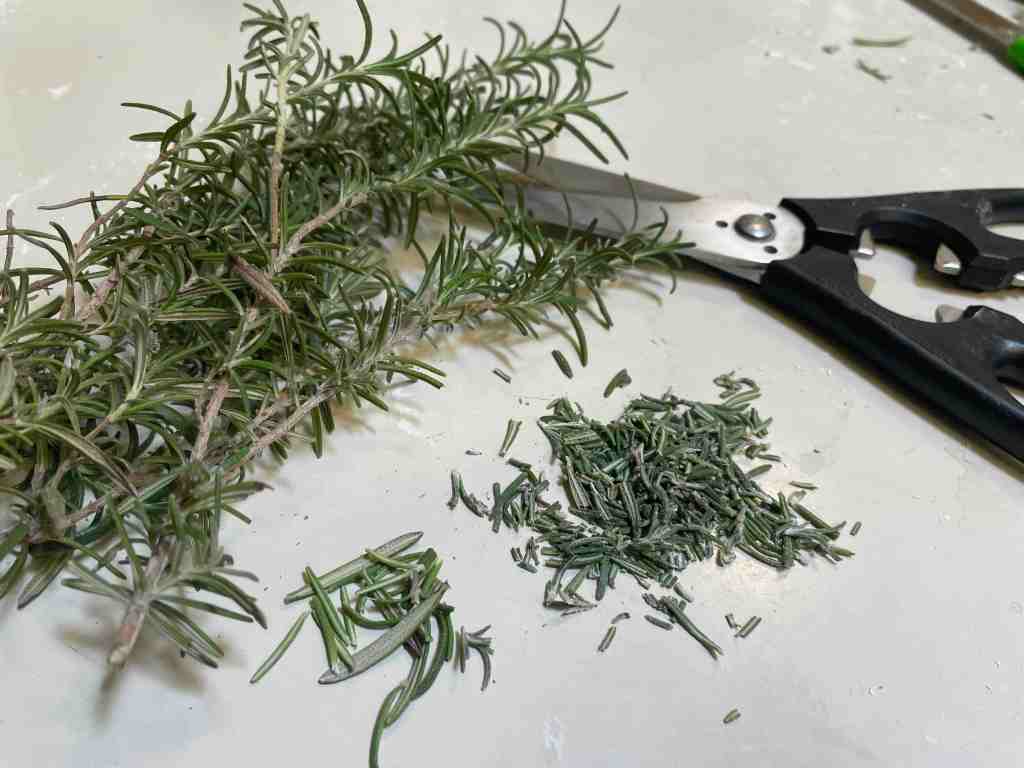
Inspired by rosemary-flavored flatbreads, I decided to try making a rosemary mesquite cracker with local heirloom wheat. Our garden supplied the fresh rosemary to cut into edible bits…. This local combination came out great:
Recipe: ROSEMARY-MESQUITE-PIMACLUB WHEAT Crackers
Ingredients:
3/4 Cup barley flour
1/2 Cup Pima Club wheat flour (from Ramona Farms, Sacaton, AZ)
1/4 Cup mesquite pod flour (any more than this will become too strong a flavor)
1/2 tsp baking soda
1/2 tsp fine sea salt (I used Sea of Cortez pilgrimage salt crystals collected by a friend)
You’ll need a greased pizza pan or baking sheet, and a greased rolling pin.
Directions (similar to previous recipe):
Preheat oven to 350F. Pre-soak rosemary bits in buttermilk to enhance flavor. Sift together all dry ingredients except the oat bran. Add oat bran separately as it will not pass thru sifter easily. Cut yogurt into dry ingredient mixture. Add buttermilk mixture gradually until dough is firm–not liquidy.
Place half the dough in center of greased pan and roll outwards until very thin and even (approx 1/8″ thickness). Be sure to tuck edges back to be equal thickness as center.
Sprinkle top of thinned dough with your desired topping. Here I’ve used rosemary bits, crystals of sea salt, and a sprinkle of chia. Pat the “topping” into the dough with your fingers so it will stick when baked. For this batch I used a cookie cutter through the rolled dough to make round crackers.
With the other half of the dough I used a greased rectangular pan which confined the rolling pin action to only two directions. Here I formed the dough into a thin circle to make “pie” wedge crackers.
Bake 8-10 minutes and check to see that the crackers have crisped. With metal spatula lift them from pan immediately to cool.
These Rosemary-Mesquite-PimaClub Wheat crackers are savory and pair well with cream cheese and jam, or as a foundation for colorful holiday canapes.
Lots of work goes into making crackers! But if our wonderful local desert grains aren’t available as crackers commercially, this is the only way to go. I challenge you to give them a try–to experiment with your own local grain combos!
Crackers are best made in greater quantity–not piecemeal. I’ve had this vision of an Indigenous-owned and -operated enterprise, with ingredients sourced sustainably from the desert, someday filling this “cracker niche,” making good revenues and providing us all with nutritious, appropriate Southwest-flavored crackers….
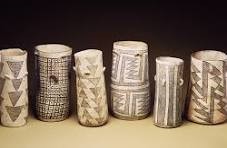
Chocolate drinking vessels found in Pueblo Bonito.
It may seem a stretch to discuss chocolate in a blog on Southwest food. But chocolate has been in the area since the 9th century. It’s Carolyn writing today and as a chocolate addict, I find the history of chocolate in our area fascinating. In the late 1800s, rancher Richard Wetherill was poking around in Pueblo Bonito in Chaco Canyon in the Four Corners area and excavated 111 cylinder jars. Archaeological technology has advanced greatly since then and researchers have dated the strata in which they were discovered to 1000 CE. Even more interesting, substances inside the jars and in pieces of broken jars indicate that the jars contained chocolate. Since the jars were all found in one room, scientists speculate that the chocolate was being used ritually. Archaeologist Dorothy Washburn also found residue that appears to be from chocolate in bowls from the site of Alkali Ridge, Utah, that date to 780 CE, even earlier.
Consider that the closest place chocolate was grown was 1,200 miles south in Mexico. This was before draft animals were used, so a trader or a series of traders carried chocolate all that way on their back, along with macaw feathers and copper bells. With all that travelling, chocolate must have required quite a bit of turquoise and other goods in exchange.
The Spanish Bring Chocolate to the Southwest
When the Spanish missionaries and soldiers came north to what we call the Southwest, they brought chocolate, one of their very few luxuries. Chocolate, being a New World crop, was much less expensive than tea, which had to come by a months-long trip across the Pacific Ocean from Asia. Their drink wasn’t the creamy concoction we now savor. Then chocolate was mixed with water and sometimes honey to sweeten it.
Father Phillip Segesser, one of the earliest priests at San Xavier Mission in Tucson, complained in a letter to his Swiss relatives that every non-Native visitor expected to be served chocolate. Father Segesser lived a very humble life, and he found this presumptuous. It is also interesting that provision orders from the day for both soldiers and priests listed both ordinary chocolate and fine chocolate, the later of which cost twice as much. We can guess what Segesser served his visitors.
During the 1781 Yuma uprising near modern day Yuma, Franciscan priest Fray Francisco Garces requested that he be allowed to finish drinking his chocolate before being beaten to death by the Quechans.
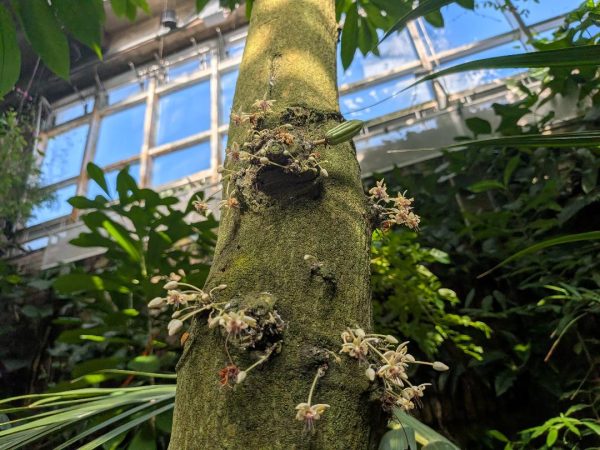
I was happy in two recent trips to learn more about my obsession. In the large green house at the Atlanta Botanical Garden, I saw a cacao tree up close and was amazed to learn that the flowers grow right from the trunk.
Cacao tree in flower in the Atlanta Botanical Garden. See a small green chocolate pod in the upper right.
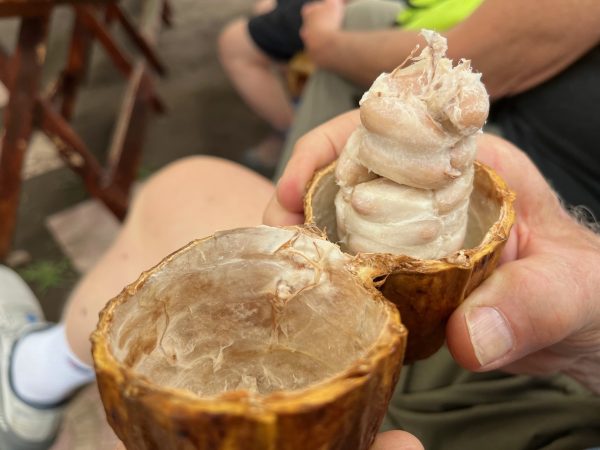
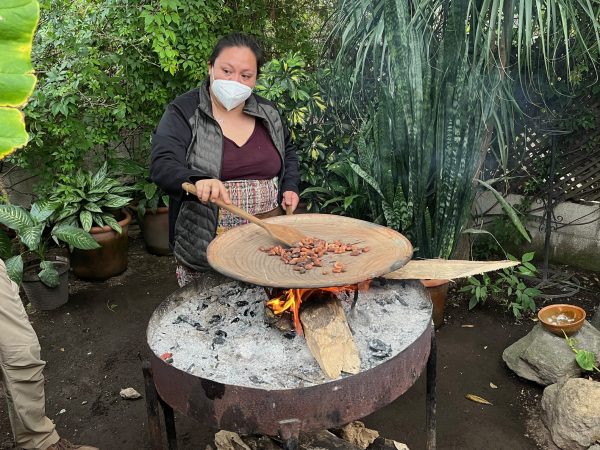
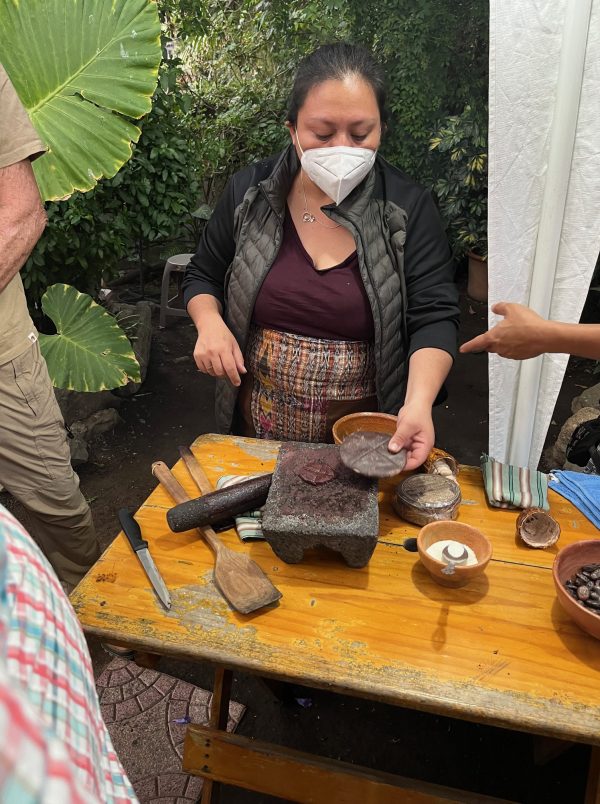
In Guatemala, I visited an artisanal chocolate maker. I got to see all aspects of converting a cacao bean into a chocolate bar, from opening the pod, to cleaning the beans, then roasting them on a comal before grinding them to a paste and adding sugar.
Just opened cacao pod. The seeds are inside the white covering.
Guatemalan artisan chocolate maker roasts cacao beans over coals.
The roasted beans are ground, combined with sugar, and formed into a patty. They are surprisingly oily. Perhaps patties like this were what the early traders brought to Pueblo Bonito in Chaco Canyon.
Chocolate pairs so well with our mesquite meal–a perfect blend of tropics and desert. These waffles will make a holiday breakfast treat.
Chocolate Mesquite Waffles
½ cup all-purpose flour
½ cup whole wheat flour
½ cup mesquite meal plus 1 tablespoon
3 tablespoons cocoa
1 tablespoon baking powder
½ teaspoon salt
2 egg yolks
1 ¼ cup milk of choice
½ cup oil
2 egg whites beaten stiff
In a large bowl, sift together dry ingredients. In a small bowl, combine egg yolk, milk and oil. Stir the wet mixture into the dry ingredients. Fold in egg white, leaving some fluffs. Do not over mix. Pour batter into hot waffle maker and follow manufacturer’s directions.
Makes about 8 waffles.
Recipe adapted from Eat Mesquite (2011) by Desert Harvesters
You can learn more about the history of food in Southern Arizona in my latest book A Desert Feast, the story of the last 4,000 years of food in the Sonoran Desert. Want more recipes using foods of the Southwest? You’d find ideas for collecting and using 23 easily recognized and gathered desert foods in Cooking the Wild Southwest: Delicious Recipes for Desert Foods. . Recipes from top Southwest chefs are collected in The New Southwest Cookbook. Just click on the titles for more information. You can learn more about me on my website.
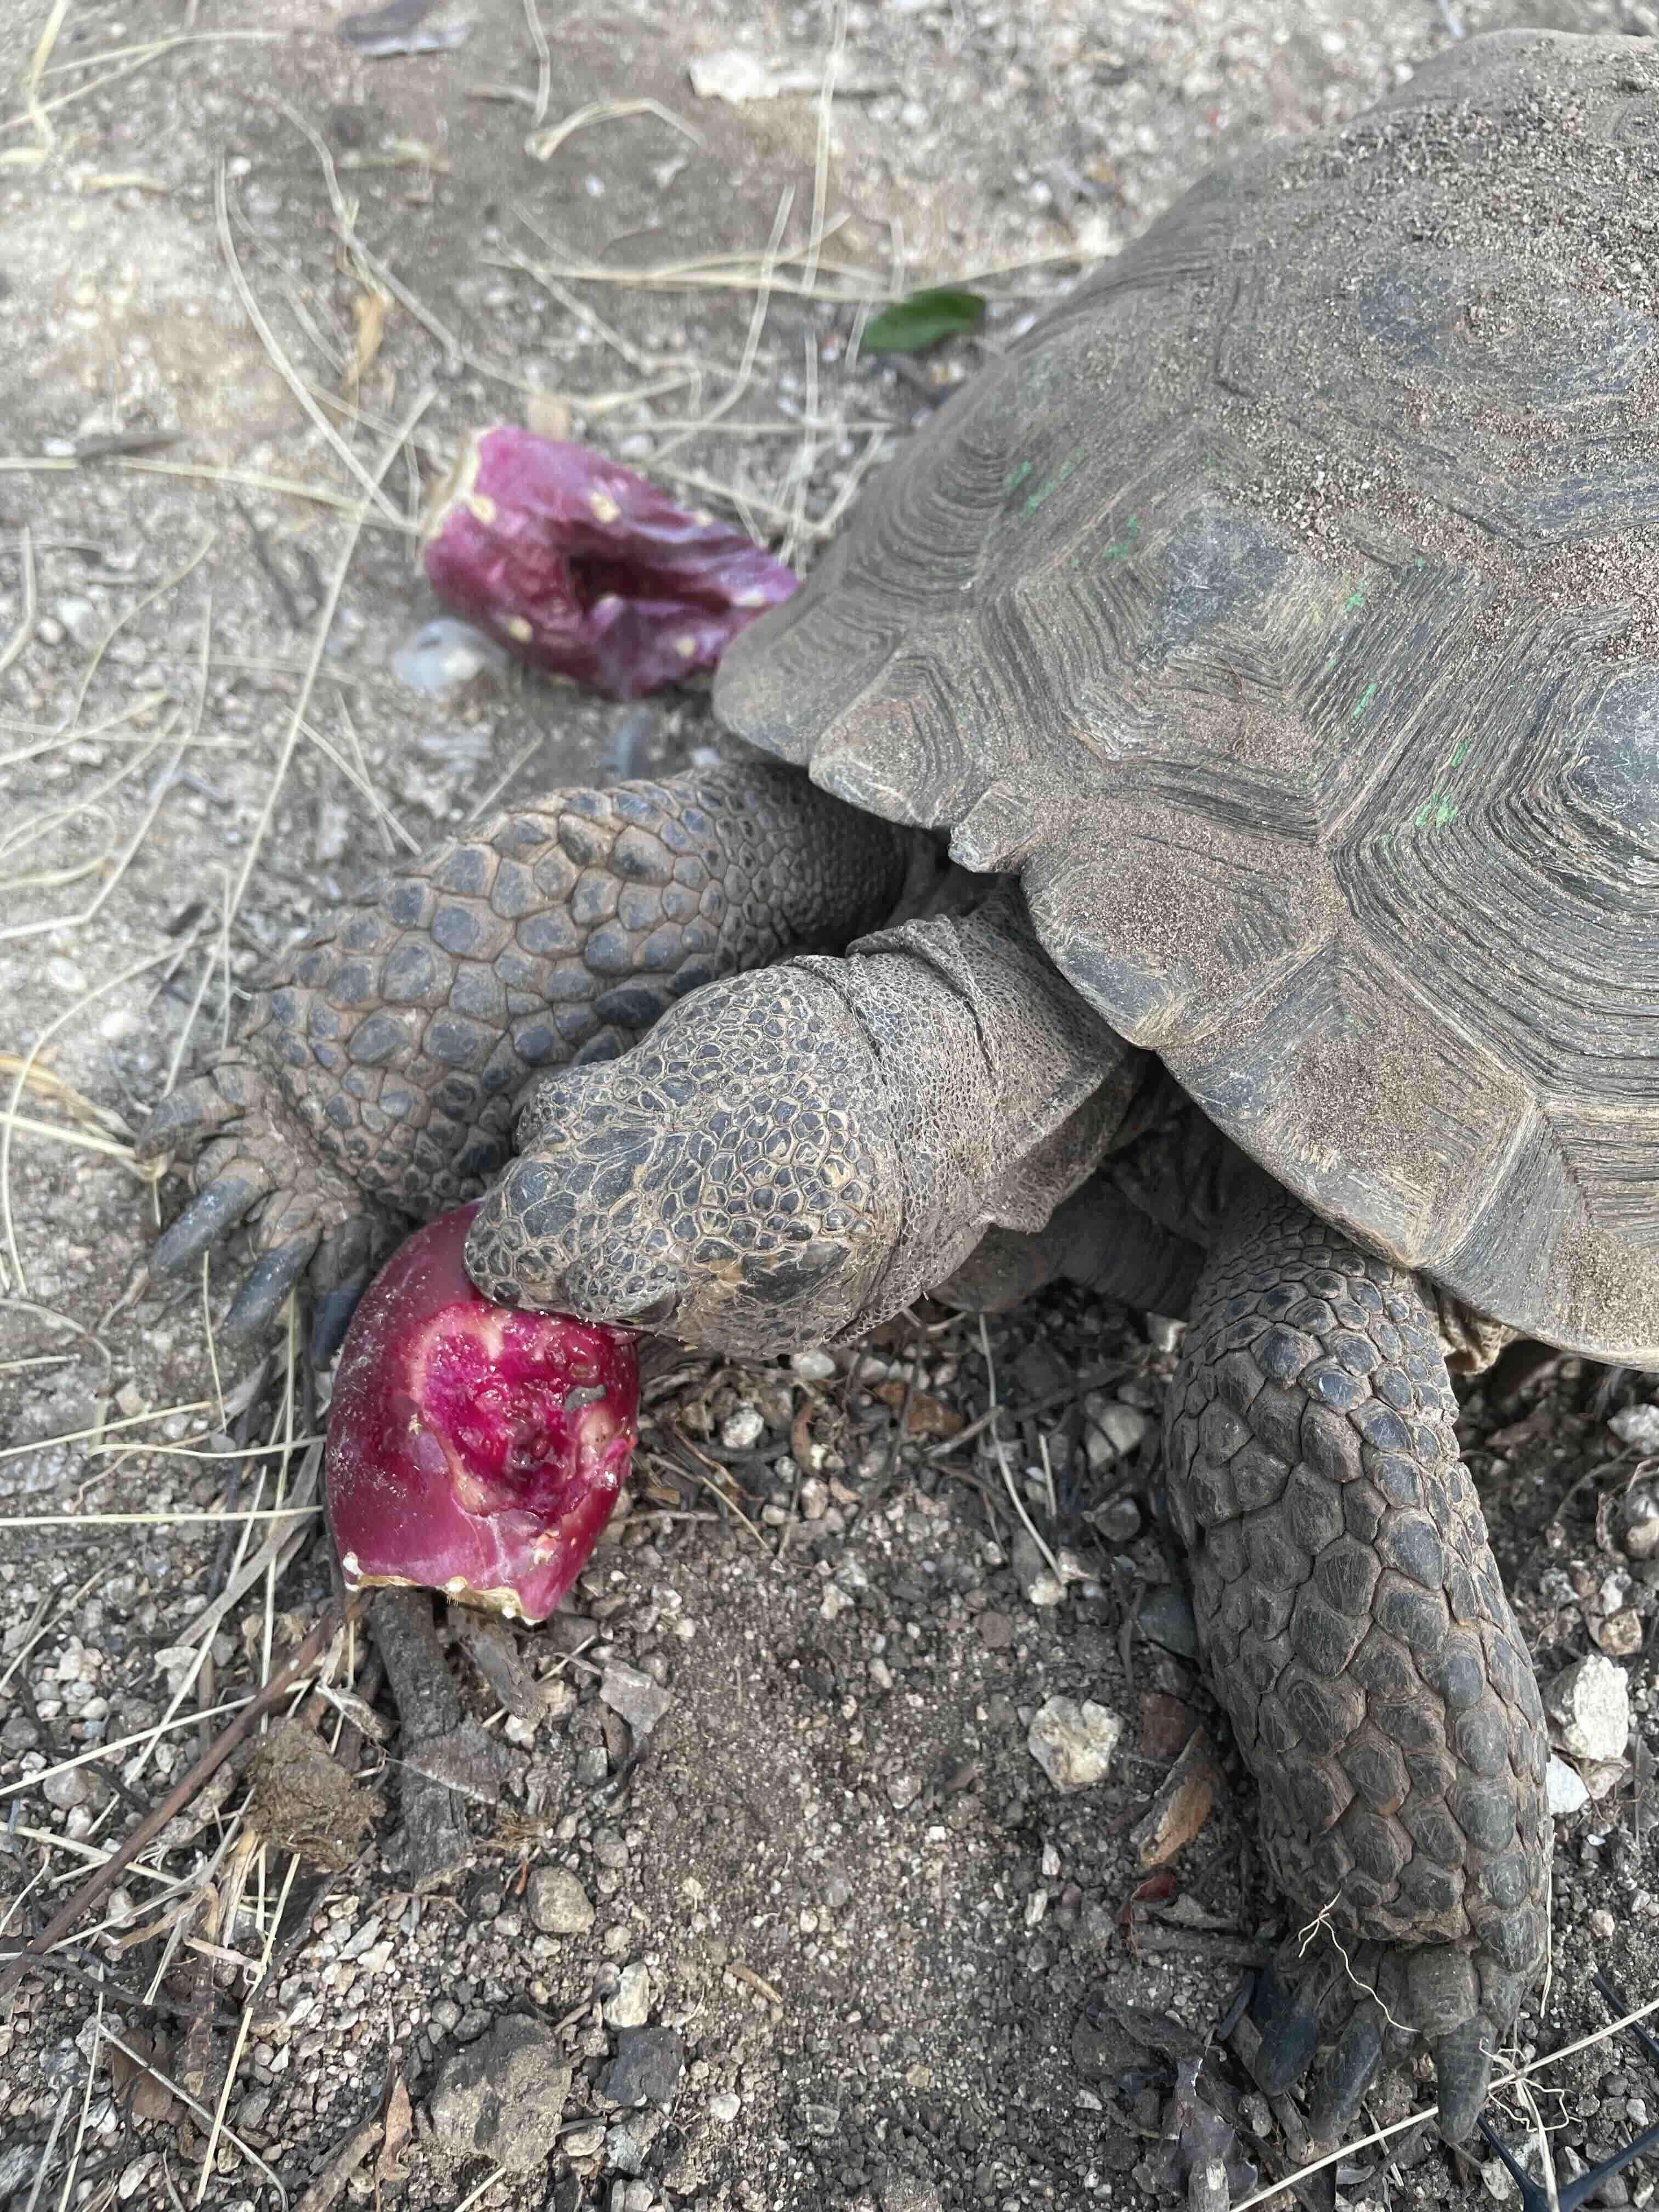
We aren’t alone. Living through this extended drought and awesome heat in the Sonoran Desert is a major feat for any creature out there–plant or animal–no matter how desert-adapted it may be! We are all feeling it. Difficult to imagine how creatures, like the long-lived desert tortoise, manage through the kind of intense drought we are experiencing.
Even in my back yard, my tended prickly pear, covered in buds and tender nopales last April, is ending this summer with tunas dropping before mature or devoured by cactus wrens, and pads chomped by packrats or ground squirrels.
Tia Marta here to share some thoughts about us humans harvesting from the wild. As I learned from my Tohono O’odham mentor, in earlier times Indigenous people had to suffer through lean times using the desert foods they’d stored from times of plenty. They knew sporatic seasonal productivity is the name of the game in the desert. Wise cultural tradition dictates that you harvest abundance when it happens, share your plenty, and store as much as possible against the expected lean times.
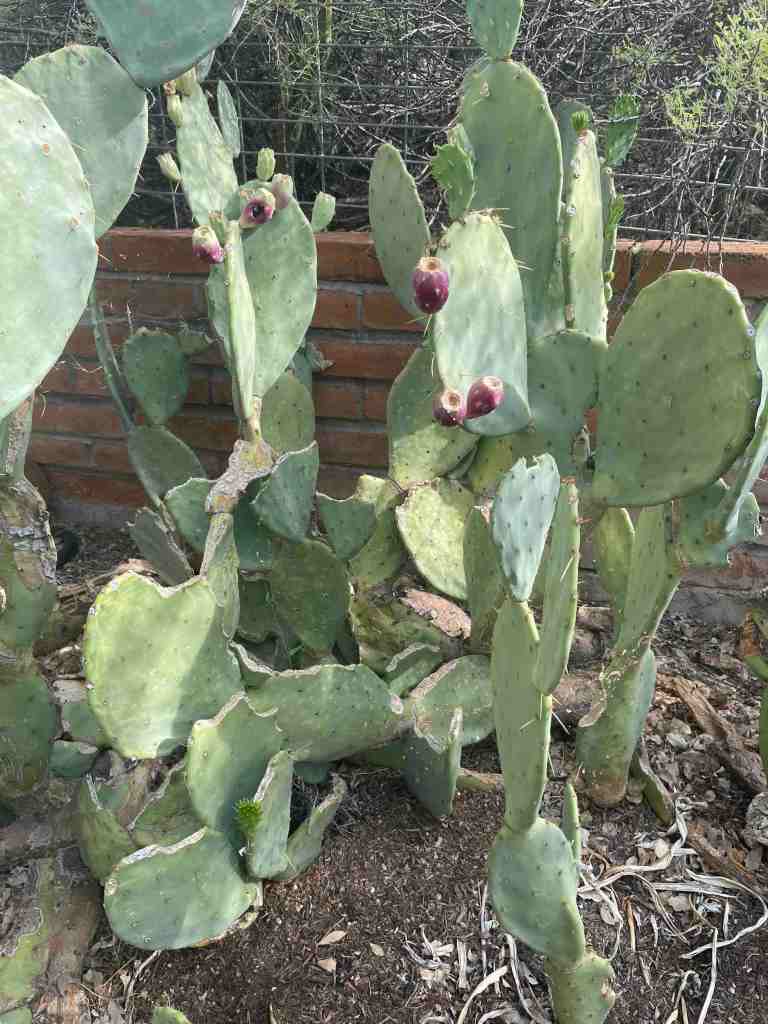
Very few native prickly pears have produced fruit this year in the Sonoran Desert, so as human desert harvesters I feel we must refrain this year, and consider the needs of our wild neighbors, the deer, javalina, cottontails, rodents, birds, etc who need what forage remains– far more than we do.
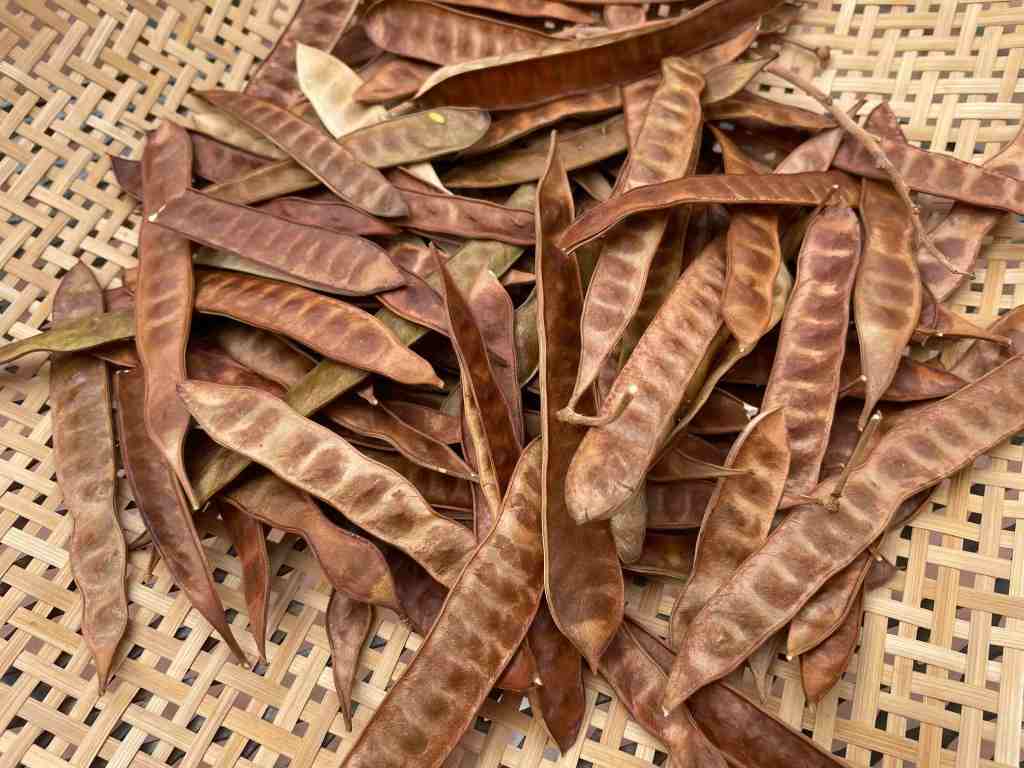
Instead, I suggest we go for an invasive! How about eating from the white lead tree, known as guaje in Mexico, huaxin by the Aztec in its region of origin? Its presence as an invader into the Sonoran Desert generates interesting controversy. The seeds contain an amino acid mimocine toxic for us mammals who have no rumen for digestion. However Guaje‘s young pods, when green, can be cooked in soups or in tacos, as cooking removes the toxicity. This small fast-growing tree has other positive attributes: It is used as great cattle fodder, provides stovewood fuel, erosion remediation, herbal medicine, and it adds soil nitrogen. Its profuse and often continued flowering makes it a good pollinator support. Caution: it IS an invasive species and, if let loose in our desert, could compromise our precious natives..
Guajes (Leucaena leucocephala) have been known and appreciated in Sonora, Mexico, for decades if not centuries. It is planted on the University of Arizona campus (see UA Arboretum) and is being researched as a potential future food plant for climate change by horticulturists at Mission Garden. I’m glad guaje volunteered in our yard from soil in a potted plant. It created a little grove of blessed shade for us, and bees have been abuzz over its puffs of cream-white flowers every spring.
I recently gathered a gallon bag of dry pods which yielded only 1/8 cup of small seed. They resemble flax seed. I soaked them to see if any were viable. About 1/3 of them swelled. When cooked for 15 minutes to remove mimosine, and drained, they proved nut-like and tasty. I’m adding them to my home-made bean dip. As a legume they will provide good protein in addition to texture and new flavor.
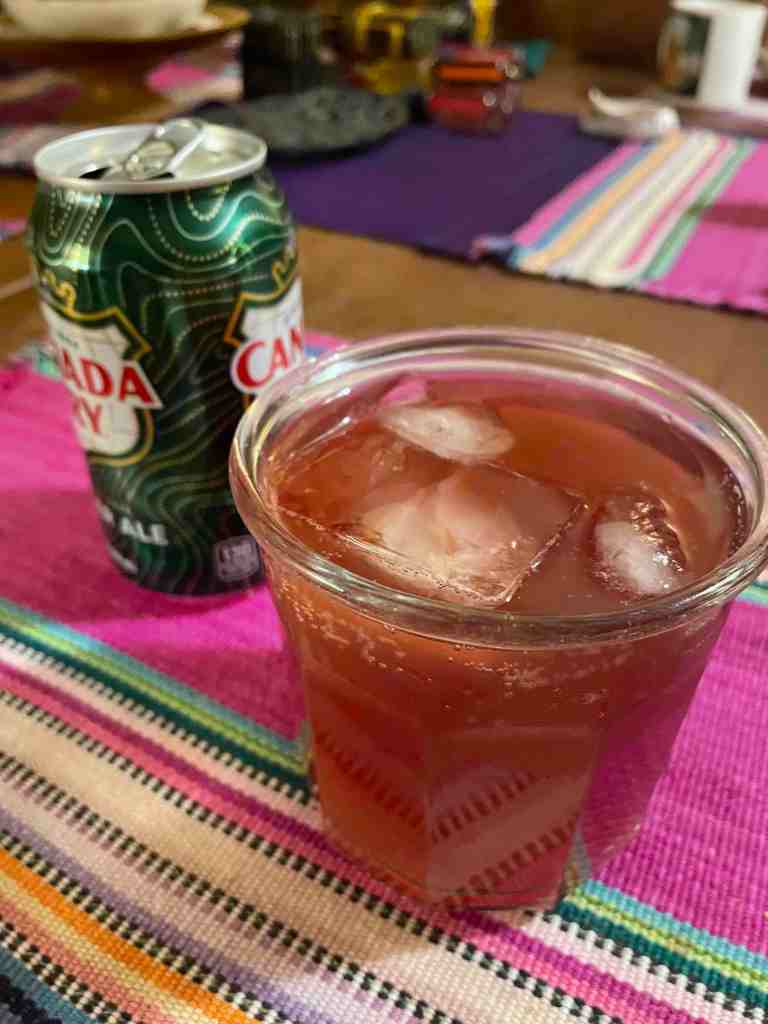
To go with the dip, I’m using a scant amount (a tablespoon per 8oz) of my conserved prickly pear juice, harvested and frozen August last year, with flavored fizzy, gingerale and a splash of mescal. With this dressed up punch, we’re sending a toast to all desert creatures out there! We hope they are benefitting from any prickly pear tunas that may be ripening in our hot, dry desert!
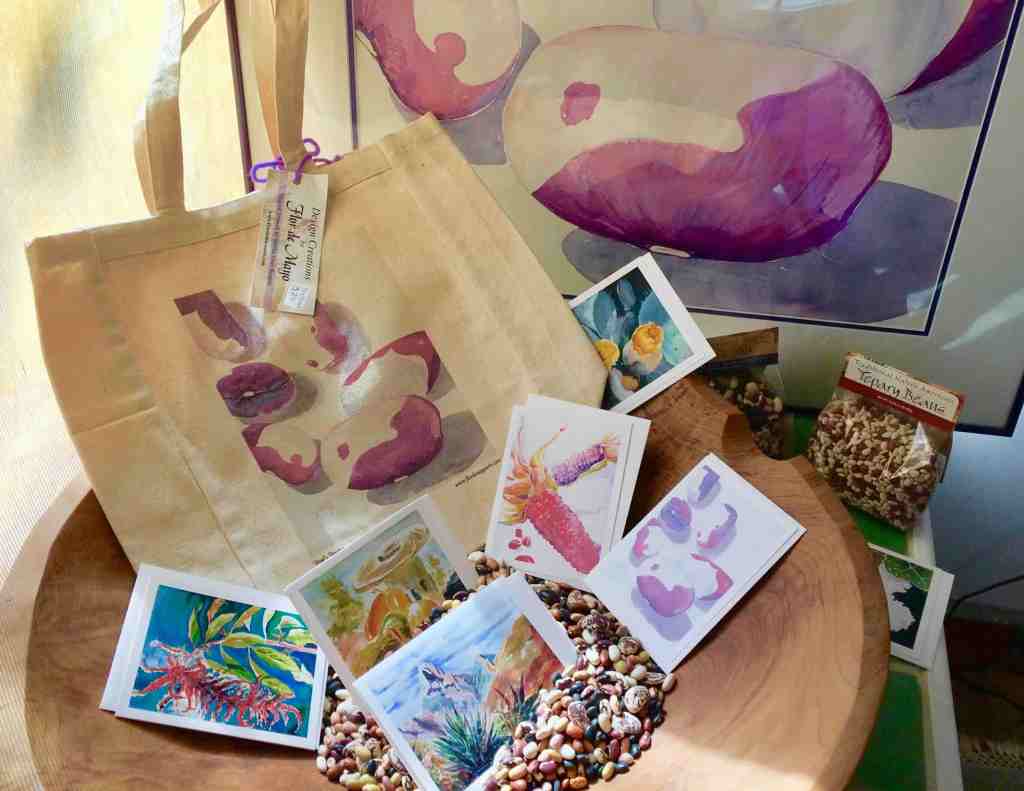
A colorful assortment of Tia Marta’s watercolor art-notecards depicting Southwest Native American heirloom foods can be found at the Mission Garden shop, or online at NativeSeeds/SEARCH.
It’s Carolyn today and I’m out in my garden to pick some delicious and healthy vegetables to bring you a season-spanning recipe. If your Ficus Indica prickly pear (the Mexican tall kind) sent out its leaves a little late this spring, you probably have a few smaller pads that are still tender enough to cook. Combine those with the purslane in your summer garden for a delicious vegetable side dish or taco filling. If you don’t have your own cactus. you can always pick up some nopal pads at any Mexican grocery store. If you buy the kind already cleaned, you’ll need to use them right away as once they are scraped, they go bad quickly. We have previously discussed how to clean prickly pear pads here.
We’ve also discussed purslane previously in this blog here, but I’ll copy the nutritional information because it is so important:
It’s sad but true that right now people are out in their yards pulling these plants out and tossing them in the garbage (or compost for the more enlightened). They should be tossing them in the wok or frying pan (see recipe below.) Purslane provides six times more vitamin E than spinach and seven times more beta carotene than carrots. It’s also rich in vitamin C, magnesium, riboflavin, potassium and phosphorus. One cup of cooked purslane has 25 milligrams (20 percent of the recommended daily intake) of vitamin C.
Especially important to those of us eating a modern diet, purslane is very high in an essential omega-3 fatty acid called alpha-linolenic acid (ALA). Omega-3s are a class of polyunsaturated essential fatty acids. Your body cannot manufacture essential fatty acids, so you must get them from food. Certain fibers also help in controlling blood sugar.
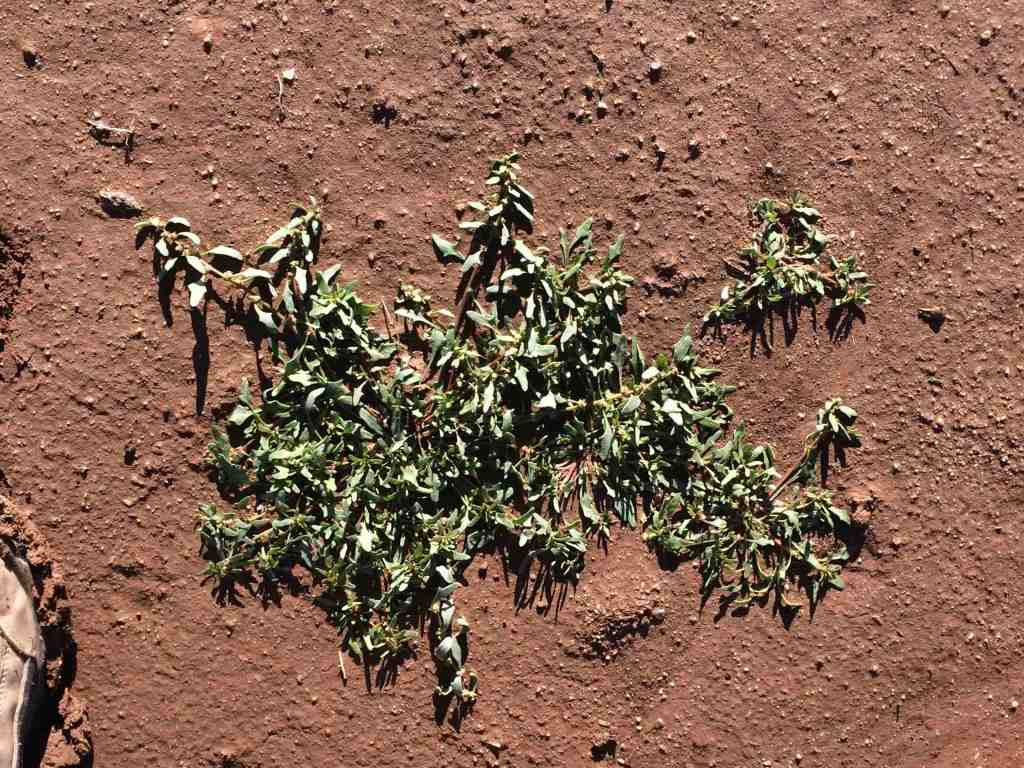
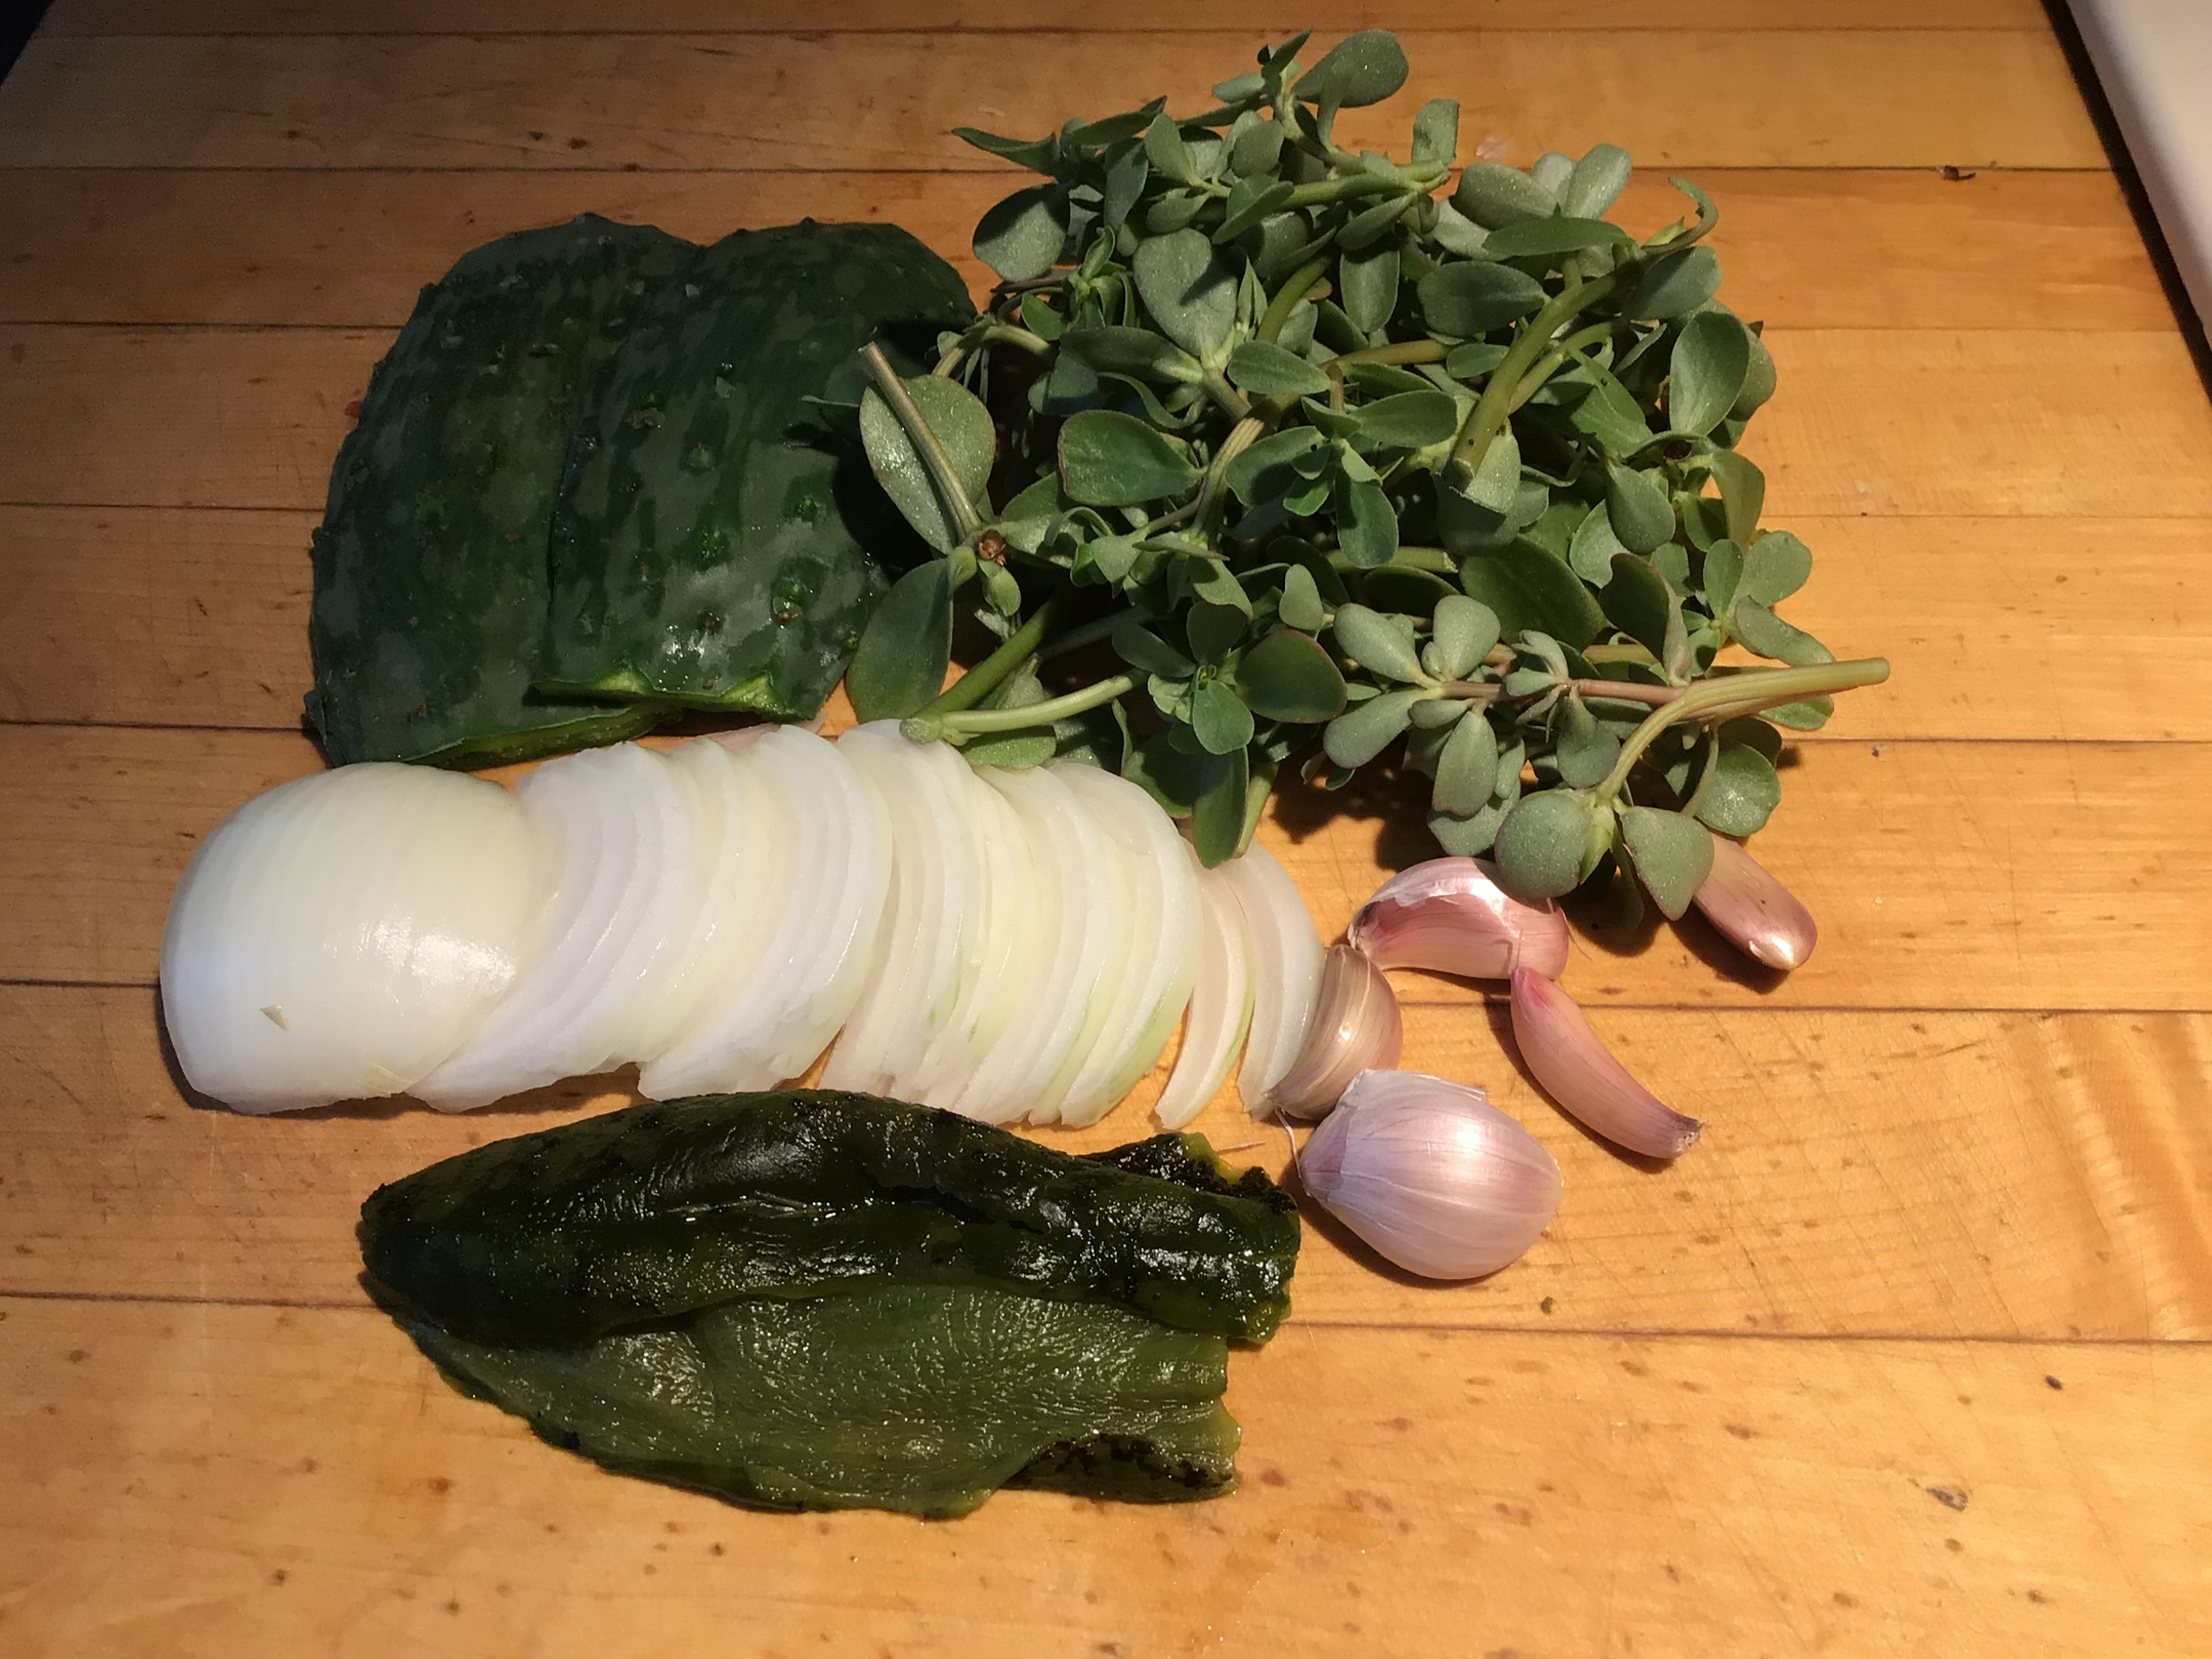
If your aren’t familiar with purslane or verdolagas, here’s a closeup photo:
Here are all your ingredients for the tacos: (top) prickly pear leaves and purslane, (bottom) onion slices, garlic and poblano chile.
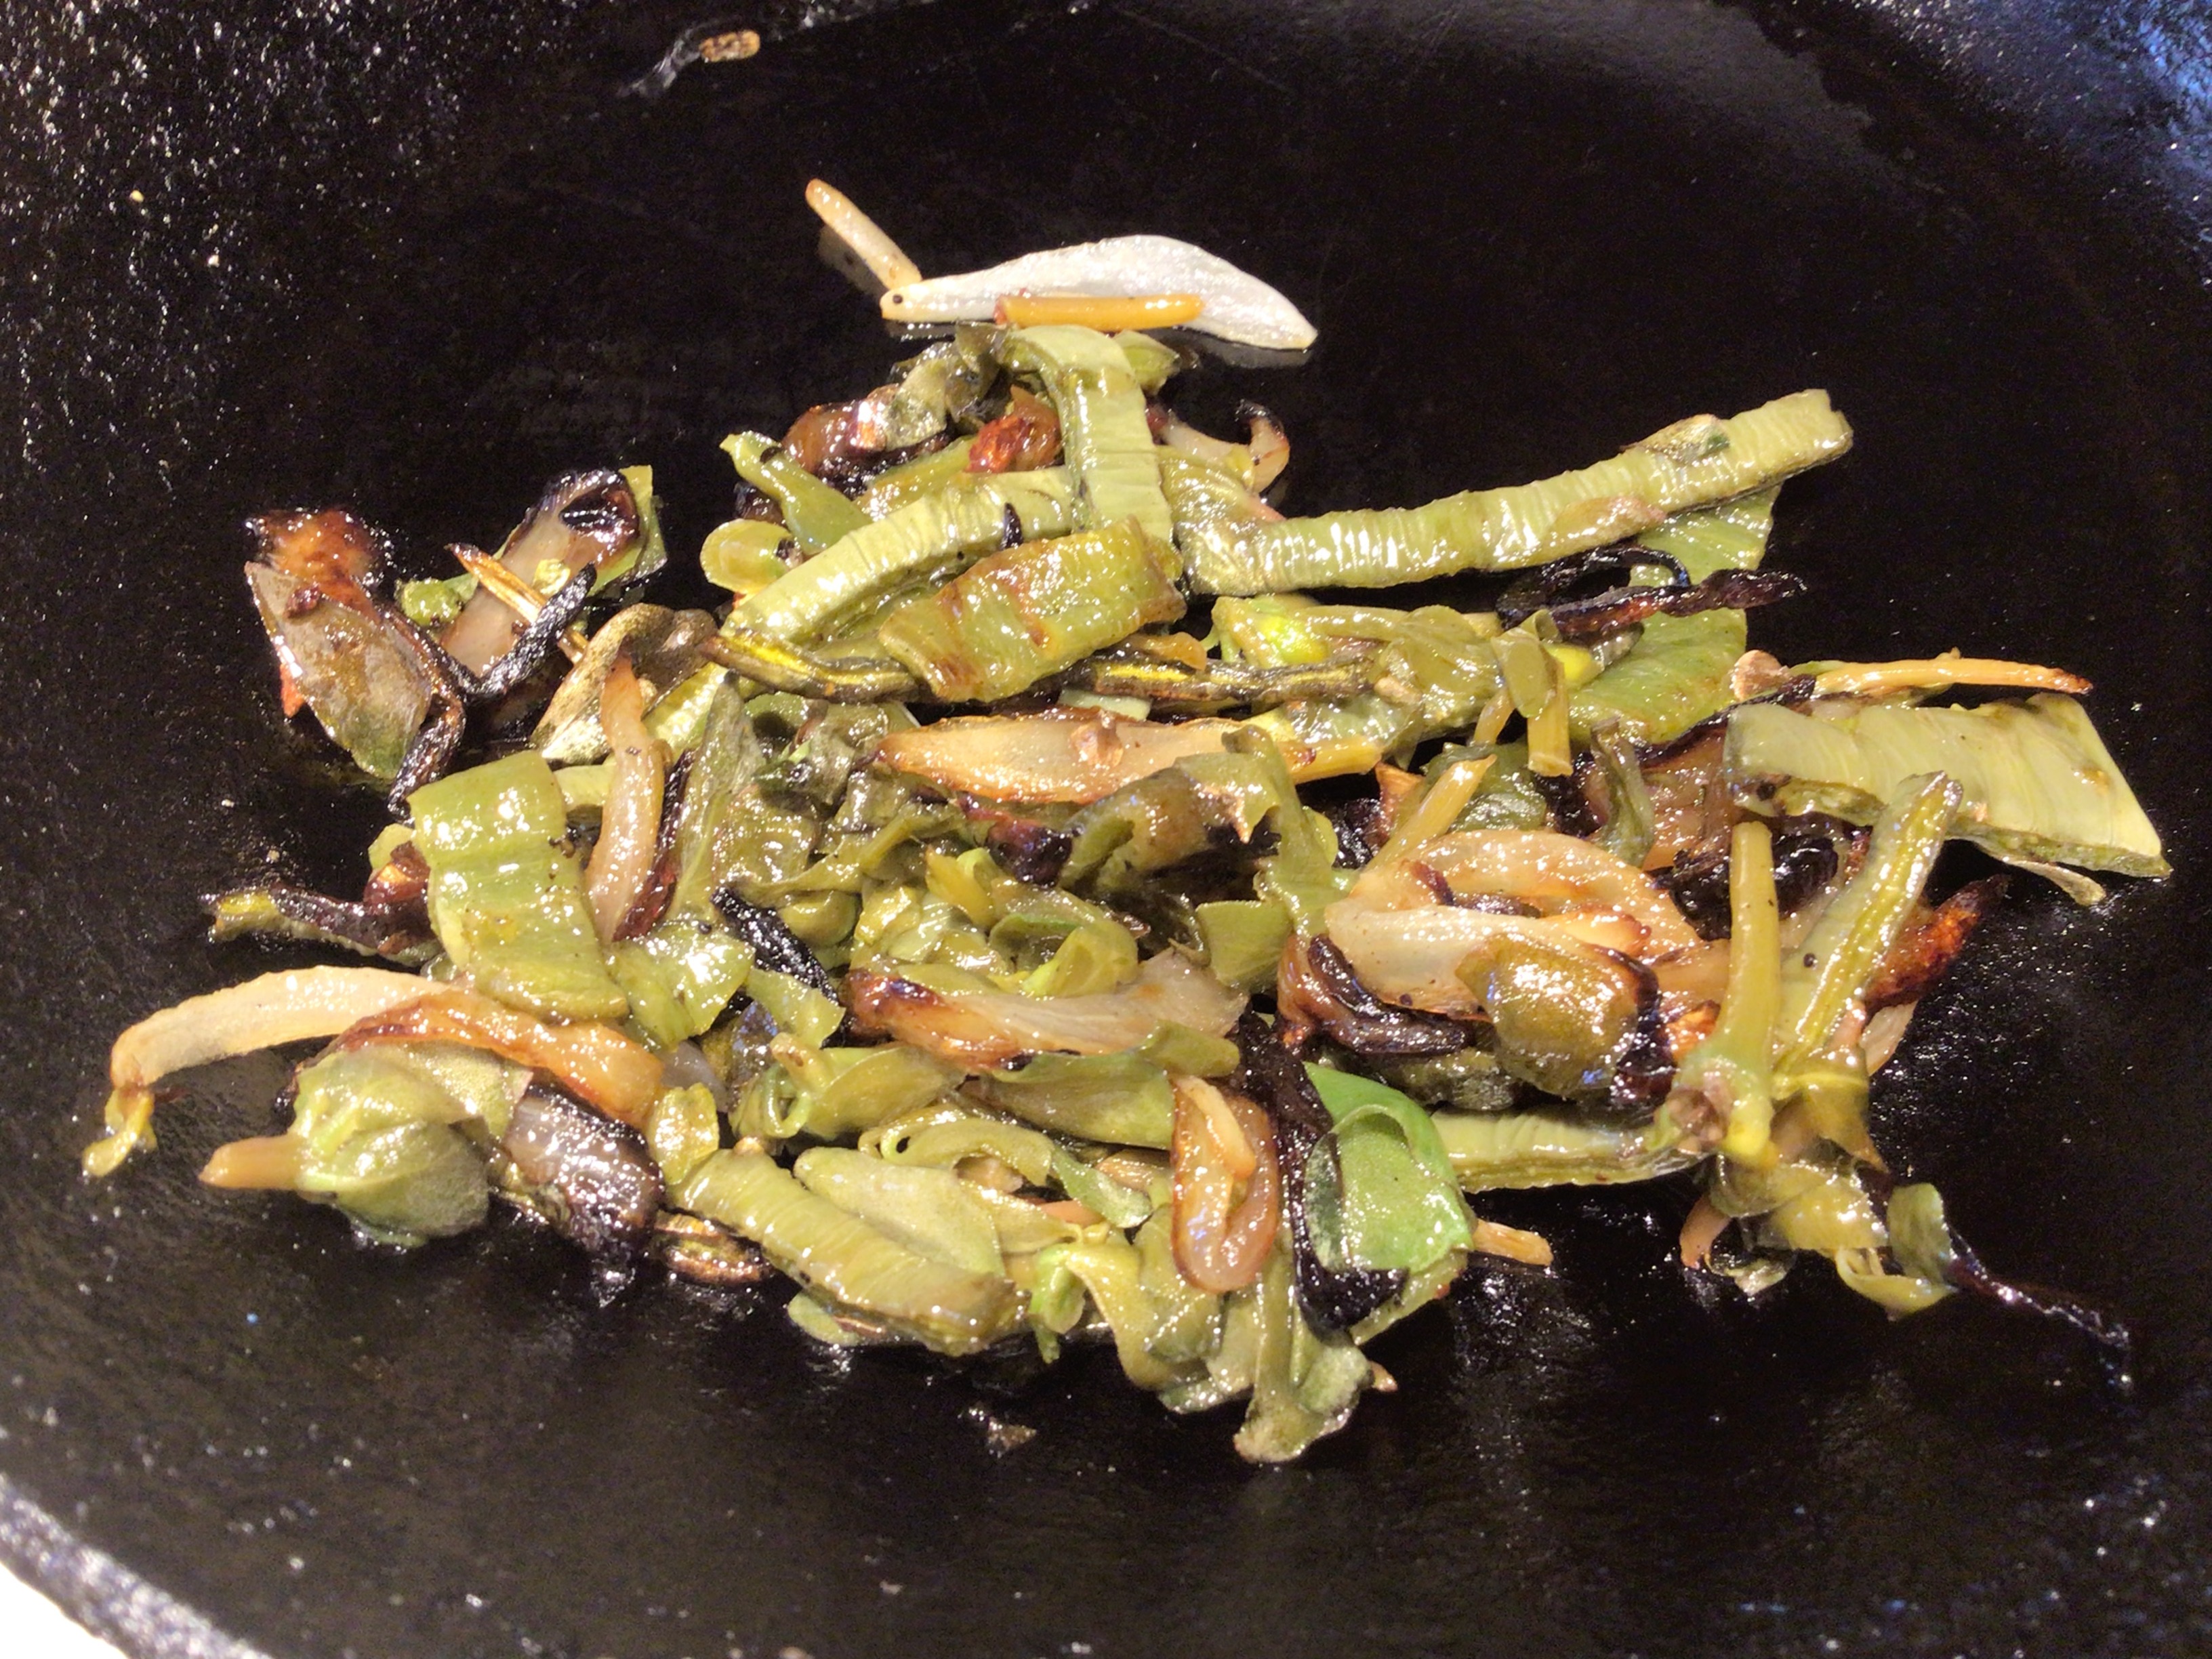
This is what the ingredients will look like cooked.
Sonoran Summer Tacos
2 2×4-inch prickly pear pads or equivalent
½ white or yellow onion
2 cloves garlic, minced (1 teaspoon)
2 tablespoons neutral vegetable oil
1 cup verdolaga (purslane), packed
1 roasted, peeled, cleaned Anaheim or poblano chile, cut into pieces
(or 2 tablespoons chopped canned green chiles)
4 corn tortillas or small flour tortillas
2-4 tablespoons crumbled cotija cheese or cheese of choice
Using rubber gloves, clean the stickers from the prickly pear pads. Rinse and cut into pieces 2 inches by 1/8 inch (roughly the size of a wood matchstick.) Set aside.
Cut the onion into thin strands by cutting from the root to the stem (not crosswise). Add the oil to a heavy frying pan and begin sautéing the onion over low medium heat. You want it to cook slowly until soft and light brown. After about 10 minutes, add the garlic. While that is happening, you can prep the rest of the ingredients.
Cut the fresh chile into pieces about 1 inch by 1/8 inch. Chop the verdolagas (purslane) roughly. After 10-15 minutes when the onions are ready, stir in the greens and chile and continue to cook.
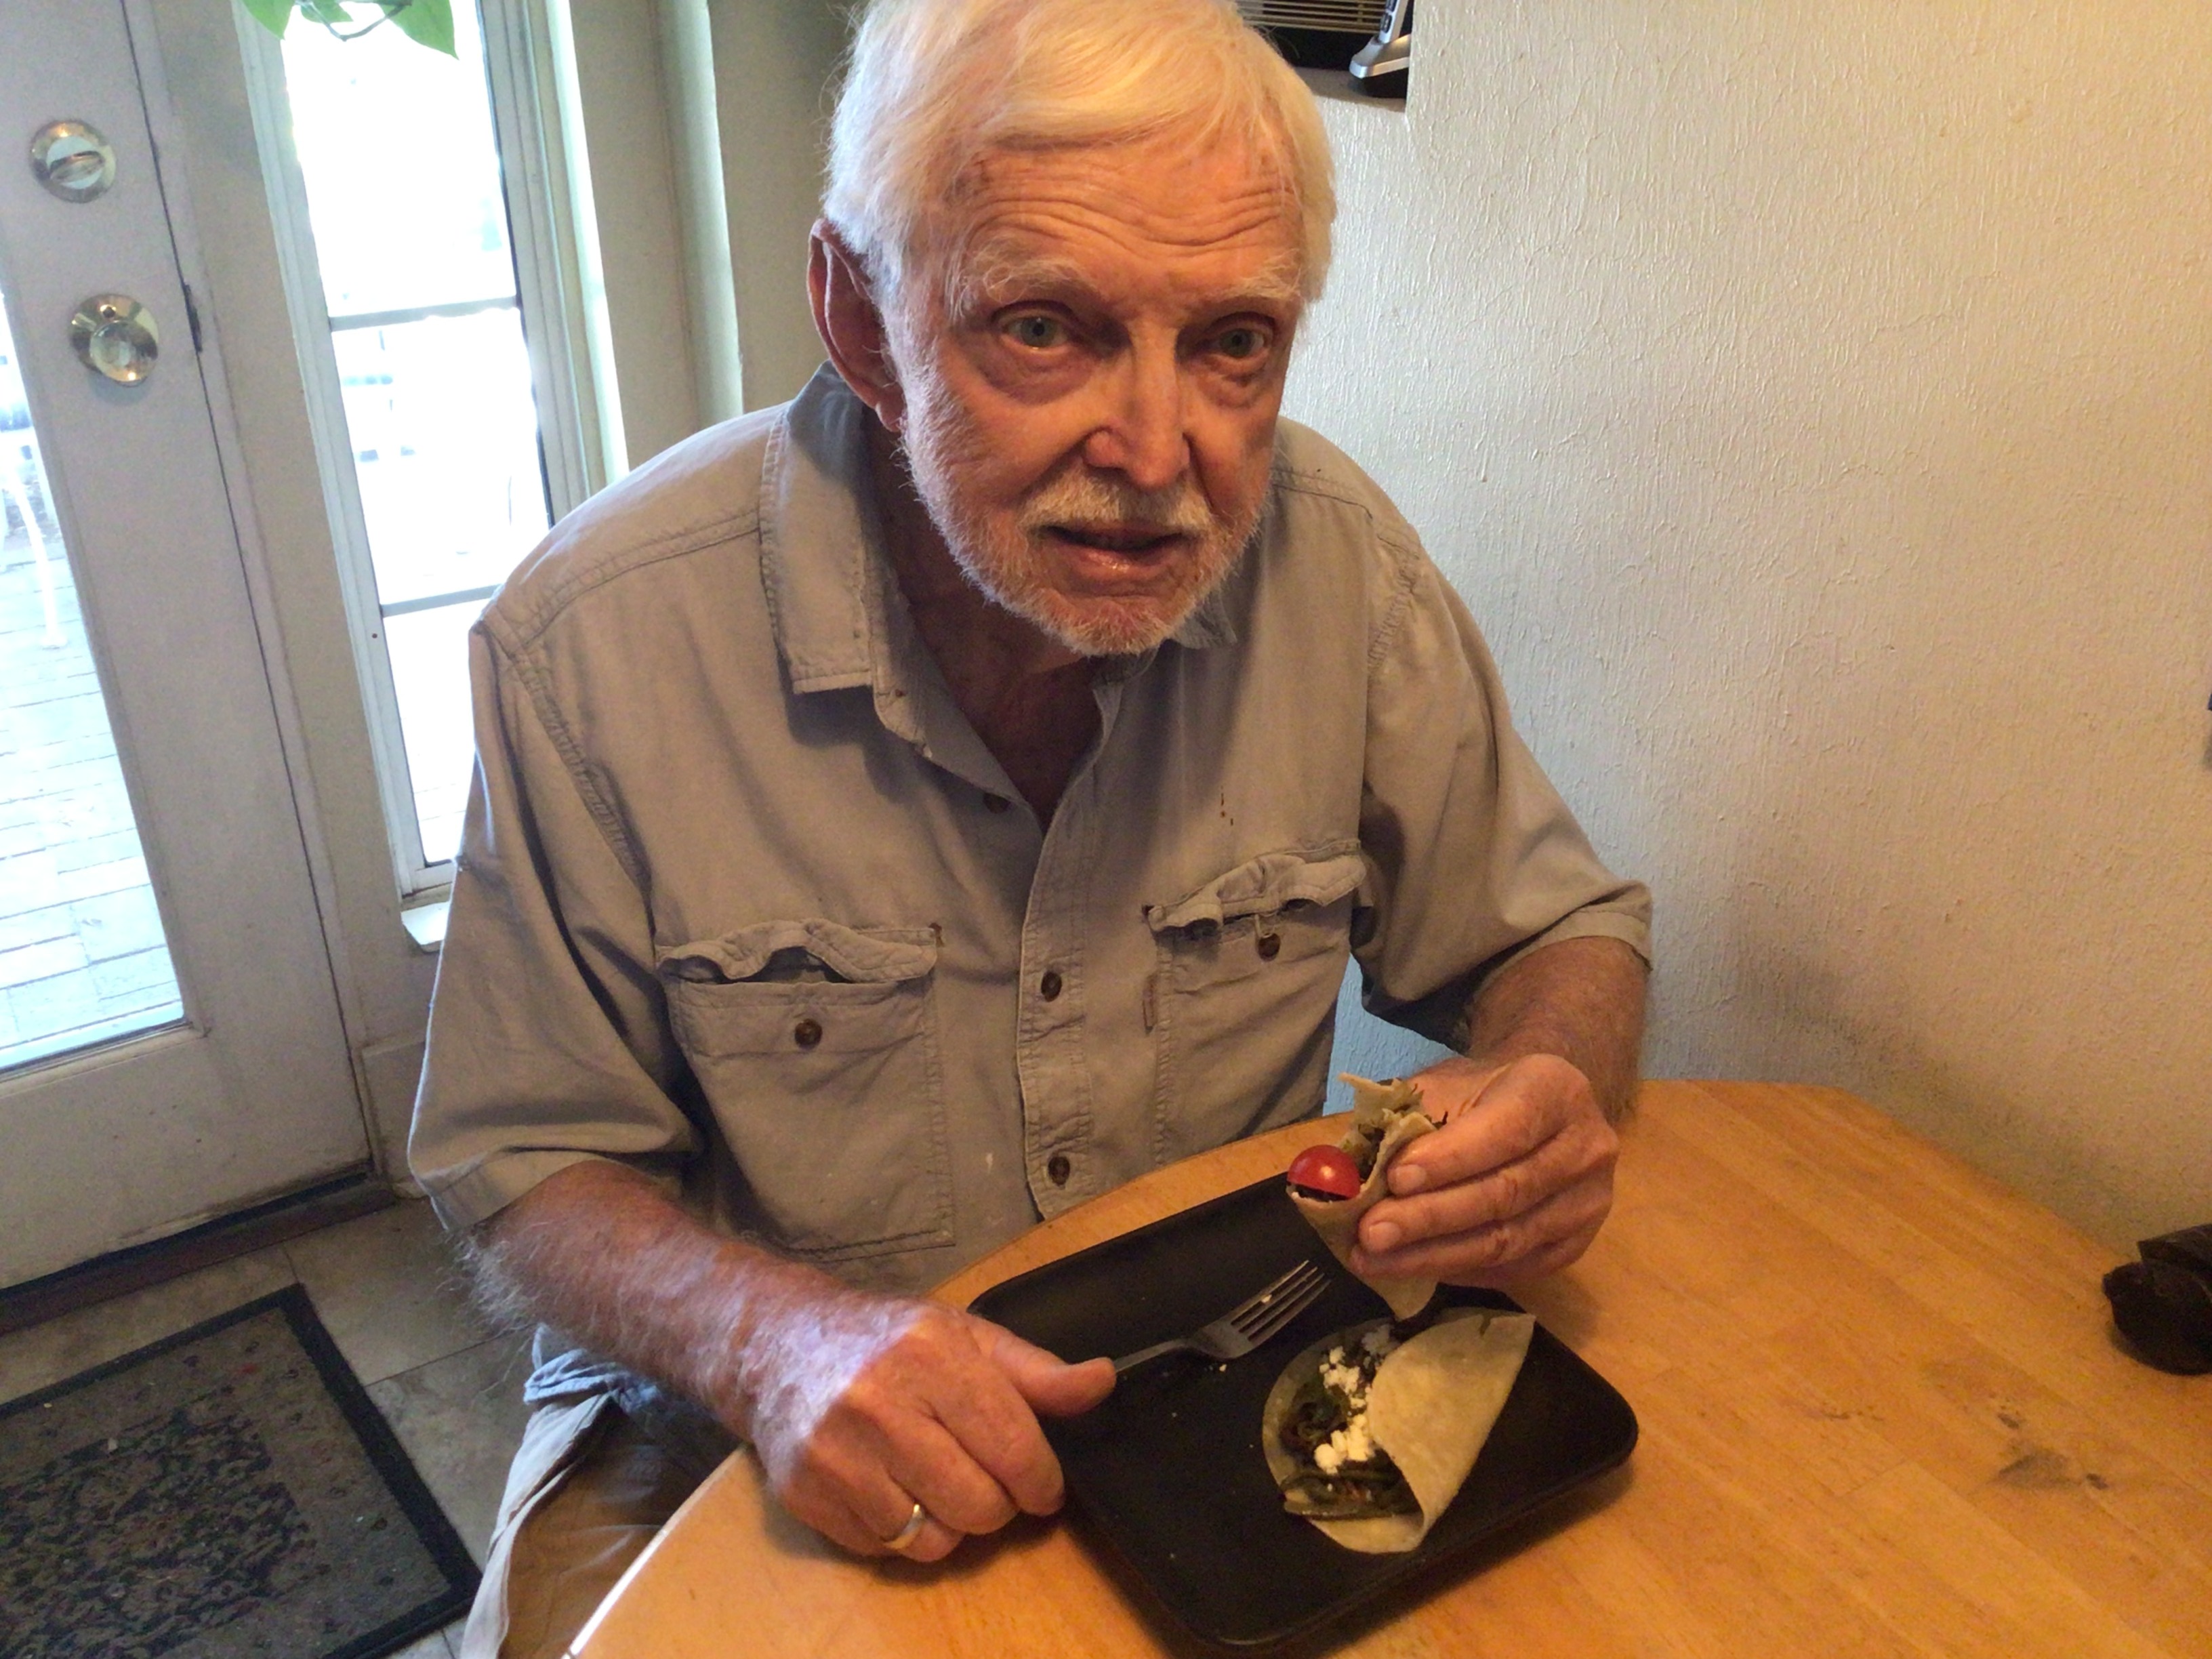
Coat a heavy frying pan with a light spray of oil and soften the tortillas. Divide the vegetables among the tortillas. Sprinkle with cheese and fold over.
Every recipe writer whether for a blog or cookbook, needs a taste tester. Is it good? Would you eat it again? Here is my taste tester who has eaten his way through five cookbooks and dozens of these blog posts over forty years.
Chief taste tester Ford Burkhart works his way through the Sonoran Summer Tacos for lunch. He gave them the thumbs up.
____________________________________
You can learn more about the history of food in Southern Arizona in my latest book A Desert Feast, the story of the last 4,000 years of food in the Sonoran Desert. Want more recipes using foods of the Southwest? You’d find ideas for collecting and using 23 easily recognized and gathered desert foods in Cooking the Wild Southwest: Delicious Recipes for Desert Foods. . Recipes from top Southwest chefs are collected in The New Southwest Cookbook. Just click on the titles for more information. You can learn more about me on my website.
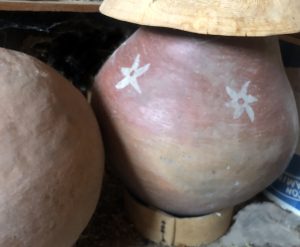
Clay Olla with Tohono O’odham 60-day corn, and tesgiüino corn beverage
Greetings from Tucson, it’s Savor Sister Emily here with my first official post! I am excited to be here, and am looking forward to hearing from you in the comments below. I first encountered tesgüino (tes-WEEN-oh) while learning about the traditions of the Rarámuri people at Mission Garden’s Rancheria (Beterachi) exhibit in Tucson, Arizona. I only knew a bit about the Tarahumara people who have lived since time immemorial in the rugged and beautiful mountains of Chihuahua in northern Mexico, called the Sierra Tarahumara. I soon learned to call them by their tribe’s own name for themselves: Rarámuri, as opposed to “Tarahumara” which was introduced by the Spanish. Many people have heard of the Rarámuri tradition of running long distances, but perhaps fewer people are familiar with another unique aspect of their culture which is found in a beverage called tesgüino.
Tesgüino is the Spanish name for a fermented corn beverage, primarily made from corn and water. The written observations of ethnographer John Kennedy in 1959 describe the important role that the beverage plays in the spiritual and ceremonial traditions of the Rarámuri people. It is also commonly enjoyed in social and community life. Known in the Rarámuri language as batàri and suguí, tesgüino is so integral to the culture that the average Rarámuri family might use 200 pounds of corn annually just for making tesgüino (Kennedy 634).
Clay olla tesgüineras with star pattern.
At least 4,500 years ago, corn became a vital crop for indigenous peoples in the Southwest, including the Rarámuri who developed and care-take many different corn varieties. Similarly, here in the neighboring Sonoran Desert, the Tohono O’odham have cultivated a fast growing 60-day corn for thousands of years and it still thrives today. I wondered if the 60-day corn indigenous to Cuk Shon could be made into tesgüino?
I reached out to my fermentation-obsessed researcher and friend Cesar Ojeda Linares in Mexico City who described to me the thick, distinctive beverage he tasted on his journeys and exploration in northern Mexico. He provided an excellent guide on how to make tesgüino according to what he learned in the community there. He found it similar to a type of atole, but thicker and with a stronger aroma. It is possible to find recipes for making tesgüino (including in Sandor Elix Katz’s book, The Art of Fermentation). Here is a fun short video on Vimeo of Señora Chenta from Alamos, Sonora making tesgüino using her traditional methods. Variations between recipes are part of the fun–diversity is where it’s at! But the basic recipe for this corn beverage always begins with dry corn kernels which are sprouted and grow roots, a simple process known as malting. This malting produces sweet sugars which can then be naturally fermented in water with the aid of healthful microbes. Natural yeasts and bacteria are present on the corn, in the air, or in a trusty heirloom tesguinera vessel, but wild plants can also be added to introduce the preferred microbes which catalyze the process. Brome grass seed (Bromus arizonicus) and sweet stevia (Stevia serrata) are among the plants that could be used to inoculate the brew, according to Fermentaciones tradicionales indígenas de México. After brewing for three to five days, the tesgüino is a mildly alcoholic, mildly sweet, refreshing and healthful beverage, best enjoyed when shared amongst family and friends.
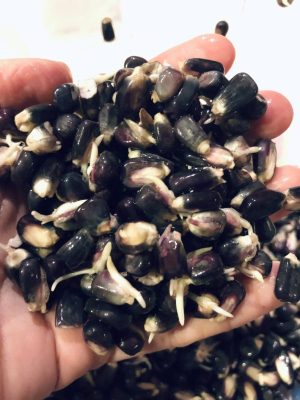
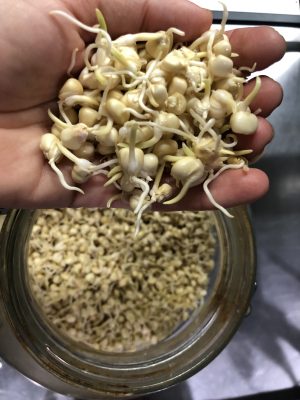
Roots emerge from kernels of blue corn after three days.
I made the beverage with O’odham 60-day corn in a clay olla following the directions below, and once again using Navajo Blue corn fermented in a ceramic salt glazed crock.
An important note on sugar. Sugar cane came to the America’s in the 15th century. Piloncillo (raw brown sugar cone) is thus not a truly “traditional” ingredient, but it has been common in the region for a long time. Including it certainly excites the hungry microbes, and the resulting beverage is not very sweet. In a traditional Rarámuri tesgüino, the tesguinera pot instead carries the inoculating microbes that kickstart the process (much like yogurt).
Recipe and Directions for Tesgüino Makes about 3 gallons tesgüino
3 pounds dry heirloom corn, preferably dent or flour varieties, organic and non-GMO. 3 gallons water, ideally filtered and de-chlorinated, *see note. 3-4 cones or bricks piloncillo (unrefined pure cane sugar from international markets) 1-3 sticks cinnamon 0.5-1 teaspoon brewers yeast (ale yeast or similar- not baking yeast), optional but recommended. Palmful organic sweet stevia leaves, optional but recommended. Ask local farmers/gardeners.
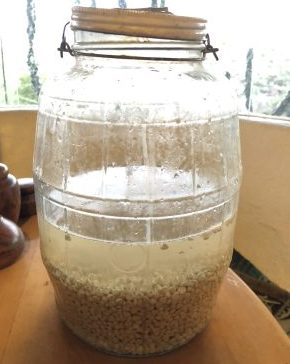
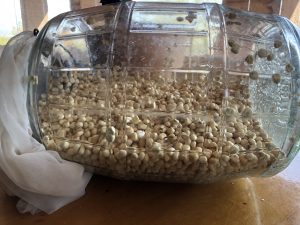
Dry corn first soaks in waterCorn seeds sprout in a large vessel after soaking and repeated rinsing.
1. Place dry corn in a large glass or plastic container (6+ quart size) such as a Cambro.
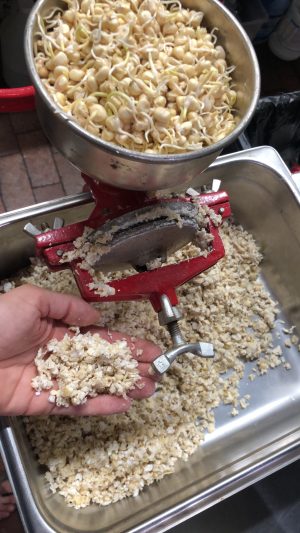
When corn seeds grow substantial roots, it is ready for grinding.
2. Cover with water and allow to soak overnight.
3. The next day, strain off the water, then cover opening with a breathable cloth or mesh lid and lay on its side, just like when sprouting seeds for eating. Store in a well lit, warm spot, avoiding direct sun.
4. Rinse and drain the corn in its container at least 2 times a day–more often is better, especially in warmer conditions.
5. After a couple days, the corn will grow a little radical (root) and first shoot. This is very exciting! In three or four days, when nearly all the corn’s roots are about ½–1 inch long, it’s ready to grind.
60-day corn ground in a molino, in preparation for cooking and fermentation.
6. Pass the sprouted corn through a hand mill molino grinder on a coarse setting, so it resembles very coarse grits, or about the texture of cooked quinoa. If you don’t own a molino, pulse small batches in a food processor.
7. Place the ground corn in a large pot, ideally large enough to hold three (3) gallons of water and the corn together. Otherwise, you’ll need to work in two smaller batches (half the mixture at a time). Add the cinnamon, and gently boil the corn in water for 1-1.5 hours to extract its natural sweetness and flavor. Stir occasionally to prevent burning. After the time has passed, add the piloncillo sugar and simmer to dissolve.
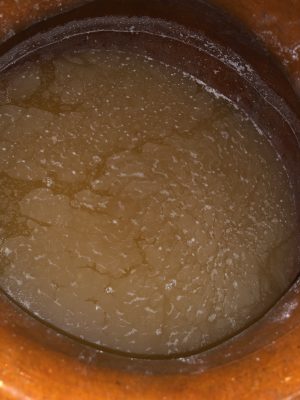
Ground corn boiling in water with piloncillo
8. Cool the mixture and carefully strain to keep all the liquid in a 3+ gallon non-reactive fermentation vessel, *see note. The strained liquid will be thick and smooth in texture. Cover lightly with a tea towel, cloth napkin, or cheesecloth. (Compost the strained corn at this point, or feed to chickens.)
9. Once the liquid is completely cool (or the next day), add ½ to 1 teaspoon dry ale yeast, and fresh stevia leaves. Stir to dissolve. Keep covered with cloth.
Tesgüino fermenting, with the natural yeast visible on the surface (harmless).
10. Each day, wash your hands and visit your tesgüino, stirring well with a clean spoon. You will find increasing effervescence. Delight in the unique texture, aroma, and color.
11. On the fourth day, it should be ready to drink. Strain if desired to remove stevia leaves (if using). It’s time to taste and enjoy! Try both chilled and at room temperature to your liking.
Invite many friends to partake in the celebration, and raise a glass of appreciation to our Rarámuri neighbors who created this beautiful beverage.
Please write in the comments below about your experiences with fermenting corn, travel in Rarámuri lands, and tesgüino!
-Savor Sister Emily Rockey
Clay Olla with Tohono O’odham 60-day corn, and tesgiüino corn beverage
*Notes:
Water- Tap water can contain chlorine which can be counterproductive to fermentation (chlorine kills good beneficial microbes). Dechlorinating is easy: simply draw the water in a vessel and allow it to sit open at room temperature for a few hours. The chlorine naturally evaporates. Or boil water for 20 minutes and let it cool. Water is now ready to use for fermentation.
Vessels- This can be glass, ceramic, a clay olla, stainless steel, or food-safe plastic. Natural materials like clay will impart an earthy flavor on the tesgüino, while glass or ceramic does not.
Storage- Although it is best to enjoy all the tesgüino amongst friends at once, it is possible to refrigerate the drink for several days, or even freeze with good results.
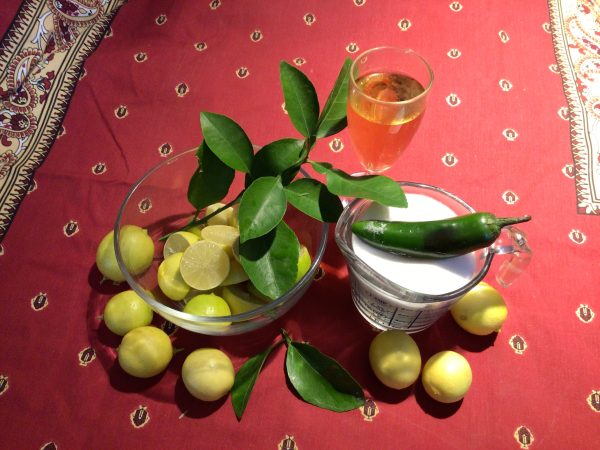
This is the season for small Mexican limes. Trees are usually very prolific and owners are happy to share the harvest. They are also available in produce sections of some store, particularly in the Southwest.
I live a five-hour drive from some glorious Mexican beaches along the Gulf of California. When I was younger, we often headed there on camping trips. As soon as we crossed the border, we’d buy a bag of Mexican limones from kids hawking them on the street and a bottle of tequila. A few sucks on the limes and a few swigs of the tequila and our vacation had begun. It’s Carolyn with you today. My days of crashing on the beach in a sleeping bag are over, but the love of the flavors that evoke our earlier adventures remains. Today I’ll show you how to combine those flavors into an adults-only marmalade.
This is the best season for the small limes called limones in Mexico or Mexican or Key limes elsewhere. If you live in a warm climate and have a friend with a tree, they will probably be happy to give you some. They are also widely available in grocery stores. Spike them with tequila or mescal and maybe jalapeño and you’ve got a treat made for gift giving. But keep some for yourself. This is an adaptation of a recipe from the 1965 version of “Joy of Cooking” that I have used for all my citrus marmalades for decades.
This is all you need to make a delicious lime marmalade: limes, sugar, some tequila or mescal, and a jalapeno
While tequila will work just fine, I prefer mescal for the smoky distinctive flavor. The soaking steps are to make sure the the rinds are very soft and almost melt into the rest of the marmalade.
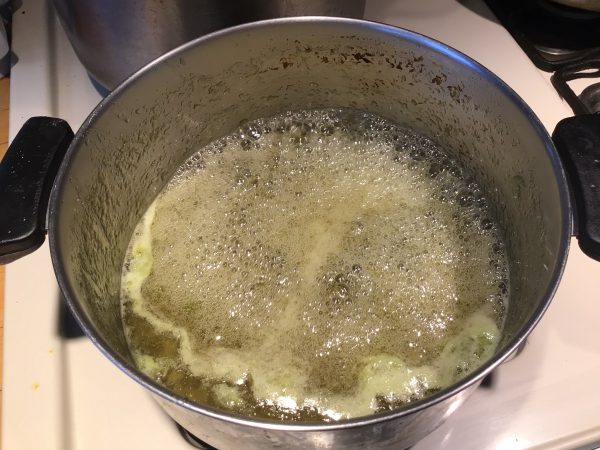
Here’s the marmalade happily boiling and getting thick.
The thermometer registered 220 degrees but had risen another degree in the time it took me to focus the camera. Moves fast at this point.
Boozy Spicy Lime Marmalade
(Makes 3 cups)
1 cup ground Mexican limes (11-12)
3 cups water
3 cups sugar
1 small jalapeño (optional)
1/4 -1/2 cup tequila or mescal
Quarter the limes and remove any seeds. Slit the jalapeno lengthwise and remove seeds and ribs. If you are using a food processor, add the quartered limes and jalapeno and process until all pieces are very fine. If you are using a blender, add the quartered limes and jalapeno and one cup of the water. Whirl until all rind pieces are fine.
Add fruit mixture to a large pot and add three cups of water or just two if you already used one cup in the blender. If any larger pieces of rind made it through, take them out and chop or slice finely. Let this sit for at least 12 hours. This softens the rind. (No, don’t get up at 2 a.m. if this is when the 12 hours are up. Proceed when convenient.) Bring the mixture to a boil and let sit for at least another six hours.
During the wait time, you can collect your jars. You will need enough jars for 3 cups. Sterilize them by covering with water and bringing to a boil or run them through a hot dishwasher cycle. If you use standard jars with two-part lids, they will seal. If you use recycled jars that don’t seal, you will need to store the marmalade in the refrigerator. Place the clean jars on clean newspaper or a kitchen towel.
When ready to proceed, add the sugar to the fruit, stir to combine, and bring the mixture to a slow simmer. Cook until it registers 220 degrees on a thermometer. This will take about 30 minutes. If you don’t have a cooking thermometer, take out a little and put it on a saucer in the freezer. (Turn the heat off under the marmalade while doing this.) If it firms up after 5 minutes, it’s done. If not, keep cooking. Watch closely. Once the temperature is reached, pour in the tequila or mescal. It will bubble furiously while the alcohol burns off. You’ll have to cook a little while longer to bring the temperature back up. At the end the temperature goes up quickly. Stir, scraping the bottom, very frequently to keep it from sticking and burning.
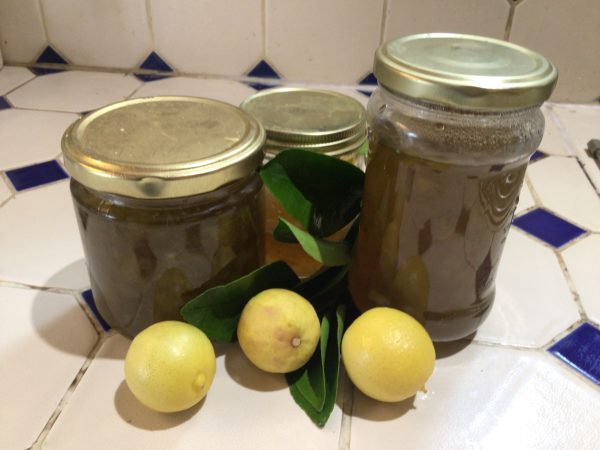
Ladle into jars. The marmalade will firm up as it cools over the next day.
(Note: If you’d like to make this quite spicy, add either more jalapeno or a small serrano chile.)
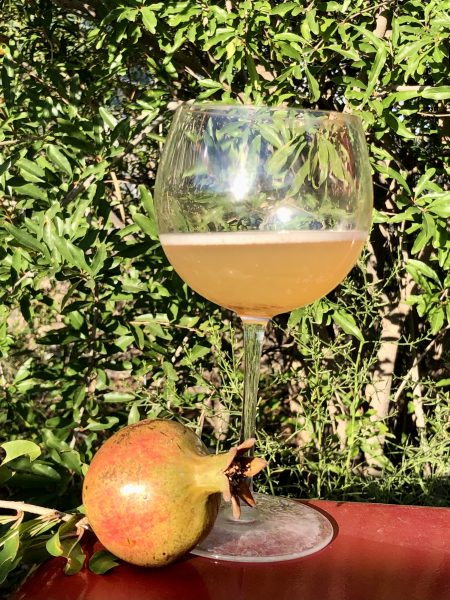
At the end of a year of simple steps, a refreshing glass of pomegranate wine.
(We are continuing our series of guest posts. Today it is Emily Rockey, who for many years was the garden supervisor at Mission Garden and in charge of the health of dozens of pomegranate trees. This post is a bit longer than we usually send, but if you’ve ever wanted to learn to make wine, Emily will take you on that journey.)
There’s something so sweetly satisfying about sitting down to enjoy a delicious treat that you made from scratch with your own hands. Better yet, something that you wild harvested or grew yourself. For some folks, that might be homemade sourdough bread, prickly pear jelly, or a meal prepared from the garden or desert. But have you ever tried making your own wine?
Perhaps you’re thinking that you need specialized, expensive equipment, or a degree in oenology (the study of winemaking). It’s possible you don’t have grapes with an impressive provenance which keeps you from crafting elegant fermented beverages. Or that you simply don’t have free time for long brewing processes, bottling, and years for aging wine to perfection. All these are misconceptions! The homebrewing process is quite fun–anticipation slowly building over many weeks as the bubbles of the beverage quietly gurgle away. It’s true that wine takes about a year before it’s ready to drink, but as they say, time flies, and before you know it, it’s time to pop the cork and gather friends to savor the moment. With regard to equipment or ingredients for winemaking, these things can come quite inexpensively, or DIY freely! Continue on for a basic step by step guide from me, guest contributor Emily Rockey. You, too, dear reader, can be a winemaker.
Winemaking, quite simply, is a natural process of live yeast consuming sugar, converting it to carbon dioxide (bubbles) and alcohol. This process is called fermentation, and with wine it takes place in two basic stages: the first fermentation occurs when fruit or plants are combined with water and yeast in an open container. Soon it becomes active and bubbly. When it slows, a second round of fermentation takes place in a closed container (less oxygen). After about eight weeks, the lively party is over and the wine shifts to a period of relative tranquility, resting in a cool dark spot such as a closet or interior room. After it settles, we’ll siphon the wine (called racking) to separate it from the yeast particles at the bottom, and let it sit for nine months. At last, your calendar will remind you that it’s time to bottle and finally taste your finished wine!
Ingredients:
To start, look around for what exists in abundance, or what’s in season. We can make wine from anything that contains sugar: fruits of all kinds, herbs, and even flowers. Prickly pear wine, elderberry, or wolfberry wine? Sure! I happened to have frozen pomegranate arils from Mission Garden.
Sugar. Organic cane sugar is the most versatile, but if you like you can experiment with other natural sweeteners (and their flavor profiles).
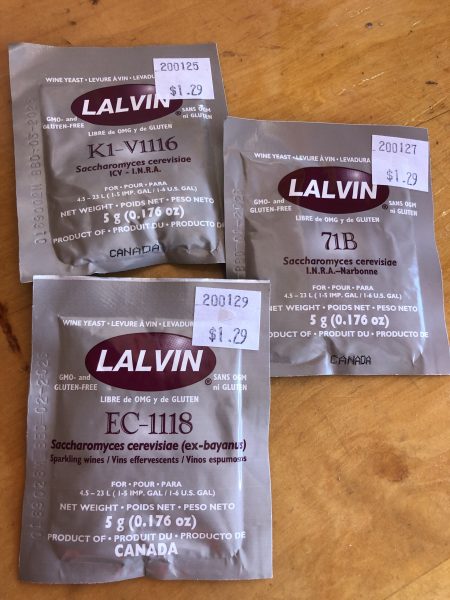
Brewing yeast: It is possible to make wine without adding packaged yeast, but for a home winemaker like you and me, yeast is easy to find and a reliable way to kickstart fermentation. Brewing yeast is sold at brew shops or online for $2-$3. Experiment a bit, or start with a neutral ale, cider, or champagne yeast.
For the recipe below, I used a neutral yeast strain called EC1118 which contributes very little flavor or aroma to the finished product. It is quite flexible, thriving in cool or warm temperatures (50-86°F). It also tolerates higher alcohol content.
For easiest and most reliable results in making your wine, use commercial yeast.
Time to produce: Regarding the preconception that wine requires significant time to produce, it’s mostly waiting time. My actual hands-on time to make a batch of wine totaled only about four fun hours…spread out over 12 months! The vast majority of the winemaking time is the wine doin’ its thing by itself.
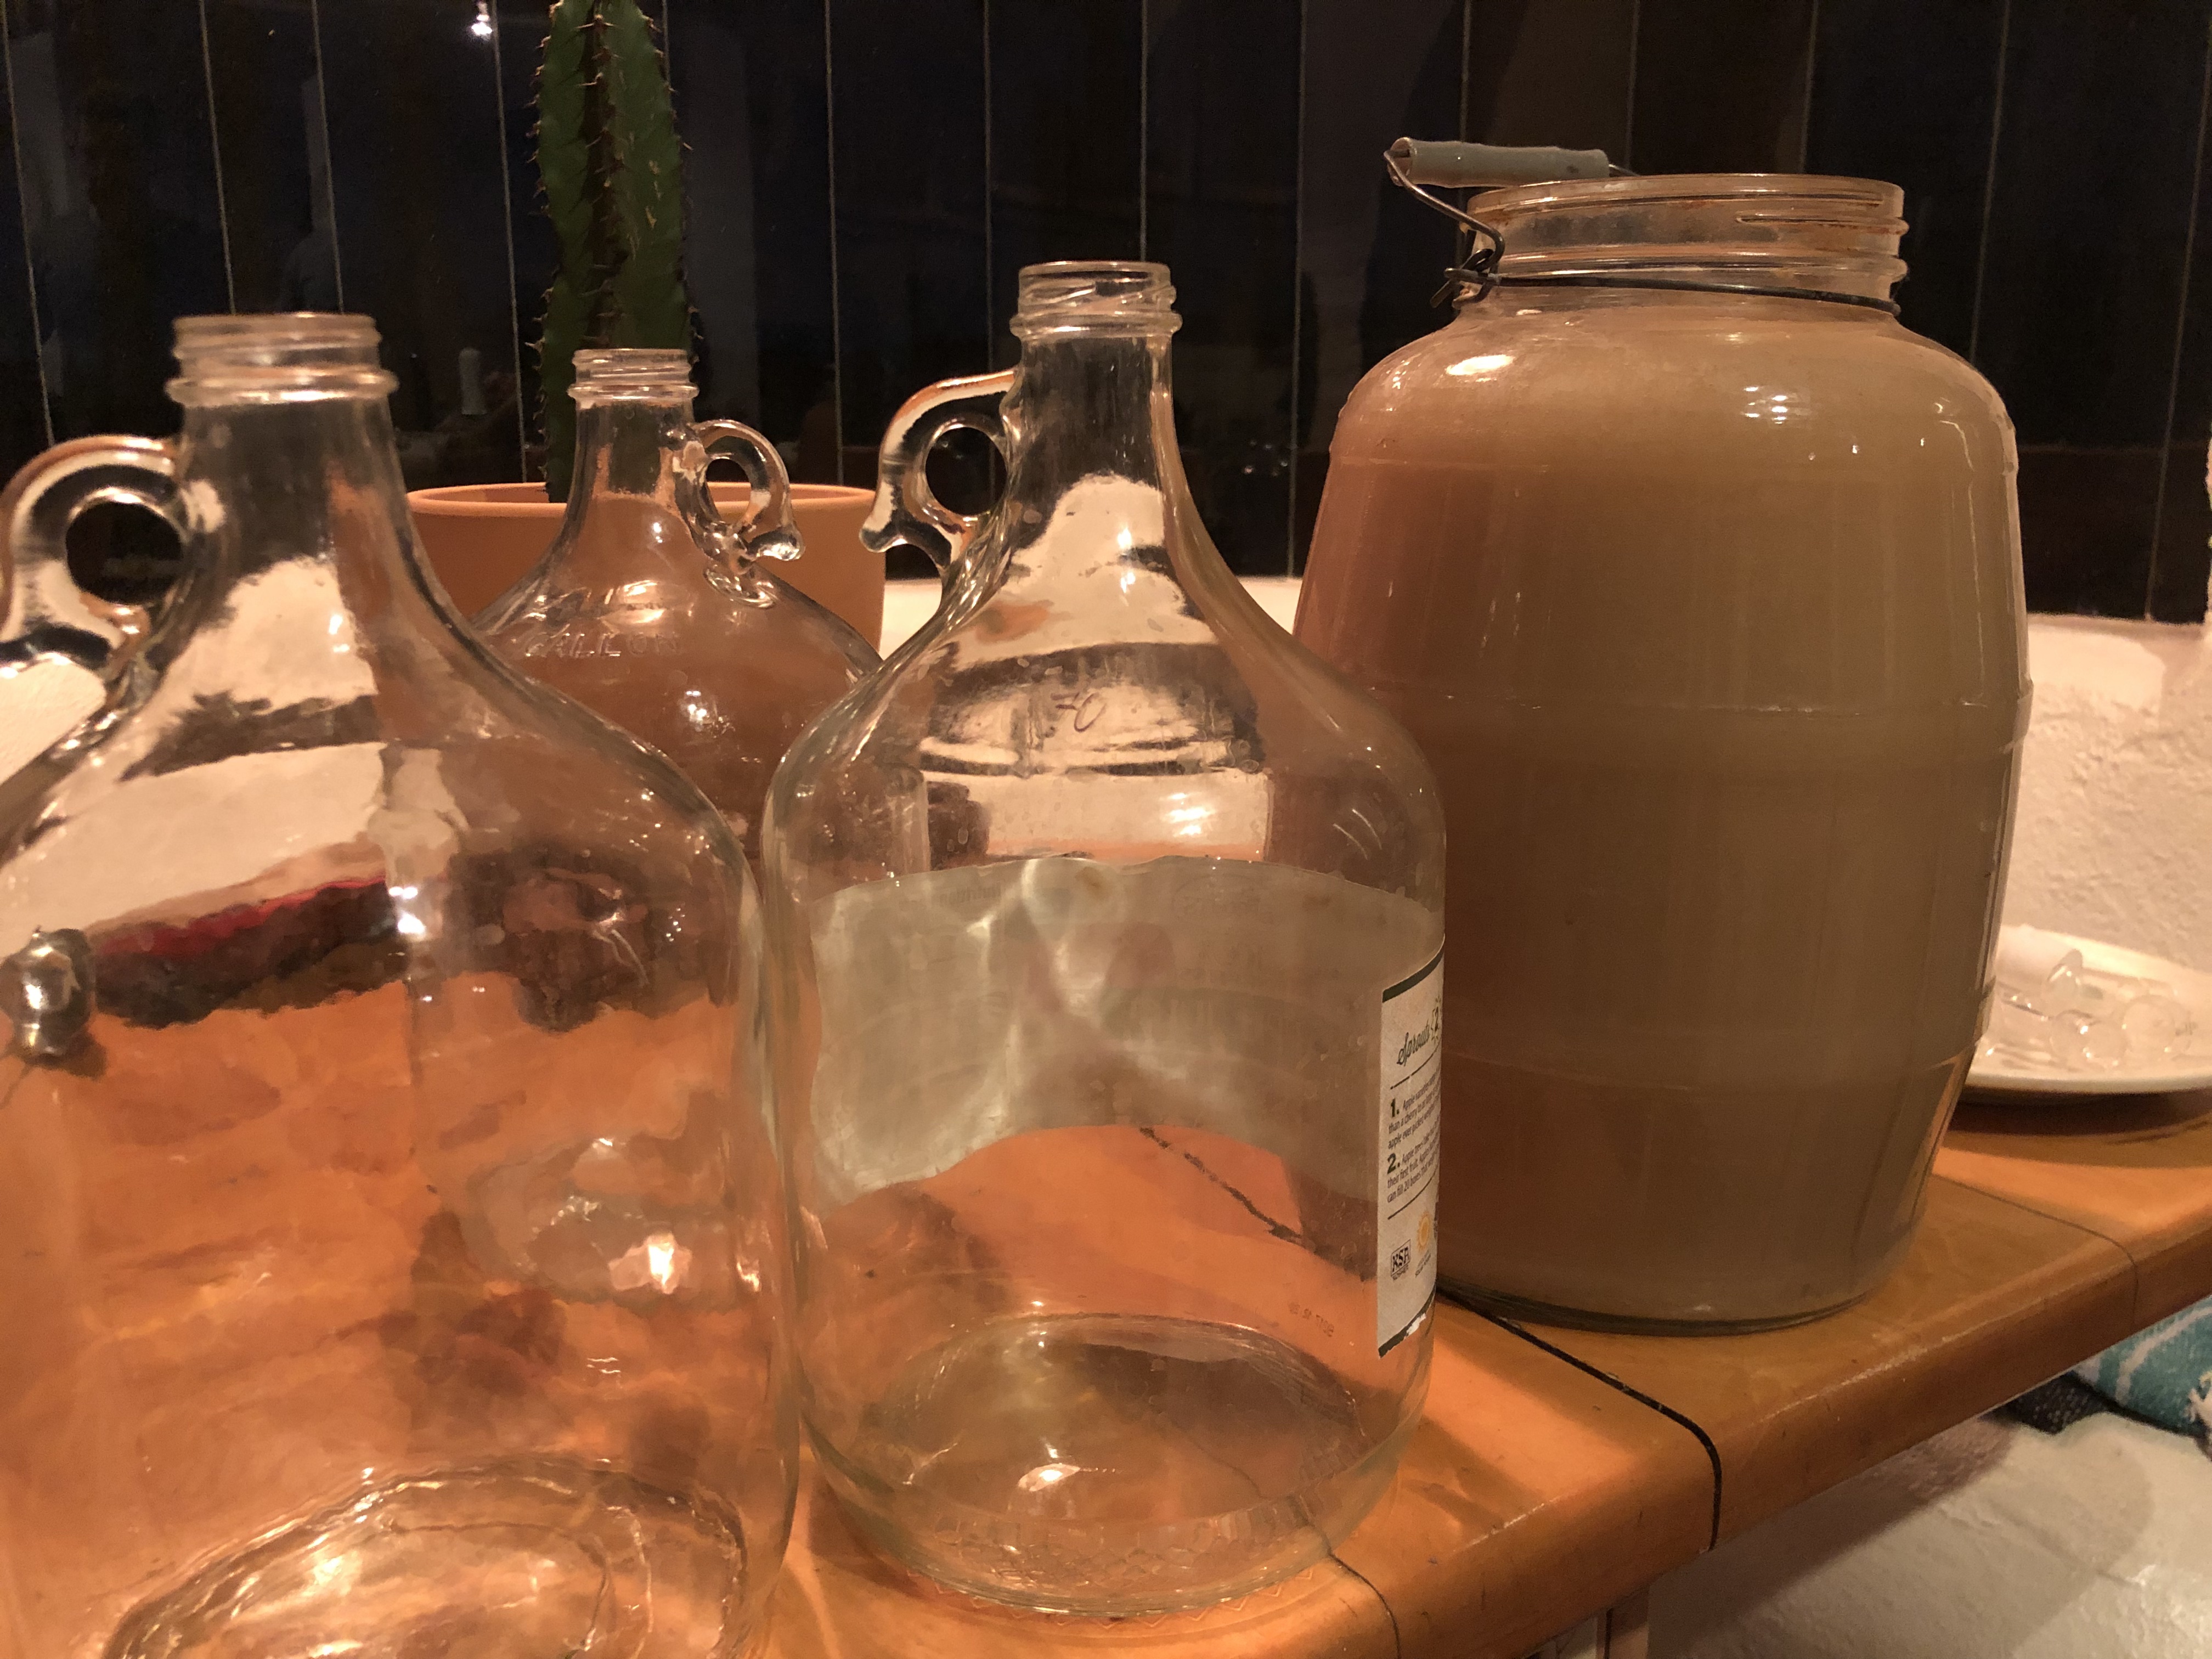
Supplies for a 3-gallon batch: The good news is that you may already own or have easy access to the basic equipment. If not, everything is inexpensive or easy to make at home.
A 3-5gallon vessel for first fermentation. Non-reactive: preferably glass, stainless steel, but many folks use food-grade plastic. Also ceramic crocks in good condition work well.
Two or three 1-gallon glass jugs (carboys). The glass jars containing commercial pressed apple juice with the handy little finger handle work perfectly.
Airlock and rubber stopper. $5 from your local brew shop or online. Allows CO2 from the brew to be released, but prevents outside air from entering the vessel. (Here’s how airlocks work.)
Sanitizer. Please use well-cleaned hands, surfaces, and tools, but don’t worry too much about sterilization–I’ve never had a problem. (There were no sanitizers 6000+ years ago in the Mediterranean region where wine was first made.) However, this is an often discussed topic for brewers. I do use inexpensive sanitizer (such as Star San brand) because it’s quite easy, quick, and safe to use.
Optional: bottles for finished wine. Or just drink it when ready with a group of friends.
Now you’re ready to make wine!
The basic recipe is inspired mostly by Sandor Elix Katz in his book Wild Fermentation.
This batch was made with Sonora White Pomegranate (Punica granatum), but I’ve successfully made Elderberry-Blueberry Wine (from Sambucas mexicana), Wolfberry Wine (Lycium pallidum), Fig Wine (Ficus carica), Mission Grape Wine (Vitis vinifera), and a funky Quince Wine (Cydonia oblonga) which we quickly transformed into brandy…
Instructions:
*Note: The ultimate ratio of fruit volume to water is approximately 1:1, so for ~3 gallons of fruit (fresh or frozen, defrosted), add ~3 gallons of water. The finished wine will be about 5 gallons. You can make smaller or larger batches by keeping the same basic ratio.
1. Place 1.5 gallons pomegranate arils into a clean container or crock (at least 3 gallons/11+ liters in size), followed by 1.75 gallons boiling water. Cover with a clean towel. Set the container on the counter at room temperature on a cookie sheet to catch drips.
2. The next day, ladle out about 1 cup of liquid in a glass and add to it 3 grams of yeast. I used strain EC1118; see above). Allow it to dissolve and get bubby and active for a few minutes.
Then add it to the main fermentation vessel, also known as the wine must. Stir well and recover with towel.
Note: A 5g yeast packet will satisfy a 5 gallon batch. For a 1 gallon batch, use only about 1/4 of the packet, and so on.
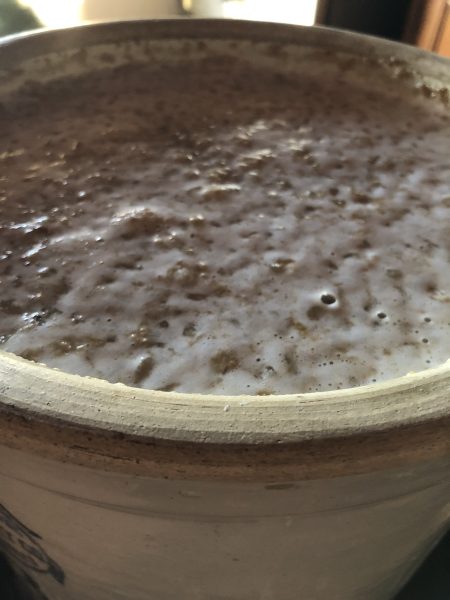
3. Within hours, the must will be bubbling vigorously! Use a ladle or spoon to “punch down” the fruit and stir it from the bottom. Recover with towel.
4. The next day, the brew will be bubbling excitedly (audibly!) as the yeast devours the fruit sugar. Each morning, midday, and night (or up to 5 times daily), punch down and stir. Keep covered with towel.
Here is the yeast bubbling vigorously devouring the fruit and water mixture.
5. On Day 3, the yeast have consumed much of the natural fruit sugar, and we need to feed them more. Heat 5-6 pounds pure cane sugar with just enough water to dissolve, cover and cool completely. Add this sugar/water mixture to the wine must, stir well, and cover. (If this seems like a lot of sugar, don’t worry, the yeast will consume most of it.)
6. Continue stirring 3-5 times daily as it continues to bubble and froth. A taste of the liquid will be sweet with a little alcohol detectable, and some zingy fruity flavors.
7. On Day 5-6 (or when bubbles are less vigorous upon stirring), it’s time to strain the fruit from the liquid and compost the spent fermented fruit. Using clean hands and tools (strainer, funnel, airlock, carboys), strain the wine to fill 2-3 carboys, avoiding empty space (oxygen) if you can; a few inches headspace is ideal. Properly fill airlocks with water (or vodka) and install.
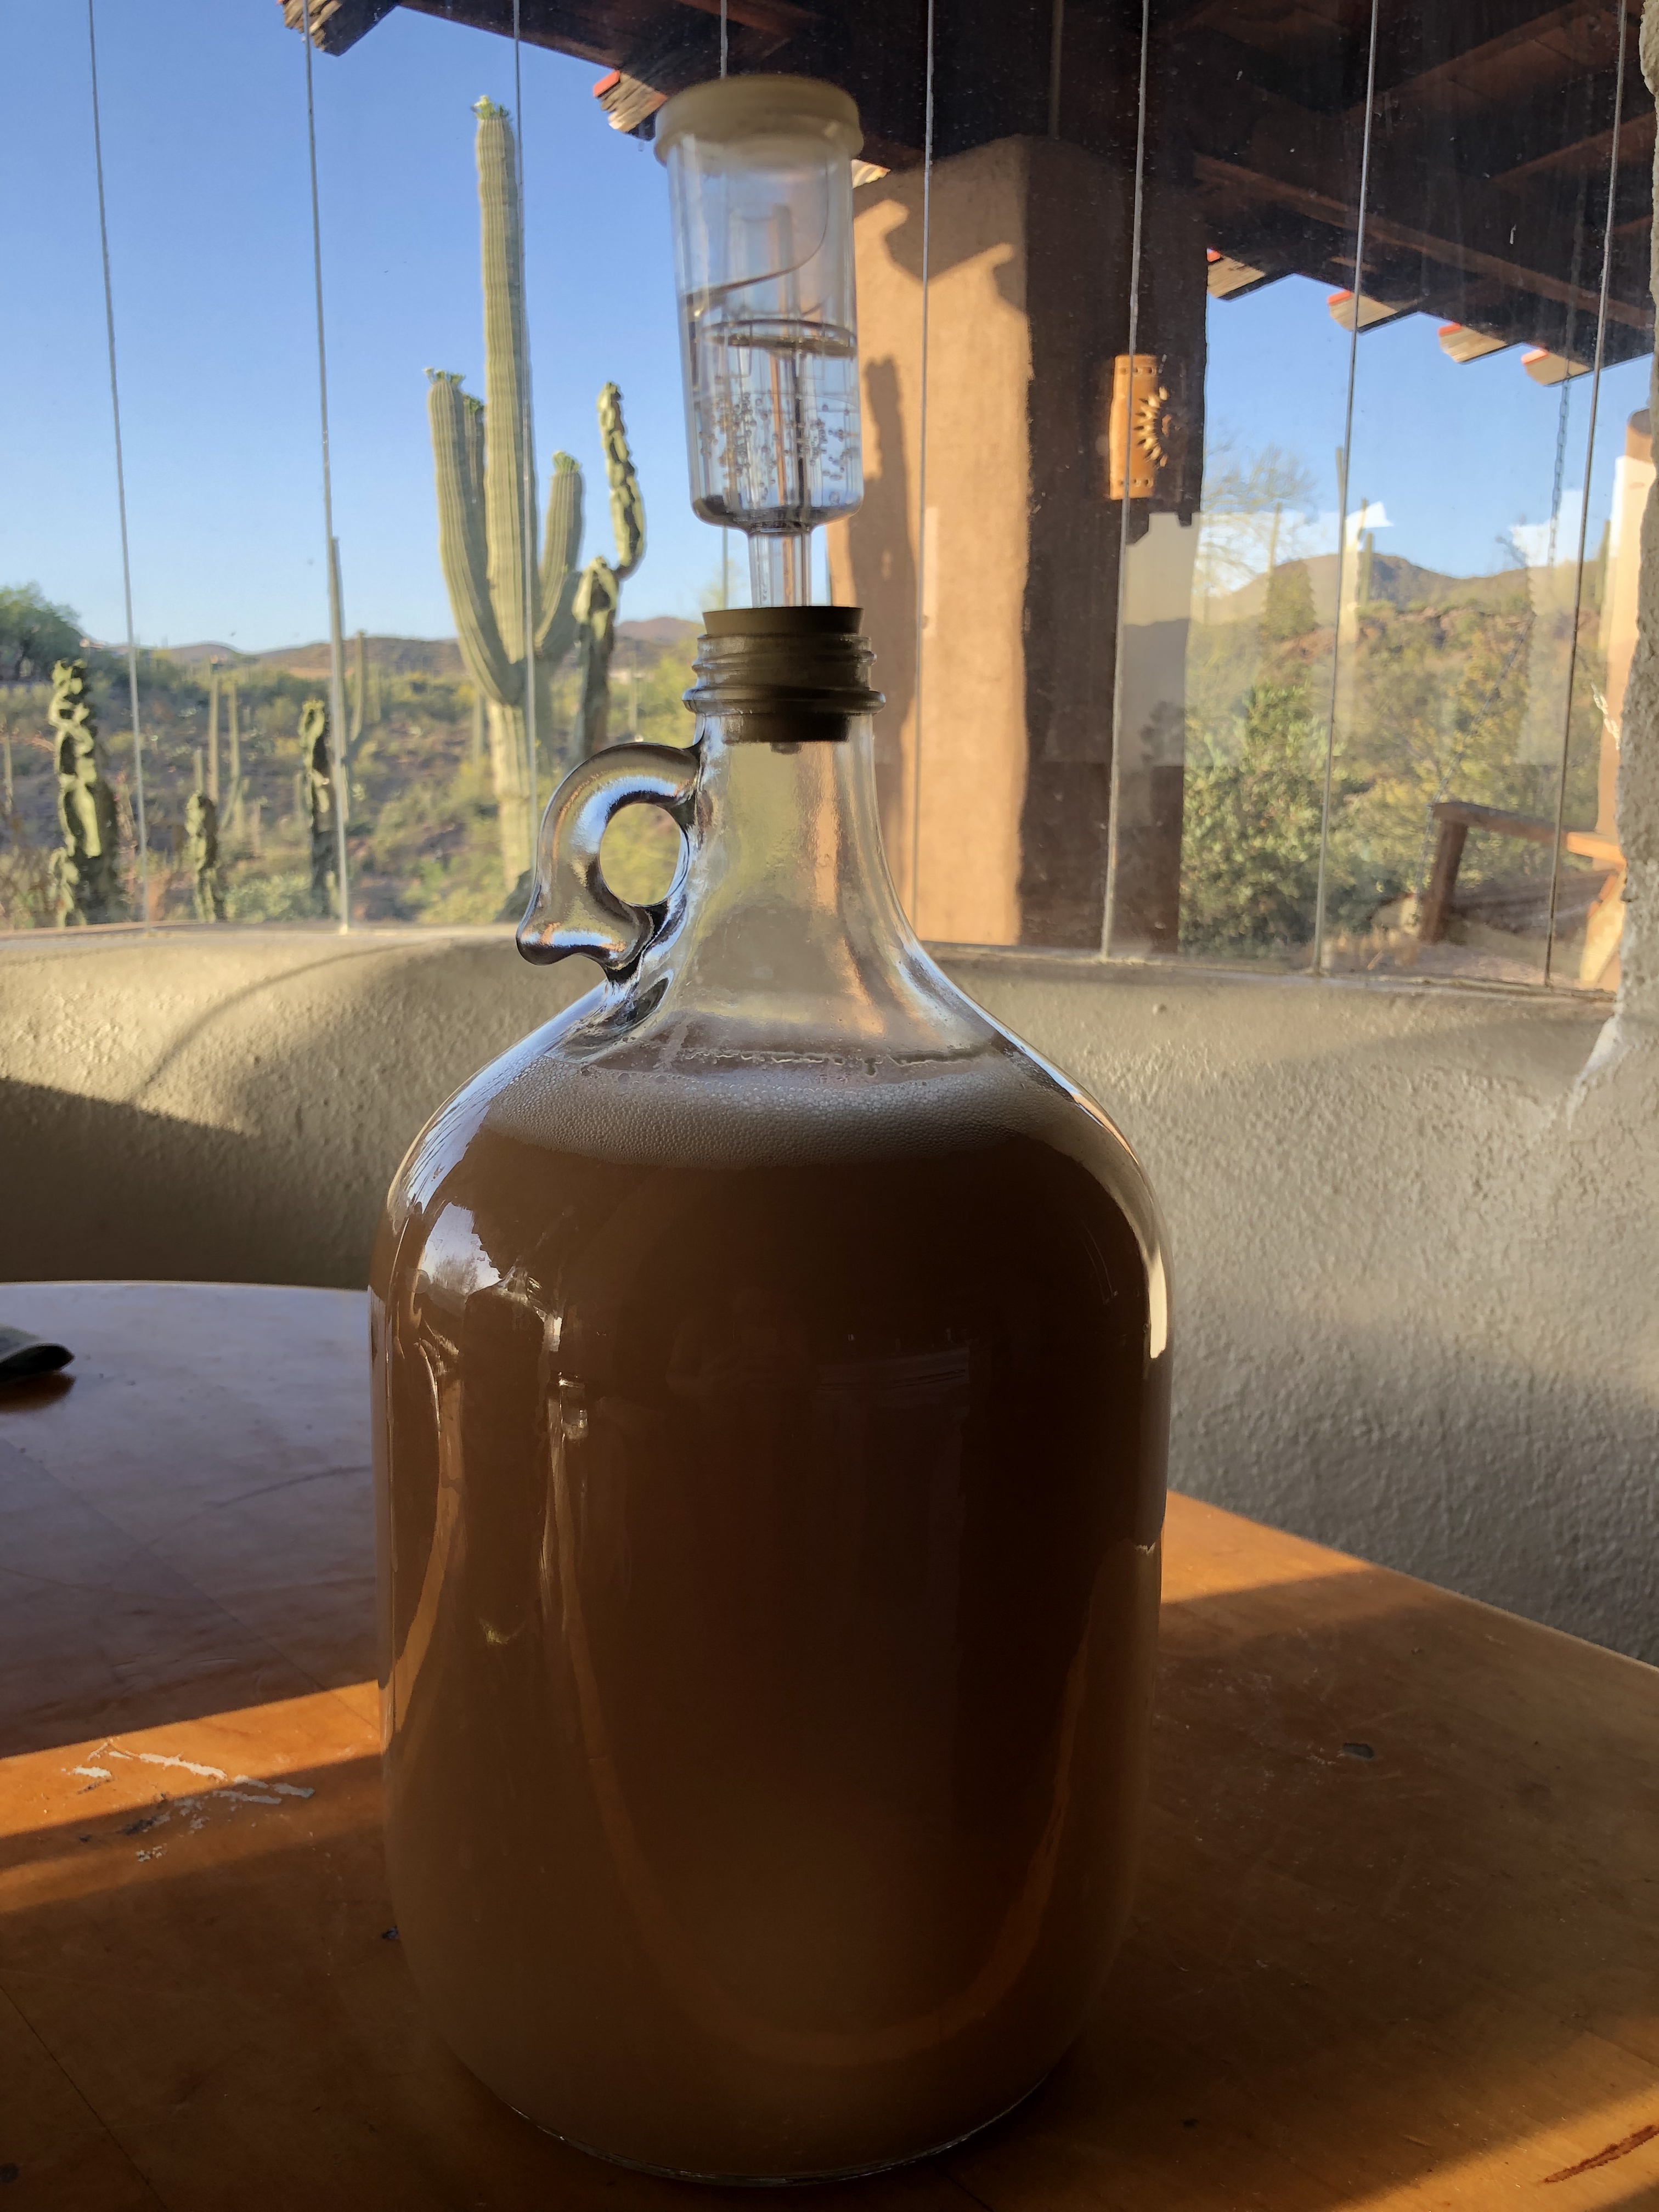
8. Keep in a cool spot for one month. I use my laundry room which stays fairly cool (~70F). Active bubbling resumes and the airlocks gurgle happily, letting carbon dioxide escape.
Carboy with an airlock. This will sit undisturbed for a month.
9. After a month, check the sugar content by carefully adding a spoonful of sugar onto the surface of the wine. If it doesn’t immediately respond with active bubbling, the sugar content is just right–replace airlock and wait another month.
If the wine does react excitedly, add ½ cup sugar, and recheck in a few days (totaling no more than 2 cups). Then, wait another month.
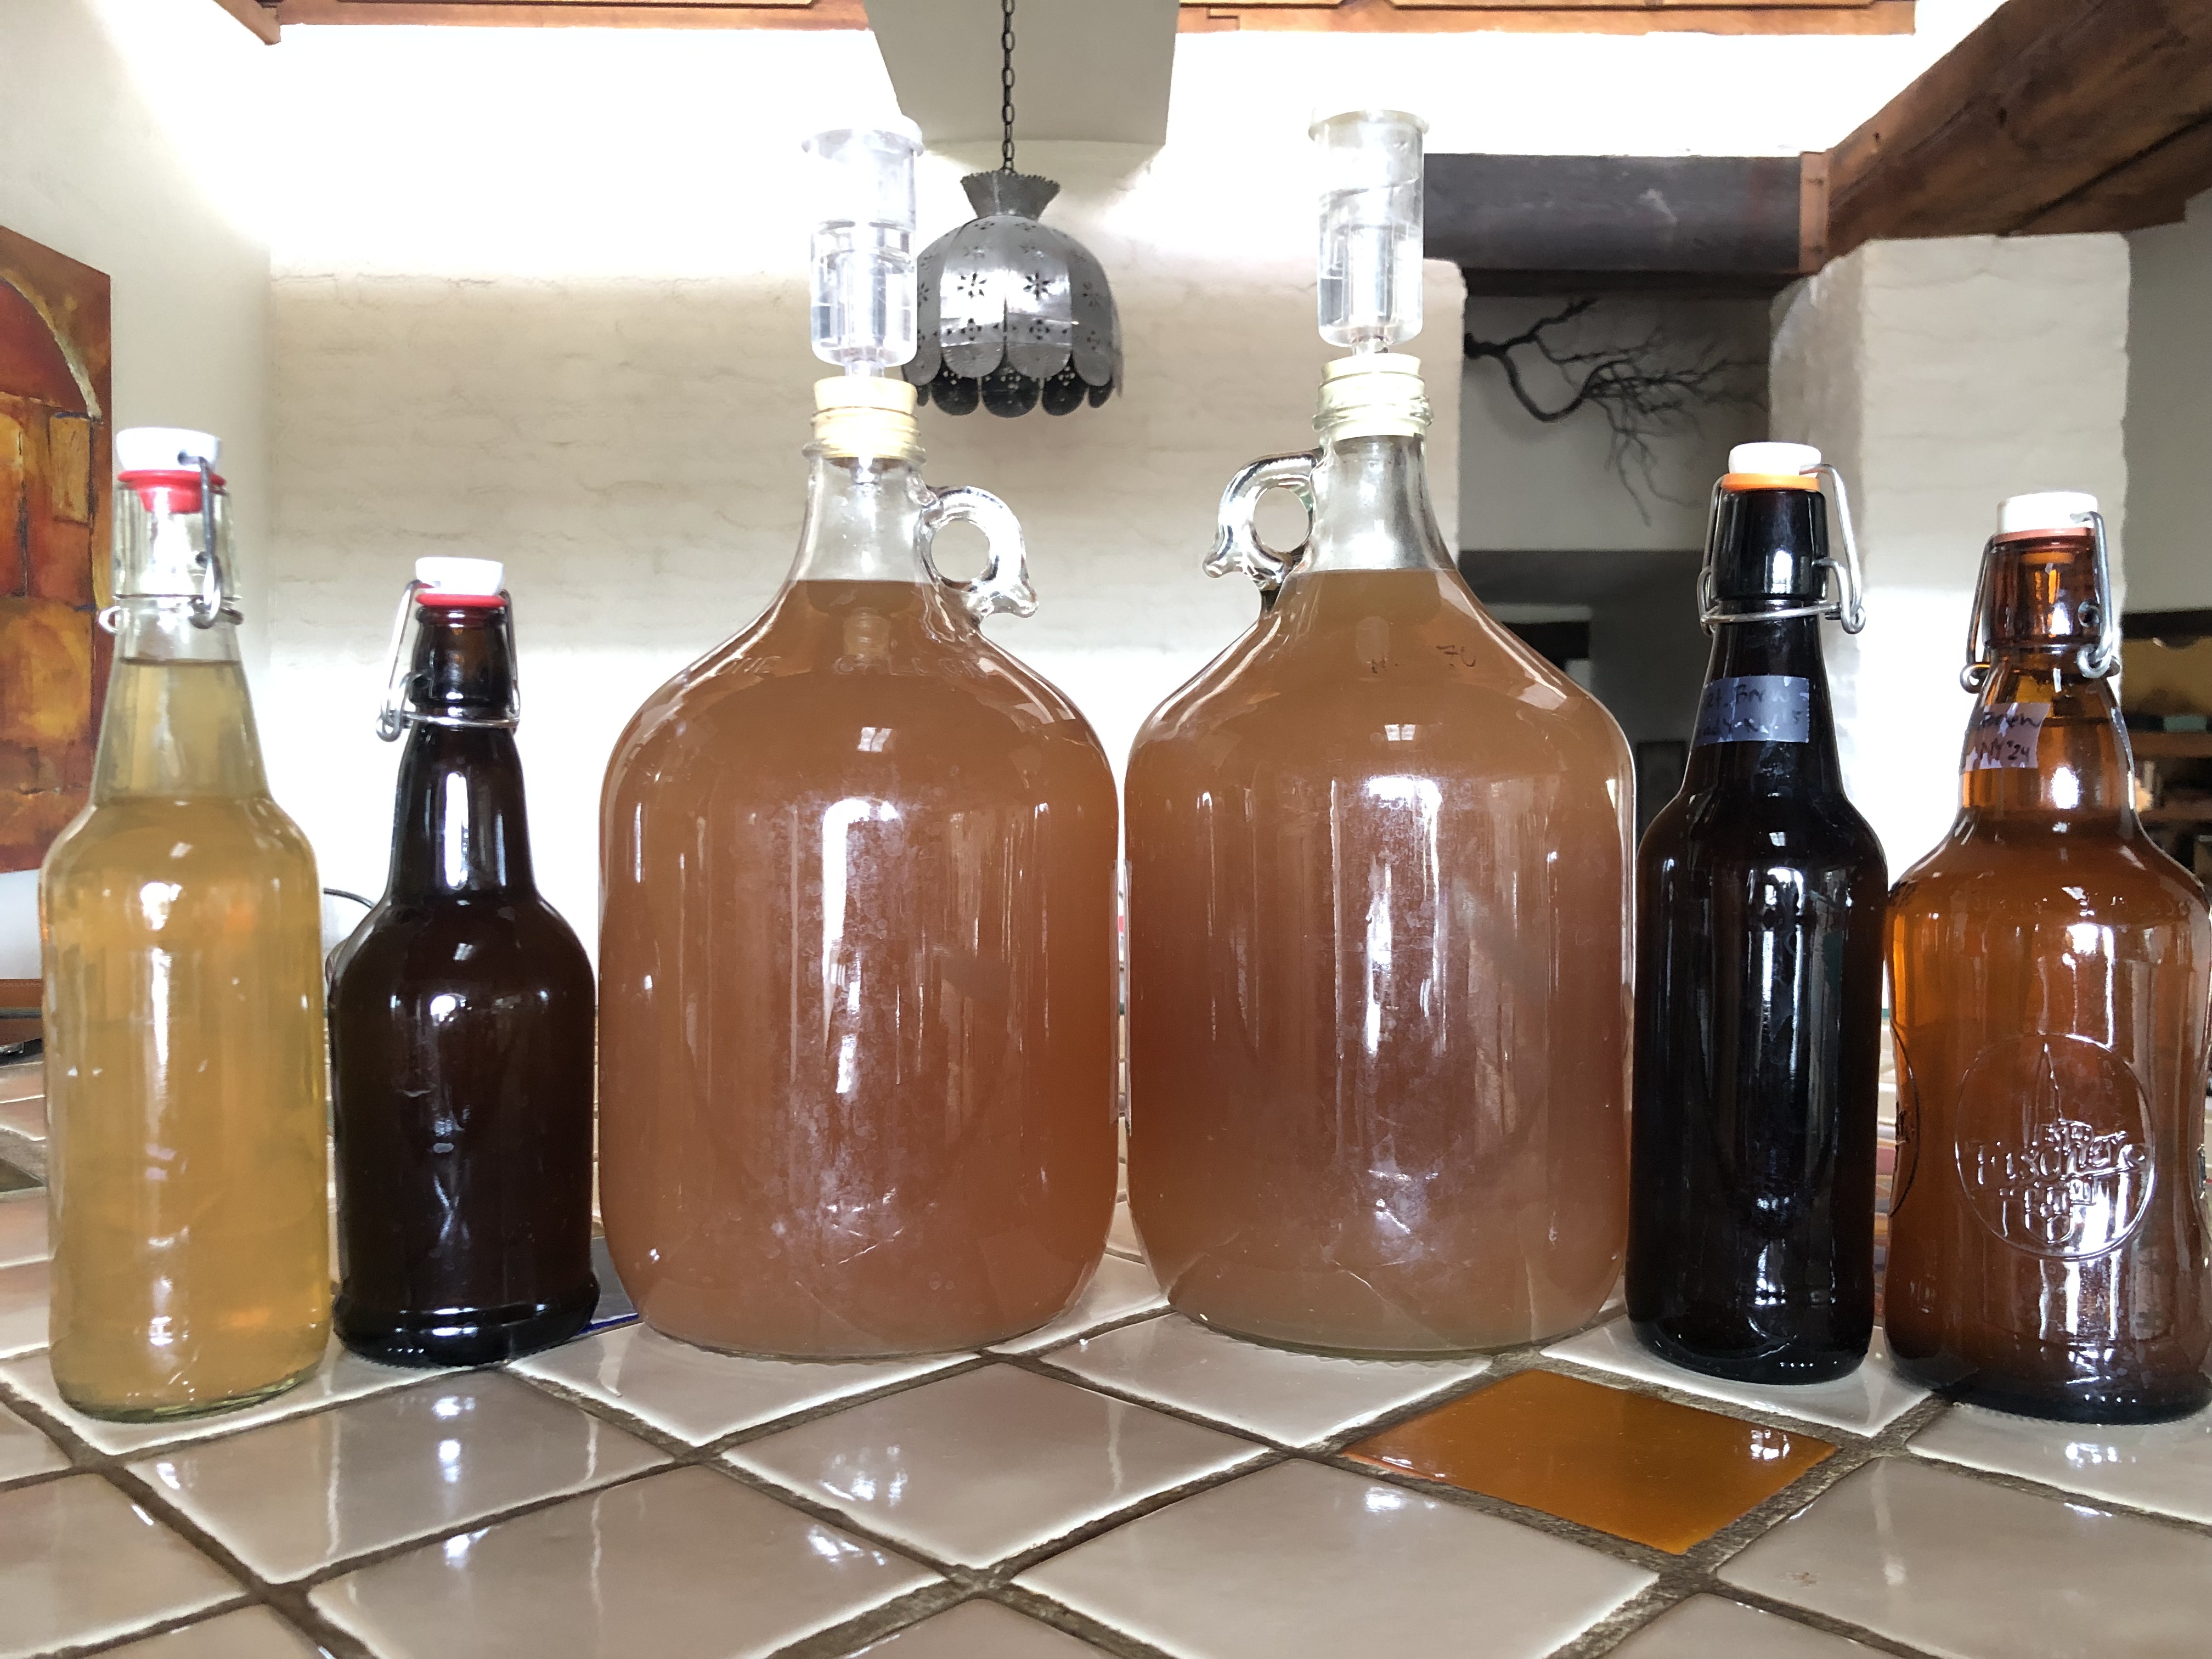
10. After these two months, clean supplies again because it’s time for the second and final siphon/rack! We’ll separate the yeast sediment on the bottom (called lees) from the finished wine. My batch made a little over 2.5 finished gallons, so I used pint sized flip-top bottles (Grolsch) for the partial gallon–just take care when opening these later due to possible pressurization.
11. Now go do something else for nine months. Periodically check that the airlock liquid hasn’t evaporated. When it’s time to sample the wine, try it both chilled or at room temp, and savor the complex and subtle flavors of the fruits of the desert.
Gallons of delicious finished wine!
Congratulations, winemaker! If the process is fun and you want to try more, there are wonderful books on home winemaking and fermentation. I am partial to Sandor Elix Katz’s guides because of their simplicity and use of natural ingredients. Sometimes I hesitate to embark on a new endeavor because I worry I’ll mess it up. I then remember that wine is a very forgiving process, and I have little to lose if anything goes truly awry. If wine gets exposed to too much oxygen, it will become vinegar (acetic acid), so the worst case scenario is you have some really interesting vinegar with which to cook. Salud!
(Please share below in the comments any wine adventures and experiences you embark upon.)