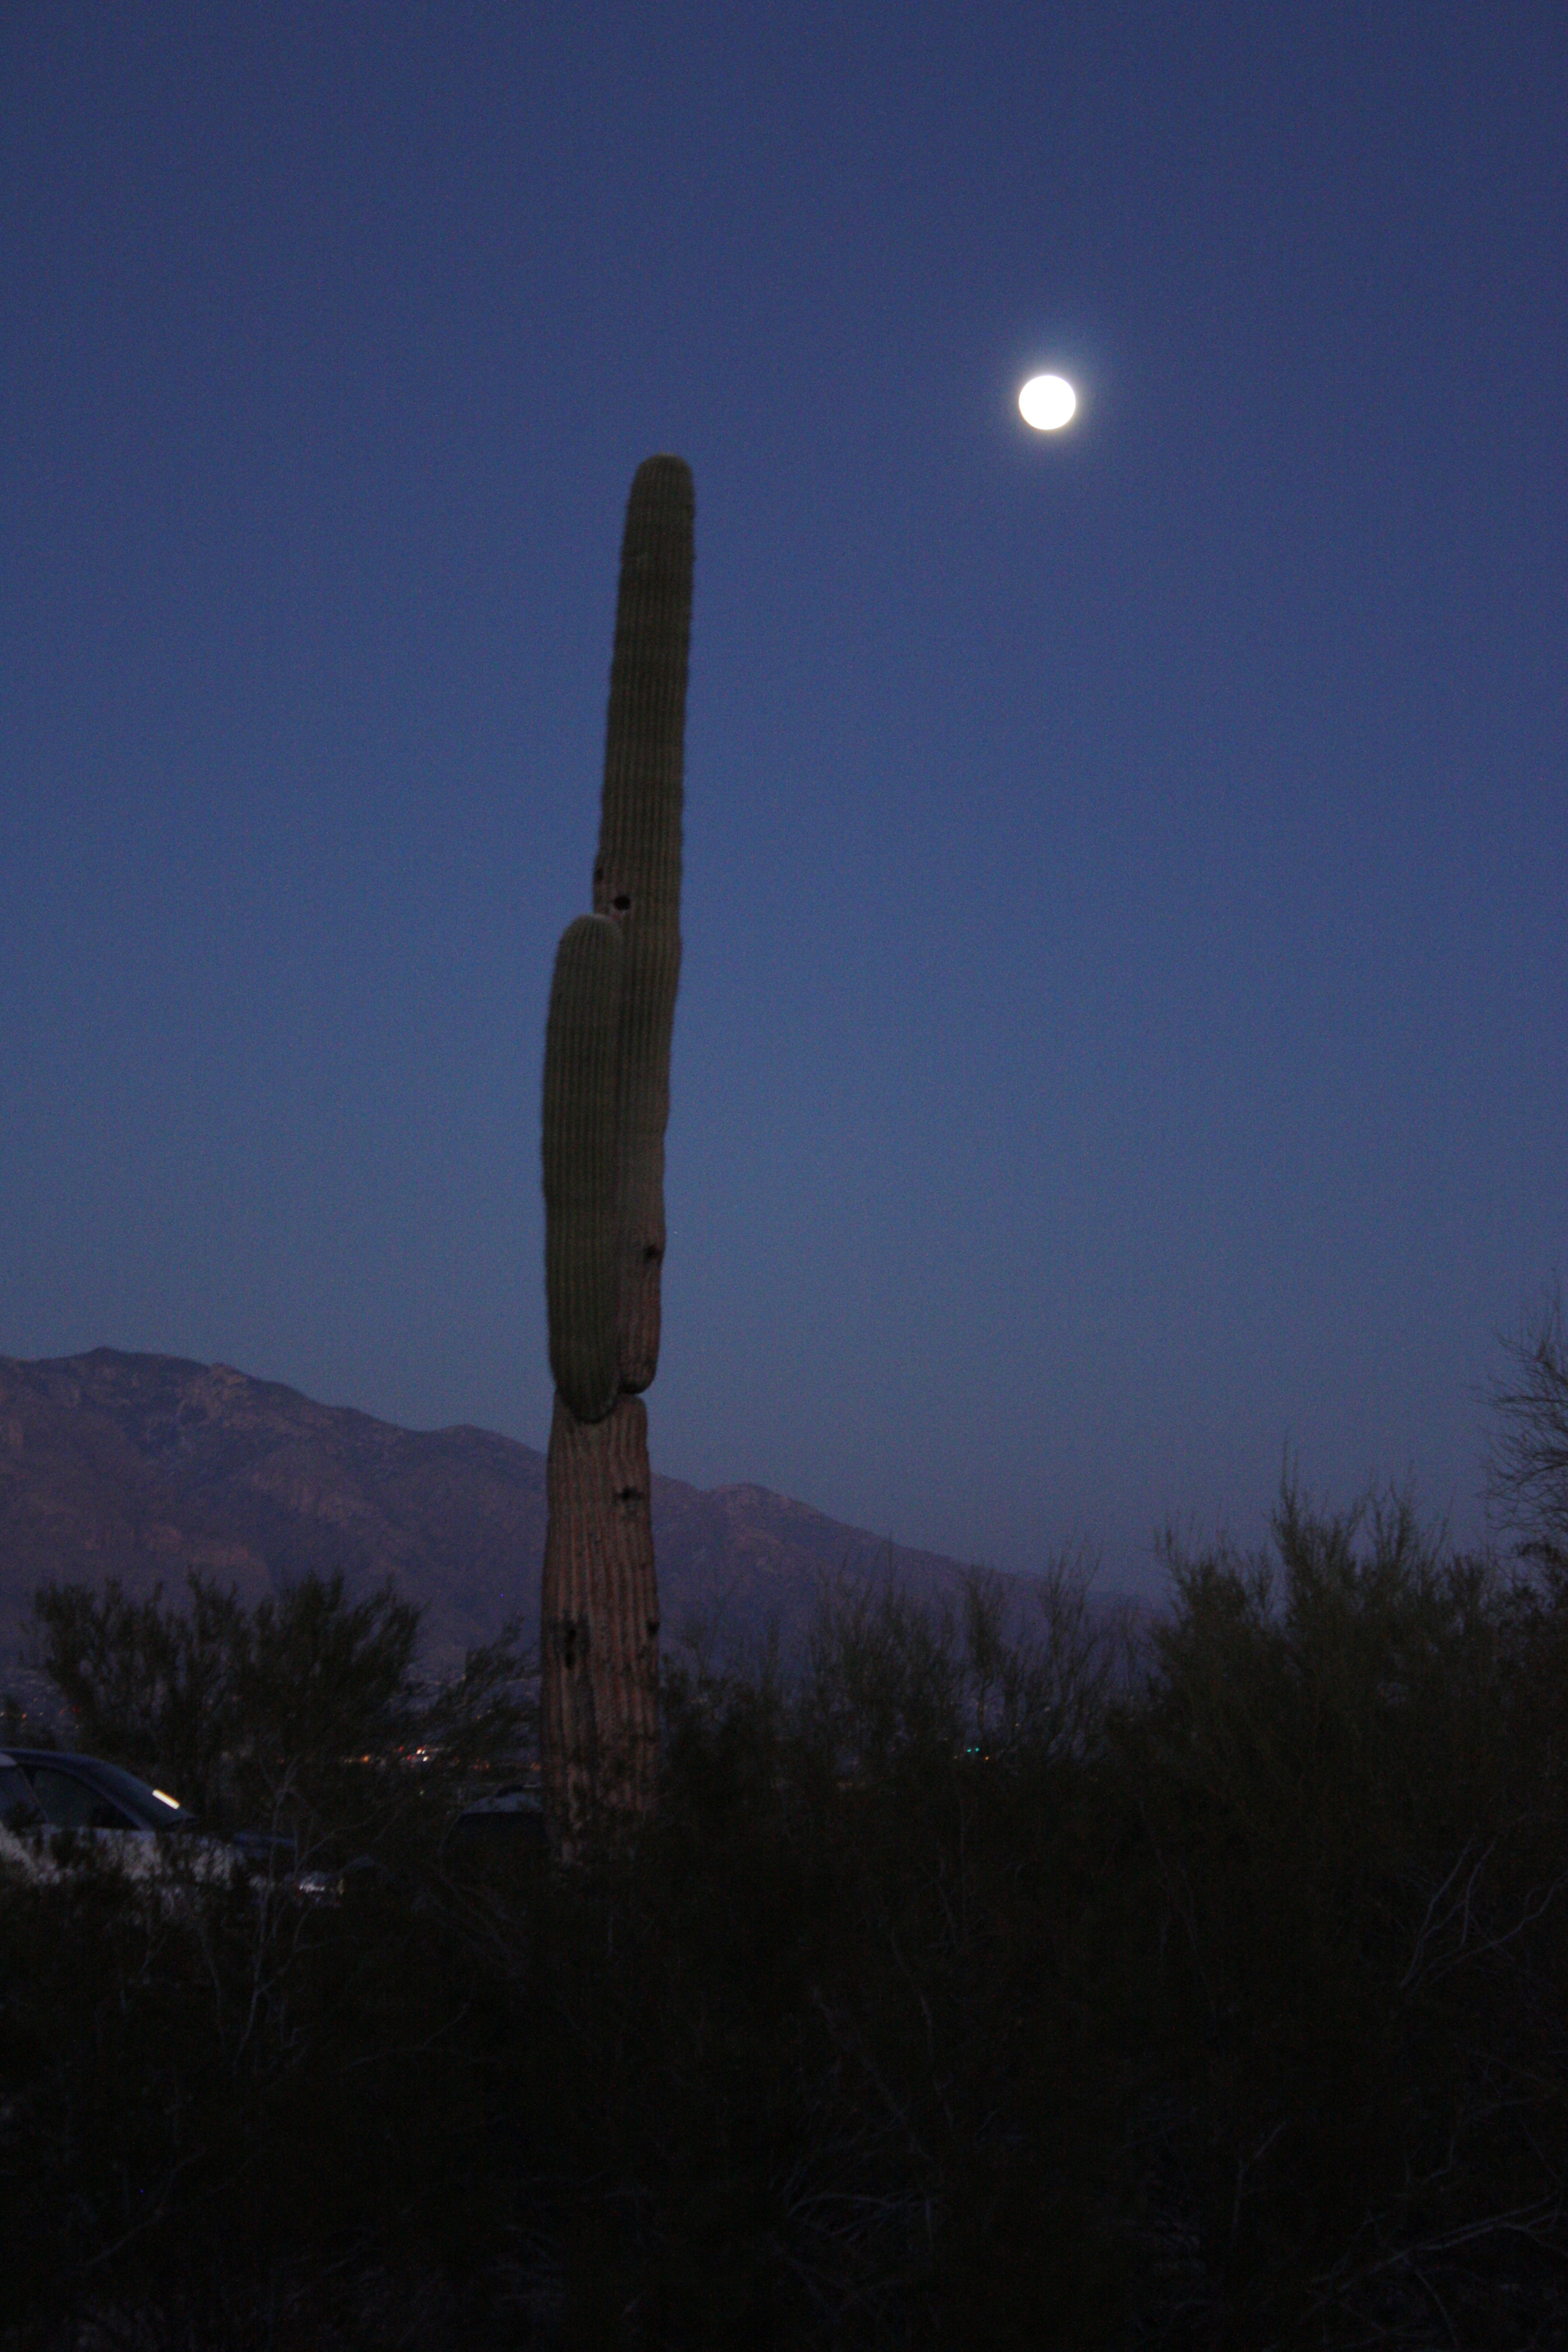
Full Moon over the Santa Catalina Mountains. Photo by J.A. Soule
In this month of five Fridays, Jacqueline missed her traditional Fourth Friday by mistake.
Full Moon over the Santa Catalina Mountains. Photo by J.A. Soule
In this month of five Fridays, Jacqueline missed her traditional Fourth Friday by mistake.
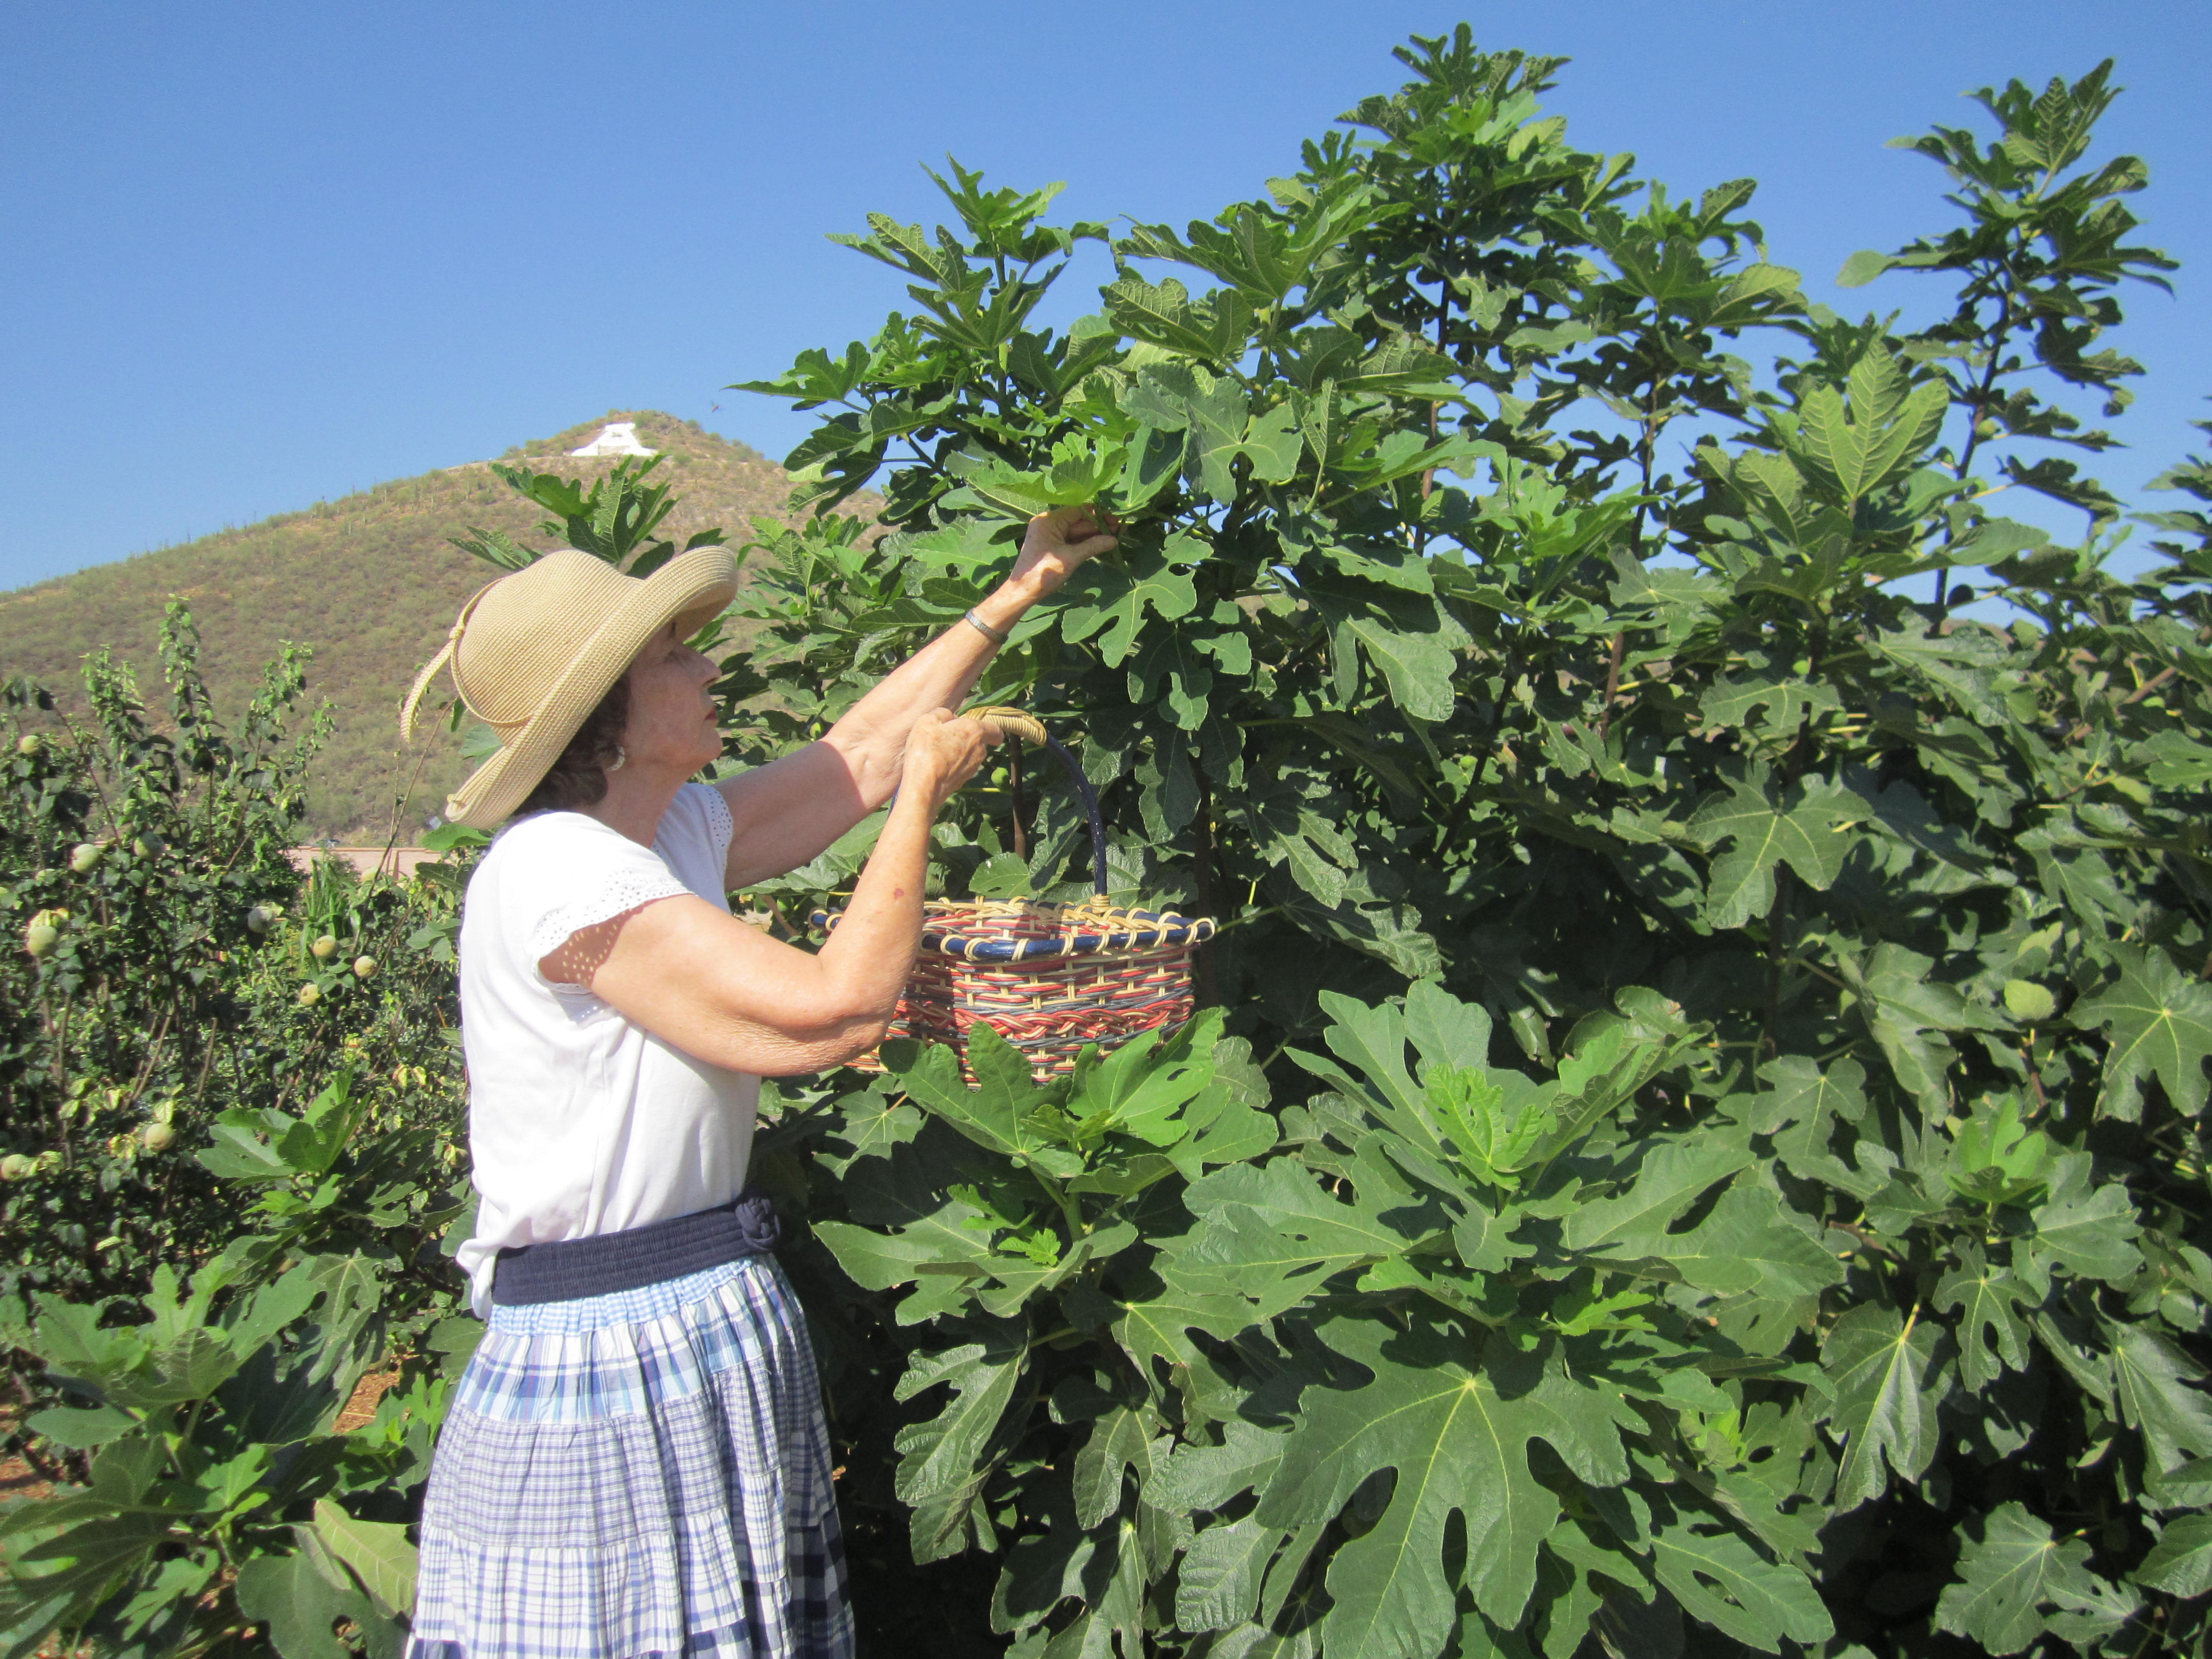
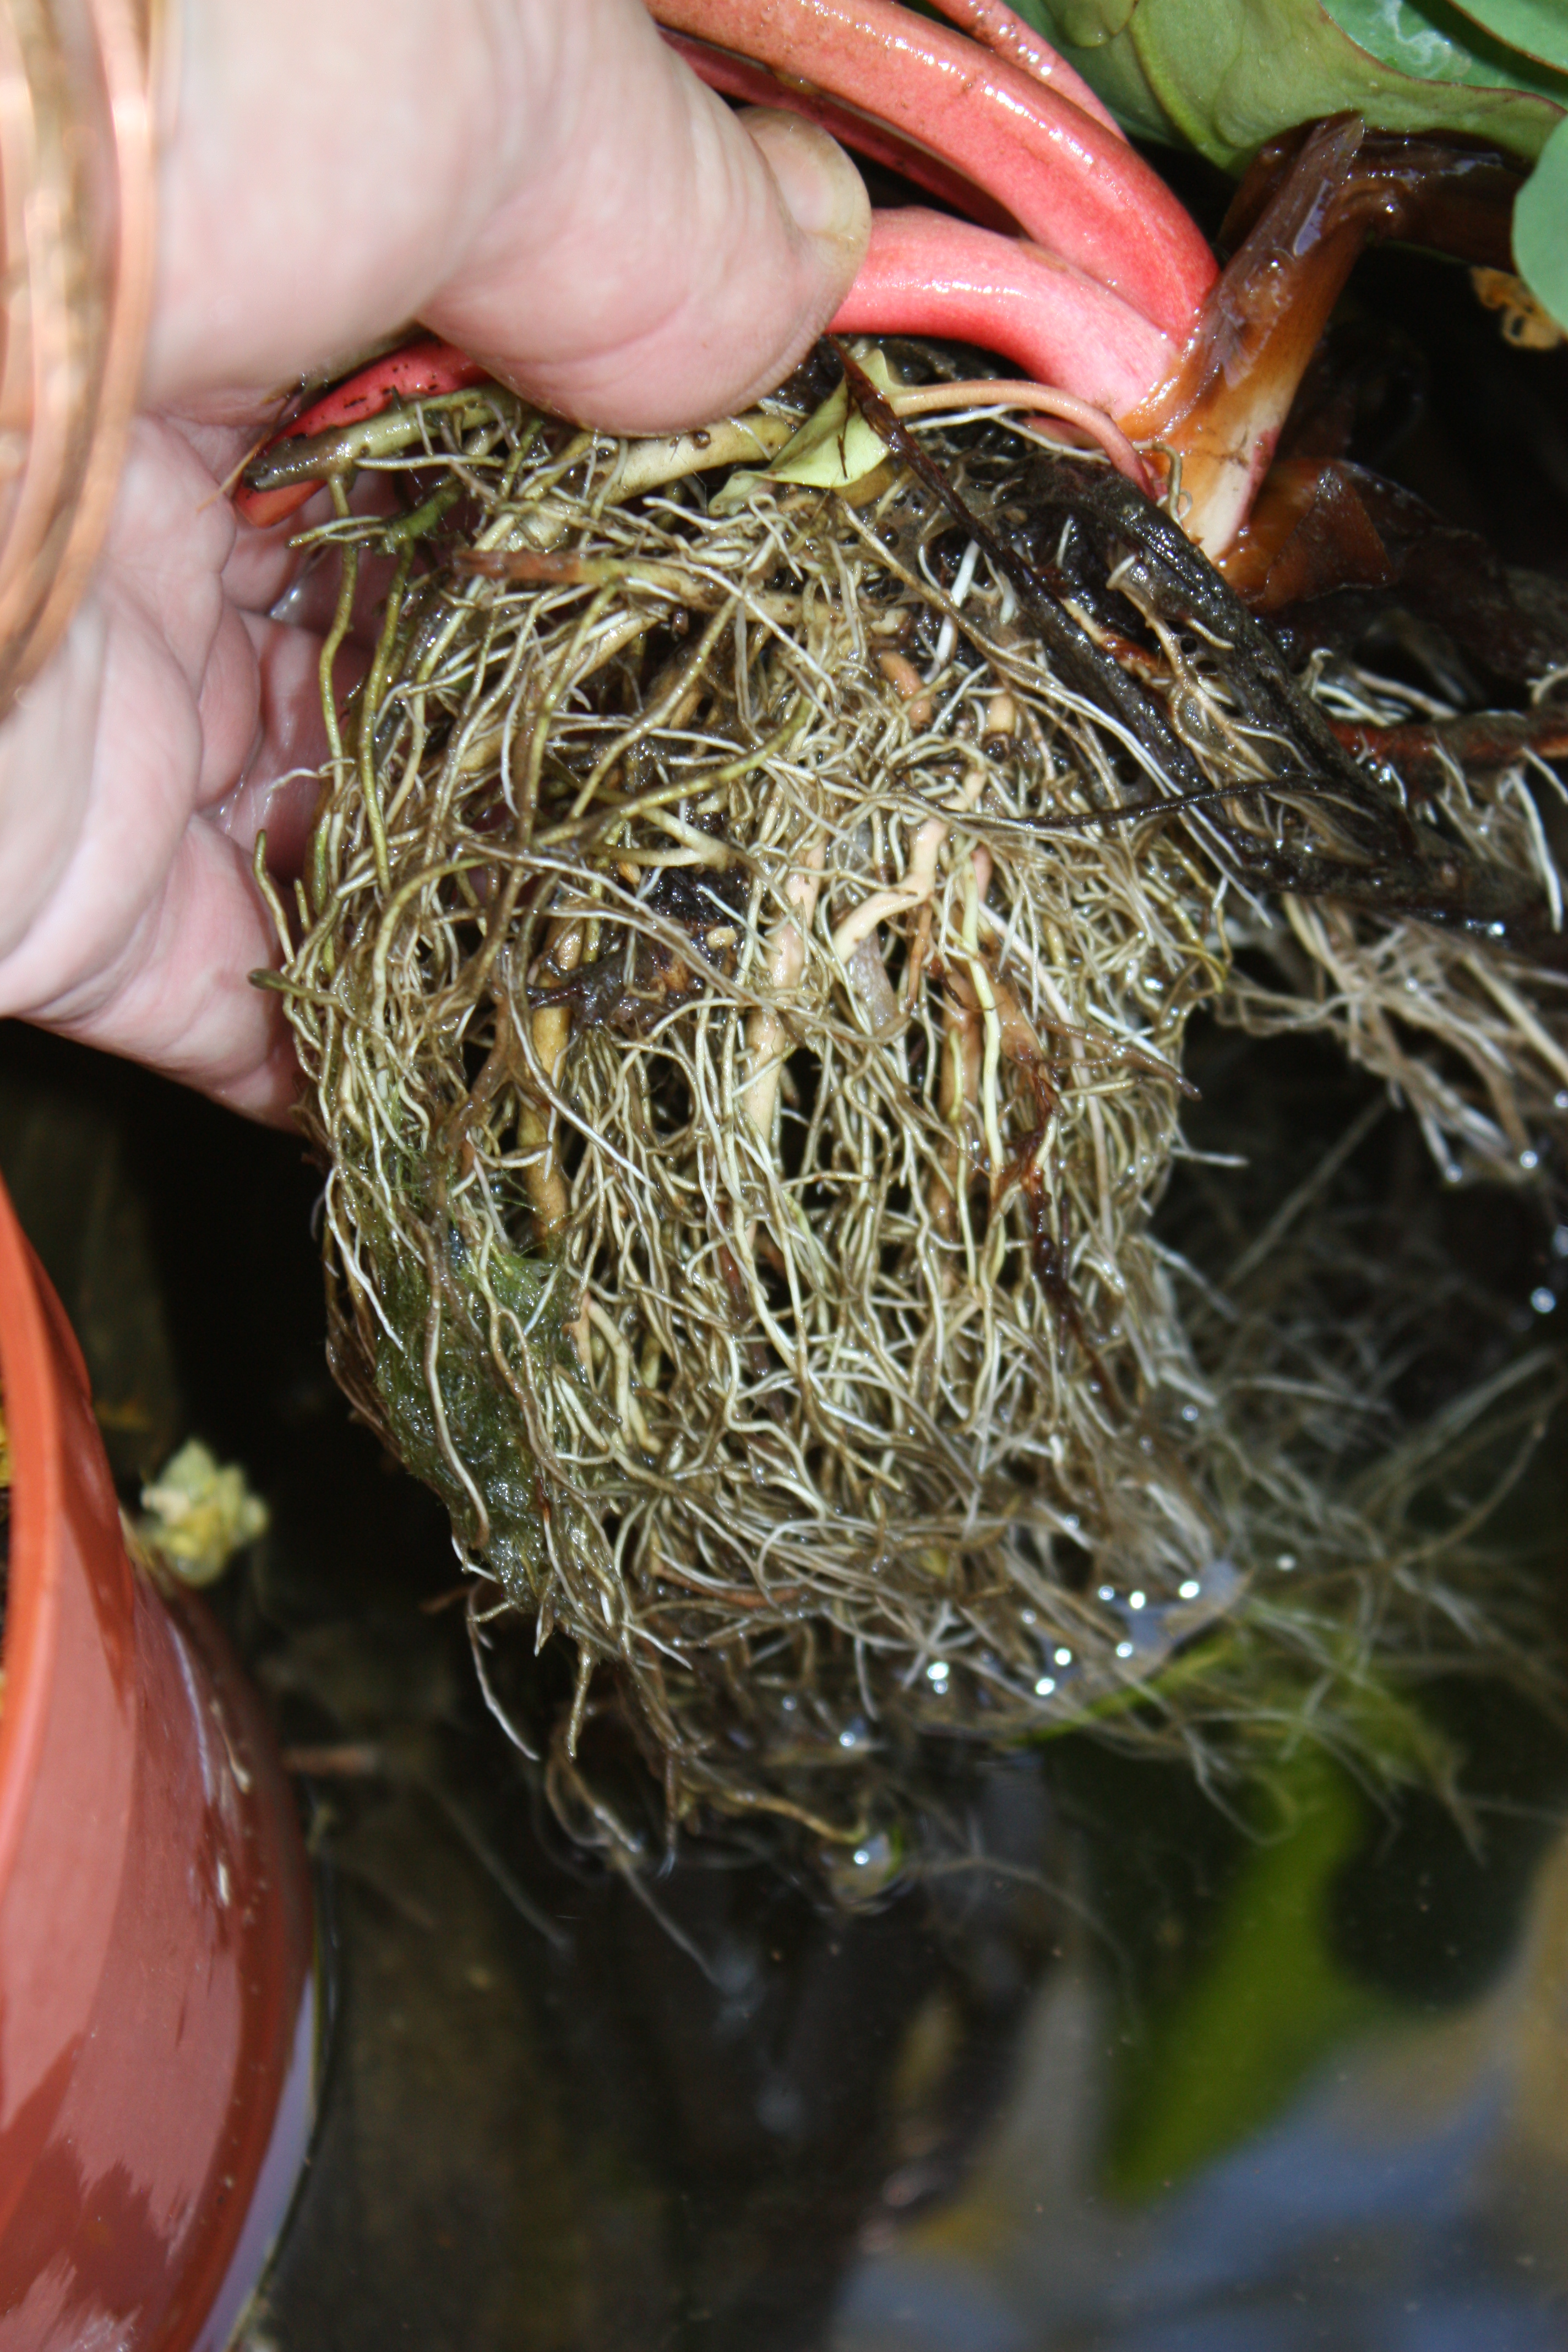
Picking figs at the Mission Garden operated by Friends of Tucson’s Birthplace.
The hottest weather of summer brings Tucson one of its sweetest treats, figs. The figs at the Mission Garden operated by Friends of Tucson’s Birthplace, are ripening now. Some of the trees have already produced and are beginning to grow their second crop. This is Carolyn today, and that is me picking figs from one of the trees in the lush recreated historic garden near the Santa Cruz River. The plan was to preserve the figs as jam to be used as an ingredient in cookies for the Farm to Table Picnic being organized by the Mission Garden and Native Seeds/ SEARCH. On the late afternoon of October 18, dinners will be able to picnic on Southern Arizona’s agricultural bounty at tables spread through the Garden. (Ticket detals next month).
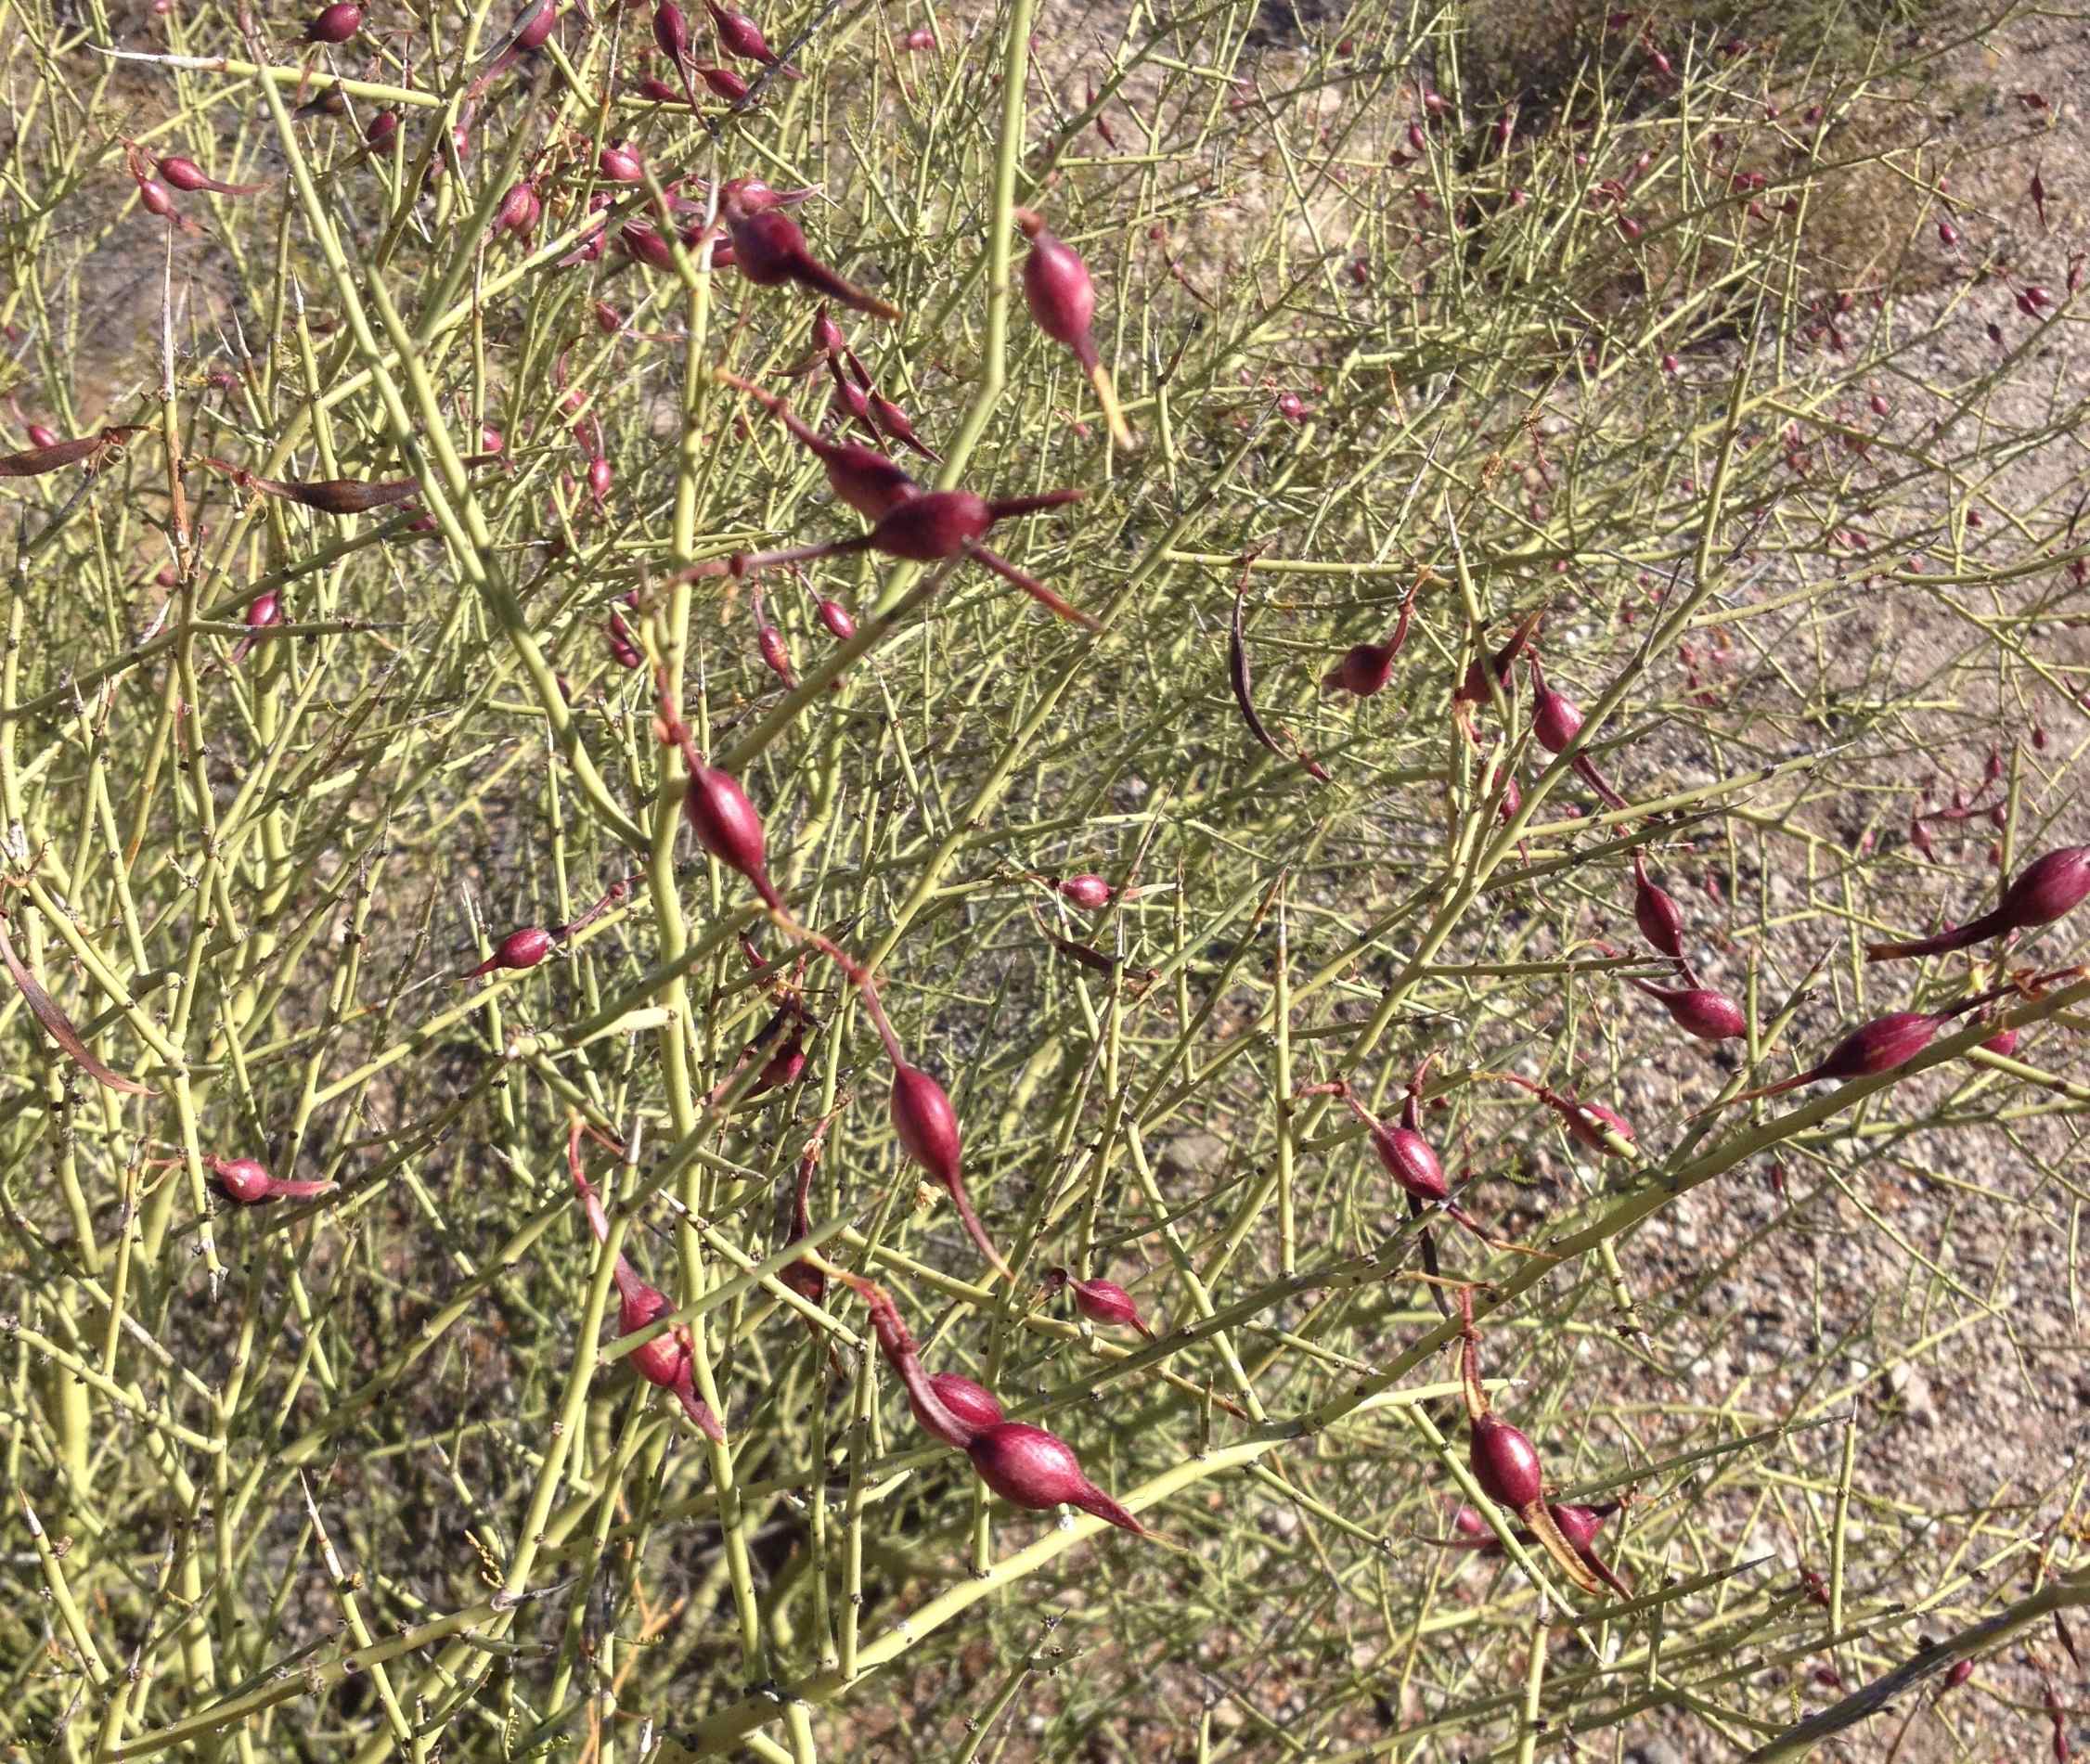
The brown figs at Mission Garden are living relics of trees brought to Southern Arizona by Father Kino. They were grown from twigs cut from plants behind the Sosa-Carrillo House. Historic records show that those trees came from cuttings of trees at San Xavier Mission. The green figs were grown from cuttings taken from trees at the settlements near the Ruby and Oro Blanco mines.
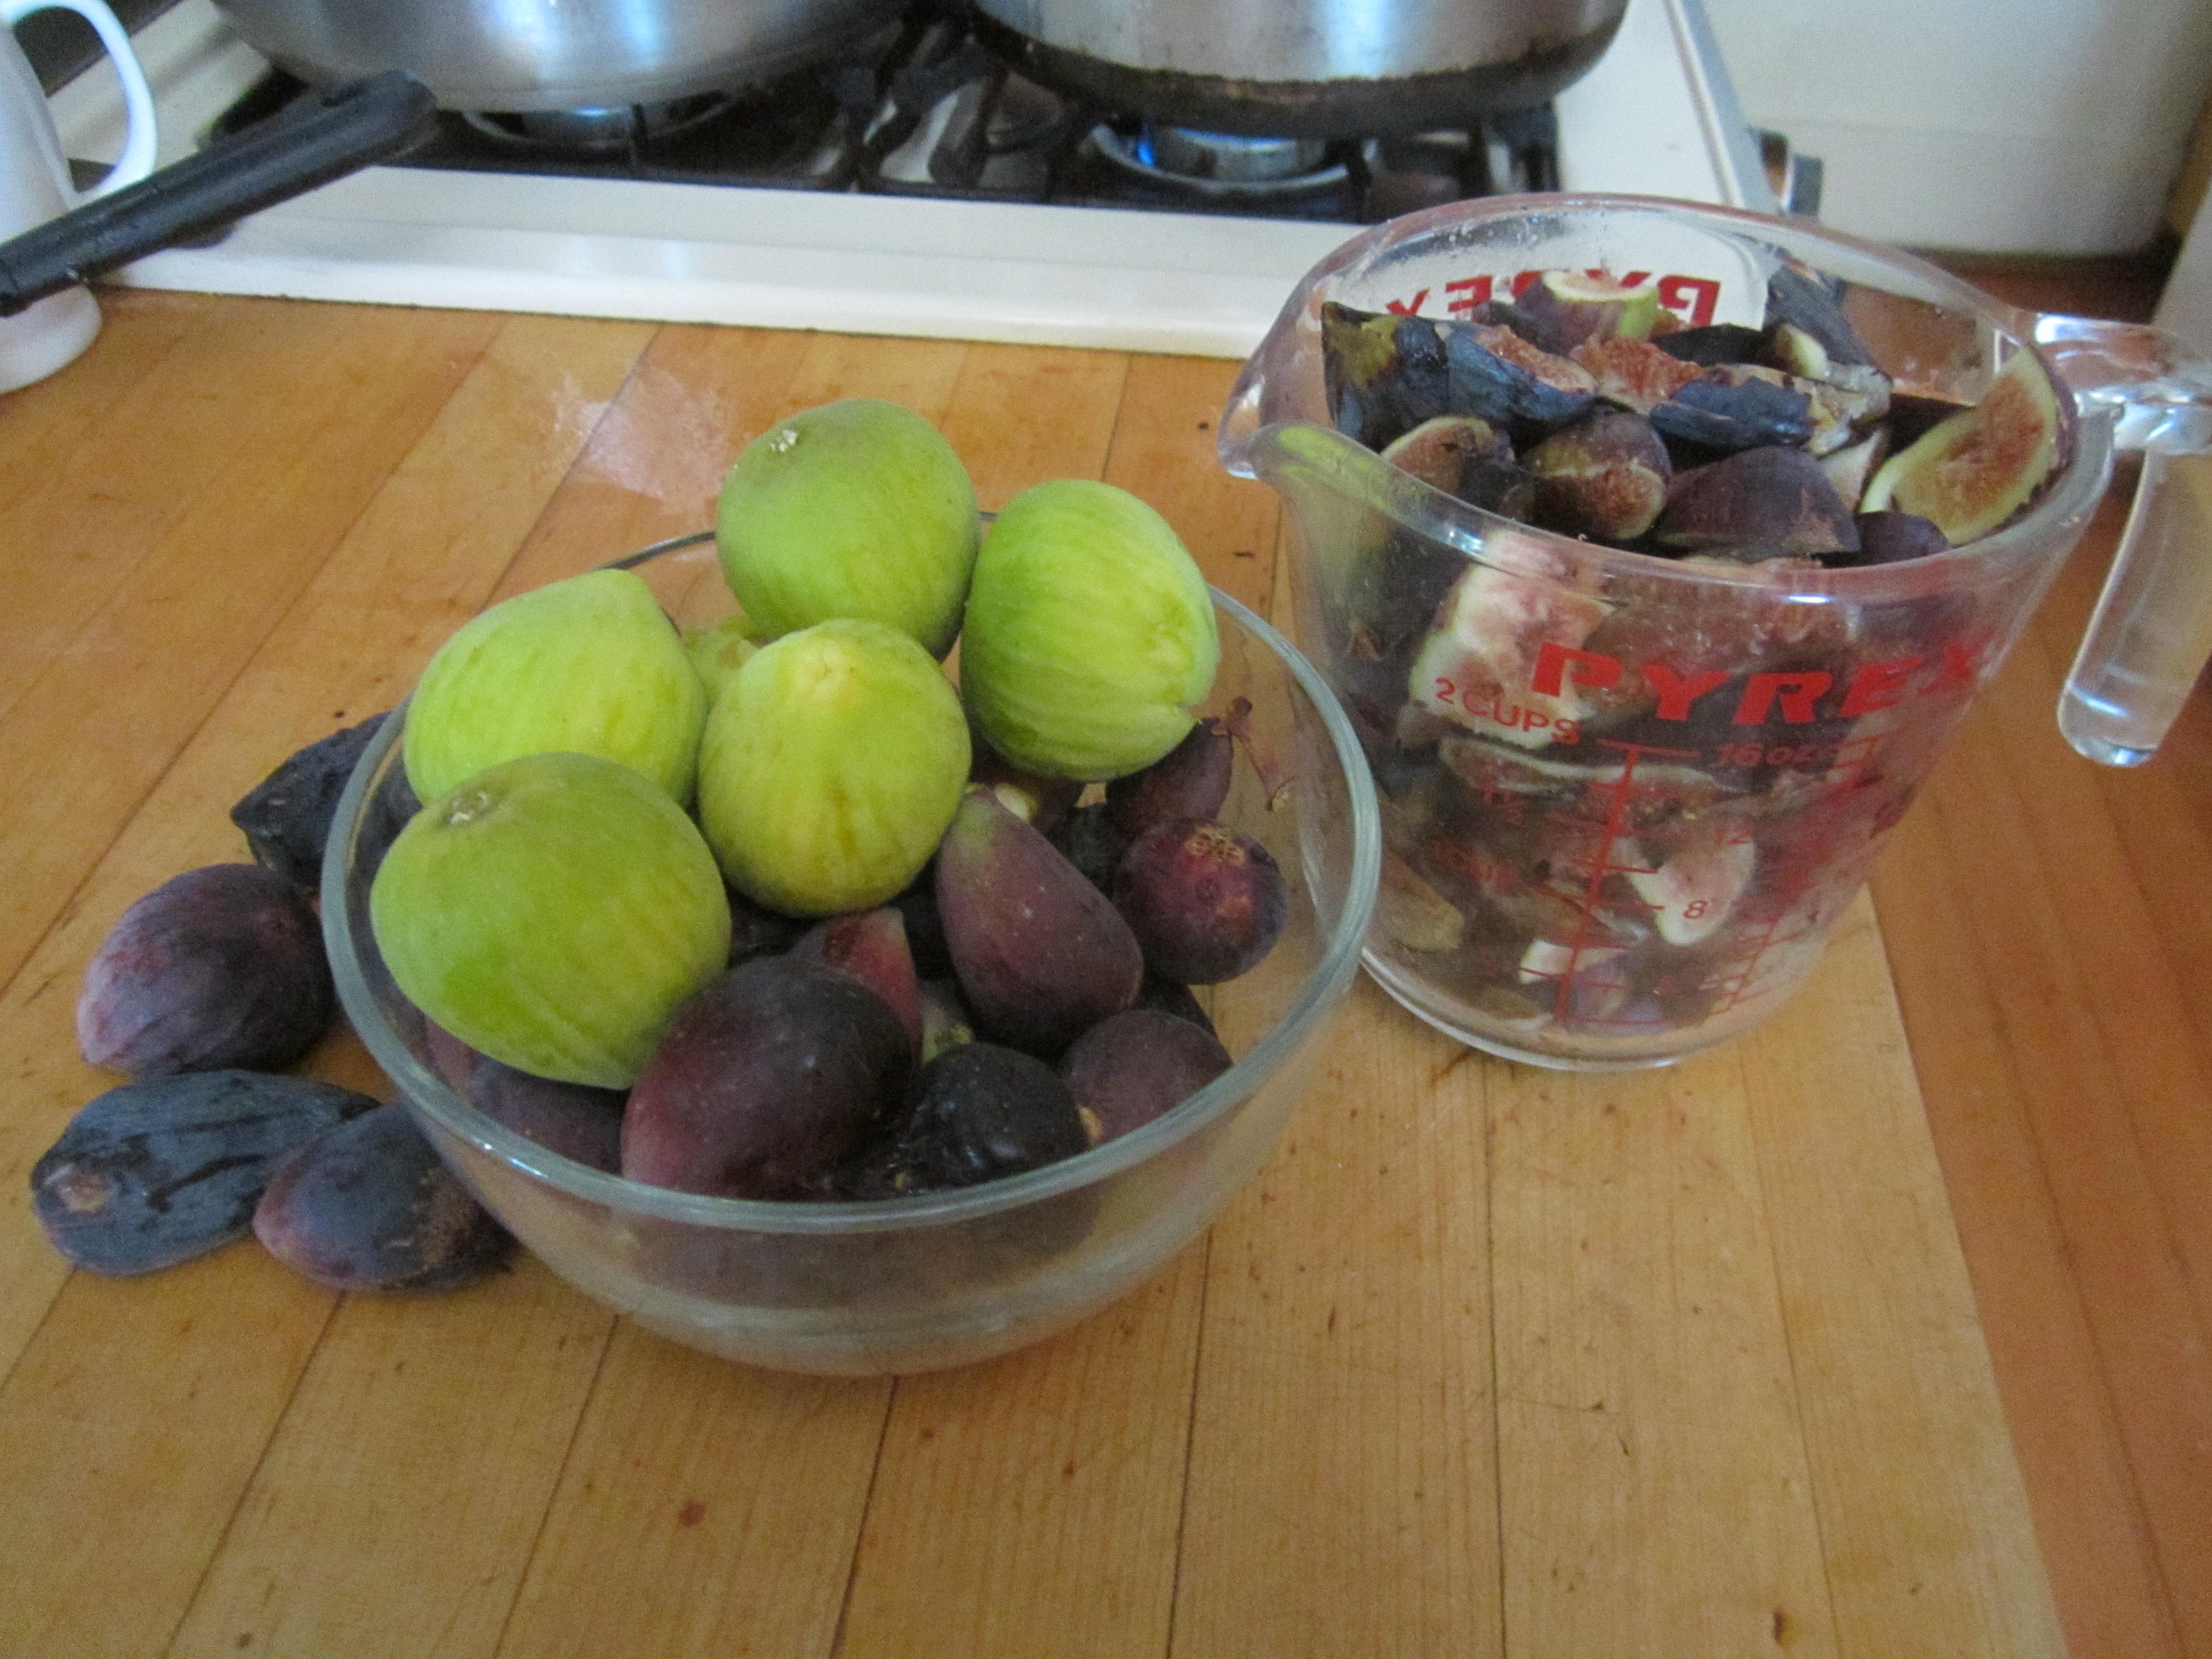
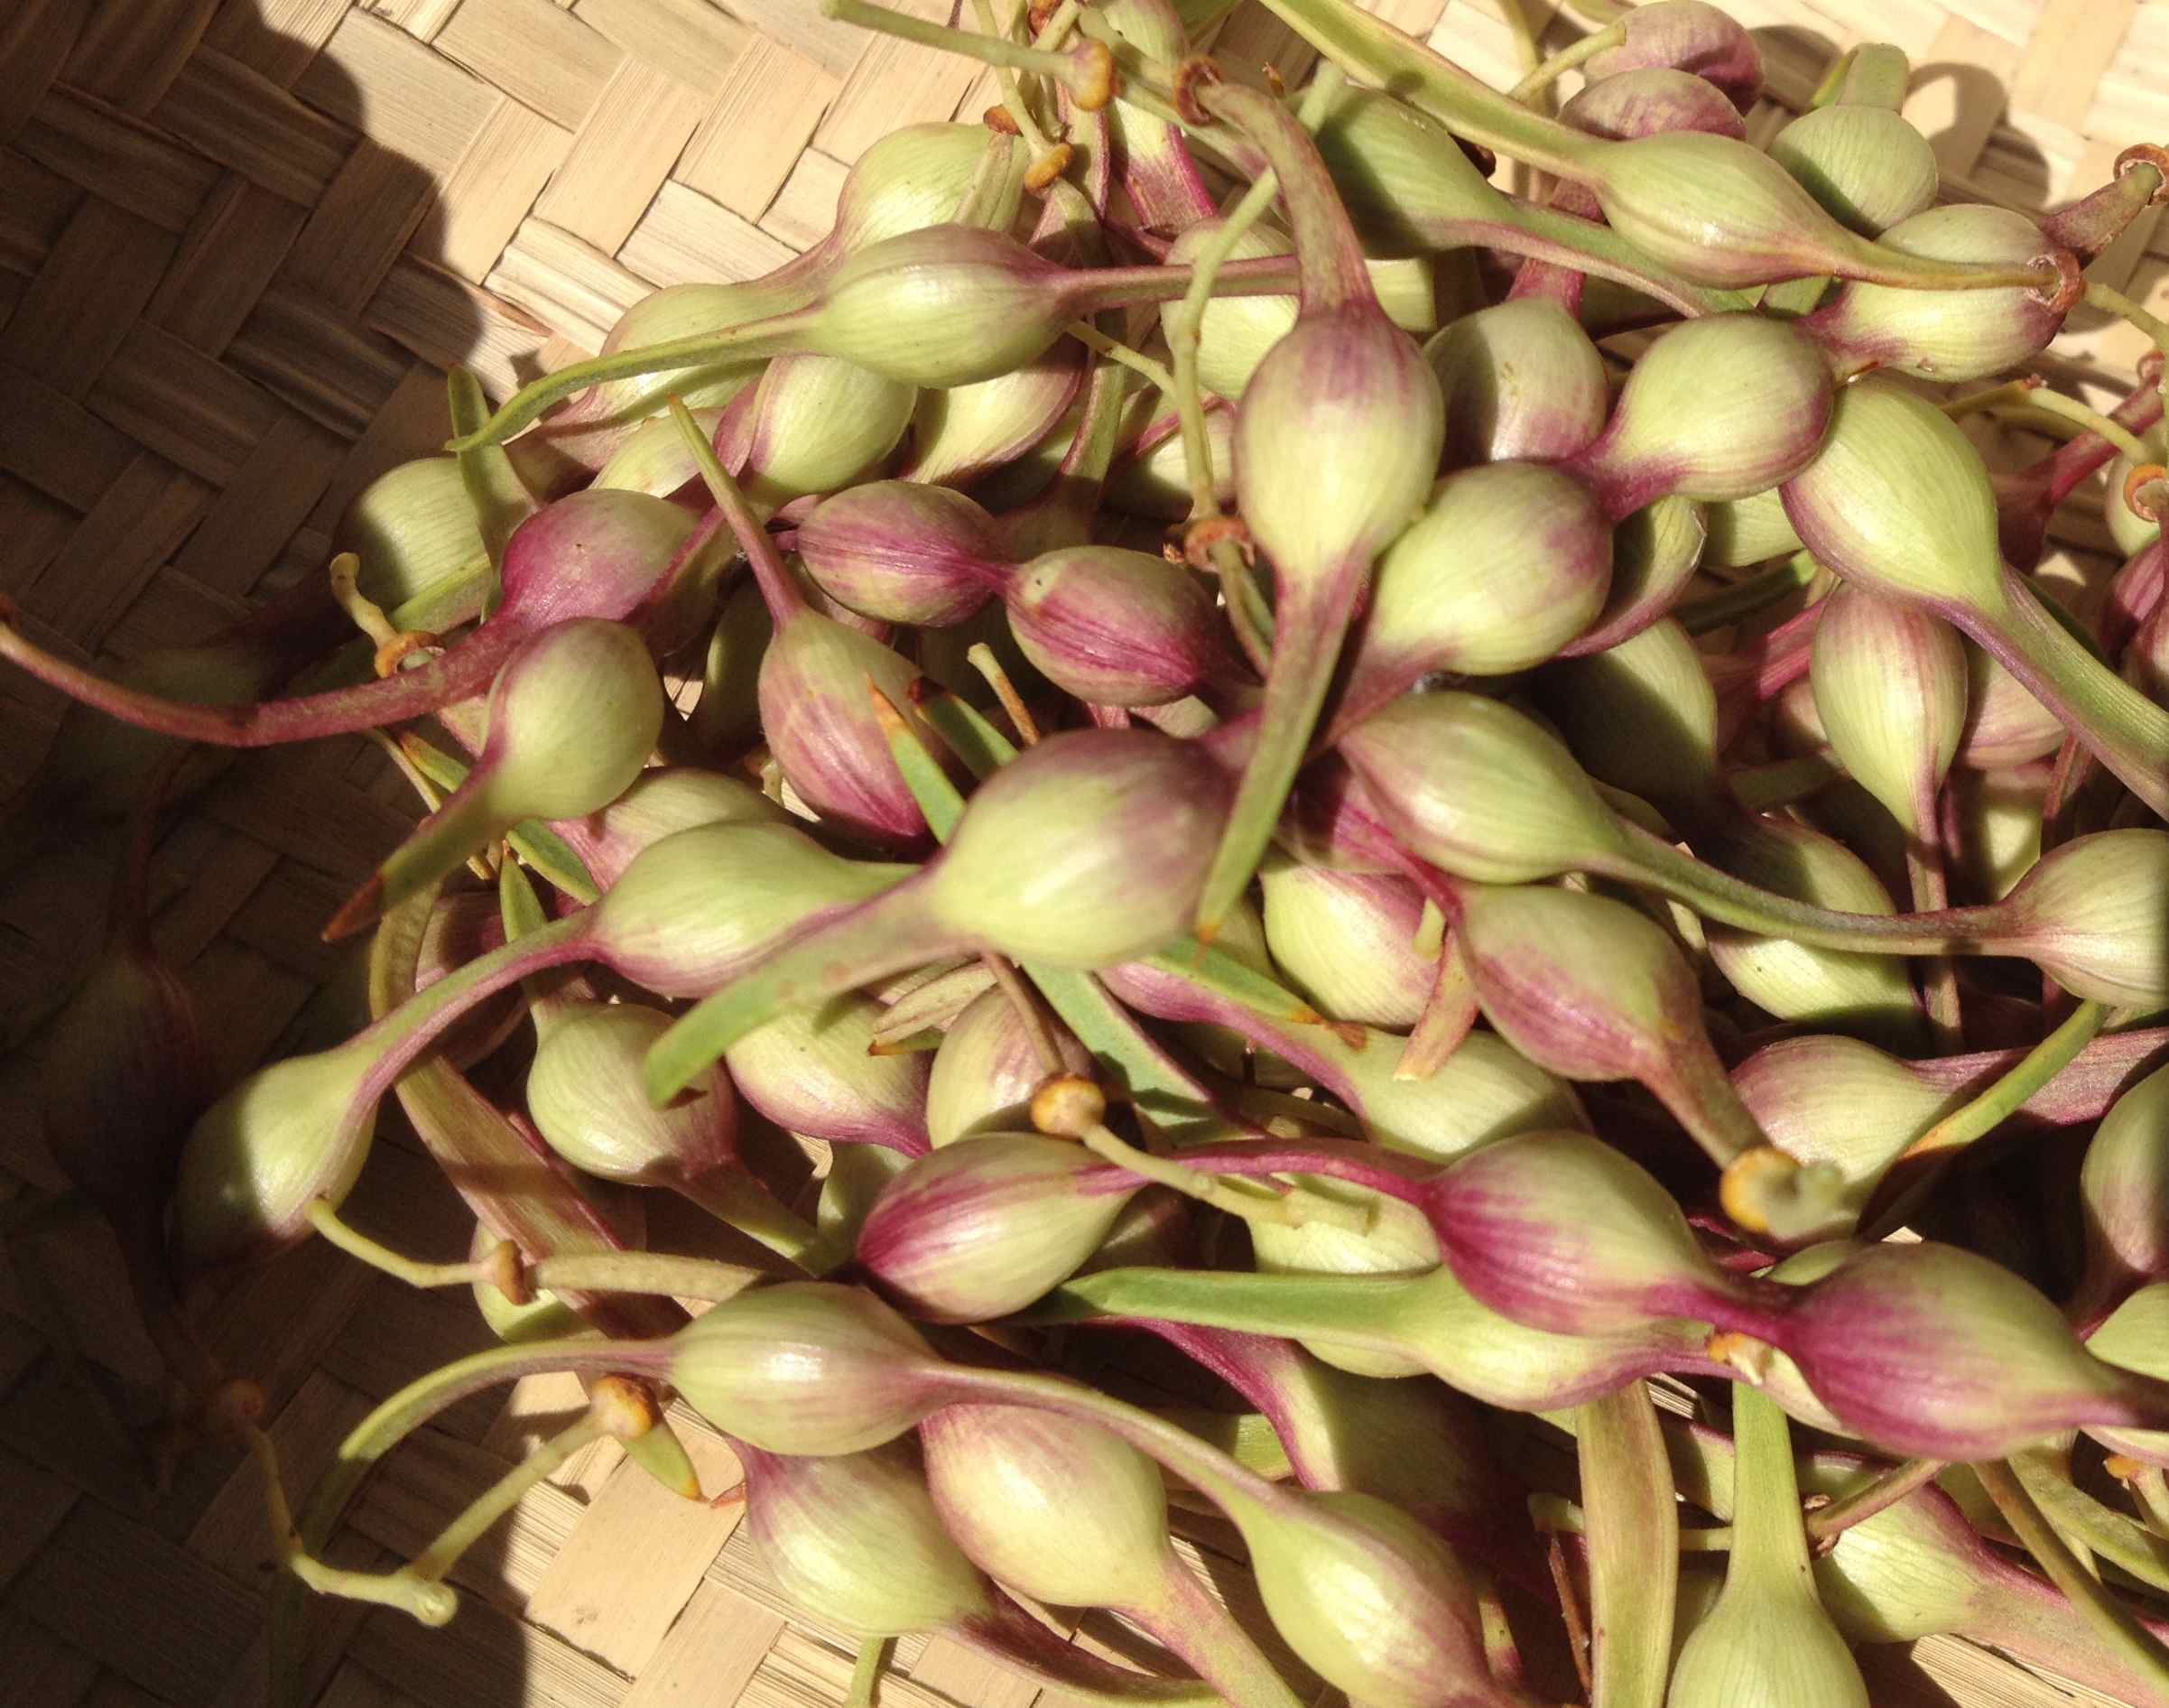
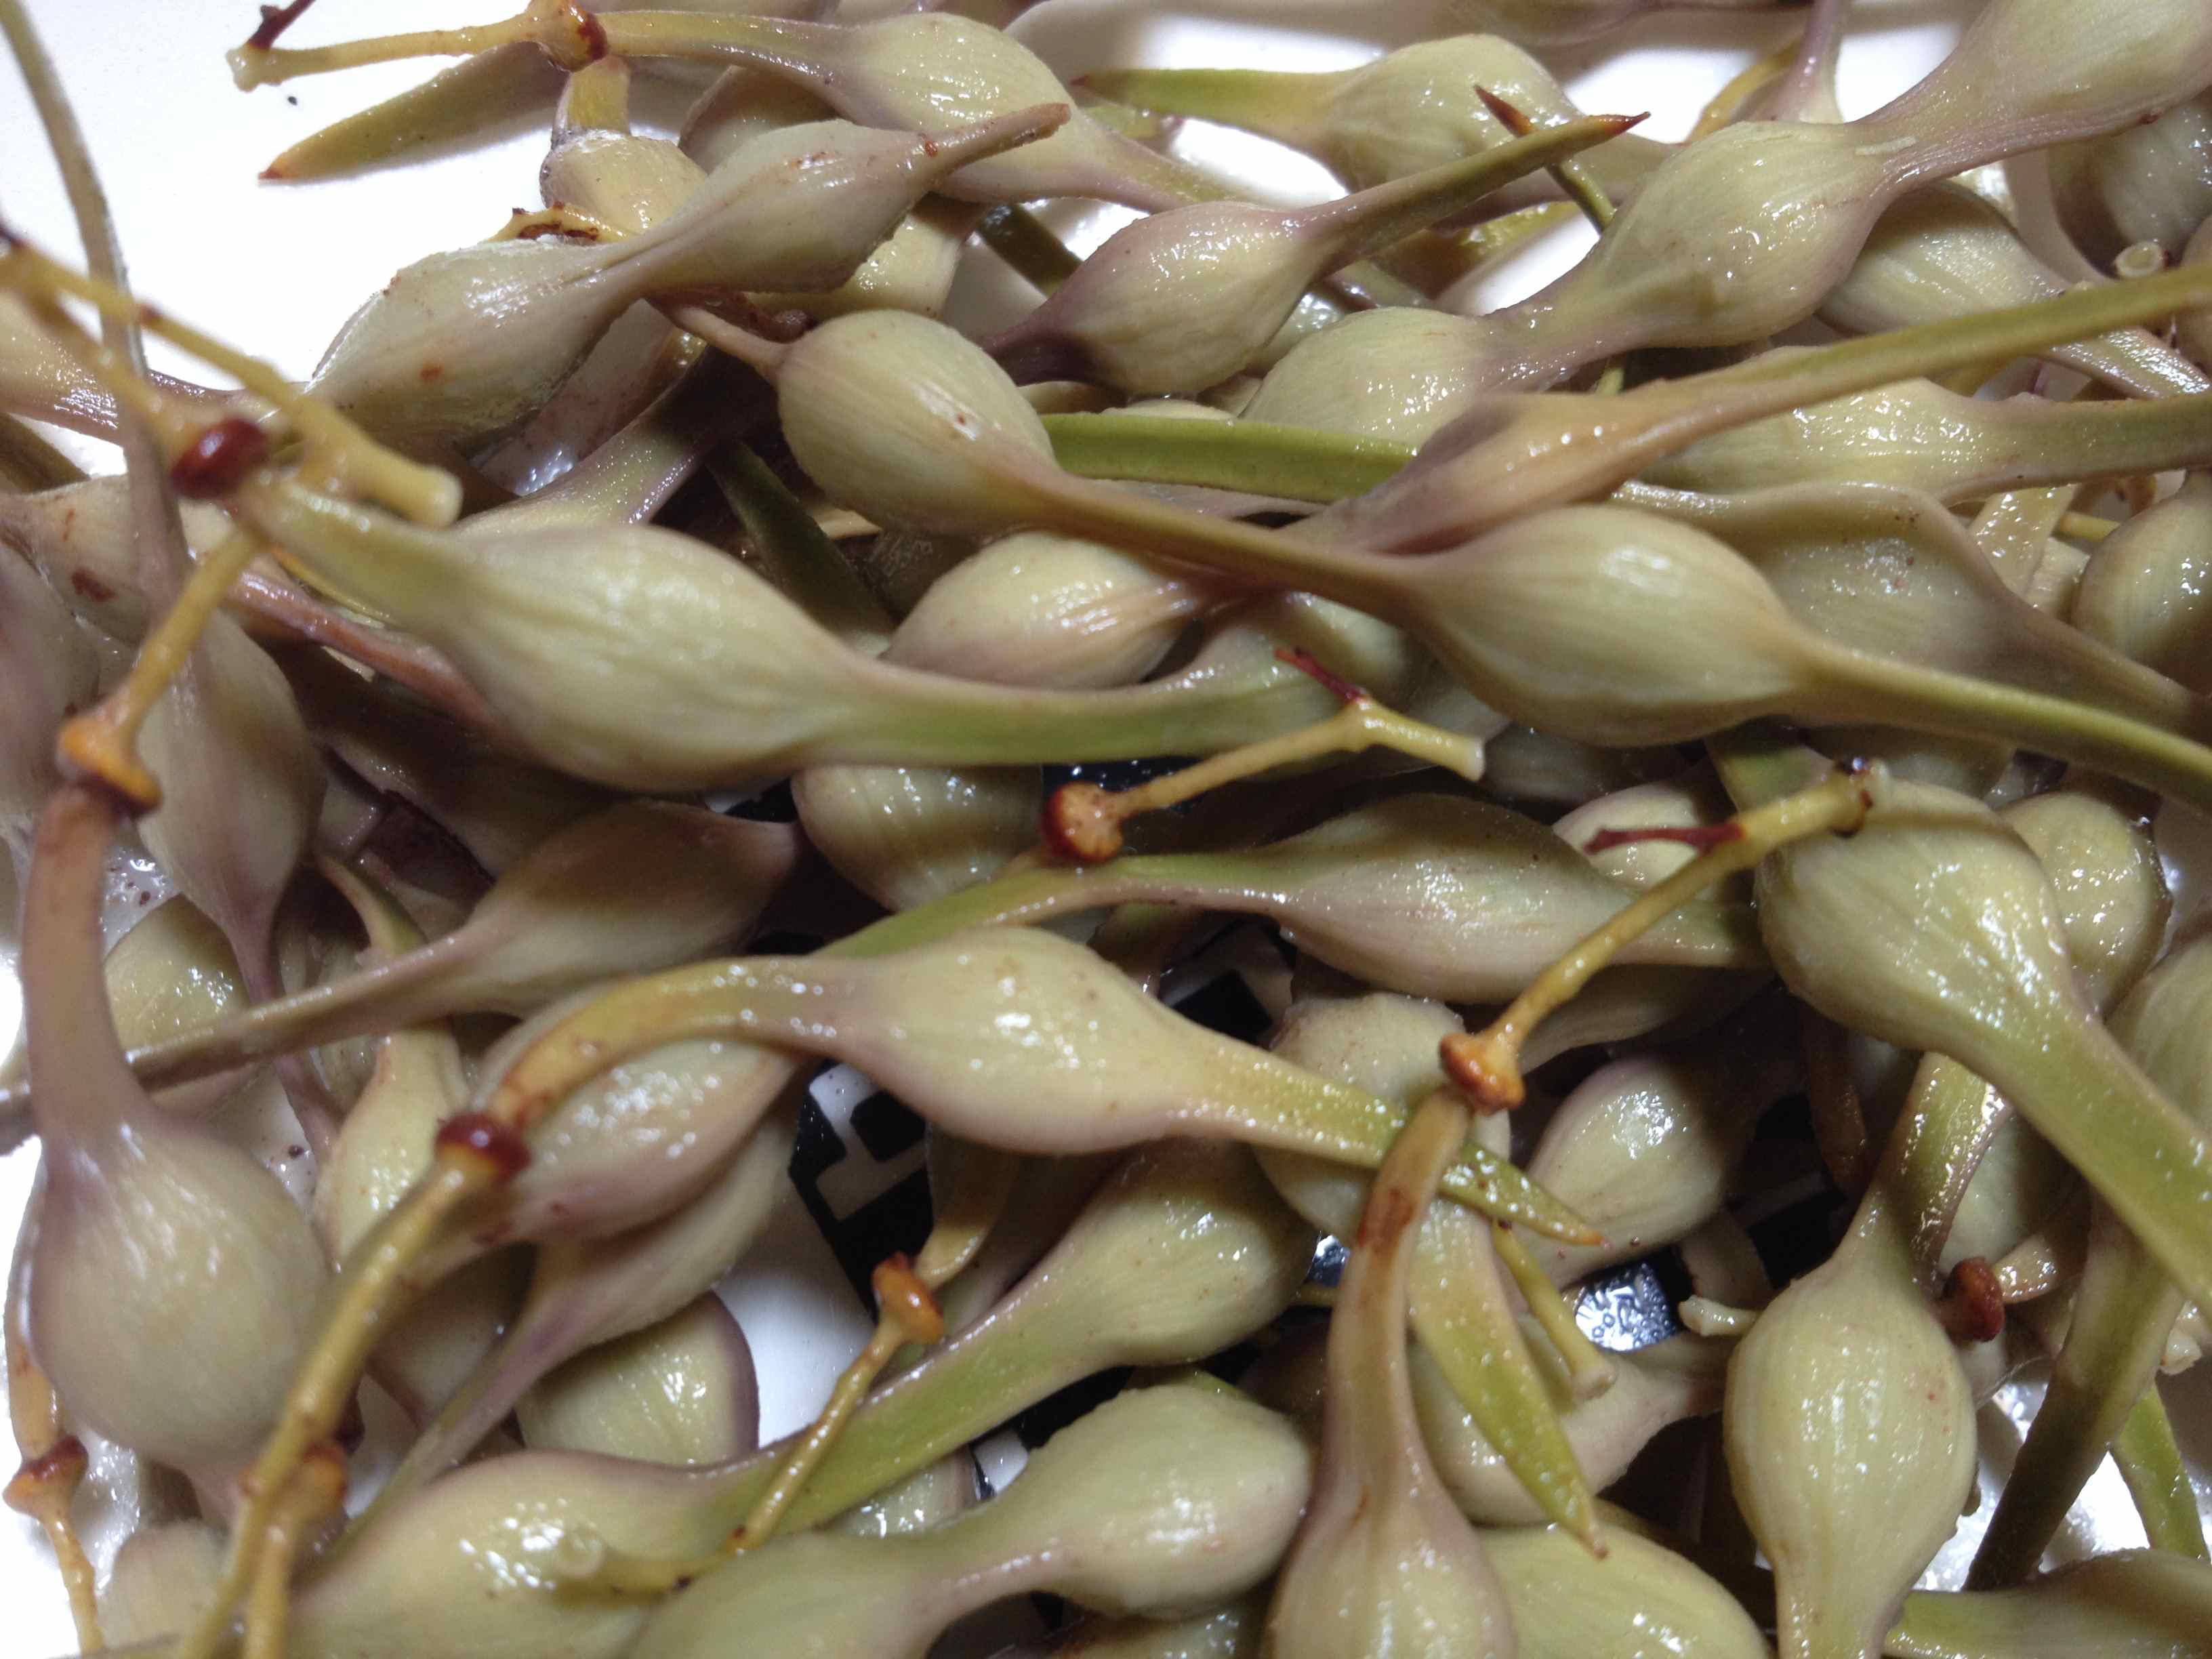
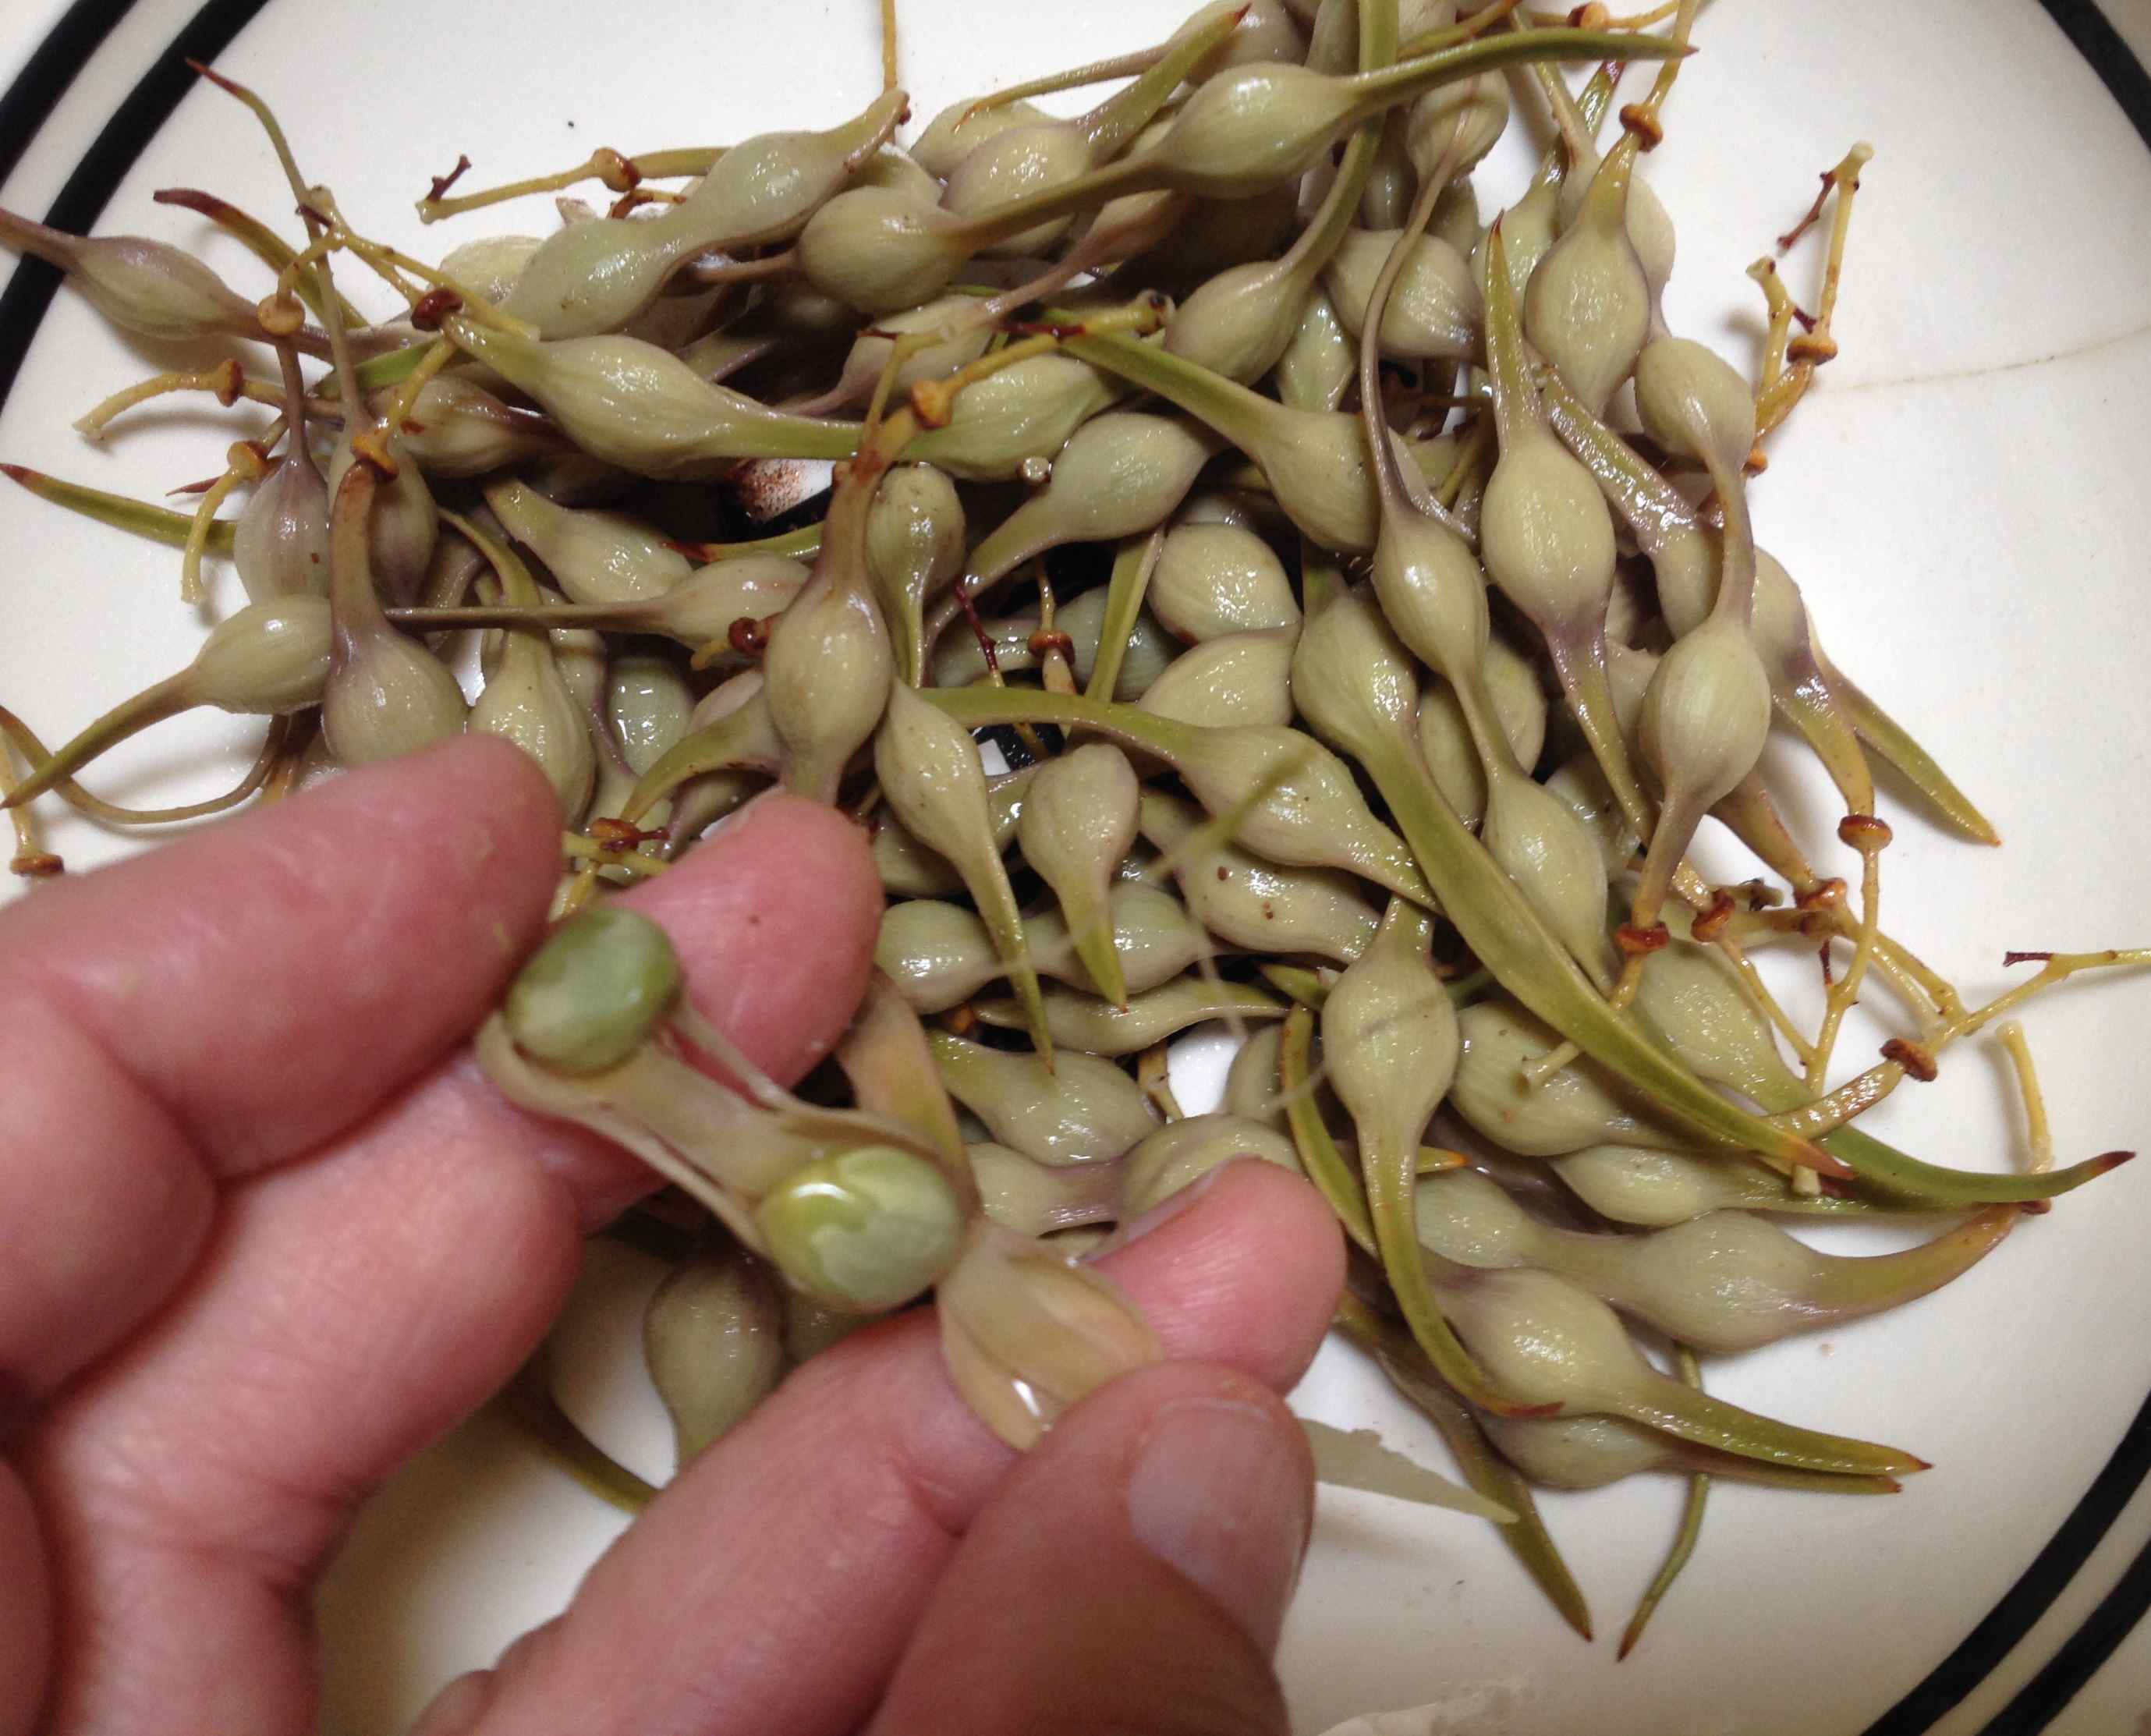
Plump figs from Mission Garden. The green ones are called “white” and some people think they are sweeter.
Generally in making jam the old-fashioned way without added commercial pectin, you measure an equal quantity of fruit and sugar and simmer until it is thick. Because these figs were incredibly sweet and because I plan to spread the jam over a base crust, I didn’t care if the jam set up like I would, say a plum or strawberry jam. So I thought it would be safe to use less sugar. Ultimately I used about 4 cups of sugar to 8 cups of chopped figs, about half the usual amount. Since I wanted a smooth product, I put the chopped figs through the blender. I could have also used my food processor.
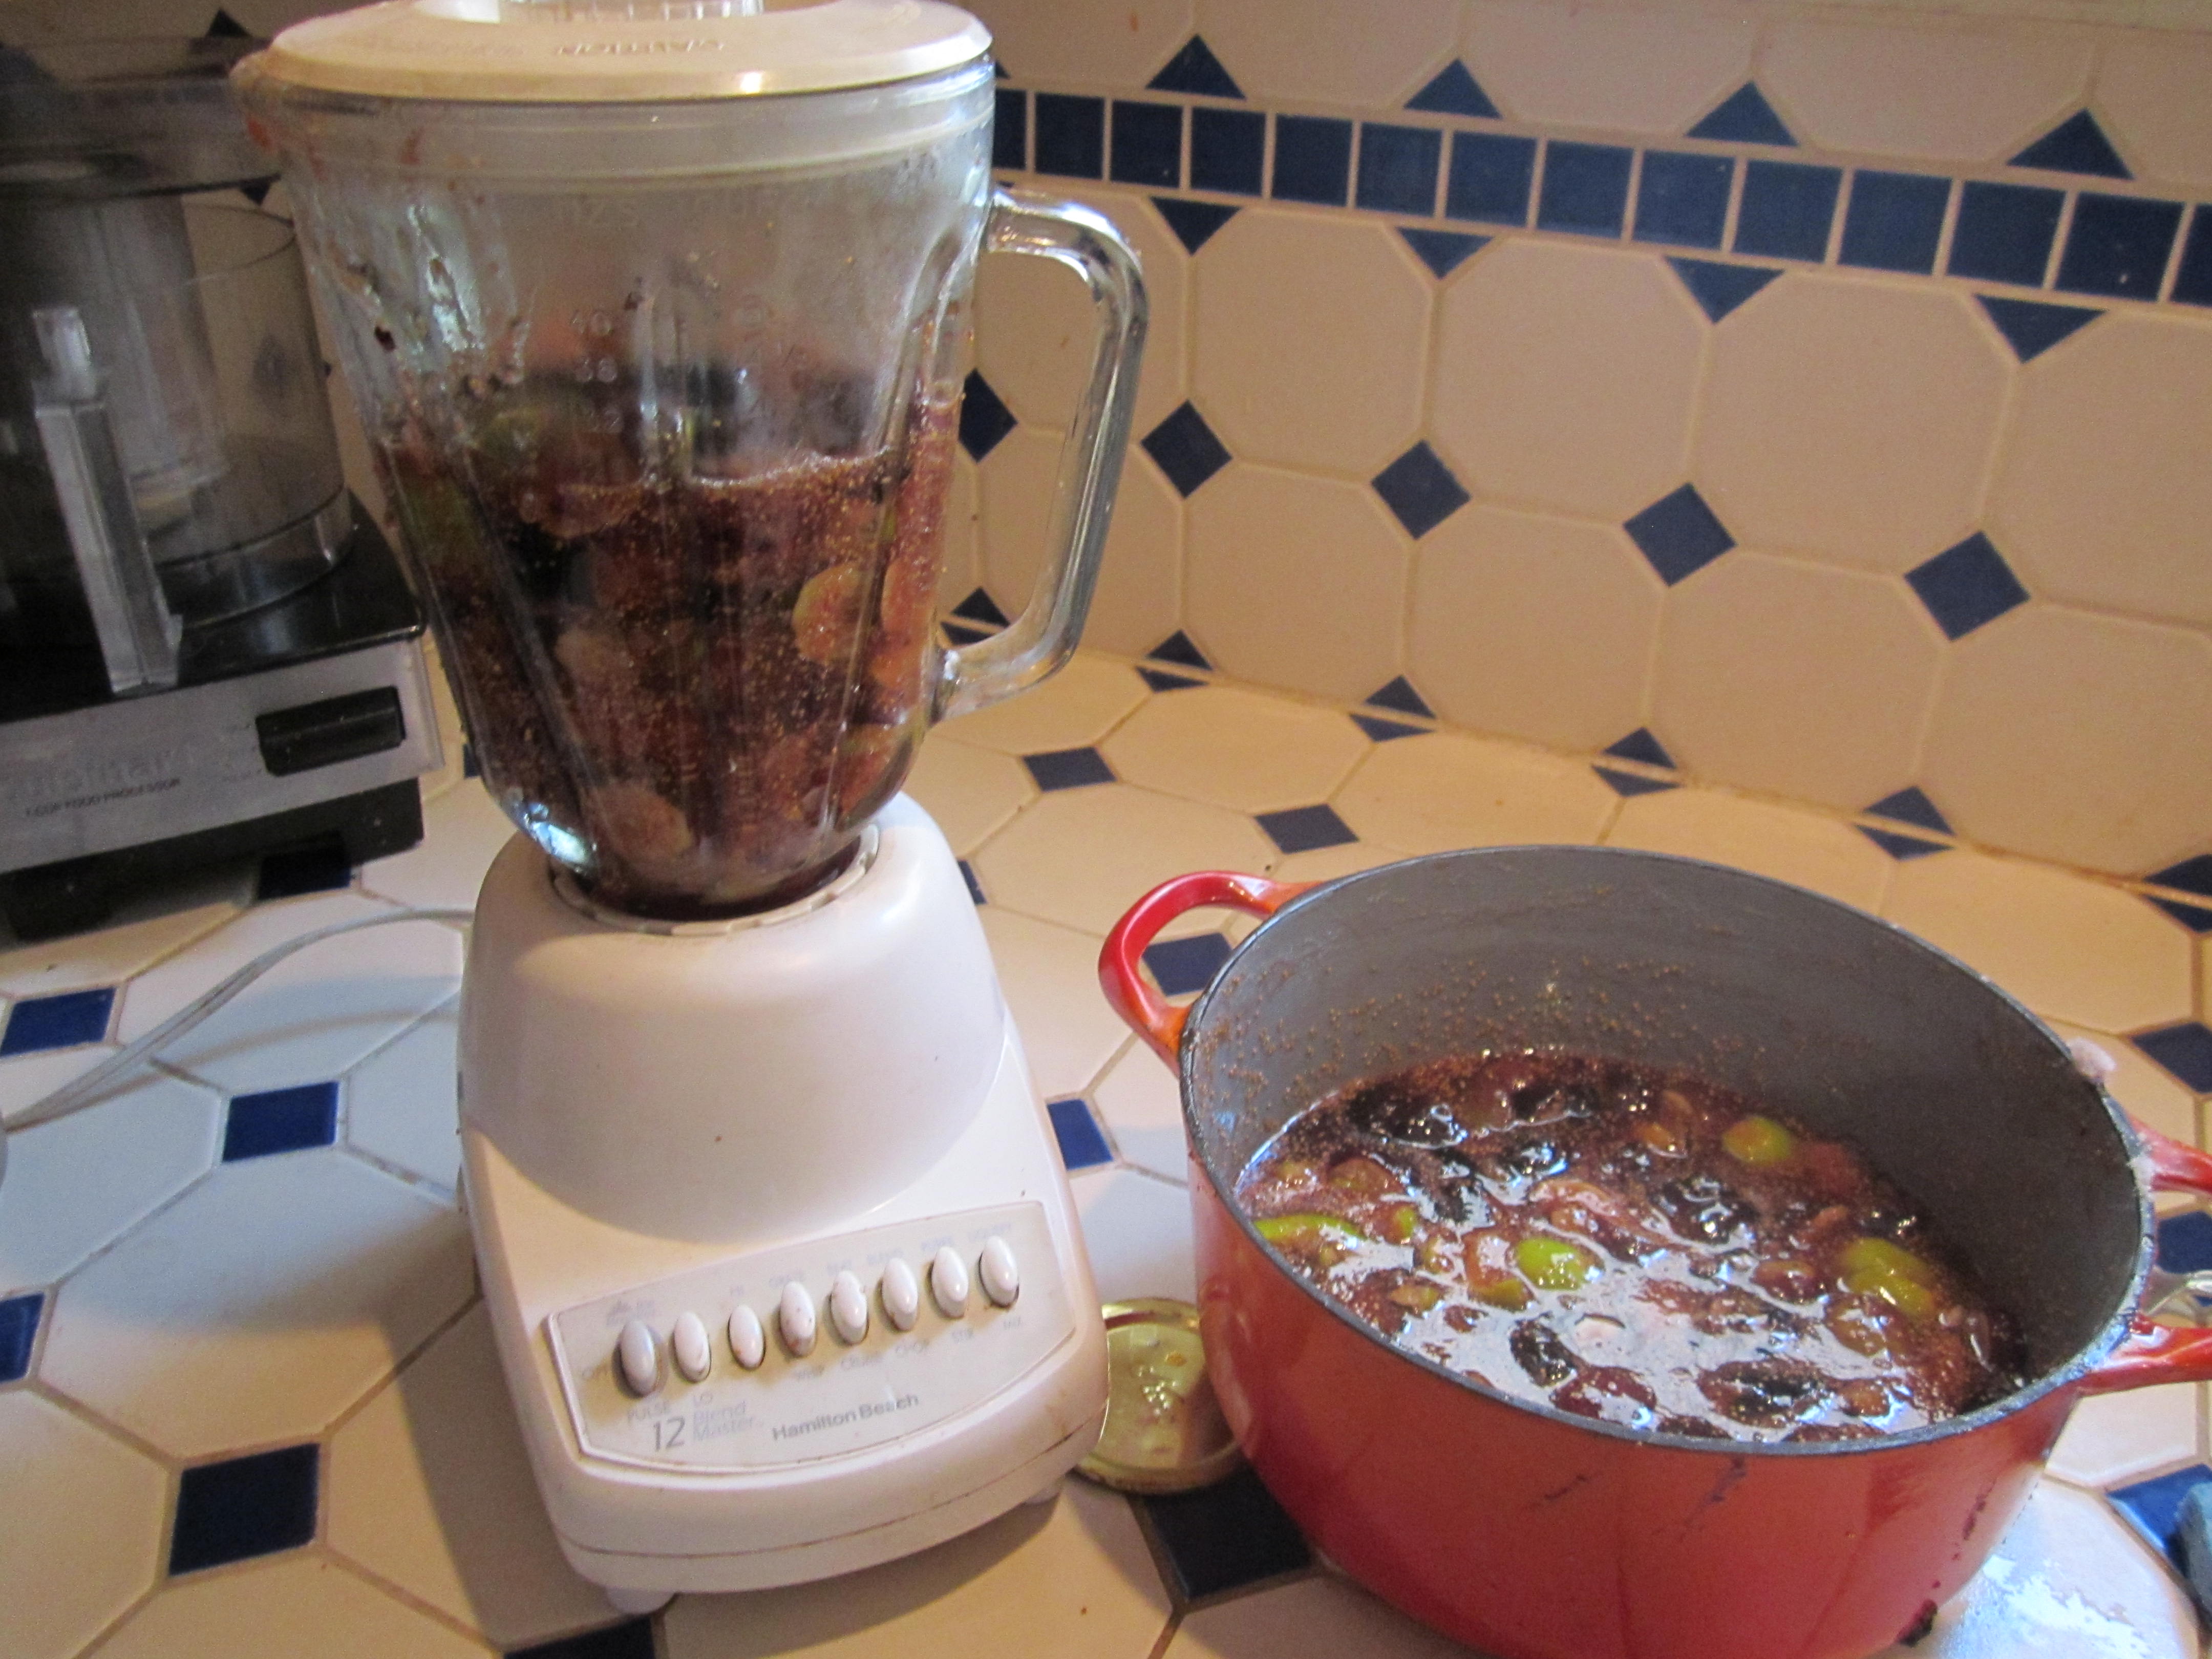
Blending the chopped figs for a smooth product.
Next came the long slow cooking. In the picture below, you can see the large pot on the left where I was boiling the storage jars to sterilize them.
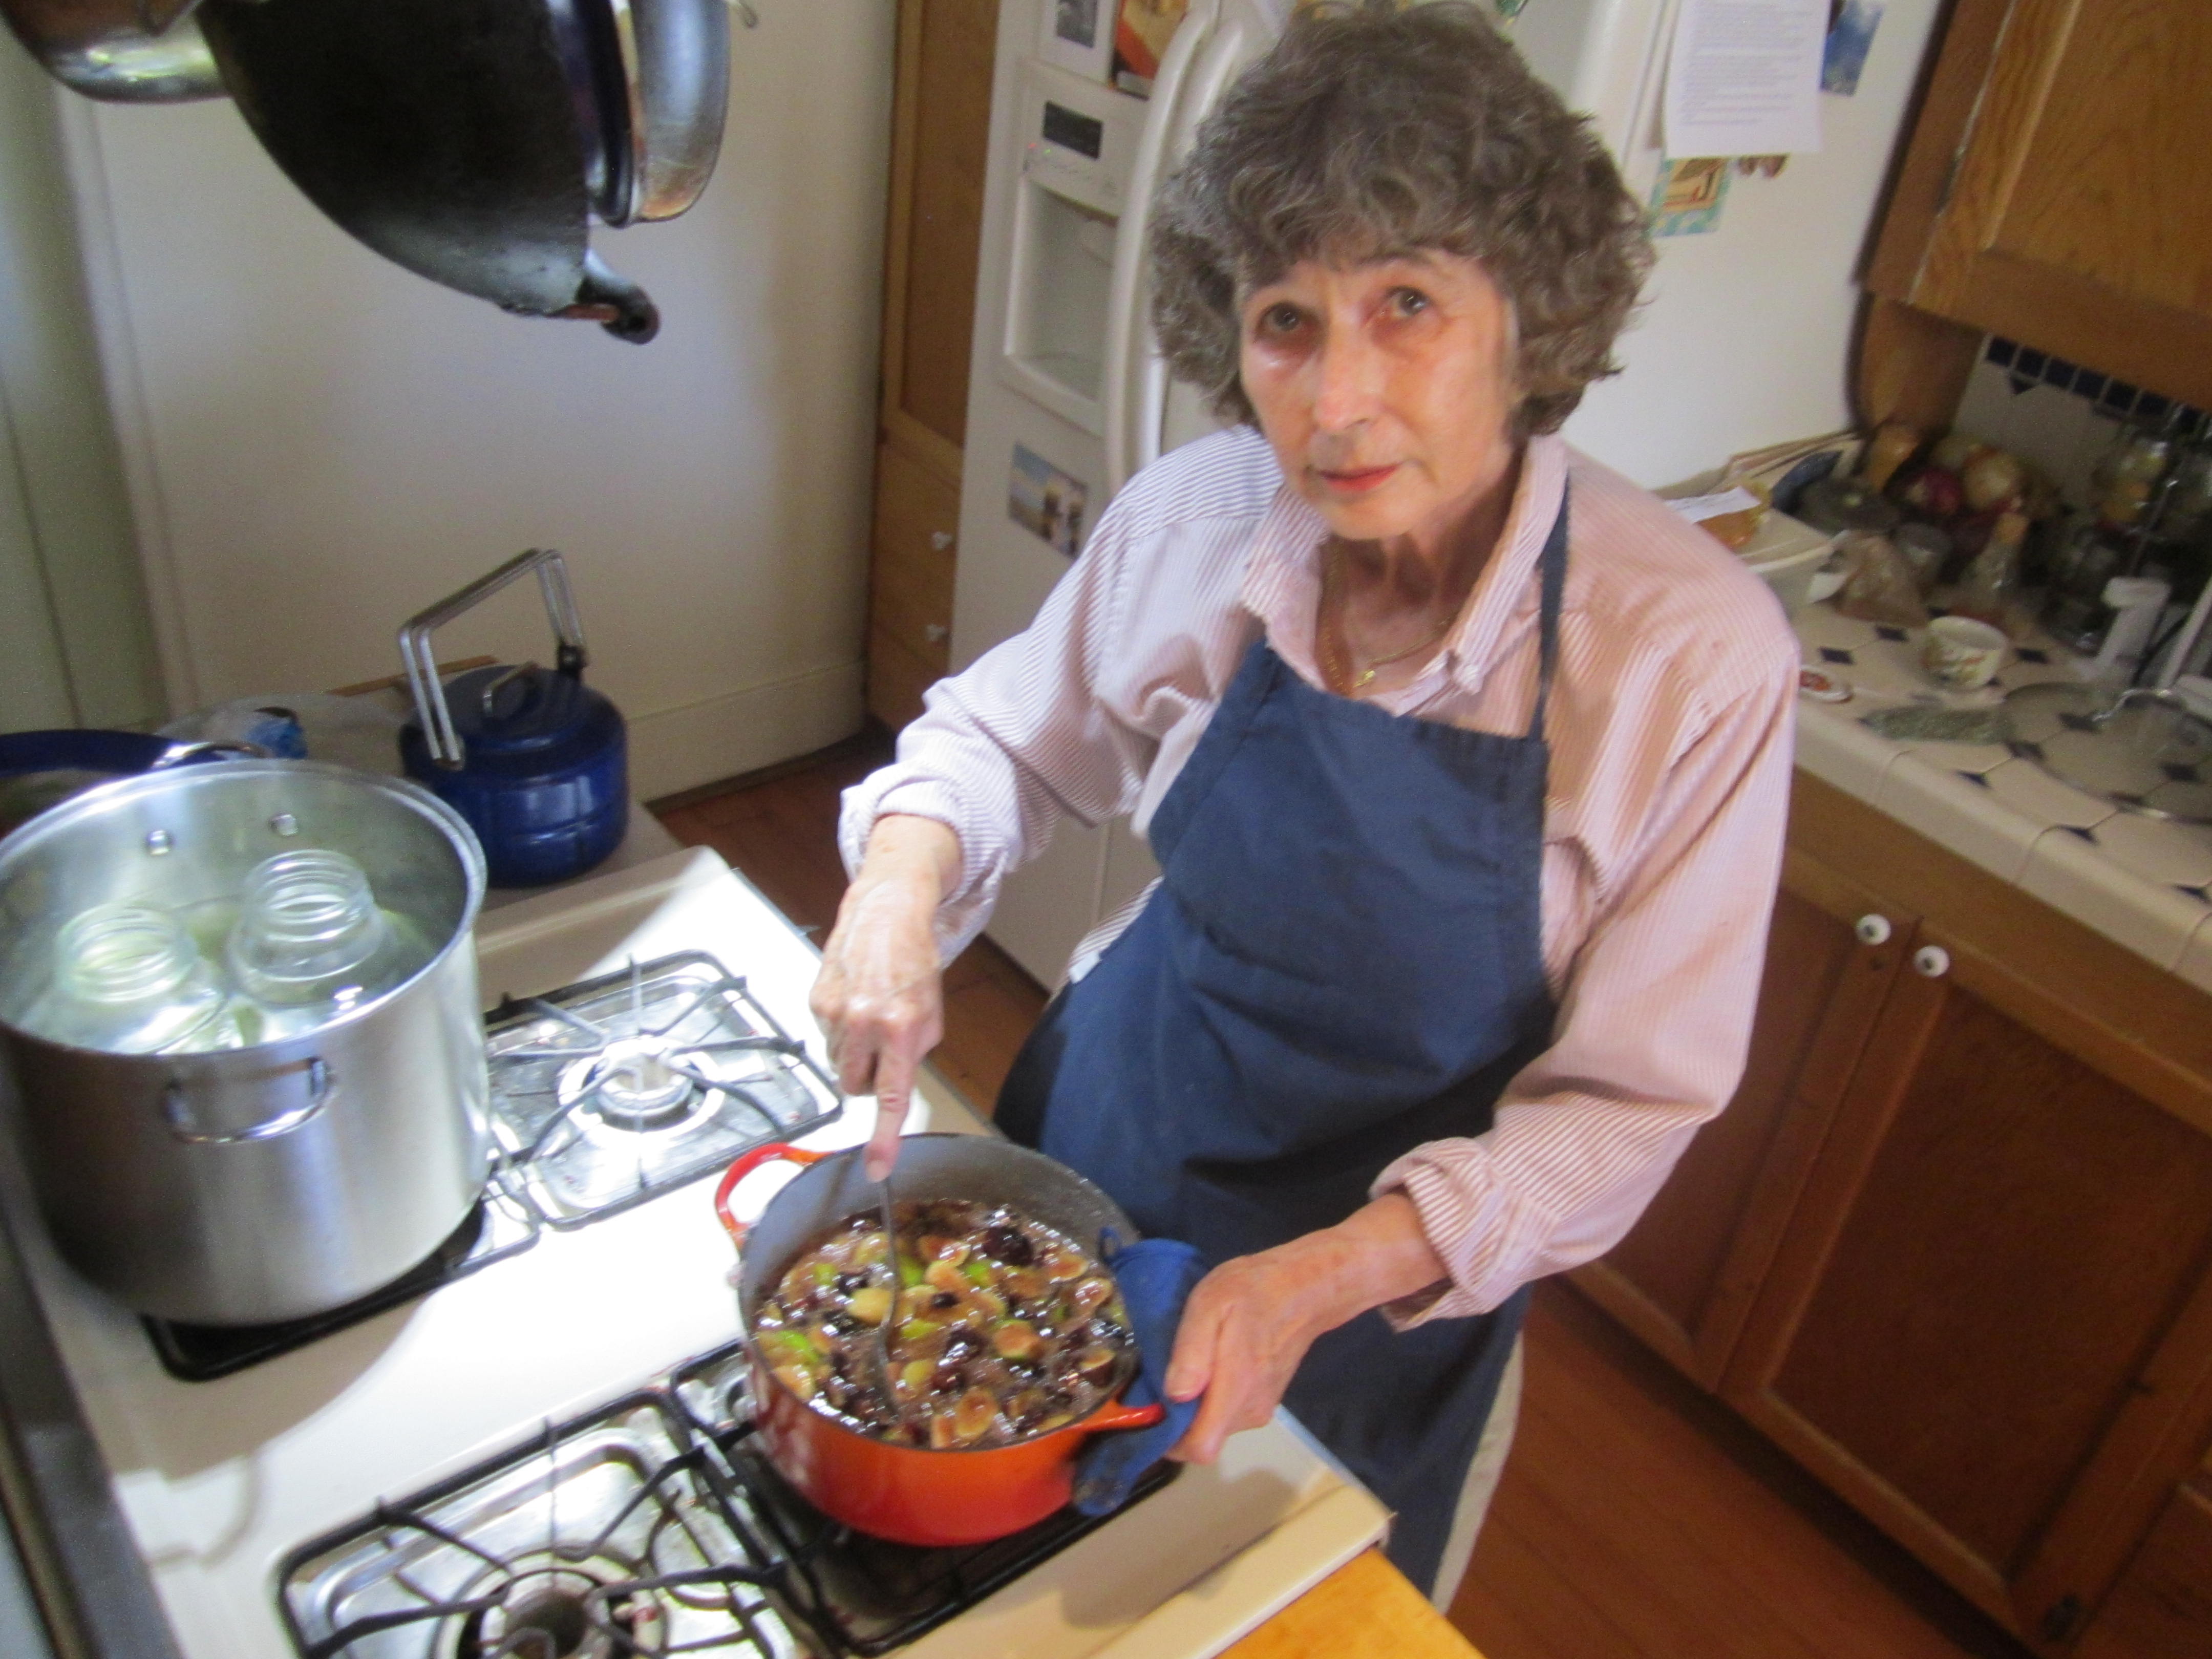
Cooking the jam.
In any jam making, you need to simmer the fruit and sugar until it reaches about 220 degrees F. This takes both time and careful watching to get the jam to a point where it is not too runny and not too stiff. In Tucson, because of our altitude, 218 degrees F usually gives a better product. Use too high a heat and the jam will burn on the bottom of the pot before it reaches the proper temperature.
To check the temperture, I used to use a traditional candy thermometer that looks like this and works with a column of mercury:
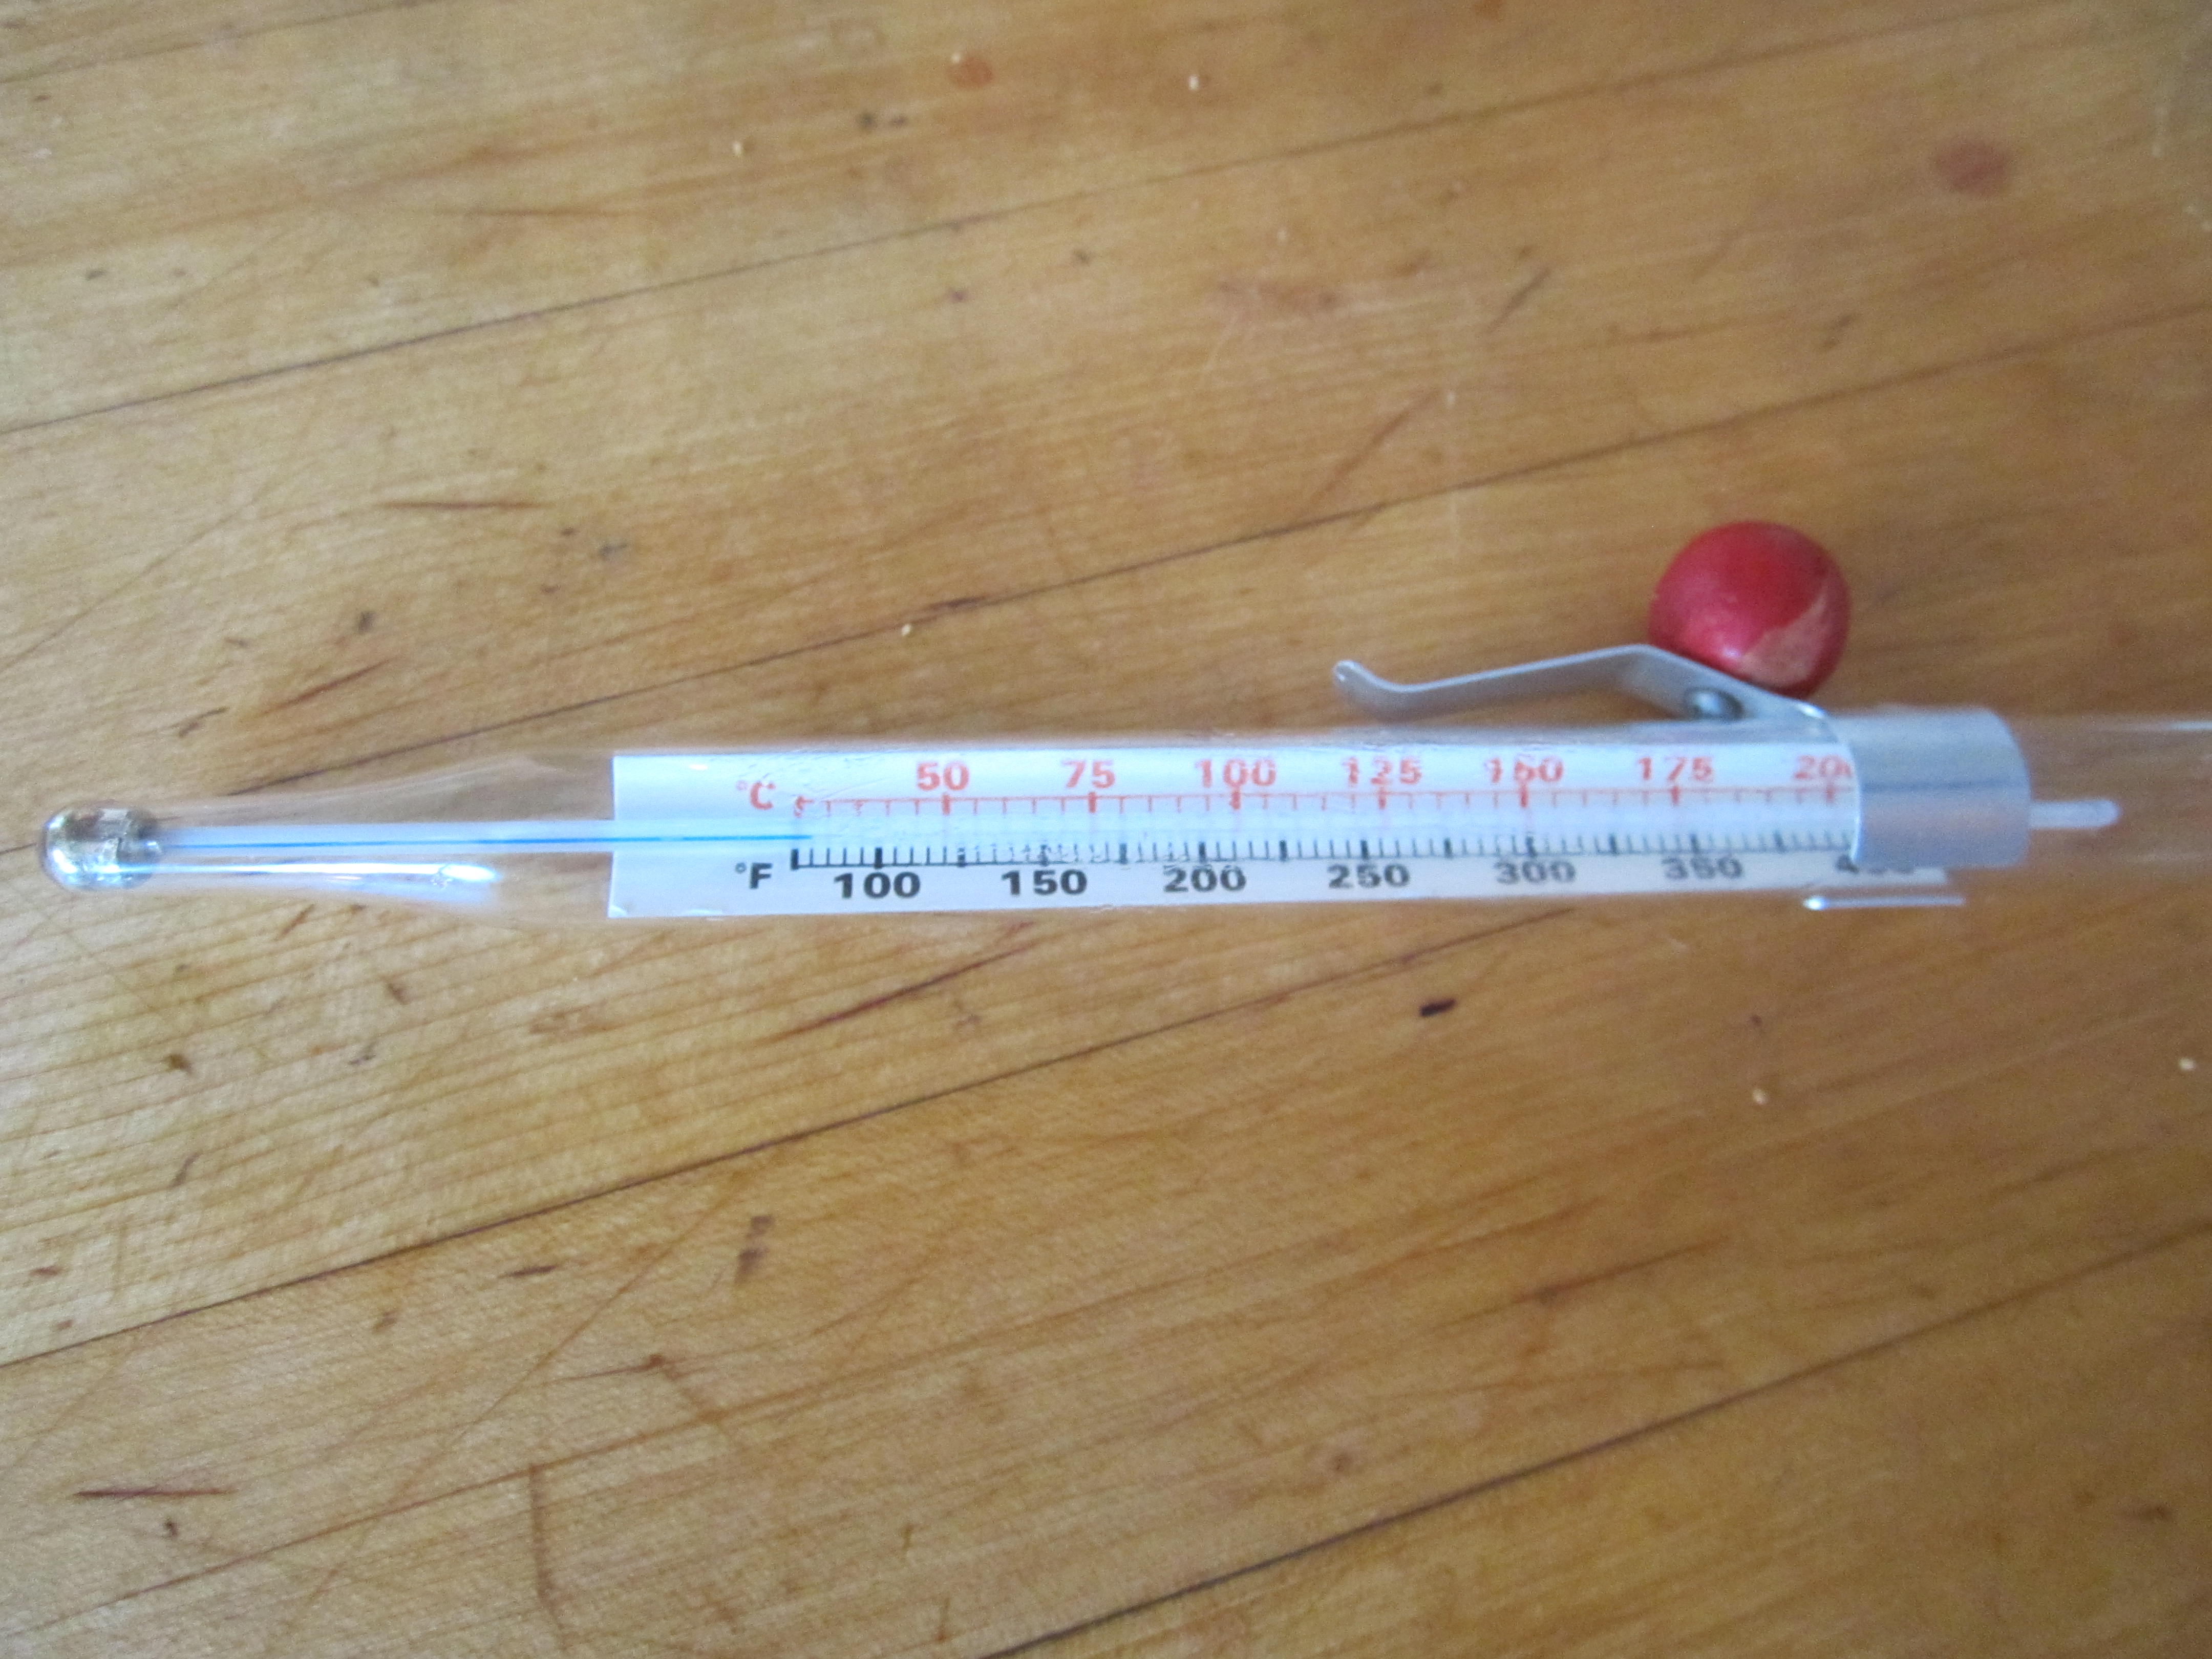
Traditional candy thermometer.
A couple of Christmases ago, however Santa brought me a digital thermometer that is good for roasting a turkey, cooking a thick steak and making jam. It has a probe that sticks in whatever you are cooking and gives you a readout. See the photo below. You can see this one has reached 212 degrees F. and the jam is almost done.:
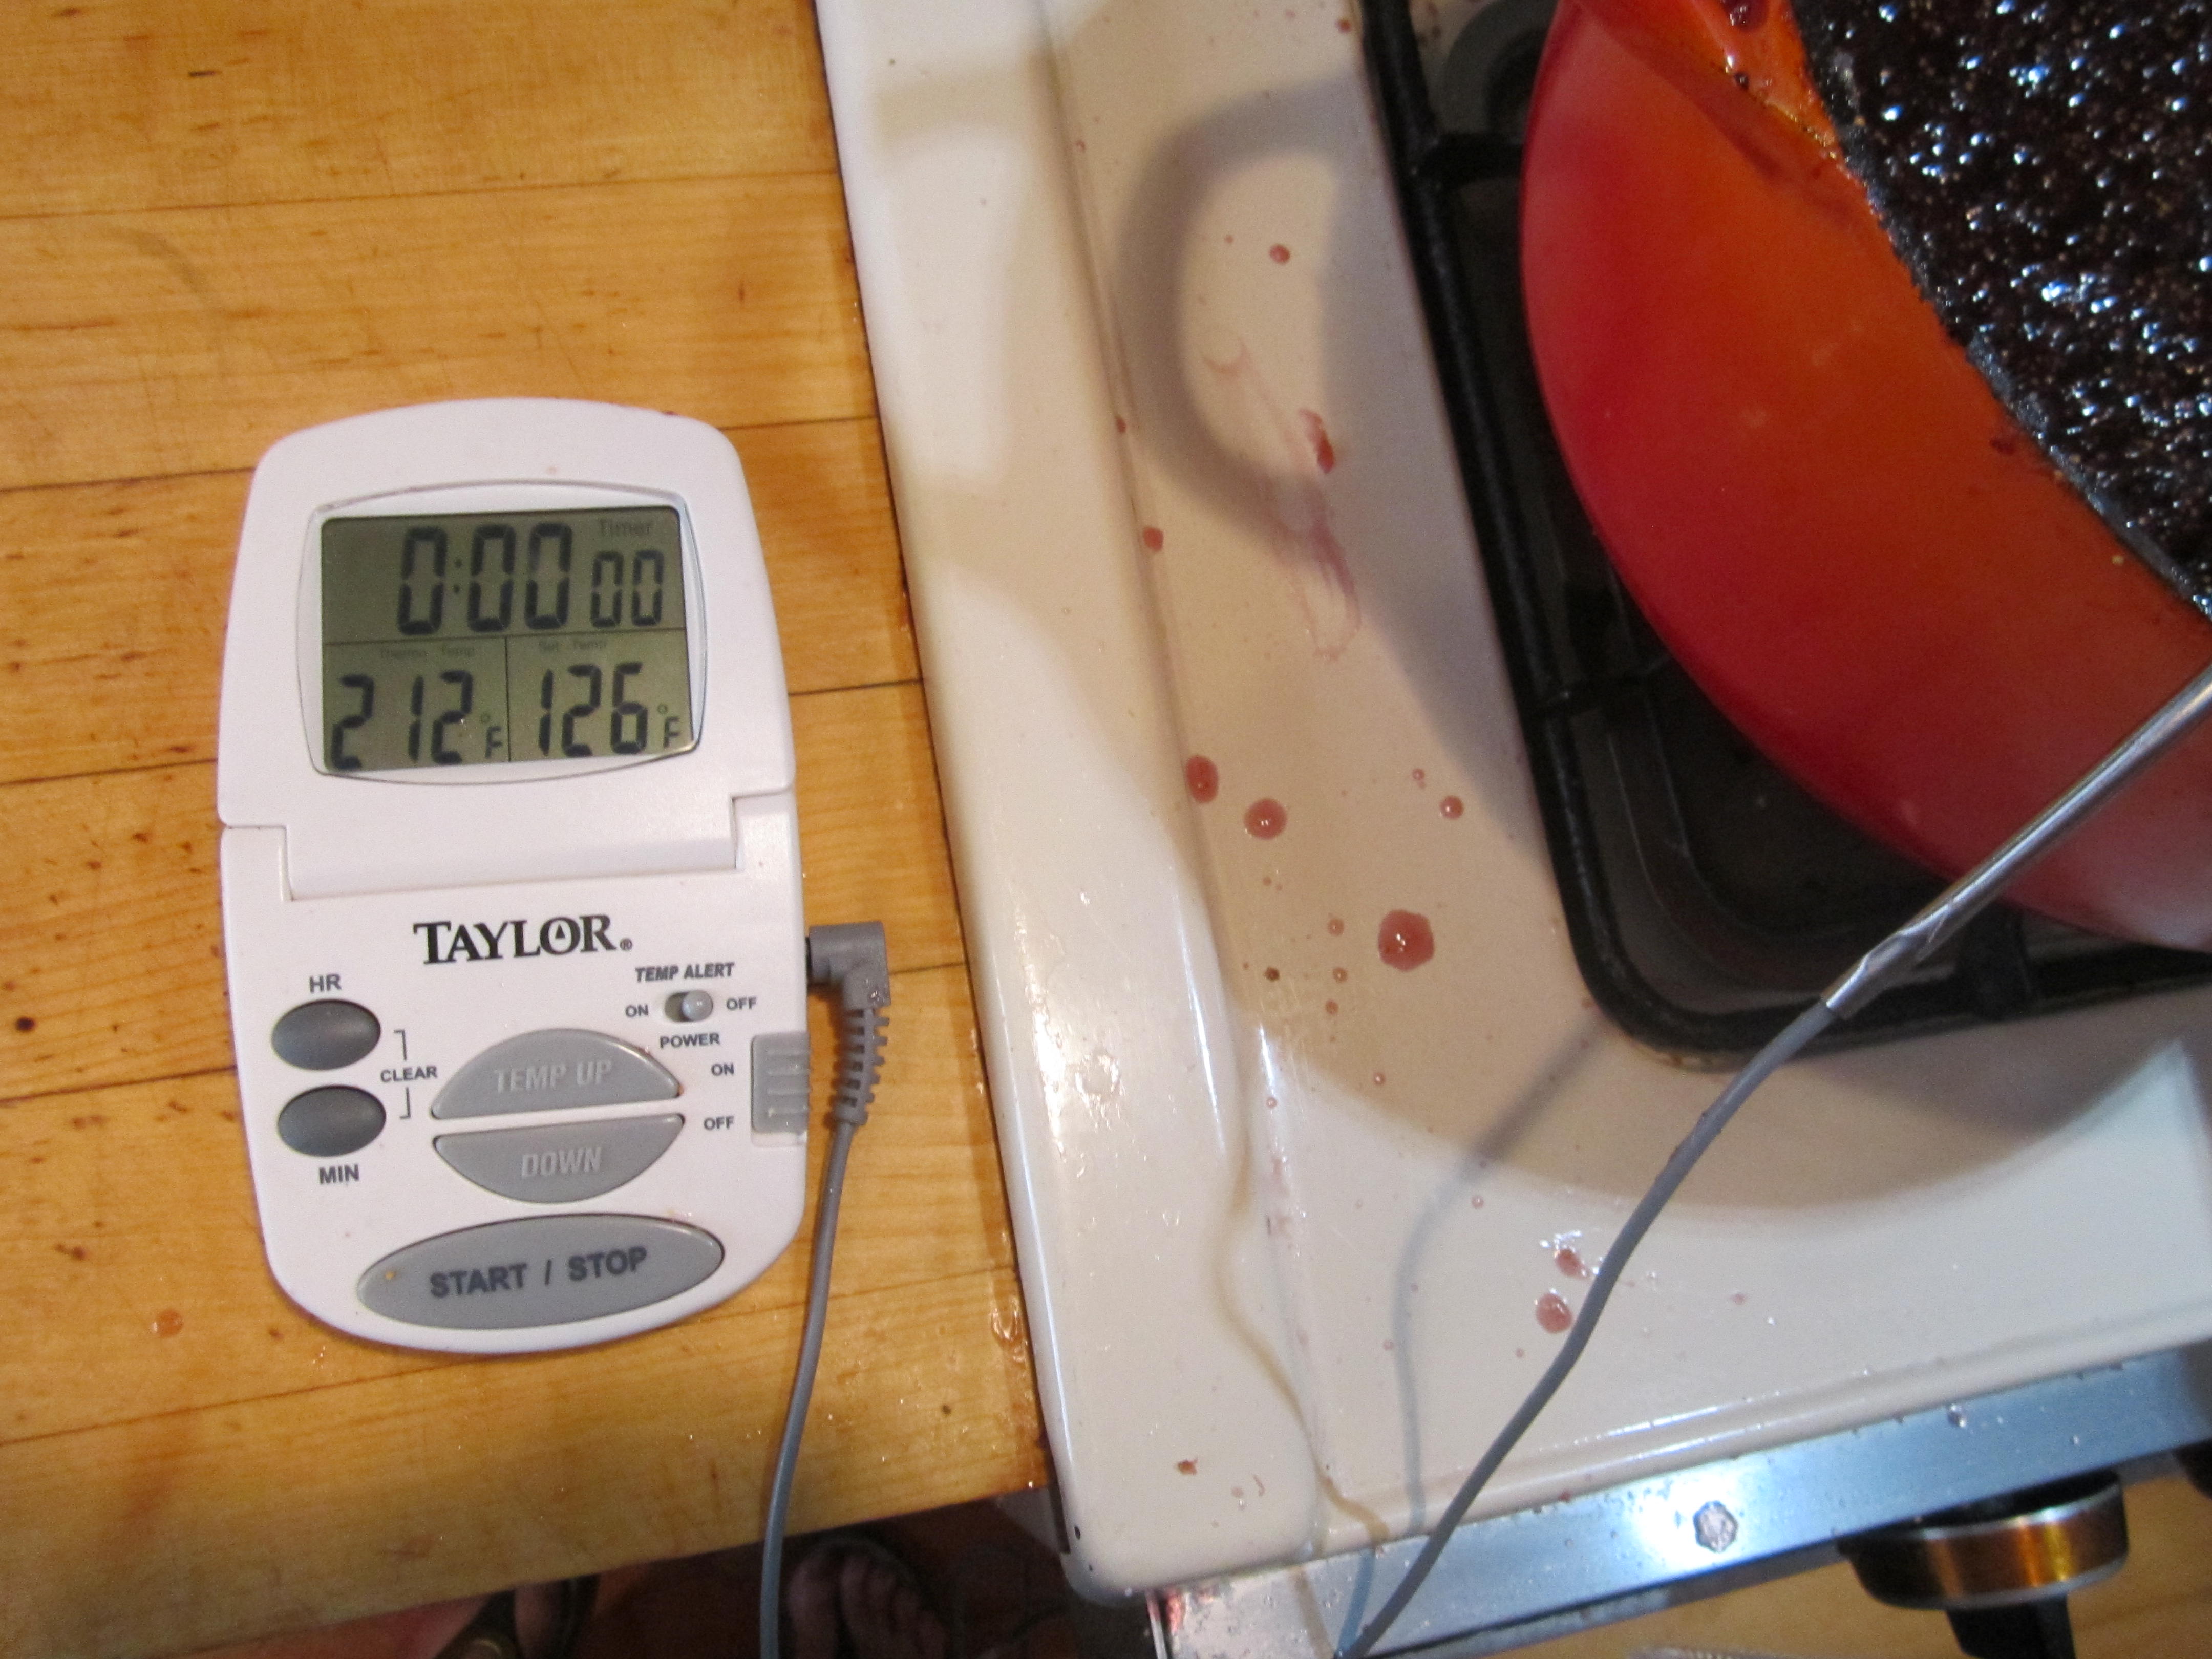
Battery-operated digital cooking thermometer. The thin silver wire on the right is a probe that rested in the jam.
Once finished, the jam just needed to be ladled into the prepared jars, capped and processed for 10 minutes in a boiling water bath. That’s a lot of jam, but I’ll be baking cookies for 200 ticket holders and a whole bunch of volunteers.
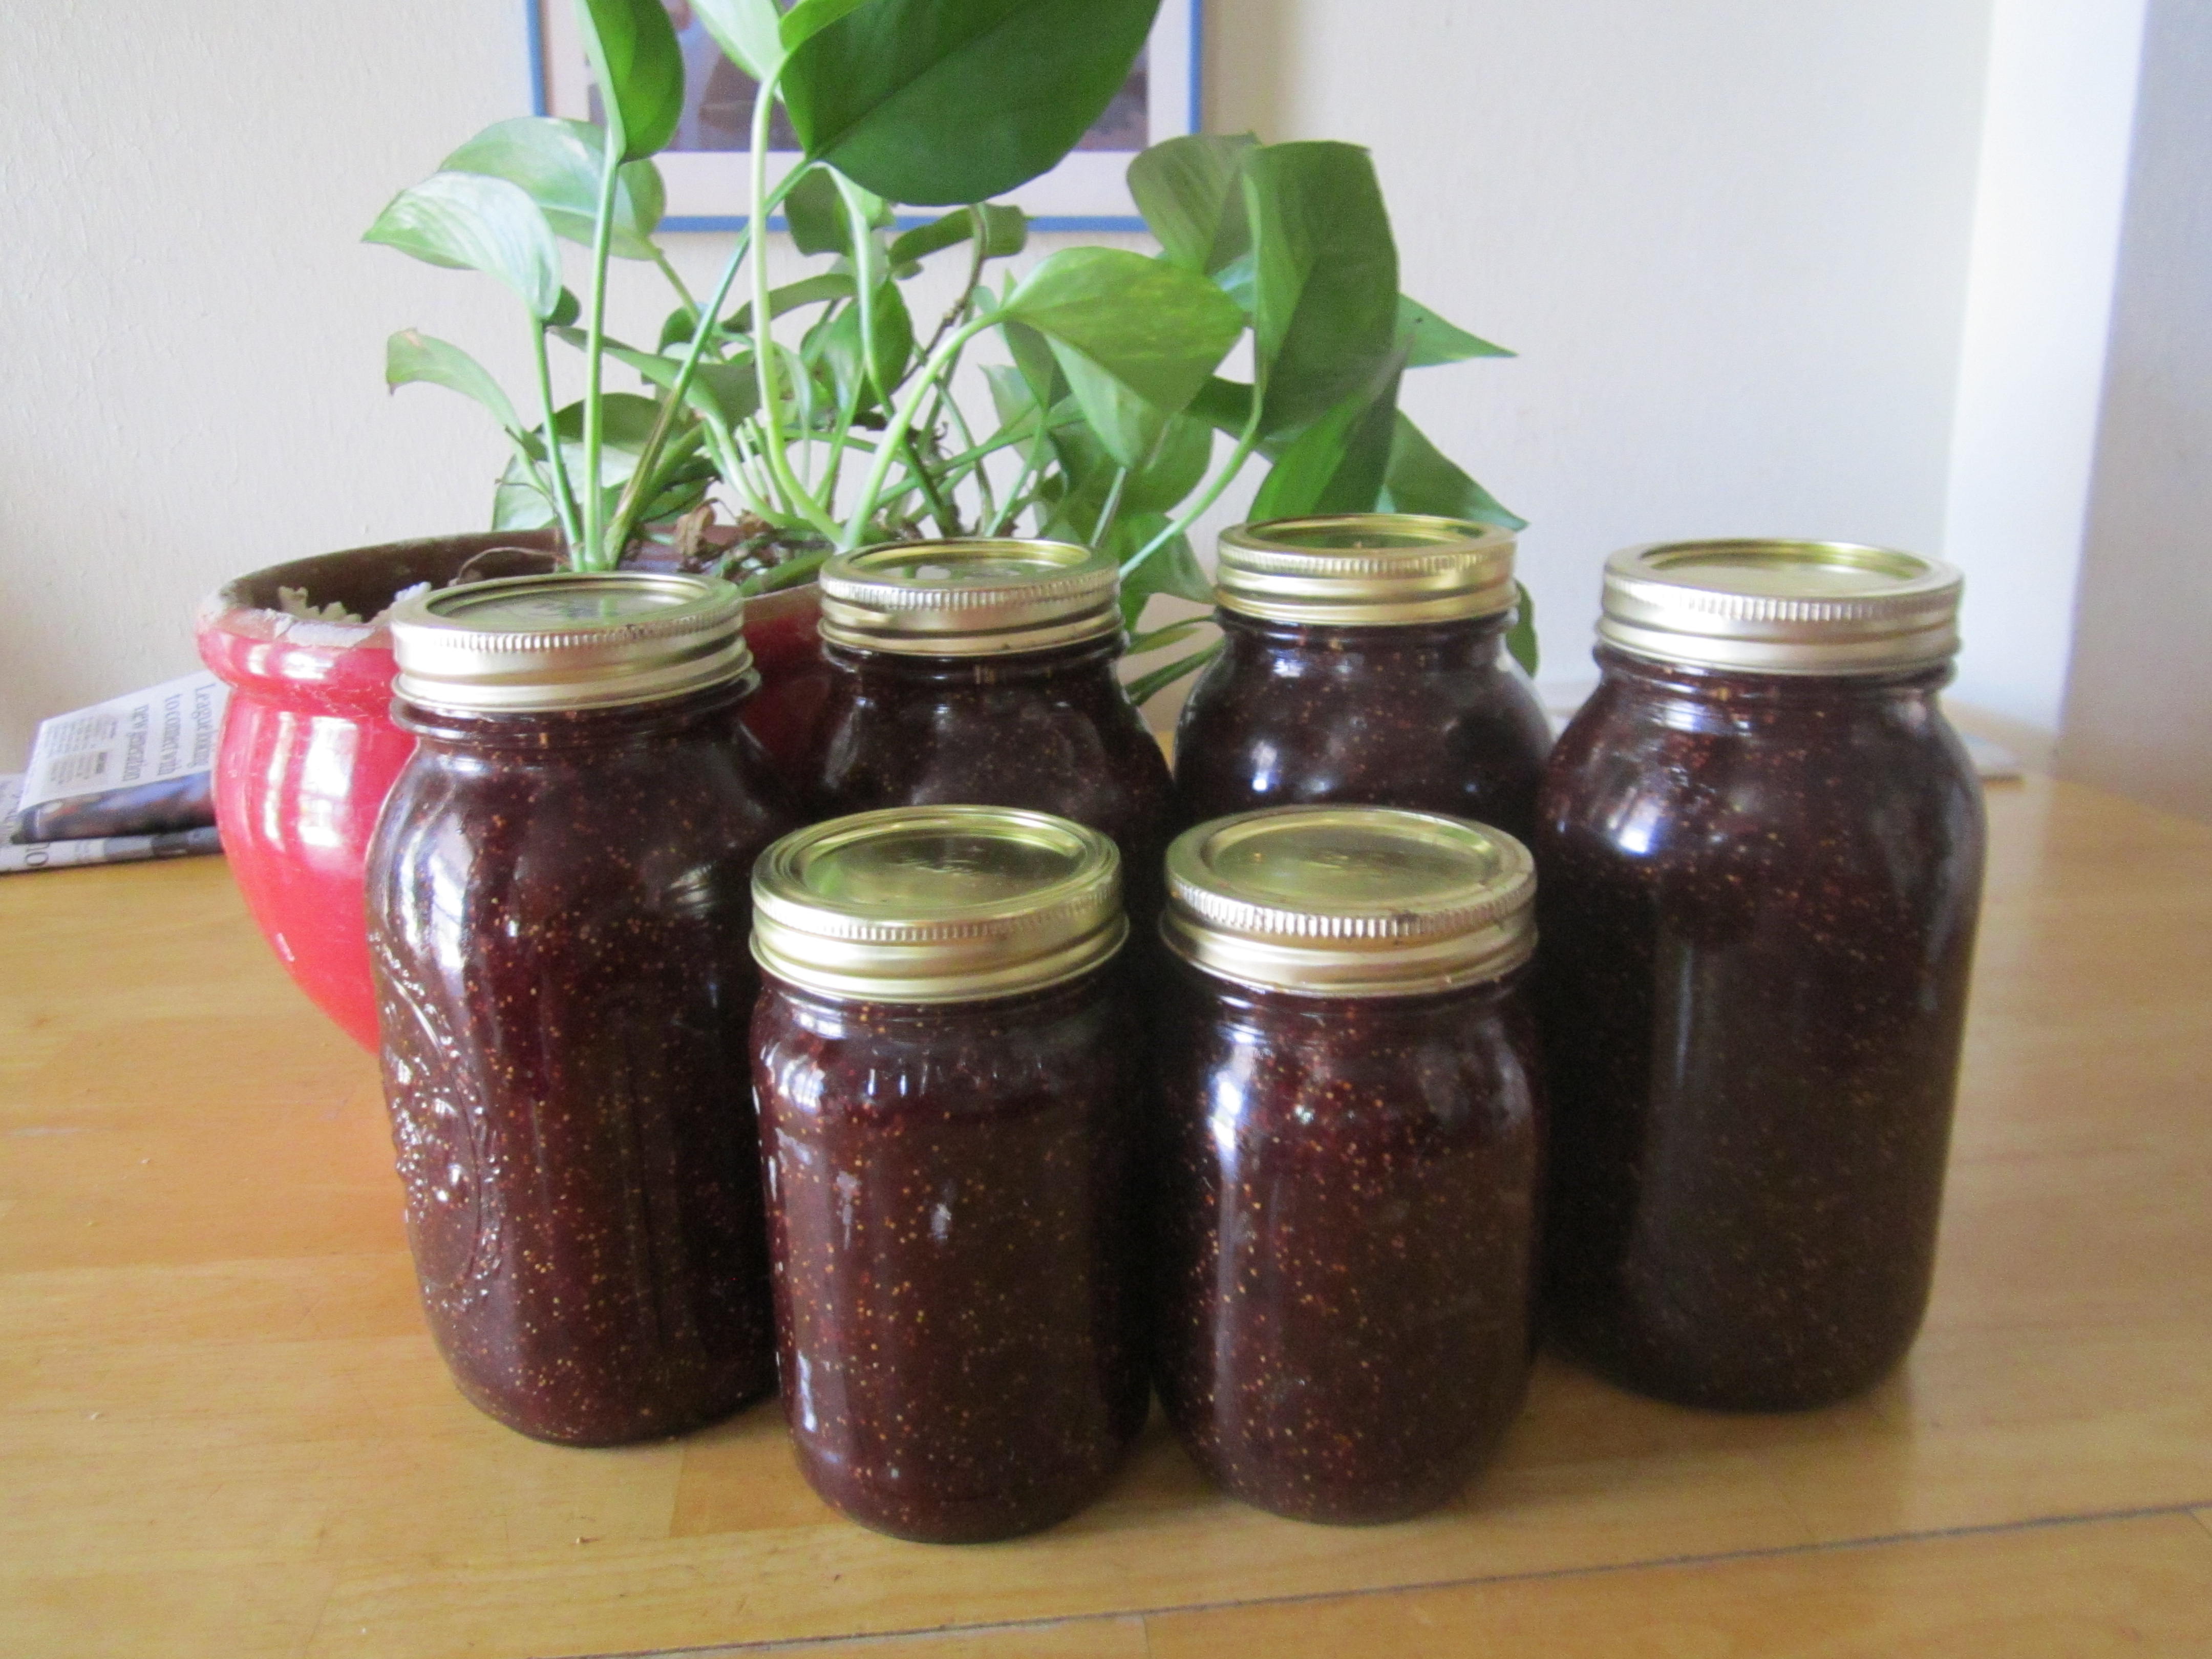
Five quarts of fig jam will wait until October to be made into fig bars for the Farm to Table Dinner.
I can’t show you a picture of the fig bars, because I haven’t made them yet. But I have used this recipe previously and it is great. It is a modification of a recipe in Fruits of the Desert by the late food writer Sandal English. If you have fresh figs and are looking for a way to showcase them, try this:
Layered Fig Bars
1 cup sifted flour
1/2 teaspoon baking soda
1/2 teaspoon salt
1 cup oatmeal, quick or old-fashioned
1 cup firmly packed brown sugar
1/2 cup butter, melted
1-1/2 to 2 cups fig jam
Preheat oven to 350 degrees F. and line an 8-inch square pan with foil or parchment paper, leaving some extending over two sides as flaps.
Sift together the flour, baking soda and salt in a large bowl. Mix in the oatmeal and sugar. Stir in the melted butter and mix until crumbly. Firmly press 2/3 of the mixture in the bottom of the prepared pan. Spread fig jam evenly over the base layer. Top with remaining crumb mixture. Gently pat the top layer down. Bake in preheated overn for about 30 minutes. Cool, lift from the pan using the paper flaps, and cut into 24 bars.
Note: If you are making this for your family and don’t care that the bars come out perfectly shaped, you can skip the step of lining the pan.
_________________________________________
Looking for ideas for how to use desert fruits and vegetables? The Prickly Pear Cookbook has delicious recipes for both the fruit and pads and complete instructions for gathering and processing. Cooking the Wild Southwest gives directions for harvesting and cooking 23 easily gathered desert plants. Find both at the Native Seeds/SEARCH retail store on Campbell or at on-line sellers.
“Begin with the end in sight”–As we put seeds in the ground, we anticipate a delicious future harvest
I’m salivating already…contemplating the harvest. Nothing can motivate us more to get out in the heat and put seeds in the ground than the idea of eating that luscious melon or stringbeans bursting with flavor, straight from the garden! Ah, anticipation! Thinking about what taste treats and nutritional benefits we might harvest a few months later can inspire us now to prep soil, browse seed racks, and get busy planting with the monsoon!
Connecting with the soil, prepping for planting a seed, can be a communion and a meditation, good for the soul and beyond….
Tia Marta here to share garden-to-table thoughts and ideas. Necessary ingredients and skills to bring: some stooped labor, lots of time, rain, patience, and perhaps songs will be needed for assisting plants into their food-giving maturity. I like to think of “companion planting” as the partnership we commit ourselves to when we garden– just me and the plant, a dynamic duo. We so need each other. In this era of instant gratification (like fast money in exchange for something to stuff in the belly), we lose sight of the plant “companions” who are really growing our food. What “companions” can we trust as well as ourselves?
Gardening provides new interactive games, new pets, beings to care for, a lively antidote to self-centered life.
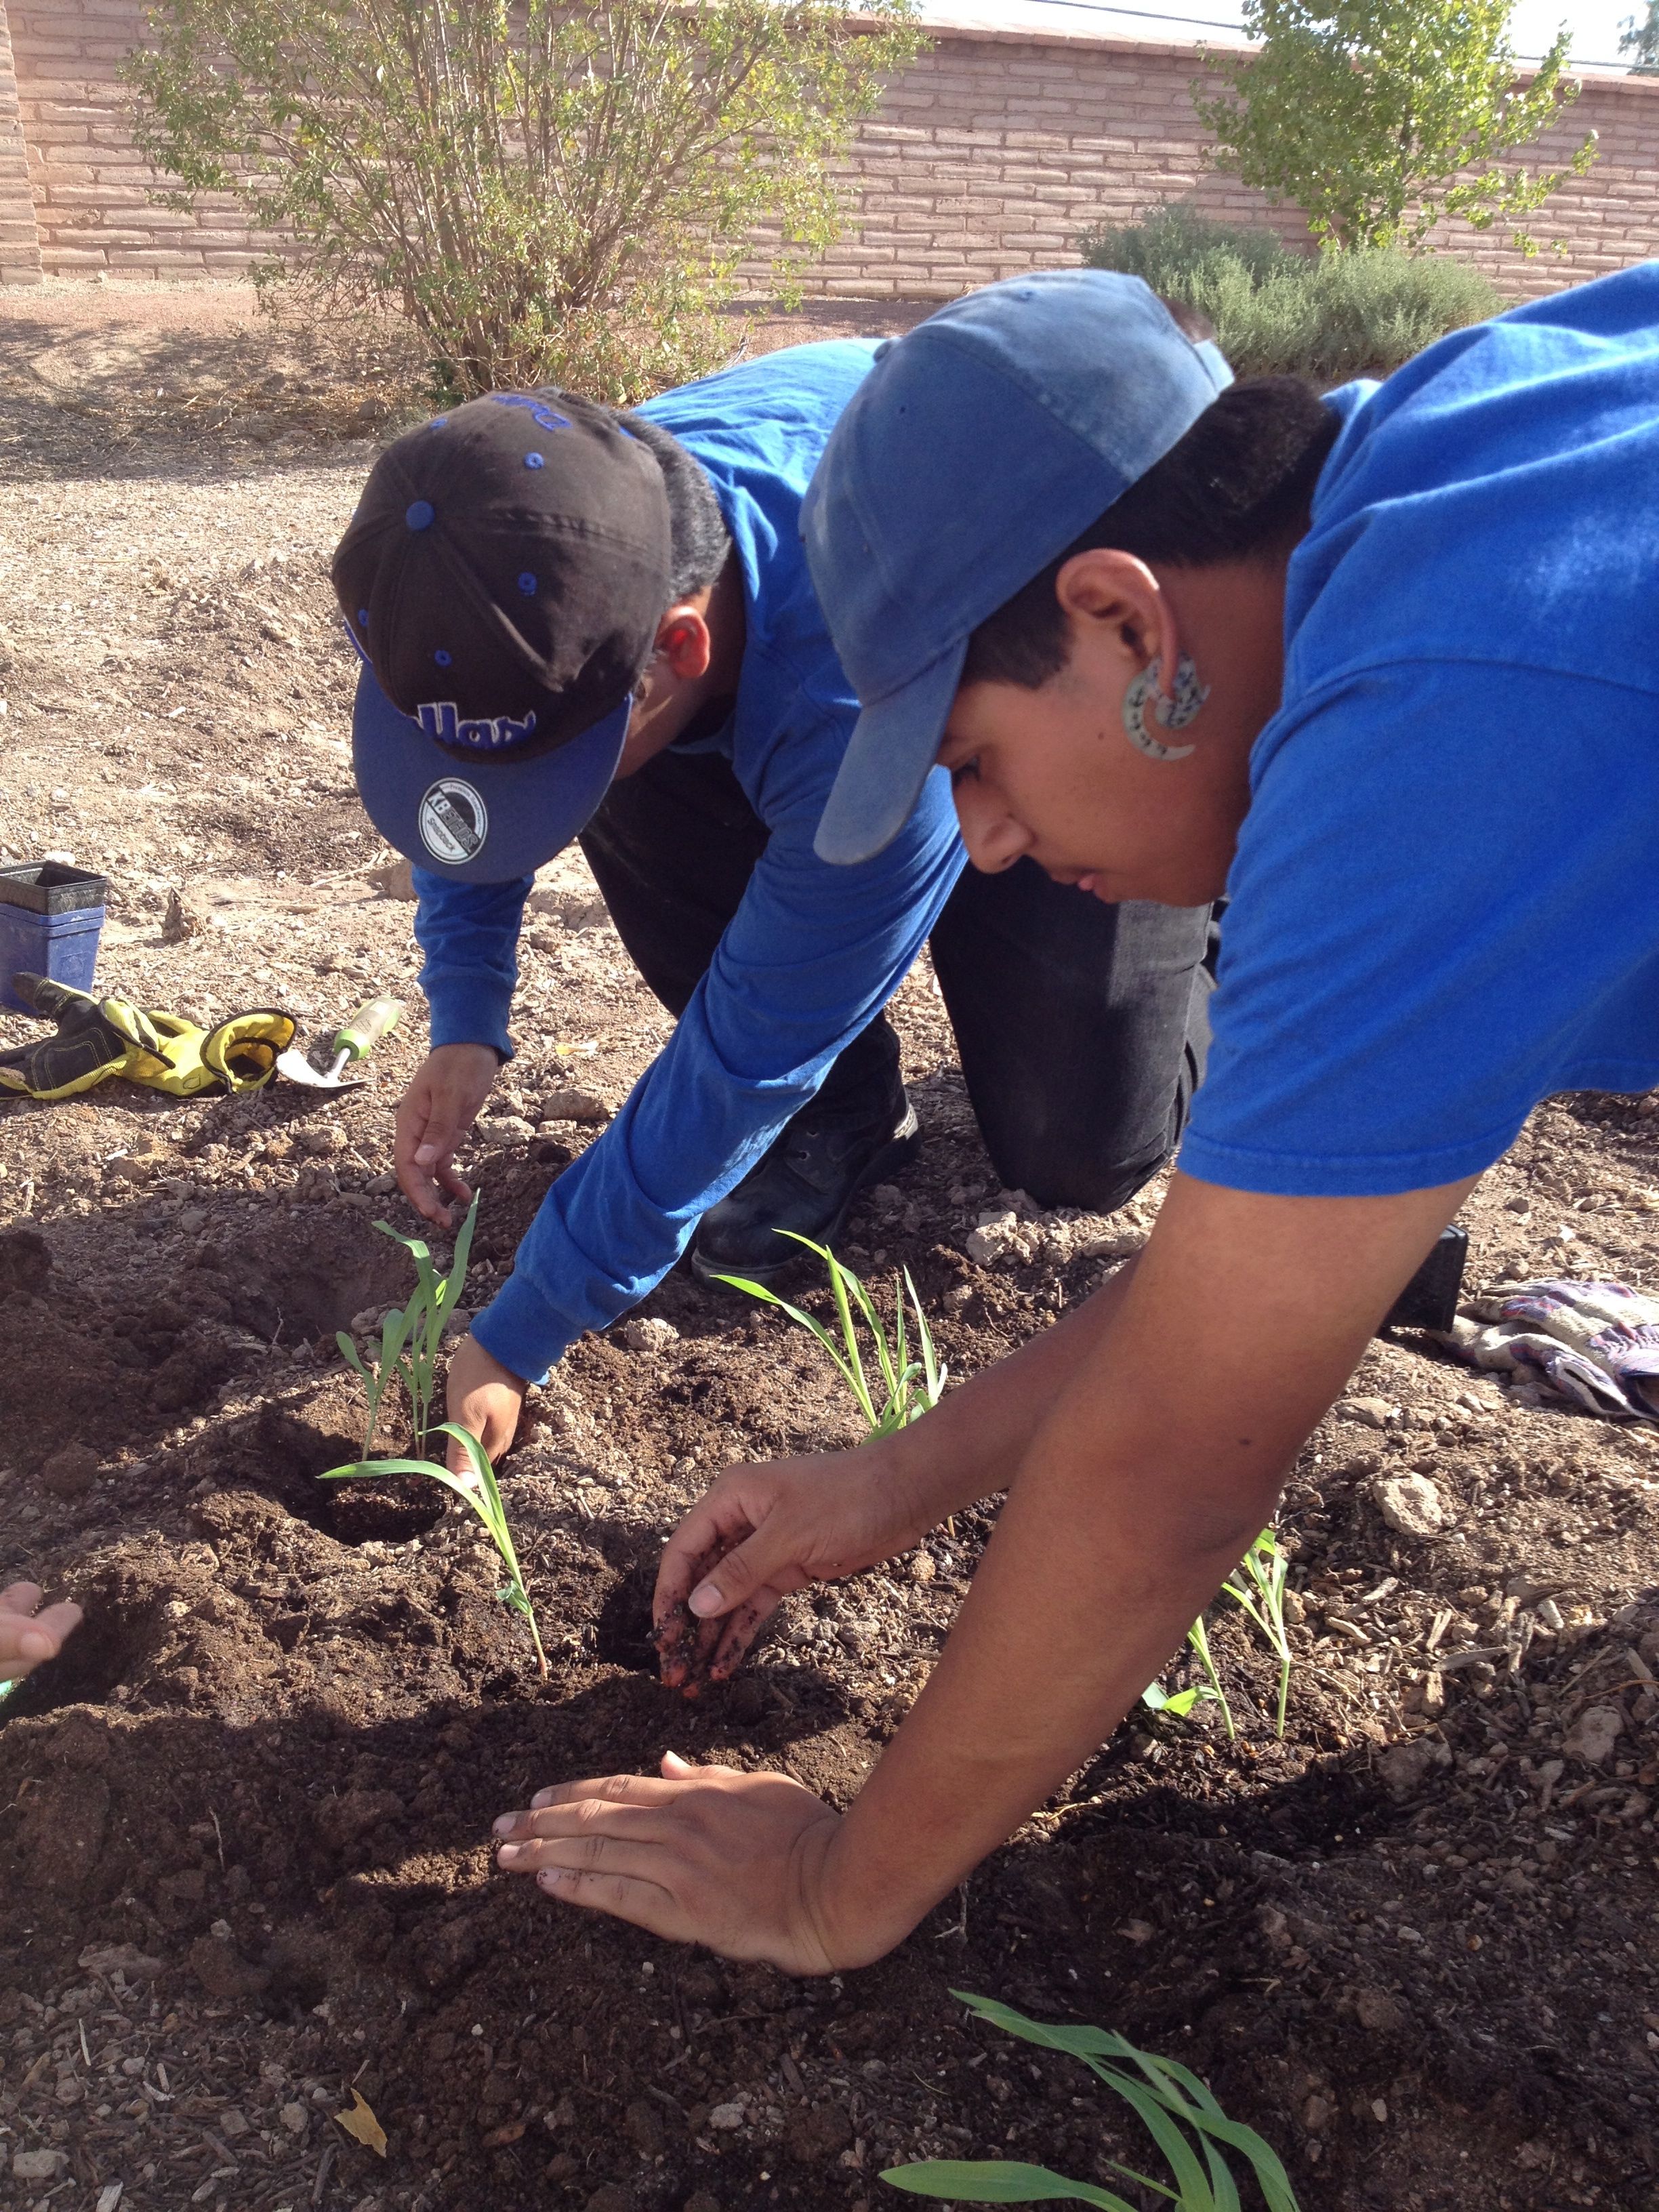
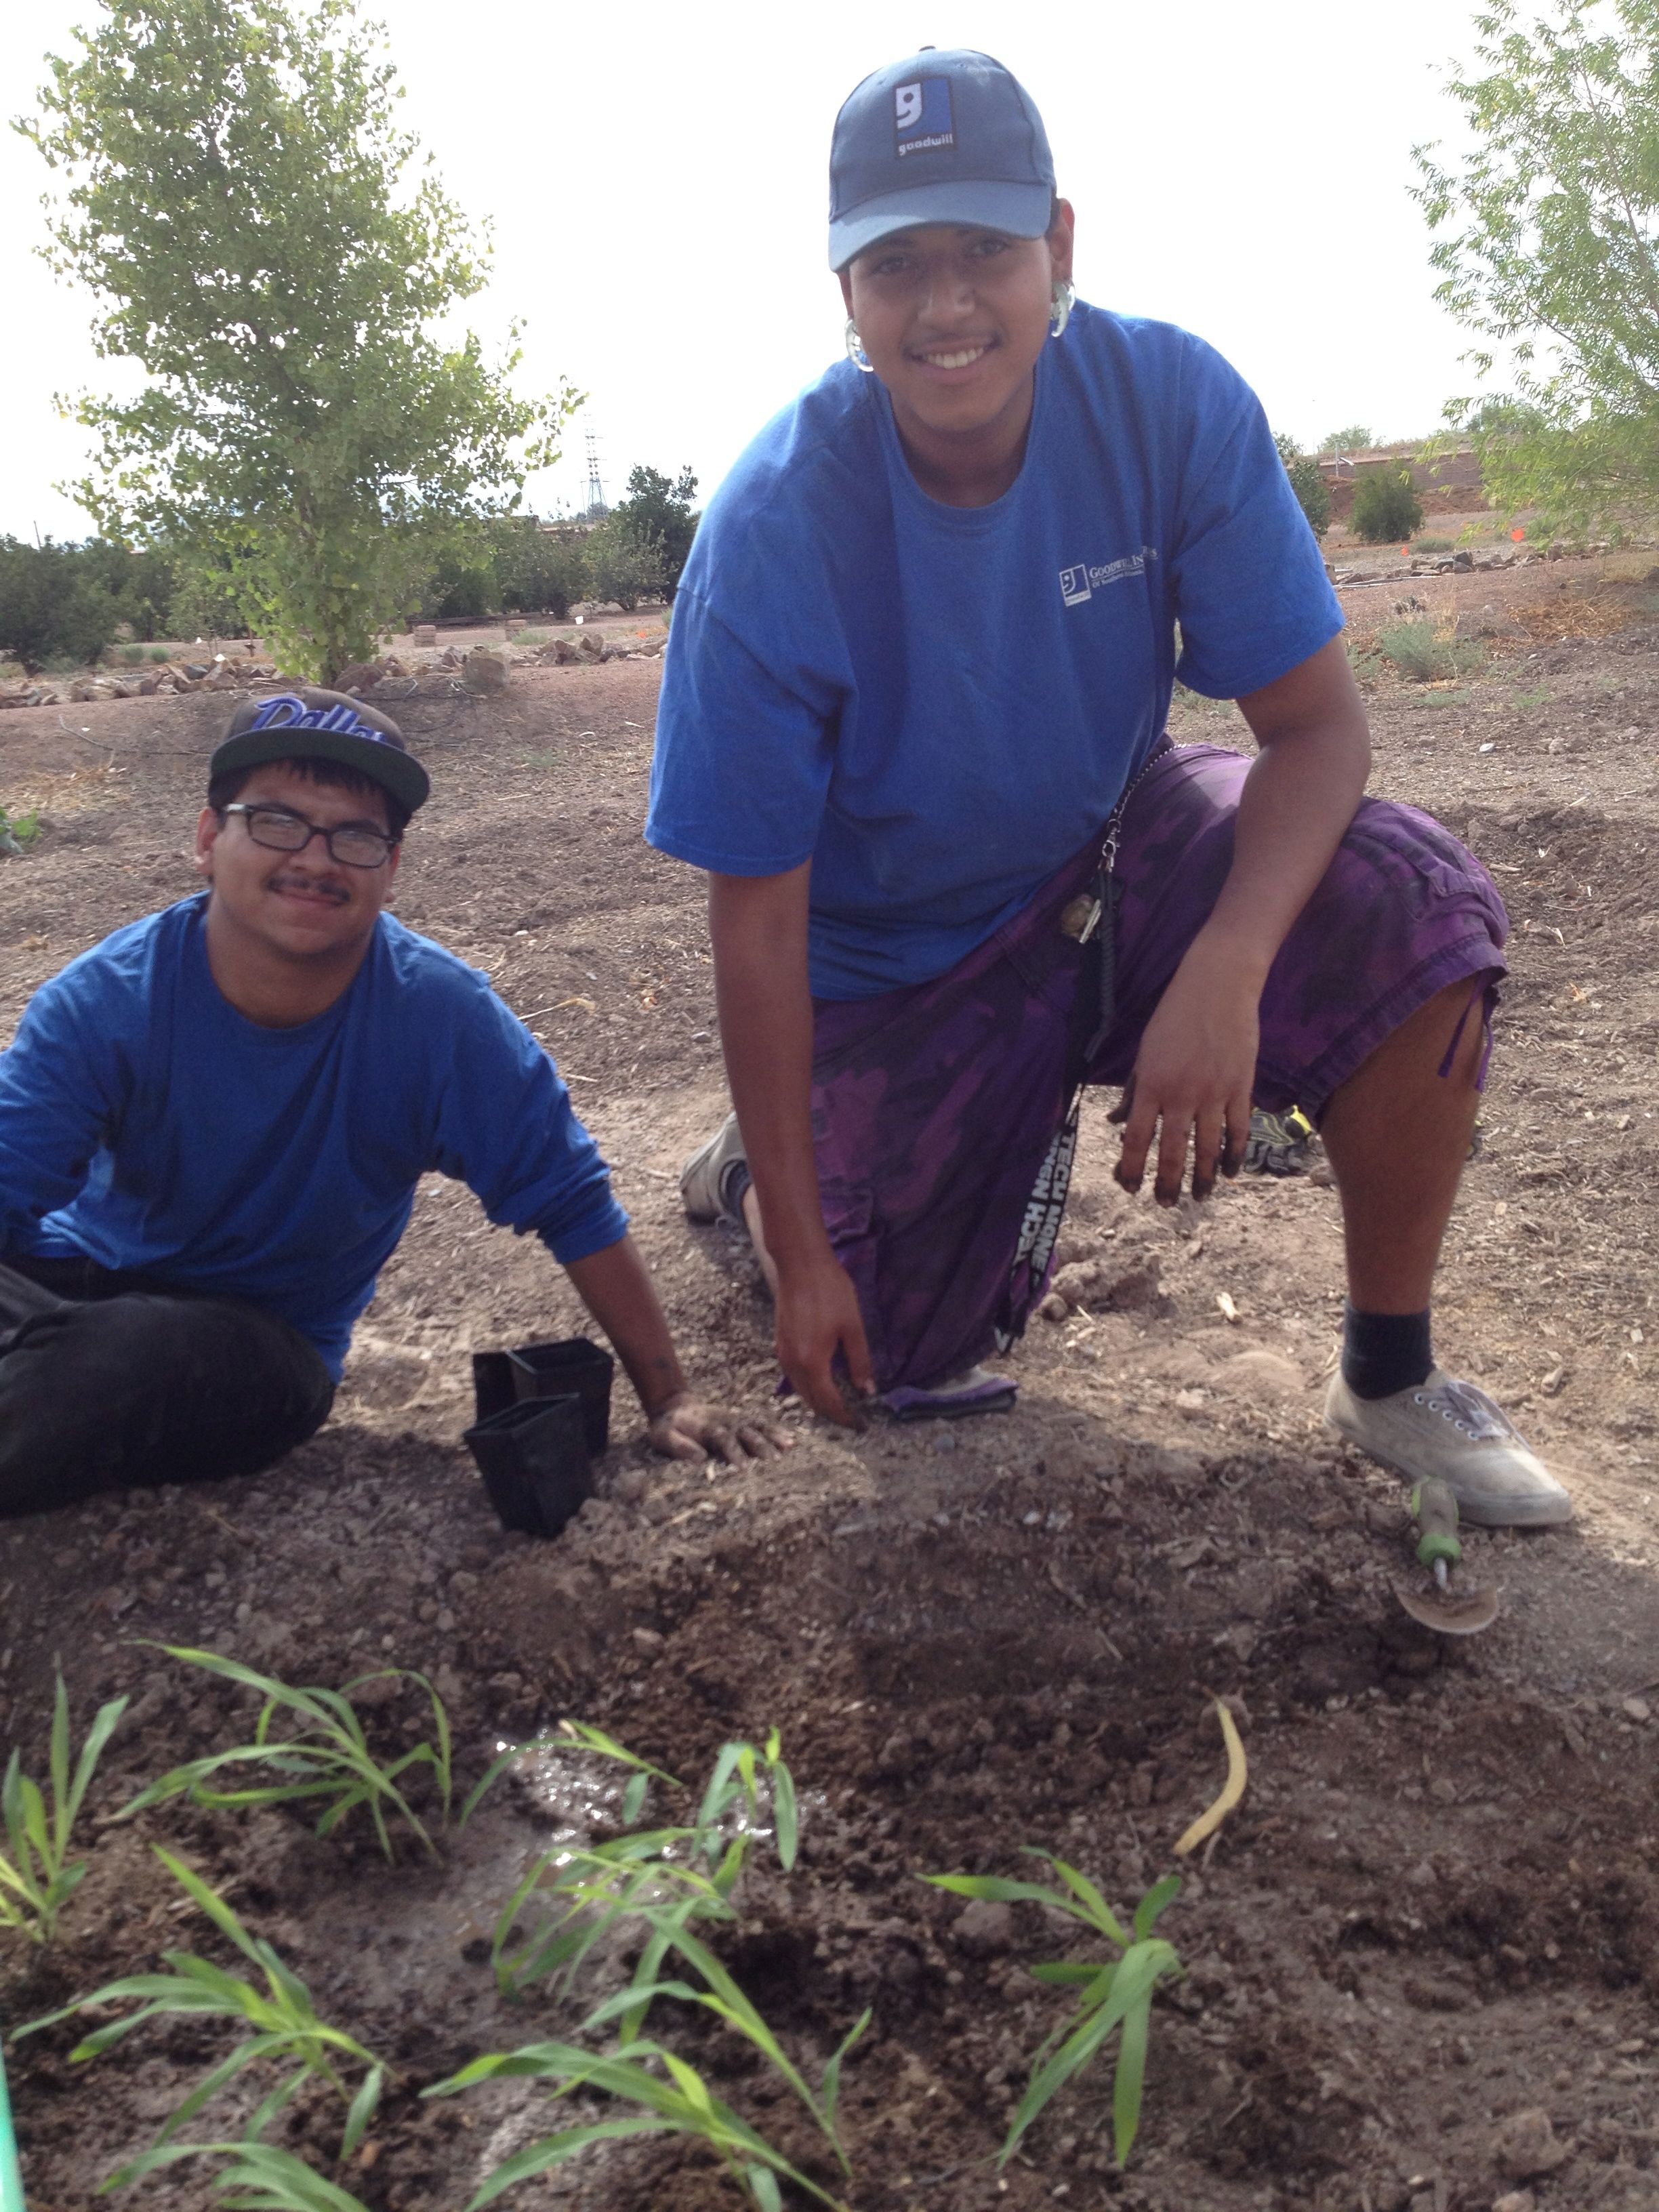
Goodworks Volunteers Barney and Oscar planting chapalote corn seedlings at Mission Garden
When your hands are covered with good clean dirt, you can anticipate a fruitful future!
We at NativeSeeds/SEARCH and Friends of Tucson’s Birthplace’s Mission Garden are planting –and planning– right now for a harvest feast in October: the right Native American teparies, the most delicious heirloom squash, the best free-range local beef, the sweetest Southwestern heirloom GMO-free corn, the most pungent local chiles, the most flavorful melons, combined with the rich white Sonora wheat harvested from the winter garden. Put the NSS/Mission Garden local foods feast on your calendar for October 18, and plan to join fellow locavores and food aficionados for a special down-home Farm-to-Table Picnic— very little distance between the farm where the food was grown and the table where we will break bread together and sip local sangria.

First burst of Hopi Red Dye Amaranth–a glorious ornamental and tasty “green” when eaten in the young stages (MABurgess photo)
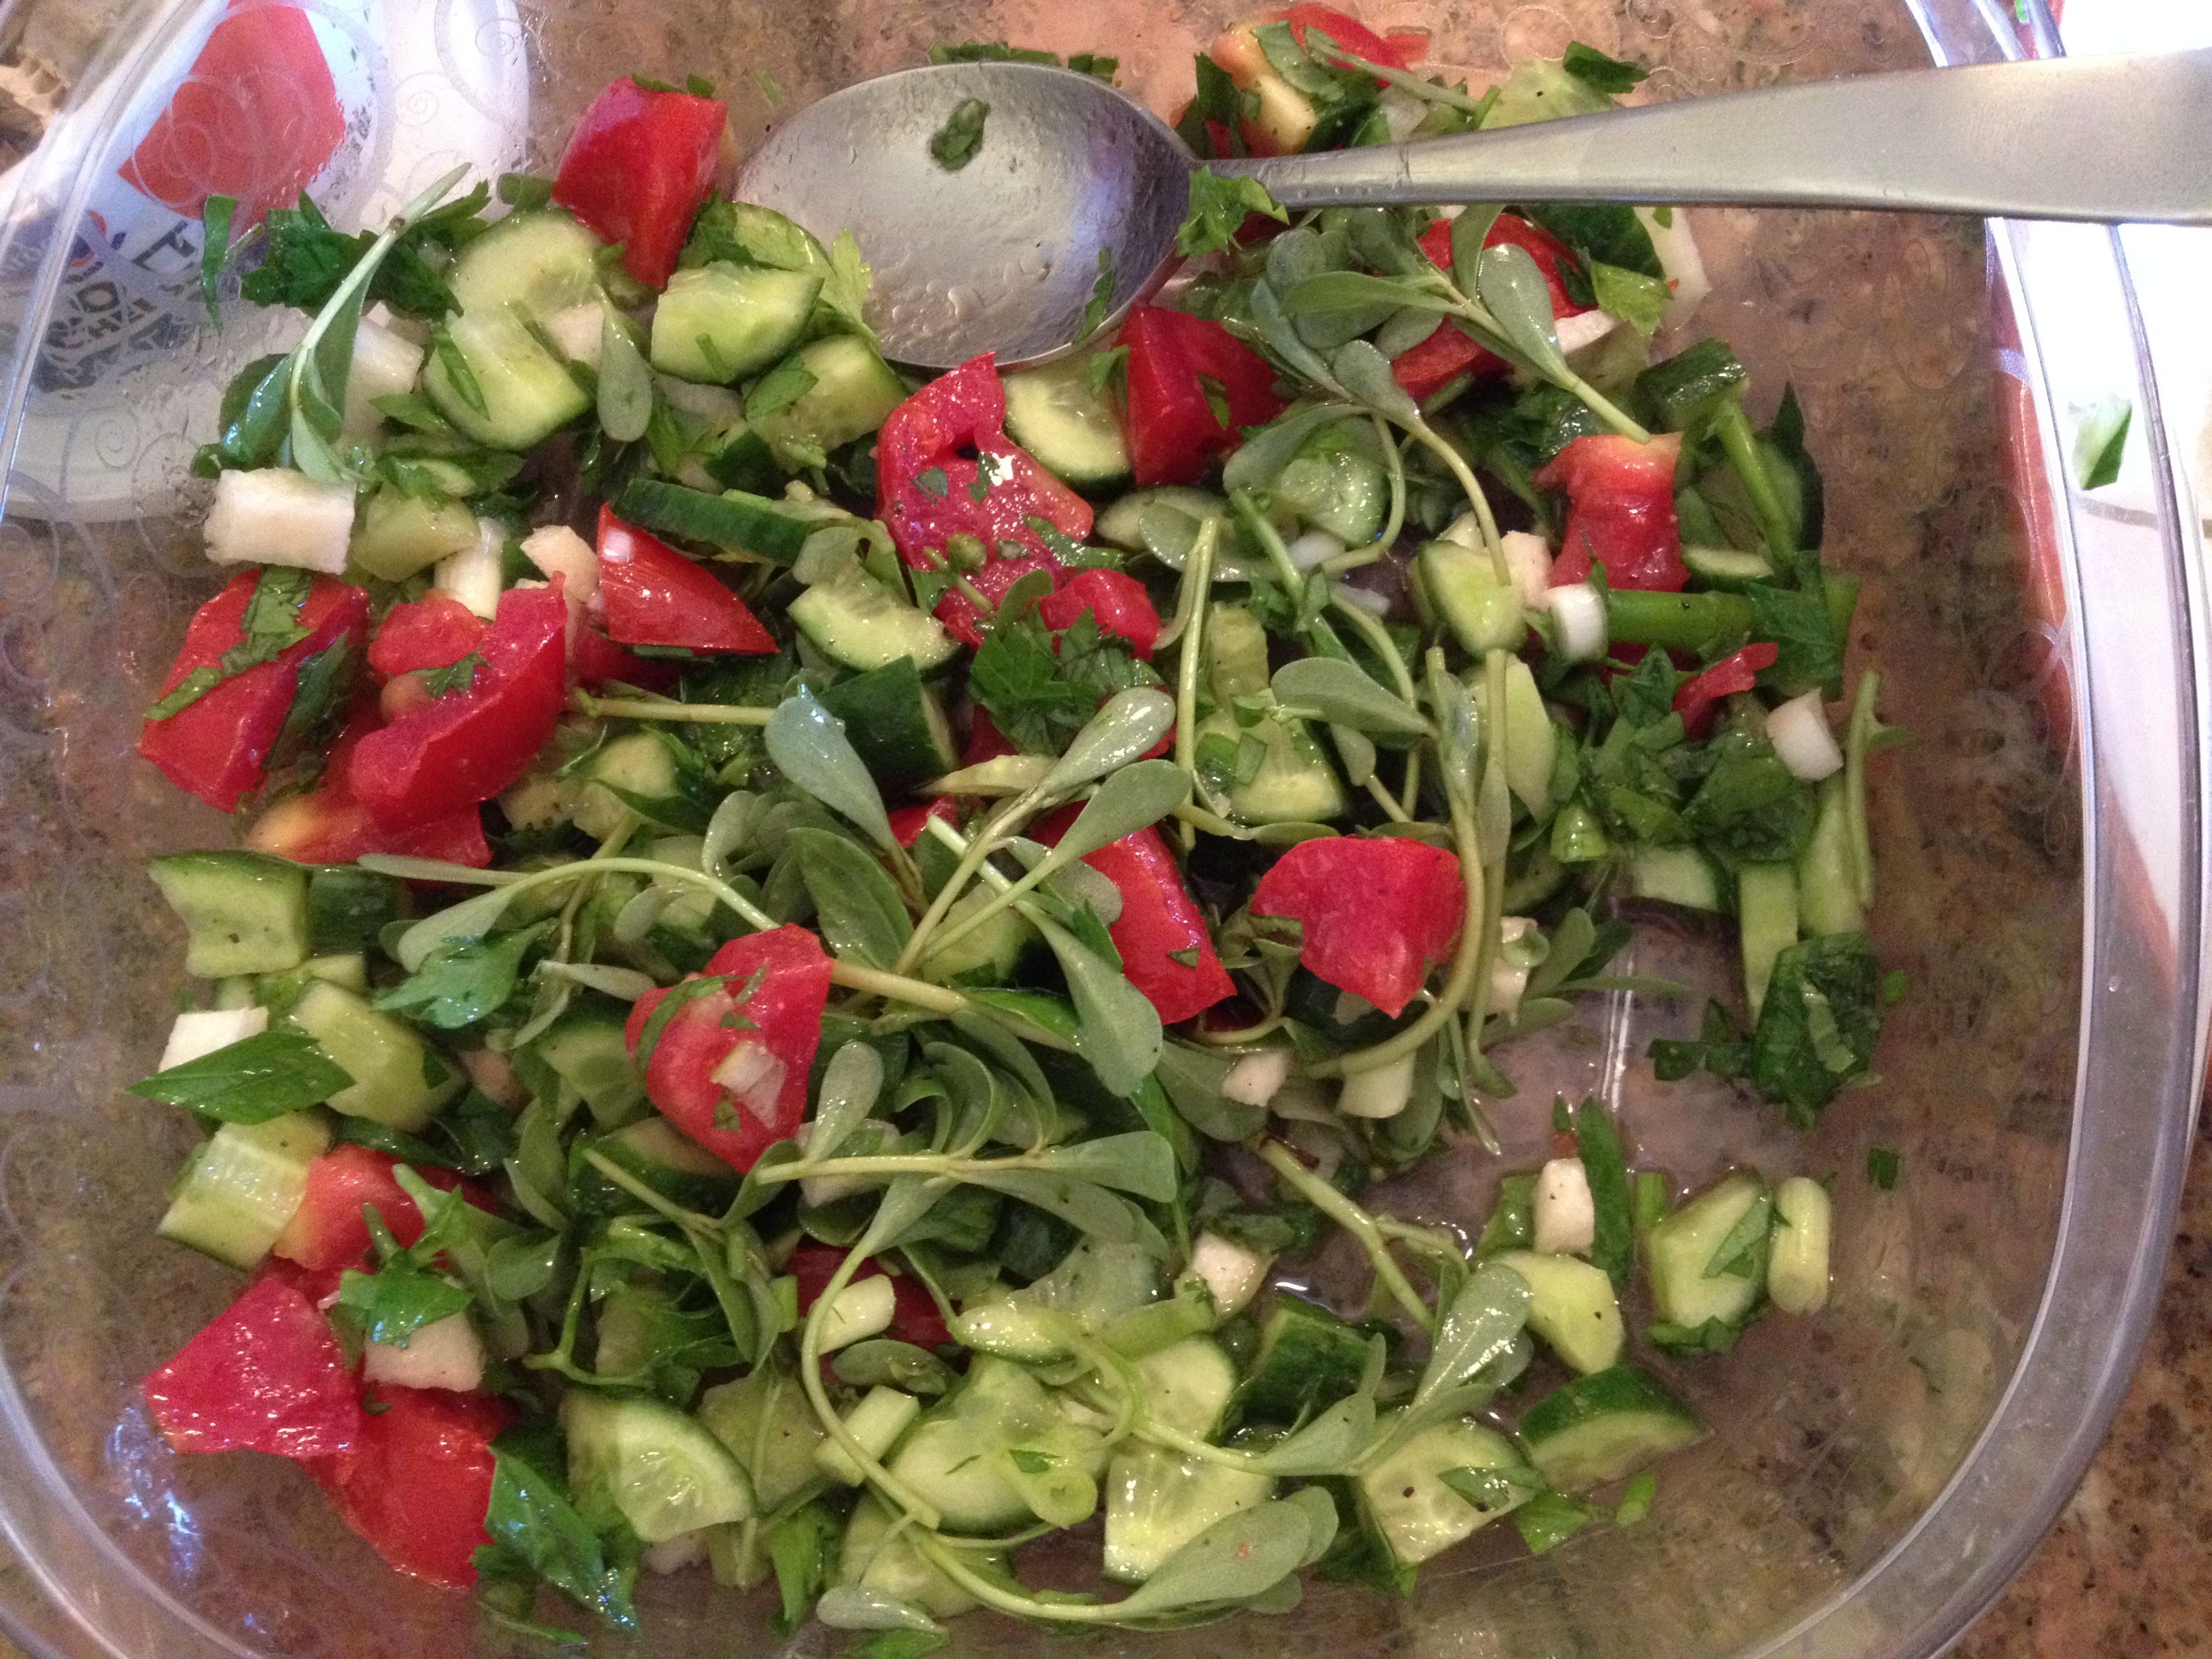
Marjorie Grubb’s summer-fresh Verdulaga saladEven before growing your monsoon garden, weeds will greet you–and they aren’t all bad. Even as your seedlings grow you can harvest some delectable weeds like verdulagas (summer purslane) or young amaranth greens.
If you are looking for ideas for planting, there are wonderful helpers at the NativeSeeds/SEARCH store at 3061 N Campbell Ave, Tucson, ready to share their monsoon gardening experiences and tested tricks. Every Thursday 2-4pm expert gardener Chad Borseth will be there to give a timely demo and to answer questions. Bring your queries to him–doubtless your questions and the answers will be of help to other fellow gardeners as well. ALSO for those new to the gardening game, and for veteran gardeners who want a head-start, try planting starts for a leg-up. They can be so much more dependable than planting seeds. You can find a diversity of summer plant starts at the NativeSeeds/SEARCH MONSOON PLANT SALE coming up soon–next Friday thru Sunday, July 17-19, at the Campbell Avenue store. There will be many varieties of chile pepper including our native chiltepin, tomatoes, okra, heirloom squashes and pumpkins, melons, corn, beans, even summer wildflowers…. Come early, as they get snapped up fast.
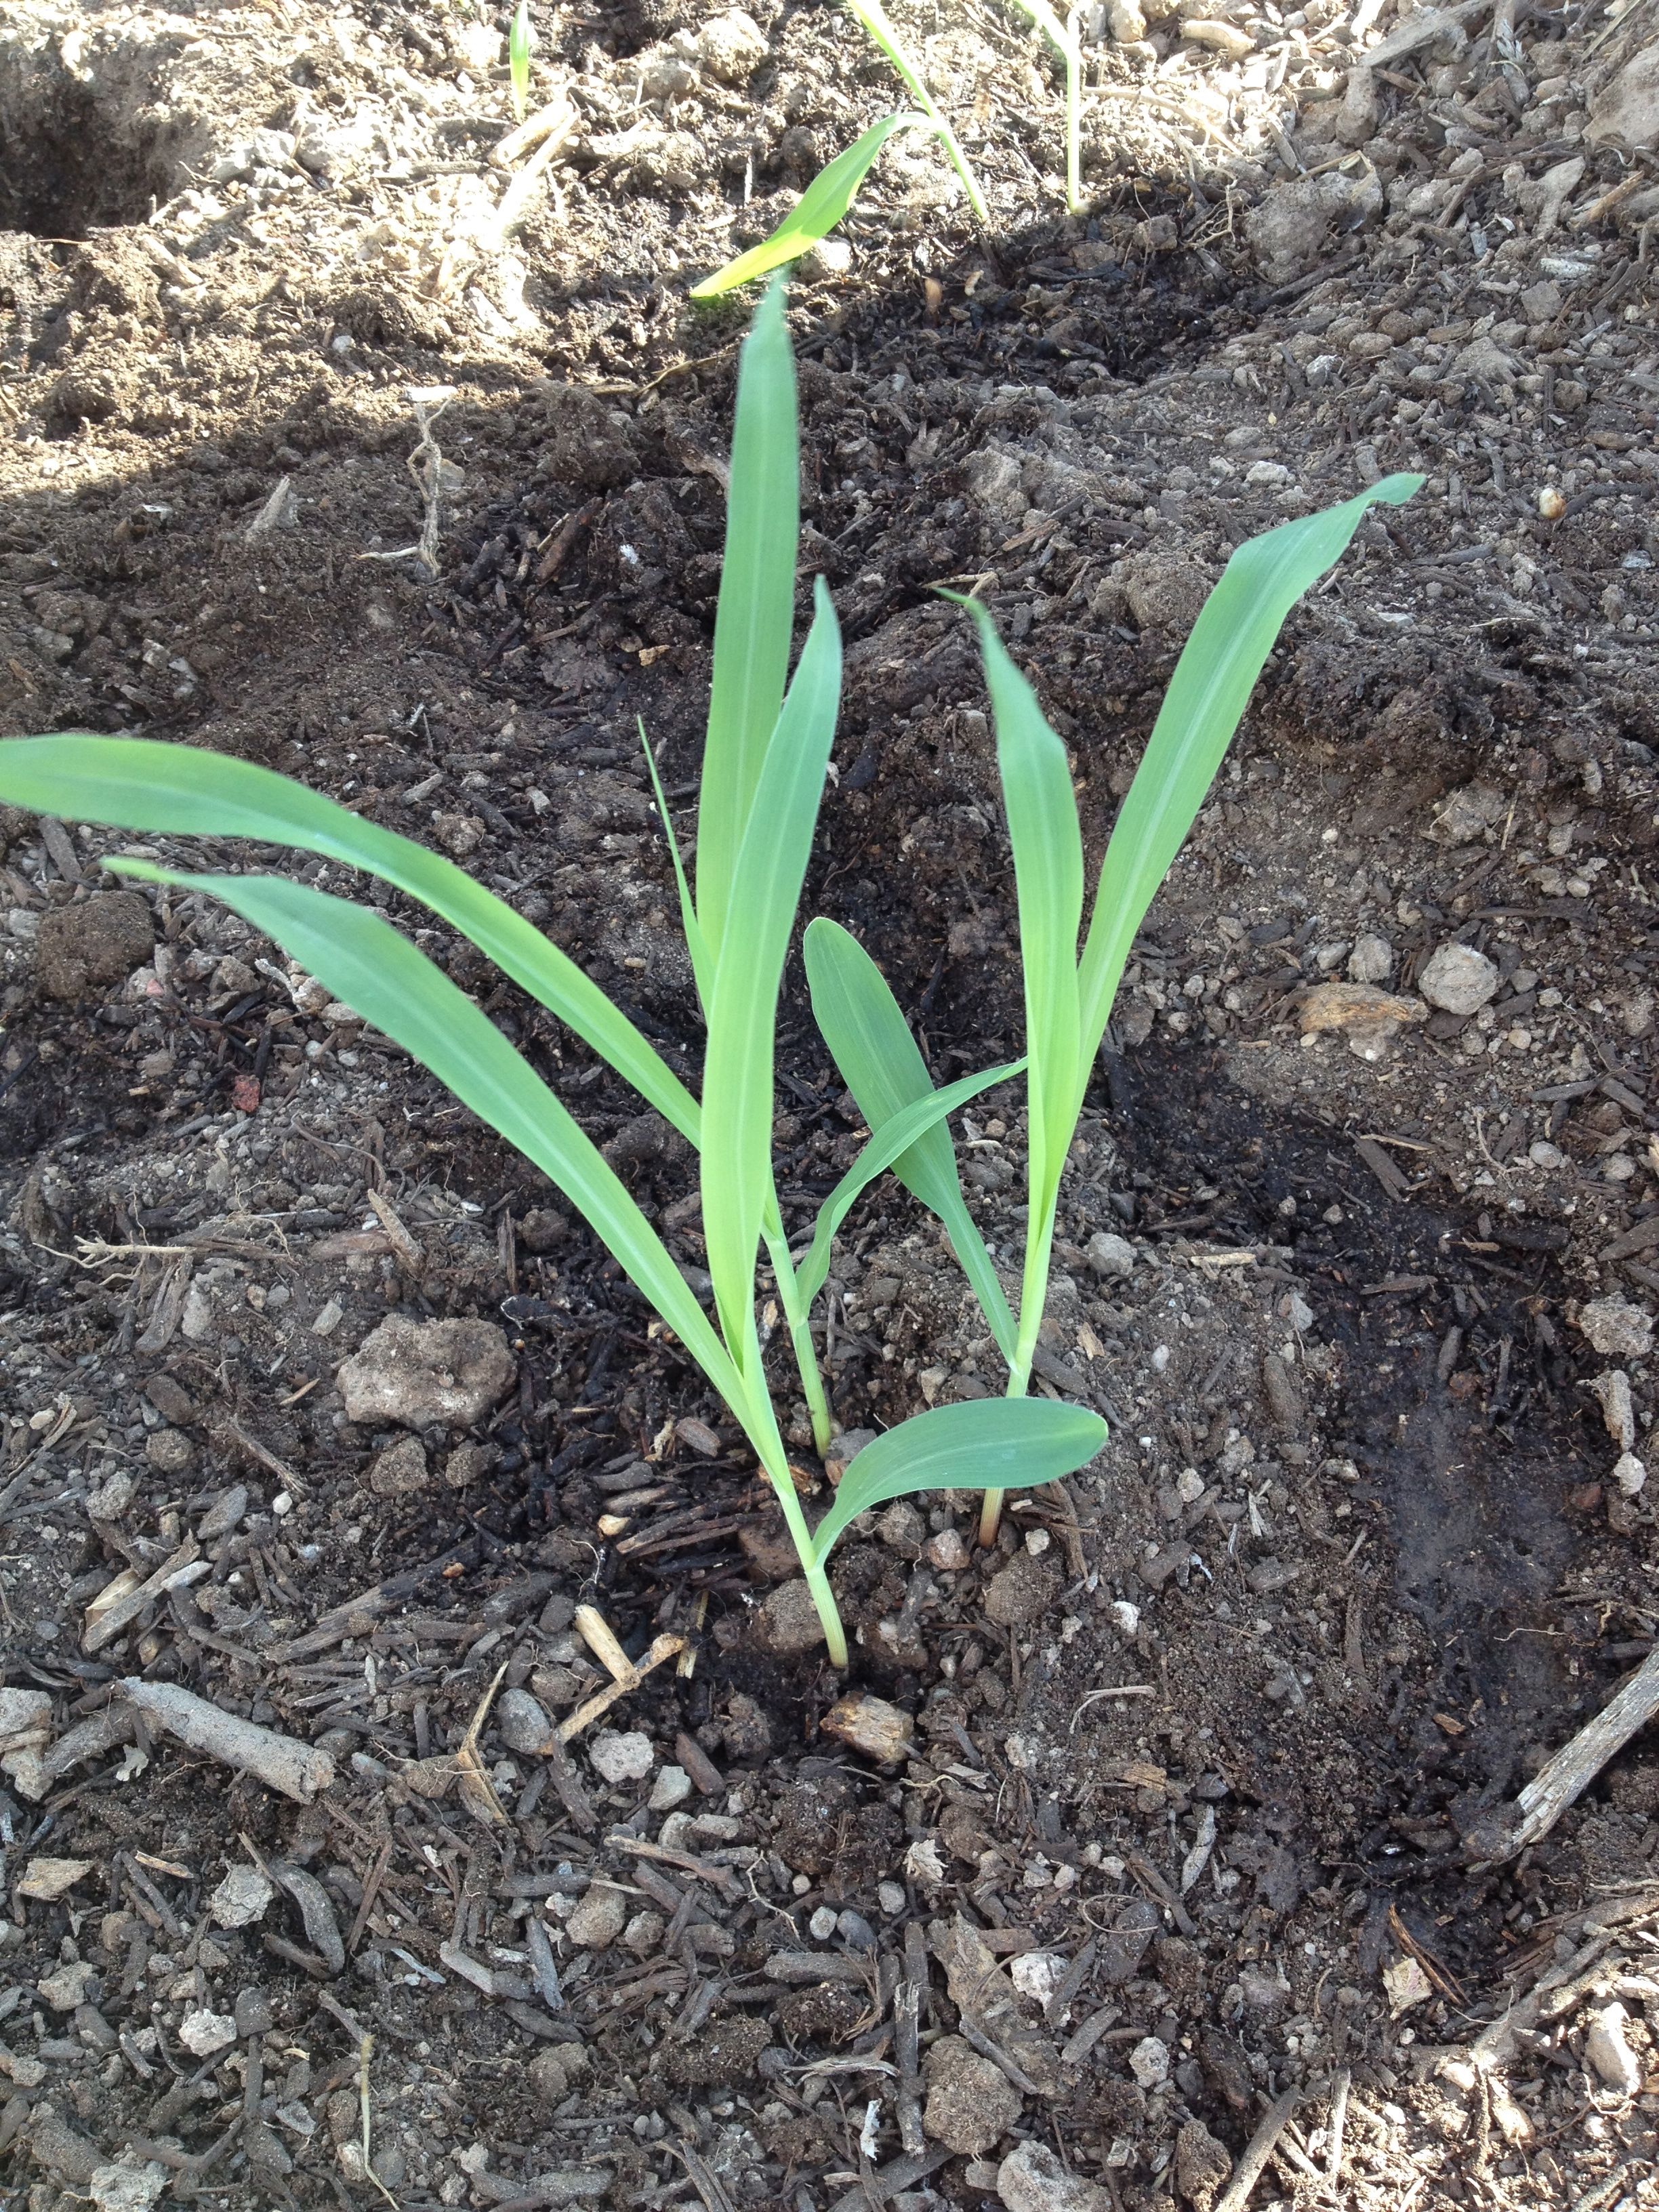
Seedlings of the ancient Chapalote corn (seed available from NativeSeeds/SEARCH)
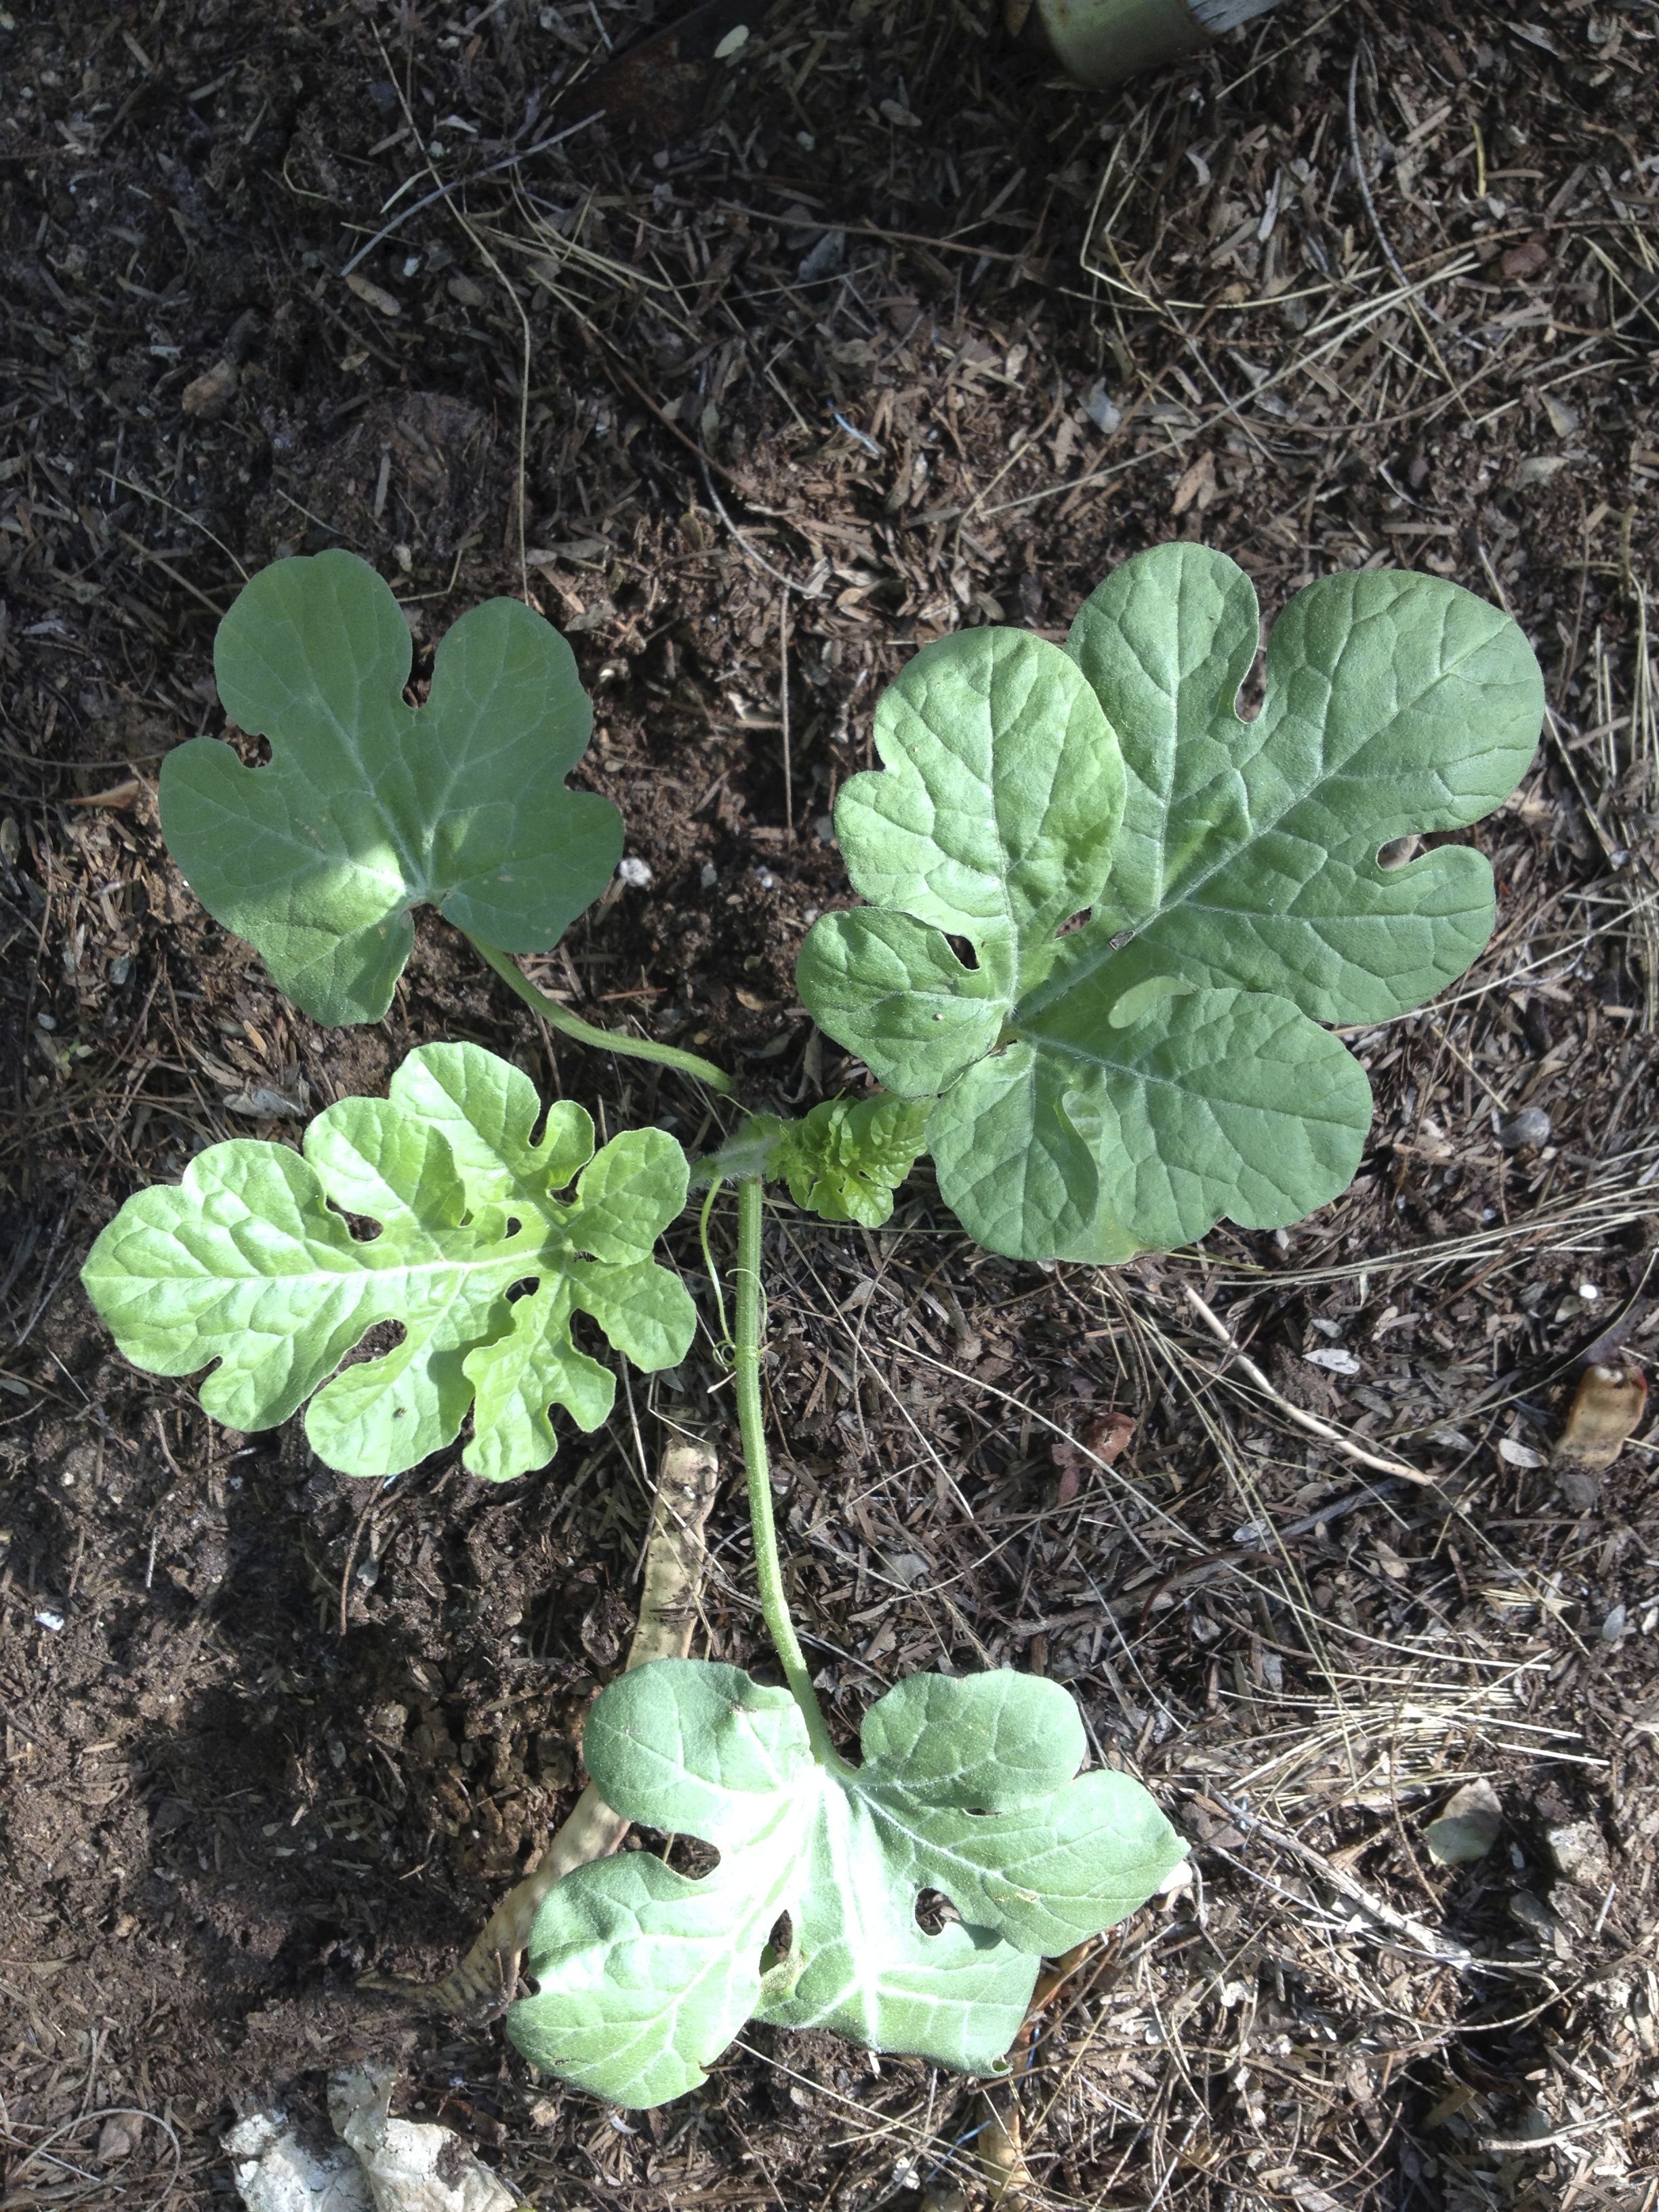
Young Tohono O’odham yellow-meated watermelon–come get seedlings at the NativeSeeds/SEARCH Monsoon Plant Sale July17-19
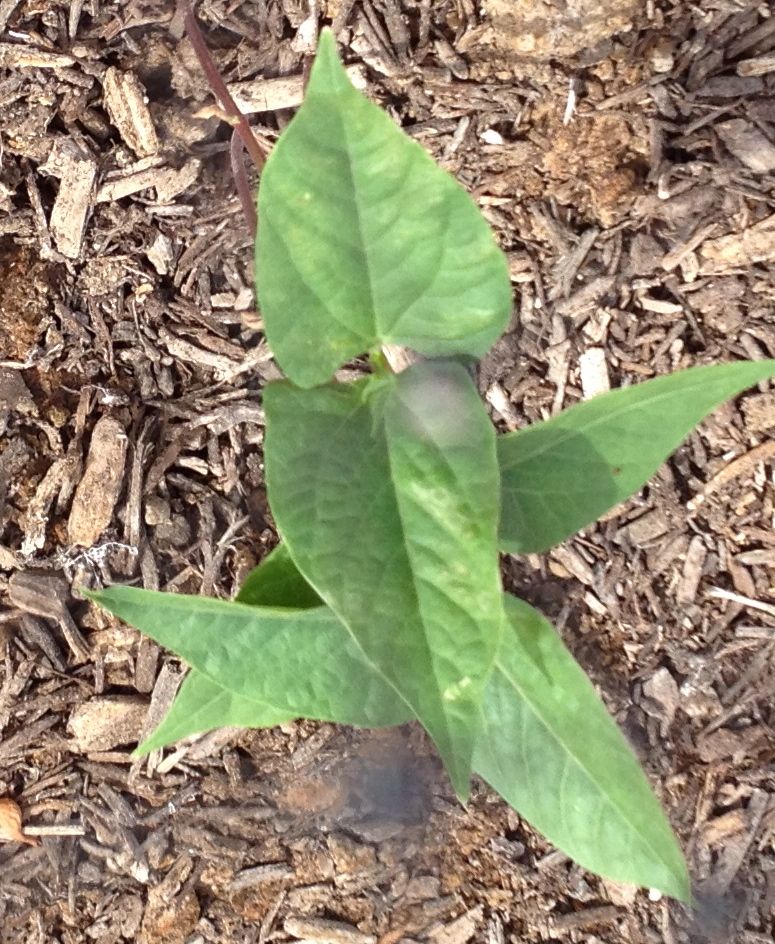
Speckled Tepary Bean seedling seen thru chicken wire protection at Mission Garden
Vulnerable and a little fragile at first, these Southwest heirlooms actually hold in their genes the ability to produce quantities of good food, abiding the unpredictable ups and downs of rainfall and temperature in the desert monsoon season. With tending, they can be little powerhouses. Their genes, selected by desert farmers over many centuries, are truly to be respected and preserved–and the way to save them ultimately is not necessarily in a seed bank nor by engineering. To save them we must GROW them! Then enjoy positive reinforcement at the harvest.
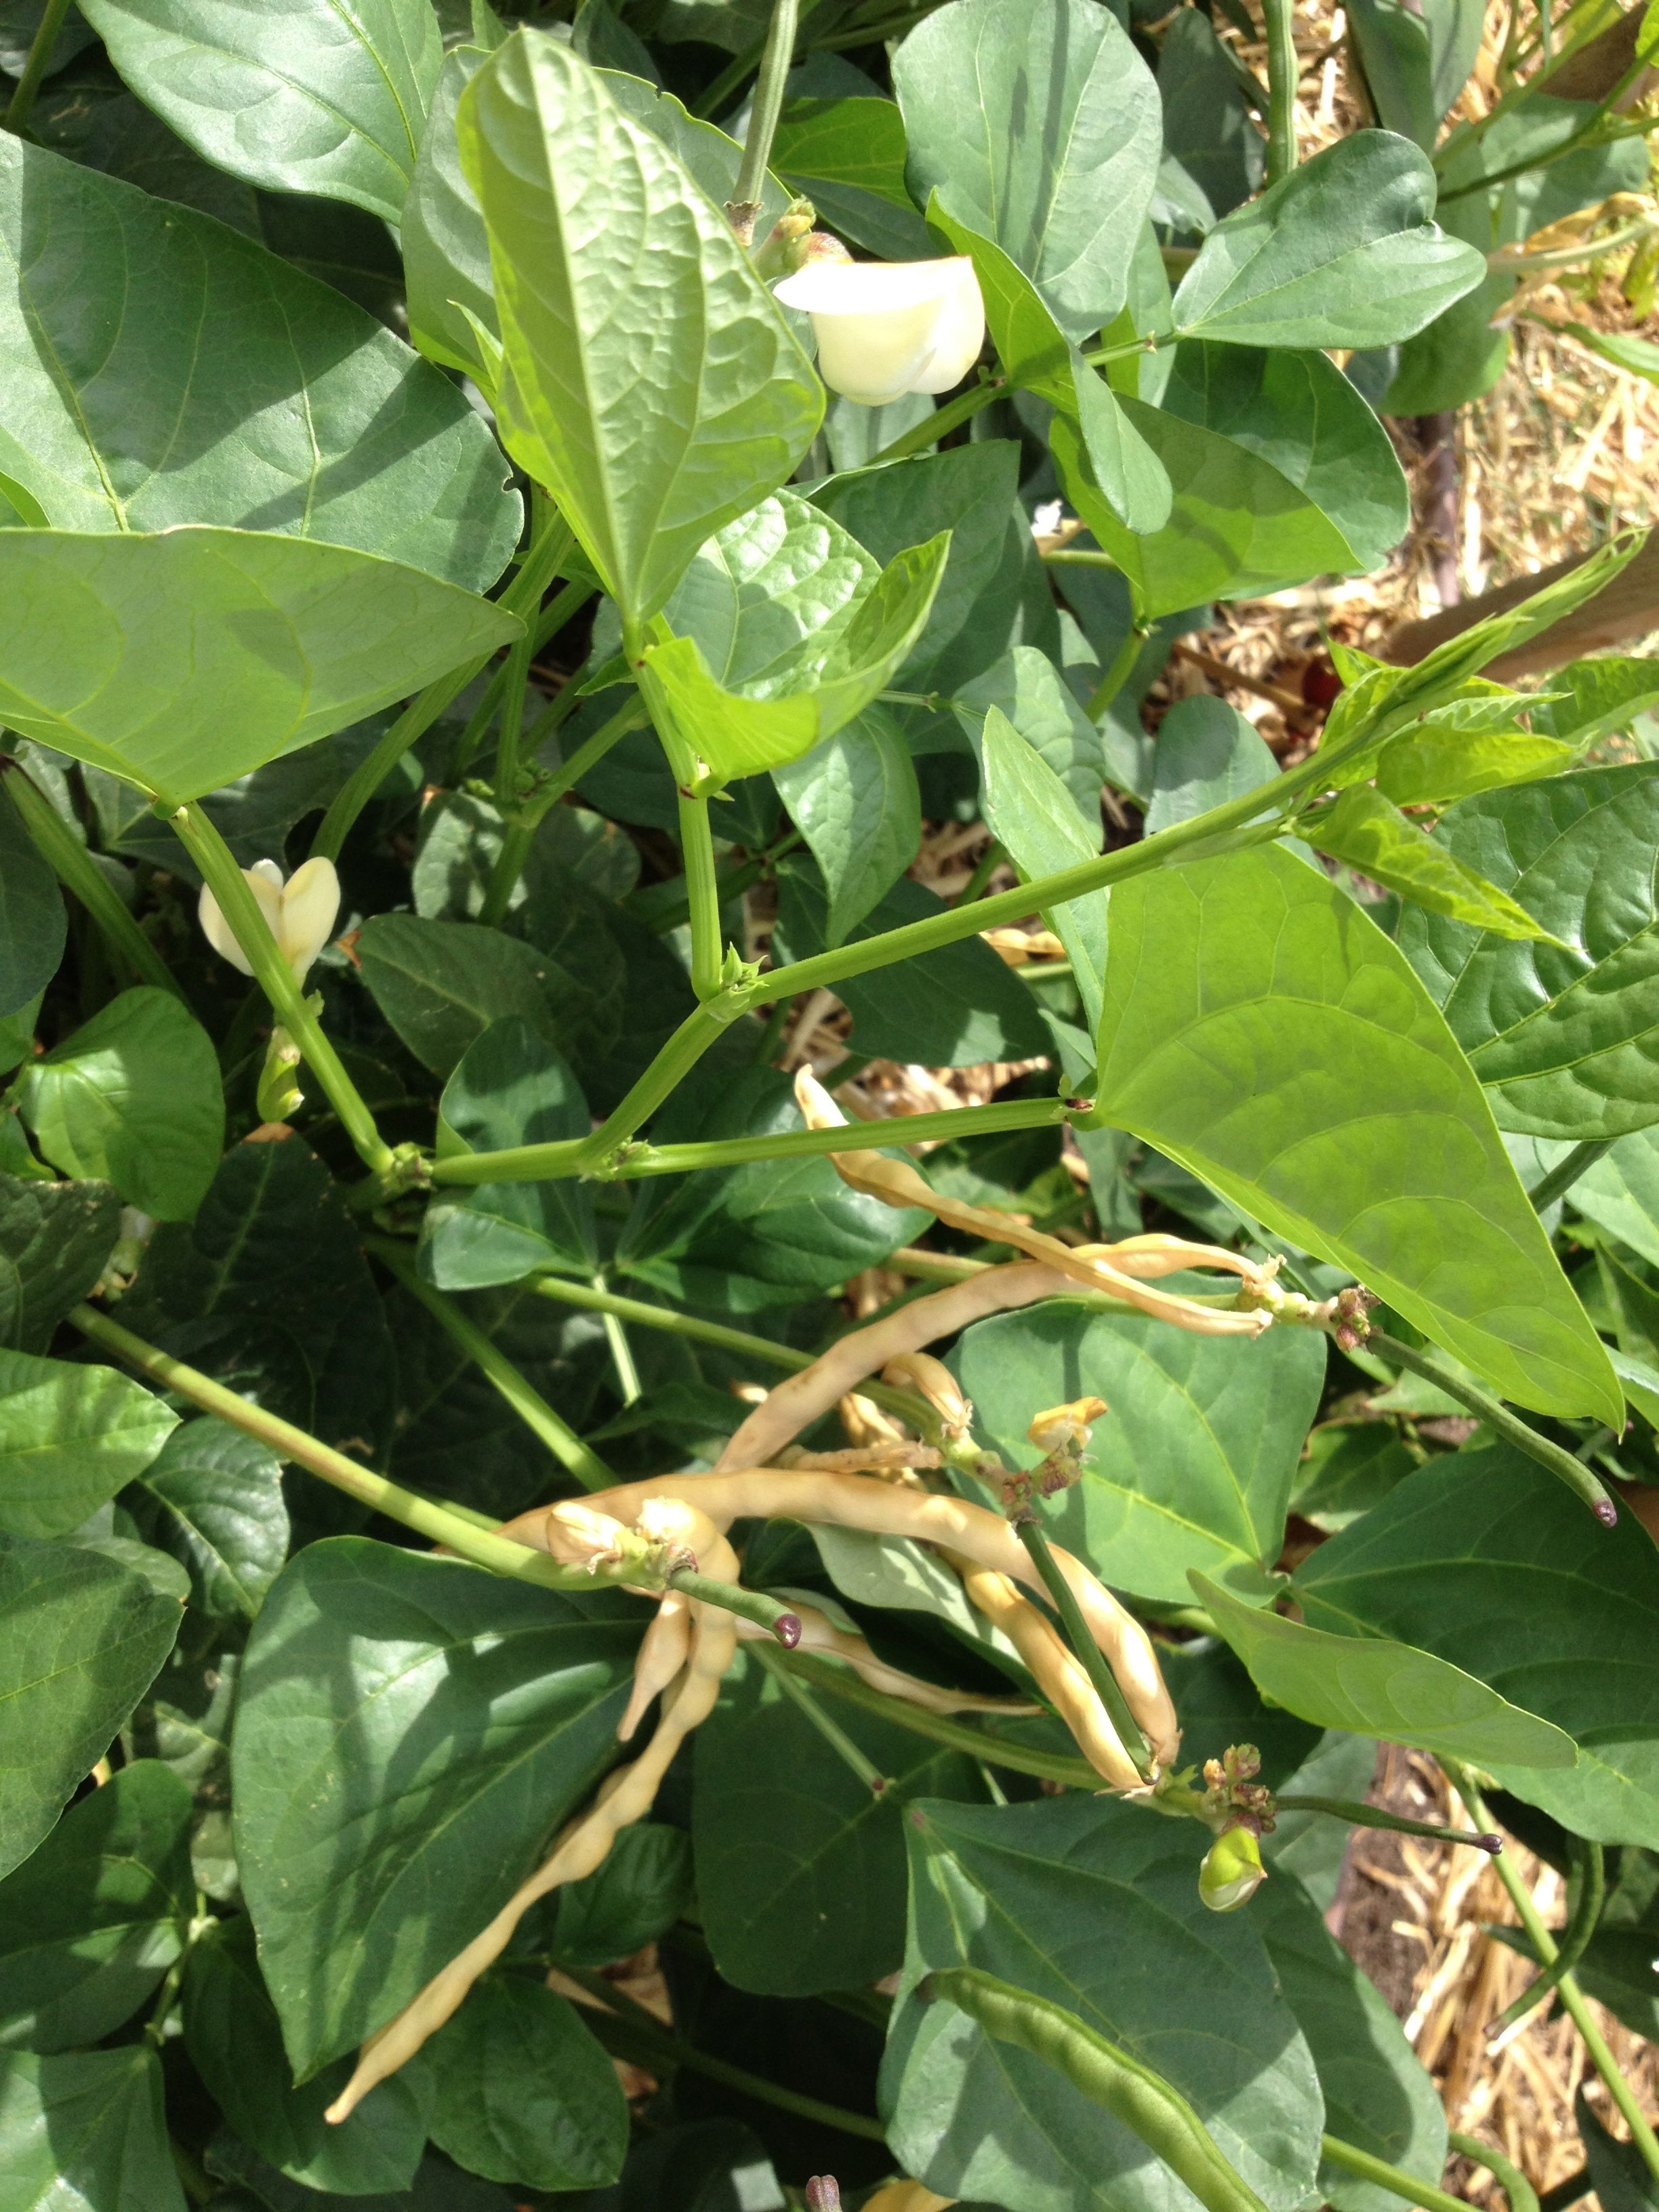
White flowers of Tohono O’odham Black-eye pea quickly producing long pods in the humid heat of monsoon season at Mission Garden (MABurgess photo)
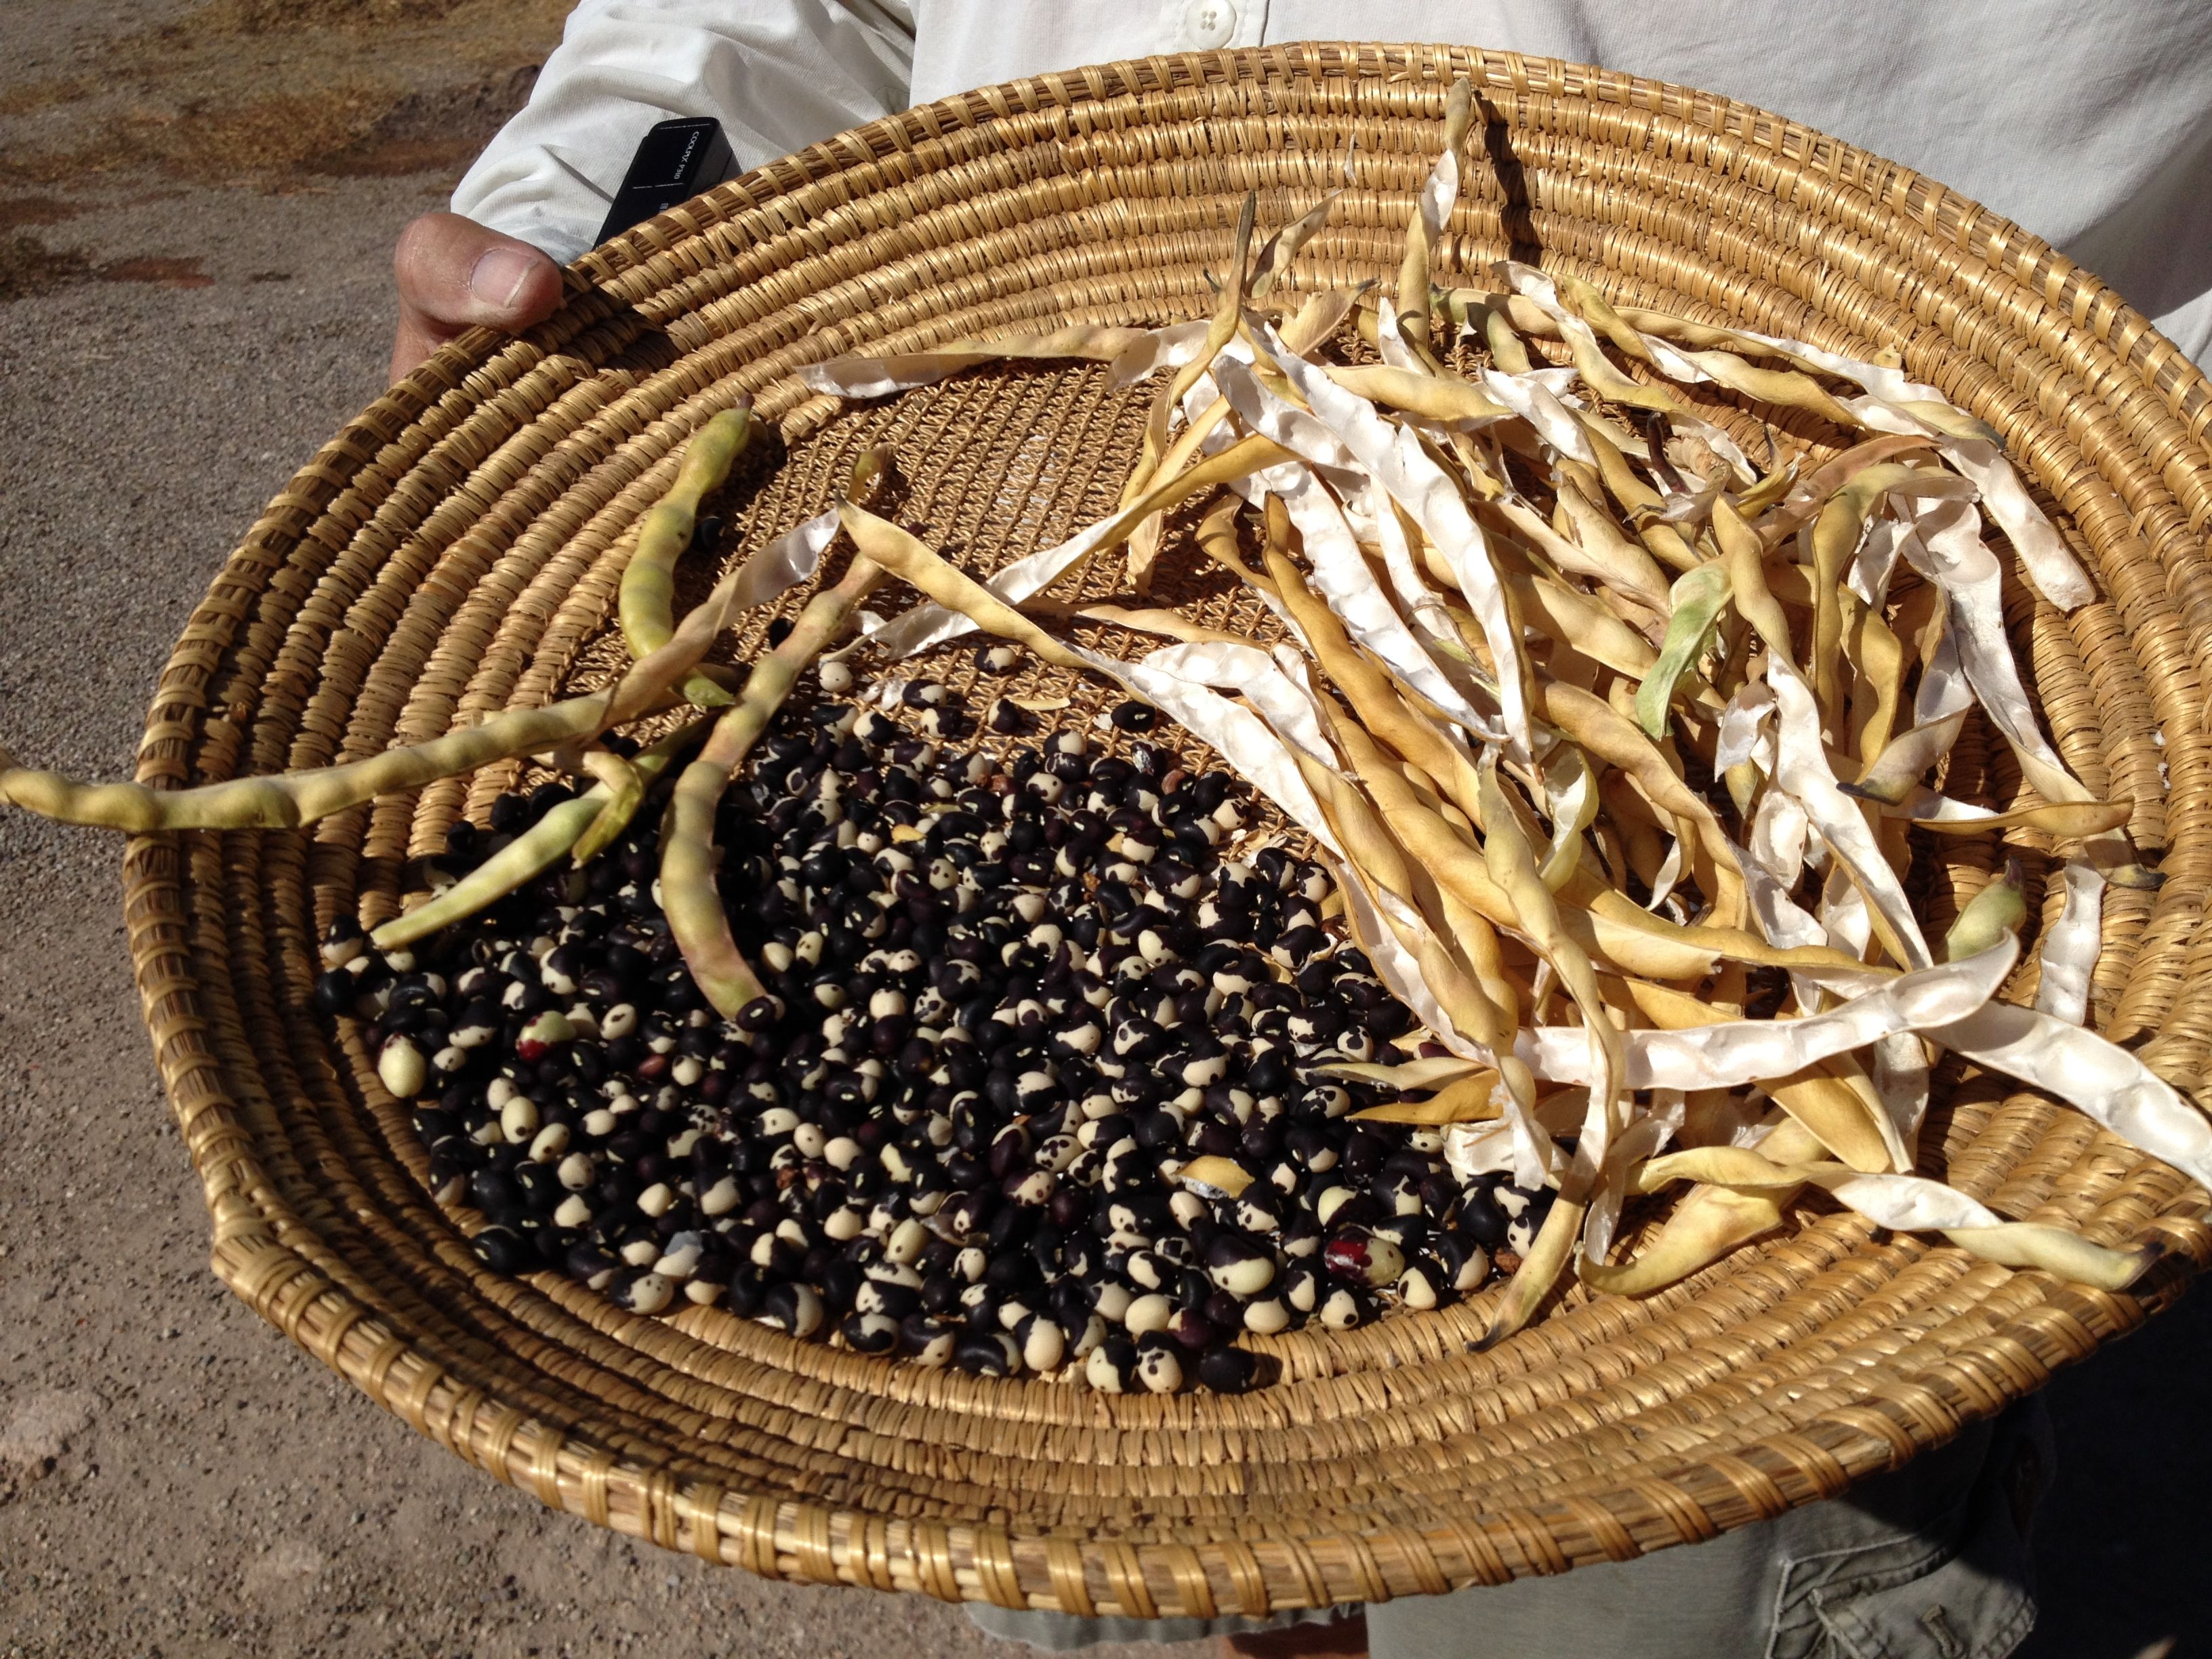
Rich harvest of Tohono O’odham U’Us Mun (black and white spotted black-eye pea) from last summer’s harvest at Mission Garden
These summer-active black-eyes, introduced by early missionaries and adopted by the Tohono O’odham, are well-adapted to hot weather and will provide a prolific feast in the fall. (U’us mu:n, pronounced “moo0nya”, means spotted or patched.) Some of their pods will reach a foot long. If you can “catch” them in the fat, mature and still green-pod-phase in your garden, you might get close to Nirvana eating fresh black-eyes–a treat very few have ever experienced.
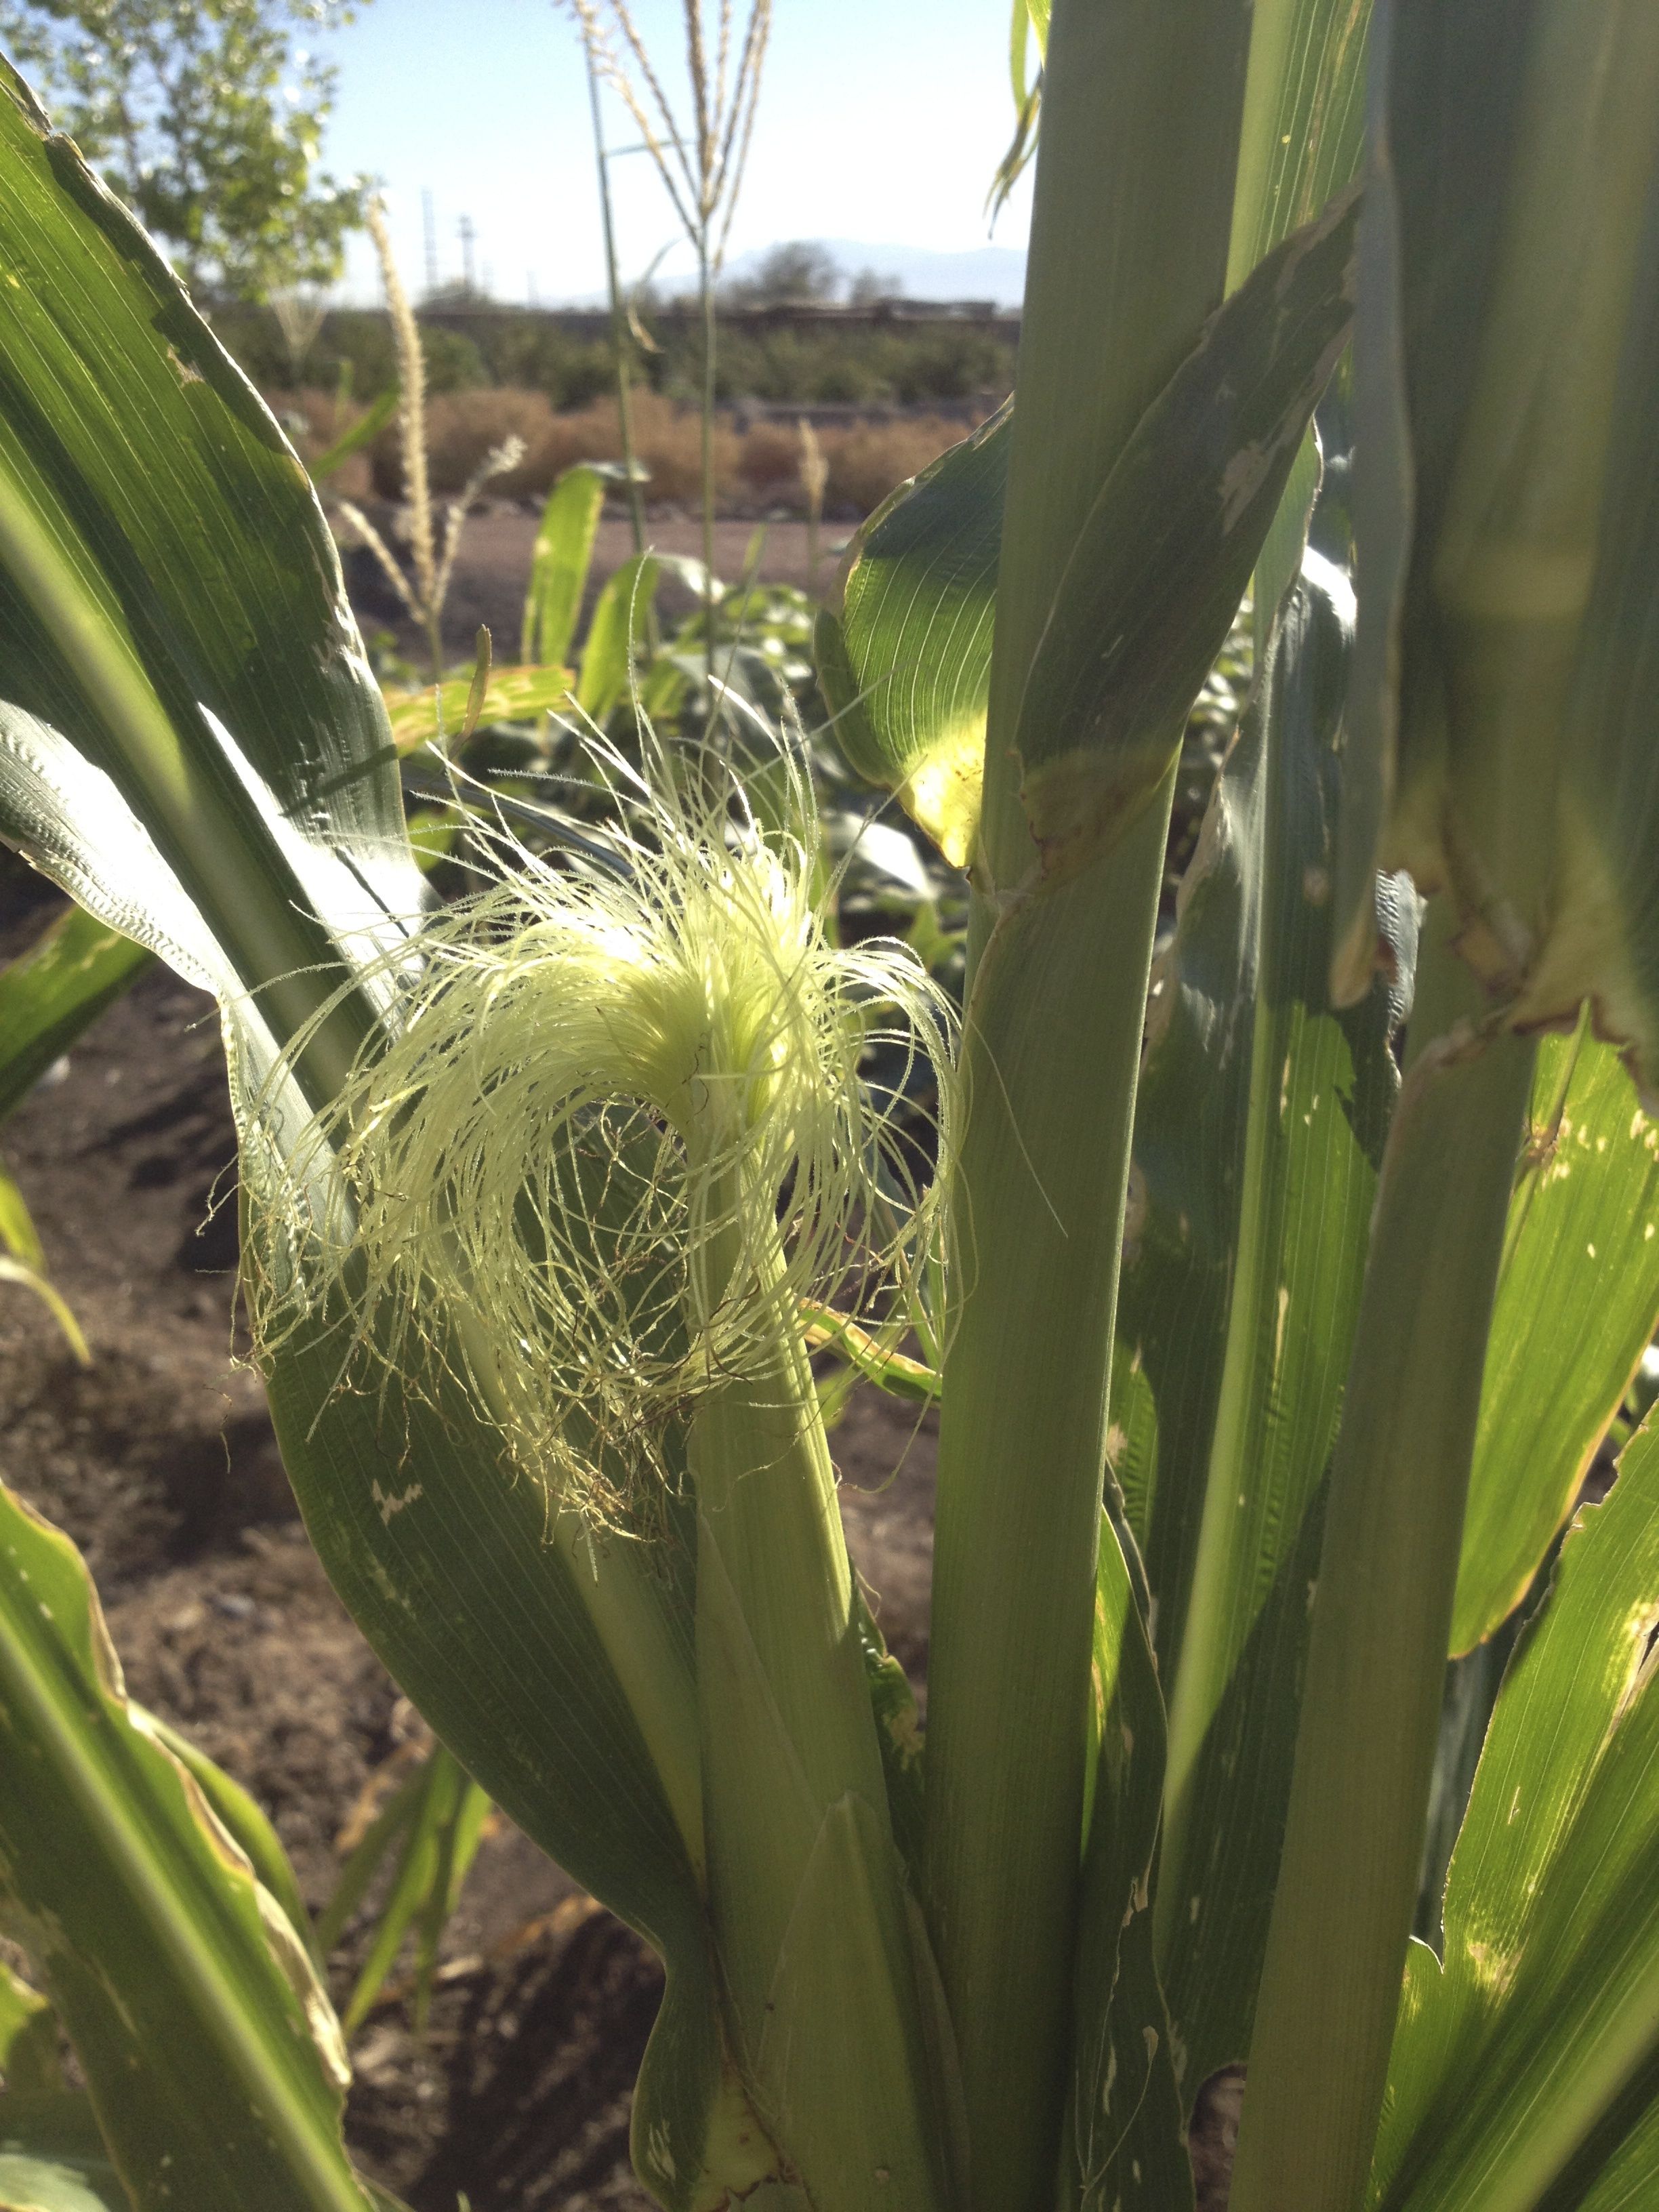
When you see silks emerge on your maturing corn plants, you can help Nature and Genetic Diversity along by touching a tassel from another plant onto the silks.
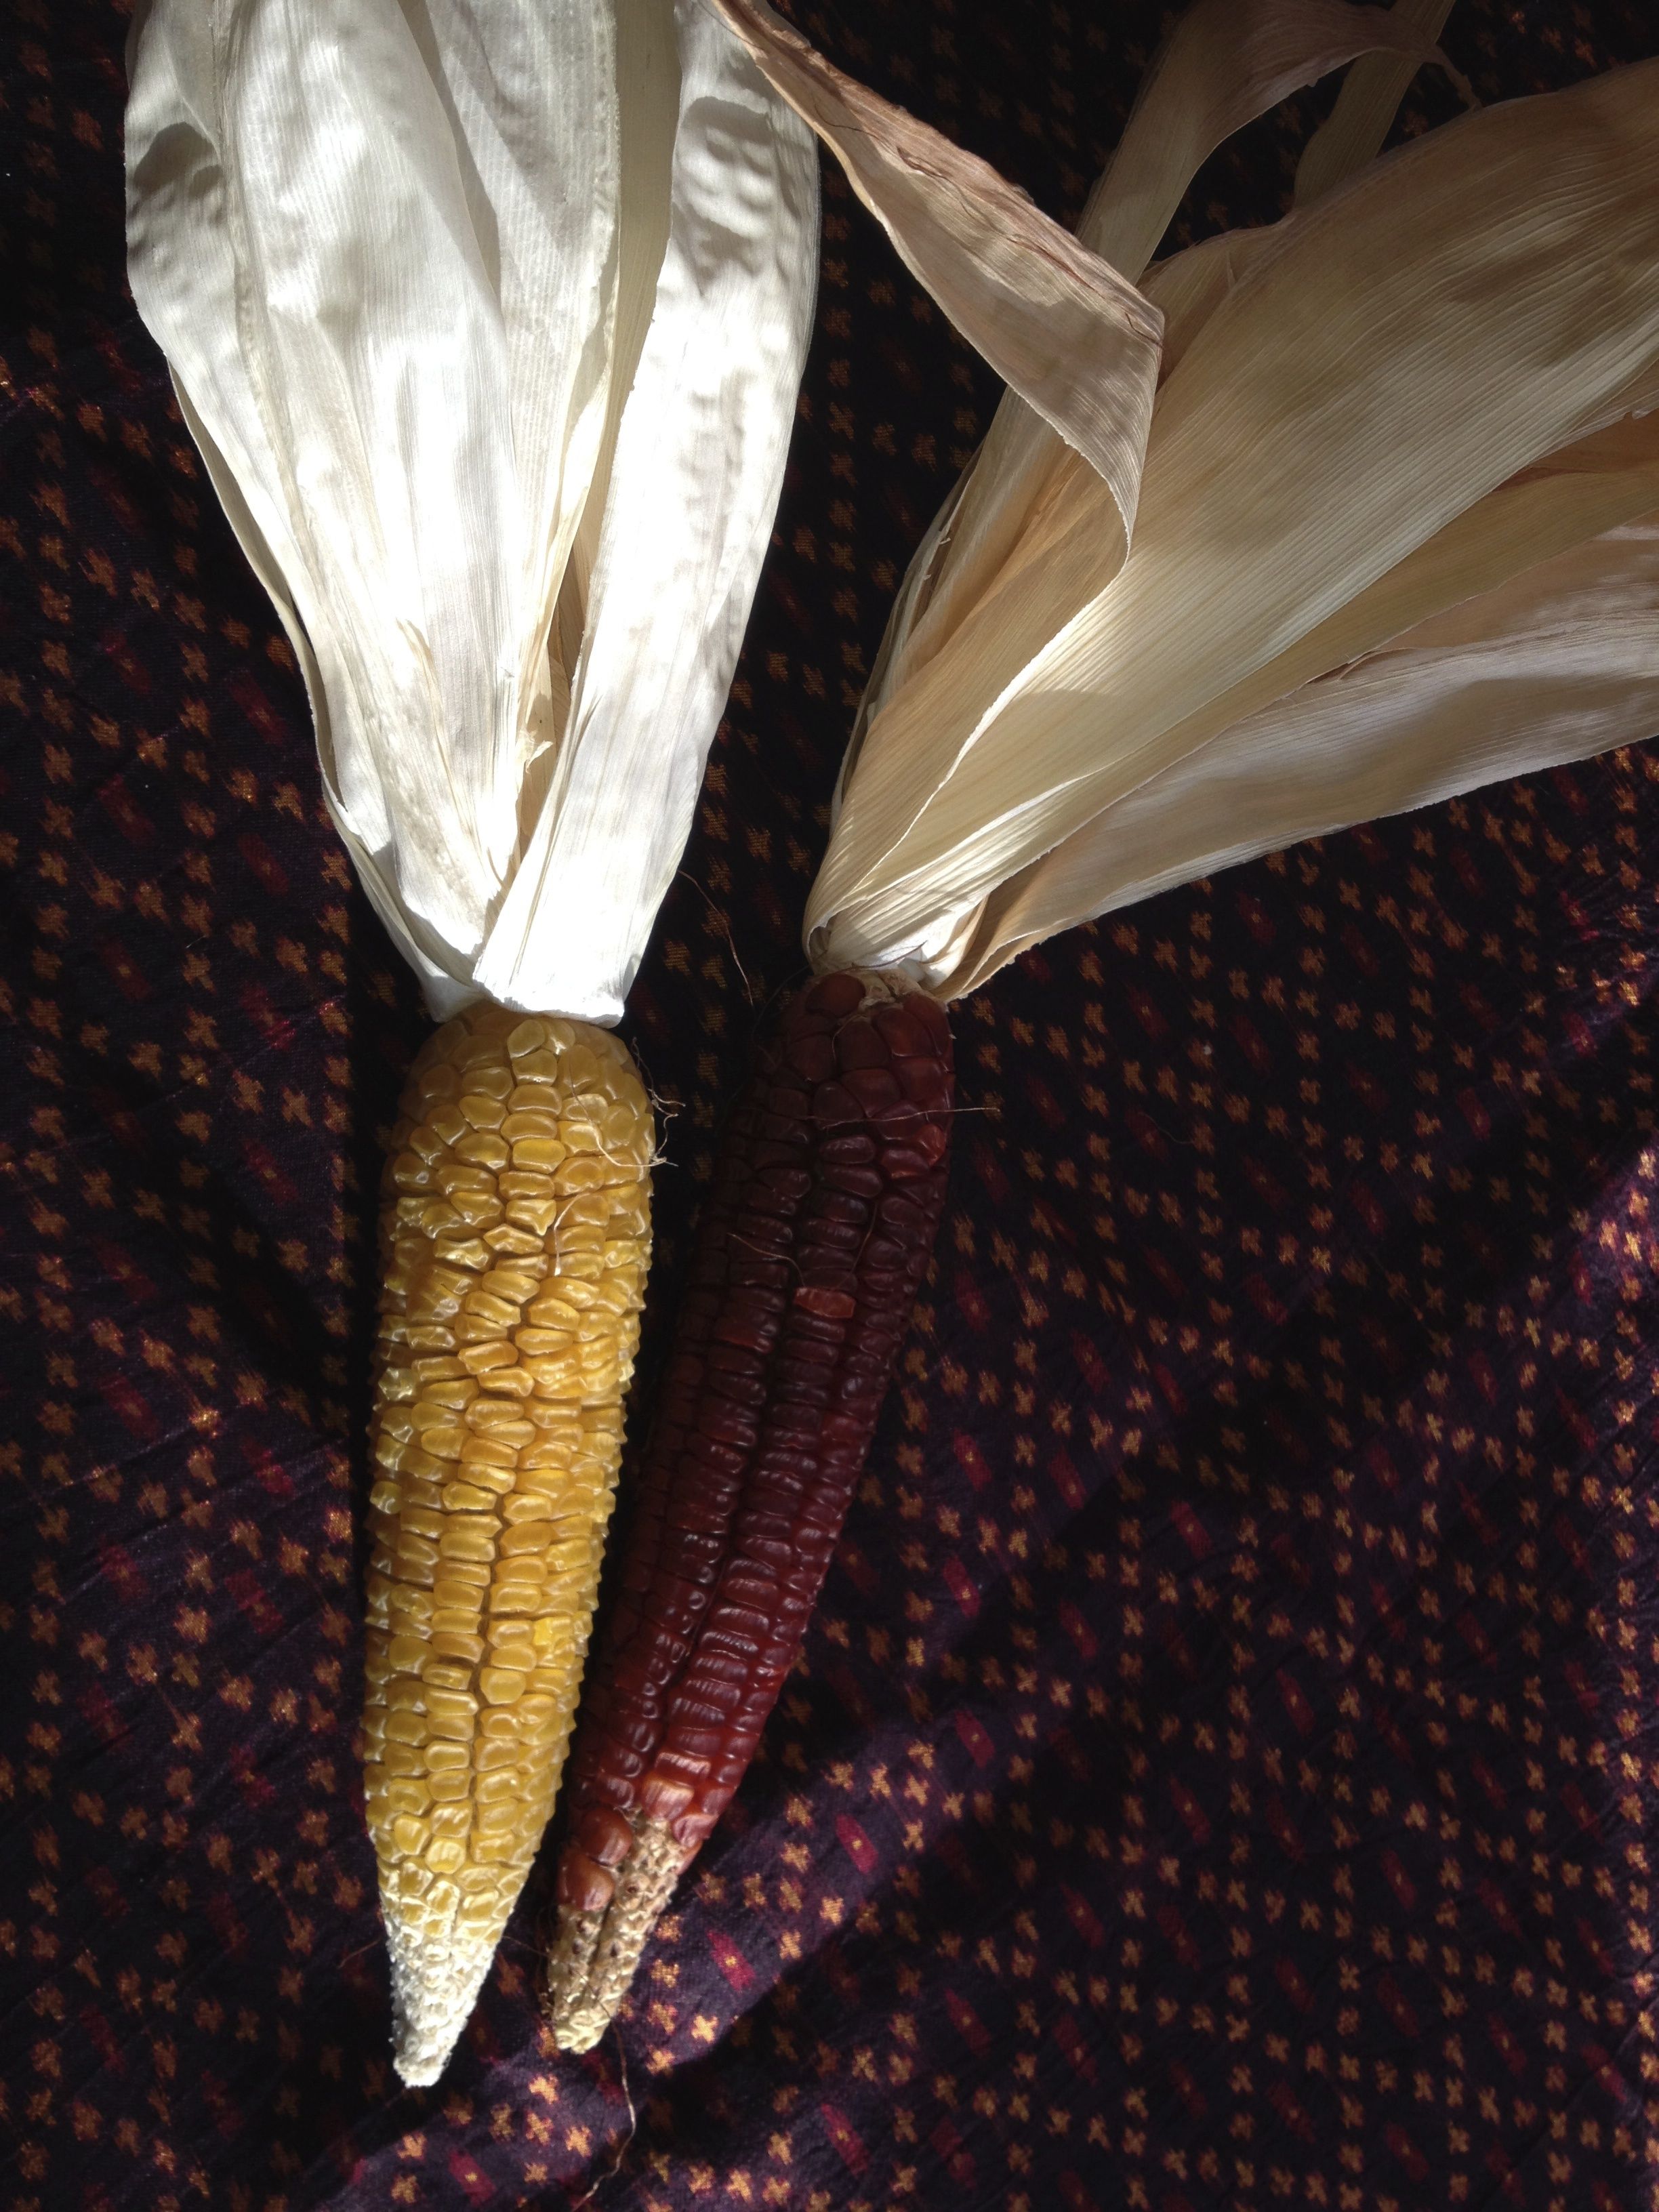
Red Sweet Corn, from the Guarijio People of southern Sonora–note the wrinkly kernels indicating sweetness. (Available through NativeSeeds/SEARCH)
Slow knowledge–a term coined by philosopher/farmer Wendell Berry–is what we can gain as we patiently watch the transformation of life in the garden. They say it even builds new neurological pathways. At the very least it can help young people learn what the word patience means!
Planting heirloom Flor de Mayo Beans, string beans, and corn now with the monsoon will mean great marinated bean salads in September!
The most nutritious and rich-tasting of all beans–our native Tepary Bean! –domesticated by early Desert People of the Southwest
Get the heat out of the kitchen! Summer is ideal time for cooking your garden or market produce with the SUN! Come see a demo at Sunday St Philips Farmers Market (on sale there).
Happy monsoon gardening! See you at the NativeSeeds/SEARCH Monsoon Plant Sale next weekend at the NSS Store. Or come visit our Flor de Mayo booth at Sunday’s St Phillips Farmers Market under the mesquites and sycamores, for gardening tips and a variety of beans to eat and plant.
A NativeSeeds/SEARCH heirloom sunflower–colorful protection for a garden margin
 Aunt Linda here on a glorious cloudy day here in the Old Pueblo. And, Whoops (!) there goes Life again, changing just when we were feeling comfortable again! Just when we think we have a handle on it, the game changes. Most of you know by now that fats are not “bad”. Fats are now heralded for the importance they play in our health. If we are wise enough, we allow Beginners Mind to open, and explore what may be there for us. Of course, we can just Resist.
Remember when eating red meat was “all bad” ? It turns out if it is grass pasture raised it is may be healthy for us.
Remember when soy was considered “all good”; it was almost a cure-all? Well … it turns out that is Not Always So.
And Remember: the game will change again.
But one “truth” that seems to stand firm, is that What Goes Into the animal you eat, or that lays the egg your feed your kids, or the bee that harvests your honey/pollen, or the seed/soil that you plant is important. For the sake of the lard we are about to render, “You are What your Animals Eat” (see feed bag below) makes a significant difference in the health of the fat you are rendering.

Well, trans-fats are “off the shelves” and in three years, as mandated by the FDA. They must be overwhelmingly “not good” for us if a government agency is willing to move that swiftly! And, among the fats and oils reshuffling themselves, and reconsidered (based on science) as healthy, heat tolerant, and delicious: Lard is “back”.
Inspiration for exploring this new/old fat and how to use it is: 100% Natural LARD: The Lost Art of Cooking with Your Grandmother’s Secret Ingredient (From the Editors of GRIT Magazine) As soon as I read about book (2012) which I ordered from our independent book store, Antigone Books, here in Tucson. The book is mesmerizing. It’s recipes are divine, earthy, and delicious all at once. And it turns out, we can render our own lard right in our own kitchens. Seemed like a fun thing to do for Independence Day.
To get “off the page” and to learn more, I interviewed Cheralyn Schmidt, my dear friend and Culinary Crusader, who has been rendering her own lard for years (and is famous for her Tamale Parties where invitees create their own tamales from different types of masa, the tastiest being made from home-rendered-lard). She is a Chef, has experience in Ag-Extension, teaches food, cooking, and nutrition — and is the Make It Happen Woman behind Tucson’s Thriving THE GARDEN KITCHEN (google it). I could gush on and on about her many talents and her bright spirit, but it is time to roll up our sleeves and get to work.
 1) WHY would you WANT to render lard? Well, One it is an act of independence to have the Know How. Two, it makes food taste more delicious. Three, contrary to conventional thinking, and as stated above, lard is considered HEALTHY these days. The chemistry involves in fats is complicated, but there is significant research that is changing our thinking about animal fats. Fats are very important in our diets, I encourage you to find out more; you may be surprised. Four, fill in Your Own reasons. Five, I enjoy experimenting and learning; the lard-rendering is one place to play with flavors. Do an experiment and see if you can Taste the Difference between pasture raised lard and corn raised lard. Also, embolden yourself with experimentation. Below you’ll see a CHILTEPIN INFUSED LARD that I played with. 2) What is lard? And where can I get it to render at home? Lard is pig fat, that you can buy from your local butcher (even butchers at your grocery store, Sprouts, Whole Foods), 4-H folks, your Heritage Breeders (VERY important in supporting Heritage Animals are folks who are willing to buy heritage animals), the county fair, FFA (used to be Future Famers of America, now I am not sure what it stands for). VERY Preferably, for both your health and the health of the animal, (NOTE: not separate), you would ask for the fat from Pastured Animals pigs. Specifically, request, the “leaf lard” of the pig, which is located around the kidney’s. It has the best quality, in terms of nutrition and taste. The book gives this as a resource for Resources as well: http://www.LardCookbook.com
 Above: fresh summer vegetables from the garden have even deeper sweeter notes when cooked in lard. 3) What can you use this home-made lard to make? Pie crusts, biscuits, sautéing vegetables, cooking eggs, main dishes such as crab cakes, salmon croquettes, beef wellington, cakes, pies, brownies, cookies, tortillas, tamales. Summer fruit, berries and vegetables are abundant this time of year! Our nectarine tree is bursting – peoples gardens are brimming over! and one way to handle the “extra” from your trees or garden is to make pie crusts or empanadas with all that summer joy. Remember to remember the Savory pies (as well as the sweet!) – you can make a wonderful pie from your tomatoes, summer squash, herbs, your native crops …. whatever is presenting itself. If you are not a gardener, consider wooing yourself and your family/friends with the offerings of the Farmers Markets – with this much abundance comes lower prices and we can make pies galore!
  Above: Tortilla and Quesadilla made with chiltepin infused lard! Note that the color of the tortilla is a nice yellow from the chiltepin infused lard-fat. Are your sleeves rolled up? Here we go: Karen Keb’s section “How to Render Lard” (in the beginning of the book), says it strait. I am going to use her basic guide as well as add photos and insights from Cheralyn and my Rendering Session – that took all of an hour and a half, for 7 lbs of pig fat. The focus this post is on rendering the lard itself, so you feel both inspired and confident enough to do this at home. Later this summer, I will feature a pie crust and some amazing filling that includes tequila – so stay tuned! LARD 101 – HOW TO: 1) ” Preheat the oven to 225 F.” 2) “Fill a large roasting pan with the chopped fat.” Ask for it to be chopped or ground. Our 7 lbs that we got from a 4-H pig raised on kitchen scraps was ground for us at the Meat Lab here in Tucson.

 3 “Roast Slowly for 30 minutes to one hour” (or) until the fat has melted and you and you have protein particles floating on top. Our seven pounds was divided over several pans and took an hour and a half. You may have noticed the red, round, chiltepin added to the pig fat in one of the roasting pans. I love this ancient, “closest living relative to the oldest known chile on the planet” “chile so much I simply HAVE to use it whenever I can. The capsicum infused taste and color added some spice to the lard. Now this can work for you and against you. So for savory pie crusts, quesadillas, or egg cooking it is SUPERB. You may not want to add it to your delicate pastry or your sweet berry pie. You will note that the color of the chile infused lard has a yellow-reddish tint, and that the lard without the chile is a beautiful white. These colors are seen in both the liquid lard and when it is firm and in the jars as well. Try infusing your lard at home with rosemary. Explore!
  4) “Skim off the solids and set them aside for the chickens” , (Keb really writes this – which I LOVE) Cheralyn suggests that these “Cracklin’s” are good on baked potatoes, on tortillas or in quesadilla’s, even in salads.

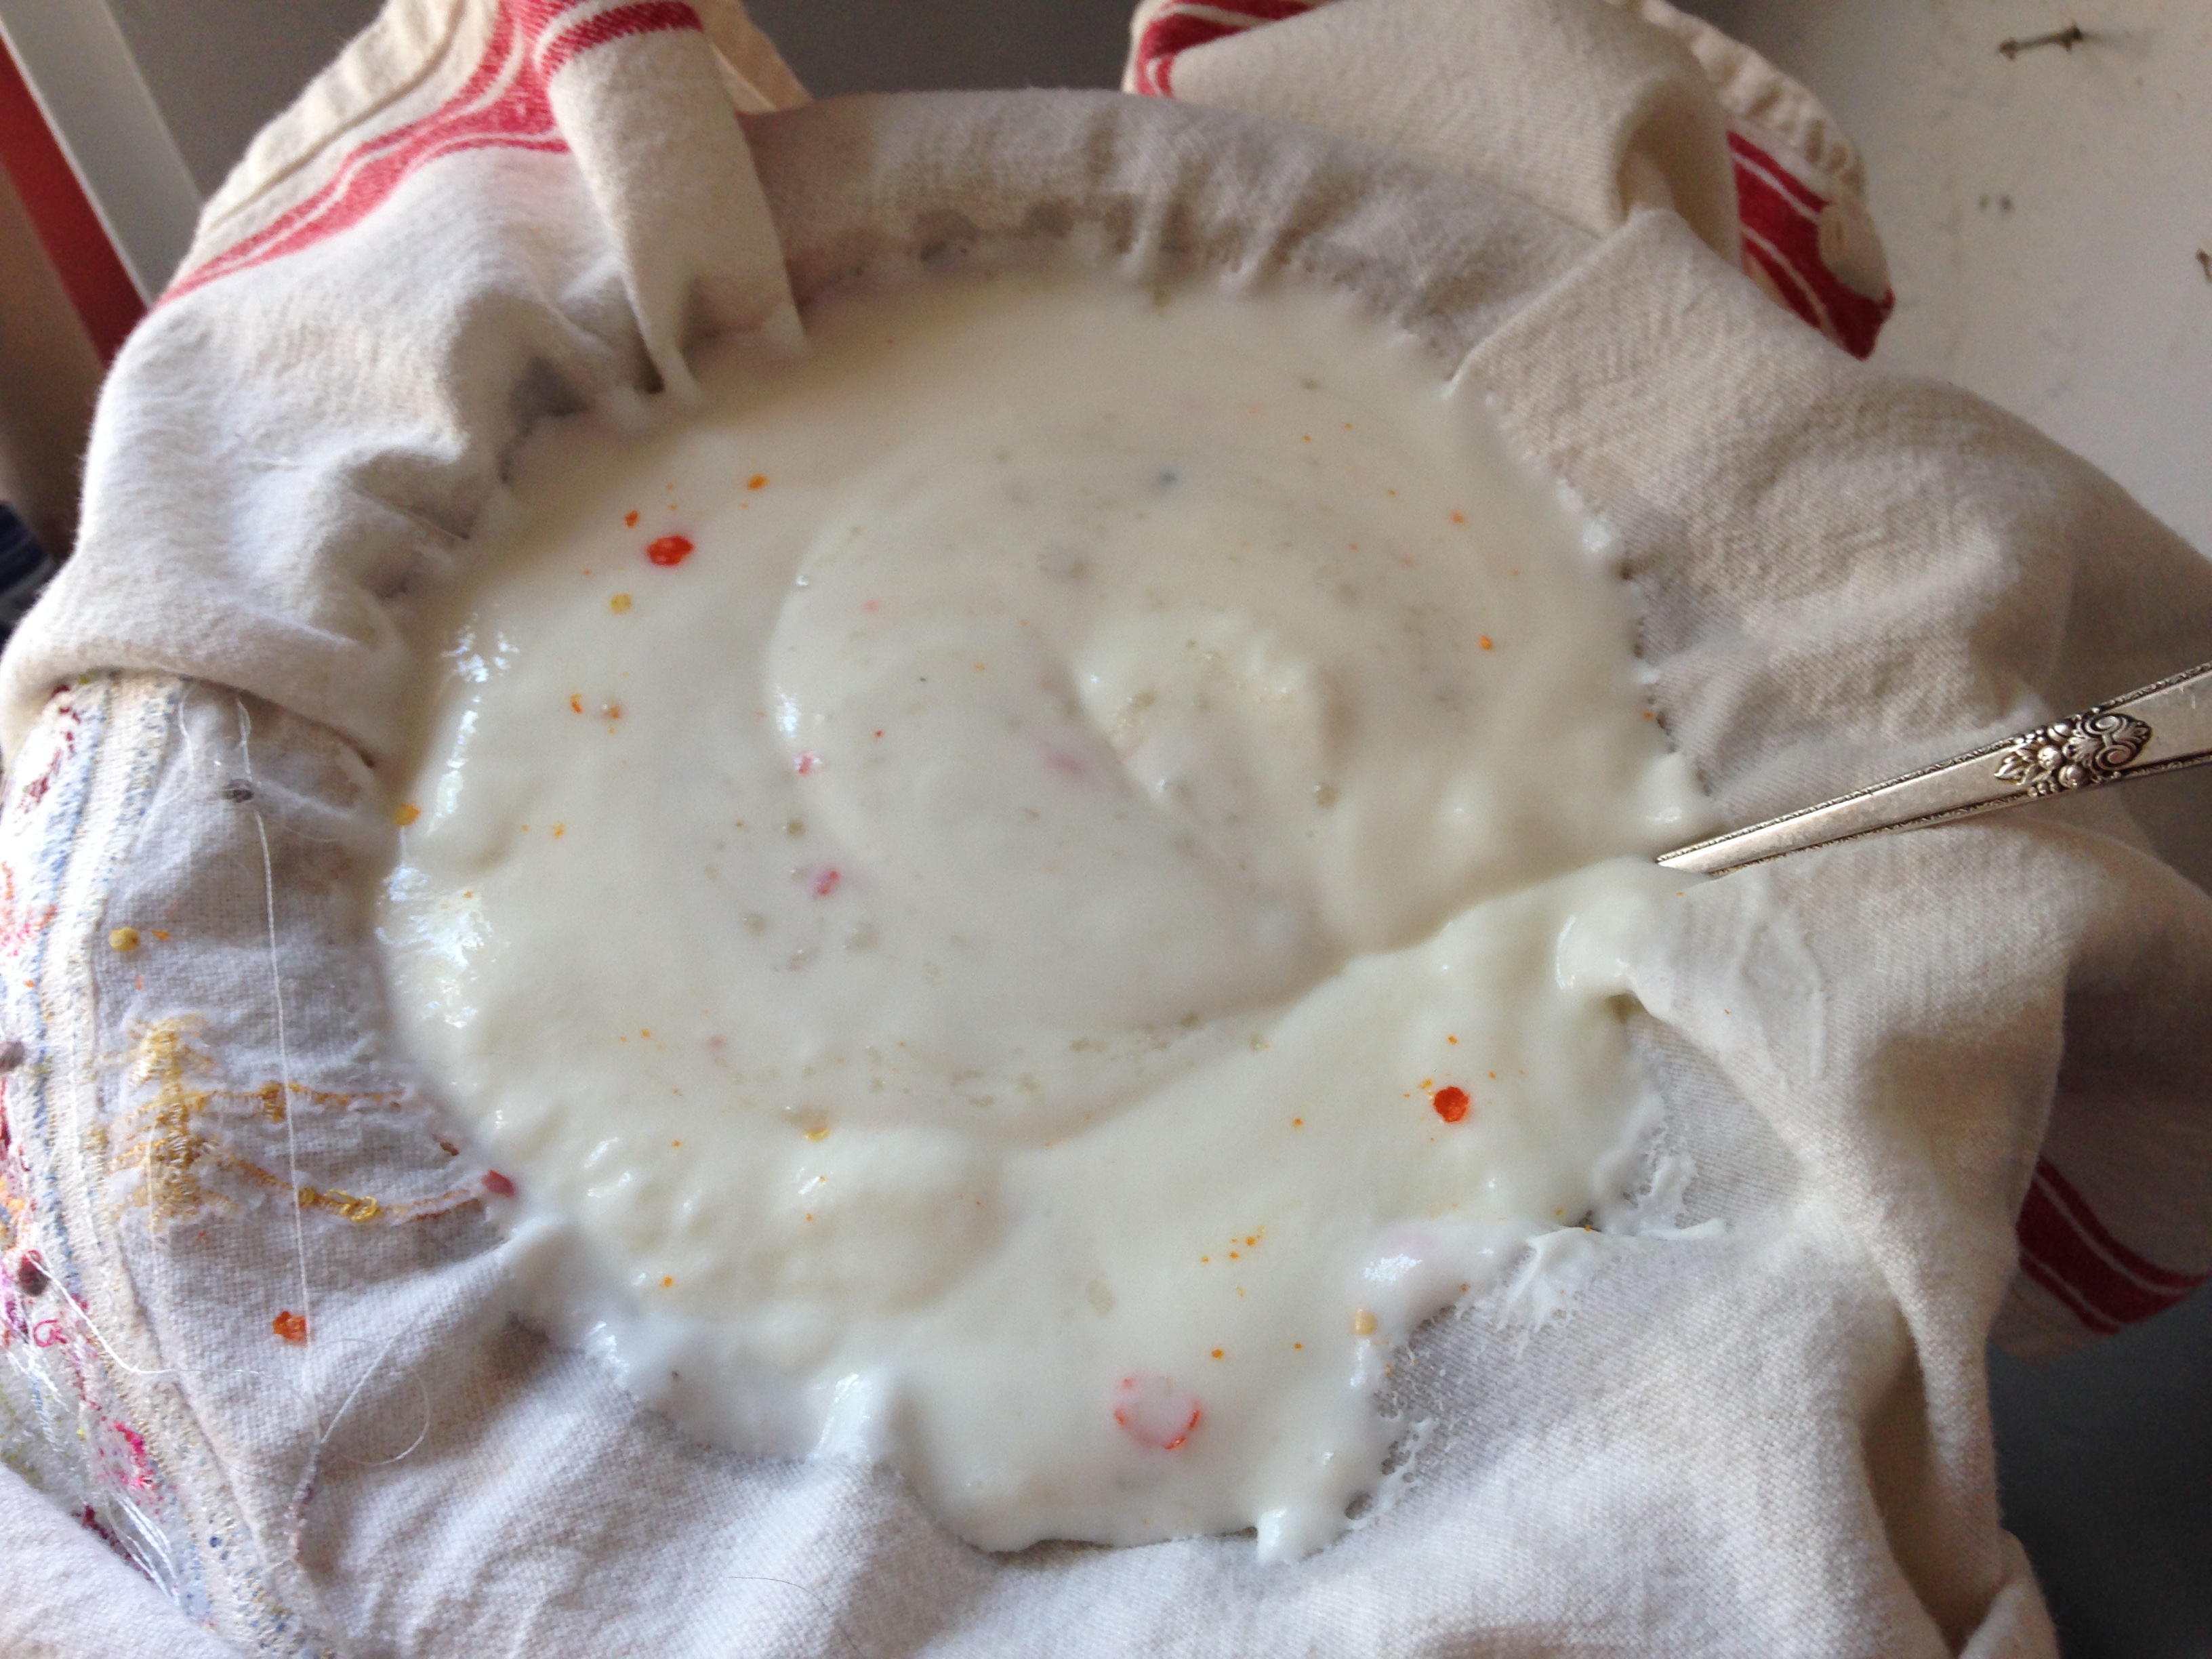
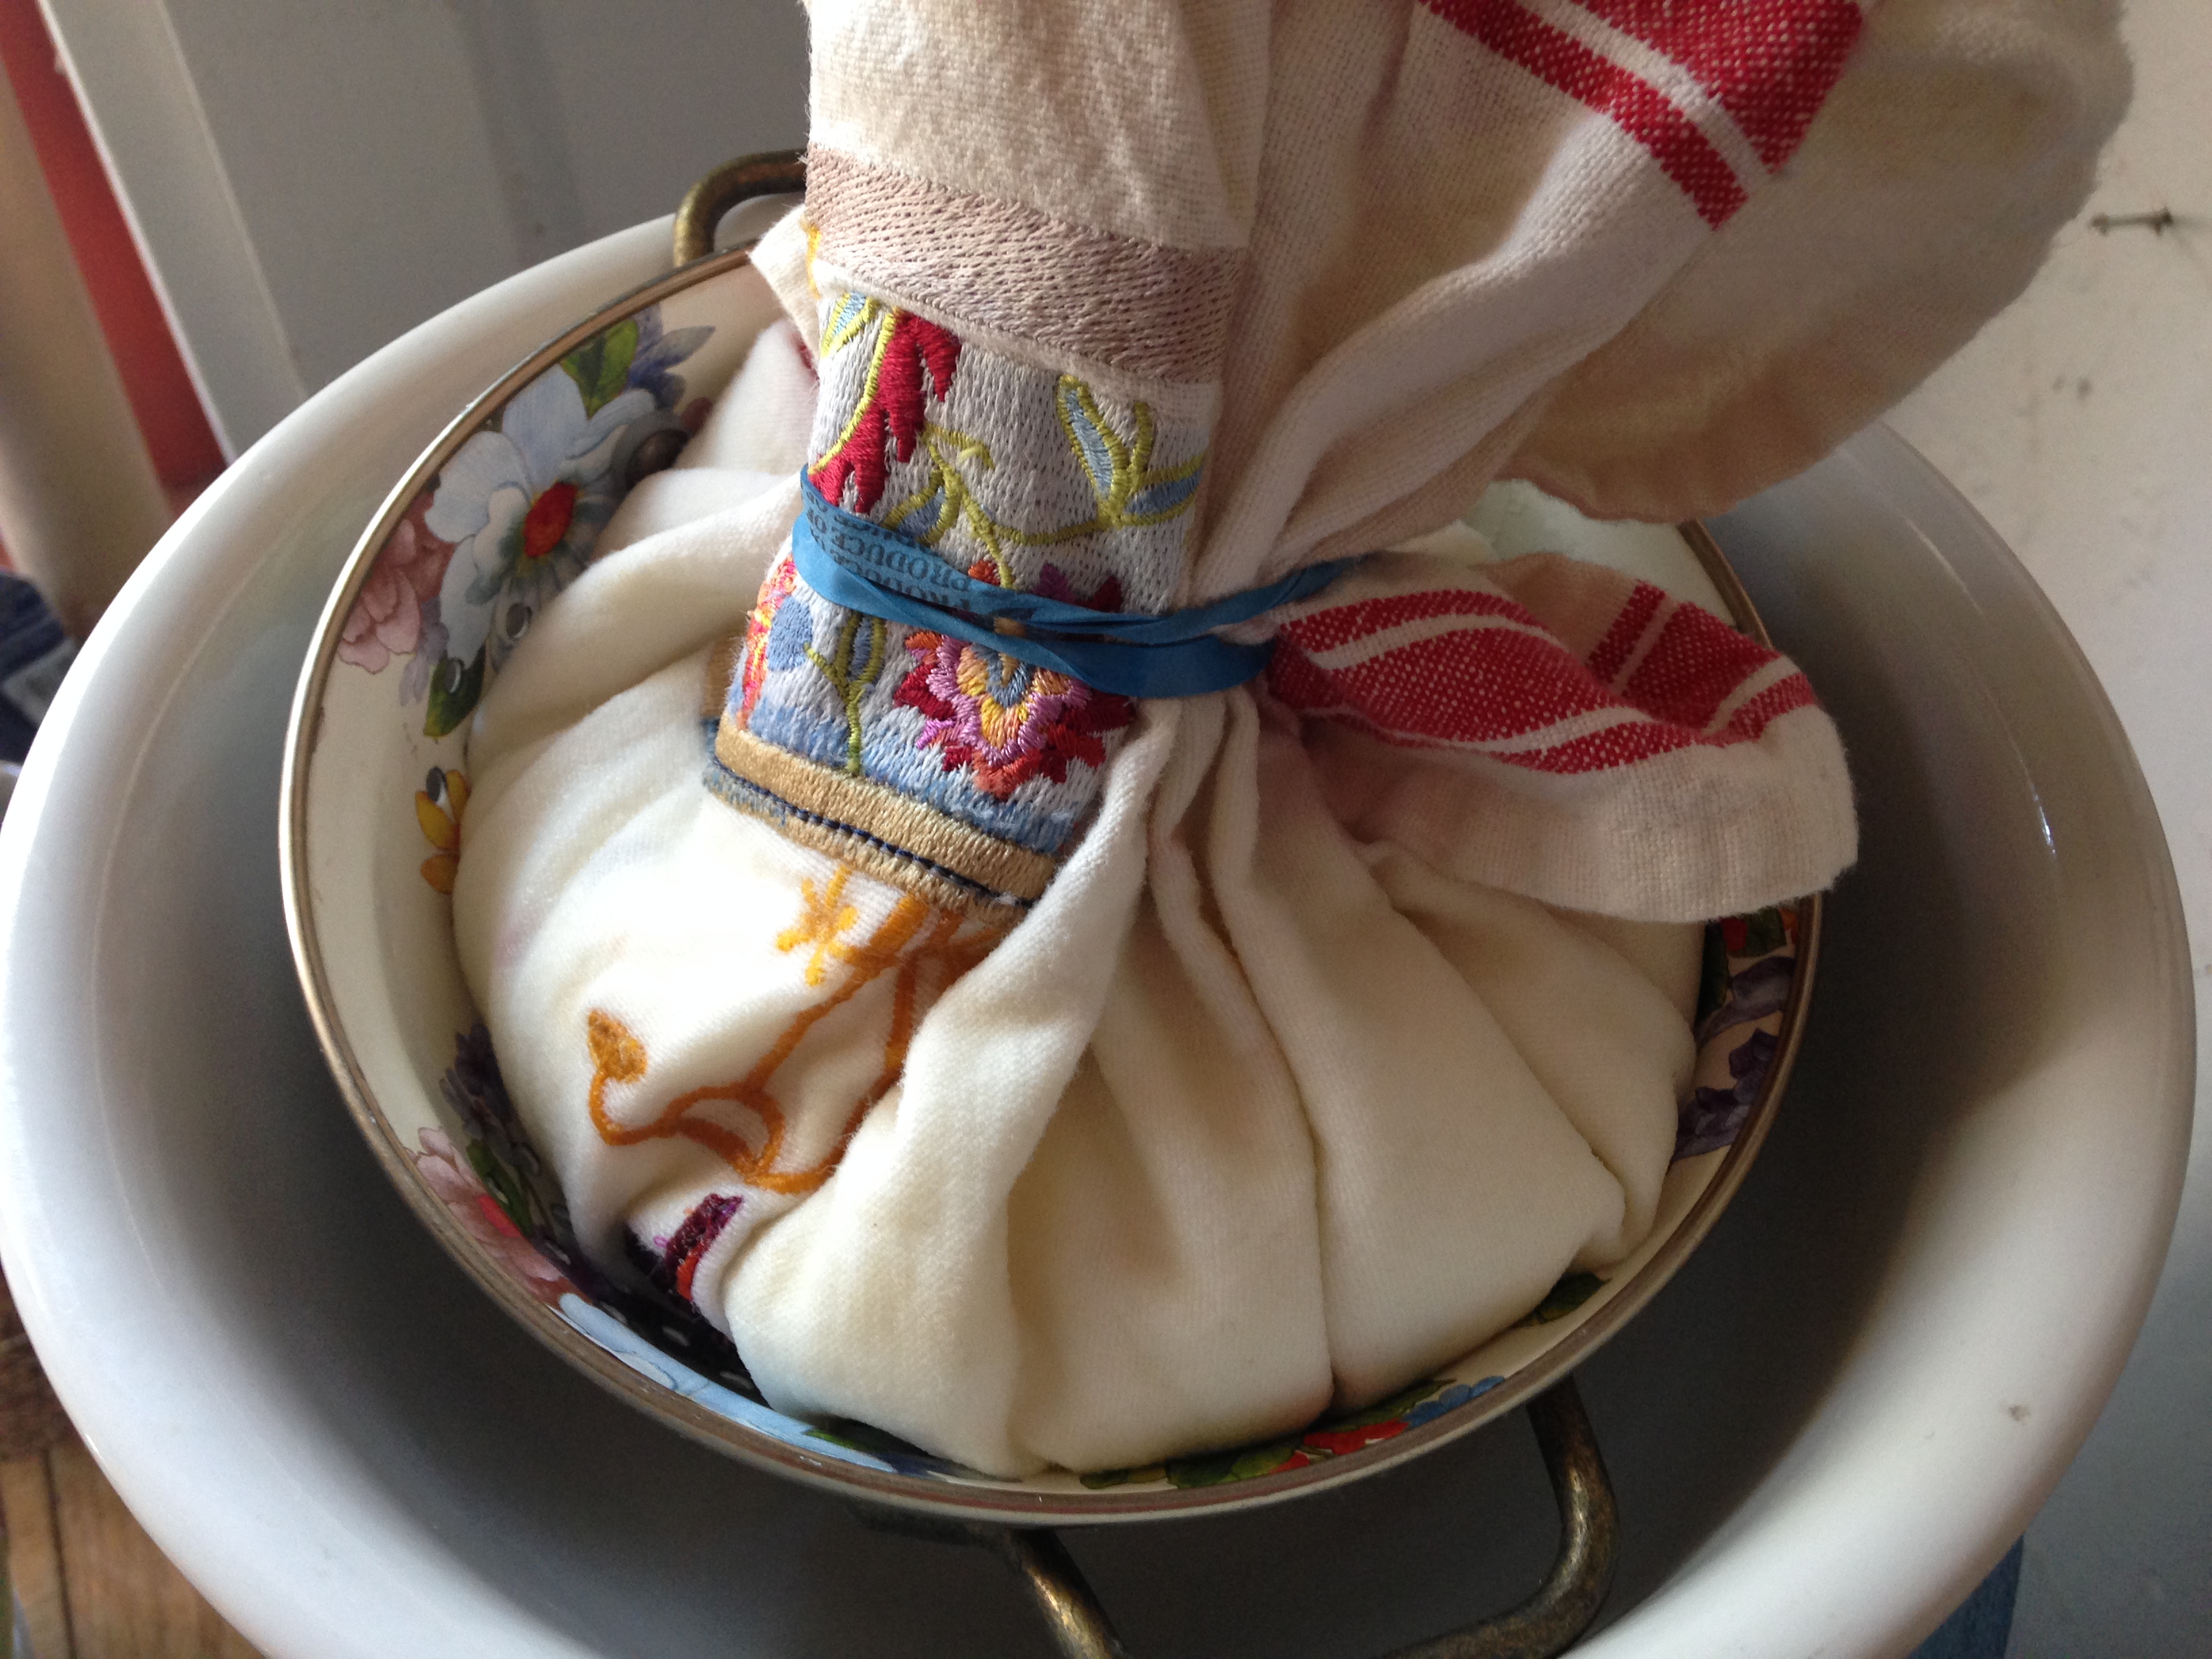
 5) “Pour the liquid fat through a mesh colander lined with a double layer of cheesecloth.” We used flower sack material and it was perfection incarnate for such a project. Those of you who follow me, know I love to make the yogurts cheese; I plan to switch over to flower sack cloth from here-on-out.

 6) ” Store in a glass canning jar in the refrigerator or freezer. It will keep for months.”
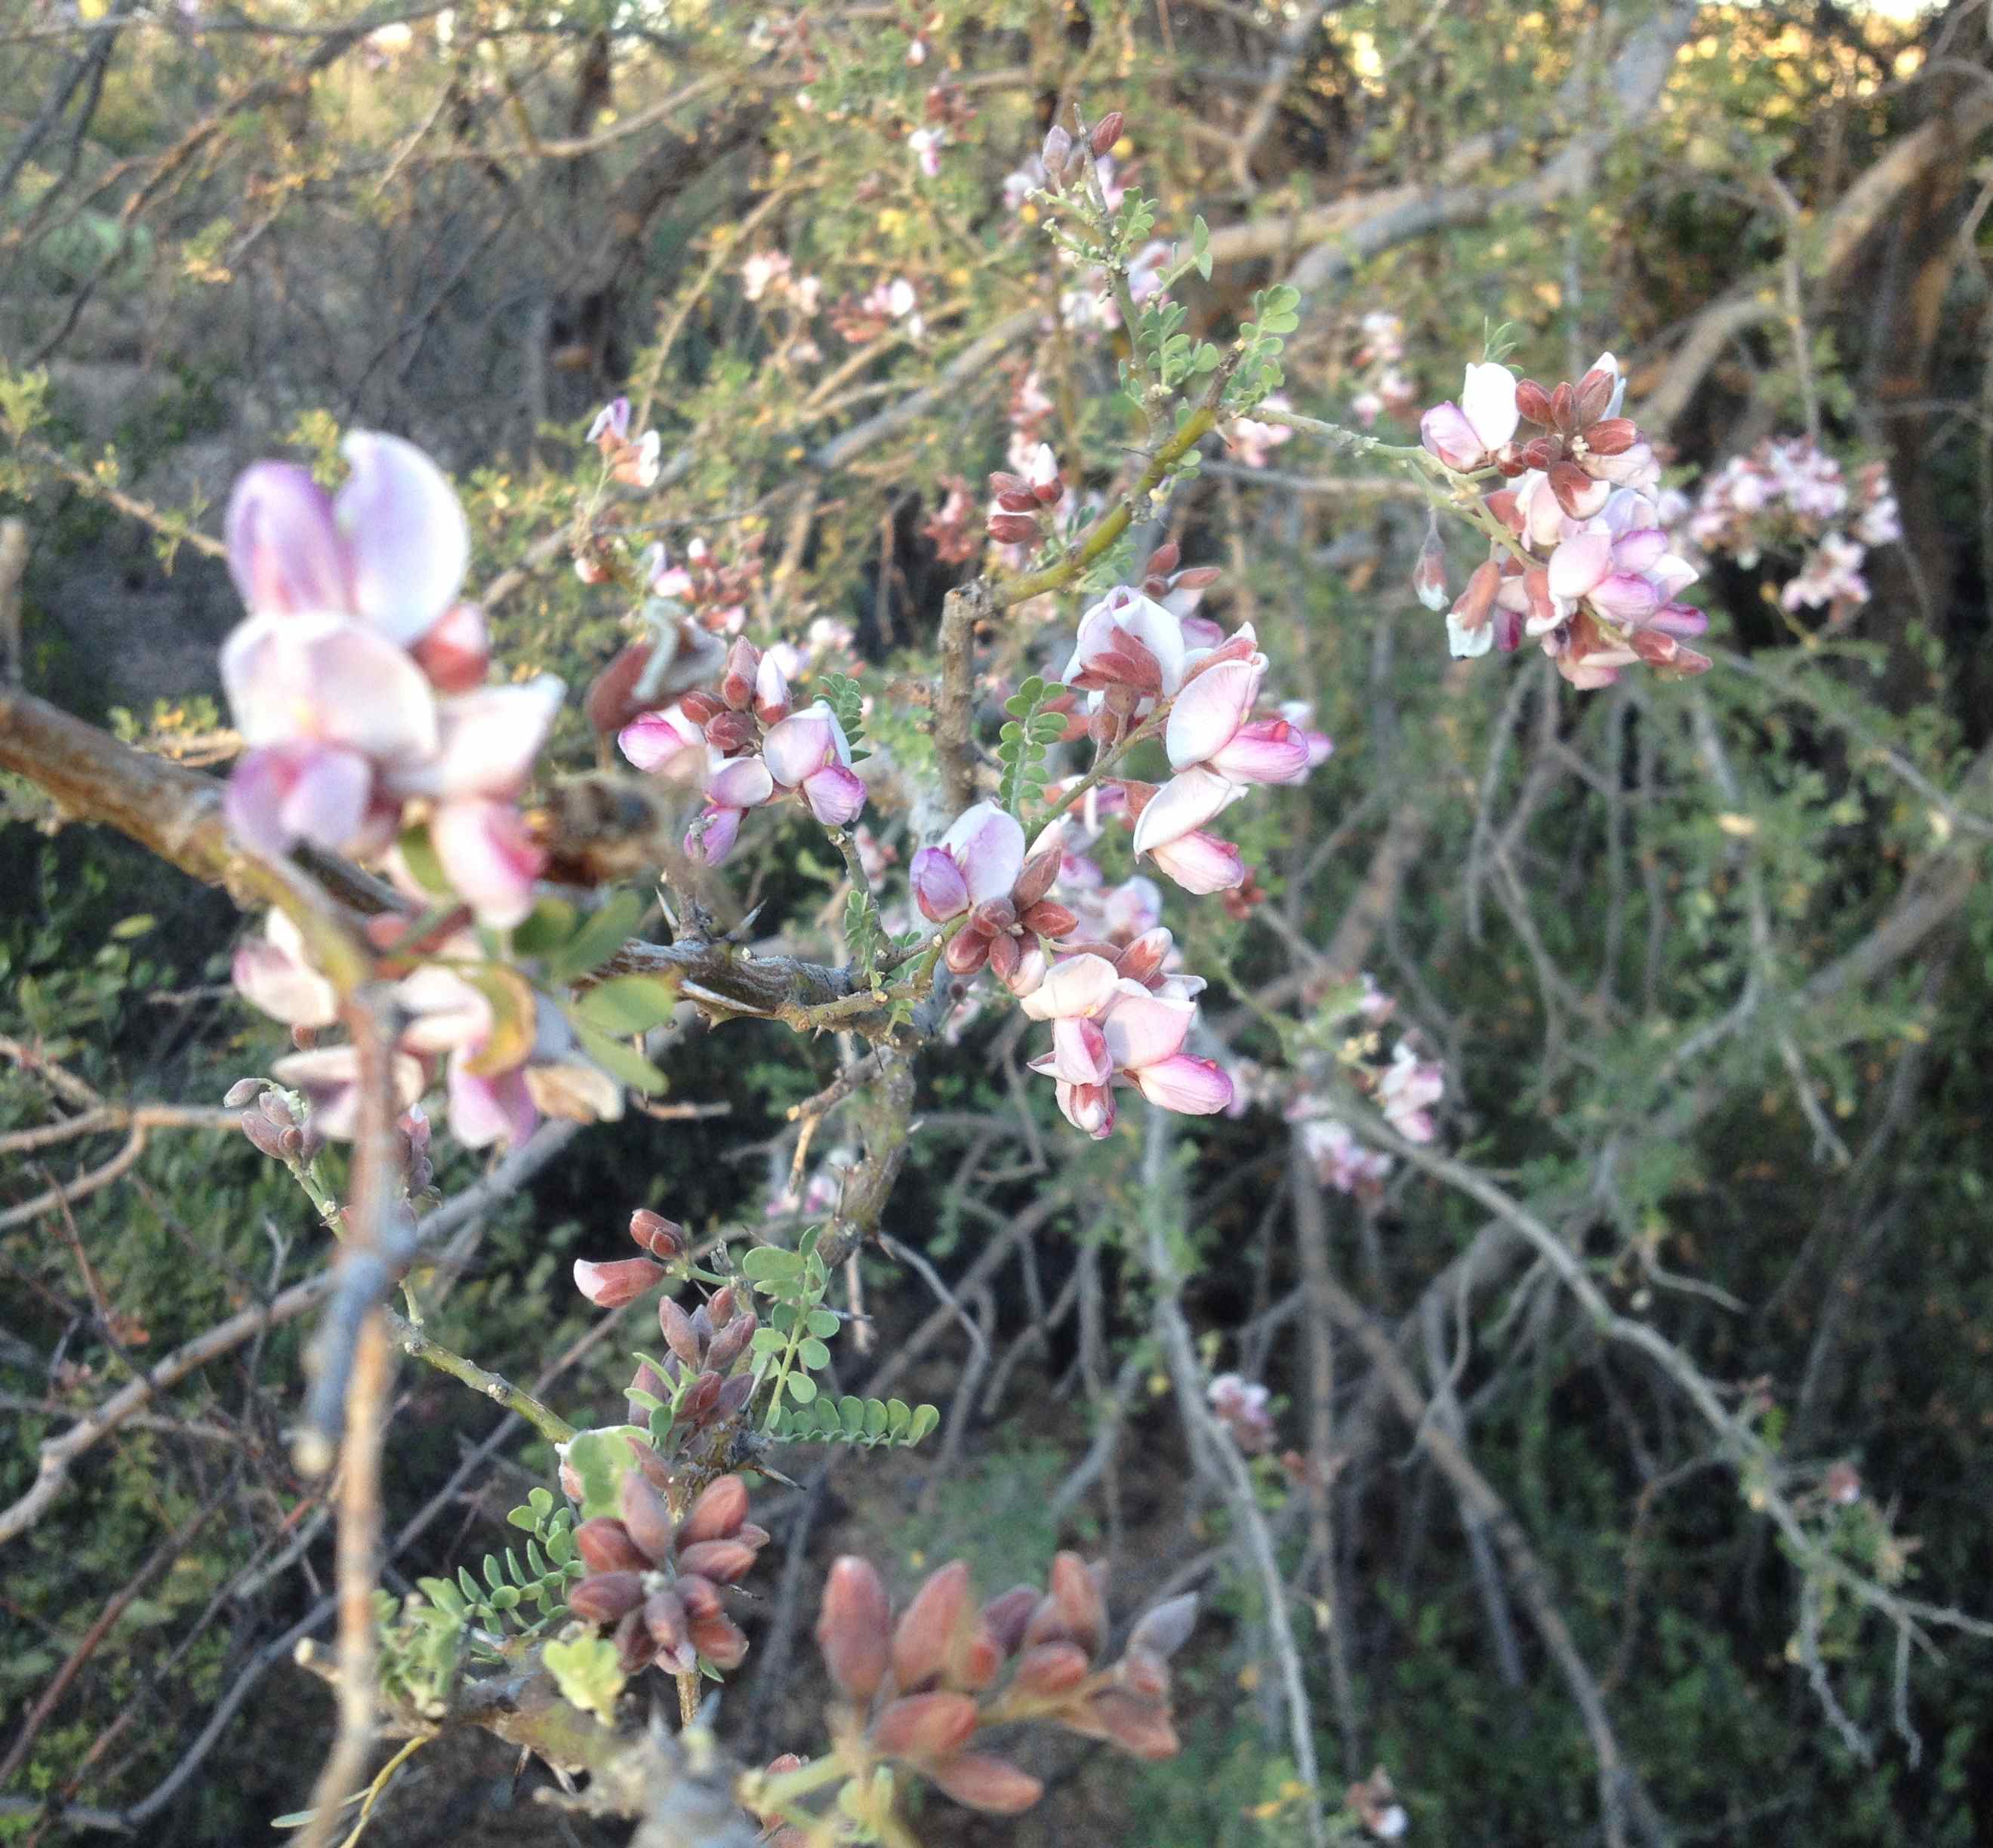
Known as hoh’it-kahm to Tohono O’odham, the Desert Ironwood (Olneya tesota) is still in flower! This should be a good bean year for ironwood as the flowers produce pods.
Hasn’t this been the most incredible, elongated spring in the Sonoran Desert ever? Tia Marta here to celebrate this red-letter year for our desert legume trees–they are still coming on!!
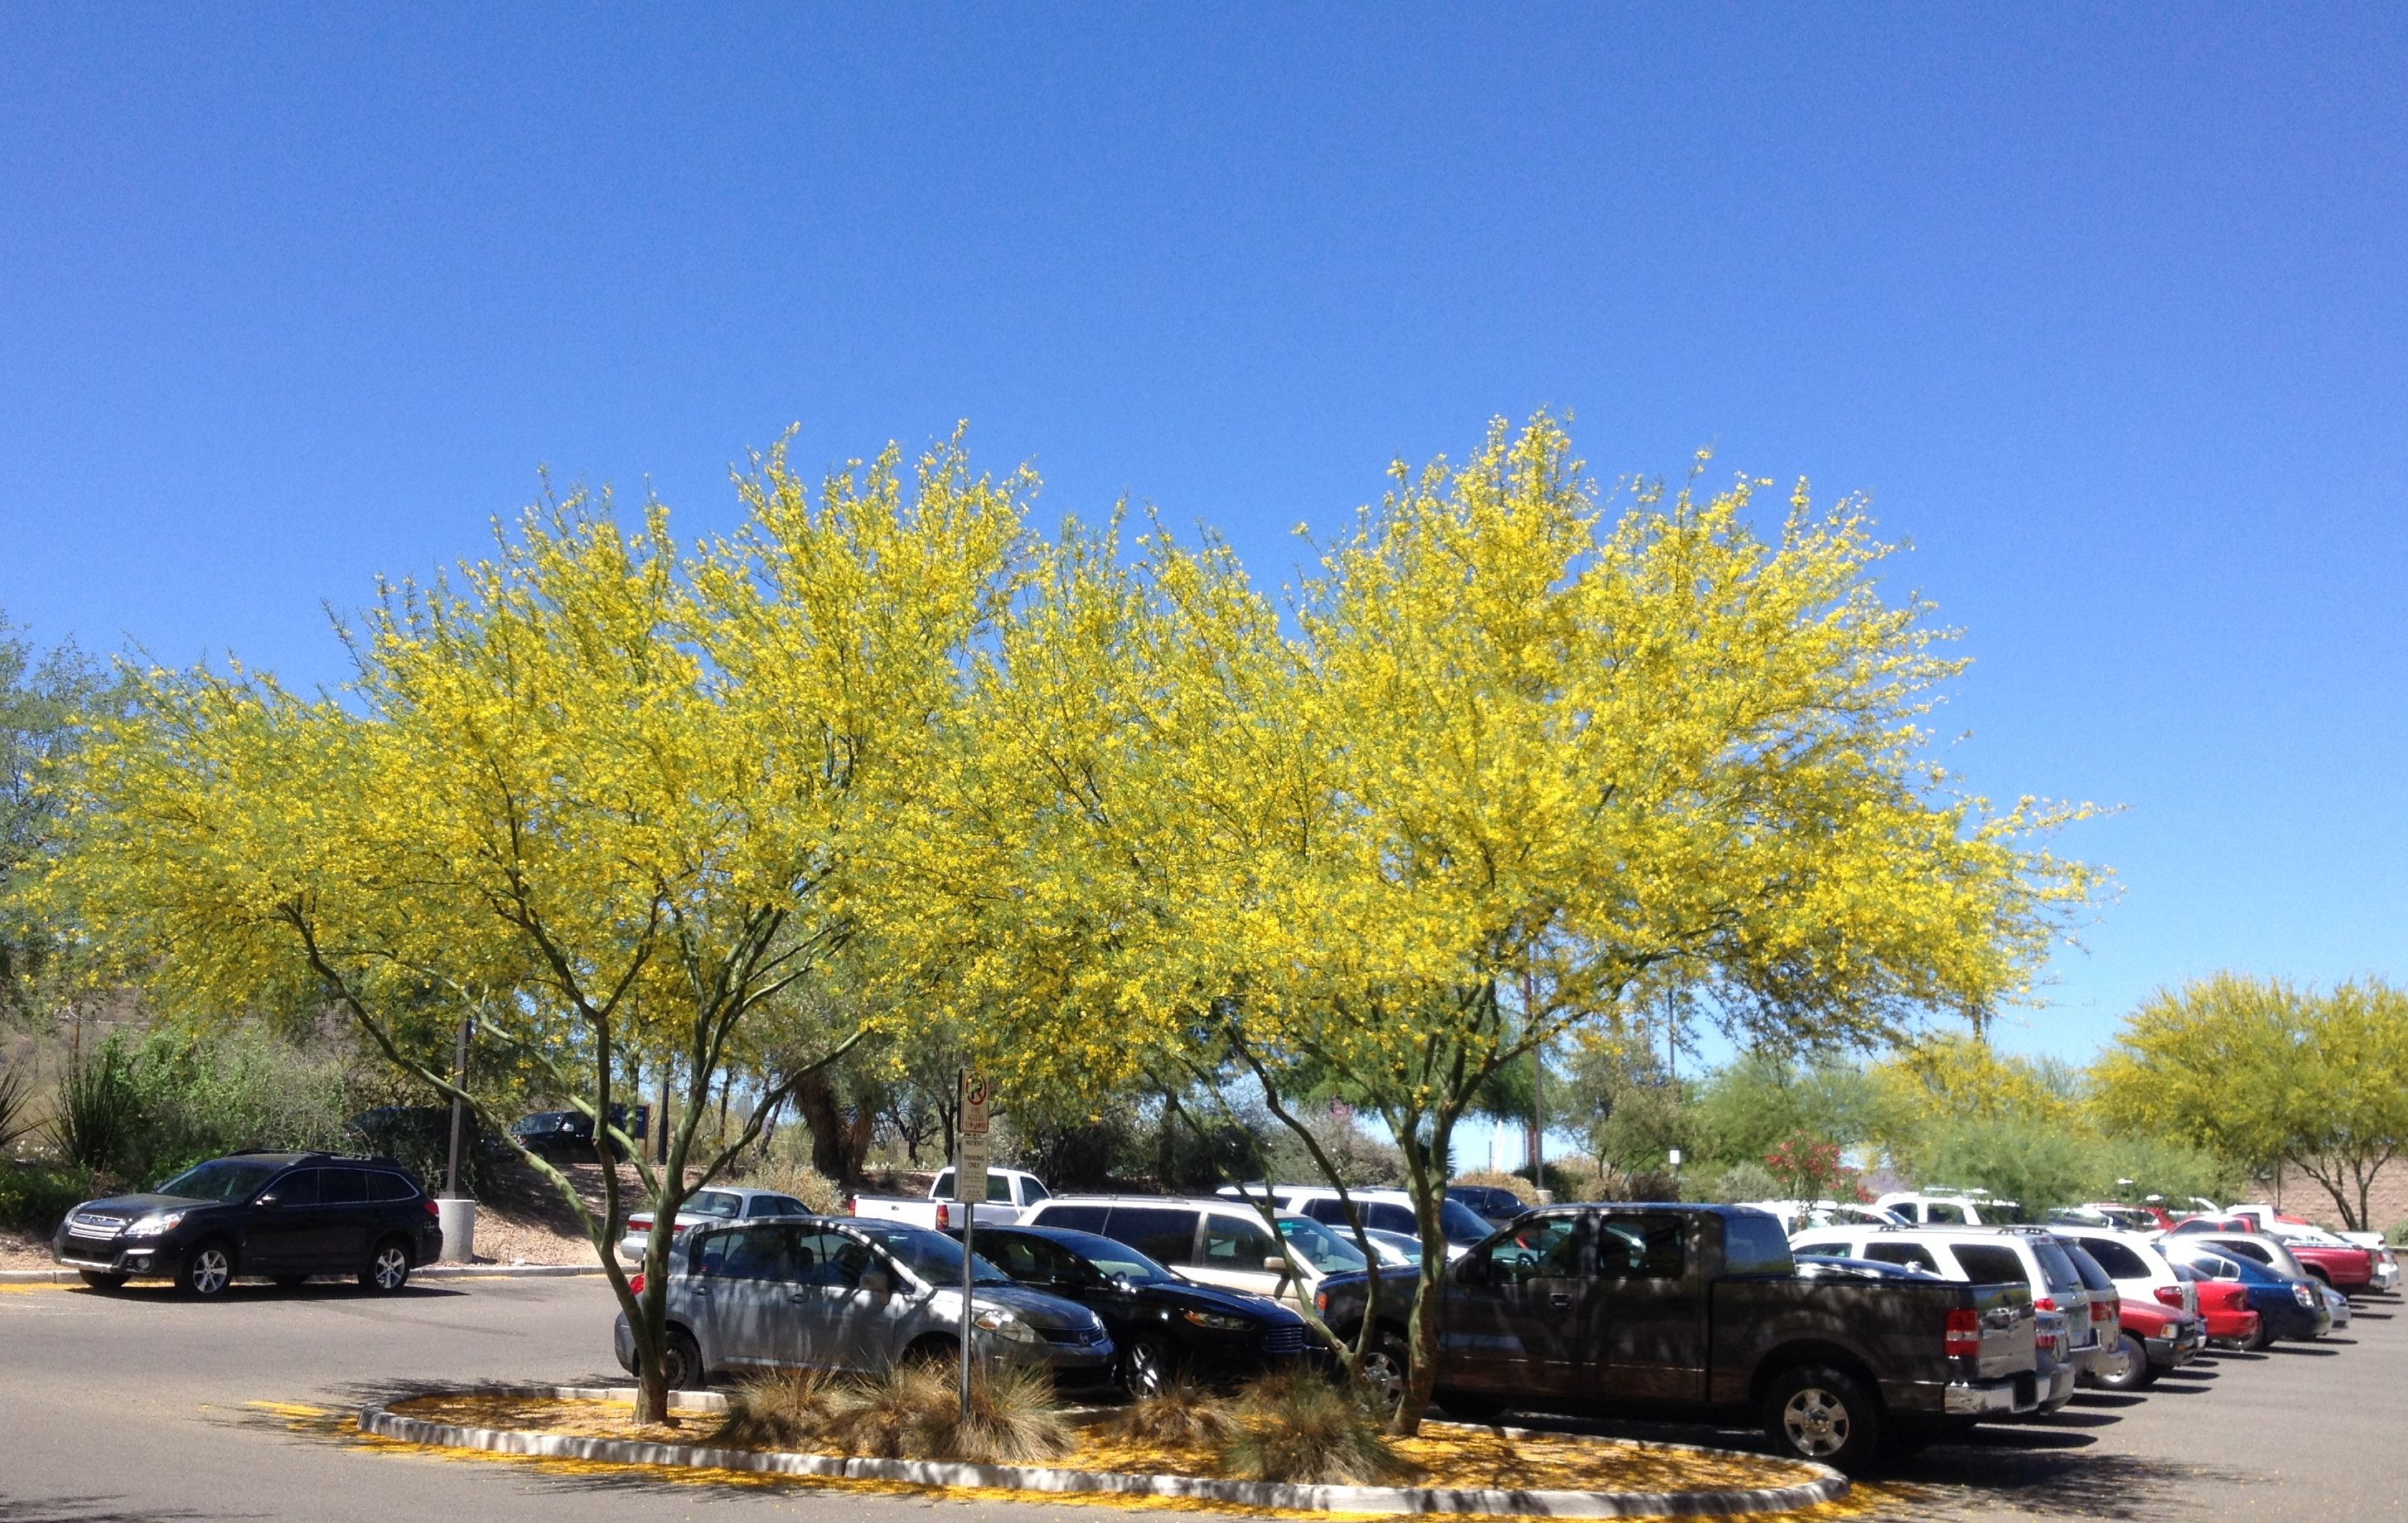
Desert Museum hybrid palo verde–thanks to St Mary’s Hospital for beautiful landscaping!
We have had the joy of palo verde blossoms from mid-April thru May. Mark Dimmitt’s amazing Desert Museum hybrid palo verde continues to grace public buildings and roadways with a glorious yellow glow. Mesquites (life-giving kui wee’hawk to traditional Tohono O’odham) are still producing creamy yellow catkins and greening pods soon to ripen. Red pod clusters are hanging from white-thorn acacia. Dusty lavender ironwood blossoms still bedeck the foothills….Color and Beauty–the first of the gifts…
For wild-food aficionados and first time experimenters, this promises to be a bountiful bean year. Bees are already going wild–they know the buzz. I’m going wild just thinking about the desert’s gifts of nutrition for so many life-forms. Humans are just a few of the happy recipients. With the help of bacteria, the desert’s bean trees even feed the soil with bio-available nitrogen, hidden from our awareness in their root nodules.

Foothills palo verde pods ready for eating off the tree! (maburgess photo)
This week is PALO VERDE TIME for sure! We gotta get out there right away because this only lasts a few days! If you want a sweet treat to pluck right from the tree, take a walk up almost any rocky hillside in the Sonoran Desert and find the Little-leaf or Foothills Palo Verde (Parkinsonia microphylla–the green barked shrubby tree with teensy leaflets, actually no leaflets right now in June’s heat). It will be covered with little hanging pods that look like paternoster beads, each seed making a bulge in the pod. Say a prayer of blessing and thanks to the Koh’o-koh-matk Tree and to Nature for this food.
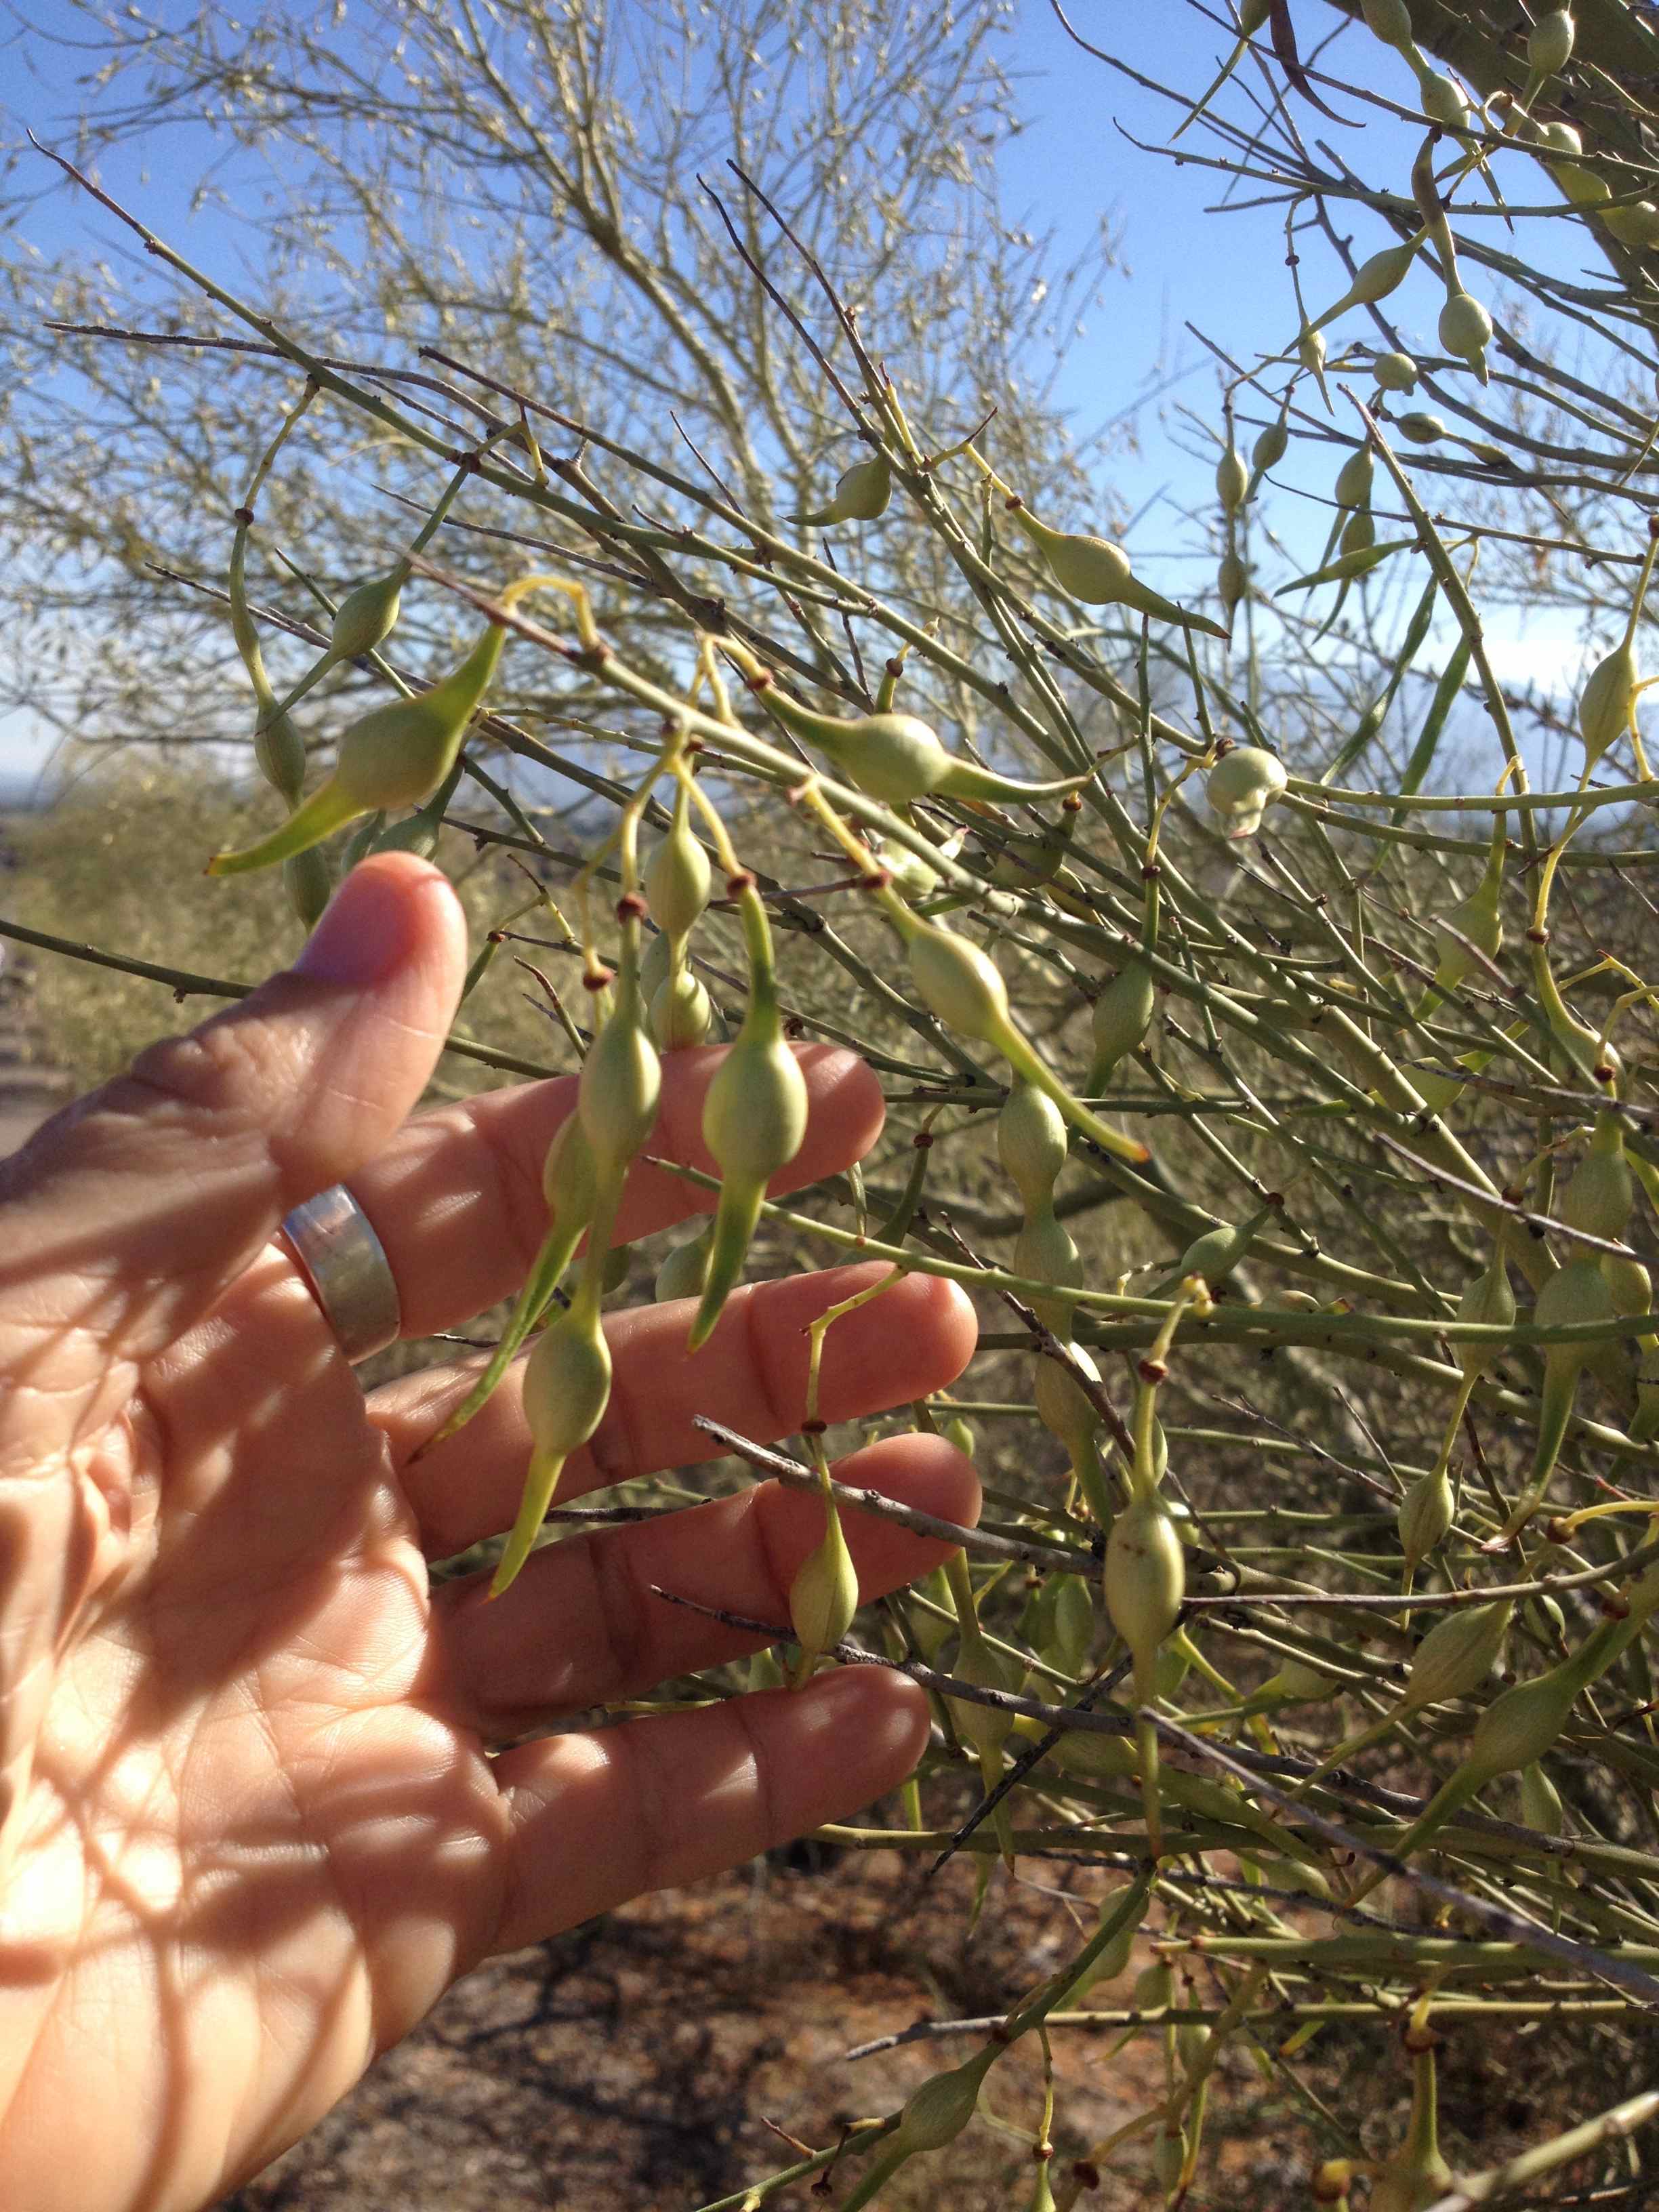
Seed pods of foothills palo verde plump and ready to pick fresh for a green desert treat.
If you find it at the right stage, you can snip the pod-covering with your teeth and peel it back to reveal the pea-like green bean–sweeter than any sweet pea you ever tasted.
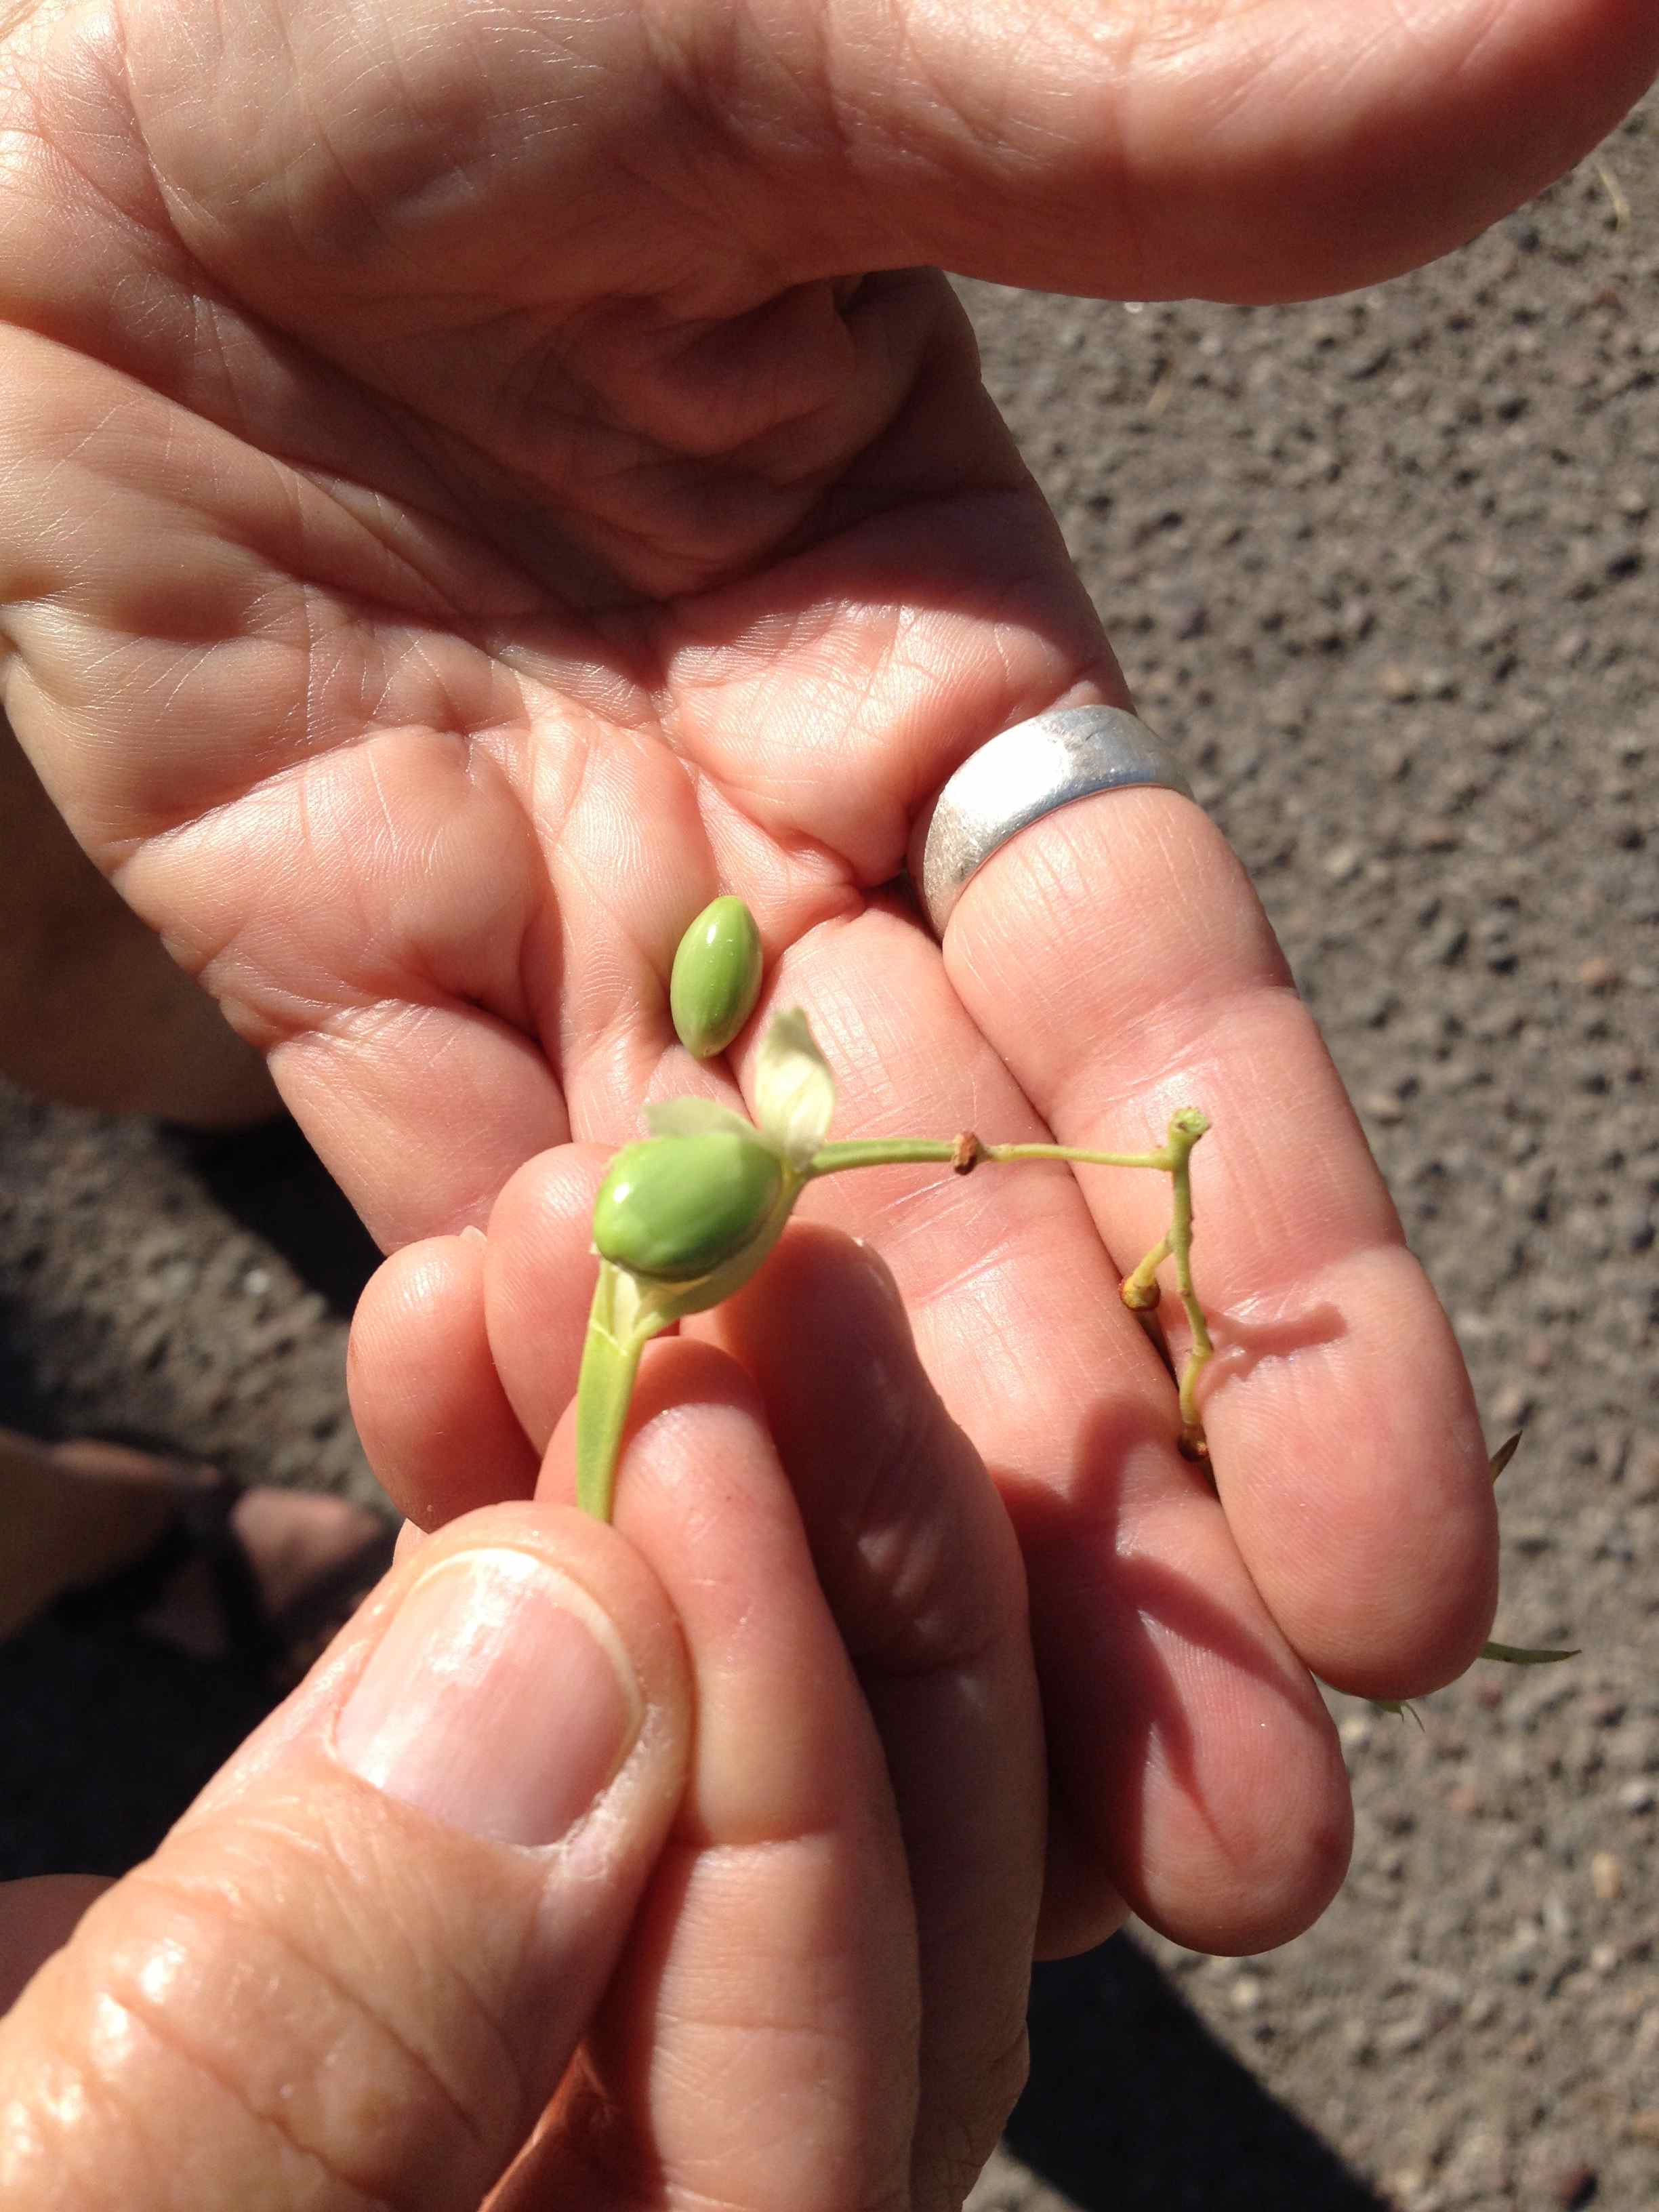
Just peel back the outer fiber and voila! there’s the delicious sweet “pea”
It can be eaten fresh right then and there. Most harvesters can’t help gorging at first, gathering later.
The variations from one palo verde to the next are interesting to see. Some pods are all green, some flecked with red, some are even purple!
Foothills palo verde with bright purple pods–Tucson’s west side.

Foothills palo verde (Parkinsonia microphylla) pod ready to eat.
If you find palo verde pods that are really getting super-plump and the pods are turning slightly buff or straw colored, they may be a little beyond the sweet stage. At that point it’s best to let them fully mature and to use them for grinding later. Both the sweet soft green “beans” and the later hard stony seeds when mature are super nutrition for whoever eats them–both chucky-jam-full of complex carbs and high protein.
Foothills palo verde harvest (maburgess photo)
Years ago in Myrtle Beach, South Carolina, I purchased snacks from a kid selling what he called “balled peanuts.” The delectable treats had simply been boiled in a salt-brine. Inspired by that treatment, I tried the same process on our desert legumes. It works wonders on mature ironwood pods–watch for them to be ripening in the coming weeks. Great also for prepping plump green foothills palo verde pods before they harden. Quick brining produces a gourmet delight–Desert Edamame!–creamier and tastier than soy bean (and who knows now if any soy is GMO-free?). Just imagine….Sonora Desert sushi, tilapia caterpillars with a side of Palo Verde Edamame….
Foothills palo verde pods cooked in brine ready to eat (maburgess photo)
Here’s a quick recipe for Desert Palo Verde “Edamame” Hors O’ouvres:
In a saucepan:
2 cups washed whole foothills palo verde pods
2 cups water
2 tsp sea salt or RealSalt
Boil for 5-10 min to desired “done-ness” or softness.
Chill and serve as snack, as a blow-em-away pot-luck offering, or as a complement to any Asian cuisine.
Easier than edamame–and you know they are not GMO! Yum!
As pods ripen further on our Sonoran Desert bean trees to become hard seeds, the cooking technology can adapt. Parching and grinding the nutritious but super-hard seeds of palo verde, ironwood, and acacia can create unusual and delicious flours for baking–but that’s another story…
Contact http://www.DesertHarvesters.org for upcoming events like the mesquite milling at Mercado San Augustin, Thursday, June 25, and demos by some of the great Bean Tree harvesters like Barbara Rose, Amy Valdes Schwemm, and Brad Lancaster. Also Google Bean Tree Farm for more harvesting ideas. Hey, thanks to Barbara Kingsolver for spreading the idea of our “Bean Trees” to the outside world!
With such nutritious plenty surrounding us, delicious gifts from hoh’it-kahm, kui wee’hawk, and ko’o-ko-matk, bean trees which the Tohono O’odham have known for centuries, we can taste–and experience–food security in our bountiful desert.
If you want more info on harvesting the desert or monsoon gardening, do come talk with me, Tia Marta, at our Sunday, St Philips Farmers Market booth–in the shade of the Flor de Mayo canopy–8am-12noon. You can find more wild desert food products at our website http://www.flordemayoarts.com. Also watch for announcements by Tohono Chul Park of our upcoming Fruits of the Desert class this August (www.tohonochul.org).
Aunt Linda here talking turkey on this soft, surprising, rainy, June morning. For me, turkeys are magic. They may not be very bright, but there are many times when smarts may be over rated. On this rainy morning, where the dust of life and the desert is washed clean, I choose heart and magic over brains.
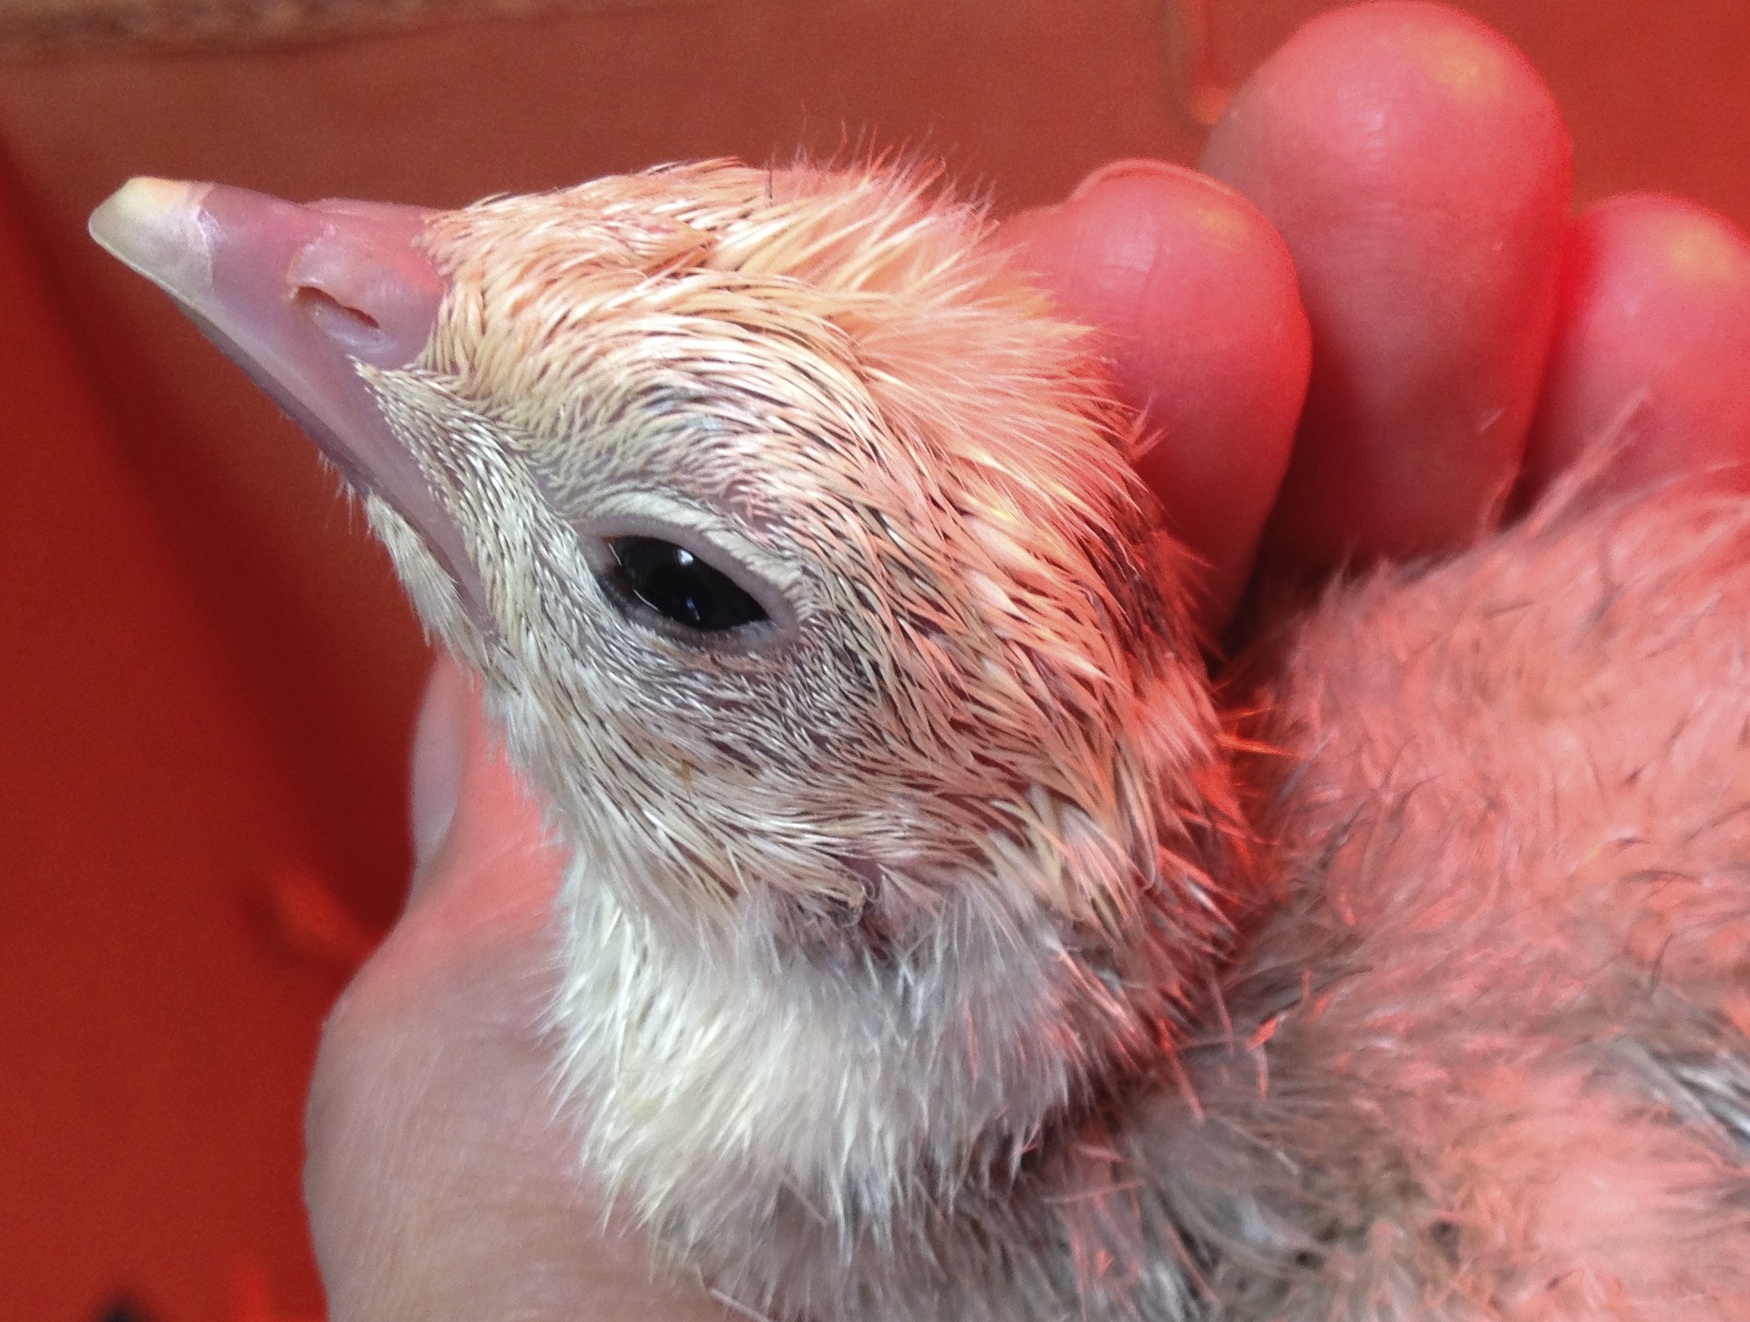
The heirloom turkey chick in the photo above is about two hours out of the shell; you can still see it’s “egg tooth” (the hard and temporary tooth that helps it peck its way through the shell and “out” into Life prominent on the tip of it’s beak.)
All domesticated turkeys, (like the hatchling above) come from wild turkeys indigenous to North and South America,
Turkey’s have run wild on this continent for centuries. There are campaigns afoot to re-wild them again, The Gould’s Wild Turkey was re-intorduces to the Sky Islands, here in Arizona, in 2013 – and appear to be thriving. Gould’s Wild Turkey (M.g. mexicana) (Gould, 1856) have long legs, large feet, long tail feathers; it’s primary coloring is copper and greenish gold. The south Mexican wild turkey (M.g. gallopavo) is not found in the US or Canada. Archeological sites in central Mexico, dating back to 800-100 BC reveal M. gallopavo bones, but whether these were domestic or wild is not clear.
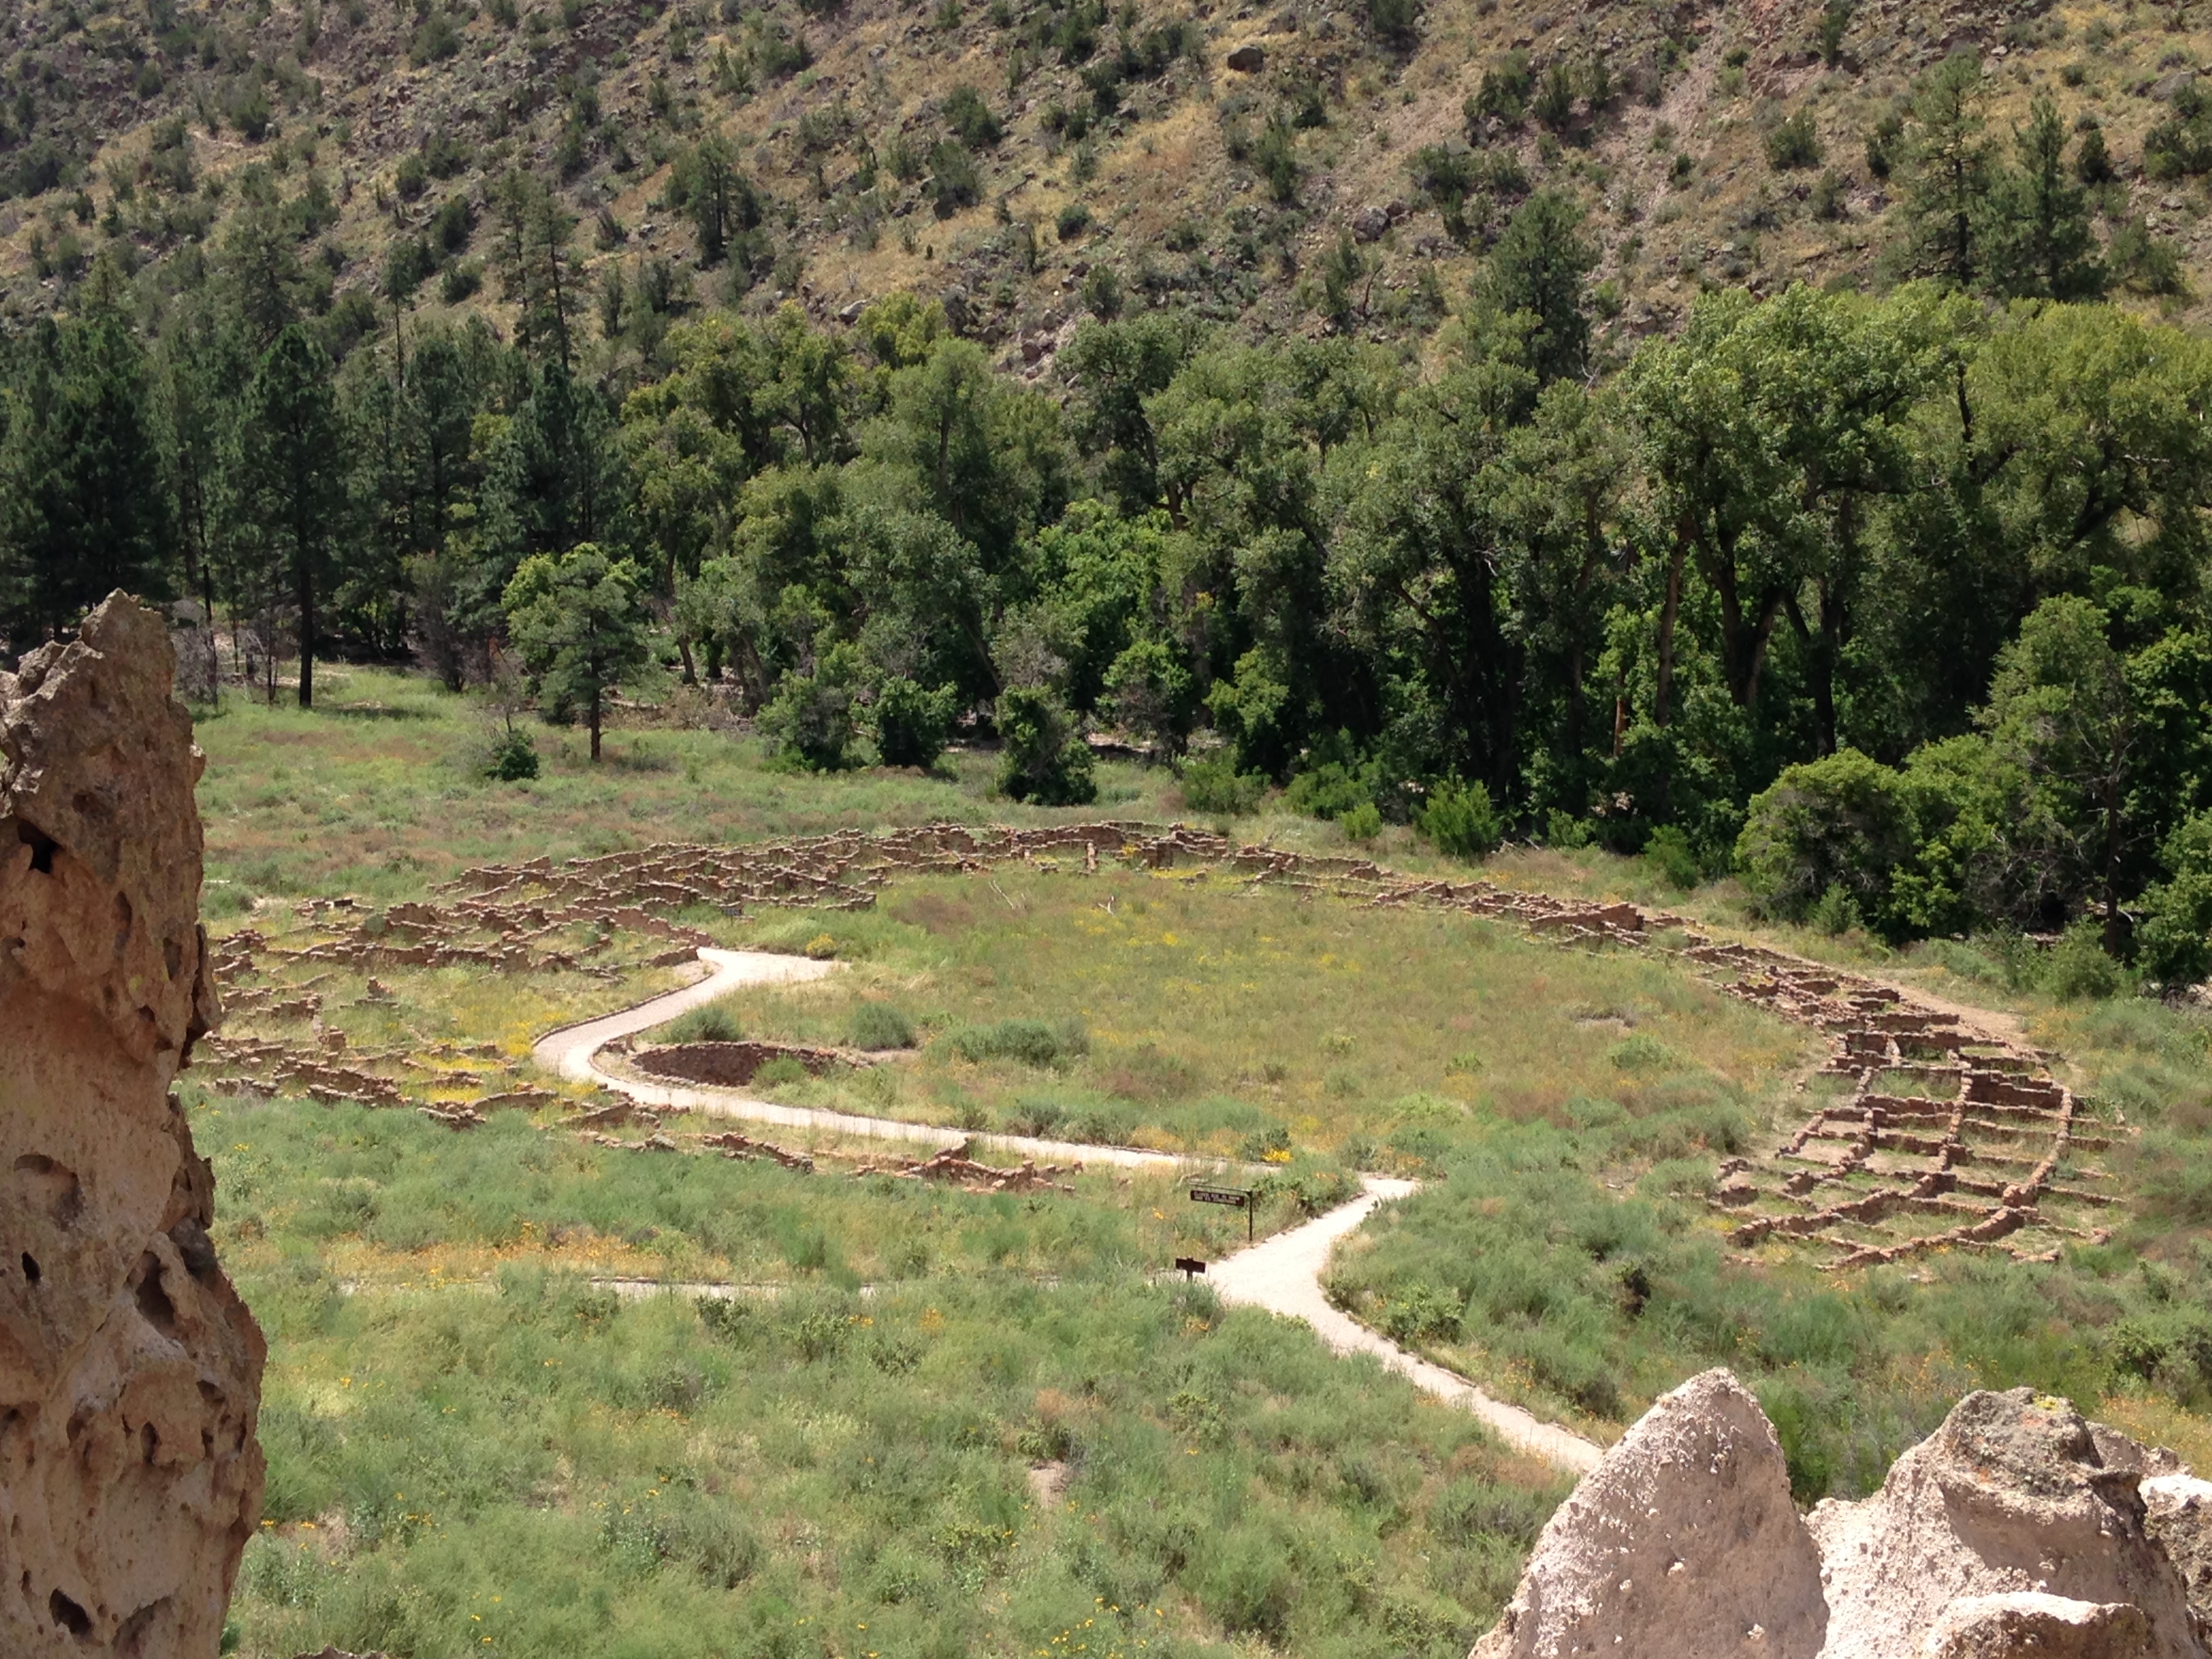
On a trip to New Mexico last summer, I came across the ruins of the ancient Village of Tyuonyo (QU-weh-nee); (see photo above) where rooms were built to shelter turkeys. There, archeological records tell us that Turkeys were raised primarily for their feathers – which were twisted with yucca fiber and woven into blankets, socks, and clothing. This would make sense for COLD winters in the high worlds of the pinon-juniper of northern New Mexico.
When raising a new-to-me breed, I never make a move without consulting the Livestock Breeds Conservancy. A trip to their website alone is an adventure! It is filled with nutrition information etc ,,, (heritage breeds have requirements that differ from conventional breeds). I highly encourage you to find out more at http://livestockconservancy.org/.
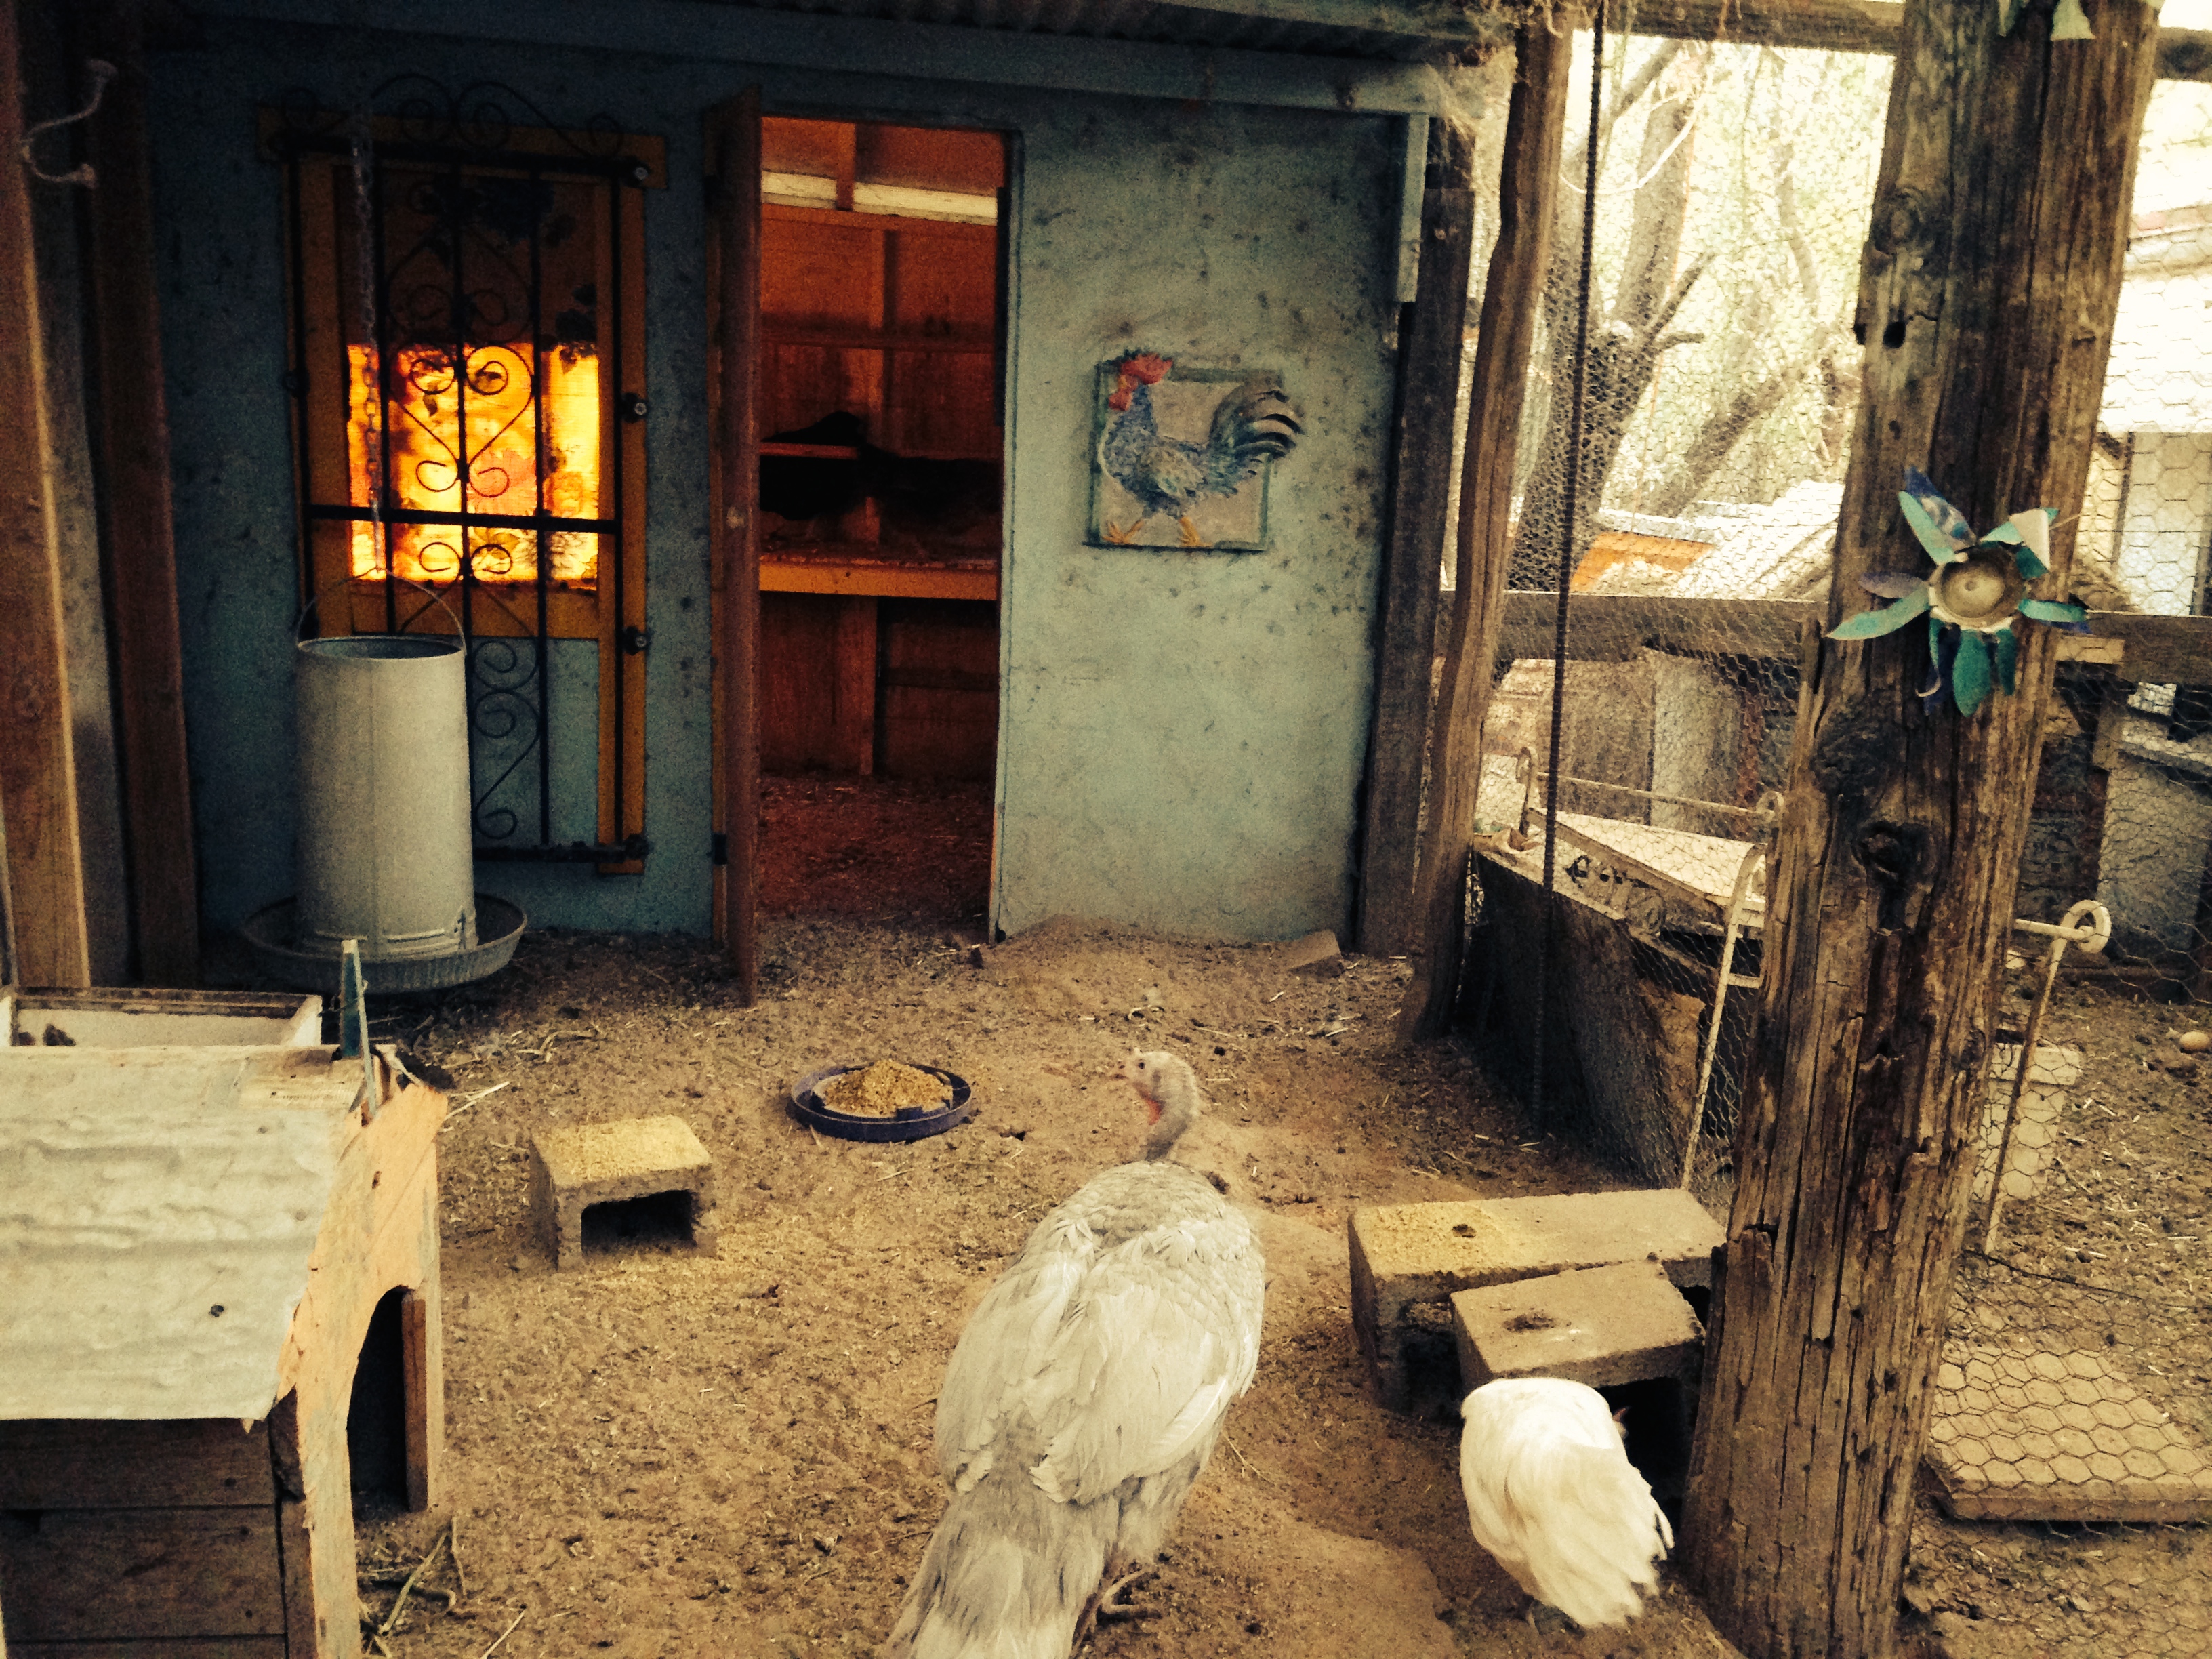
I love the way they move. I love the way they sound. I love how protective the Toms (the males) can be when they “sound the alarm” upon hearing something (bobcat, hawk, or human) enter the yard). Toms, in all honestly, can become quite aggressive as they come of age, so be careful if you decide to raise them and you also have small children. I love the THUMP the males make as they strut. I love the way a warm, just laid turkey egg feel in my hand. I love how the hens will brood over any number of eggs.. Whether you raise turkeys for meat or eggs or just plain fun, I encourage you check out an heirloom breed and consult the http://livestockconservancy.org/
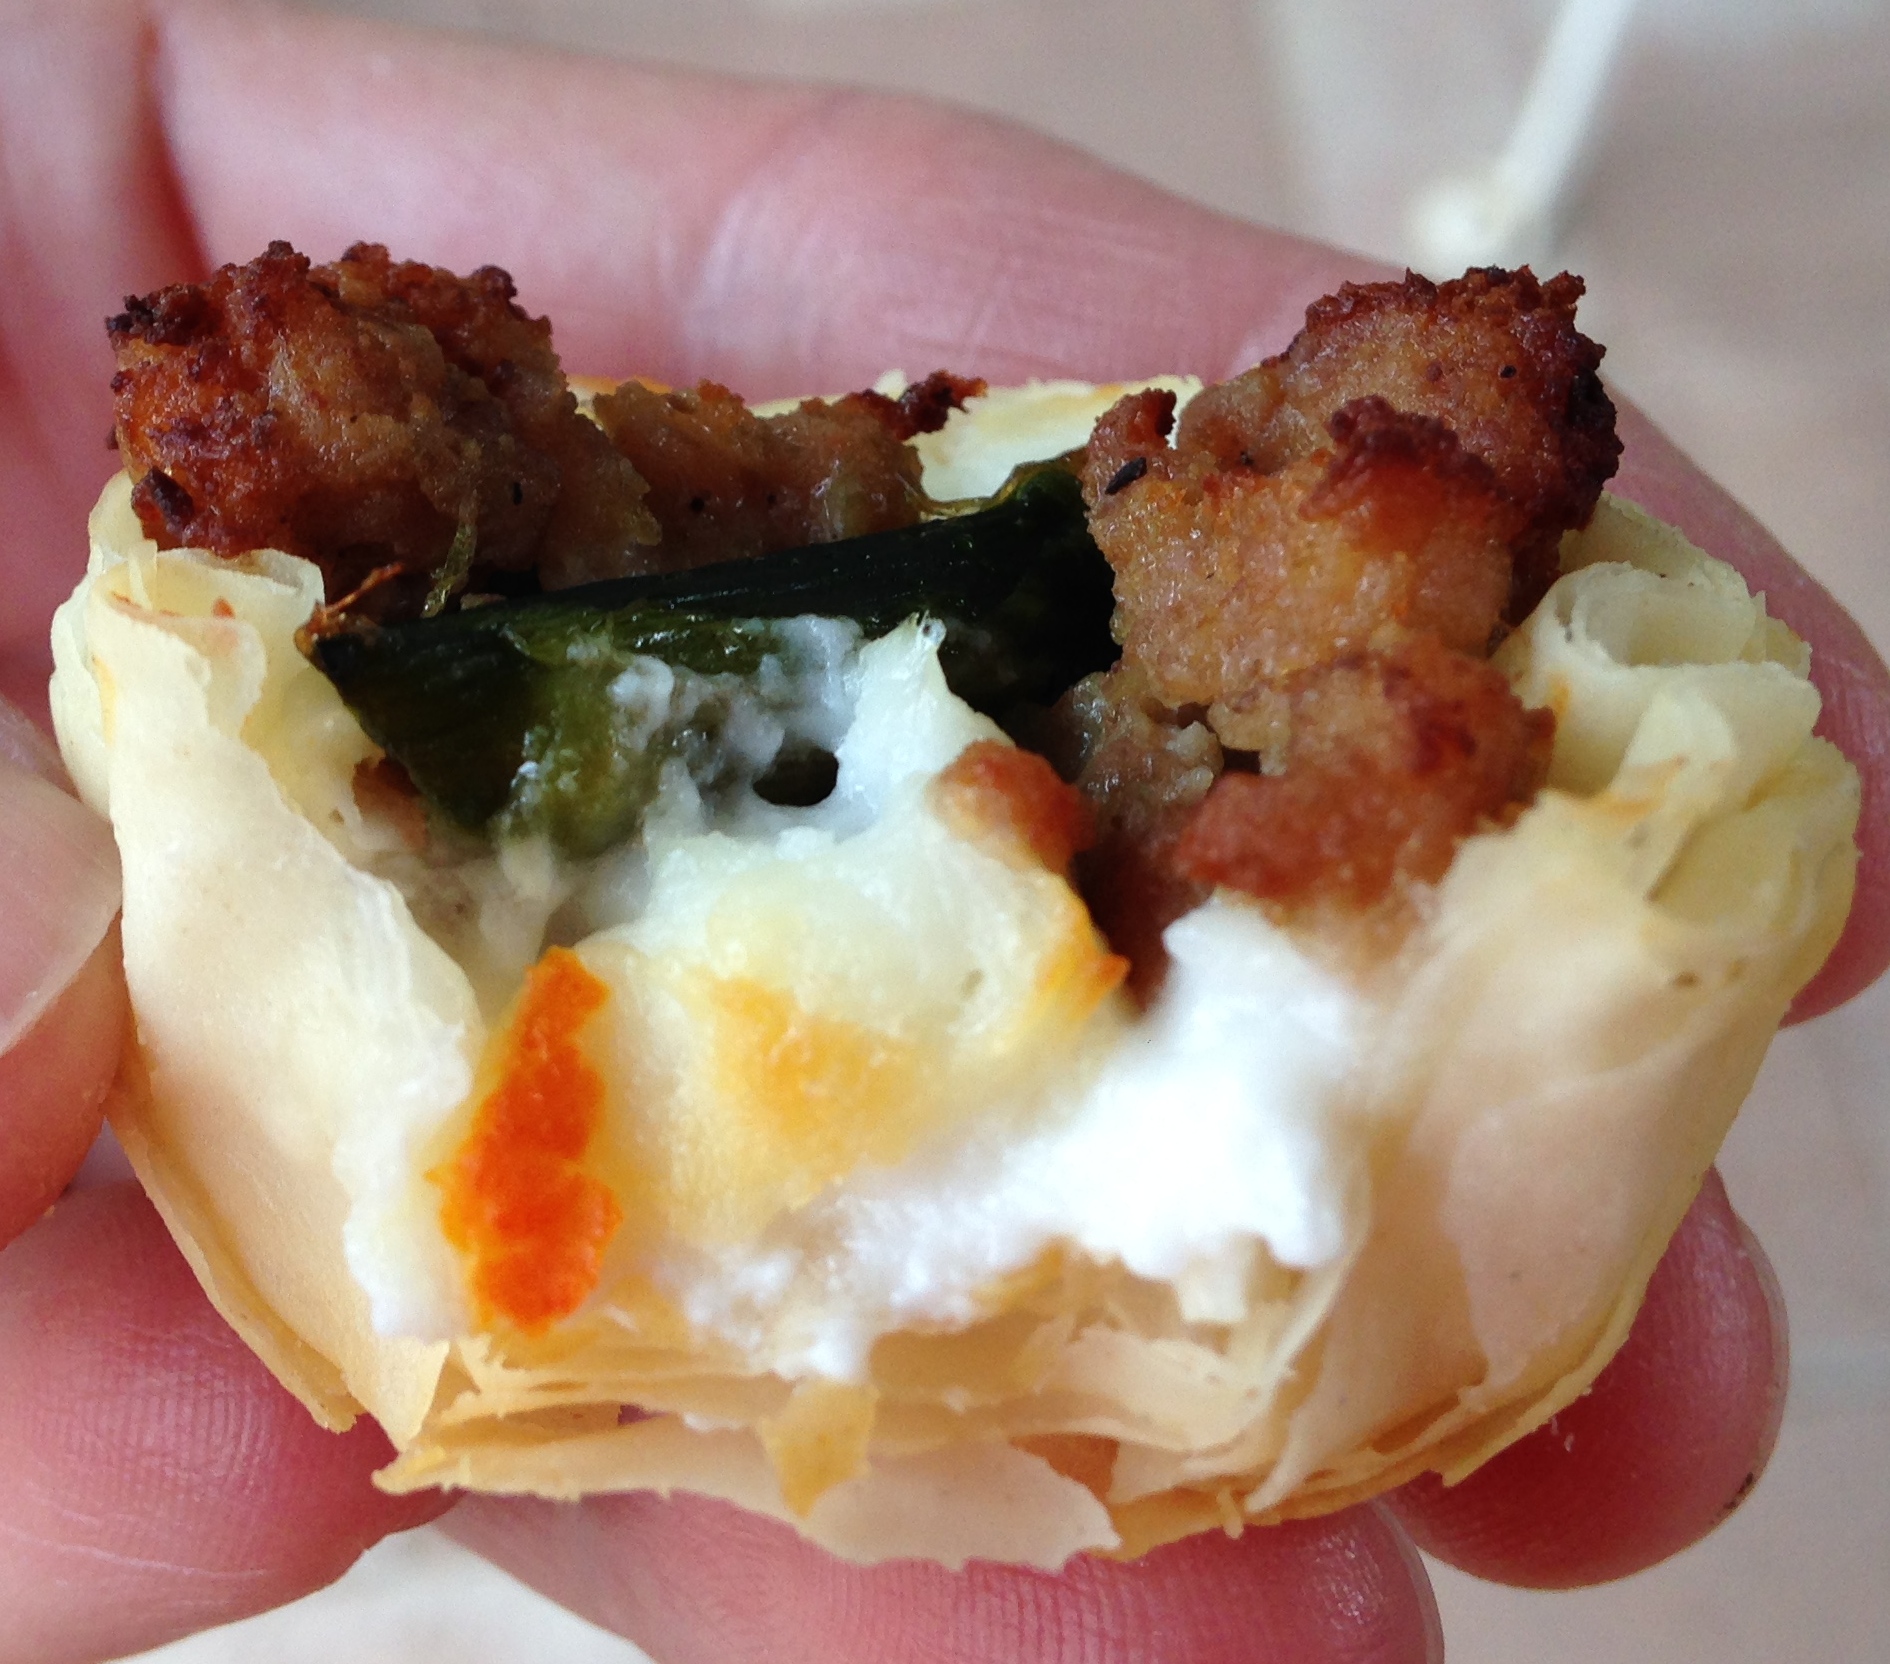
RECIPE: Magic turkey Tapas – Pies – with bird pepper goat cheese. The Magic of these little Tapas-Pies is that they are made from two significant indigenous Ingredients. The native bird of the America’s, the turkey. And: native chiltepin/bird peppers (humans have been eating for about 9000 years.) Chilpetin is considered the closest living relative to the oldest known chile.
NOTE: if you think you want to try the goat yogurt chiltpein cheese, make it 24 hours ahead. (See January 2014 for recipe)
*To start. preheat the oven to 350 and thaw 24 Mini FIllo Shells (of course if you are a purest, by all means make your own)
INGREDIENTS:
-half a medium red onion (finely chopped)
-two toes of garlic (finely chopped)
-16 oz of ground turkey
-6-10 crushed chiltepin (or any red chile you like)
-a handful of oregano from the garden
-one bunch of asparagus (steamed or roasted)
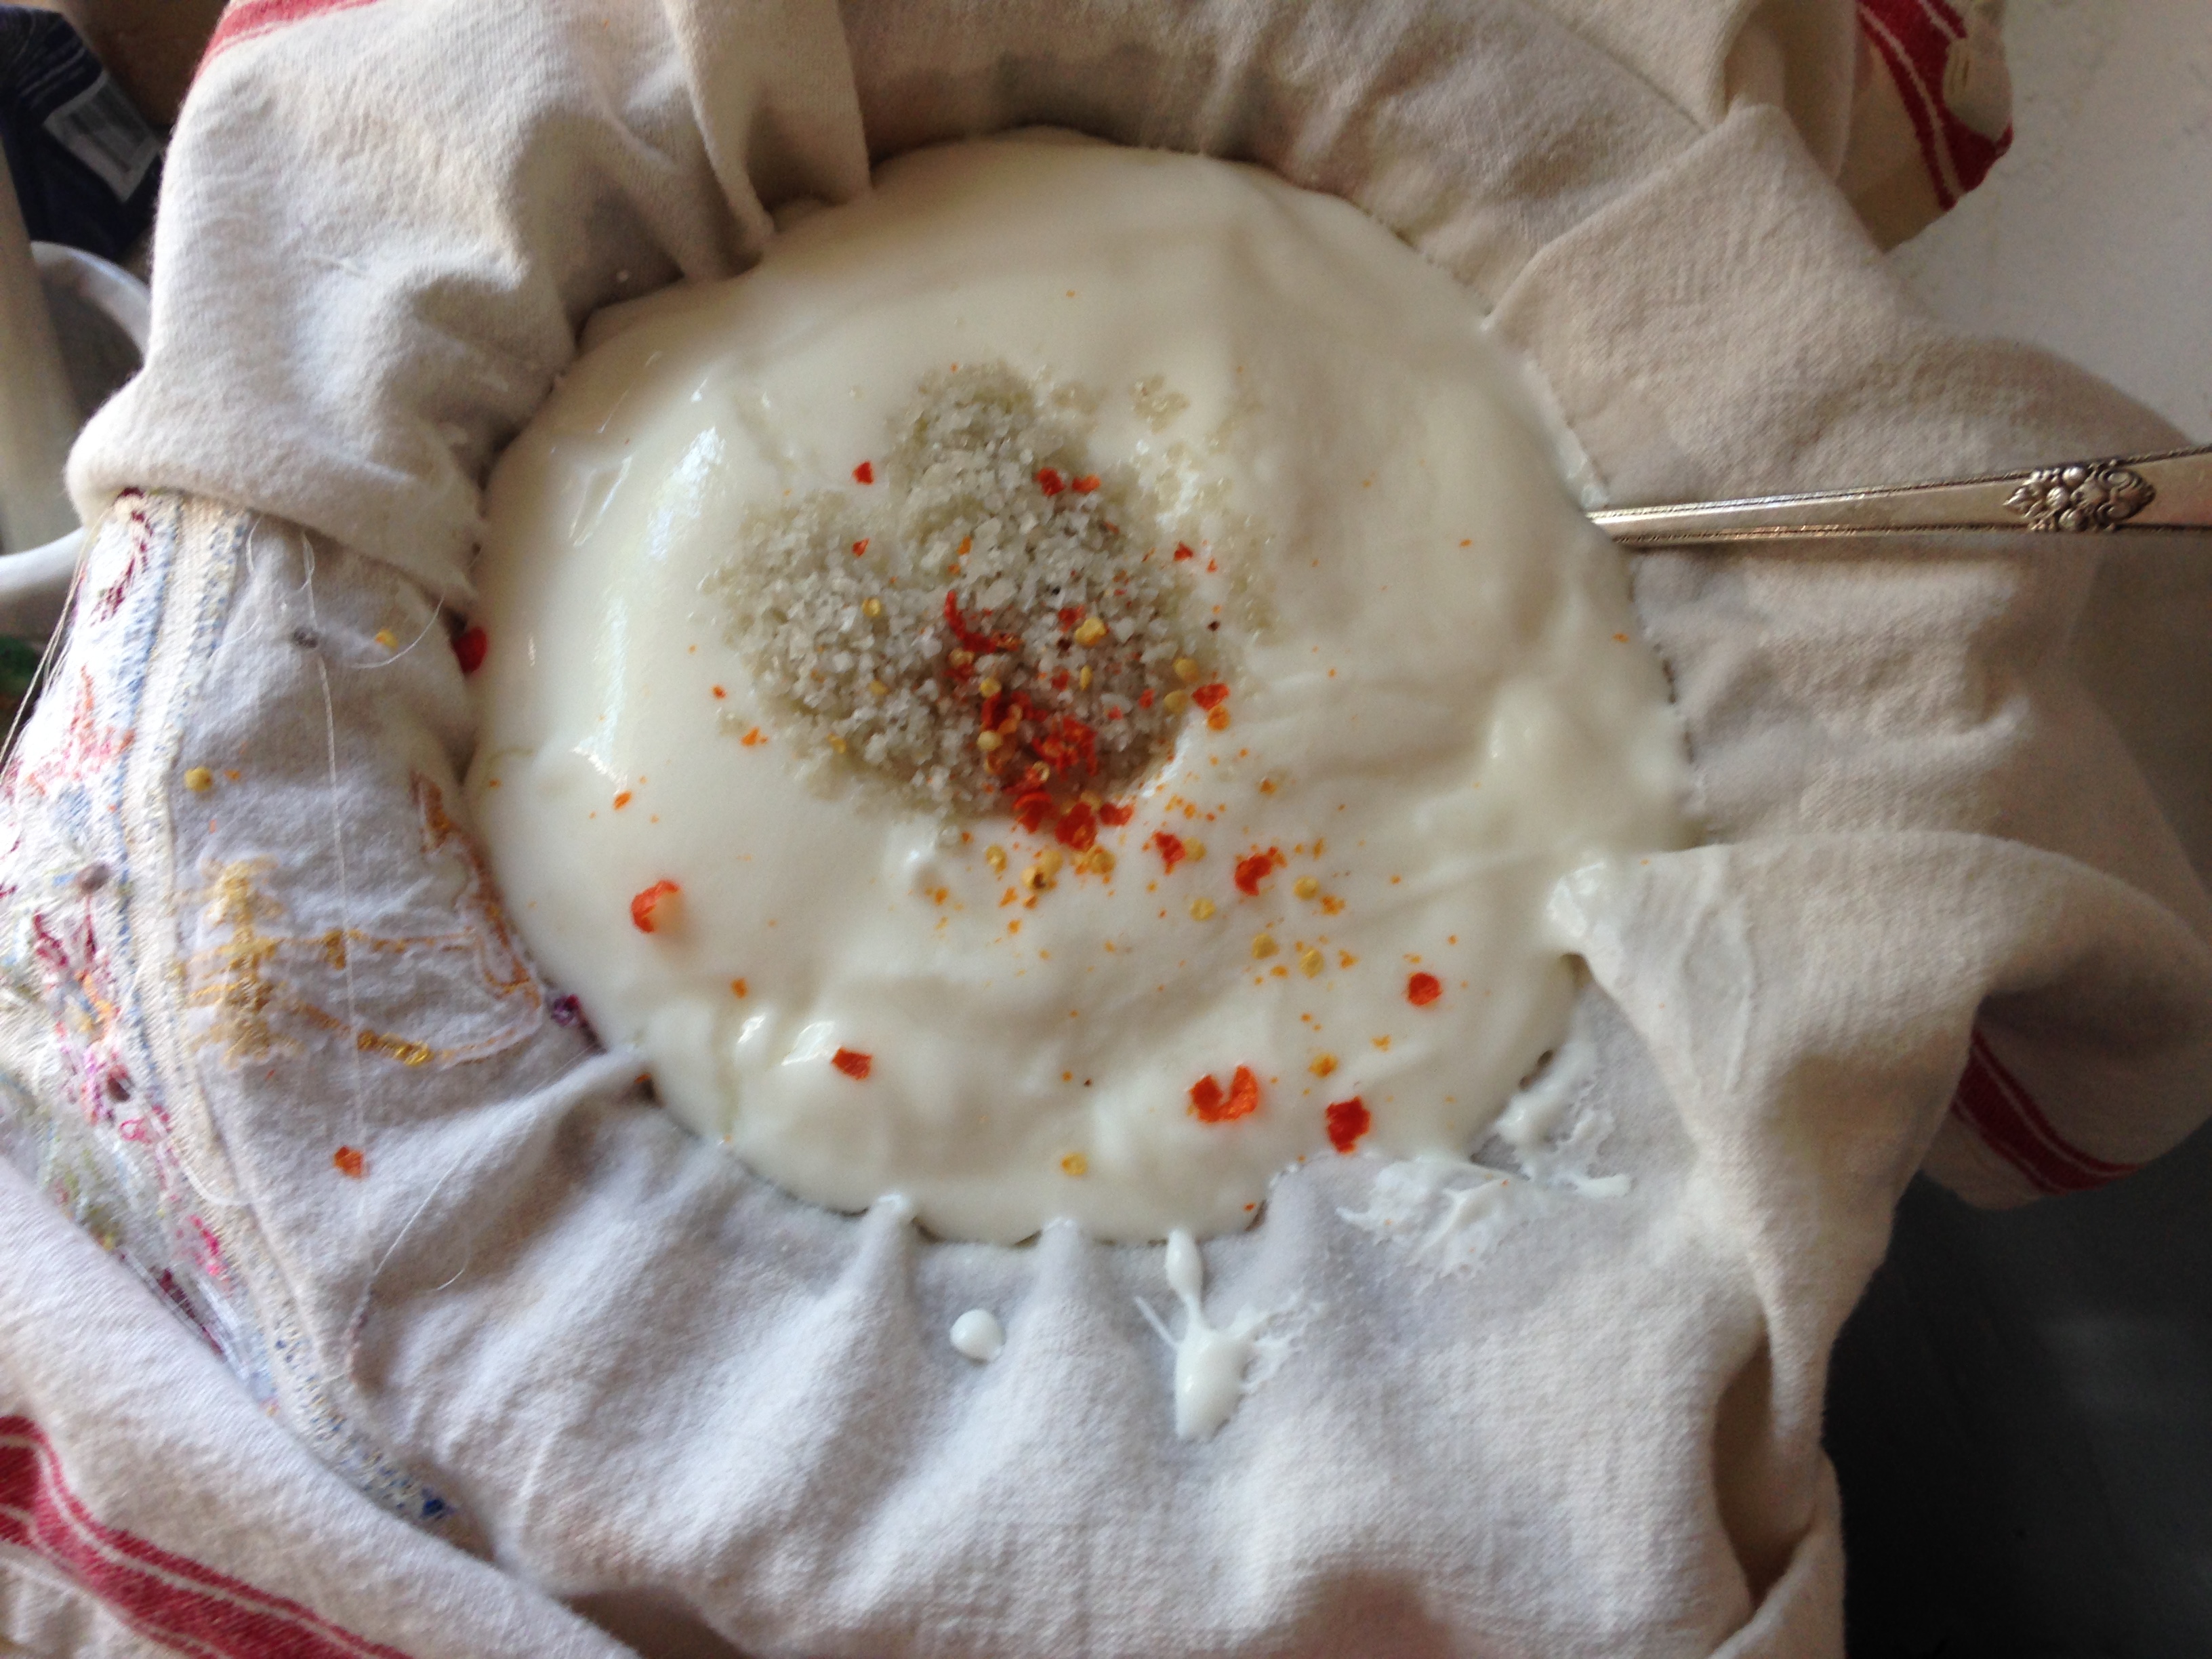
-chileptin goat cheese (make from full fat. 12 oz yogurt, with two tablespoons of chunky salt)
HOW TO:
saute the onion, garlic,

then add turkey, ground chile – cook thoroughly — add oregano and asparagus.

Fill the Fillo Shells
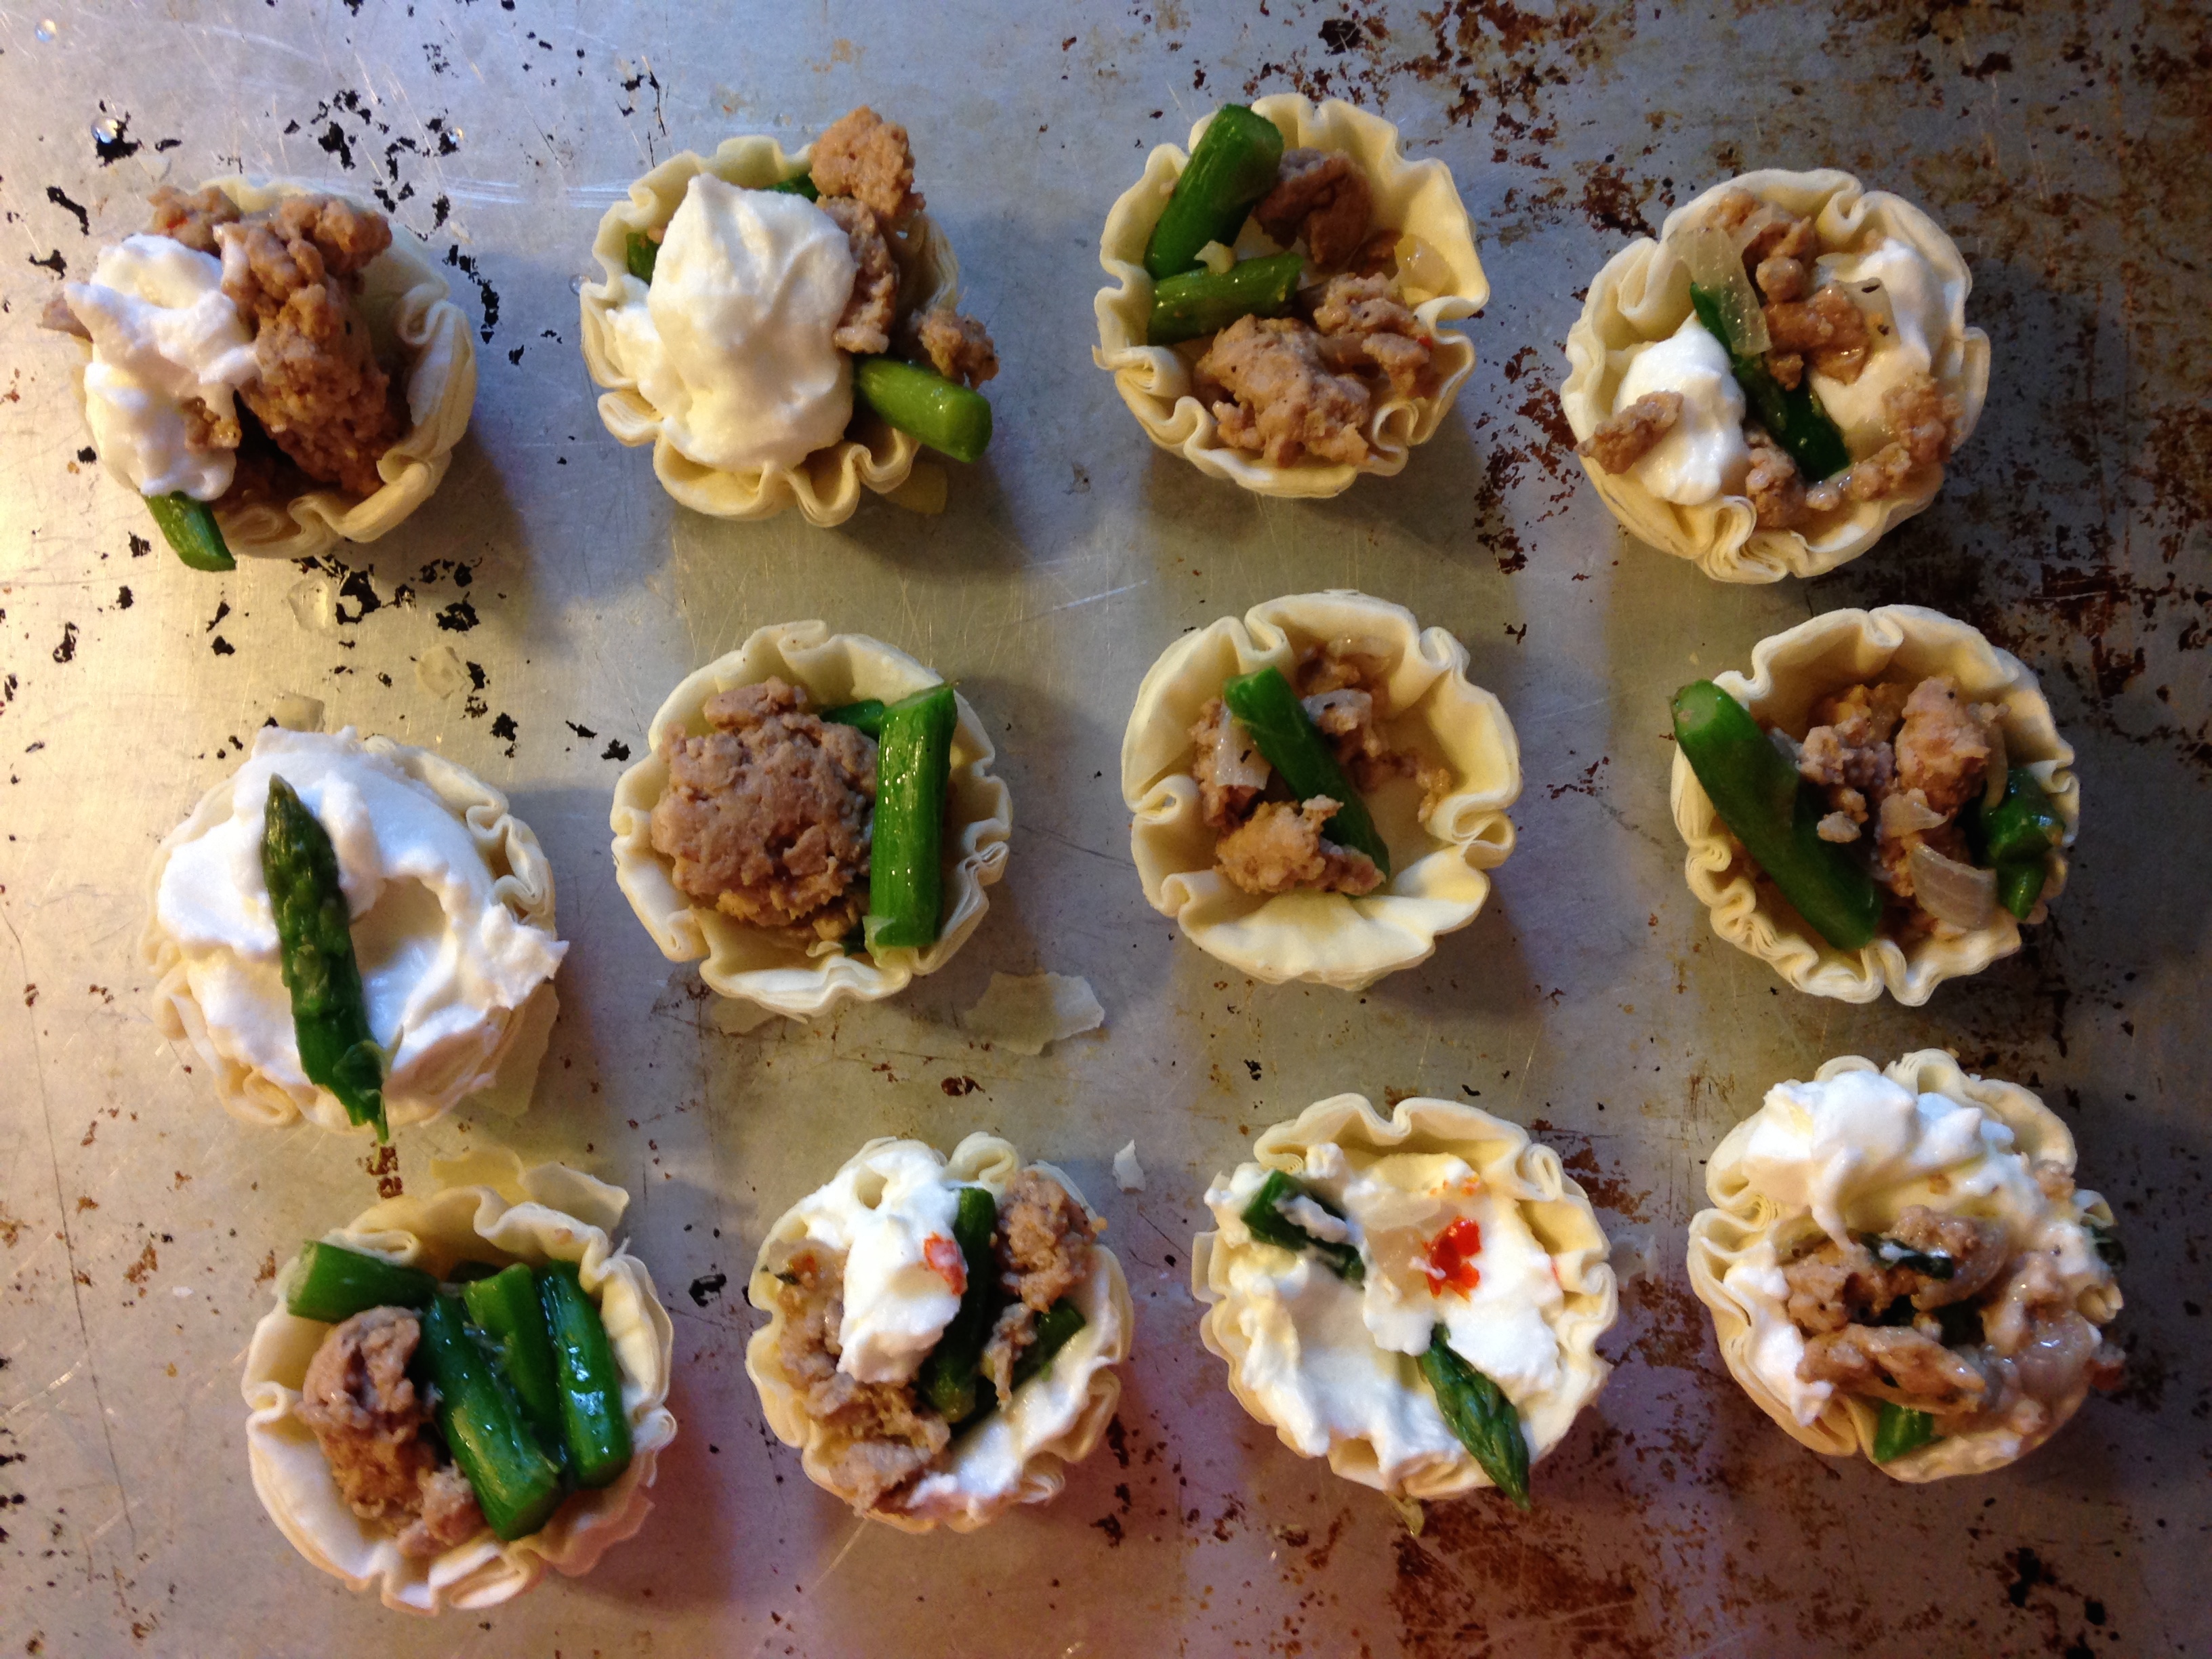
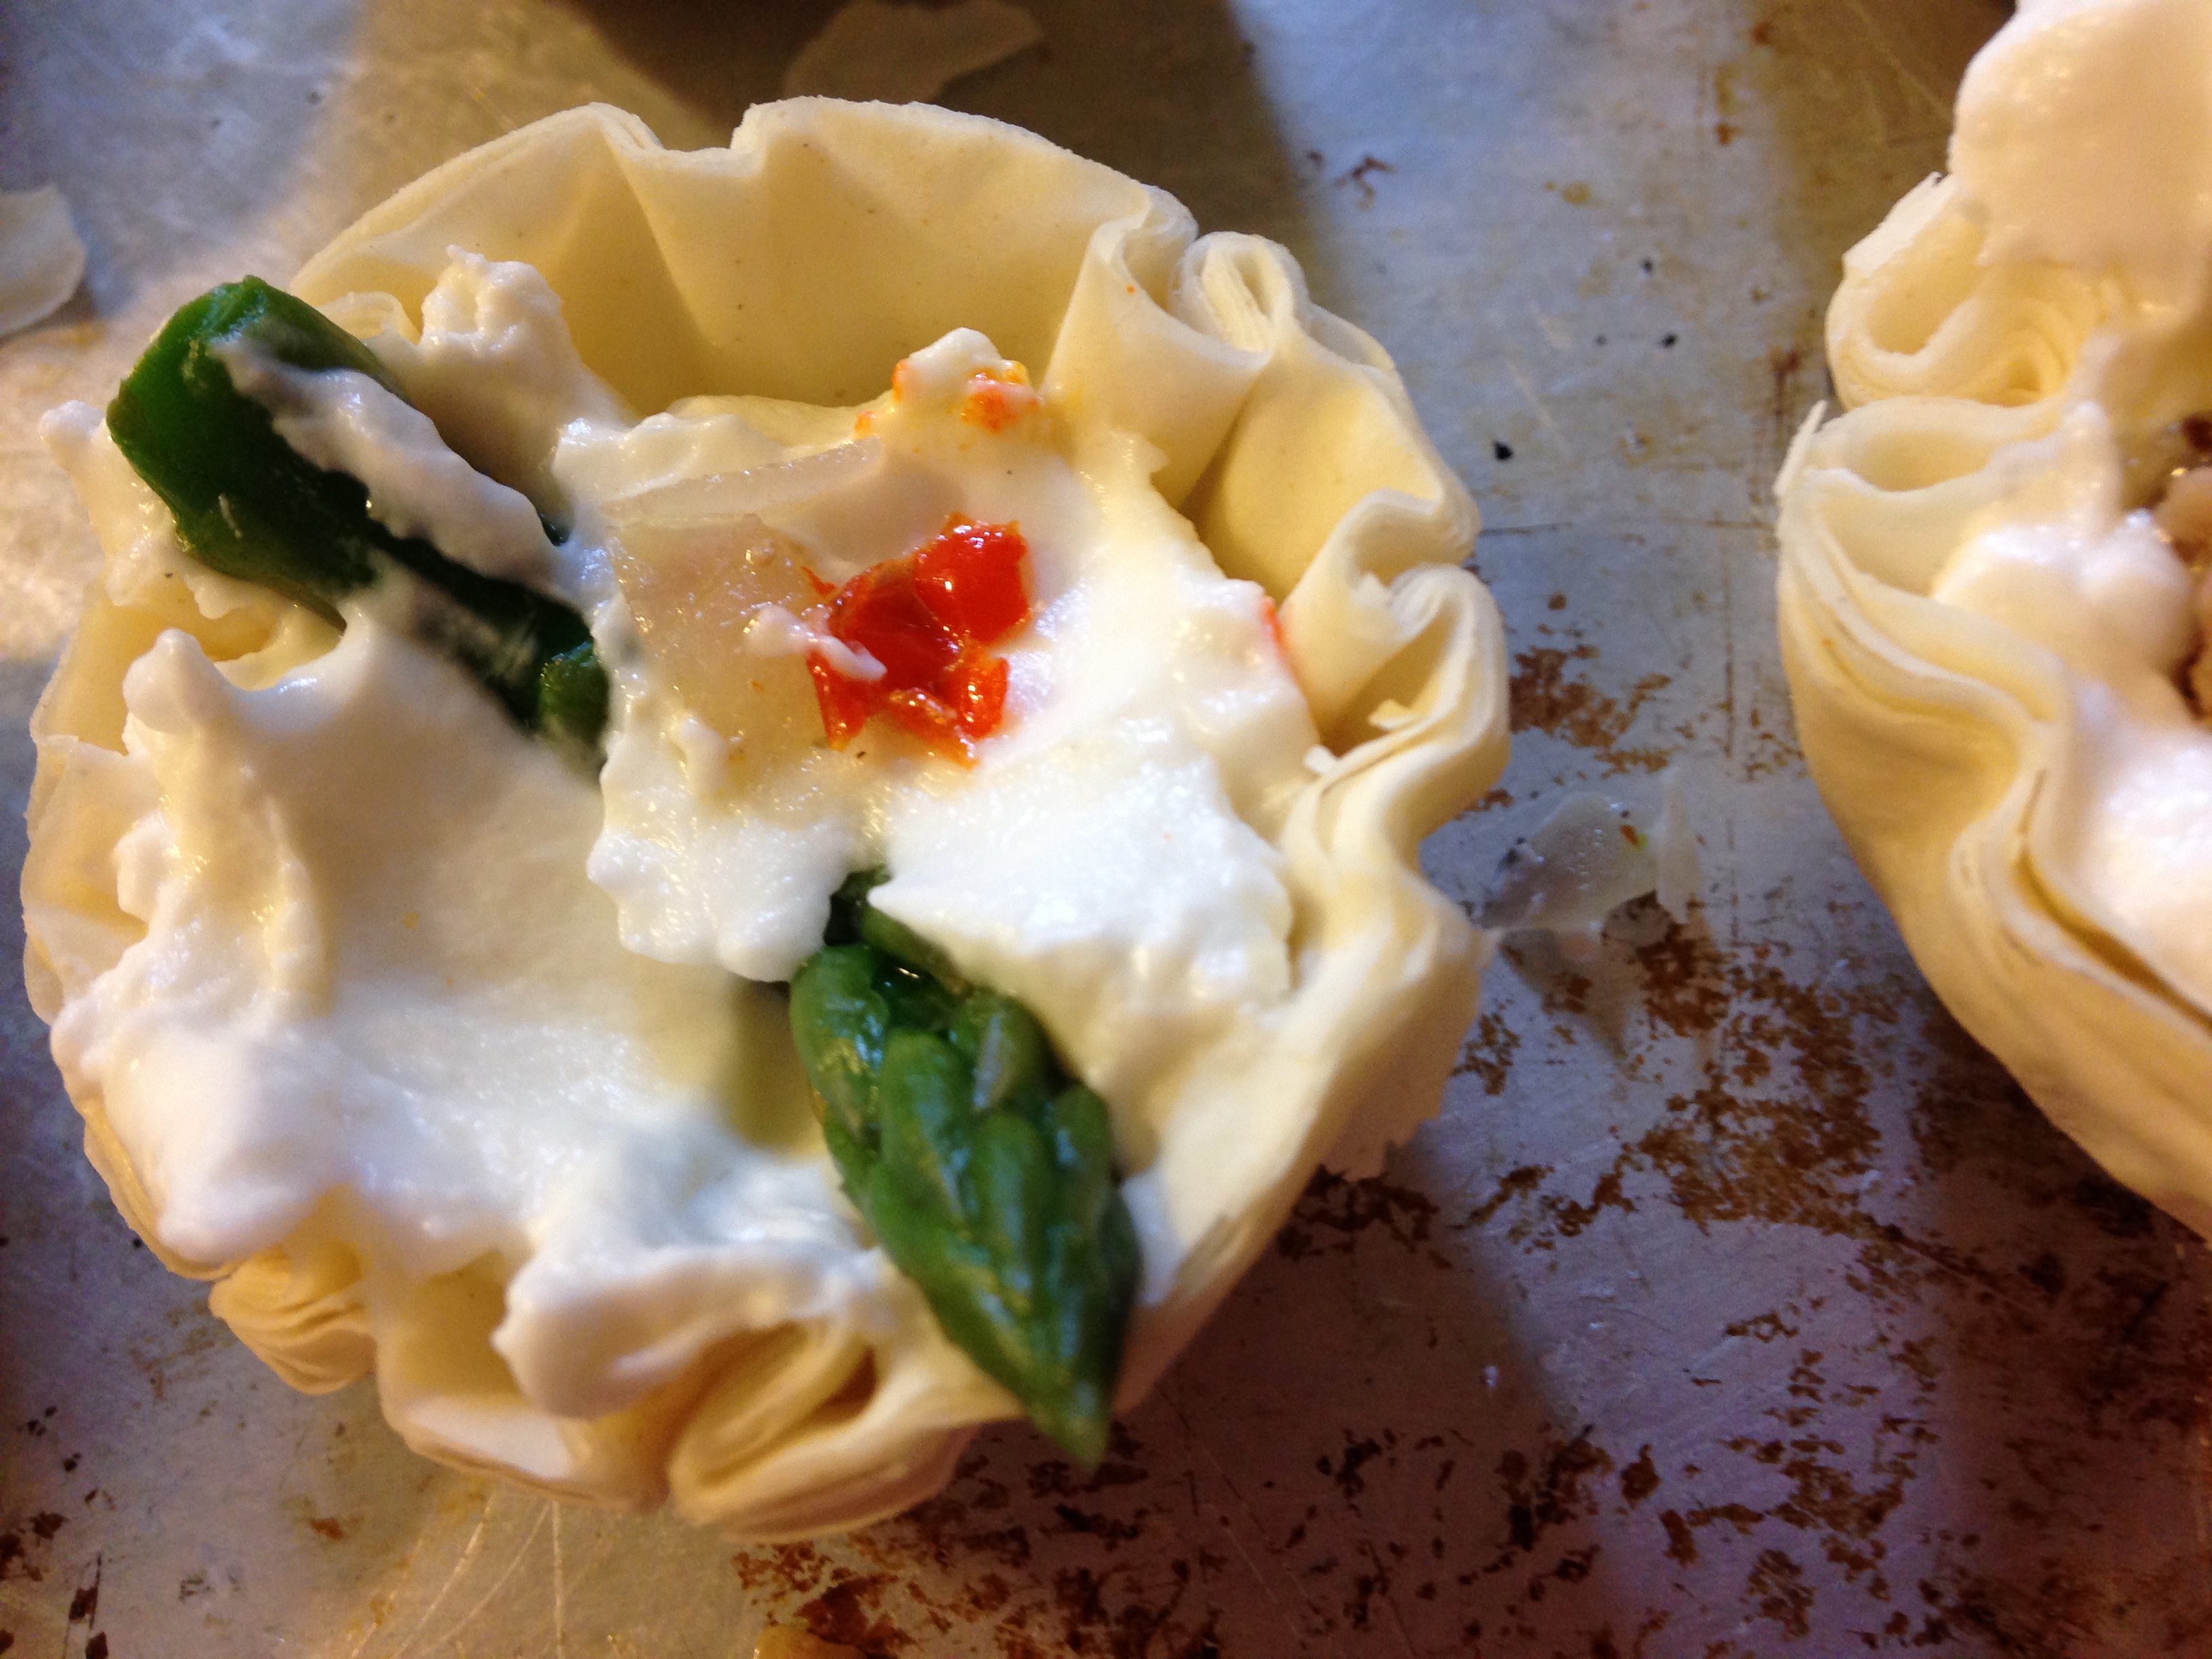
Bake at 350 until golden brown – baking time will depend on the oven – mine took about half an hour
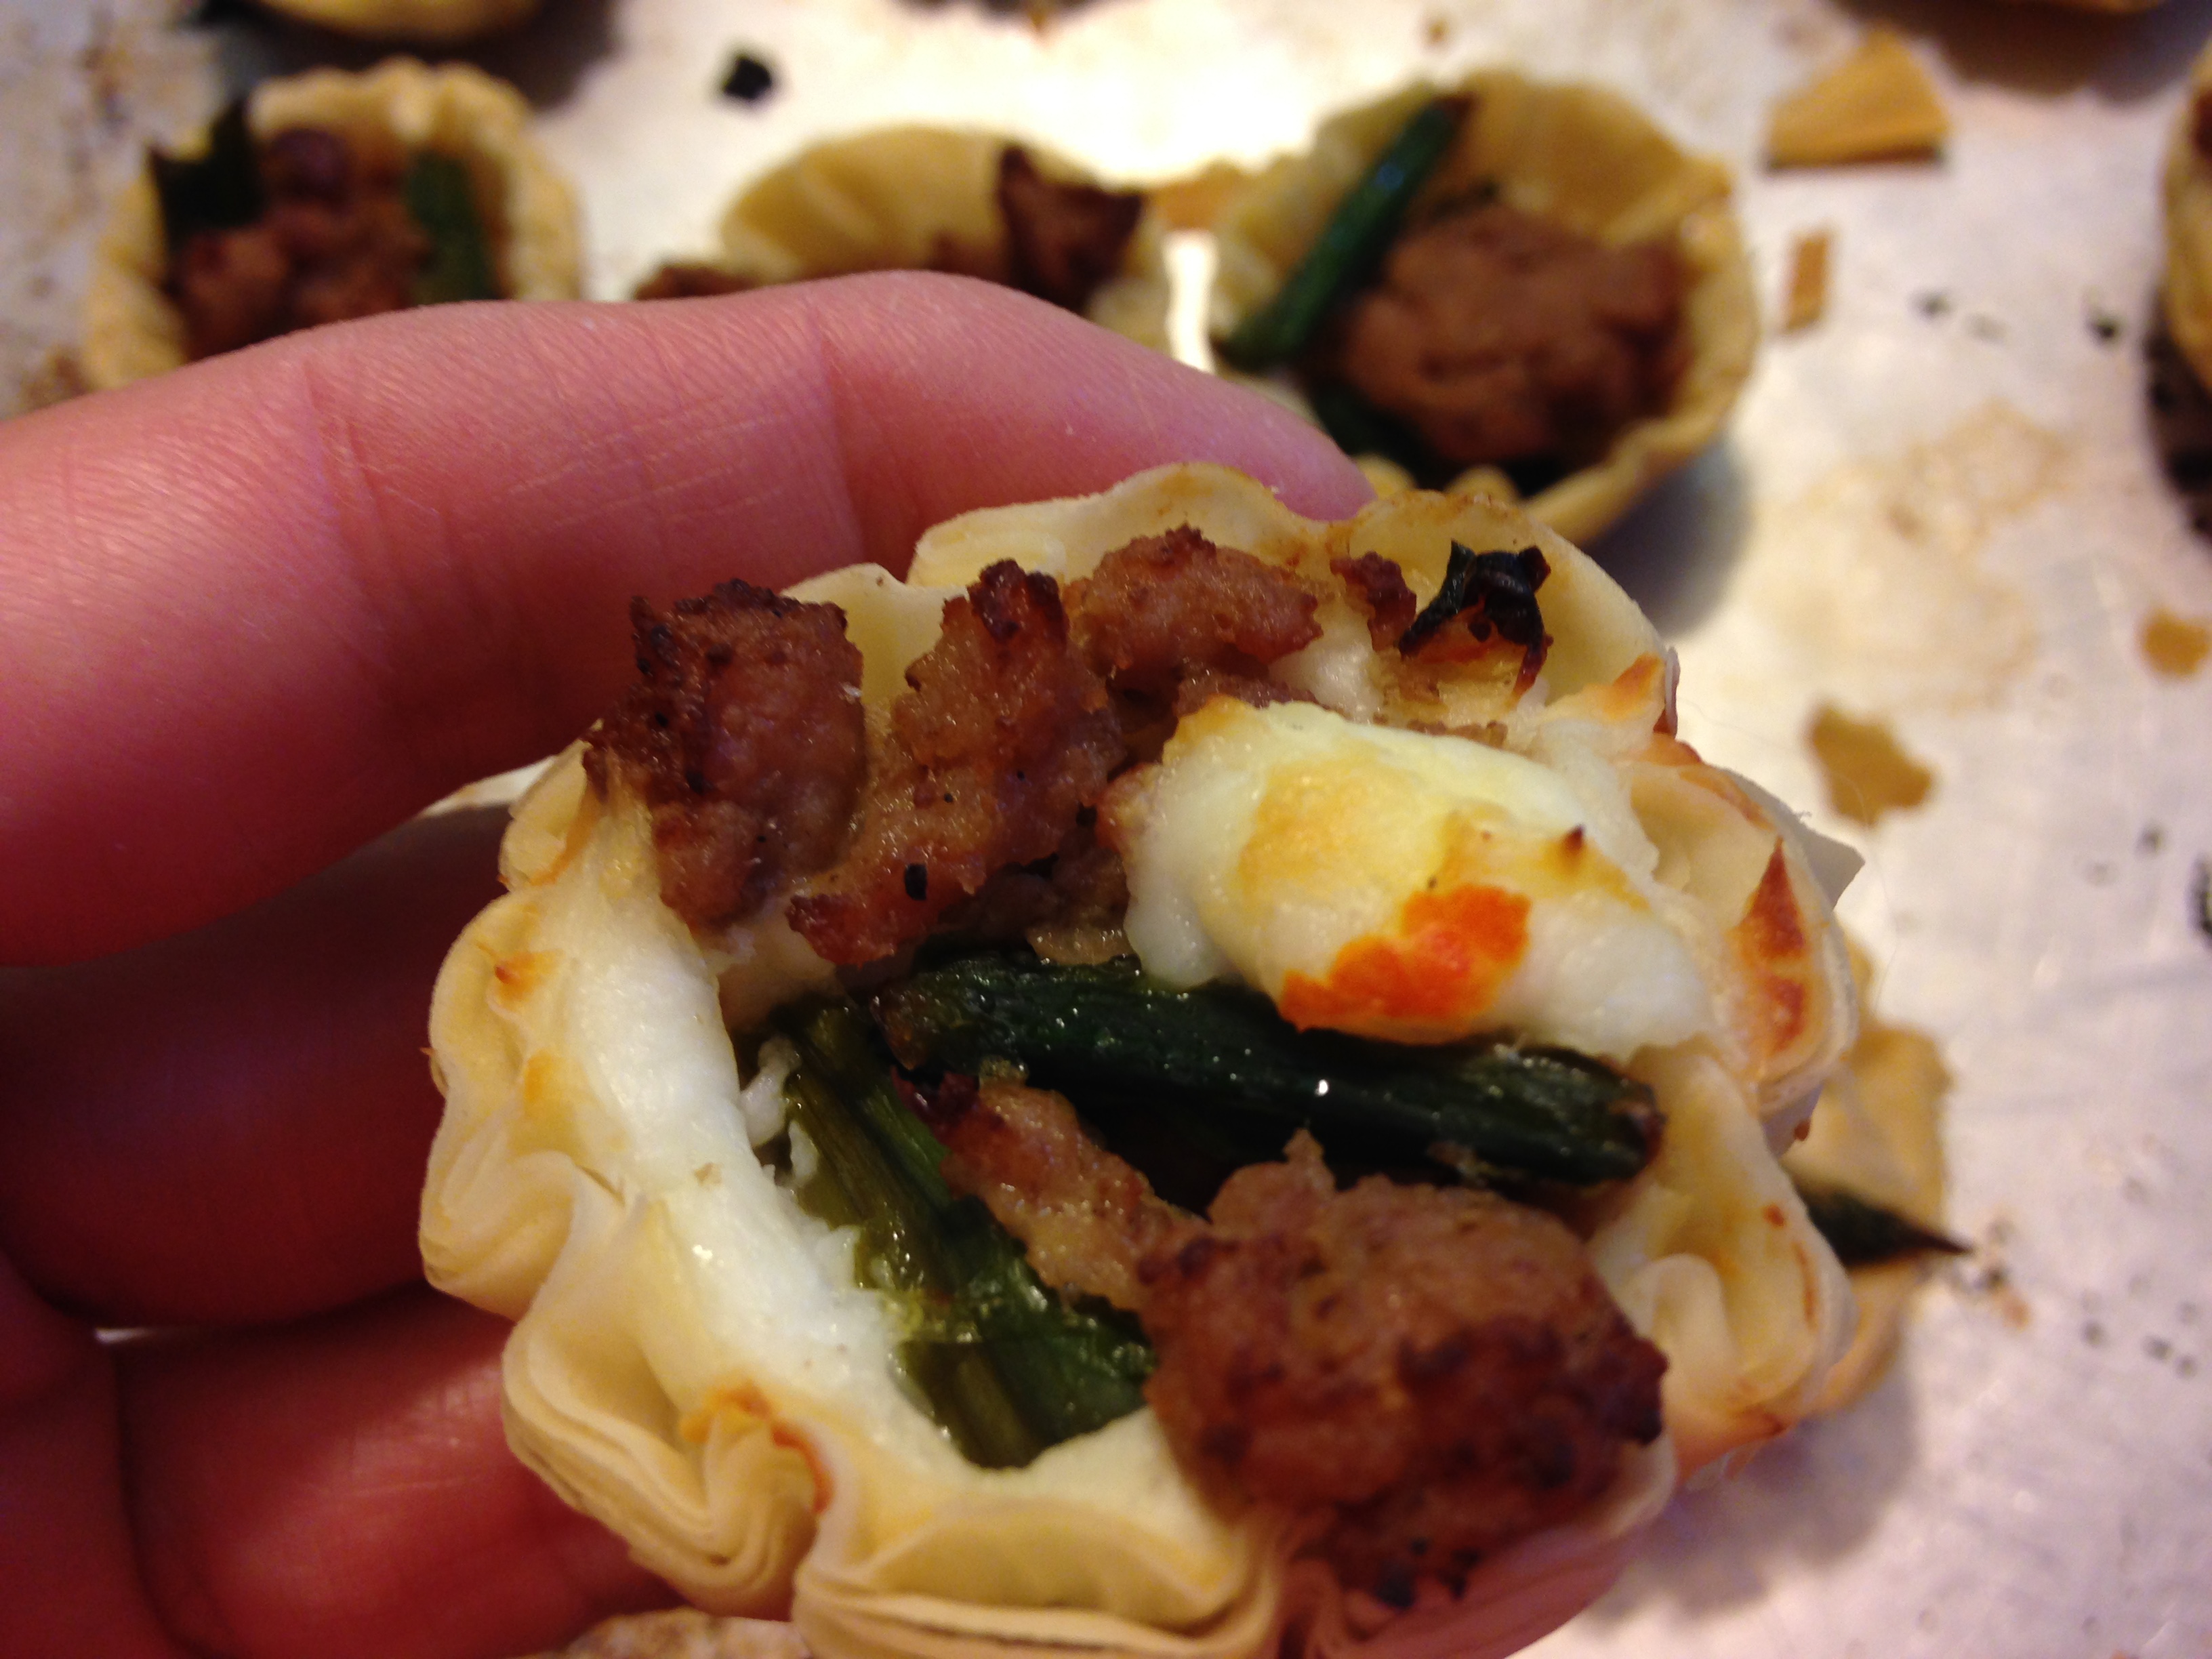
I could not believe how flavorful these little turkey are! ENJOY!!!!
A chile cheese review:
Place one 12 oz., full fat goat yogurt into a towel, in a colander, over a bow, (so whey can drip out)
Add two tablespoons coarse sea salt and chitepin to taste.
Mix thoroughly.
Tie up cloth.
Untie 24 hours later.
Refrigerate after opening.
You can also let it sit in the fridge while you are letting it transform from yogurt to infused cheese.

With White Sonora Wheat waving its ripening seed heads in May’s wind, it’s time again to celebrate our local agriculture–our ability to feed ourselves locally. Yea!.. harvest time now for our winter gardens’ bounty as it dries…
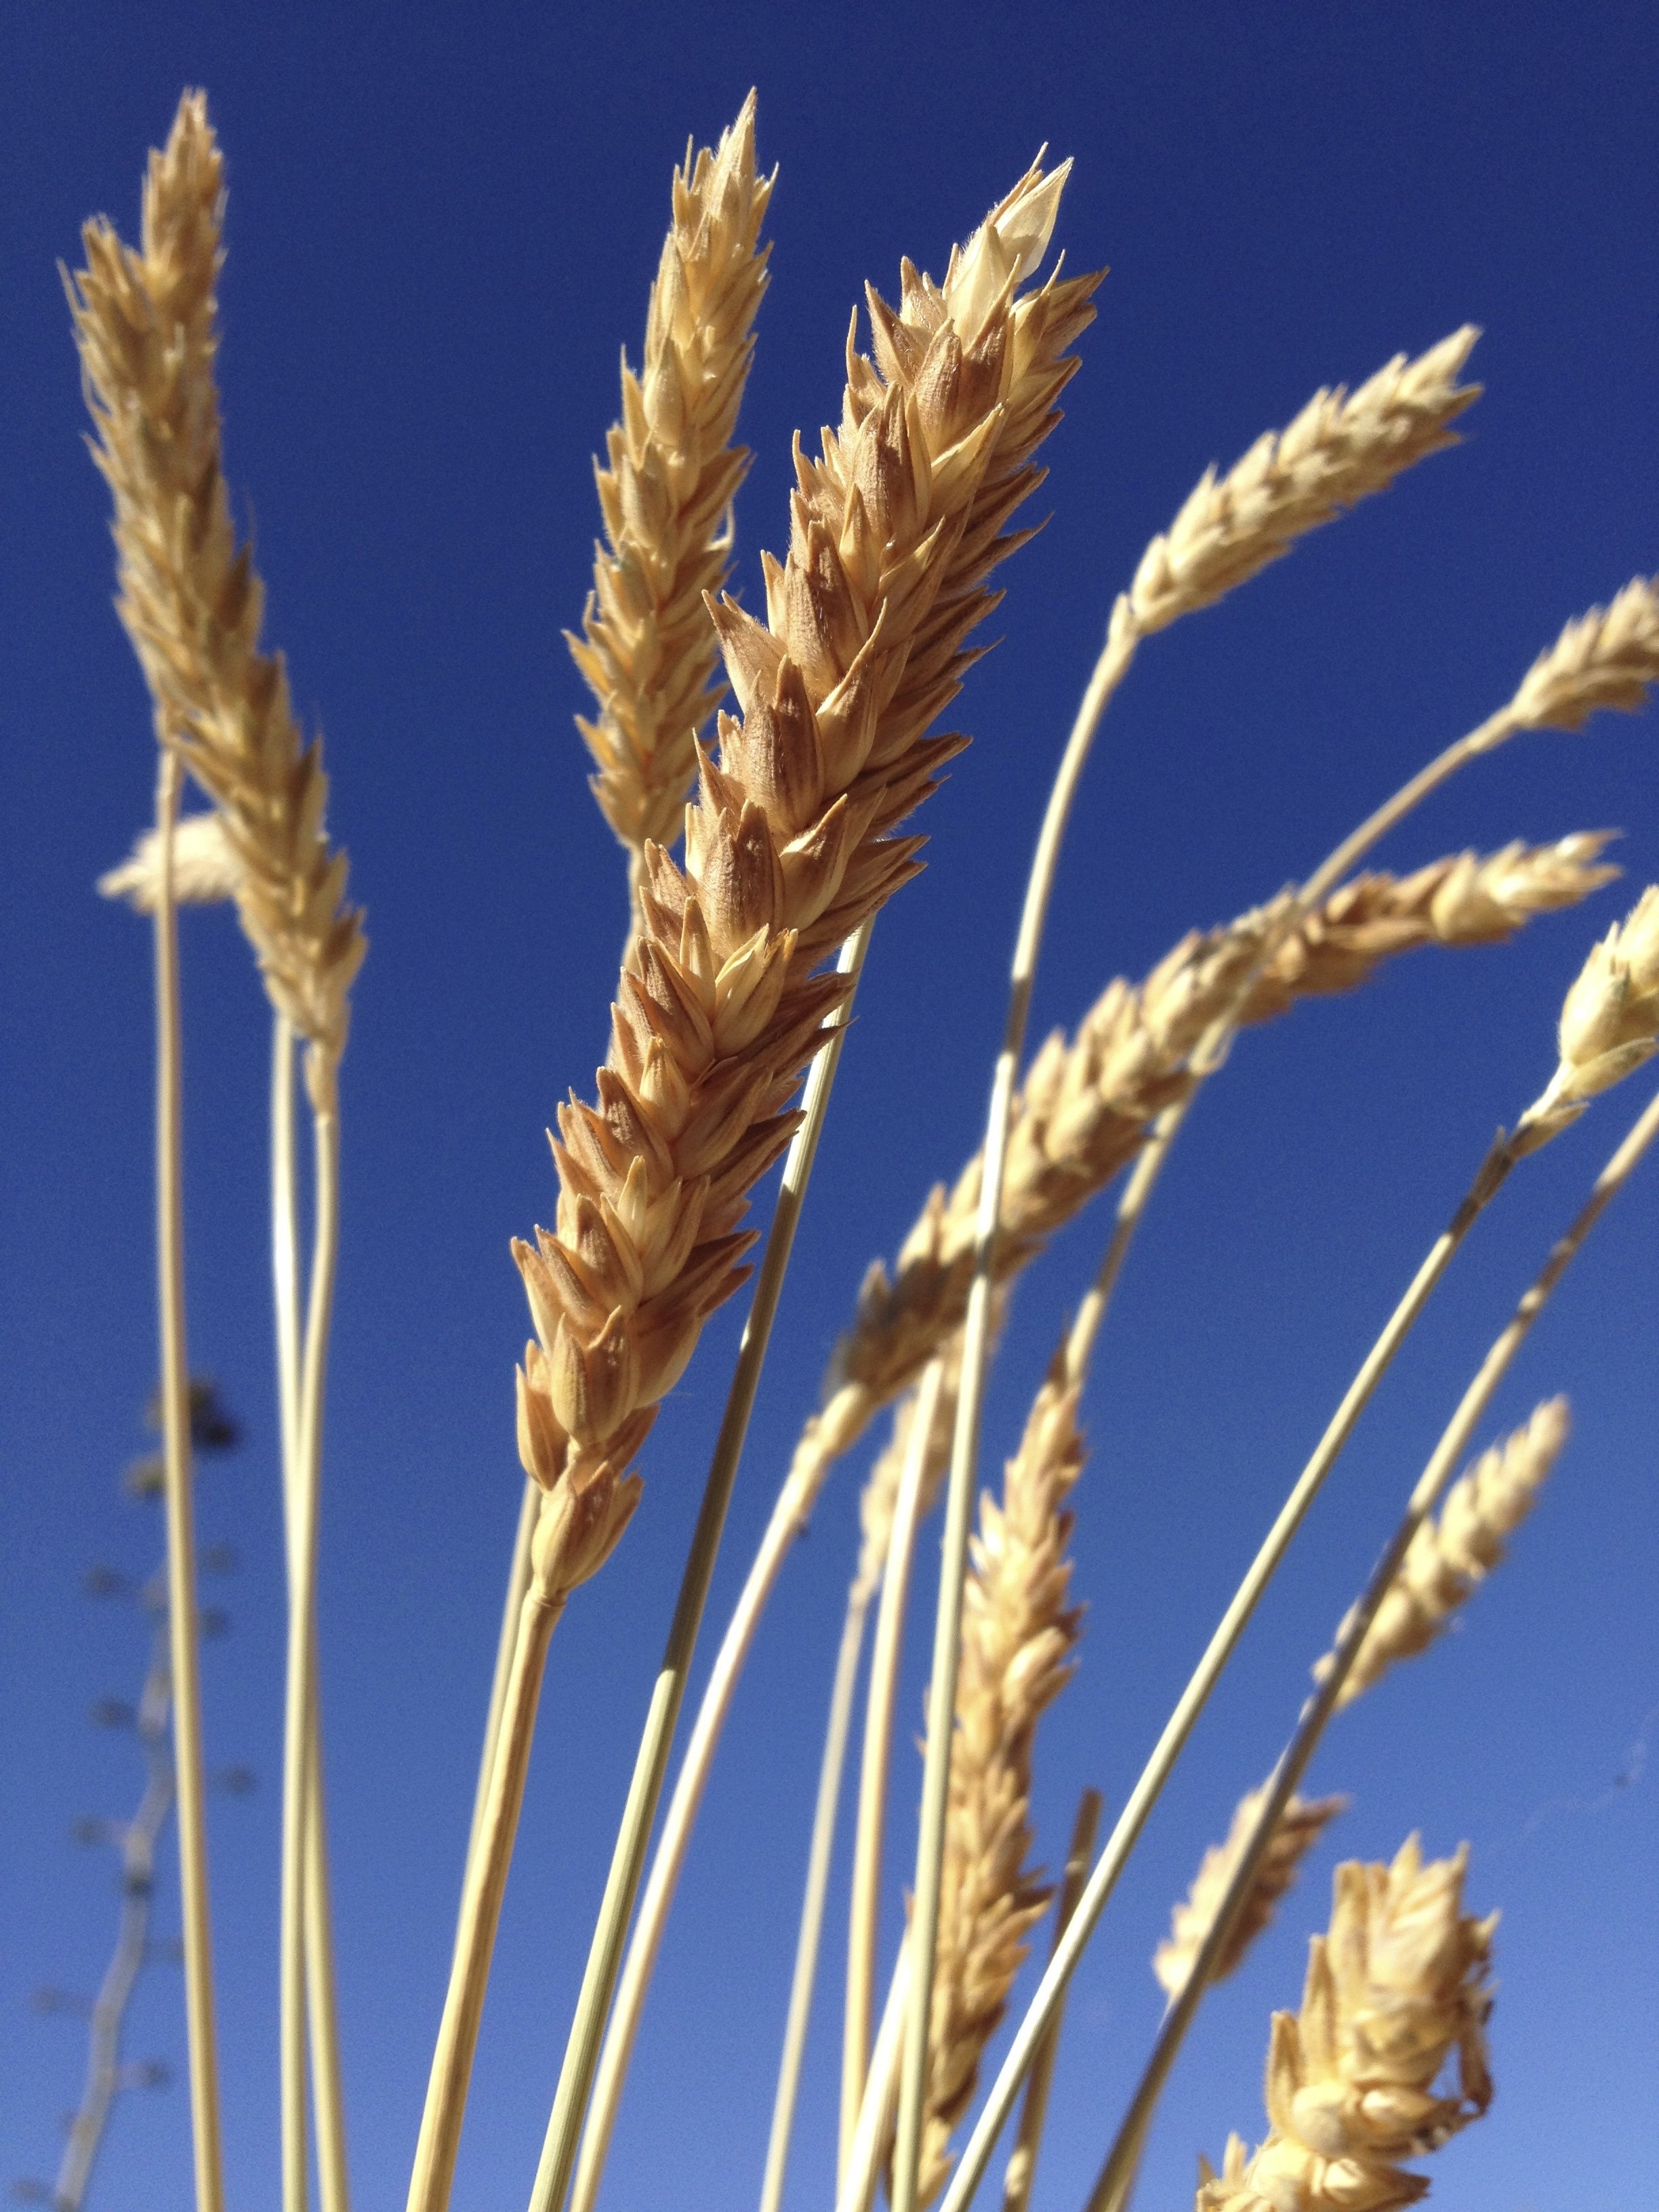
Ripened seed heads of organic heirloom White Sonora Wheat from BKWFarms in Marana (MABurgess photo)
Tia Marta here inviting you to return to the hallowed soil of Schuk-shon–Tucson’s Birthplace “Black Spring”–at the foot of “A” Mountain, in the new Mission Garden, to the very site of the original garden supporting Mission San Augustin de Schuk-shon. The Feast of San Ysidro Labrador is approaching.
May 15 is the traditional Dia de San Ysidro, Saint Isidor, patron saint of farmers and gardeners.
According to legend, San Ysidro Labrador was so hard-working and generous with his produce to all in need—people or animals–that angels would plow next to him to triple his crop. In my artistic interpretation, San Ysidro lies exhausted under a tree from working his field while an angel guides his ox to finish his plowing.
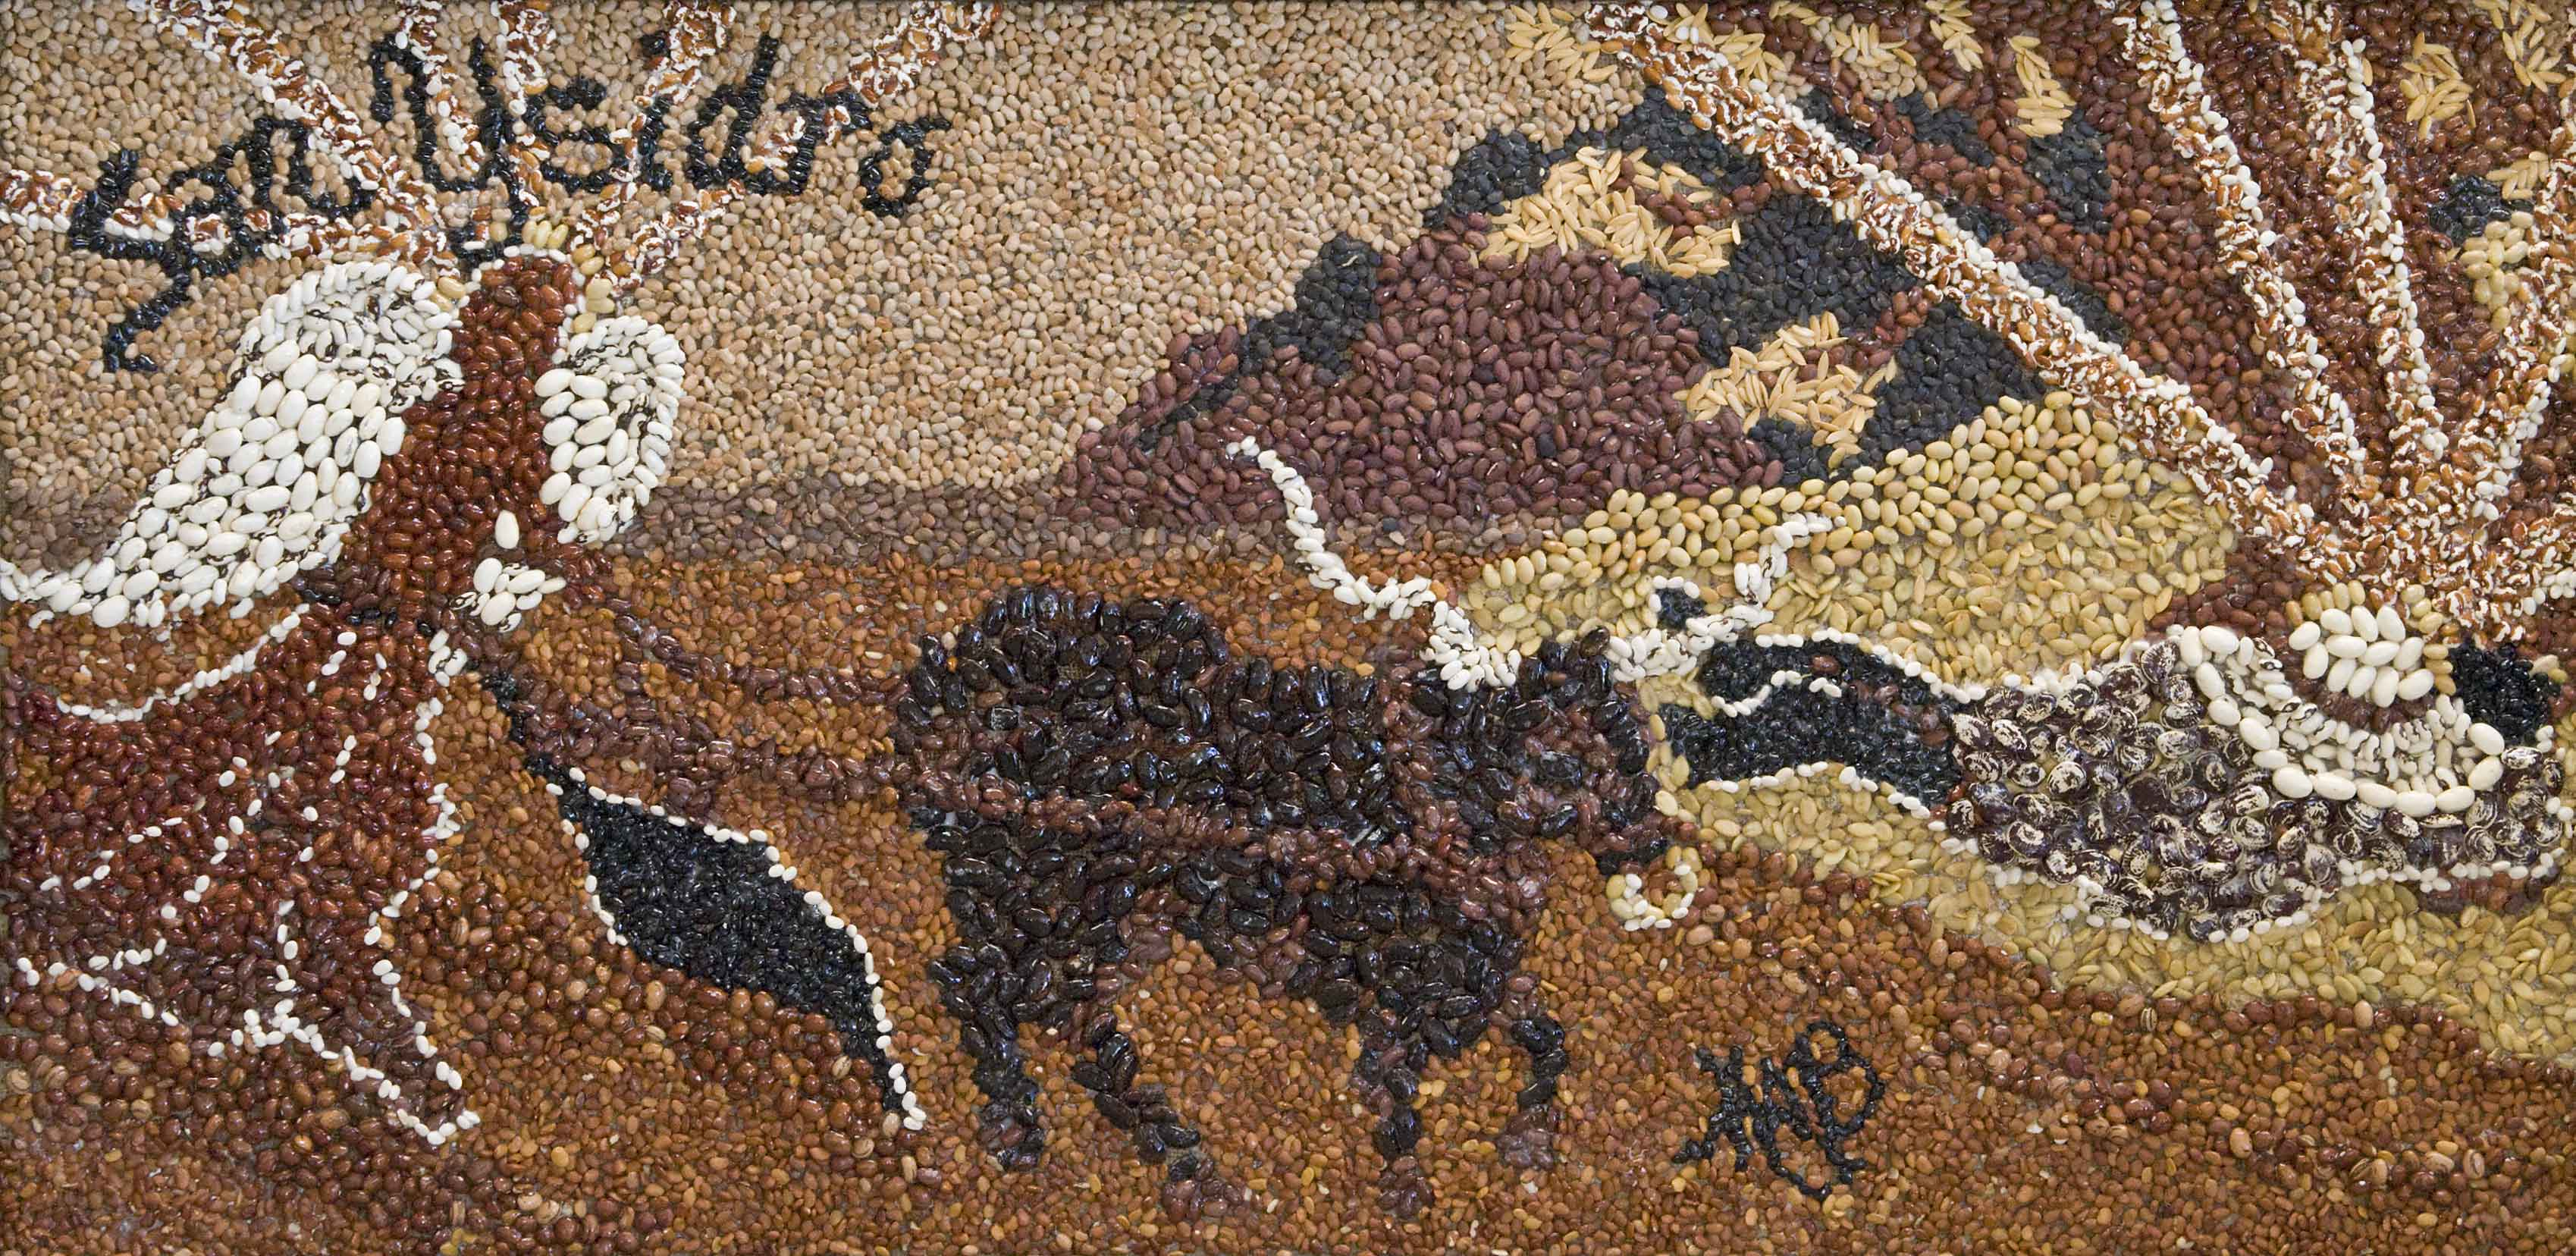
Heirloom bean mosaic of San Ysidro Labrador created by artist/ethnobotanist MABurgess
Here in my big-scale heirloom bean mosaic, the “medium is the message”–in part. It was assembled using more than 21 colorful varieties of Southwestern heirloom beans and seeds, grown out from the Native Seeds/SEARCH Collection, in Tucson, Arizona.
The ancient seeds used to “paint” this image pay homage not only to San Ysidro but also to the generations of traditional farmers who have selected their seed and labored to grow the best for feeding family and community. Their seed-saving has provided us today with priceless heirlooms, fitting genes, and hope for a food-secure future. (Notecards of my San Ysidro mosaic will be on sale at the fiesta as a fund-raiser for Mission Garden’s good work.)
This year, our San Ysidro fiesta will be celebrated on Saturday, May 16, within the adobe-walled orchard of living agricultural history, Tucson’s newest “museum park” sponsored by the non-profit Friends of Tucson’s Birthplace. Planted in this living museum are representative crops that have fed the sequence of Tucson residents over the last 4100 years. Seeds of these ancient crops were blessedly conserved by the caring staff and volunteers of NativeSeeds/SEARCH over the past 34 years.
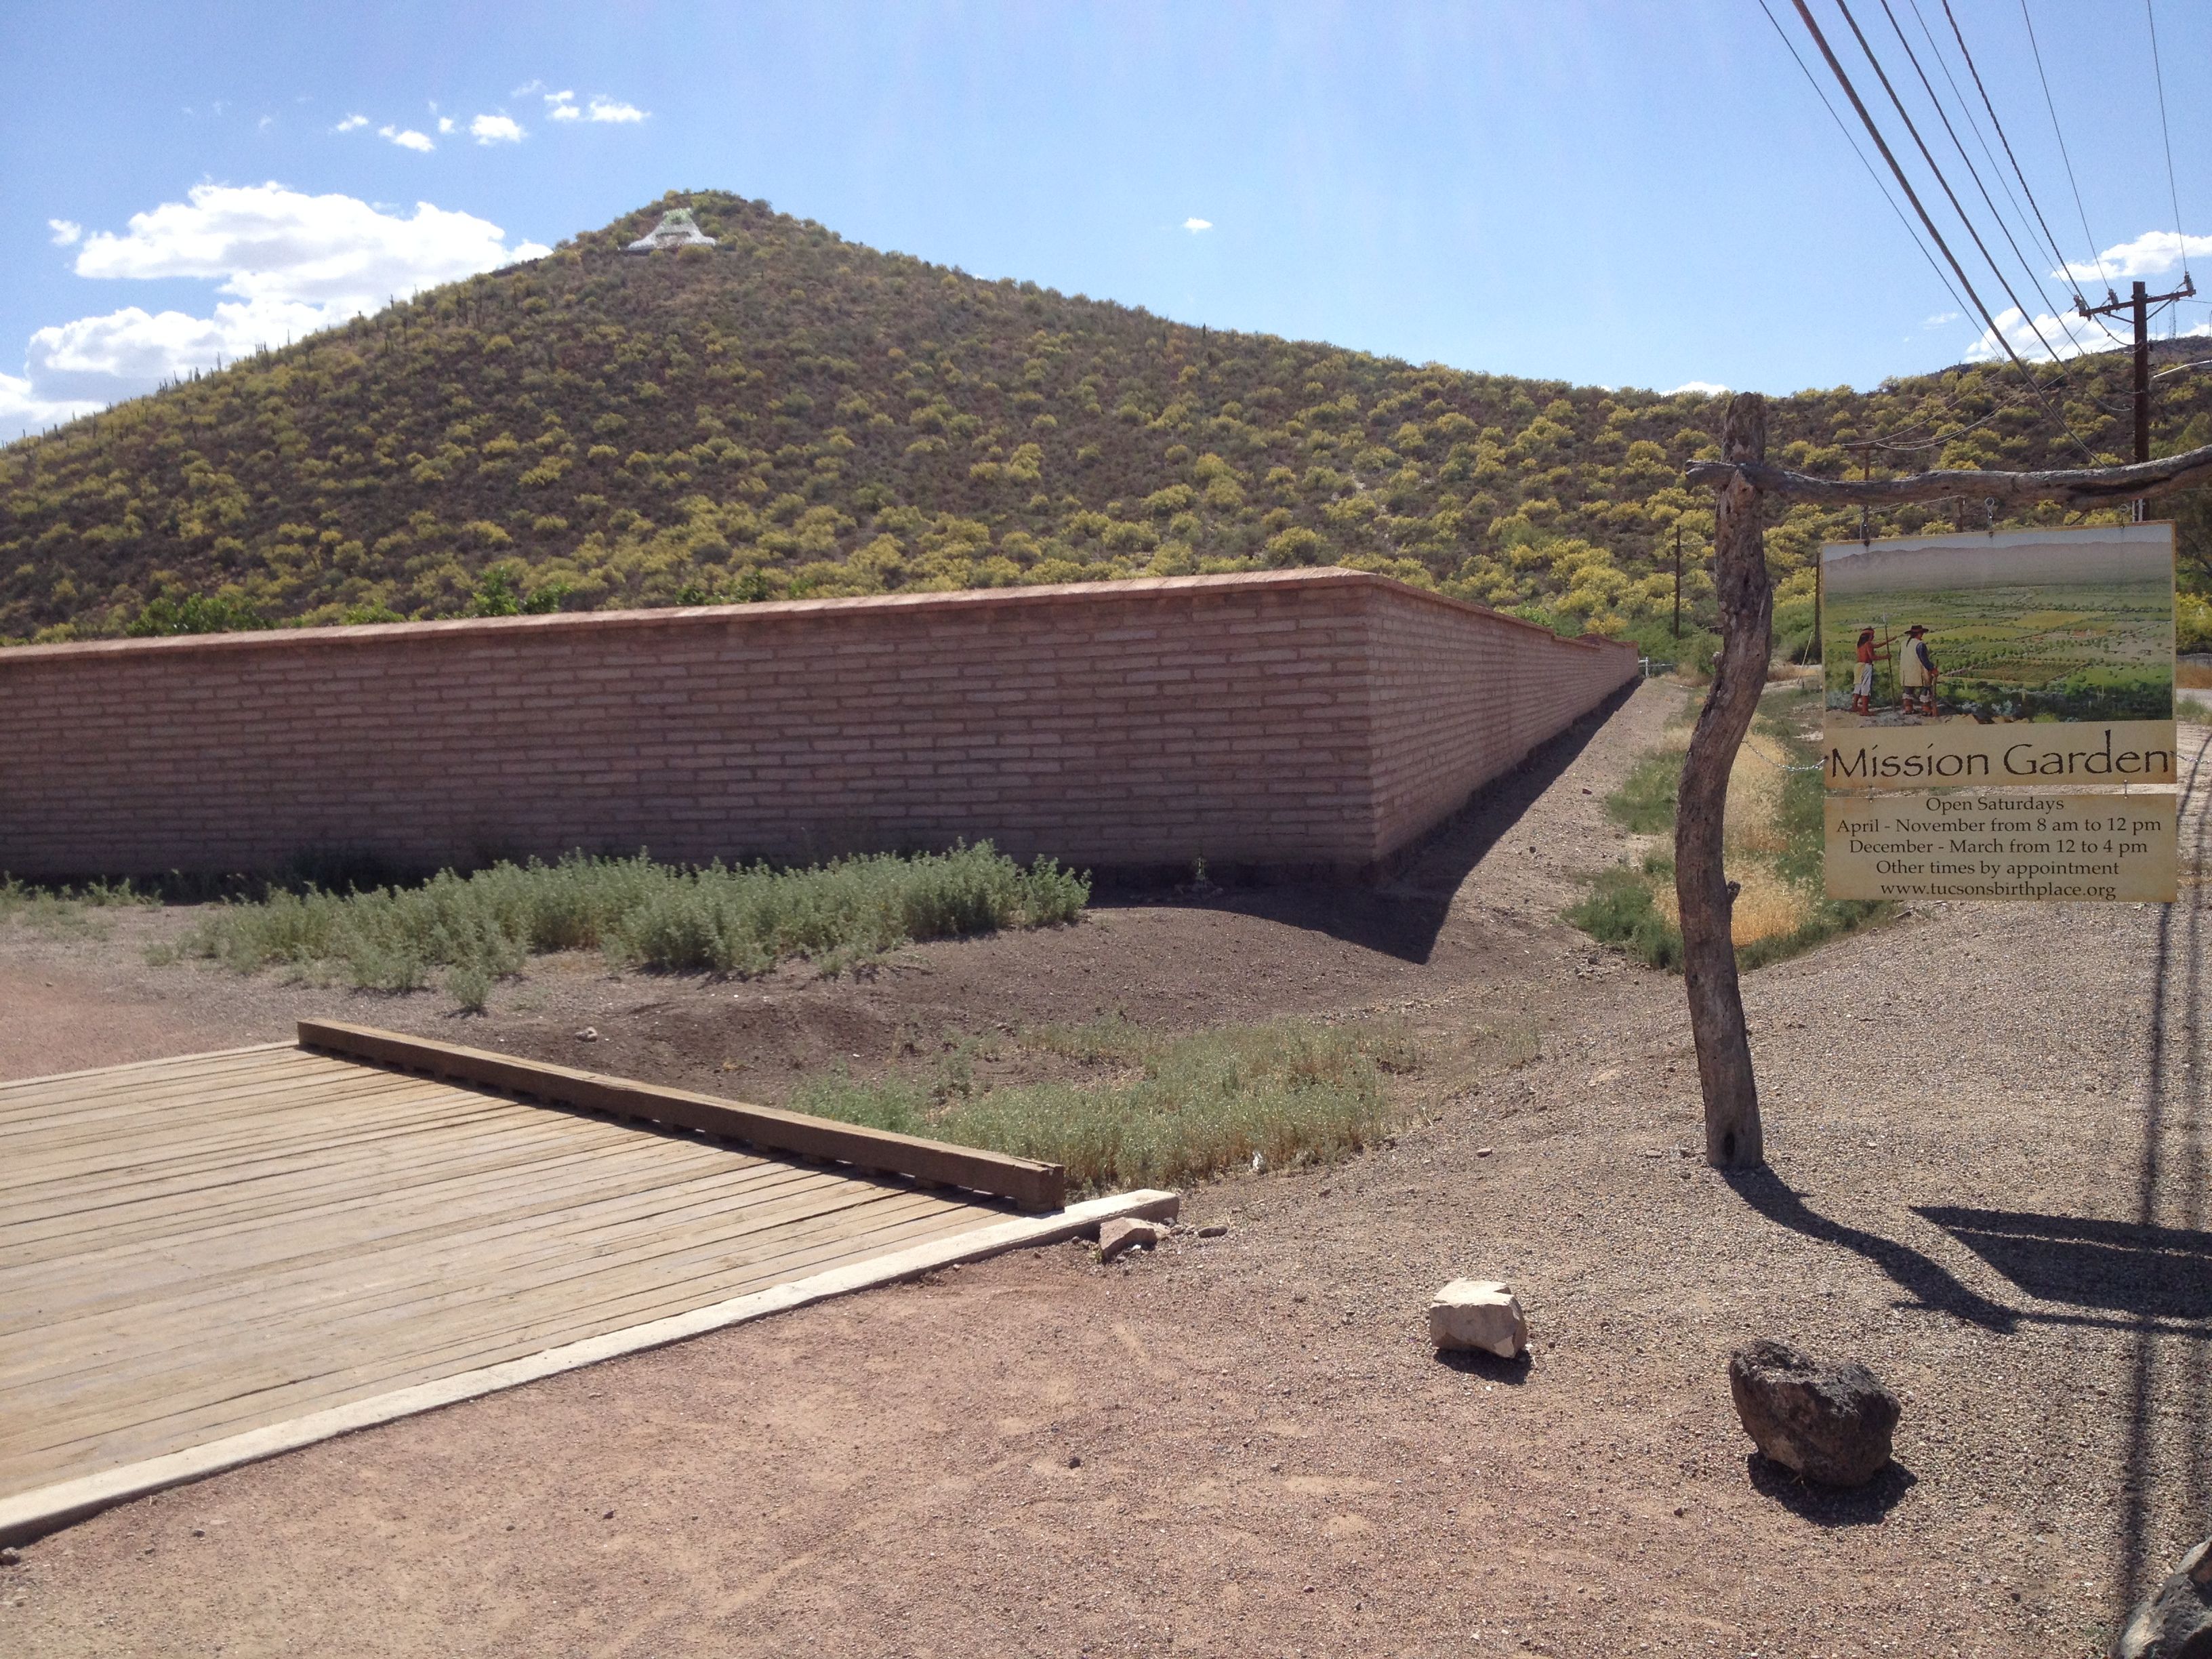
The new Mission Garden–living agricultural history
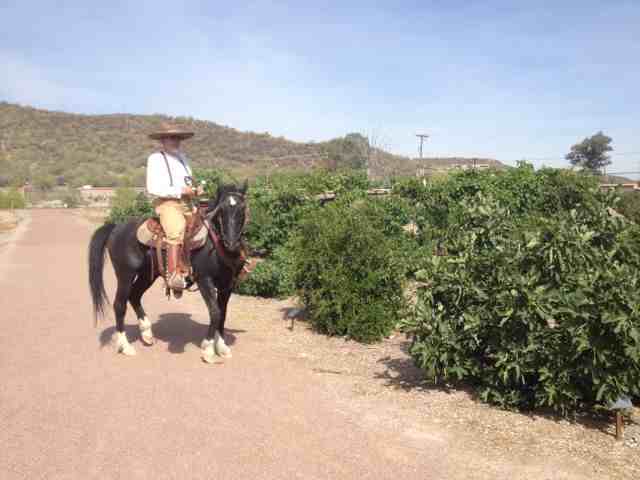
Vaquero in the Orchard of heirloom Mission Period fruit trees at San Ysidro Fiesta 2014 (MABurgess photo)
The Dia de San Ysidro celebration will officially begin at 9am with a procession from the future Tucson Origins Heritage Park next to the Santa Cruz “river” channel to Mission Garden’s east gate at 929 West Mission Lane, just east of Grande (Mission Road.) Festivities will include music by Mariachi Las Aguilitas from Davis Elementary, Alabanza with Bobby Benton, a presentation by historian/author Dr. Tom Sheridan, Native American four-direction prayers and blessing of the fields, food, and animals, and the Tohono O’odham Desert Indian Dancers from San Xavier. Designs for the new cultural theme gardens (Chinese, Mexican, Afro-American, and Medicinal) will be unveiled.
Activities will culminate with a tasting of Pozole de Trigo, the traditional Sonoran stew for the feast-day prepared by talented volunteer cooks from Tucson’s Hispanic community. For a fabulous recipe to try in your own kitchen, check out Bill Steen’s article for Sonoran Wheat Posole in Edible Baja Arizona–here’s the link to directions with his mouth-watering photos:
http://www.ediblebajaarizona.com/a-personal-posole
Or, for an even more local recipe, try this Akimel O’odham (Pima) recipe for Heirloom Wheat Posole with Tepary Beans:
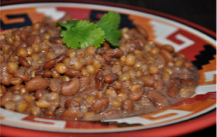
Pima Posole with Tepary Beans and White Sonora Wheat, served at Heard Museum
The combination of high protein Native Teparies and delicious low-gluten Heirloom Wheat Berries makes this a rich and nutritious stew.
Heirloom Wheat Posole with Tepary Beans—Pilt’kan ch Ba’bawi Posh’oldt
Ingredients:
2 cups dry tepary beans *
Water to more than cover the beans for initial soaking and cooking
1 large marrow bone (or beef broth as substitute for ½ the water when simmering, omit for vegetarian)
2 cups dry whole wheat berries (wheat kernels) **
3-4 cups drinking water or stock
Sea salt to taste (1-2 Tbsp.)
Black pepper or native chiltepine peppers***, to taste
Directions:
Carefully sort dry beans to remove stones. Wash, rinse, and cover with good water to soak overnight. Drain when plumped and ready to cook.
In big cooking pot, put beans, marrow bone, and drinking water to cover. Bring to a boil then simmer for 2+ hours.
Separately, rinse wheat berries and drain. Add wheat berries and salt to the cooking teparies. Add more water and/or stock. Bring to boil, then simmer an additional 1 ½ hours or until wheat berries are round and tender, and teparies are tender(not chewy).
Reserve excess water for later soup stock. Remove bone. For serving, posole should be moist with broth. Add black pepper and sea salt to taste. If picante bite is desired, add one or two crushed chiltepine peppers.
Enjoy this traditional taste of the desert! ***********Here’s where to find these traditional ingredients (being grown anew in their home turf):
*Native tepary beans are available at www.nativeseeds.org or at www.ramonafarms.com .
** Organic White Sonora Wheatberries are available at Flor de Mayo tent at Sunday St Philips Farmers Market, Tucson, or at the NativeSeeds/SEARCH Store, 3061 N Campbell Ave, Tucson.
***whole wild-harvested chiltepine peppers are available at Flor de Mayo tent, Sunday St Philips Farmers Market, Tucson, or at the NativeSeeds/SEARCH Store, Tucson.
*****************************************************************************************
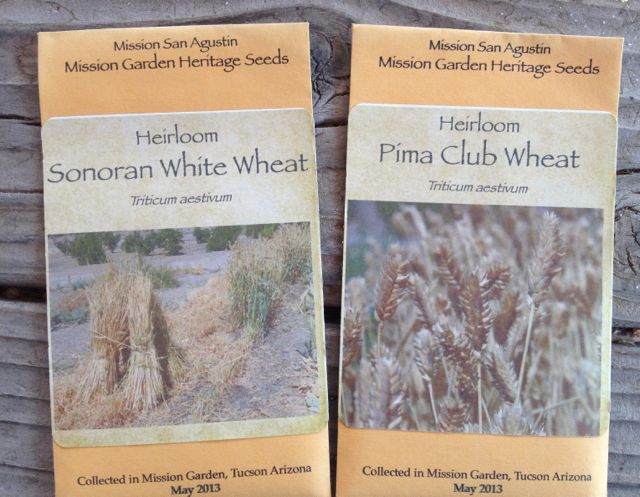
Seed packets of heirloom wheat varieties grown at Mission Garden, for sale to plant in your own winter garden.
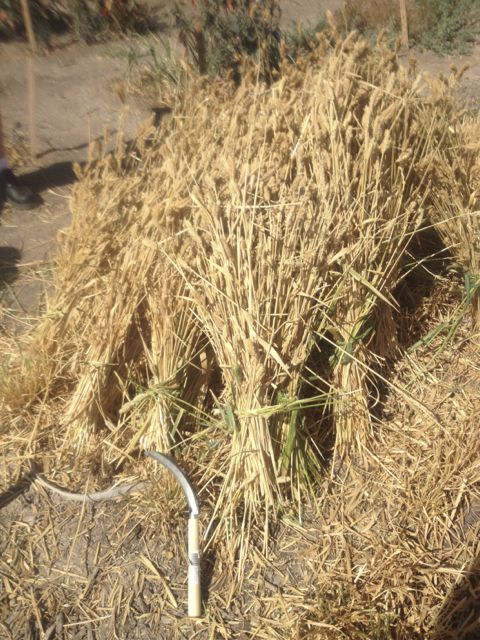
Sheaves of heirloom White Sonora Wheat hand-harvested at Mission Garden
Because Dia de San Ysidro especially heralds the wheat harvest, the staple grain introduced by Padre Eusebio Kino and other missionaries over 300 years ago to the Native Tohono O’odham community living here, this year’s festivities will include a ceremonial wheat harvest, guided by expert plantsman and Desert Museum staff person Jesus Garcia, to take place around 8am, Saturday, May 16, before the procession.
Support organizations, such as NativeSeeds/SEARCH, San Xavier Coop Association, BKWFarmsInc, and Tucson Herbalist Collective will have booths with demonstration items, tastes of native foods, solar cooked White Sonoran Wheat berries, traditional food products packaged for sale, and resource people to talk with about desert gardening for real food.
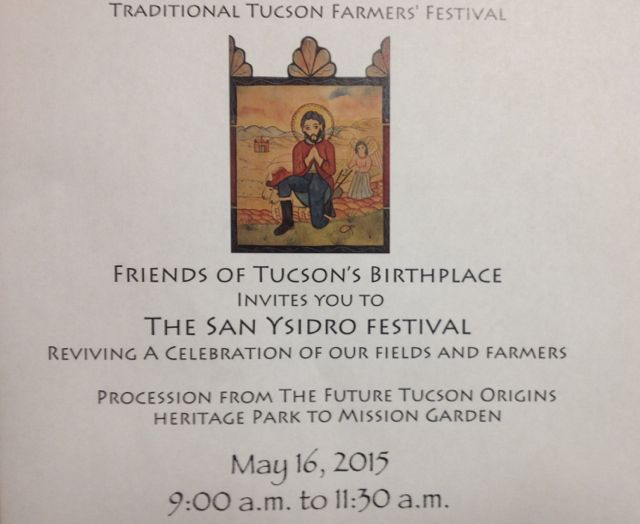
Invitation to the 2015 San Ysidro Fiesta
The event is free with a donation requested. Find out more details of the San Ysidro Festival at www.tucsonsbirthplace.org. Hope to see you there!
[For more great recipes and stories about White Sonora Wheat, you can search with the box above using those key words, thru the last 2 years of this blog.]
 Aunt Linda here on a hot afternoon this last day of April, in the Old Pueblo. There is notable buzzing in the mesquite tree outside my door. It is a sound I wait for each spring. For me, the best part of keeping bees is not the honey; though honey is remarkable. The best part is how they open wide my appreciation of the world around me.
If we were to hop a pollen grain and ride it back in time, all the way back to the Cretaceous Period, what would we find? The first flowers on planet earth. (Two hundred million years ago, there were plenty of plants on the planet, but no flowers.)
Michael Pollan in The Botany of Desire, describes how “flowers changed everything” when they emerged on the planet. “Instead of relying on wind or water to move genes around, a plant could enlist the help of an animal by striking a grand coevolutionary compact: nutrition in exchange for transportation.” (p108).
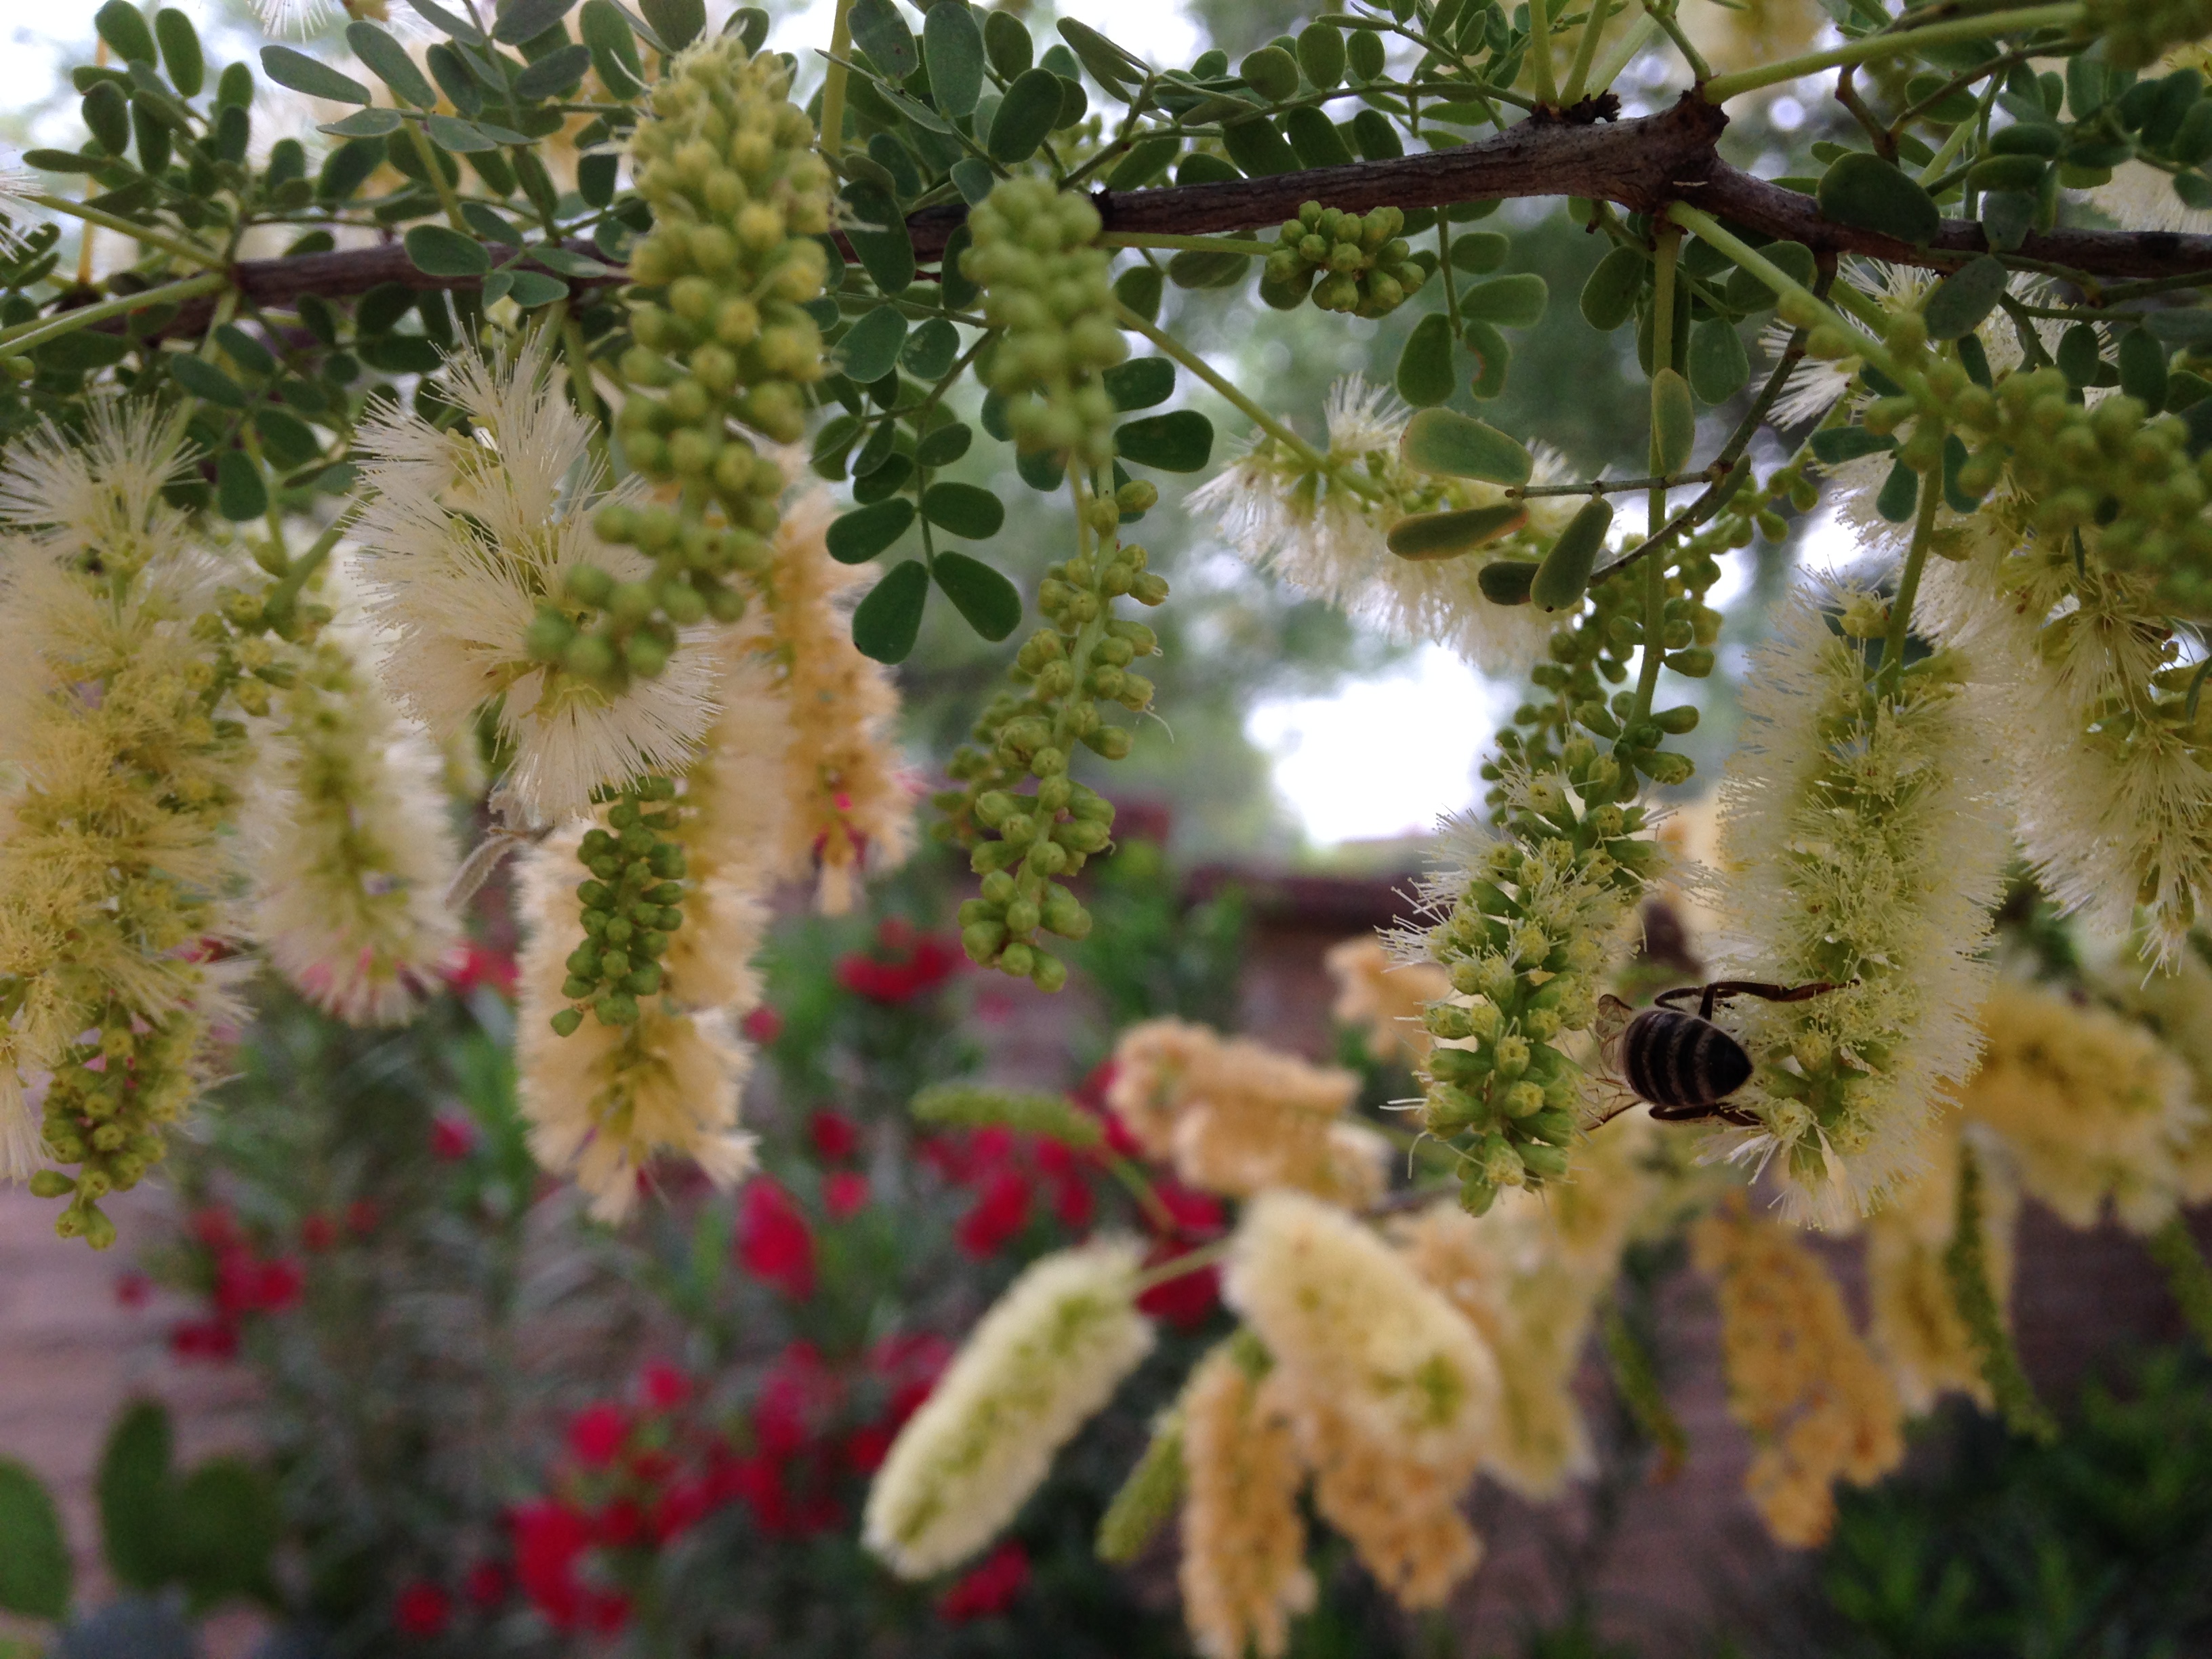
This coevolutionary compact has been so successful that we see it very much in action in our own yards and neighborhoods even as I write.Below are a few photos of this ancient dance thriving in my own backyard – showing Apis Mellifera (honey bees) moving plant pollen around in exchange for nutrition.
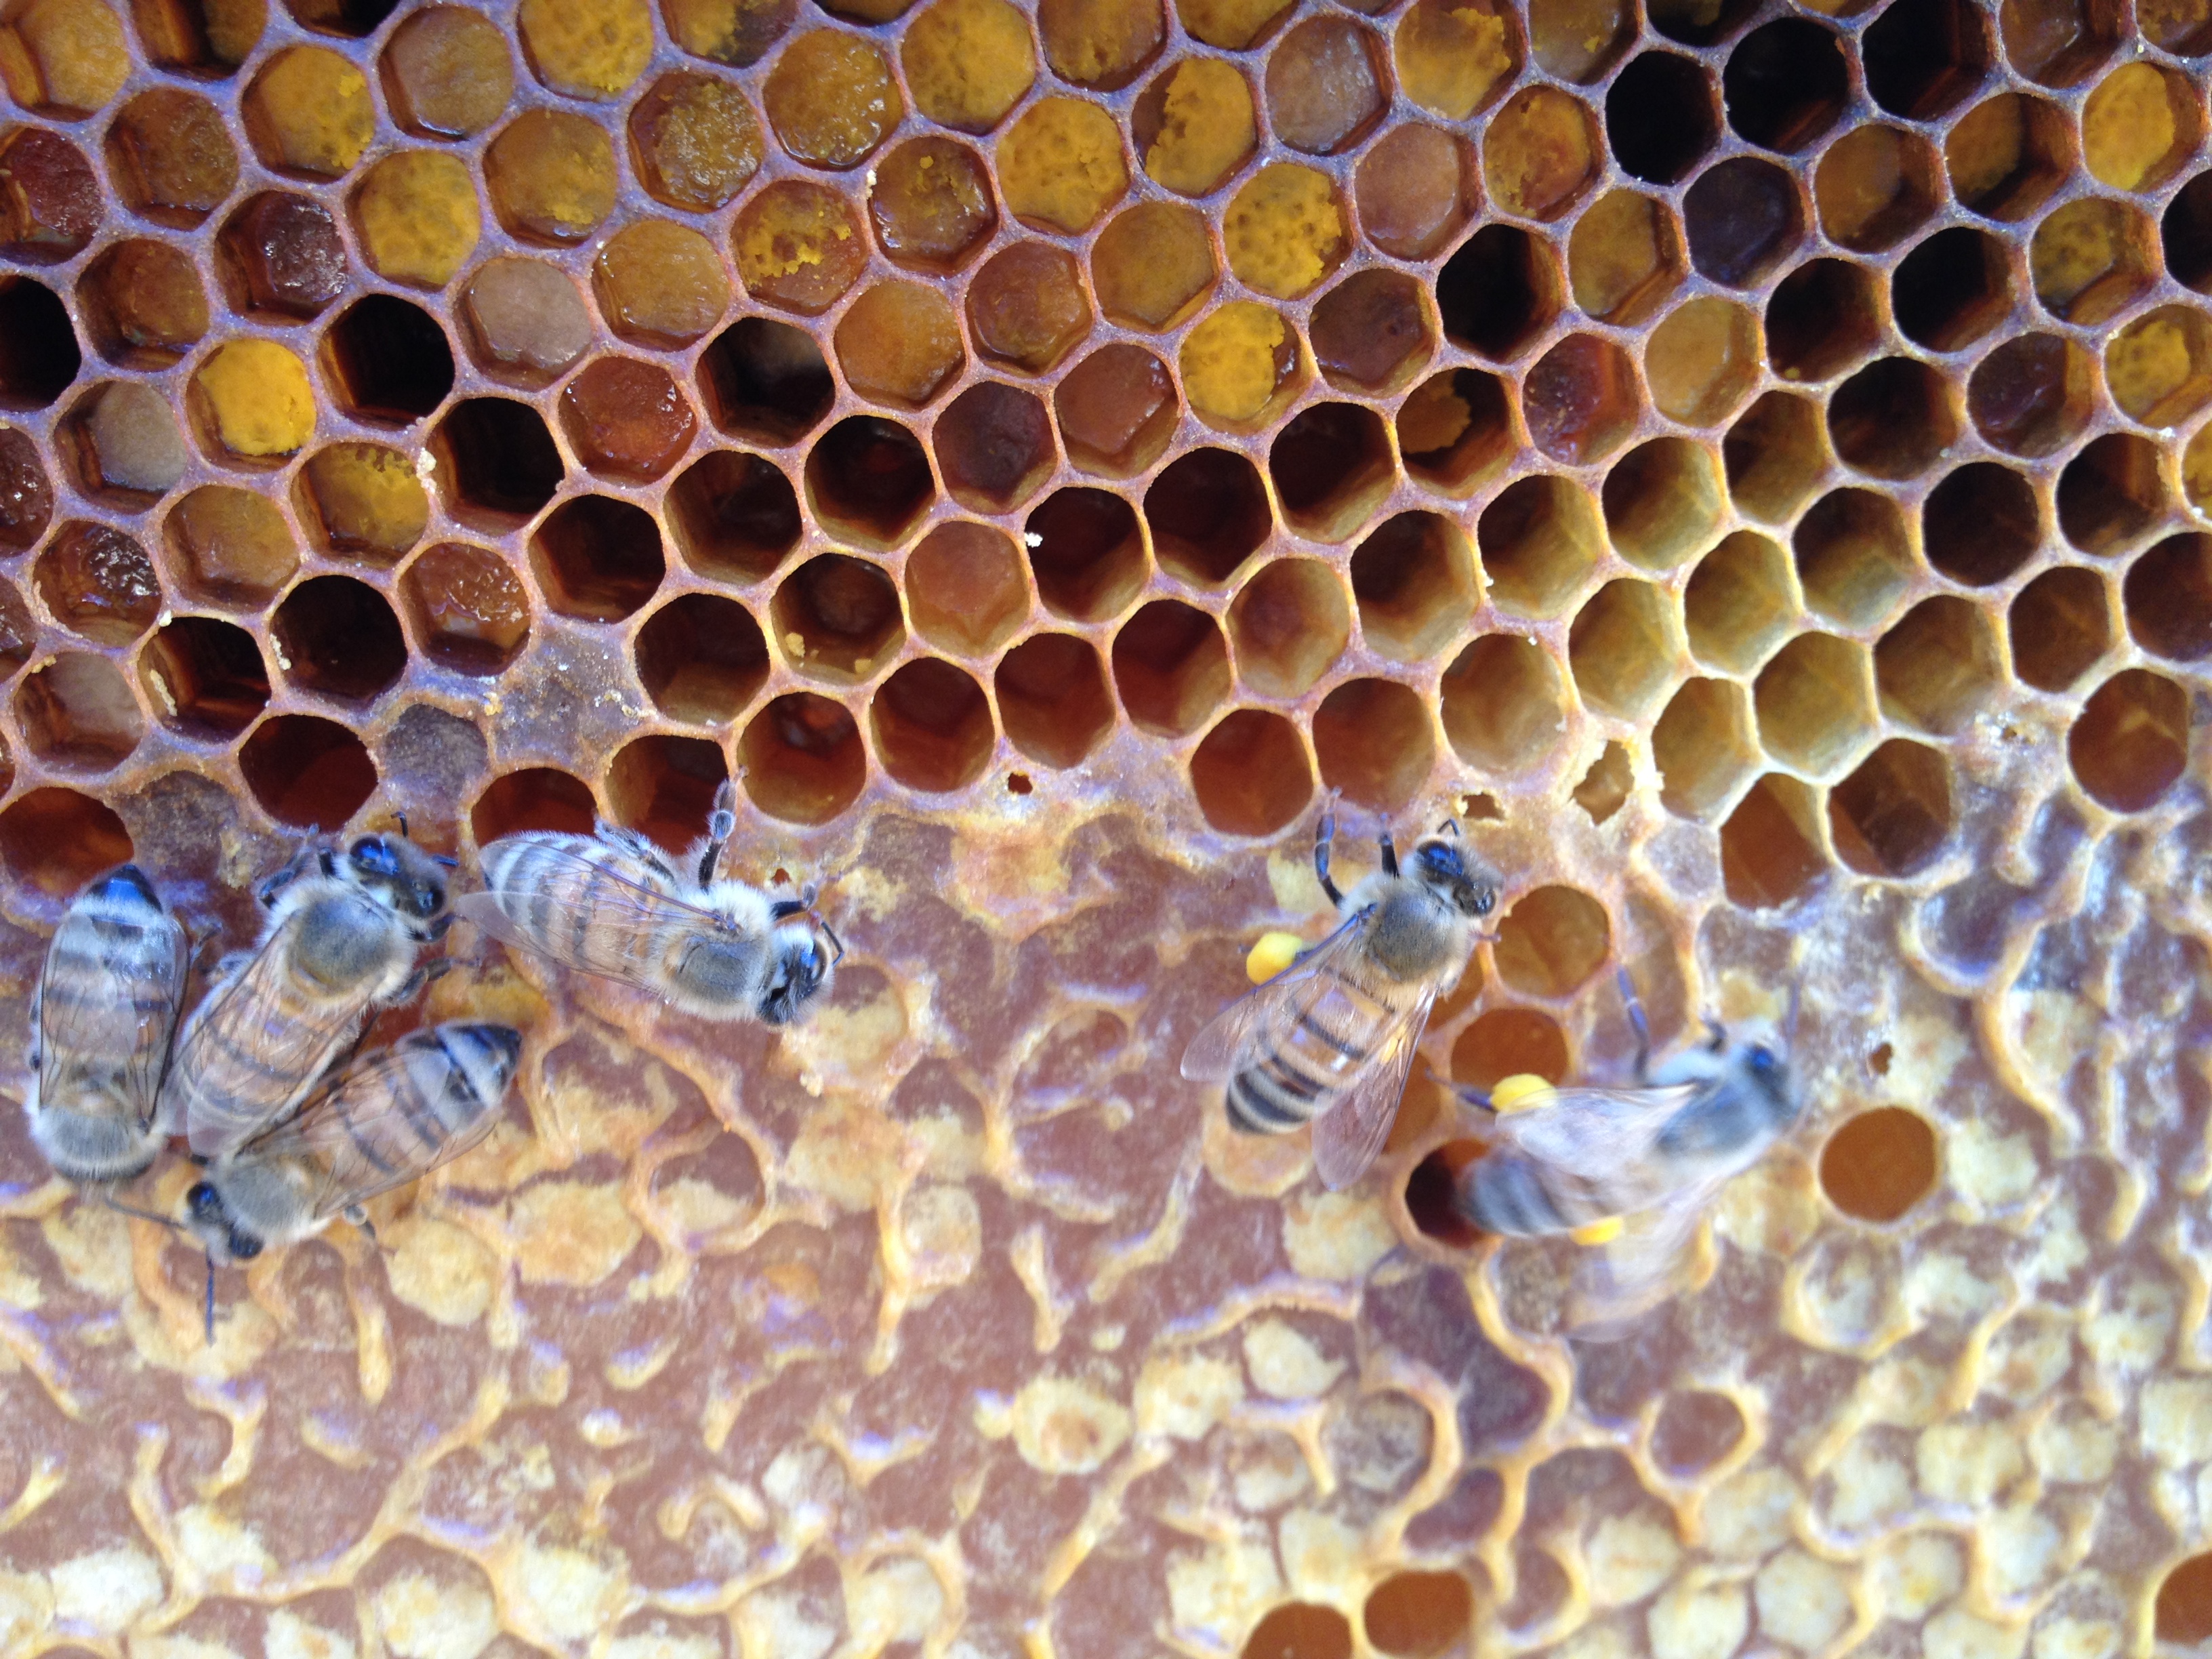
The female foraging bee is gather pollen (protein rich food). She rubs her fur on the anthers of flowers and then combs the pollen off her body with the special “pollen combs” located on her front and middle legs. (below)
She packs the pollen into her pollen sacks (alot like “saddle bags”) on her back legs and carries it back to the hive. (below)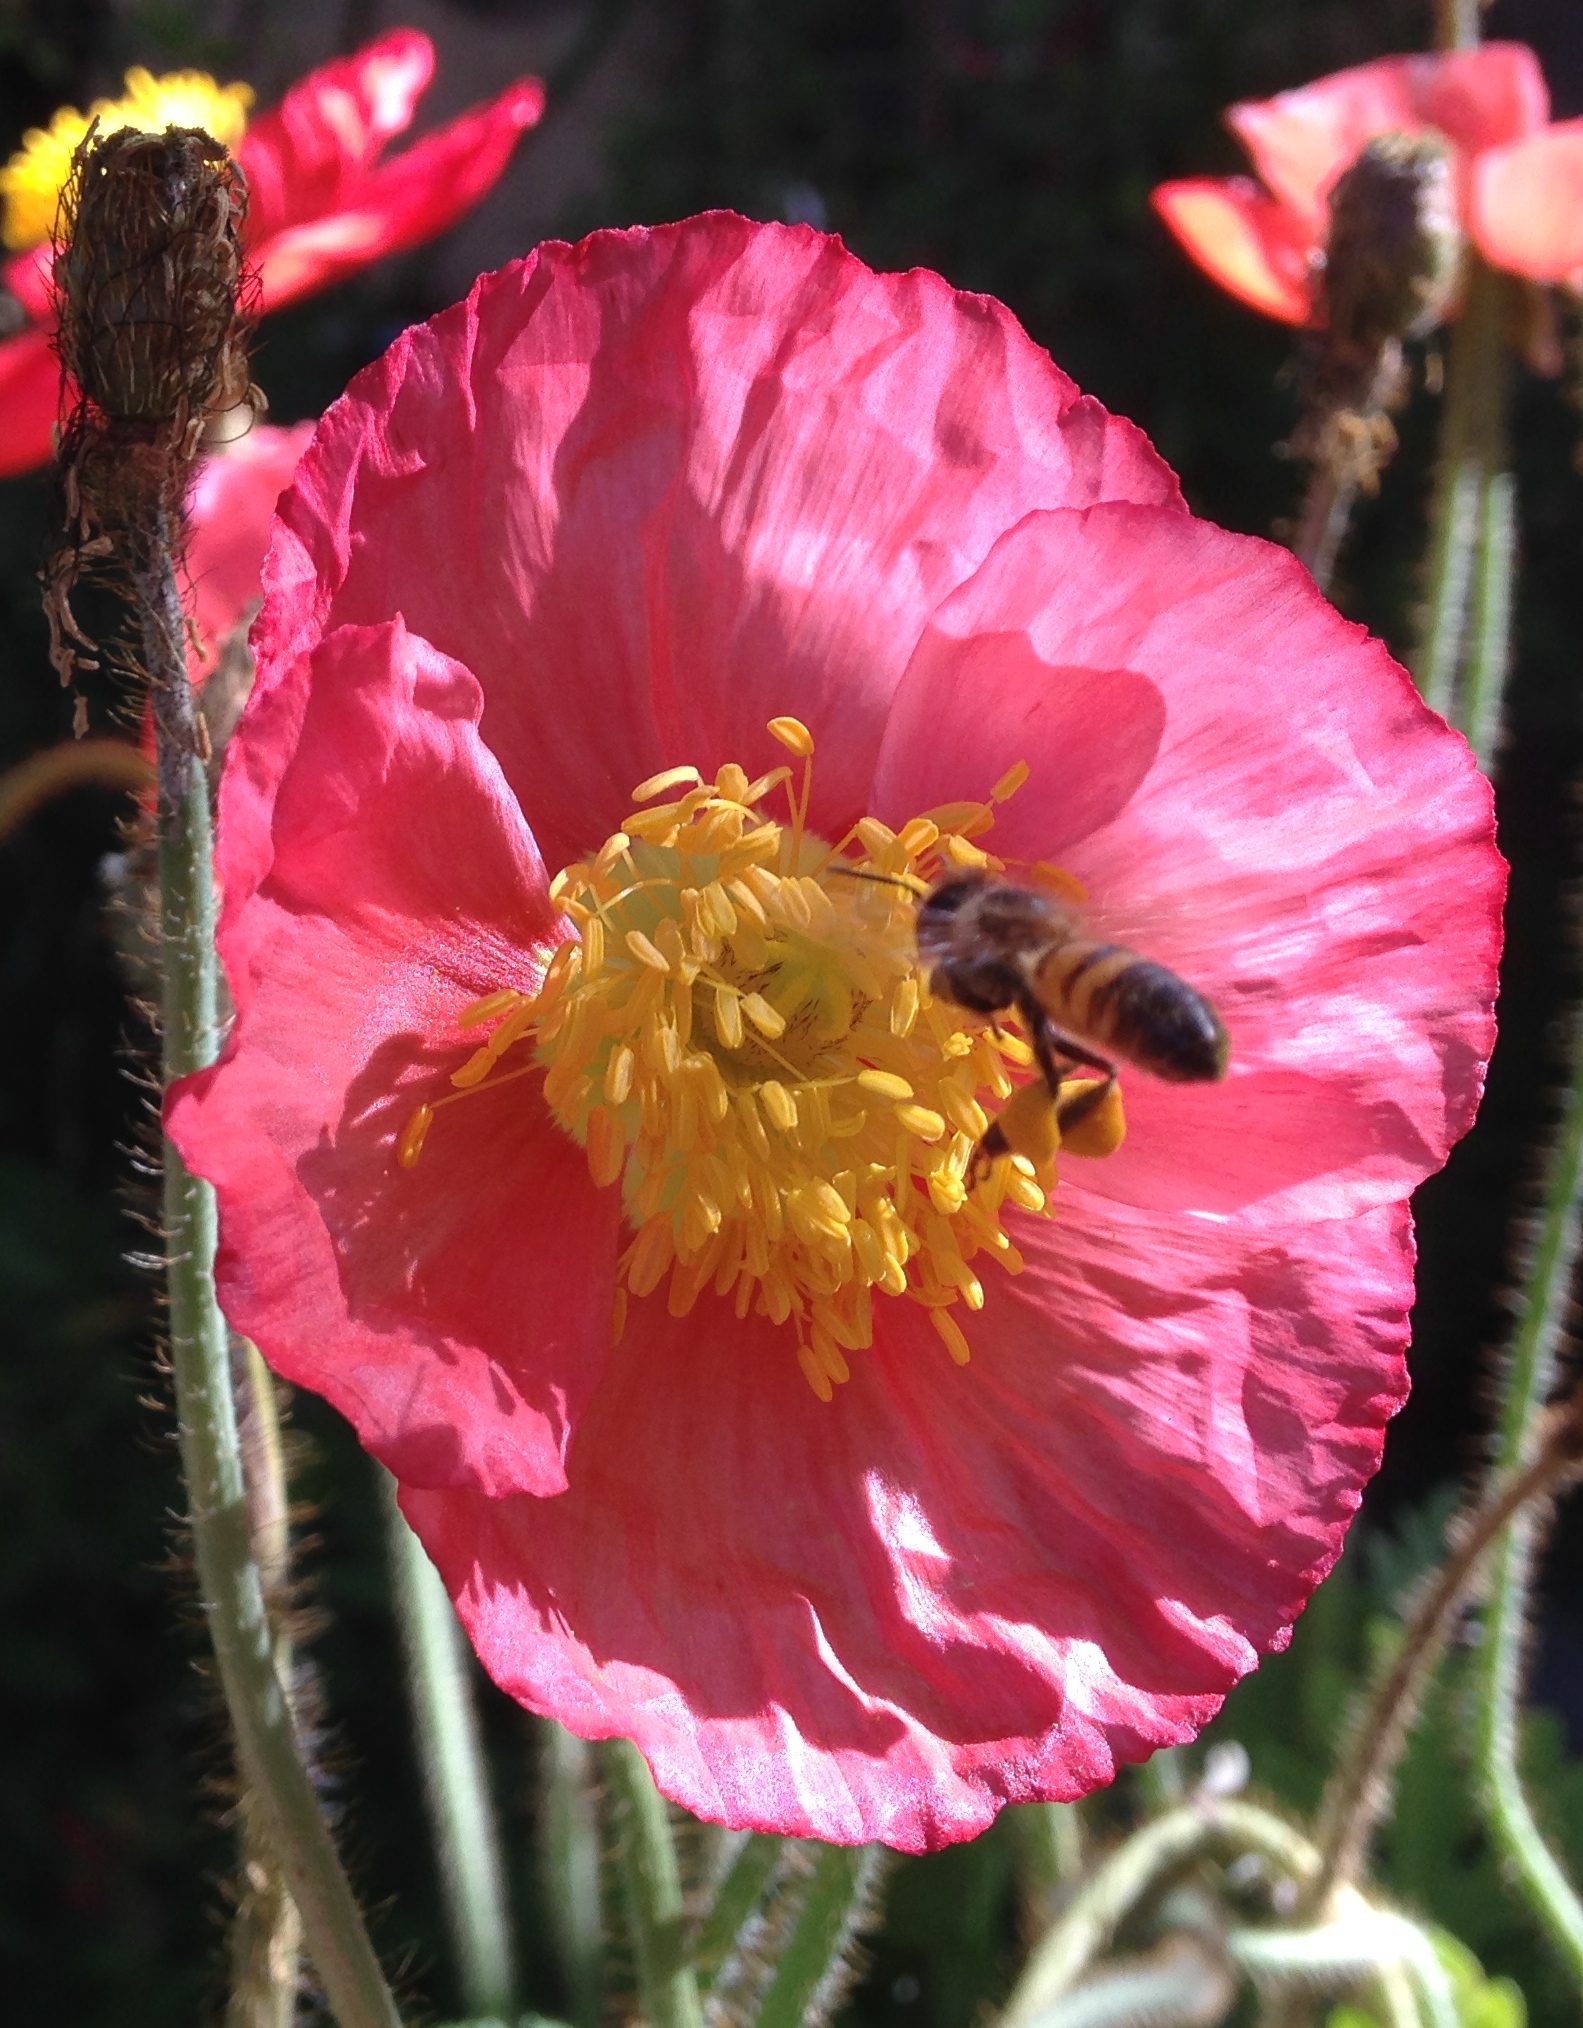
Once back in the hive she will store the pollen into cells near the brood nest; She does this by lowering her back legs into the cell and knocking off the pollen pellet into the cell; if you look closely you will see many colors of pollen and sometimes more than one type of pollen pellet in one cell. (below) Bee Bread is a mixture of of nectar and pollen stored to be later fed to baby bees.
Today’s Recipe is not a recipe at all, but an Invitation.
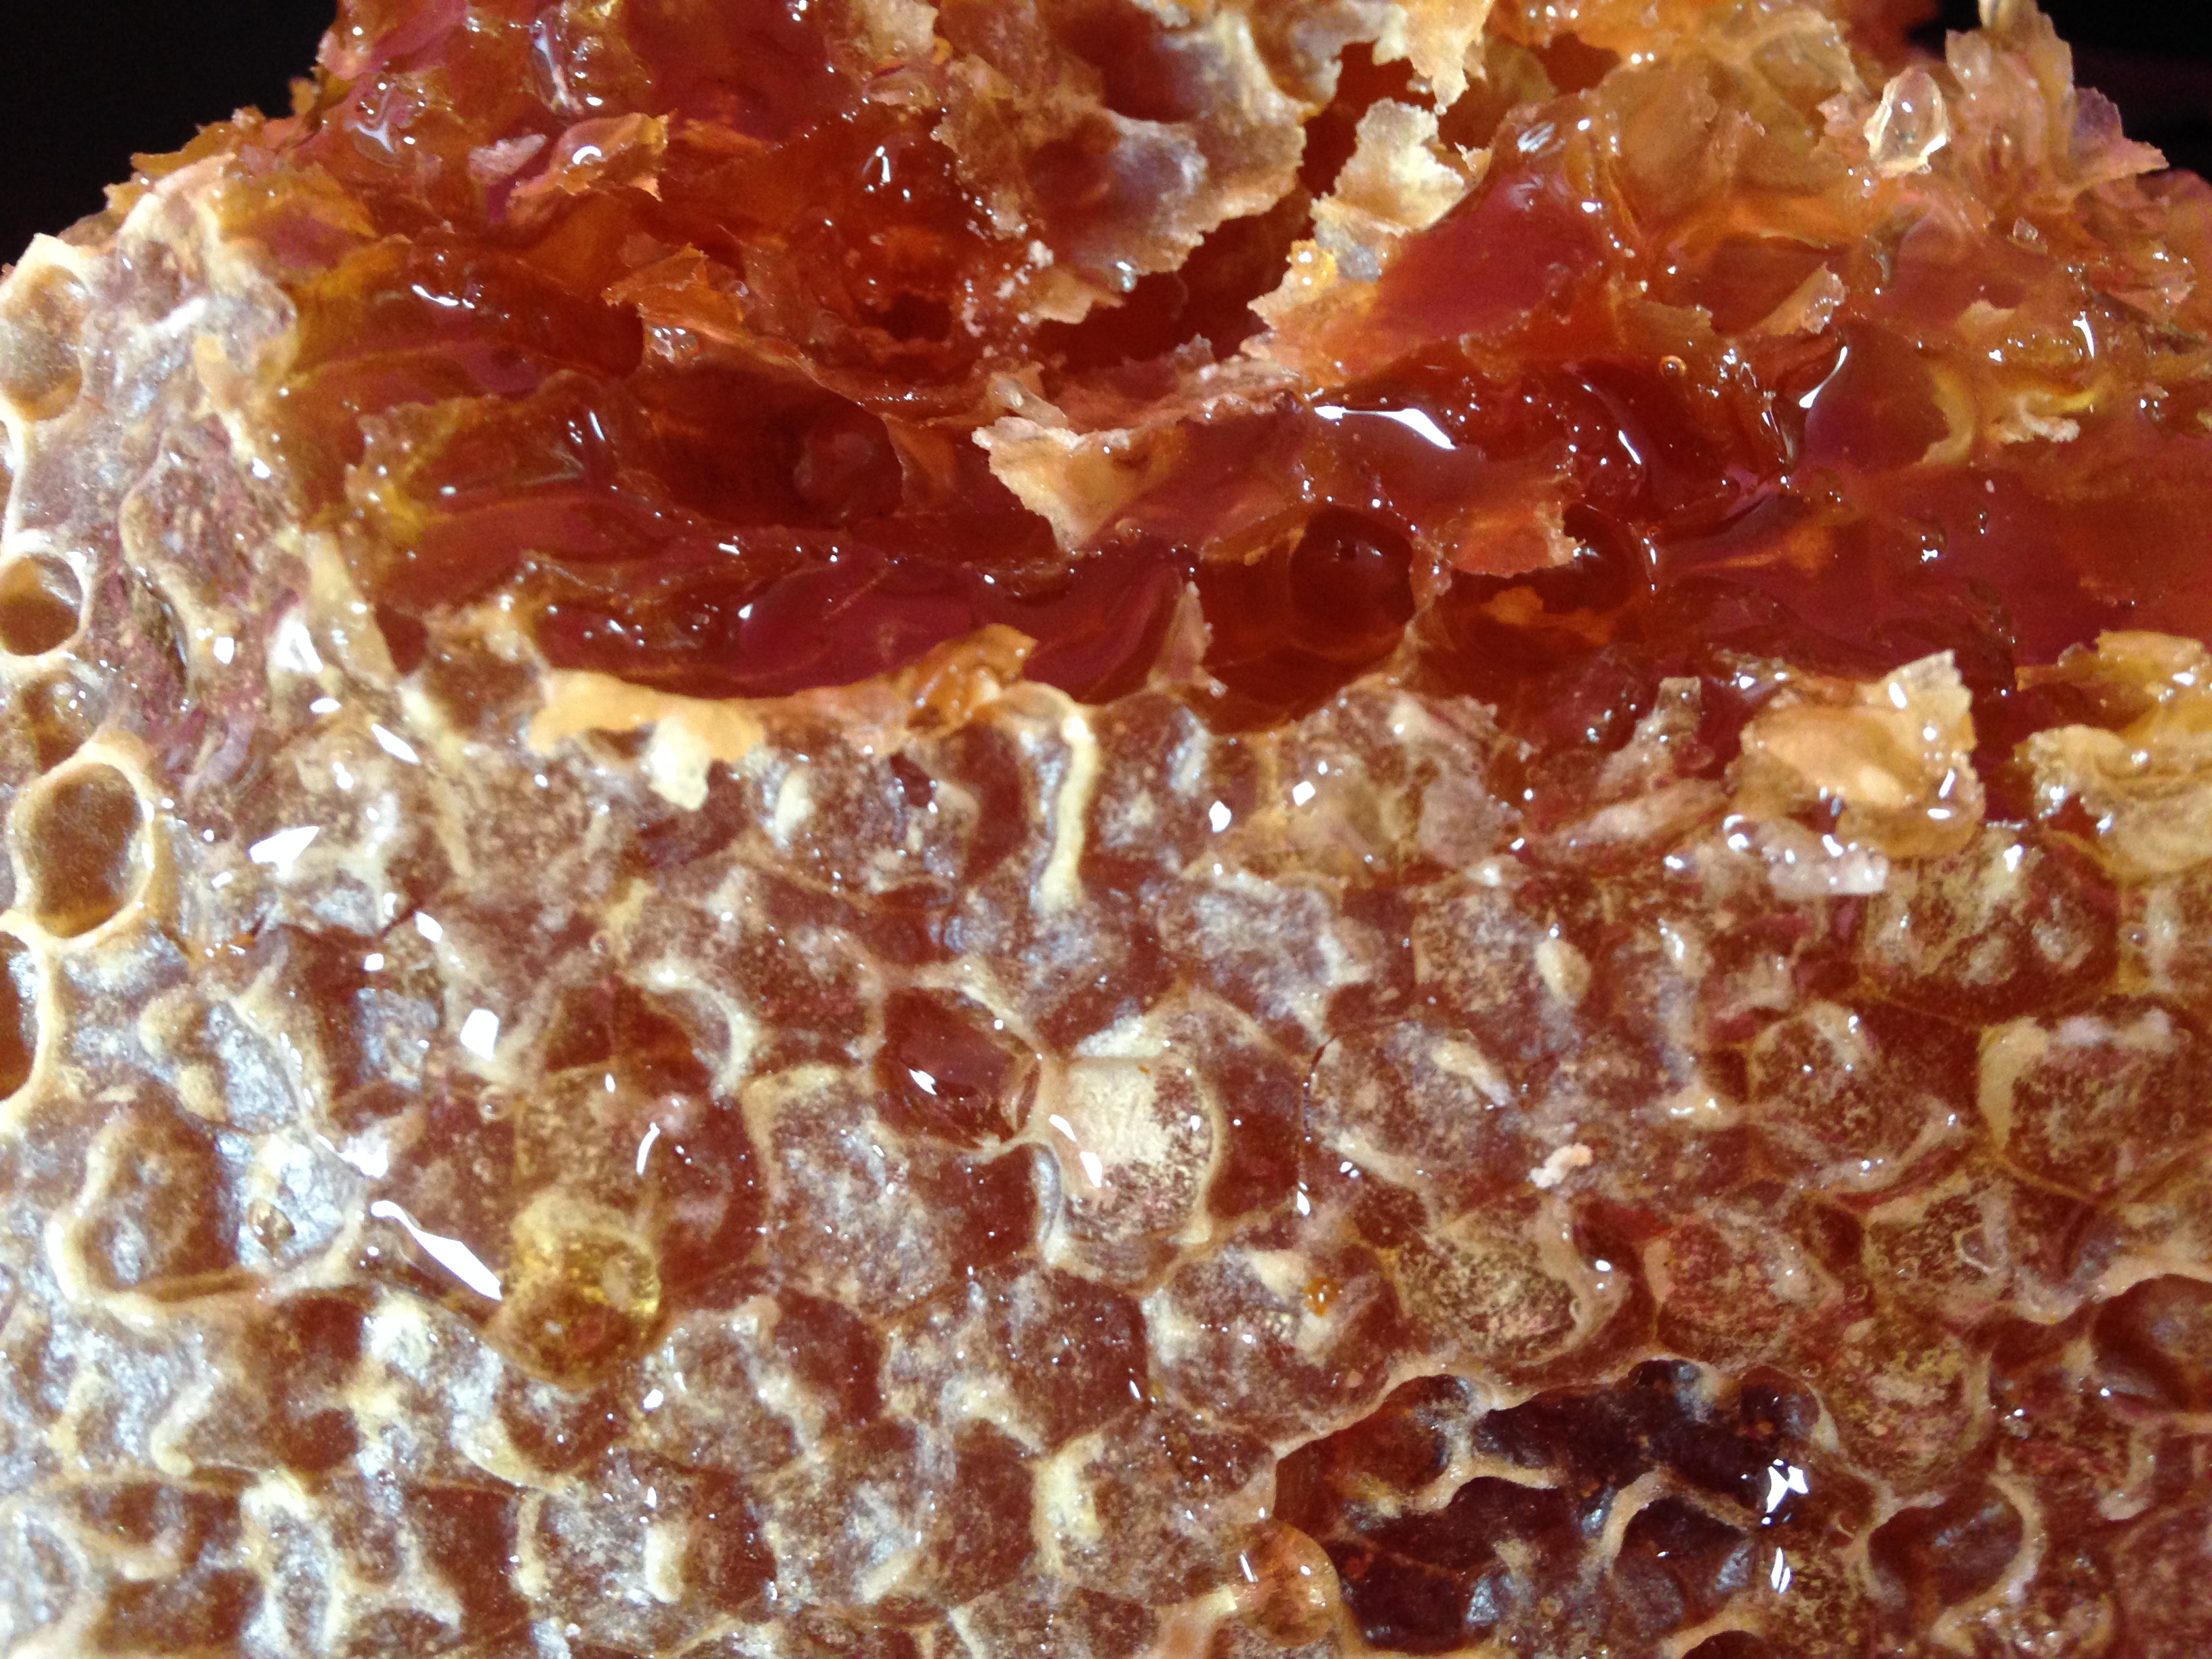
Seek out and taste fresh honeycomb.
Not just honey, but honey still in it’s wax comb.
If you do not have a beekeeper living near you, then look in a health food stores or farmers market.
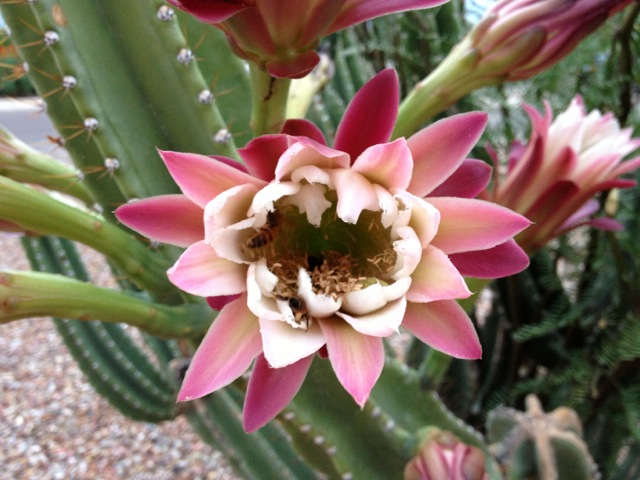
It is pure joy to hold and smell and taste honeycomb – and to taste honey so pure that the last “hands” that touched the honey, were the bees’s before they capped the cell. See if you can taste the mesquite, the rosemary, the cactus flower, or whatever blooms near you, within the honey.
Below is honeycomb I harvested this morning.
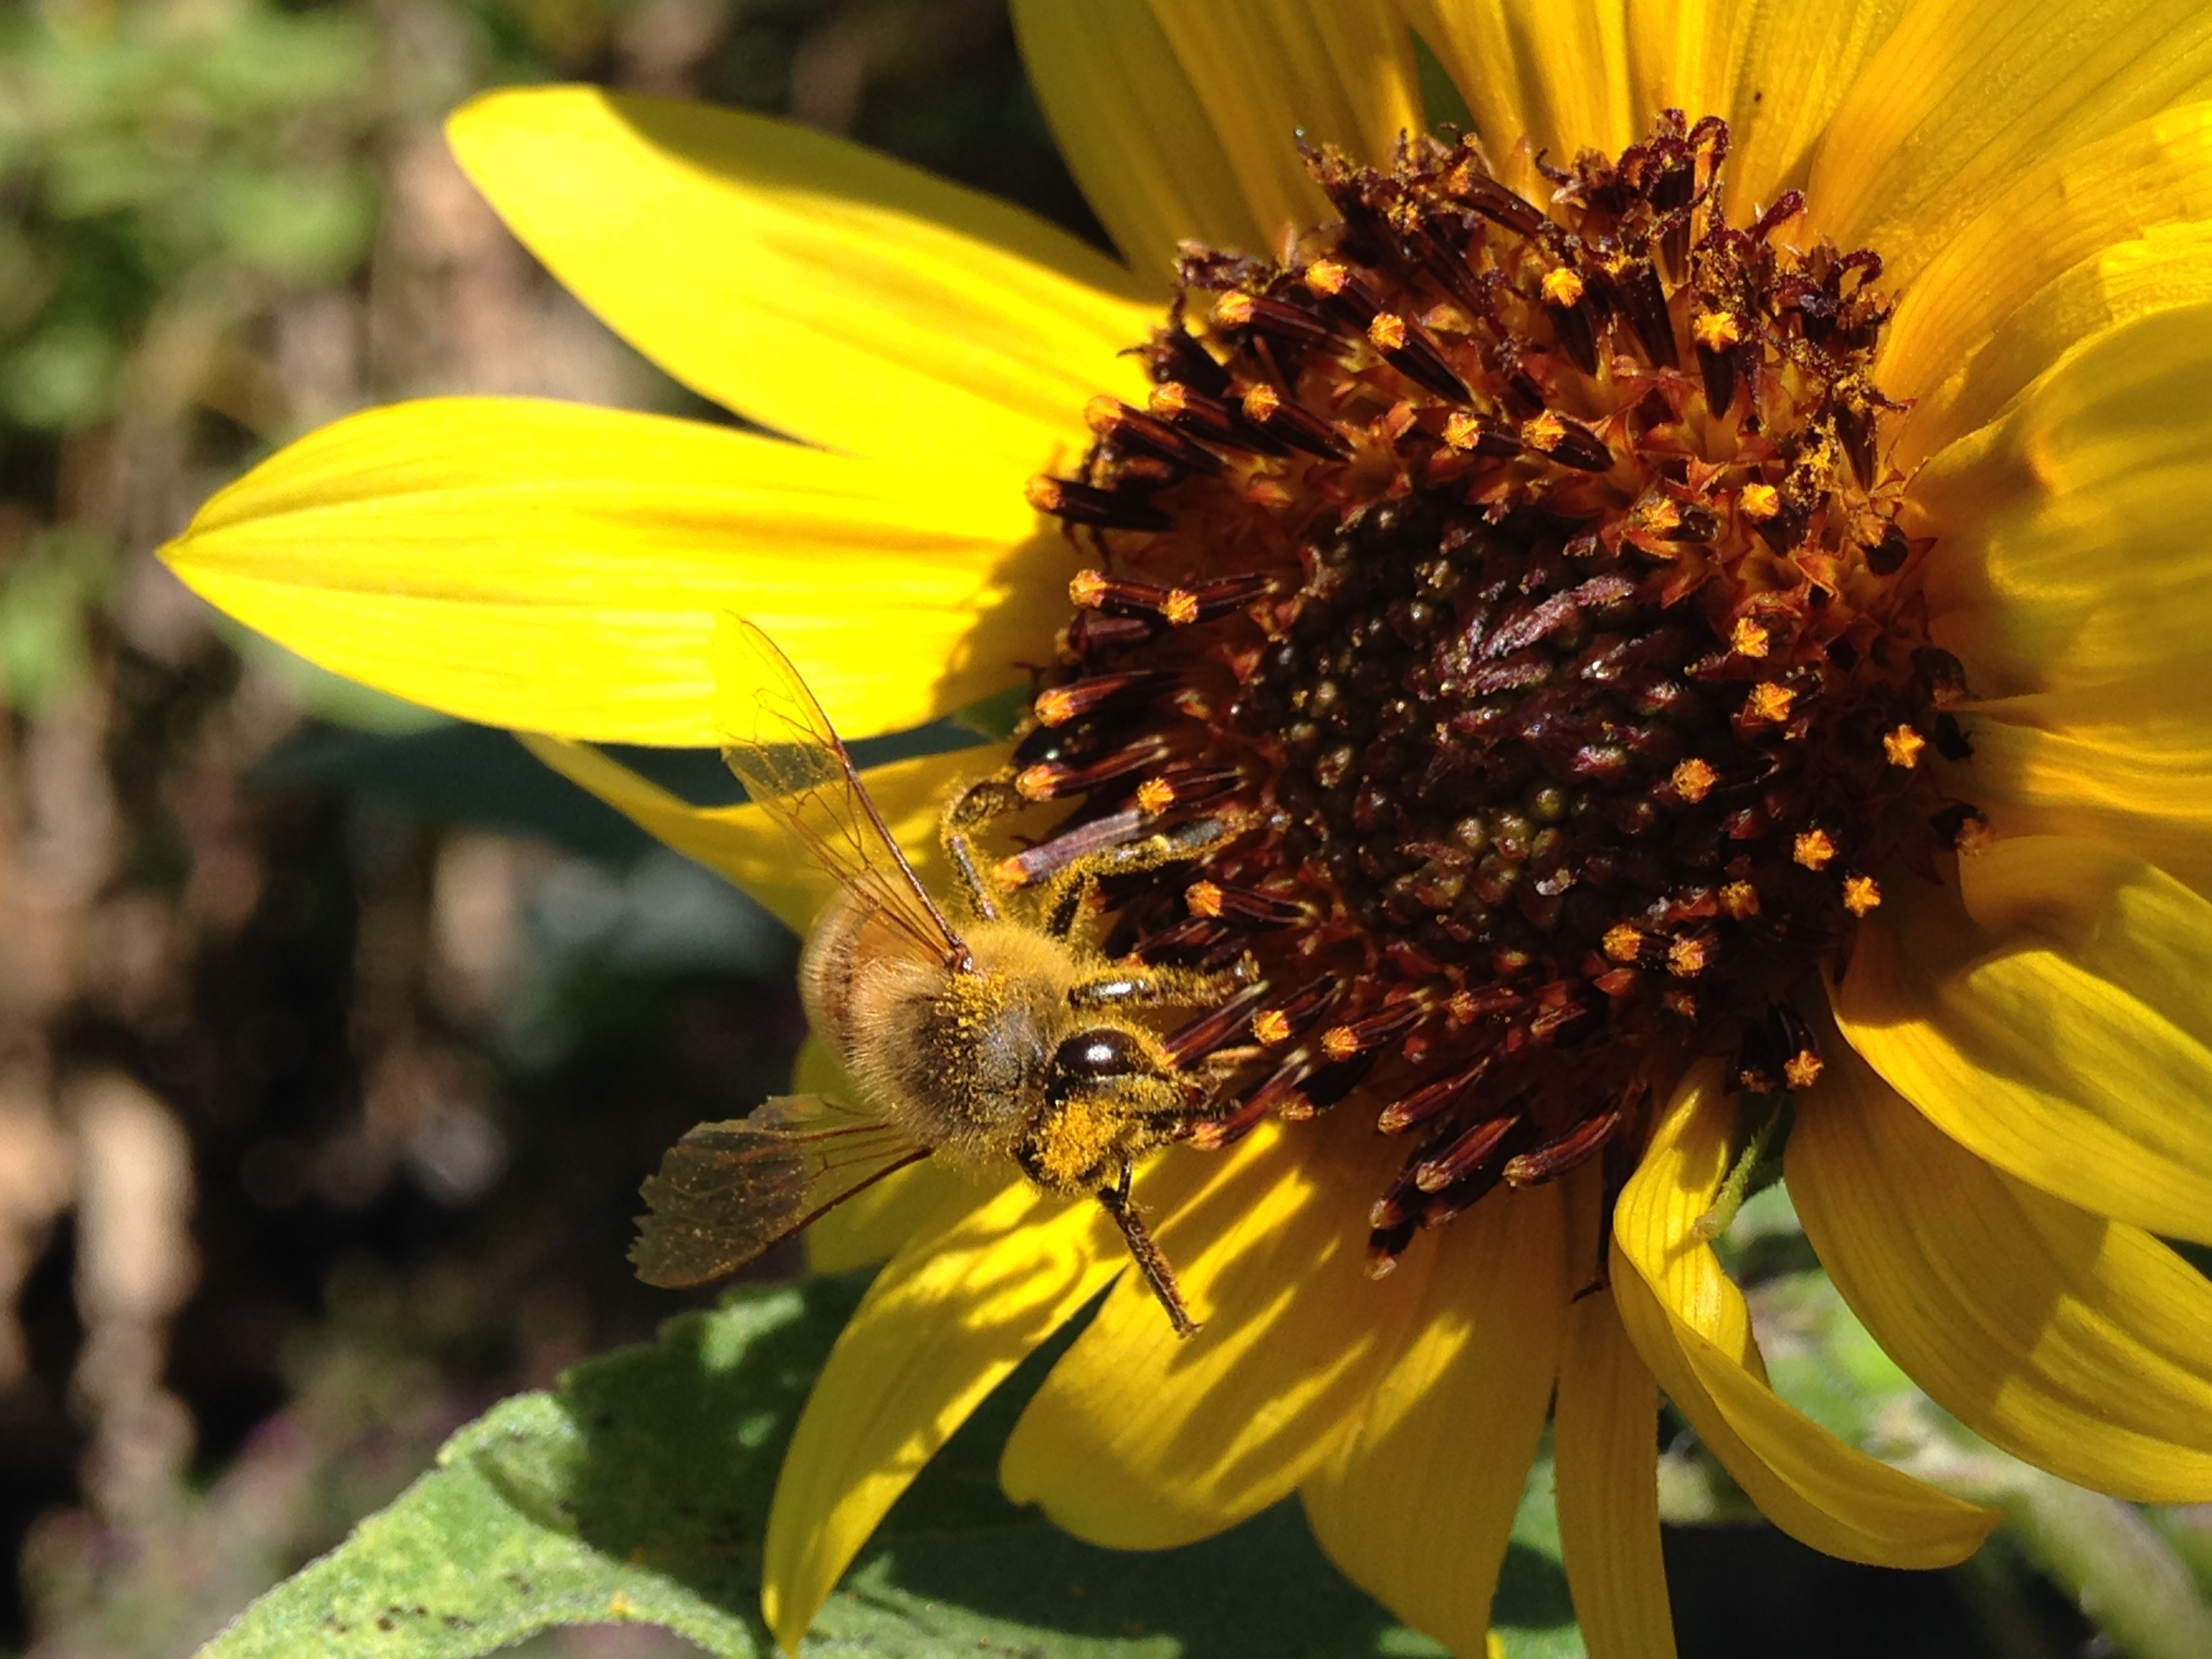
Cactus Flower and pollen being gathered; note the pollen sack on back leg (below)
 More Cactus Flower pollinating going on (below)
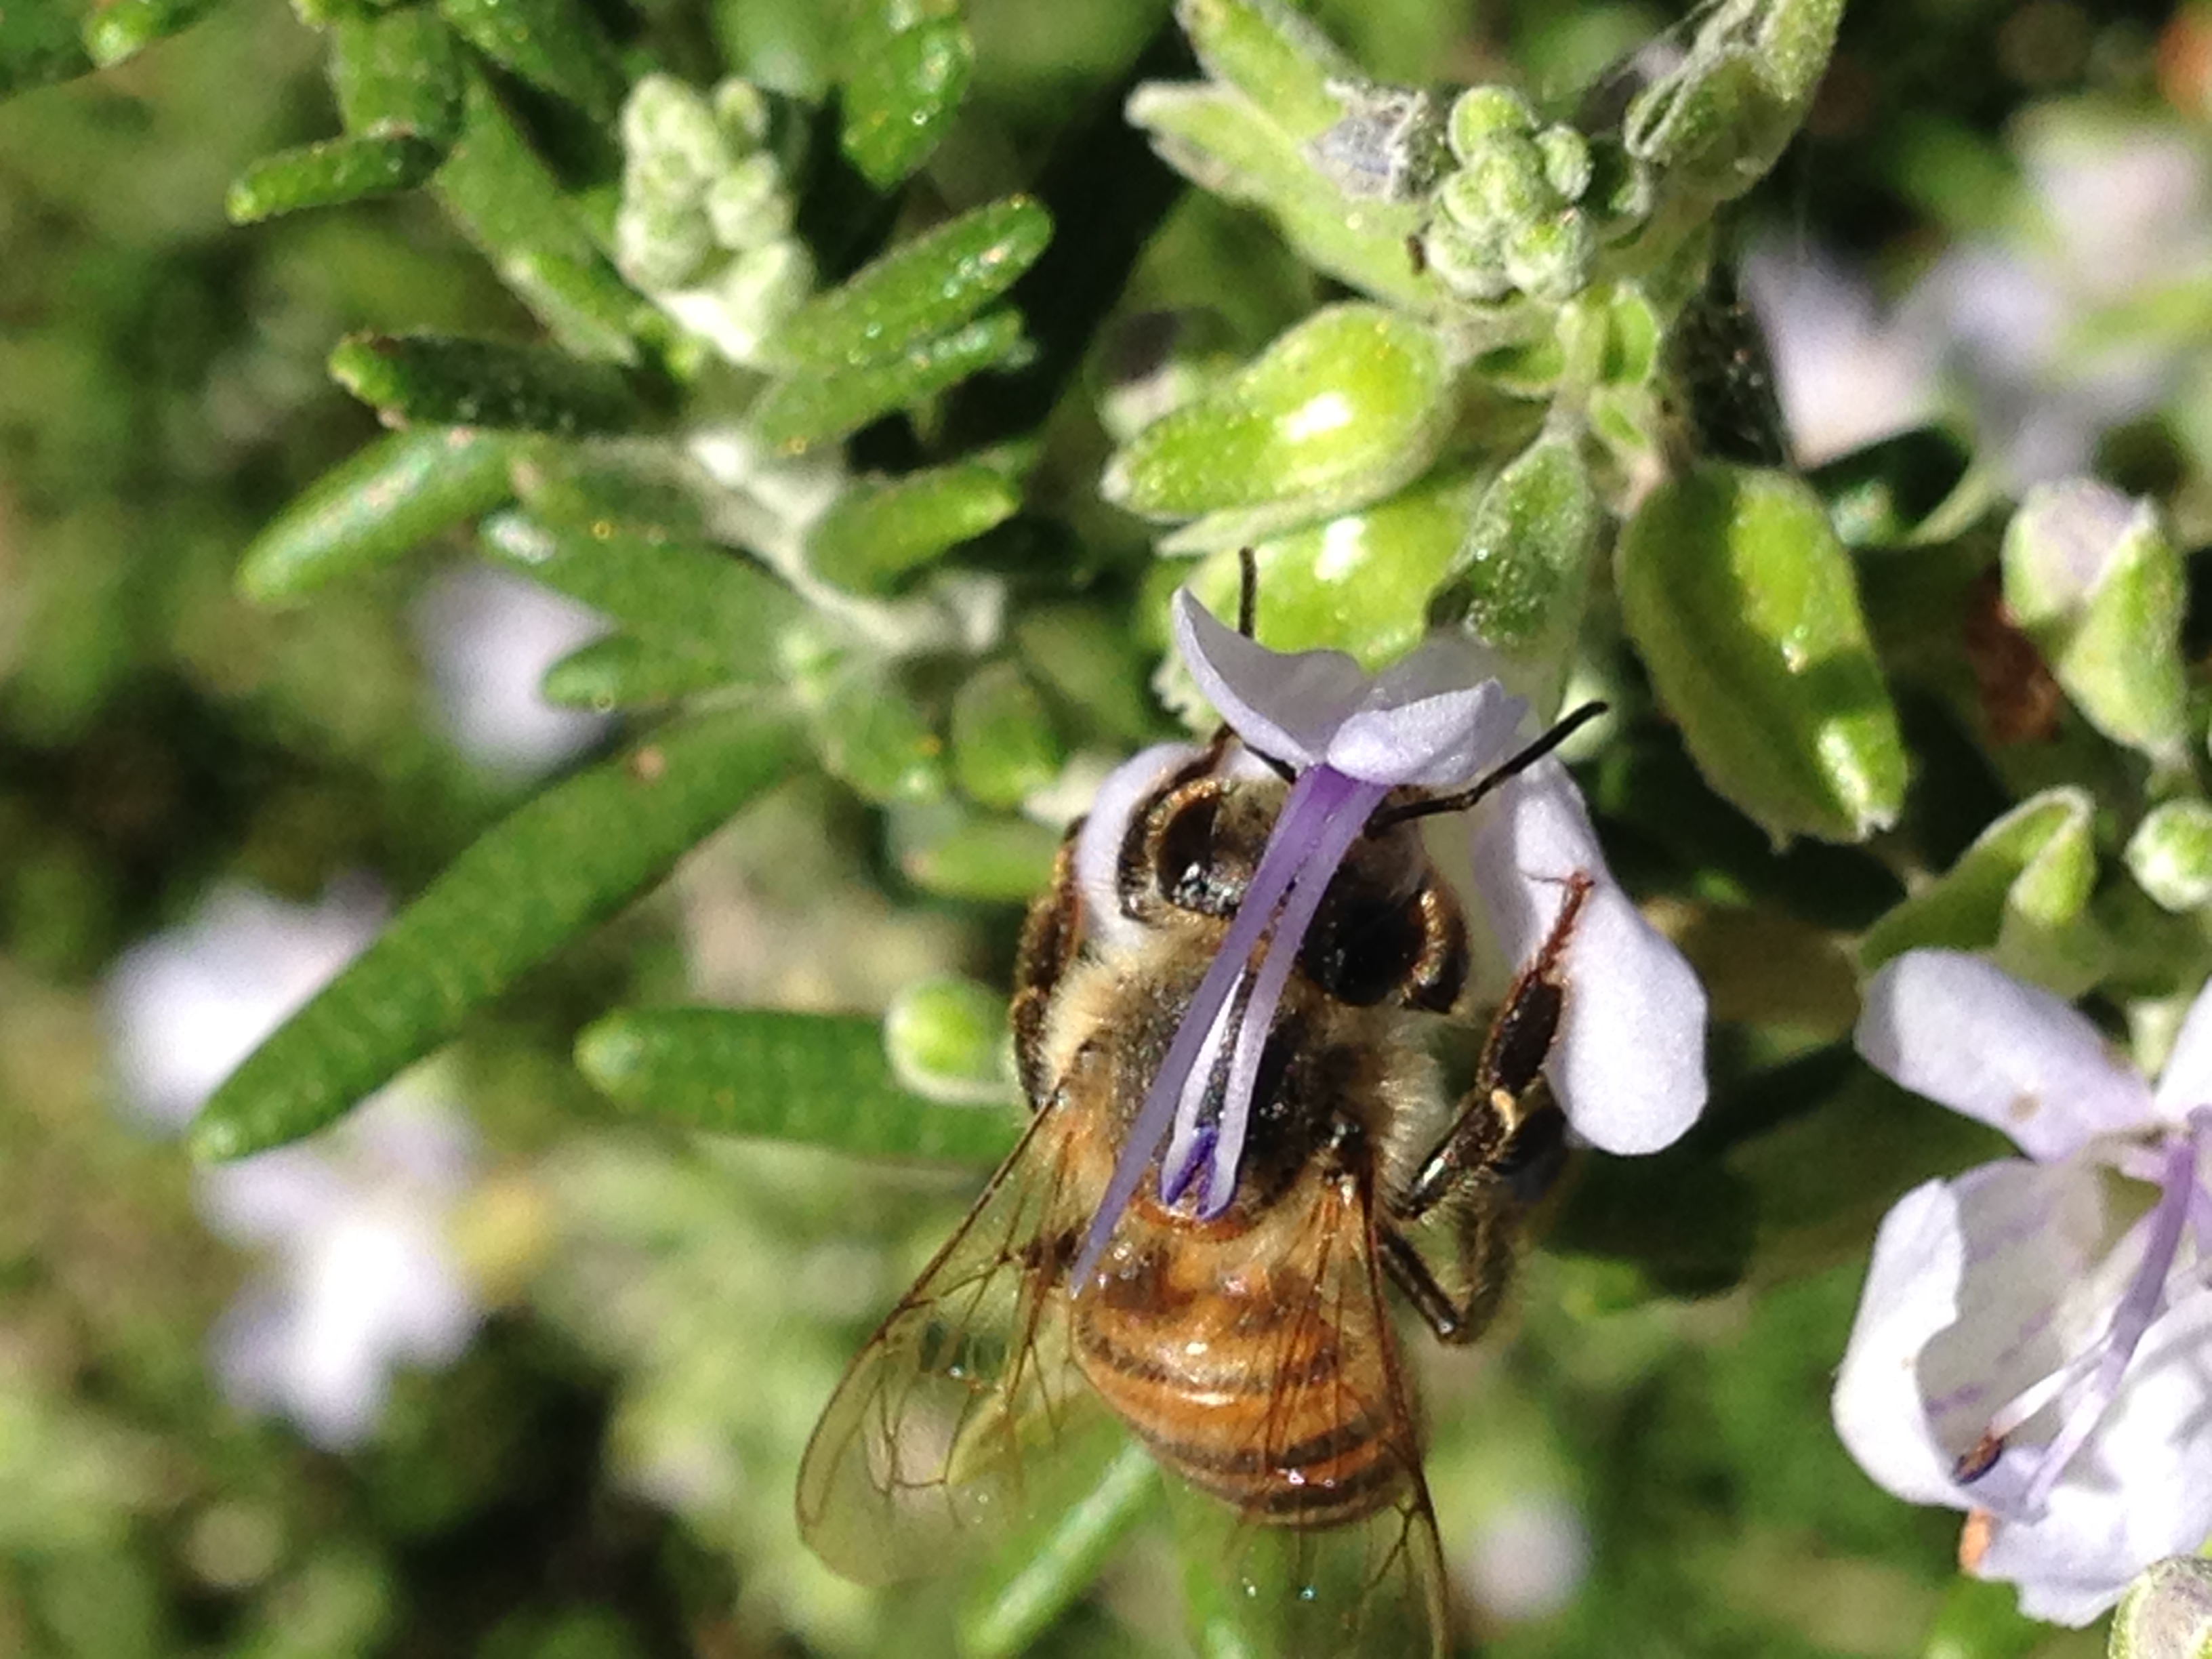
 Rosemary flowers and foraging bee (below)
Yerba mansa is a member of a tiny plant family. Our Sonoran Desert has many such unique plants in it.
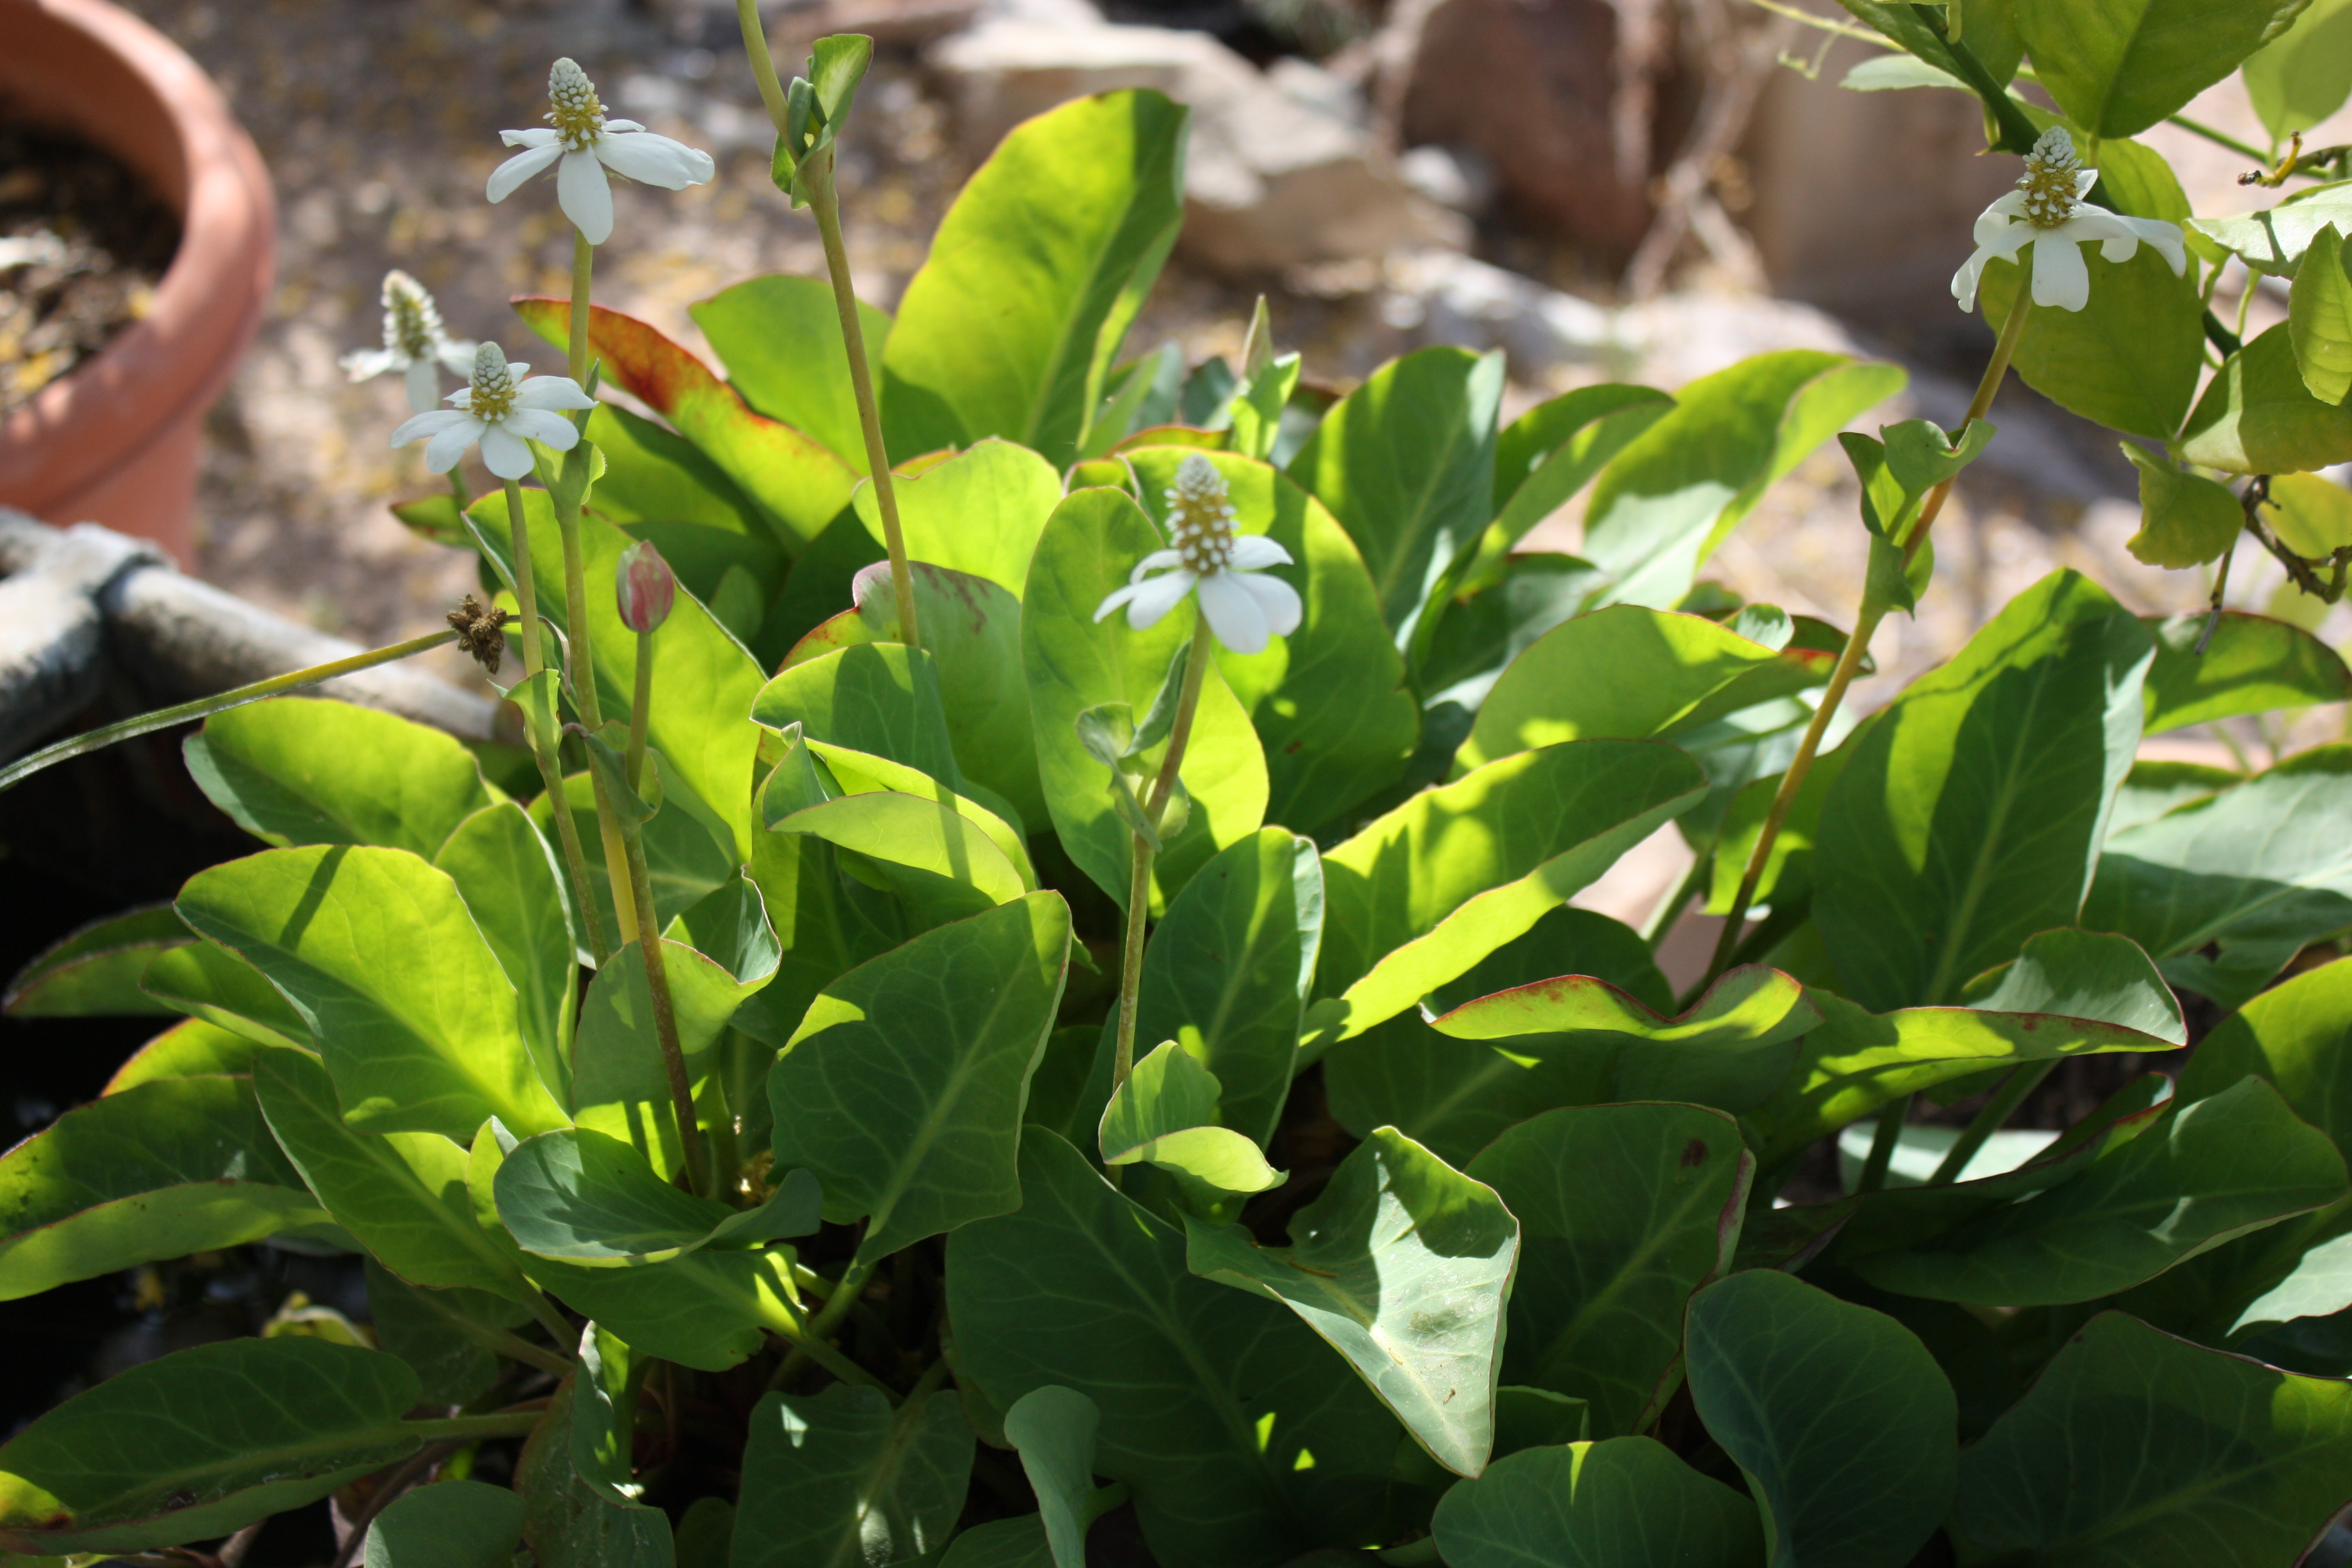
Jacqueline Soule here to tell you of a very unusual plant blooming in my garden right now – a member of the very unique Lizard Tail Family, the Saururaceae. This distinct plant family has only seven species in it, grouped into four genera. I am writing today about Anemopsis californica, also called yerba mansa.
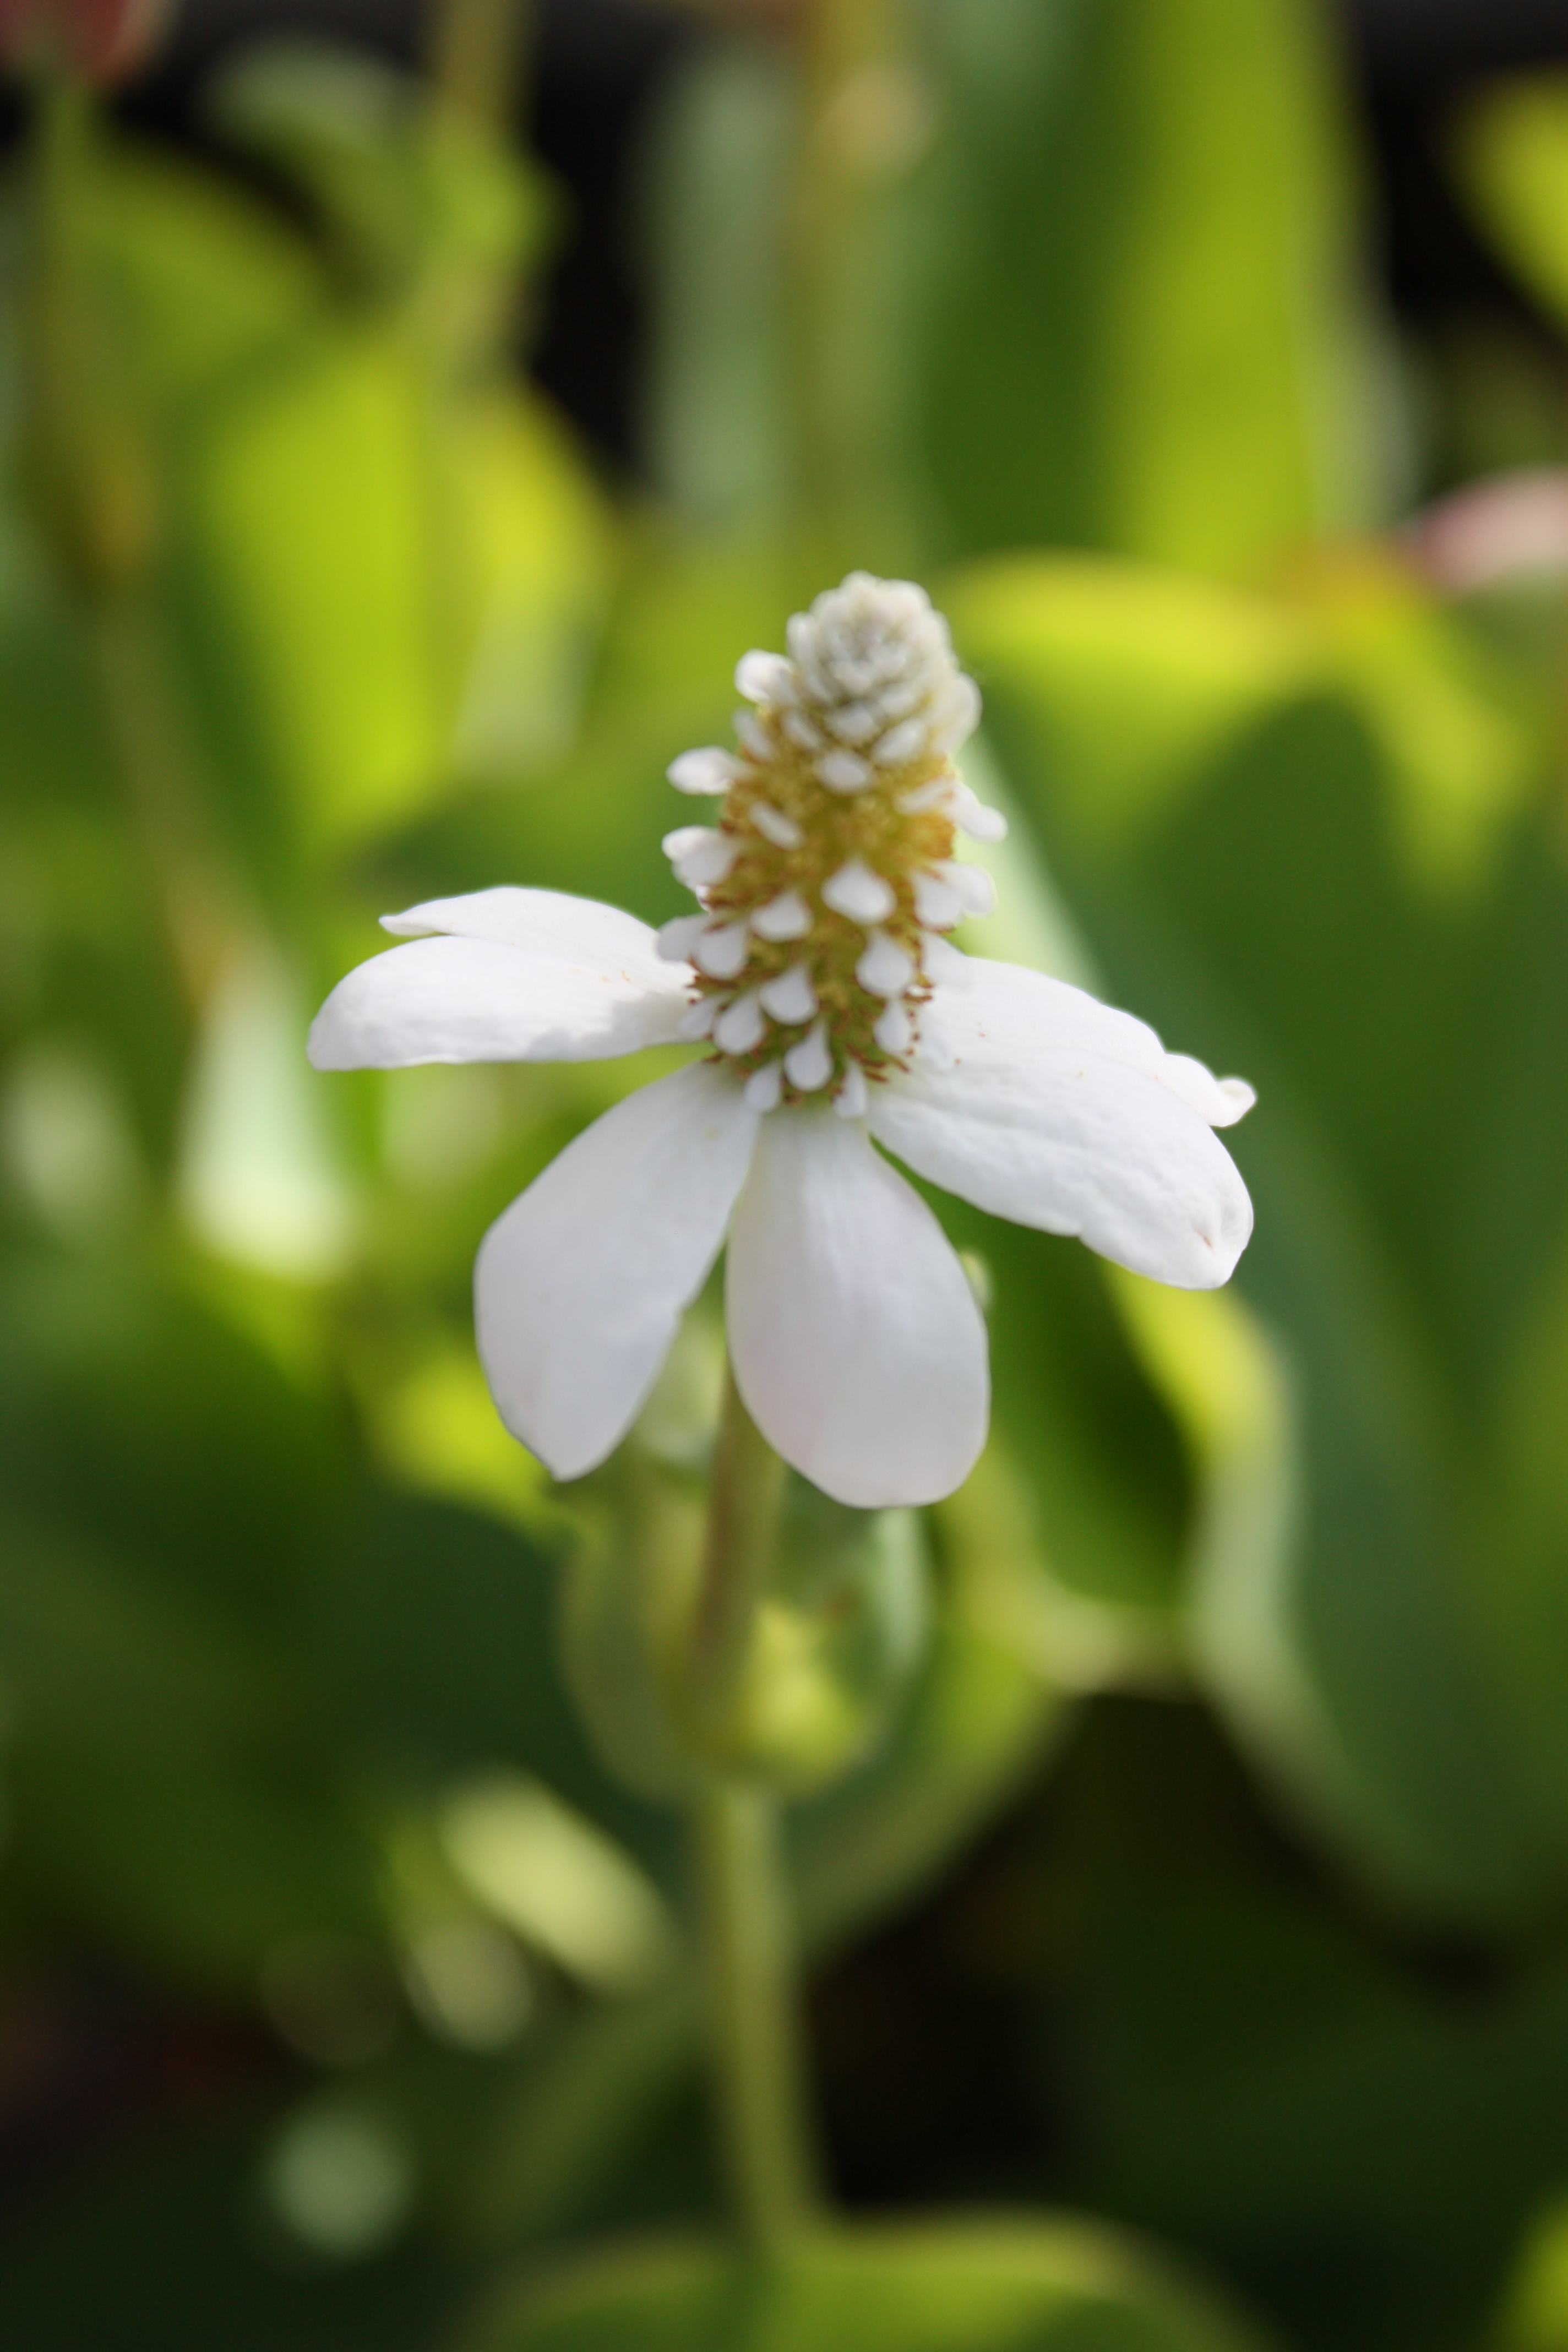
What looks like a single flower is technically a cluster of tiny flowers.
Medicinal.
Yerba mansa is used as a medicinal herb, but it also makes a pretty pond plant. All parts of the plant have a distinct spicy fragrance, a blend of ginger, eucalyptus, a touch of juniper and a dash of pepper. The roots are especially fragrant, reminiscent of a cross between camphor and eucalyptus with a hint of pepper. One of the active compounds in yerba mansa is methyleugenol, an anti-spasmodic, similar in chemical structure to compounds found in other medicinal herbs.
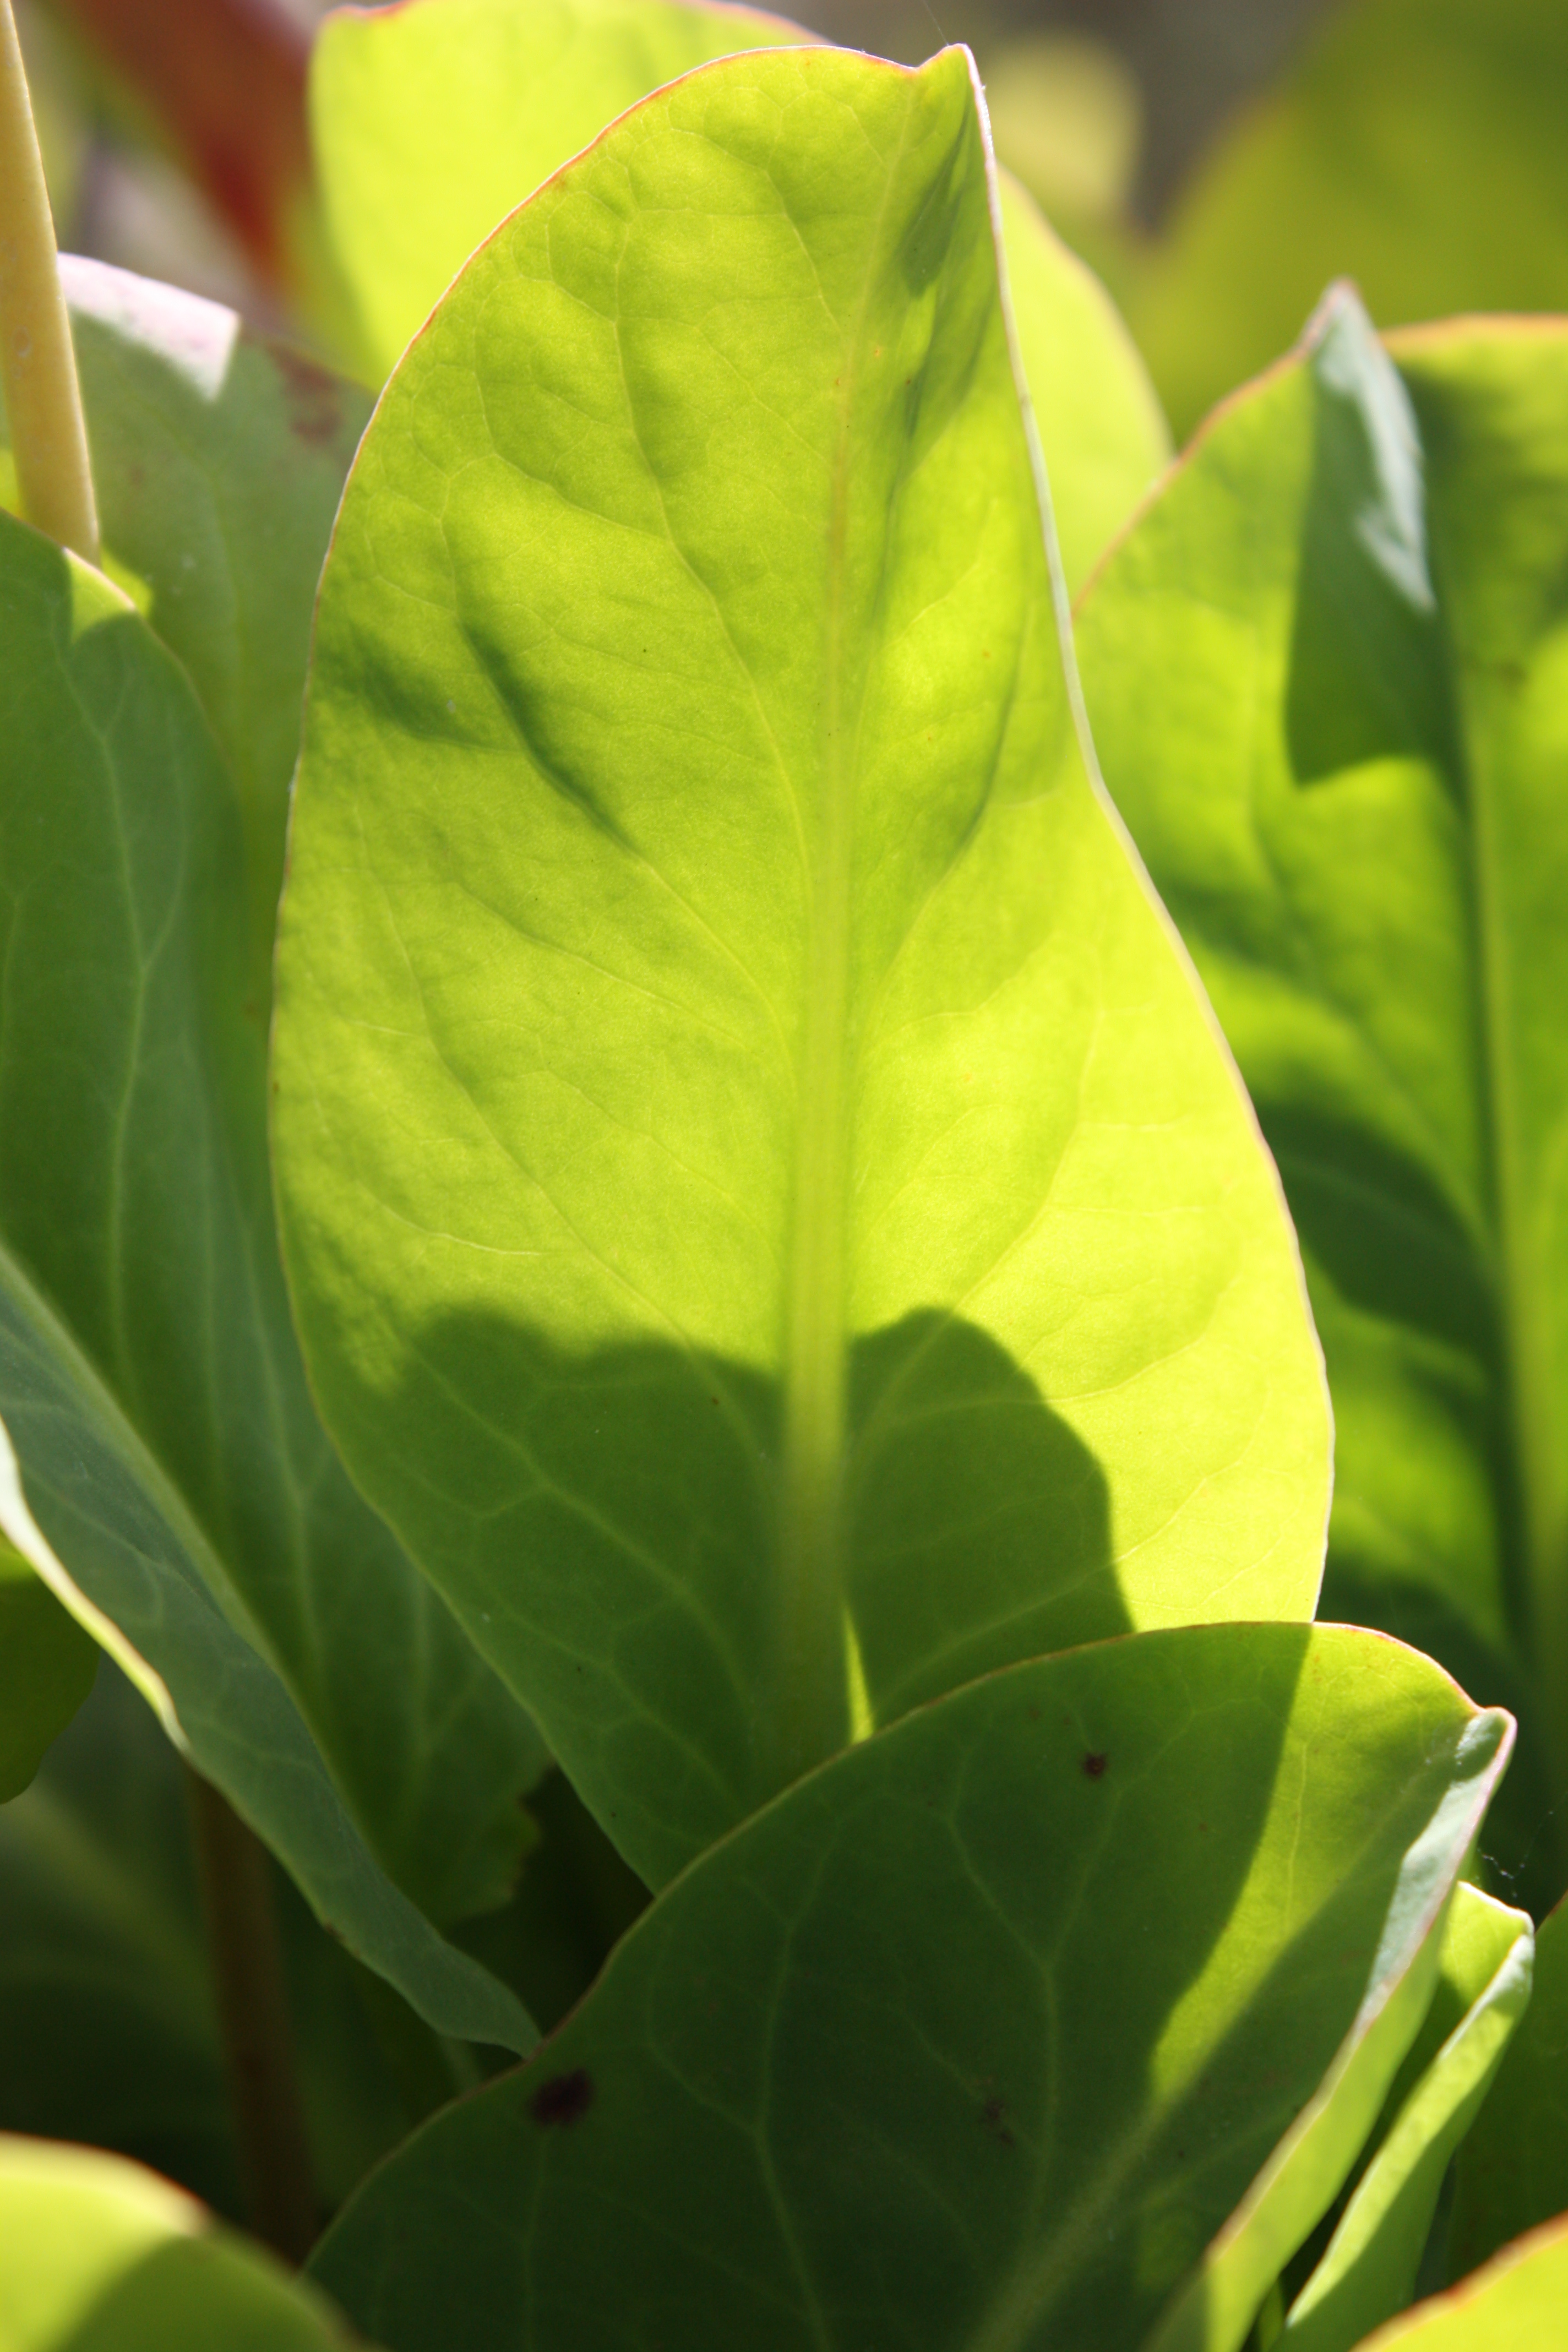
Even when they are newly emerged, the leaves bear a tracery of the red pigments they feature in fall.
Yerba mansa is versatile; it can be taken orally as a tea, tincture, infusion or dried in capsule form. It can be used externally for soaking inflamed or infected areas. It can be ground and used as a dusting powder. In New Mexico the leaves are used to make a poultice to relieve muscle swelling and inflammation. Spanish settlers in California used the plant as a liniment for skin troubles and as a tea for disorders of the blood.
Planting and Care.
While it is a pretty garden plant, yerba mansa would not appear in xeriscape books. It requires consistently moist soil and will not tolerate drying out between waterings. But by definition a xeriscape should include some oasis, and this is often a water garden.
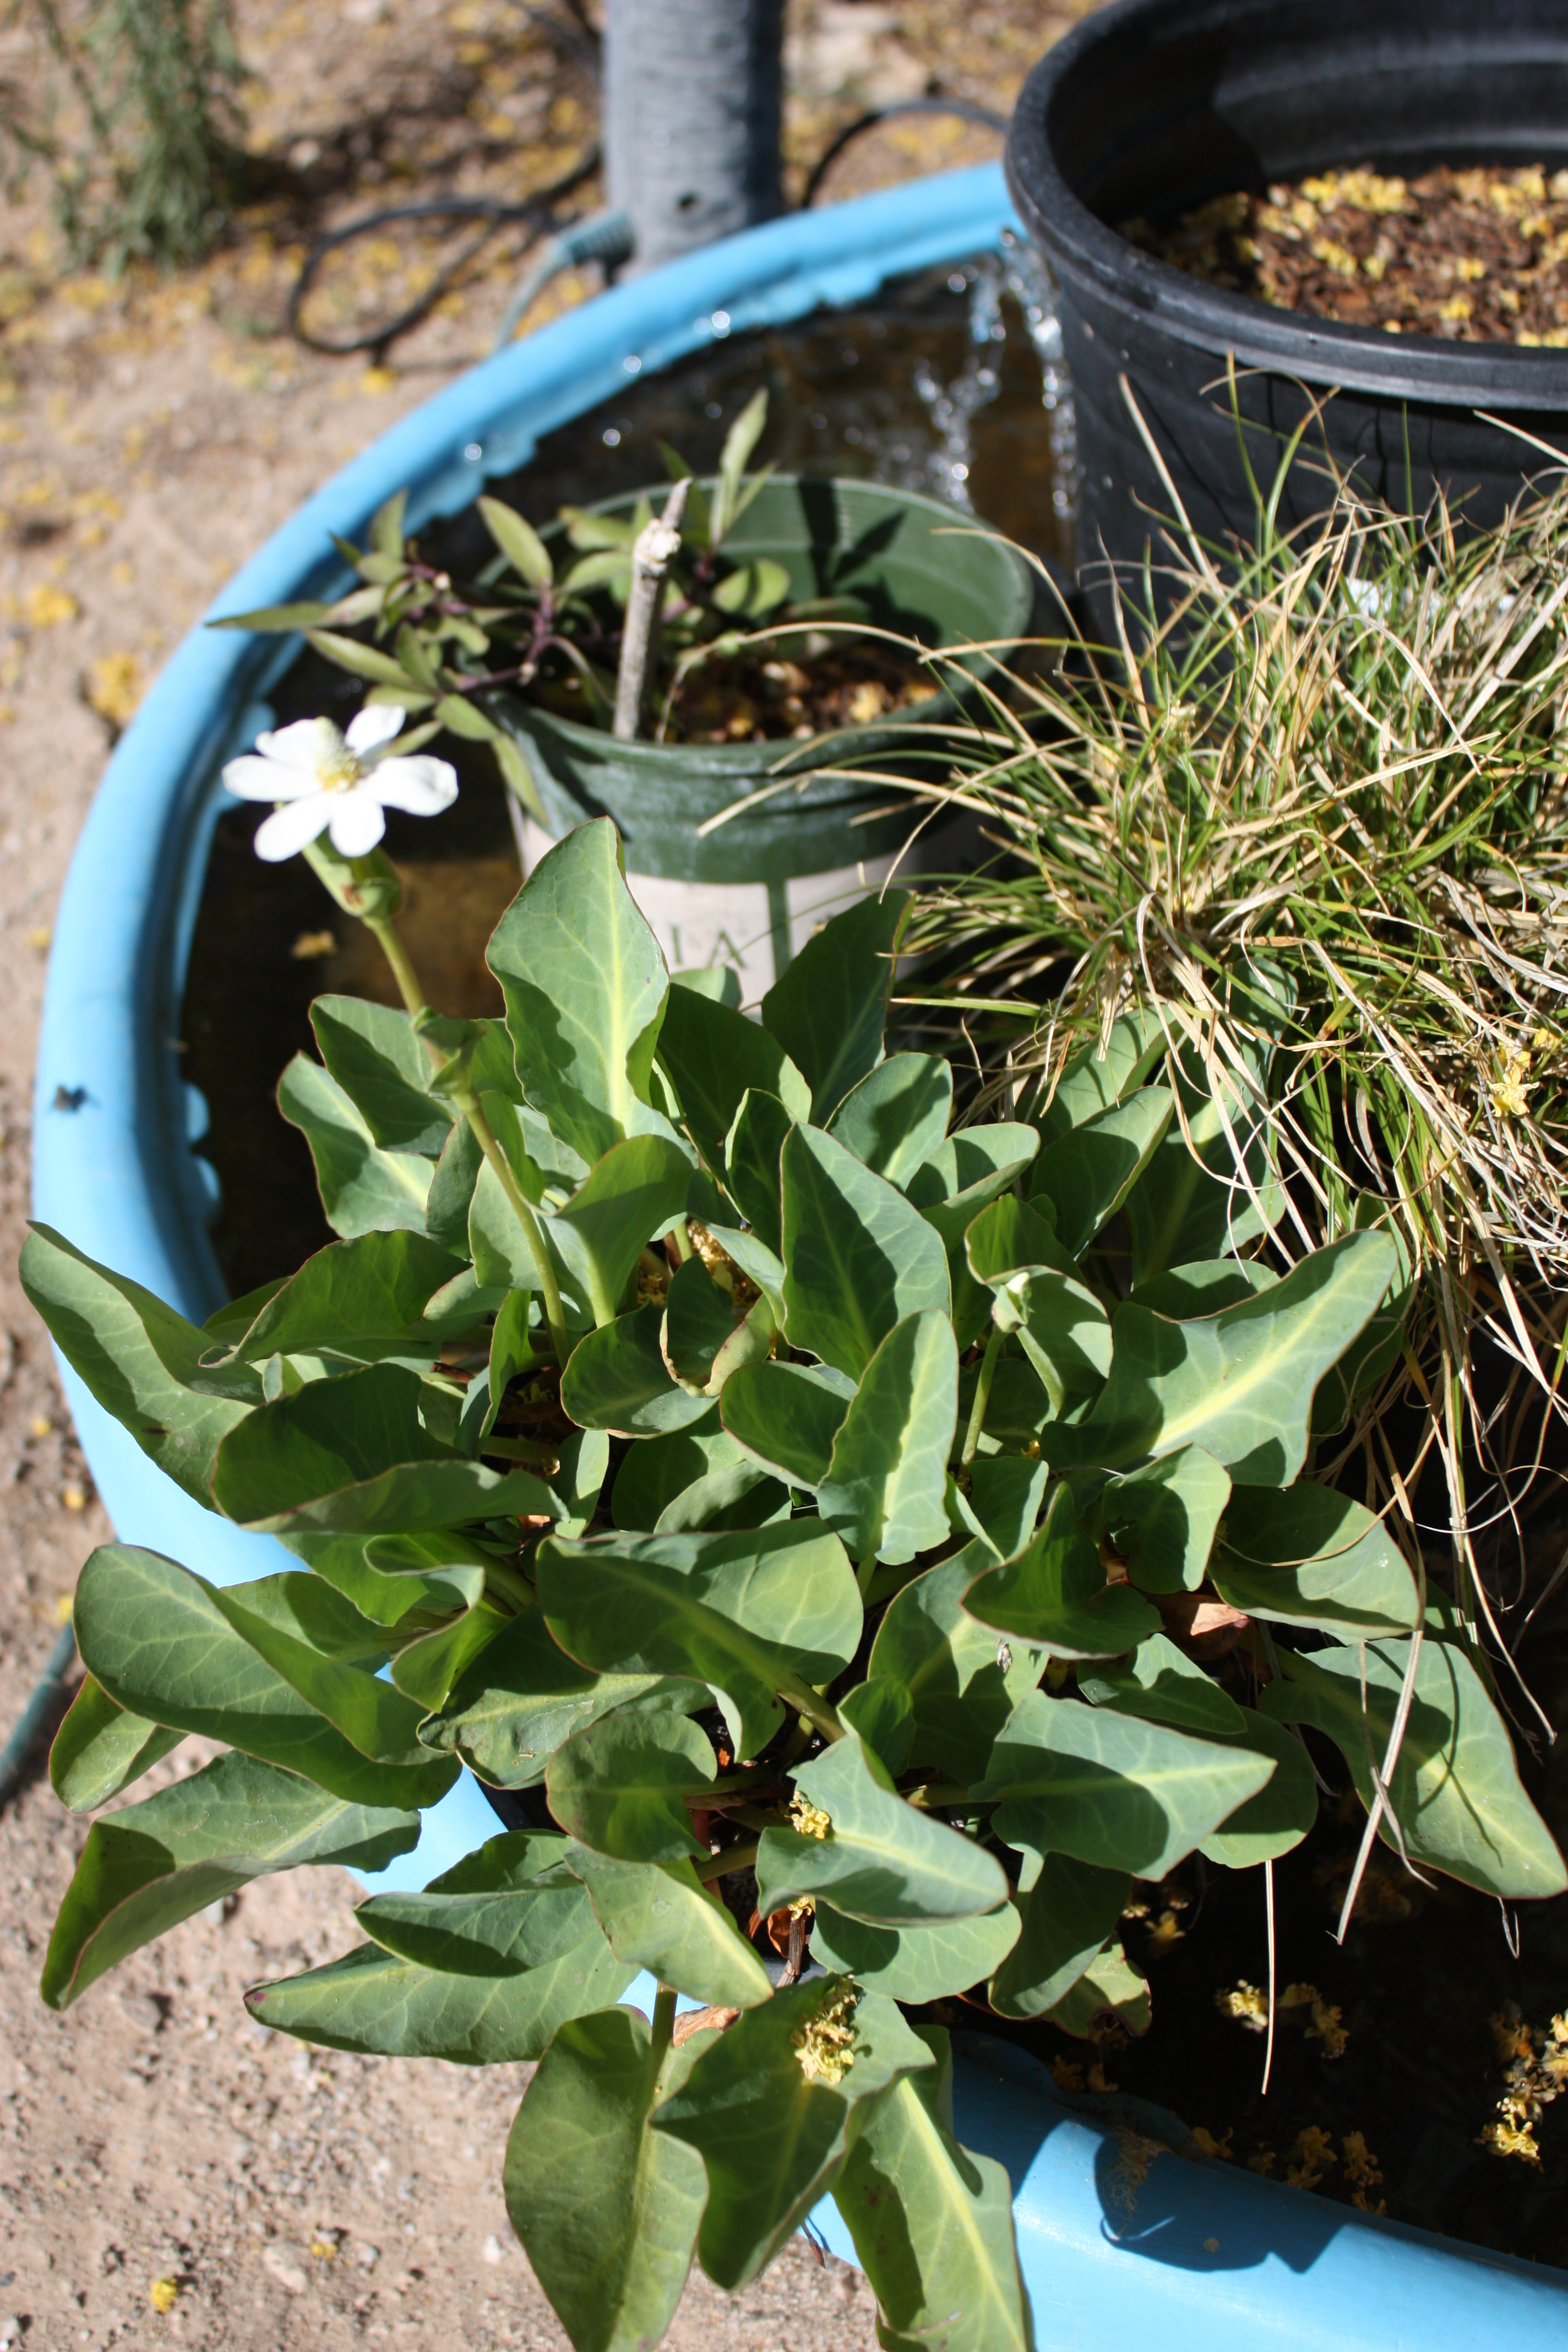
Yerba mansa features large leathery leaves when it gets ample water.
Yerba mansa is valuable in the water garden. Koi and other fish do not browse it like they do many other plants, thus it can readily spread and help clean the water. It also appears to help keep fish from getting bacterial infections such as Pseudomonas fluorescens (causing fin rot and fish dropsy) and fungal infections such as Saprolegnia.
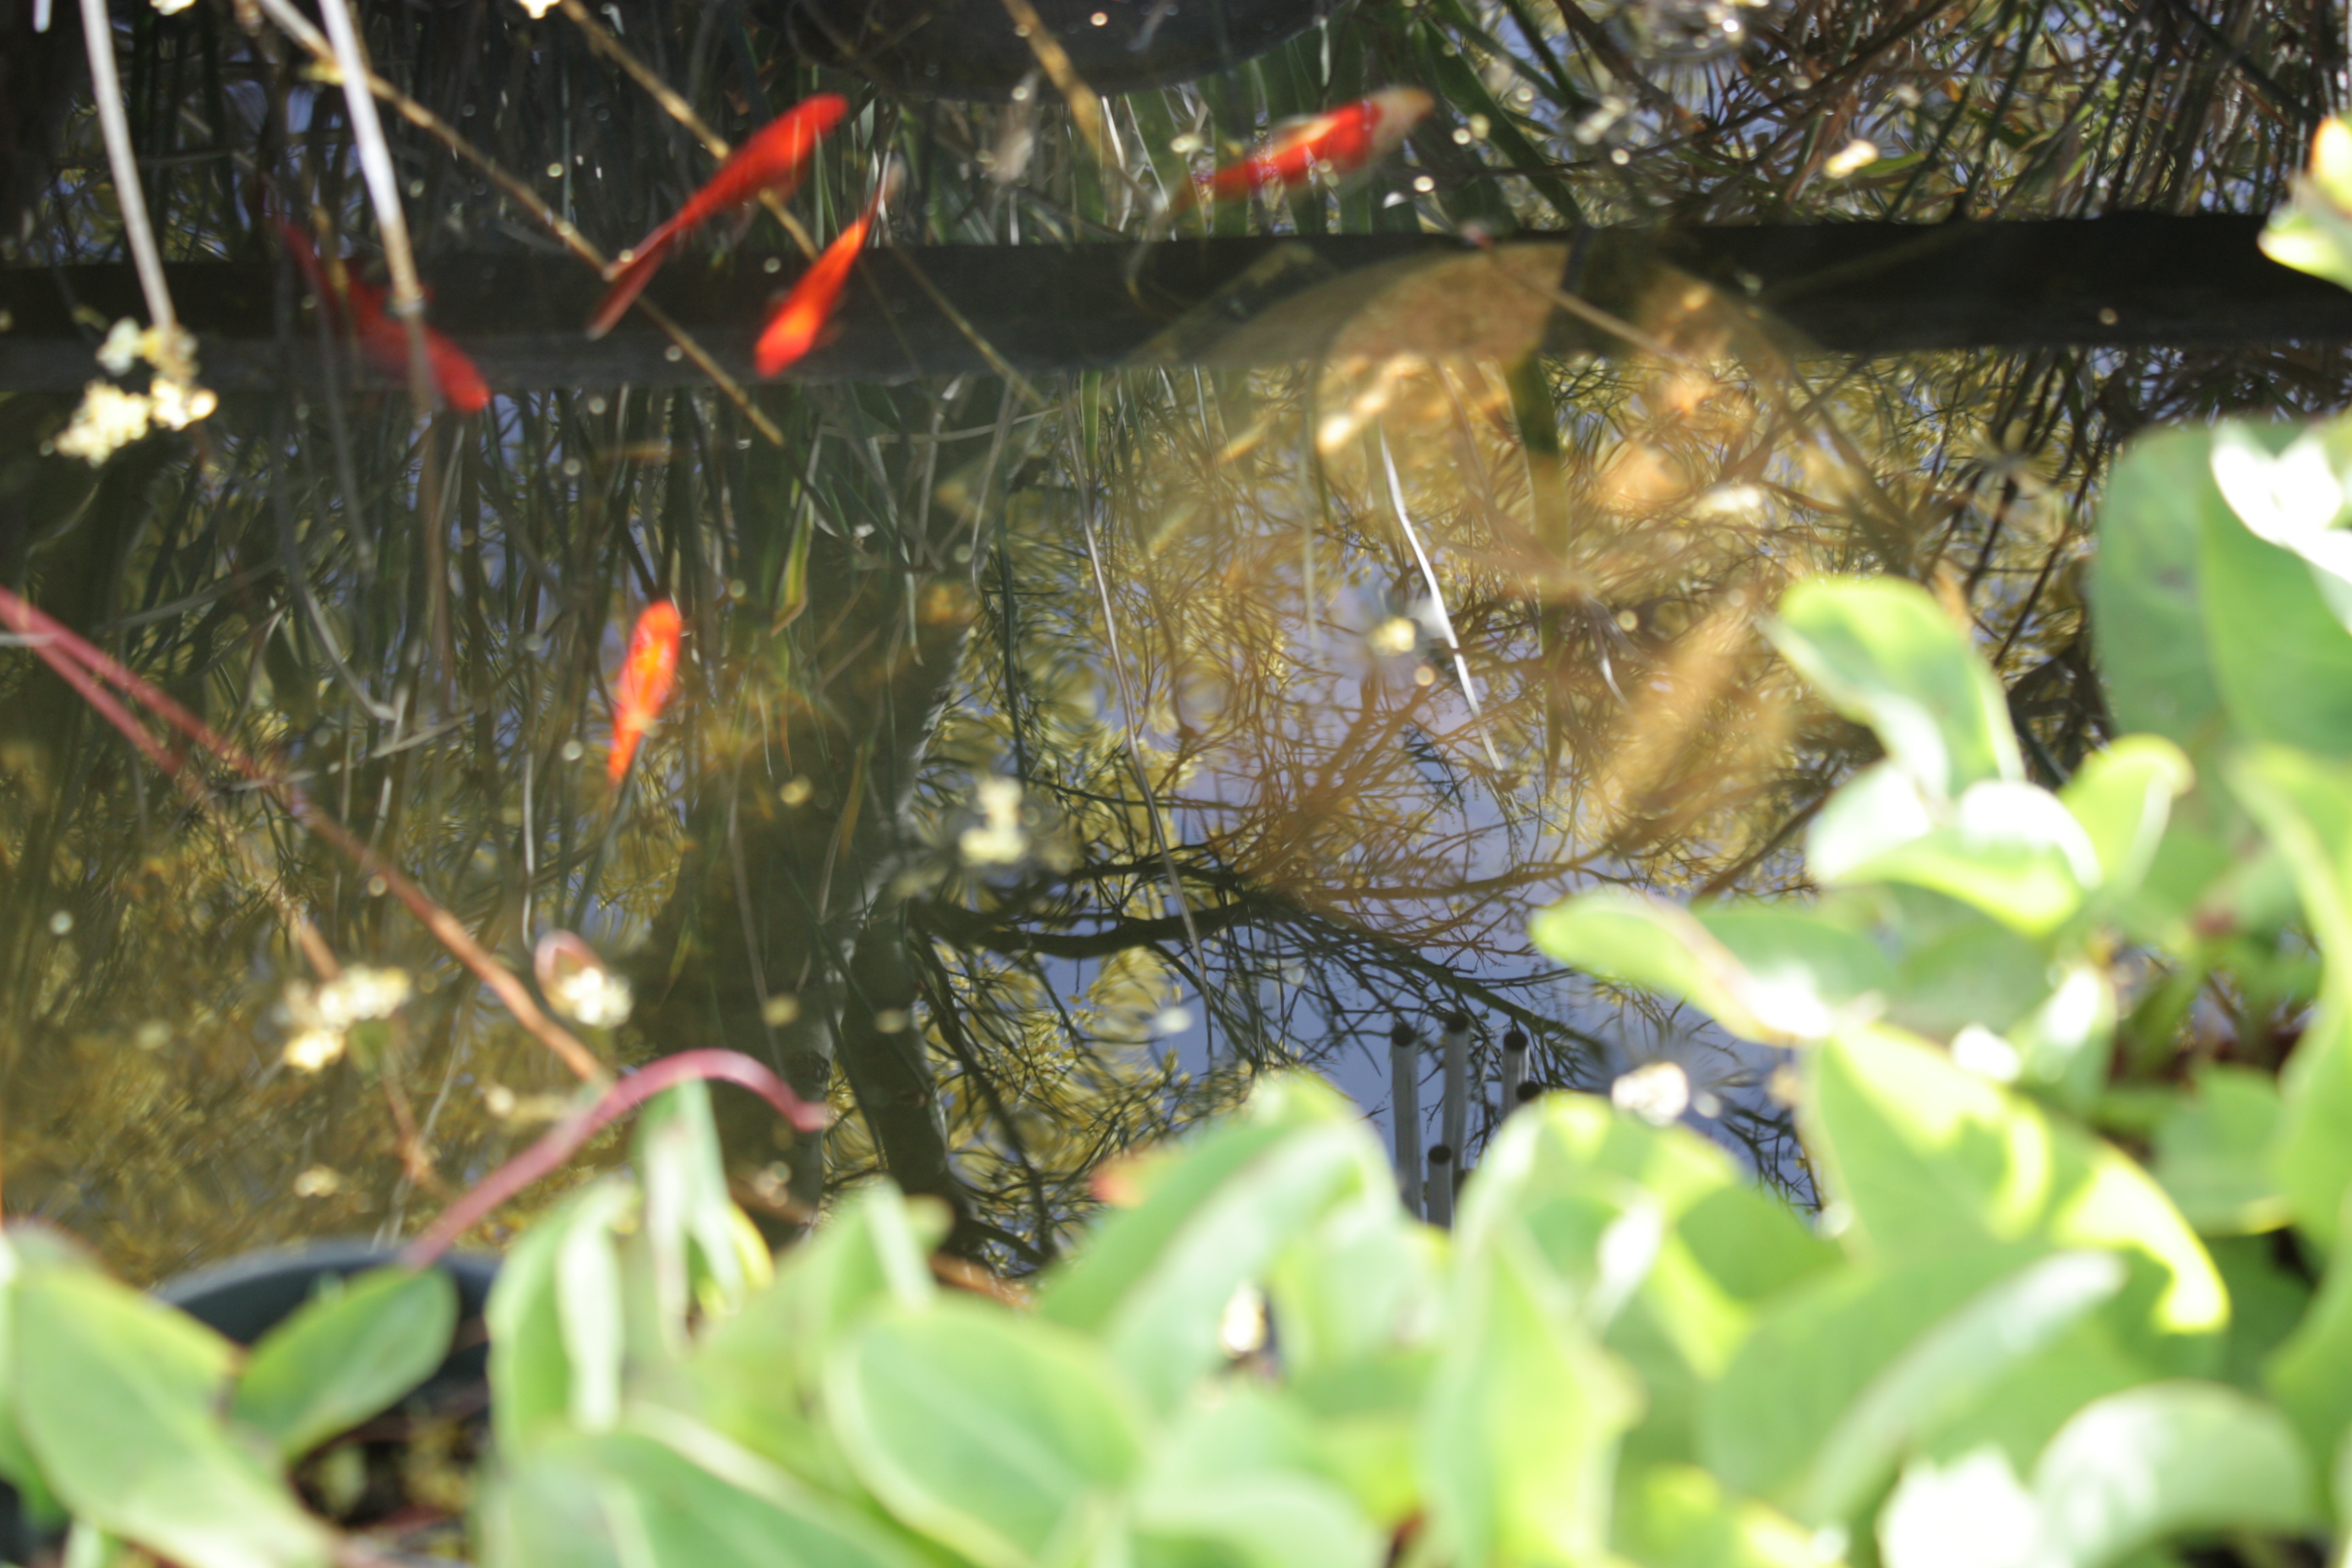
Great for the water garden, yerba mansa’s antibacterial properties can help keep your fish healthy.
Cooler autumn weather can bring blotches of maroon to the leaves and stems. If the temperatures are cool but not freezing, the entire plant may turn color. If the temperature falls below 20 F, the leaves die. Not to worry, the plant readily comes back from the roots. The plant is considered hardy to USDA Zone 5.
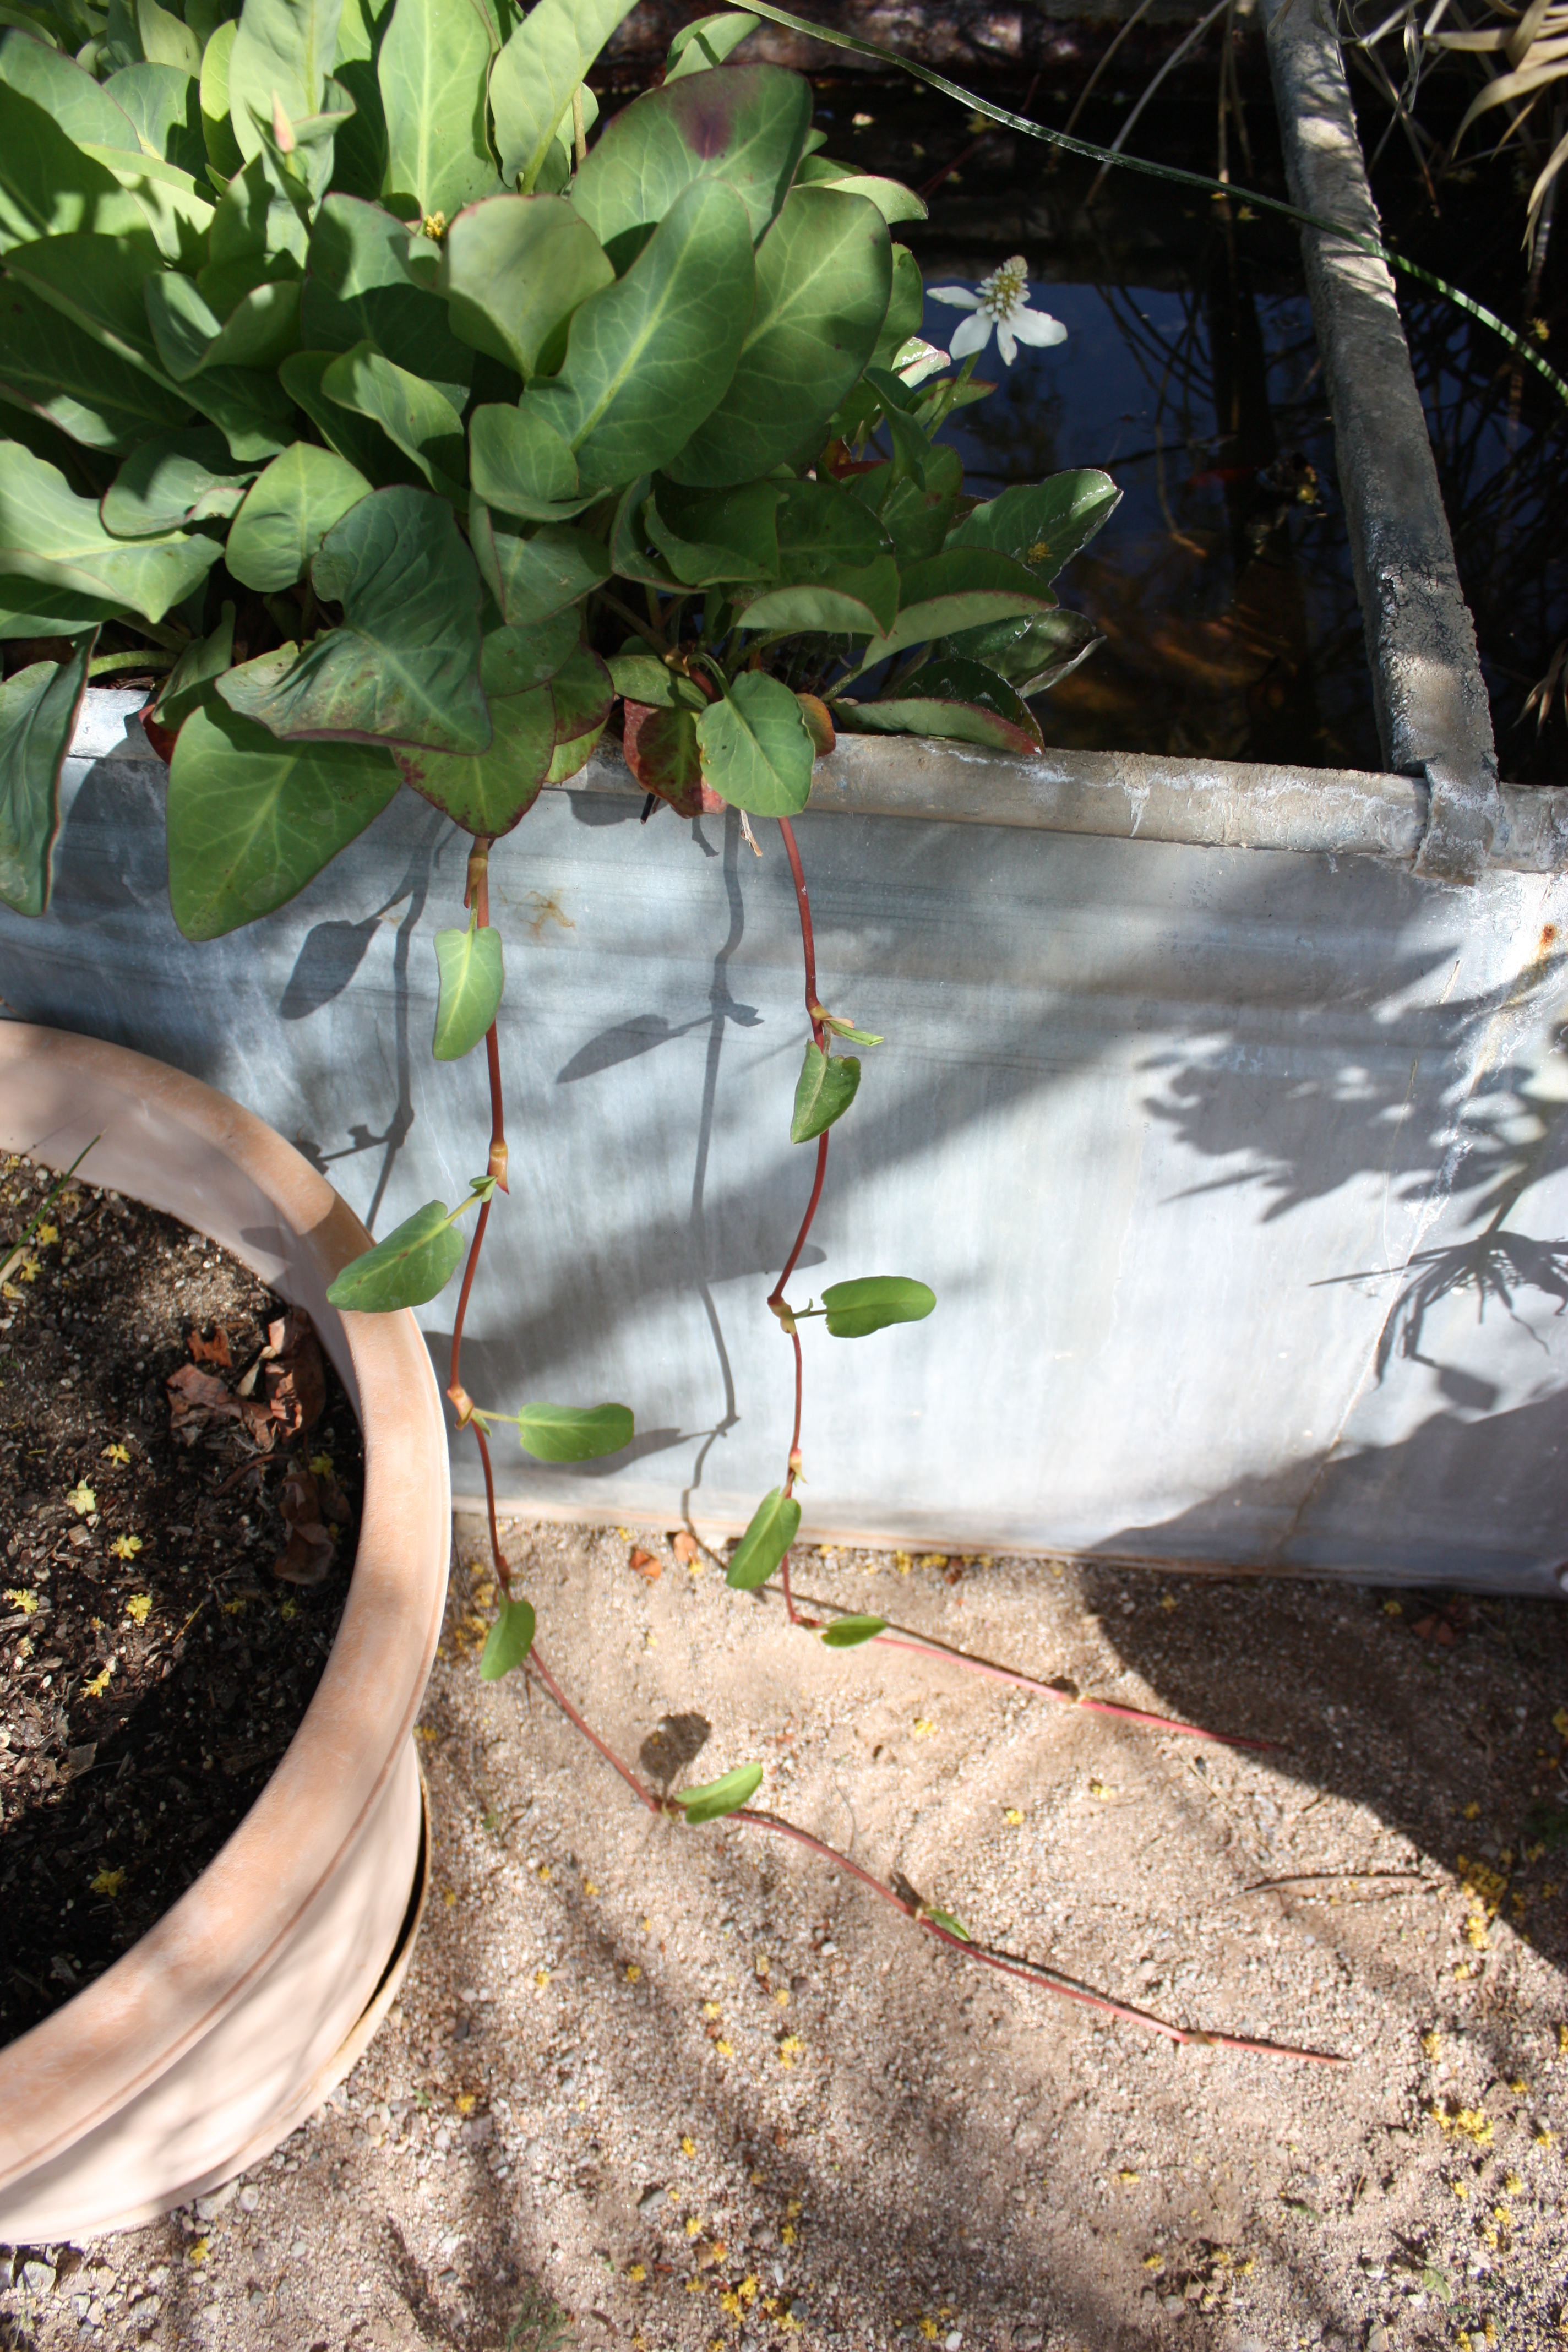
Yerba mansa will send out runners seeking to colonize new territory. It will not take root where there is not ample water – like in the desert outside the water garden!
In our area the plant is gaining popularity and can now be found in a number of nurseries that carry water garden plants.
Harvesting and Use.
Roots for medicinal purposes should be collected in the fall preferably after the first freeze. After the first freeze the plant will begin to store the useful chemicals in its root system. Harvest the thick fleshy roots under the main part of the plant, not the thin roots on the runners.
The smaller white roots are the ones harvested and dried for their medicinal properties.
Wash roots to remove clay and silt, then set them to wilt for several hours before cutting them into small pieces (roughly 1/4 inch square). Continue to dry the chopped roots until firm and dry.
About Jacqueline Soule
If you live in Southeastern Arizona, please come to one of my lectures. Look for me at your local Pima County Library branch, Steam Pump Ranch, Tubac Presidio and more. After each event I will be signing copies of my books, including the latest, “Southwest Fruit and Vegetable Gardening,” written for Arizona, Nevada and New Mexico (Cool Springs Press, $23).
All text and all photos (except where noted) are copyright © 2015 by Jacqueline A. Soule. All rights reserved. I receive many requests to reprint my work. My policy is that you may use a short excerpt but you must give proper credit to the author, and must include a link back to the original post on our site. Photos may not be used.
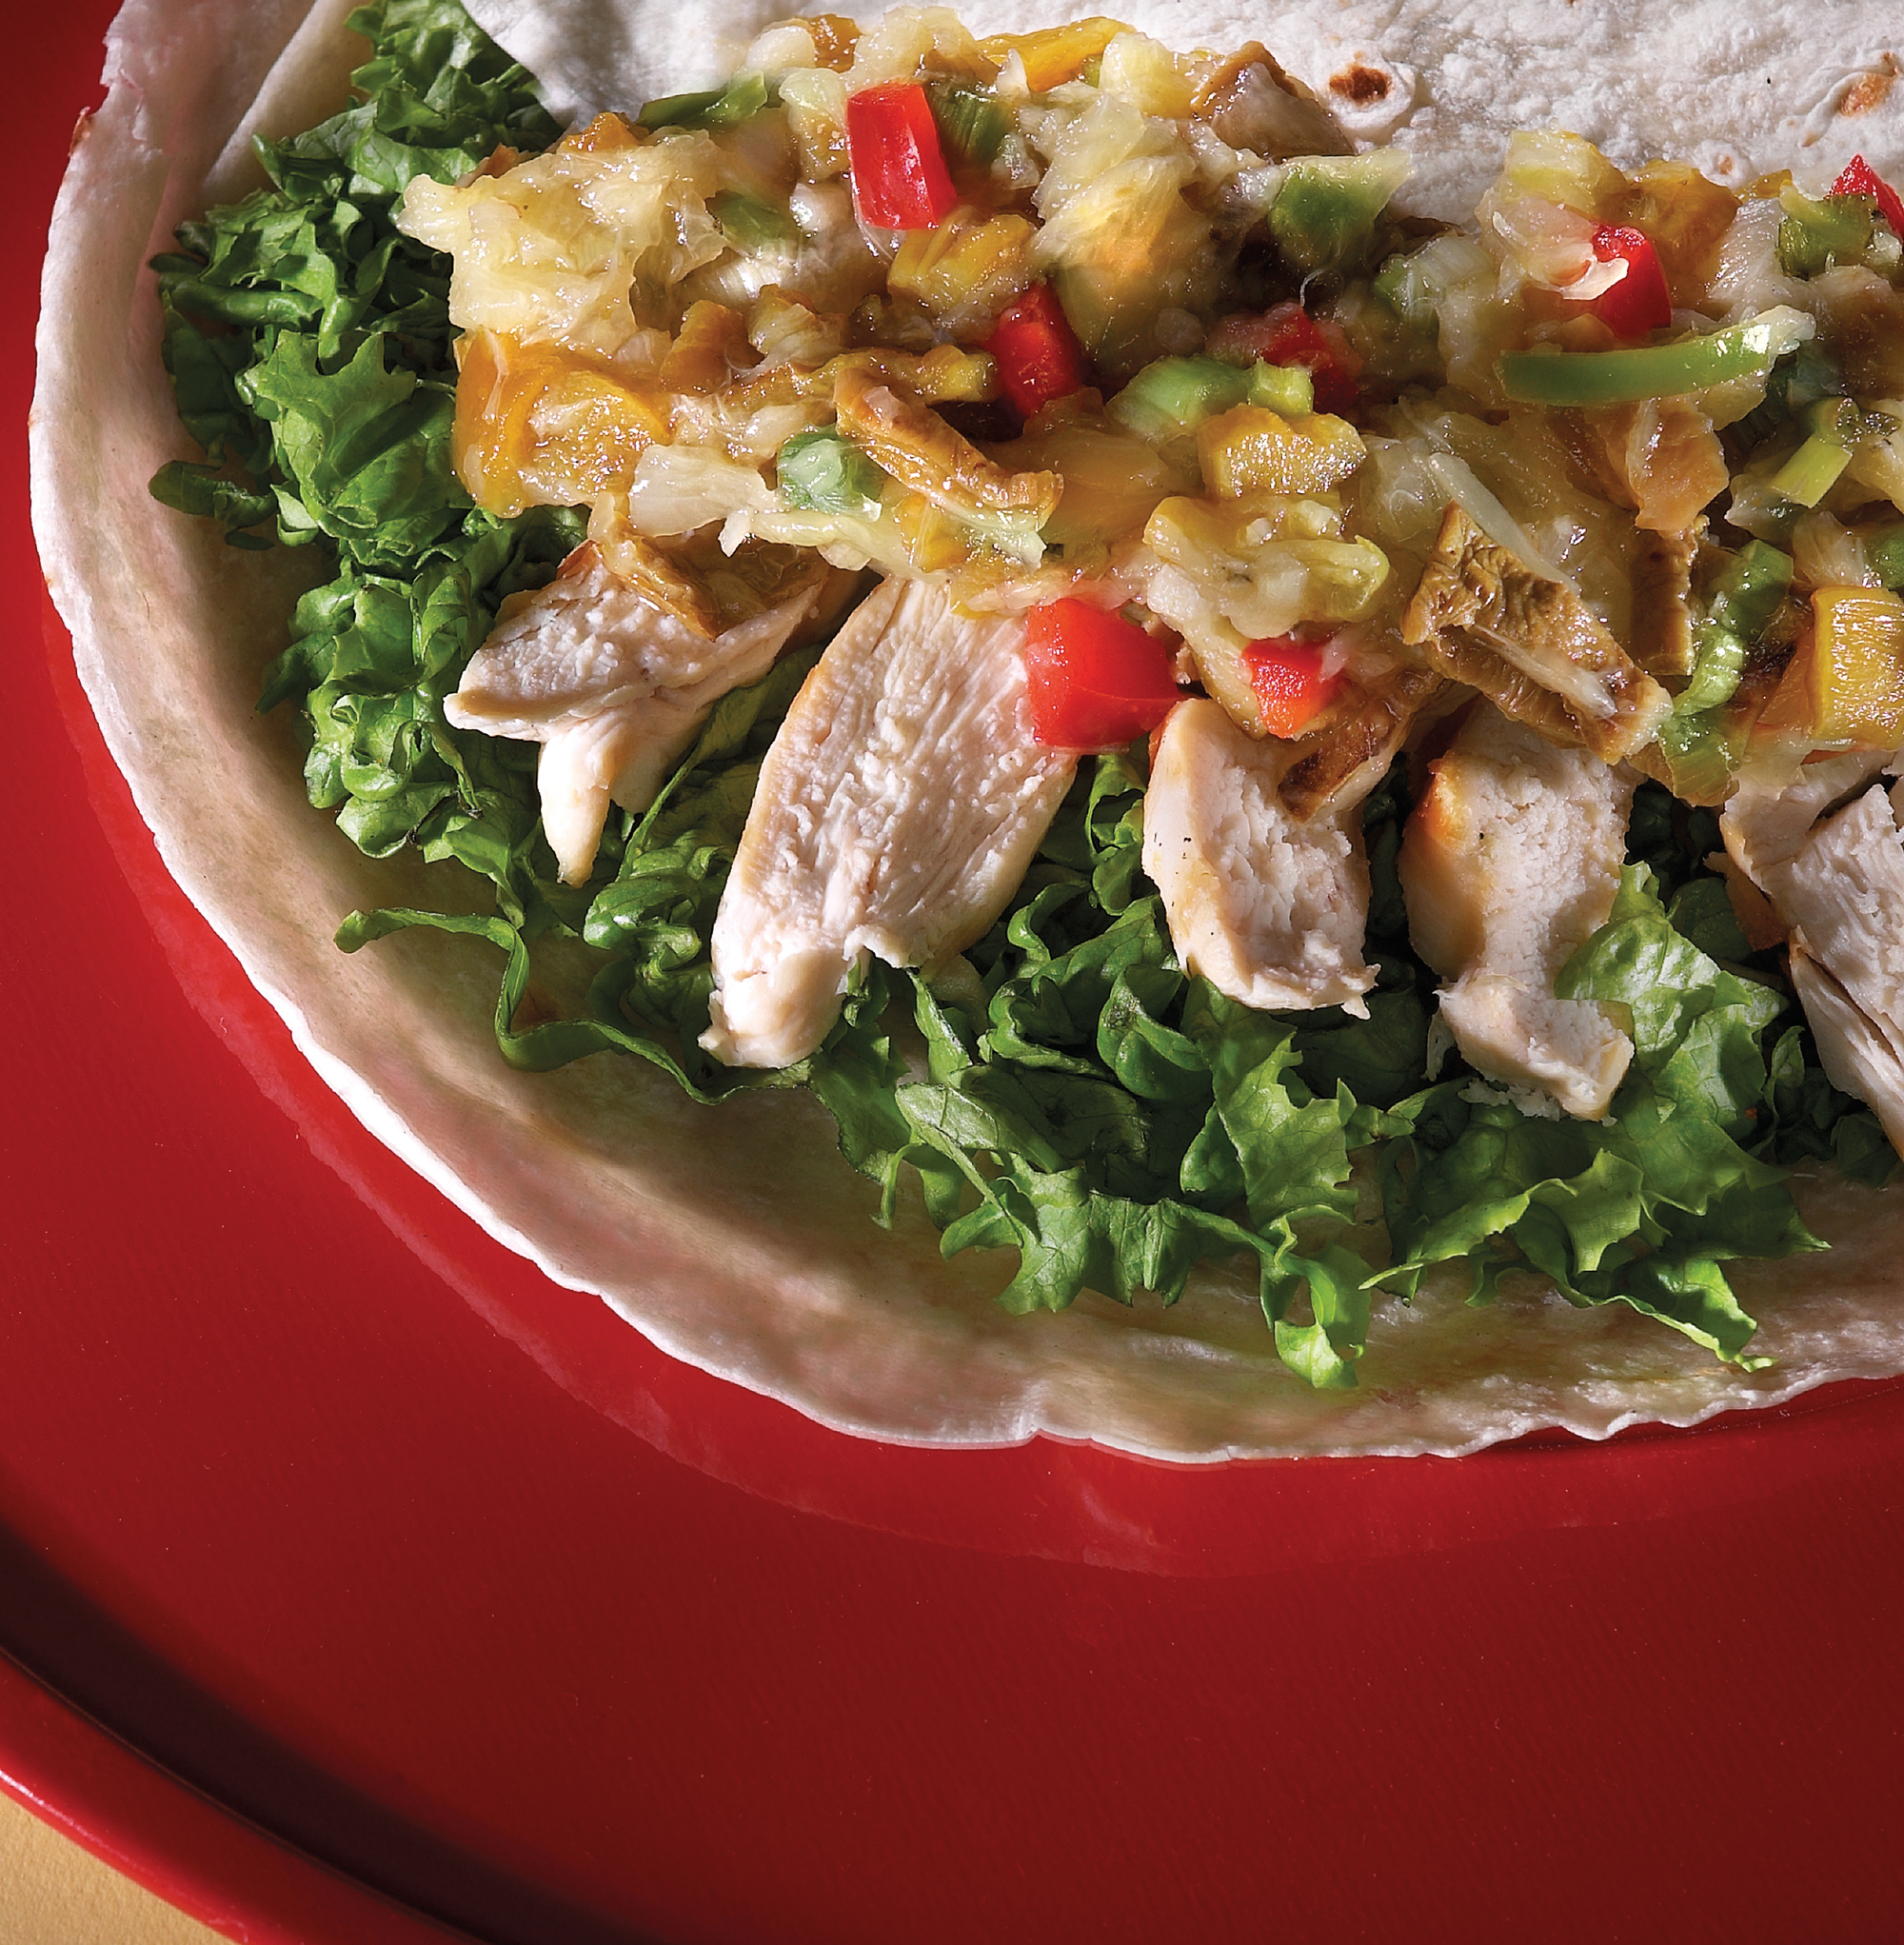
Grilled Chicken with Nopalito and Pineapple Salsa (from The Prickly Pear Cookbook)
If it’s April, it’s time to gather nopales here on the Sonoran Desert. Carolyn here today tempting you to read further with this photo of a delicious salsa made with nopalitos. (Definition of nopalito: a nopal, or cactus pad, cut into little pieces). At the bottom of the post, I’m going to give you the recipe and a video of how to turn a cactus pad into a yummy taco.
The many varieties of prickly pear put out their new growth when the spring warms up. All prickly pear pads are edible (meaning they not only won’t kill you but in this case are very nutritious), but they are only appropriate for food when they are new. After about six weeks, they develop a fibrous infrastructure. The easiest kind to prepare are the pads from the large Mexican variety of prickly pear that do not grow wild this far north. They are called Ficus indica or sometimes Burbank because Luther Burbank did some breeding work on them. The wild cactus pads are also delicious, but harder to prepare because of the abundance of spines. You can do a rough estimate of when a pad is ready to pick if it is about the size of your hand. The nopales available in Mexican grocery stores are grown by farmers who know how to manipulate the plant to keep fresh pads coming year ’round.
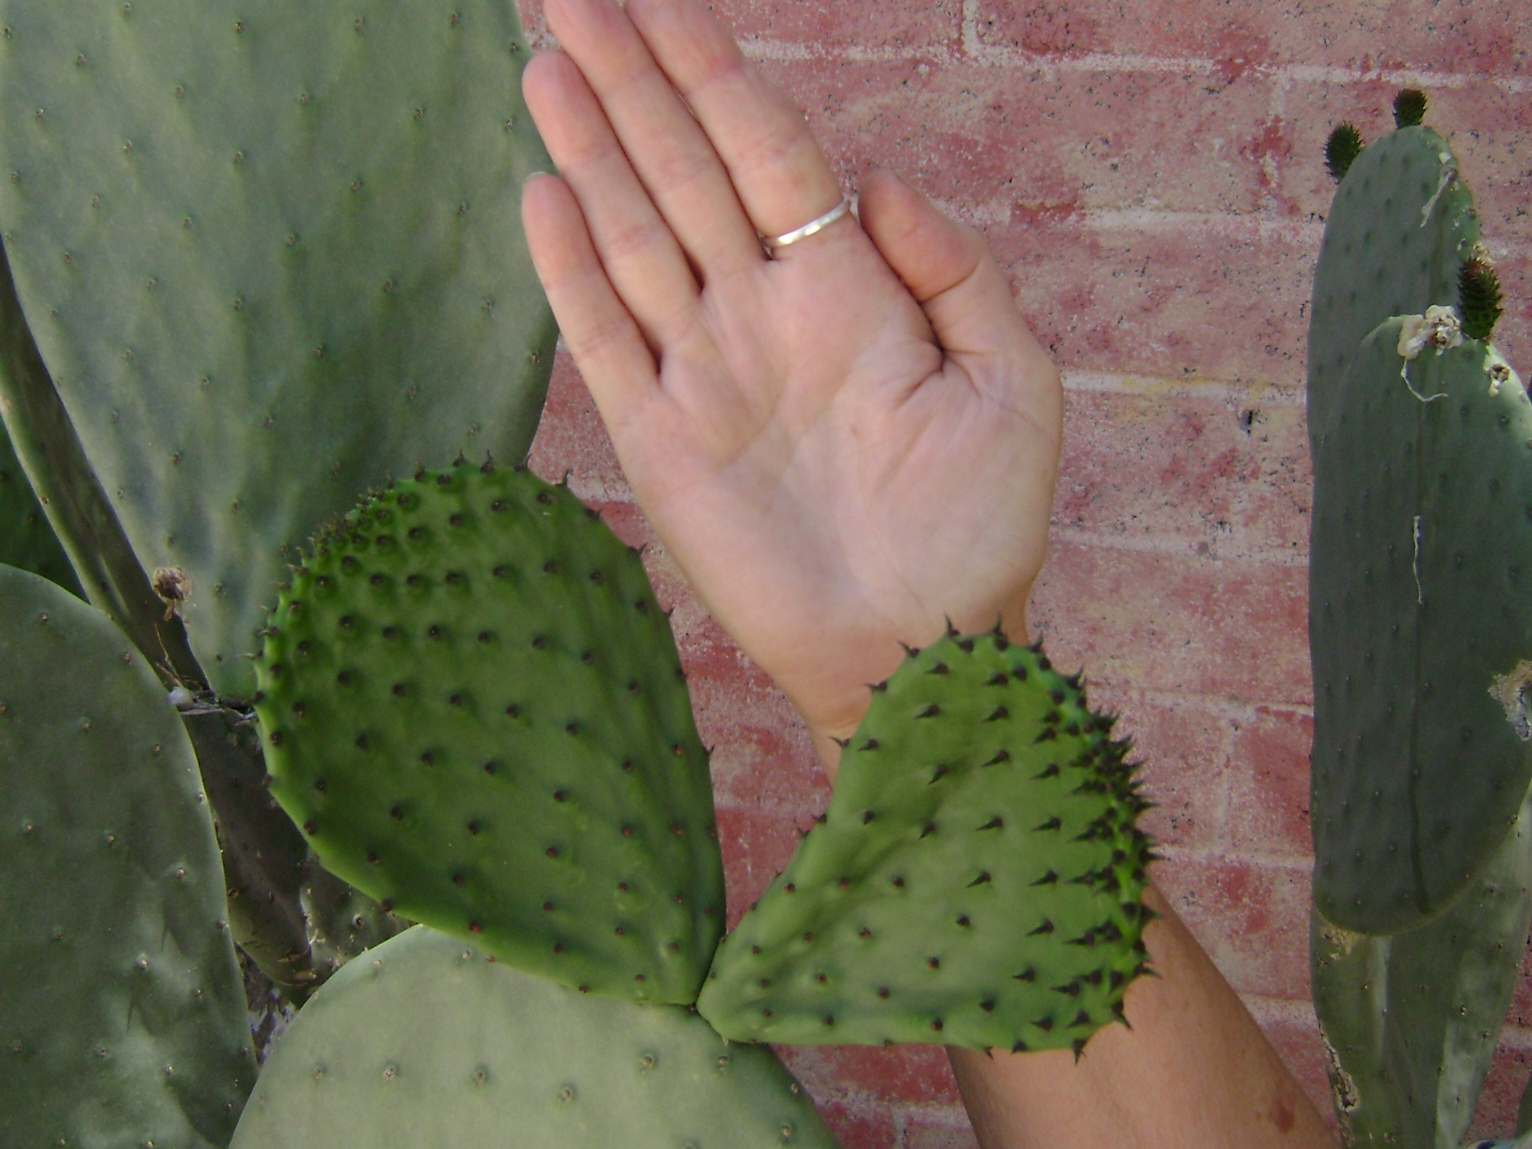
Pick nopales in the spring when the size of your hand.
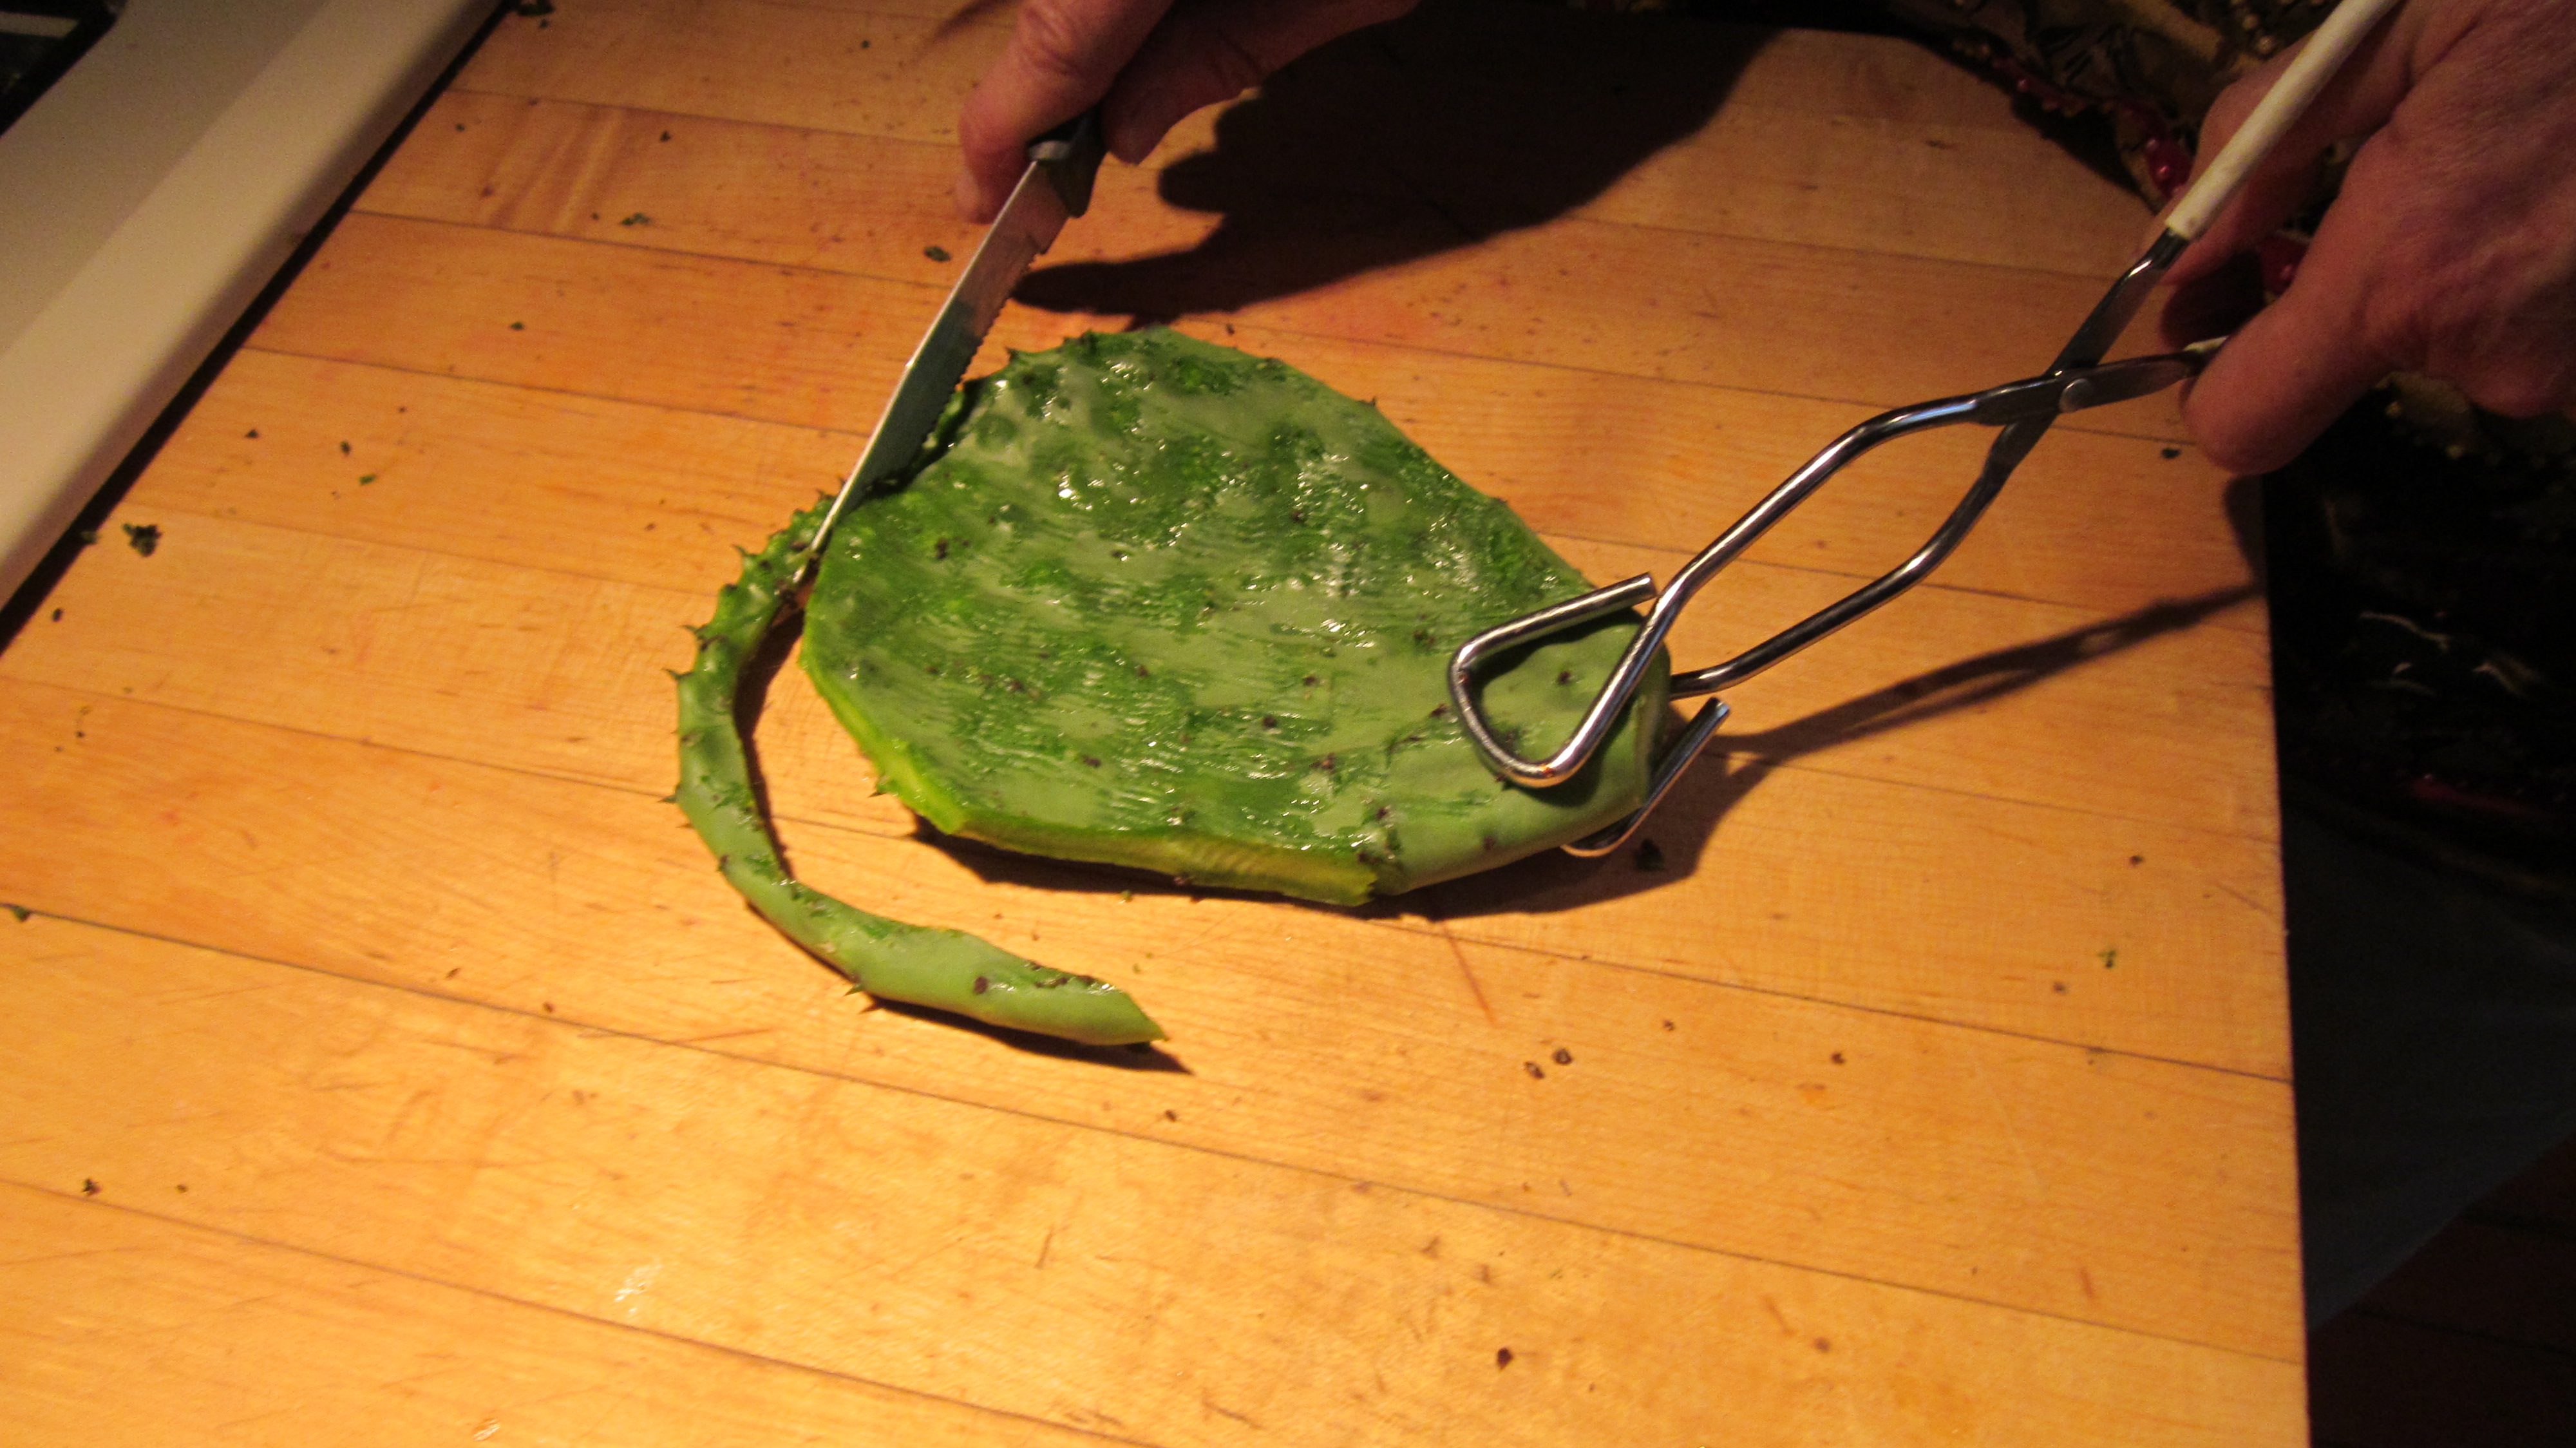
To prepare the nopales, you’ll use tongs, of course, and then don rubber kitchen gloves to protect your hands as you get rid of the stickers. You don’t need industrial strength gloves, just good quality ones from the grocery store will do. Using a common steak knife, scrape vigorously against the growth (from outer edge to stem) to remove the stickers.
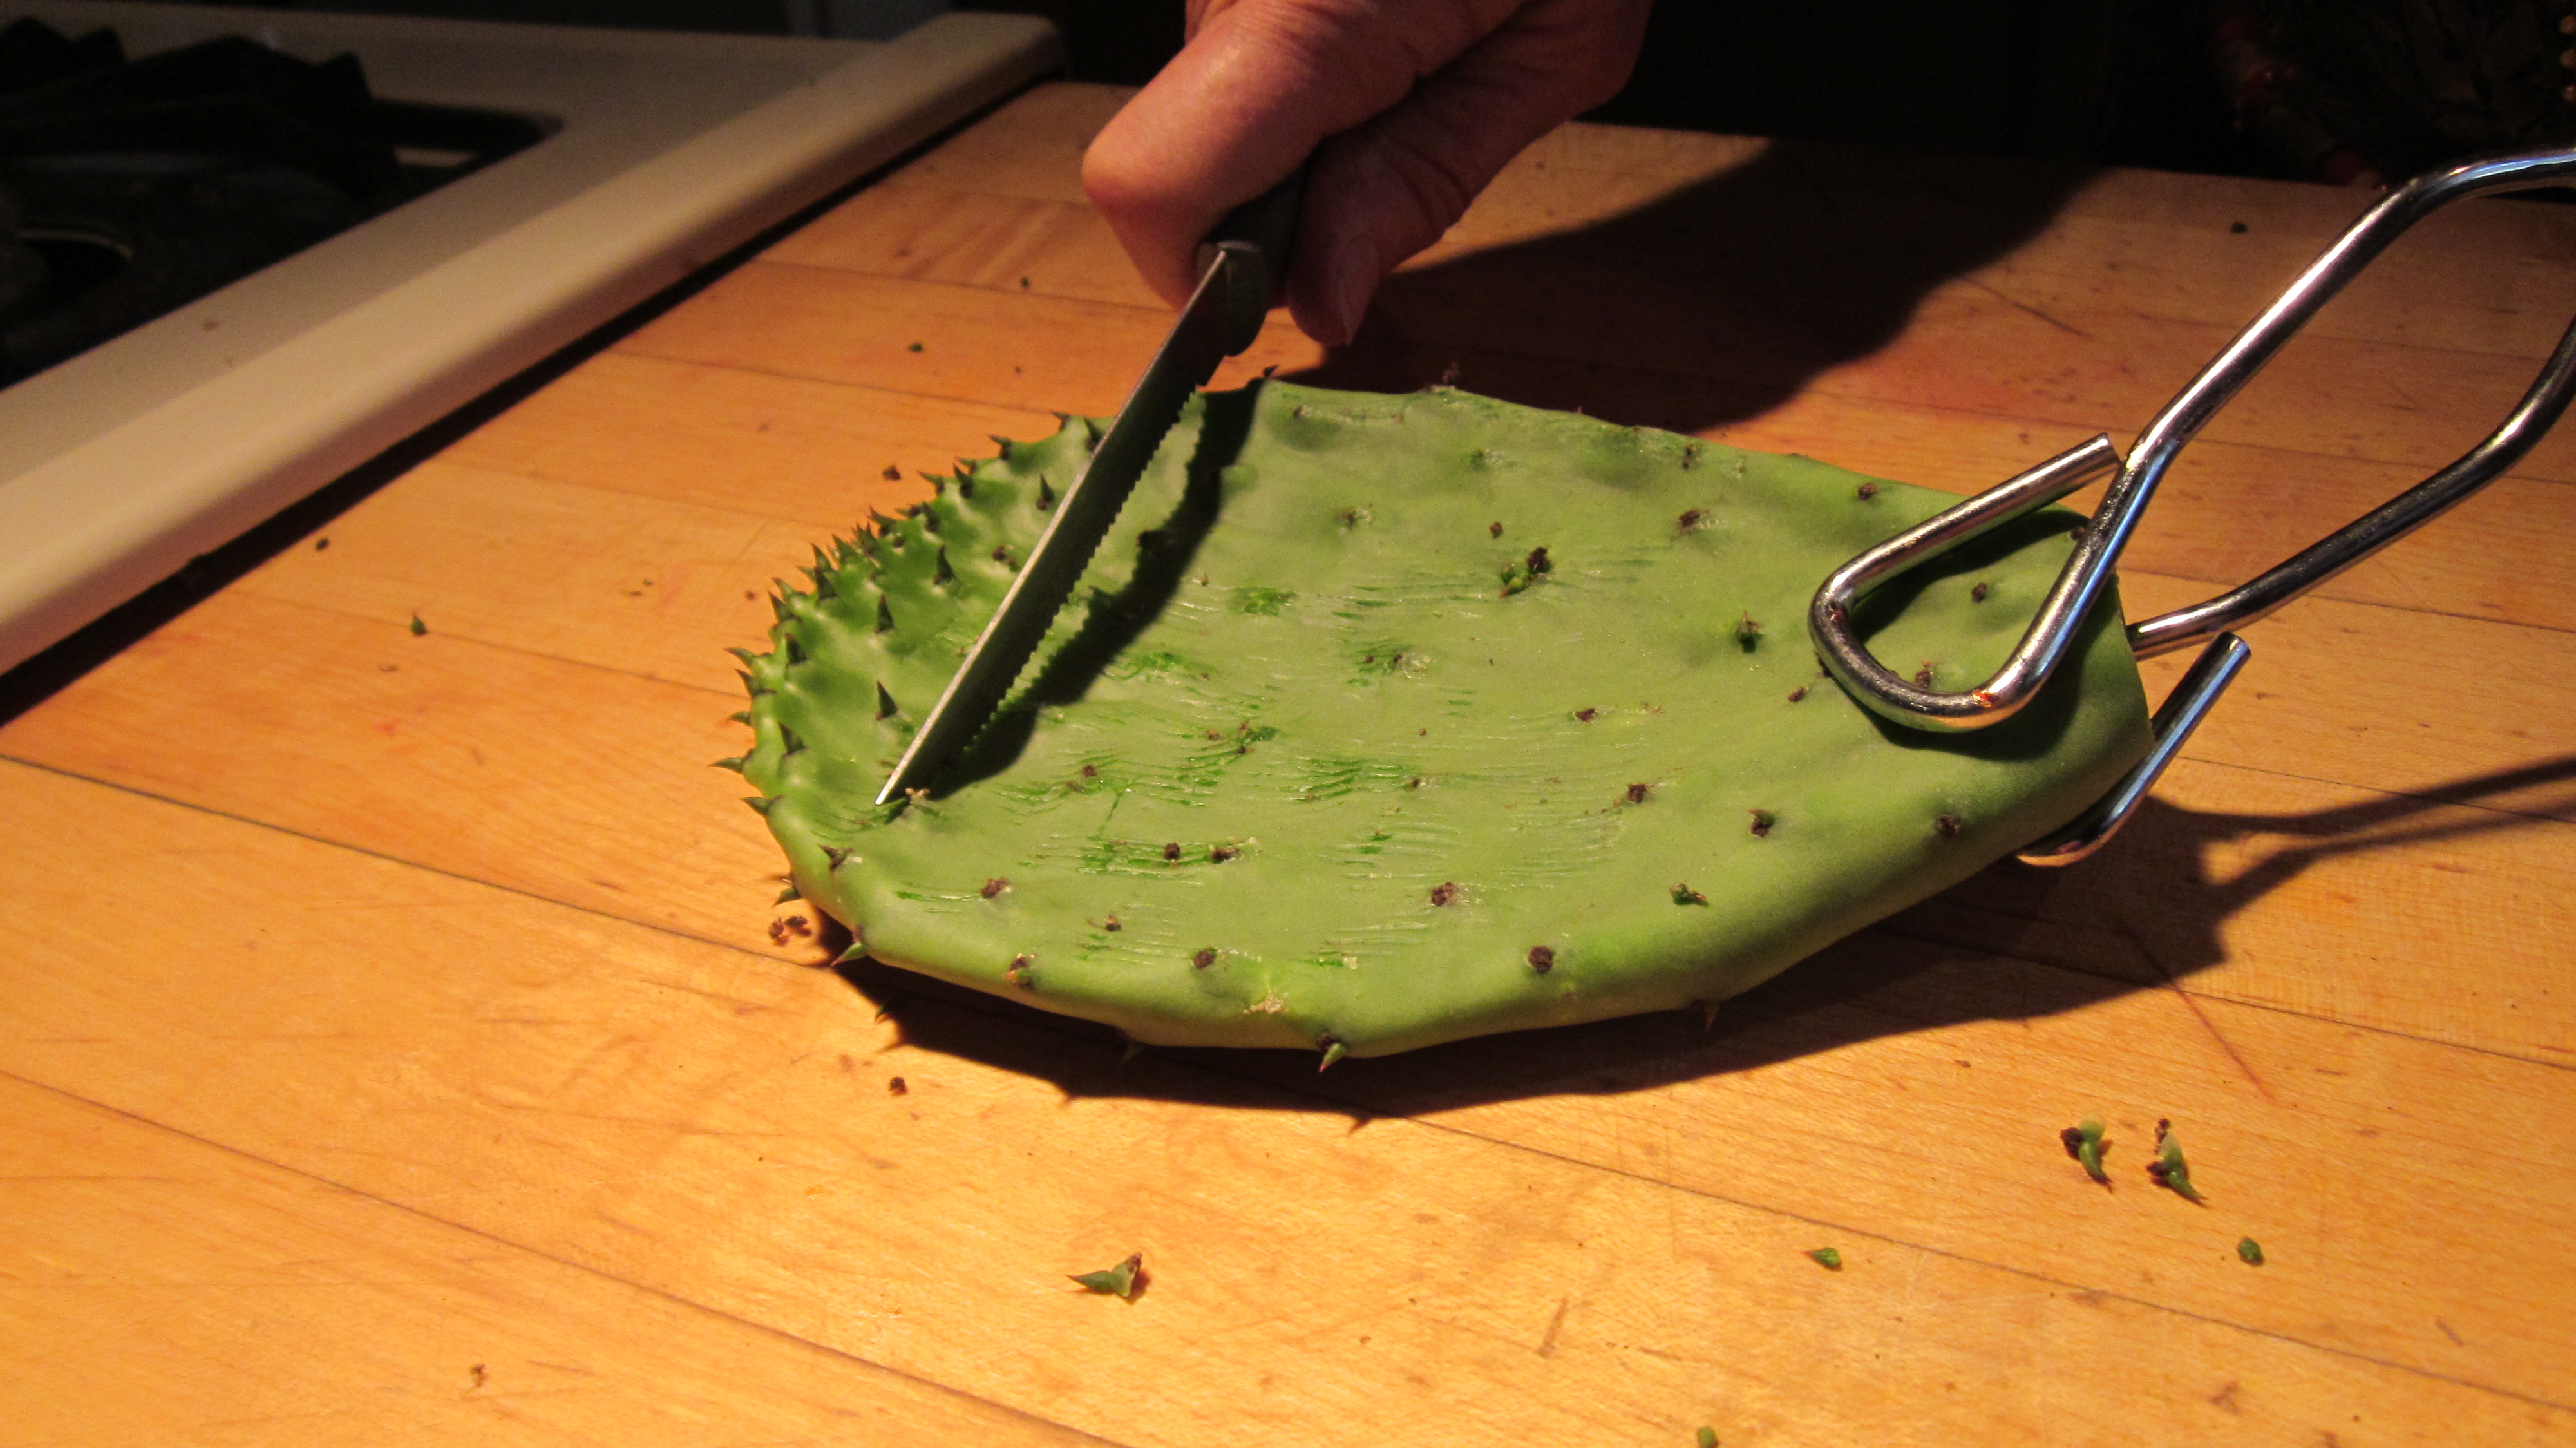
Scrape the thorns vigorously in the direction of the stem.
The edge has lots of stickers so just trim it off.
 At this point, you can cut it into small pieces to cook or leave it whole and cut it up later. You can cook them in a frying pan filmed with oil, or use the Rick Bayless method (he of TV show fame) and toss them with a little oil, sprinkle with sale, put on a cookie sheet and roast in a 375 degree oven for 20 minutes. In any case, you should check them and turn them over as they cook.
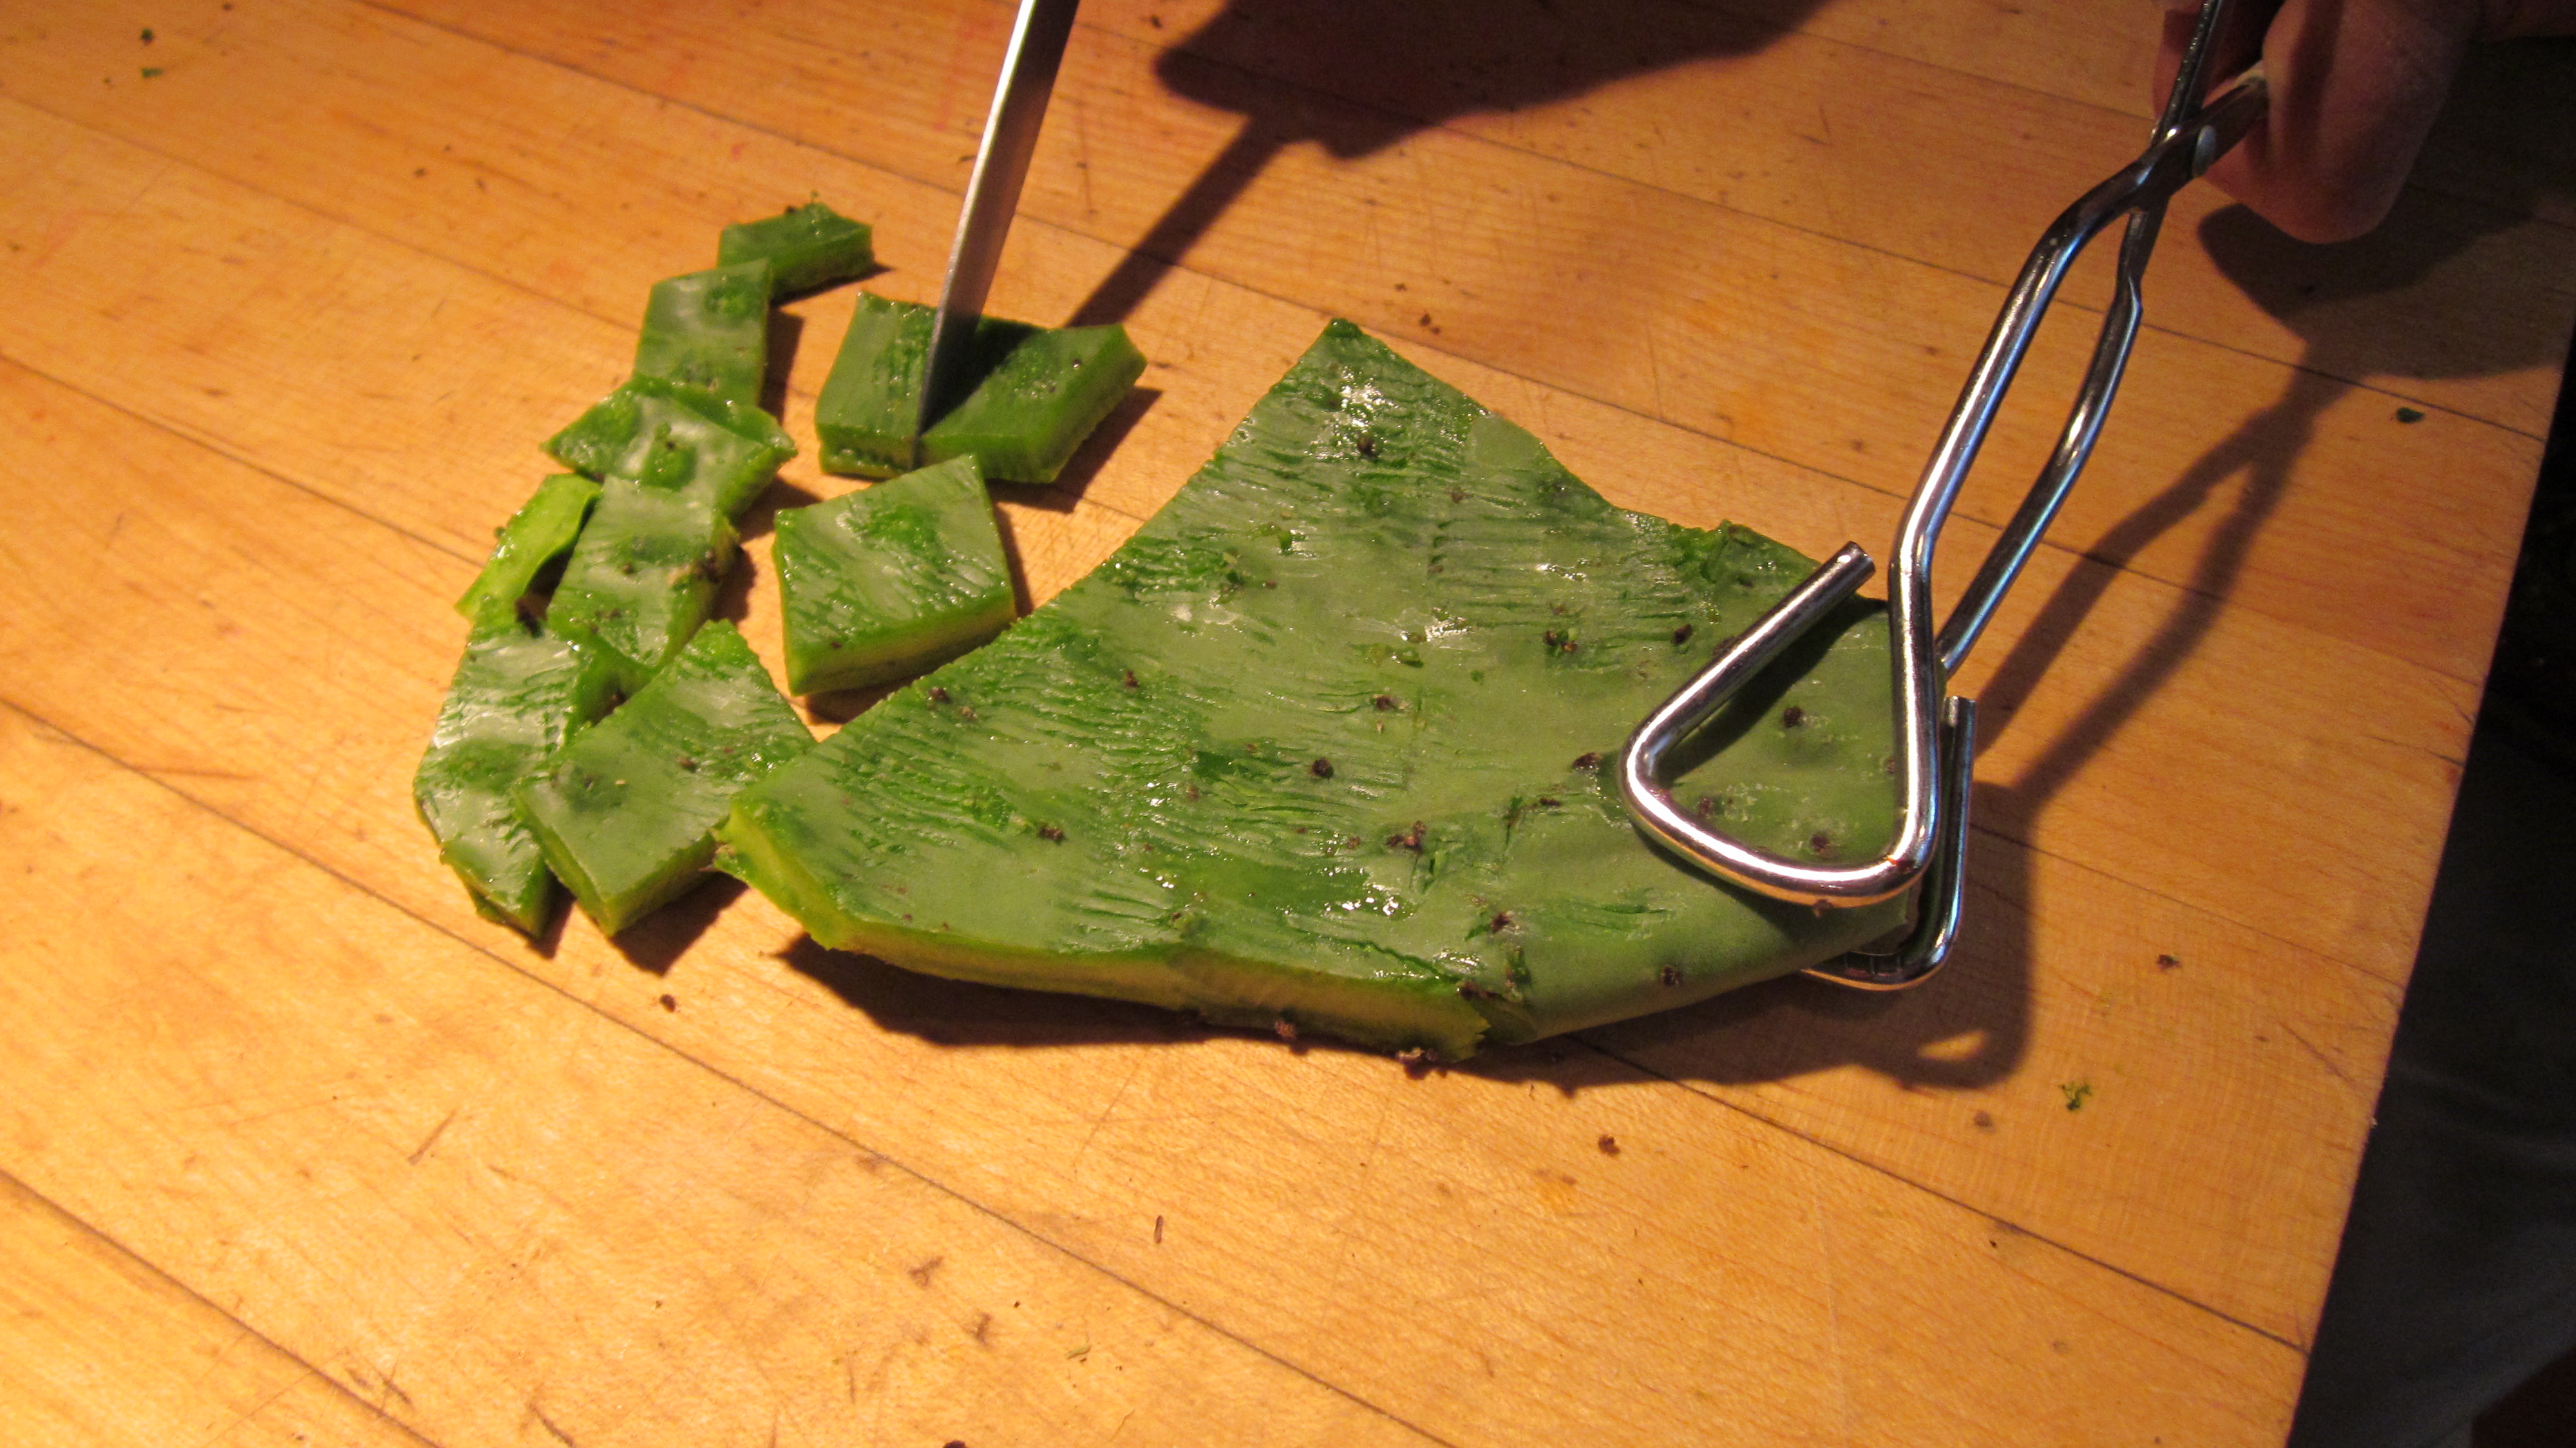
Cut into small pieces to cook.
The nopales will turn from bright green to a more olive color as they cook. The gummy sap that some people find objectionable will dry up and become less noticeable.
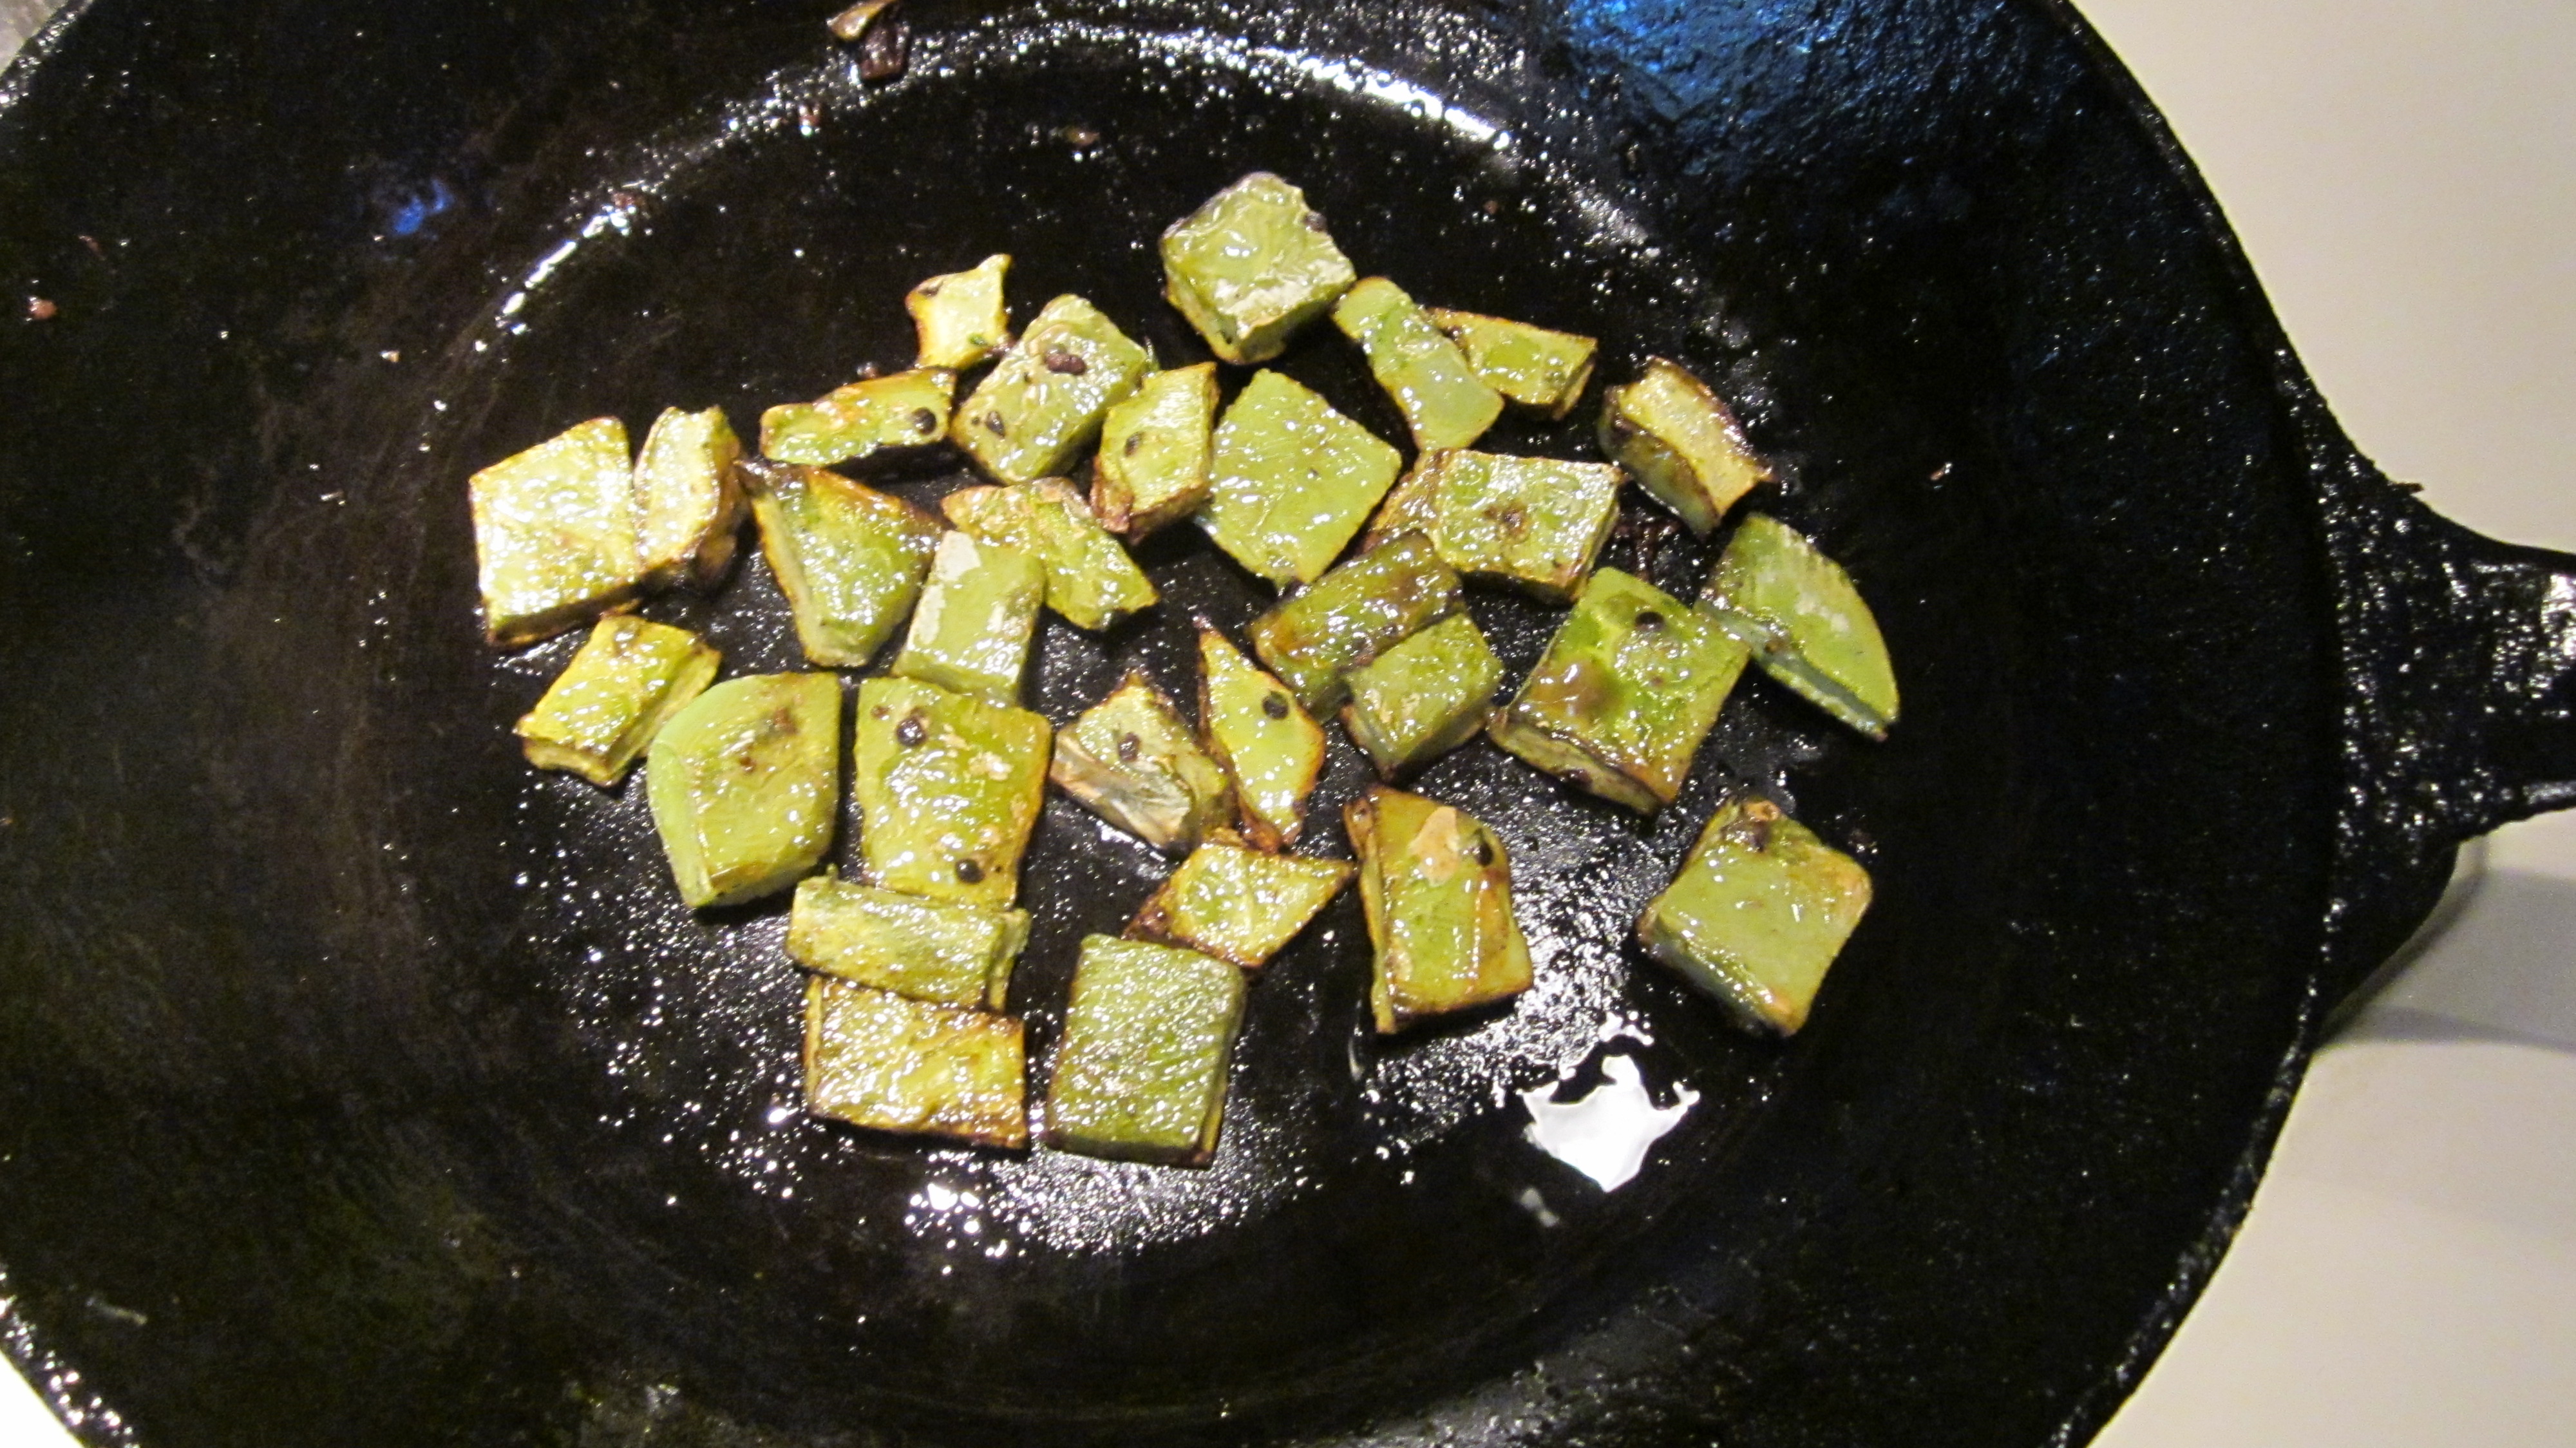
The cooked nopalitos turn from bright green to olive.
You can also cook nopales on the barbecue alongside some chicken to make a delicious taco. This video ( find it at the bottom of the magazine article) shows you how to clean the nopal and grill it. Take a look here.
Here’s the recipe for the sauce in the picture at the top of the blog:
Grilled Chicken with Nopalito and Pineapple Salsa
(Makes 4 servings)
This is good to serve as a light entrée with rice and a vegetable. It is also great as a stuffing for fresh flour tortillas topped with shredded lettuce.
1 raw, cleaned prickly pear pad
1 tablespoon vegetable oil
1 cup canned crushed pineapple packed in it’s own juice
¼ cup finely chopped red bell pepper
¼ cup thinly sliced green onions, including some tops
1 tablespoons canned green chiles
1 finely minced serrano chile (optional)
½ teaspoon finely minced garlic
2 tablespoons lime juice
¼ teaspoon salt
1 tablespoon finely minced cilantro (optional)
4 large boneless chicken breasts
Cut prickly pear pad in 1 ½ inch squares. Film a heavy frying pan with the oil and add the prickly pear pads. Cook over low heat, turning occasionally, until pieces have given up much of their juice and are slightly brown. Remove from pan, cool, and chop into pieces as wide as a matchstick and about ¼-inch long.
Transfer to medium bowl. Add remaining ingredients, stir to combine and set aside for flavors to mingle.
Grill chicken breasts until done. Slice each one crosswise into five or six pieces and arrange each on a plate. Put a portion of the salsa on top of or beside the chicken.
______________________
Want more recipes for the bountiful crop of nopales we’ll have this year? Check out The Prickly Pear Cookbook and Cooking the Wild Southwest. You can flip through The Prickly Pear Cookbook here. Both books are available locally at Native Seeds/SEARCH on Campbell or from on-line booksellers.
