I’ve been writing about natural food (wild and homemade) for about 50 years. In the 1970s I was part of a groundswell of young people hoping to create a better society. We fled the big cities for rural communes, and we formed communities of cooperation and back-to-the land values. It wasn’t easy and we made lots of mistakes.
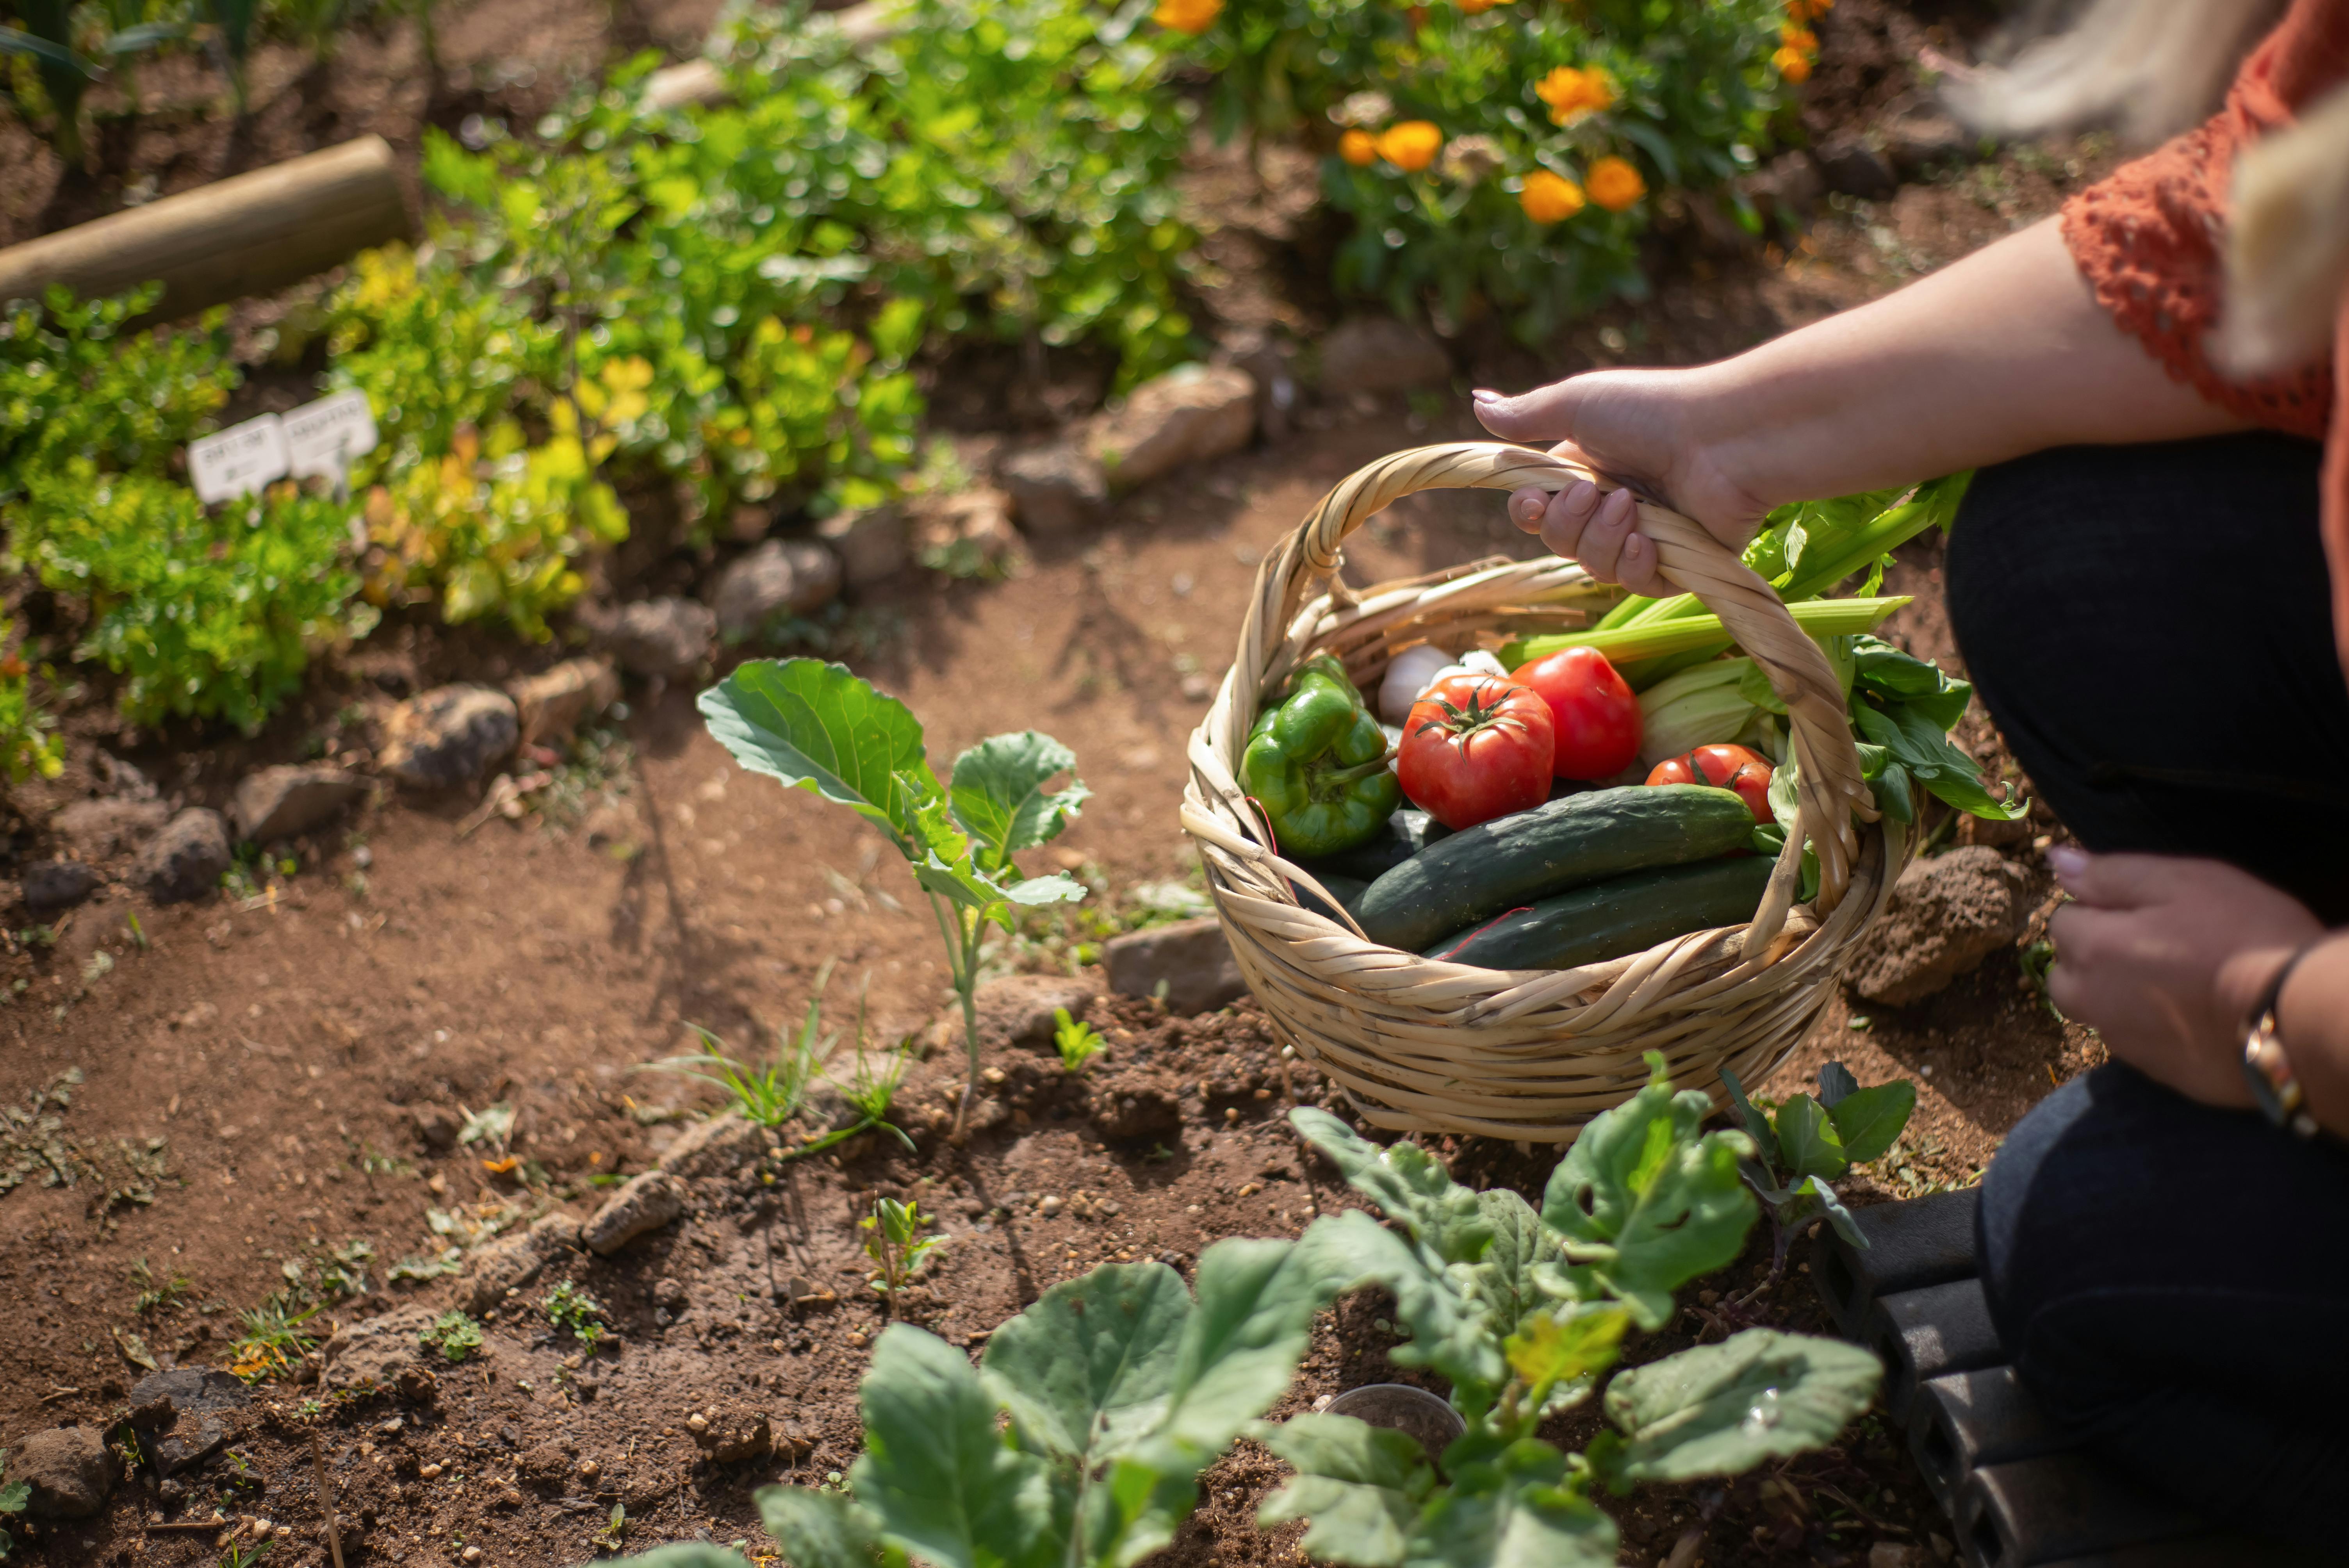
They called us hippies. We learned to grow gardens
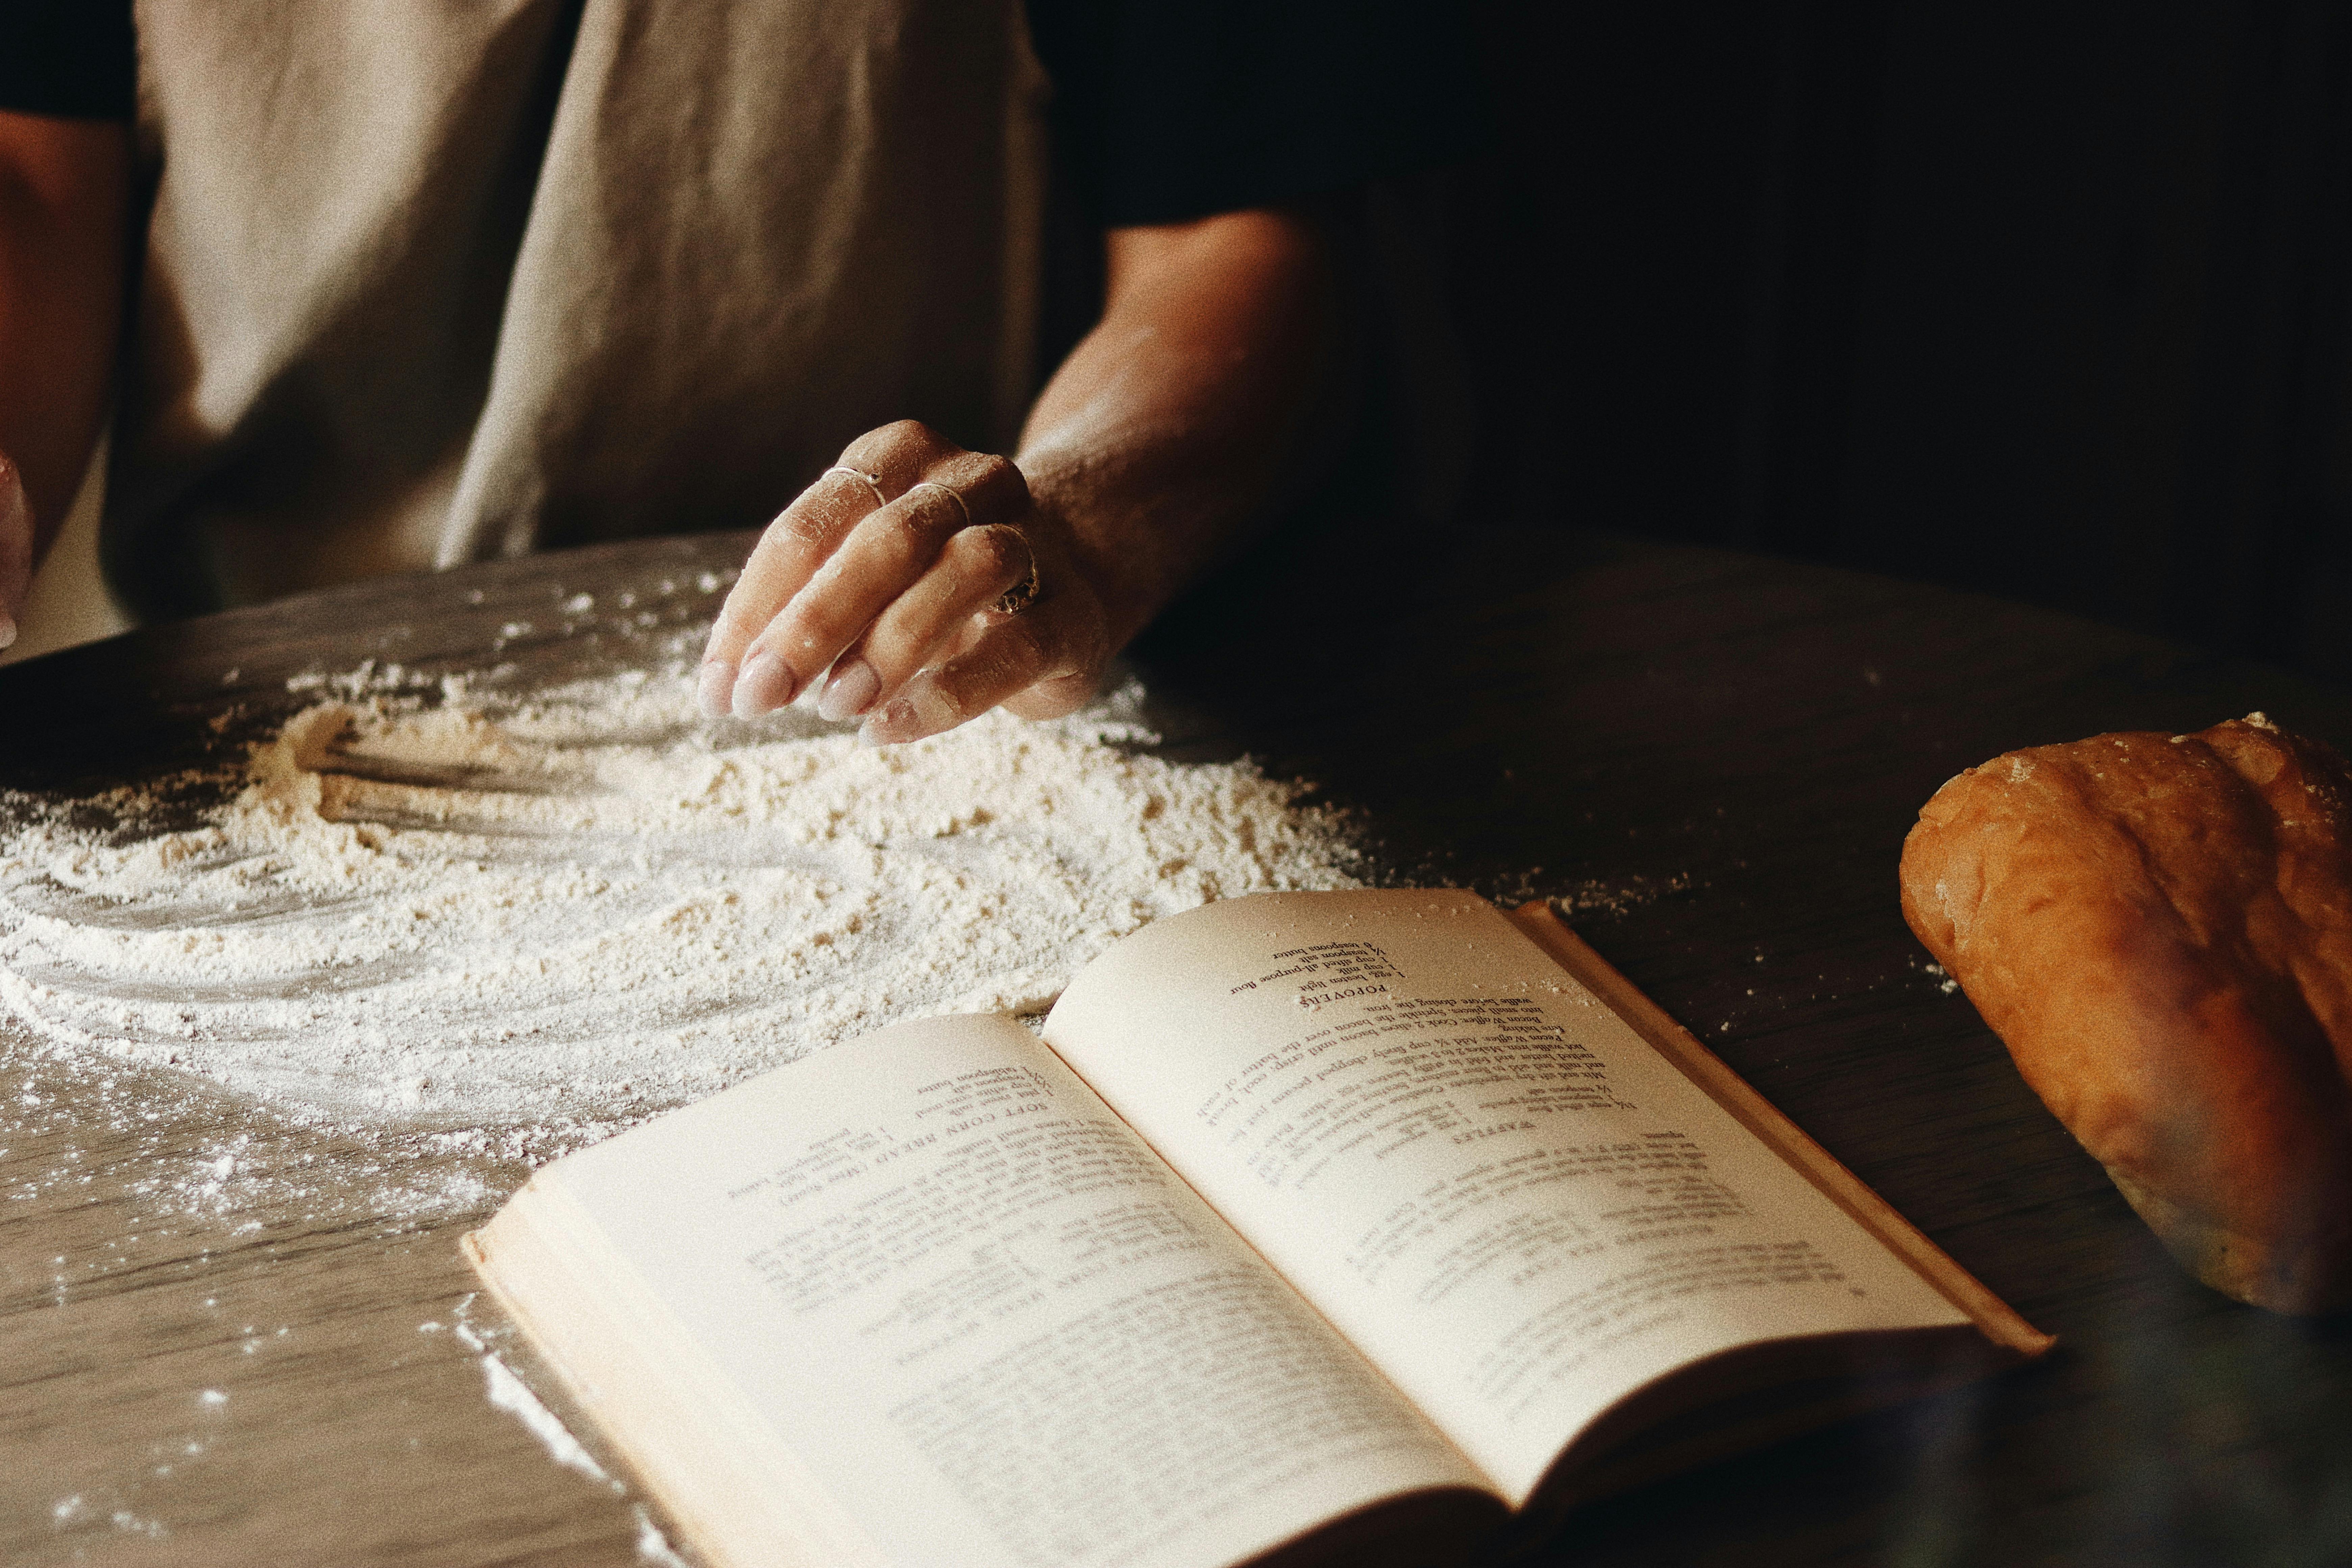
We learned to bake bread
We protested the Vietnam War
And of course there was always sex, drugs and rock n’ roll.
My new novel Everything We Thought We Knewis set in Bella Vida, a 1970s commune. It’s fiction but in many ways it’s my story and the story of thousands who tried to fashion a better better society. Join the residents of Bella Vida to be transported into the grit, dreams, and heartbreak of the era. Like most communes, Bella Vida eventually disbands. But that was not the end of the story for its residents. Thirty years later a child born there, now an adult, forces long-held secrets to be revealed and changes everyone’s life forever.
Reviews:
Her characters are delightfully dimensional, and her creative twists of plot keep the reader riveted. A delight! — C. Laughton
In Everything We Thought We Knew, Niethammer immerses us in the back to the land movement of the early 1970’s to explore what constitutes a good life. Is it the untested visions of idealistic youth or the compromises that inevitably define middle age? –Margaret Grunstein
Christie arrives with a sincere desire to change her life and maybe change the world, but she also carries a self-righteous certainty about how things are supposed to be which is quickly derailed in this commune. She is rescued by her curiosity, adaptability, and open mind. – Ann Evans
A rollicking romp through the 60s/70s and a woman’s heroic story, set in the foothills of Sky Island country in southeastern Arizona. With its wonderful characters and poignant surprise ending, this is Carolyn Niethammer’s beautiful, page-turner storytelling at its best. –Rick Brusca
Be transported back to 1970, protest the Vietnam War, frolic during invented holidays, and dance under the stars at an Indian ruin. You can find Everything We Thought We Knewin paper and ebook direct from the publisher, Booklocker and at Amazon.com,Barnesandnoble.com, Walmart.com
My mentor and guide Juanita-baḍ warned us there will be times like this. Now awesome drought is upon us! She said if we need food from the desert, we must know famine-food-plants for the dry times. Tia Marta here to share some of her advice for desert harvesters in a drought.
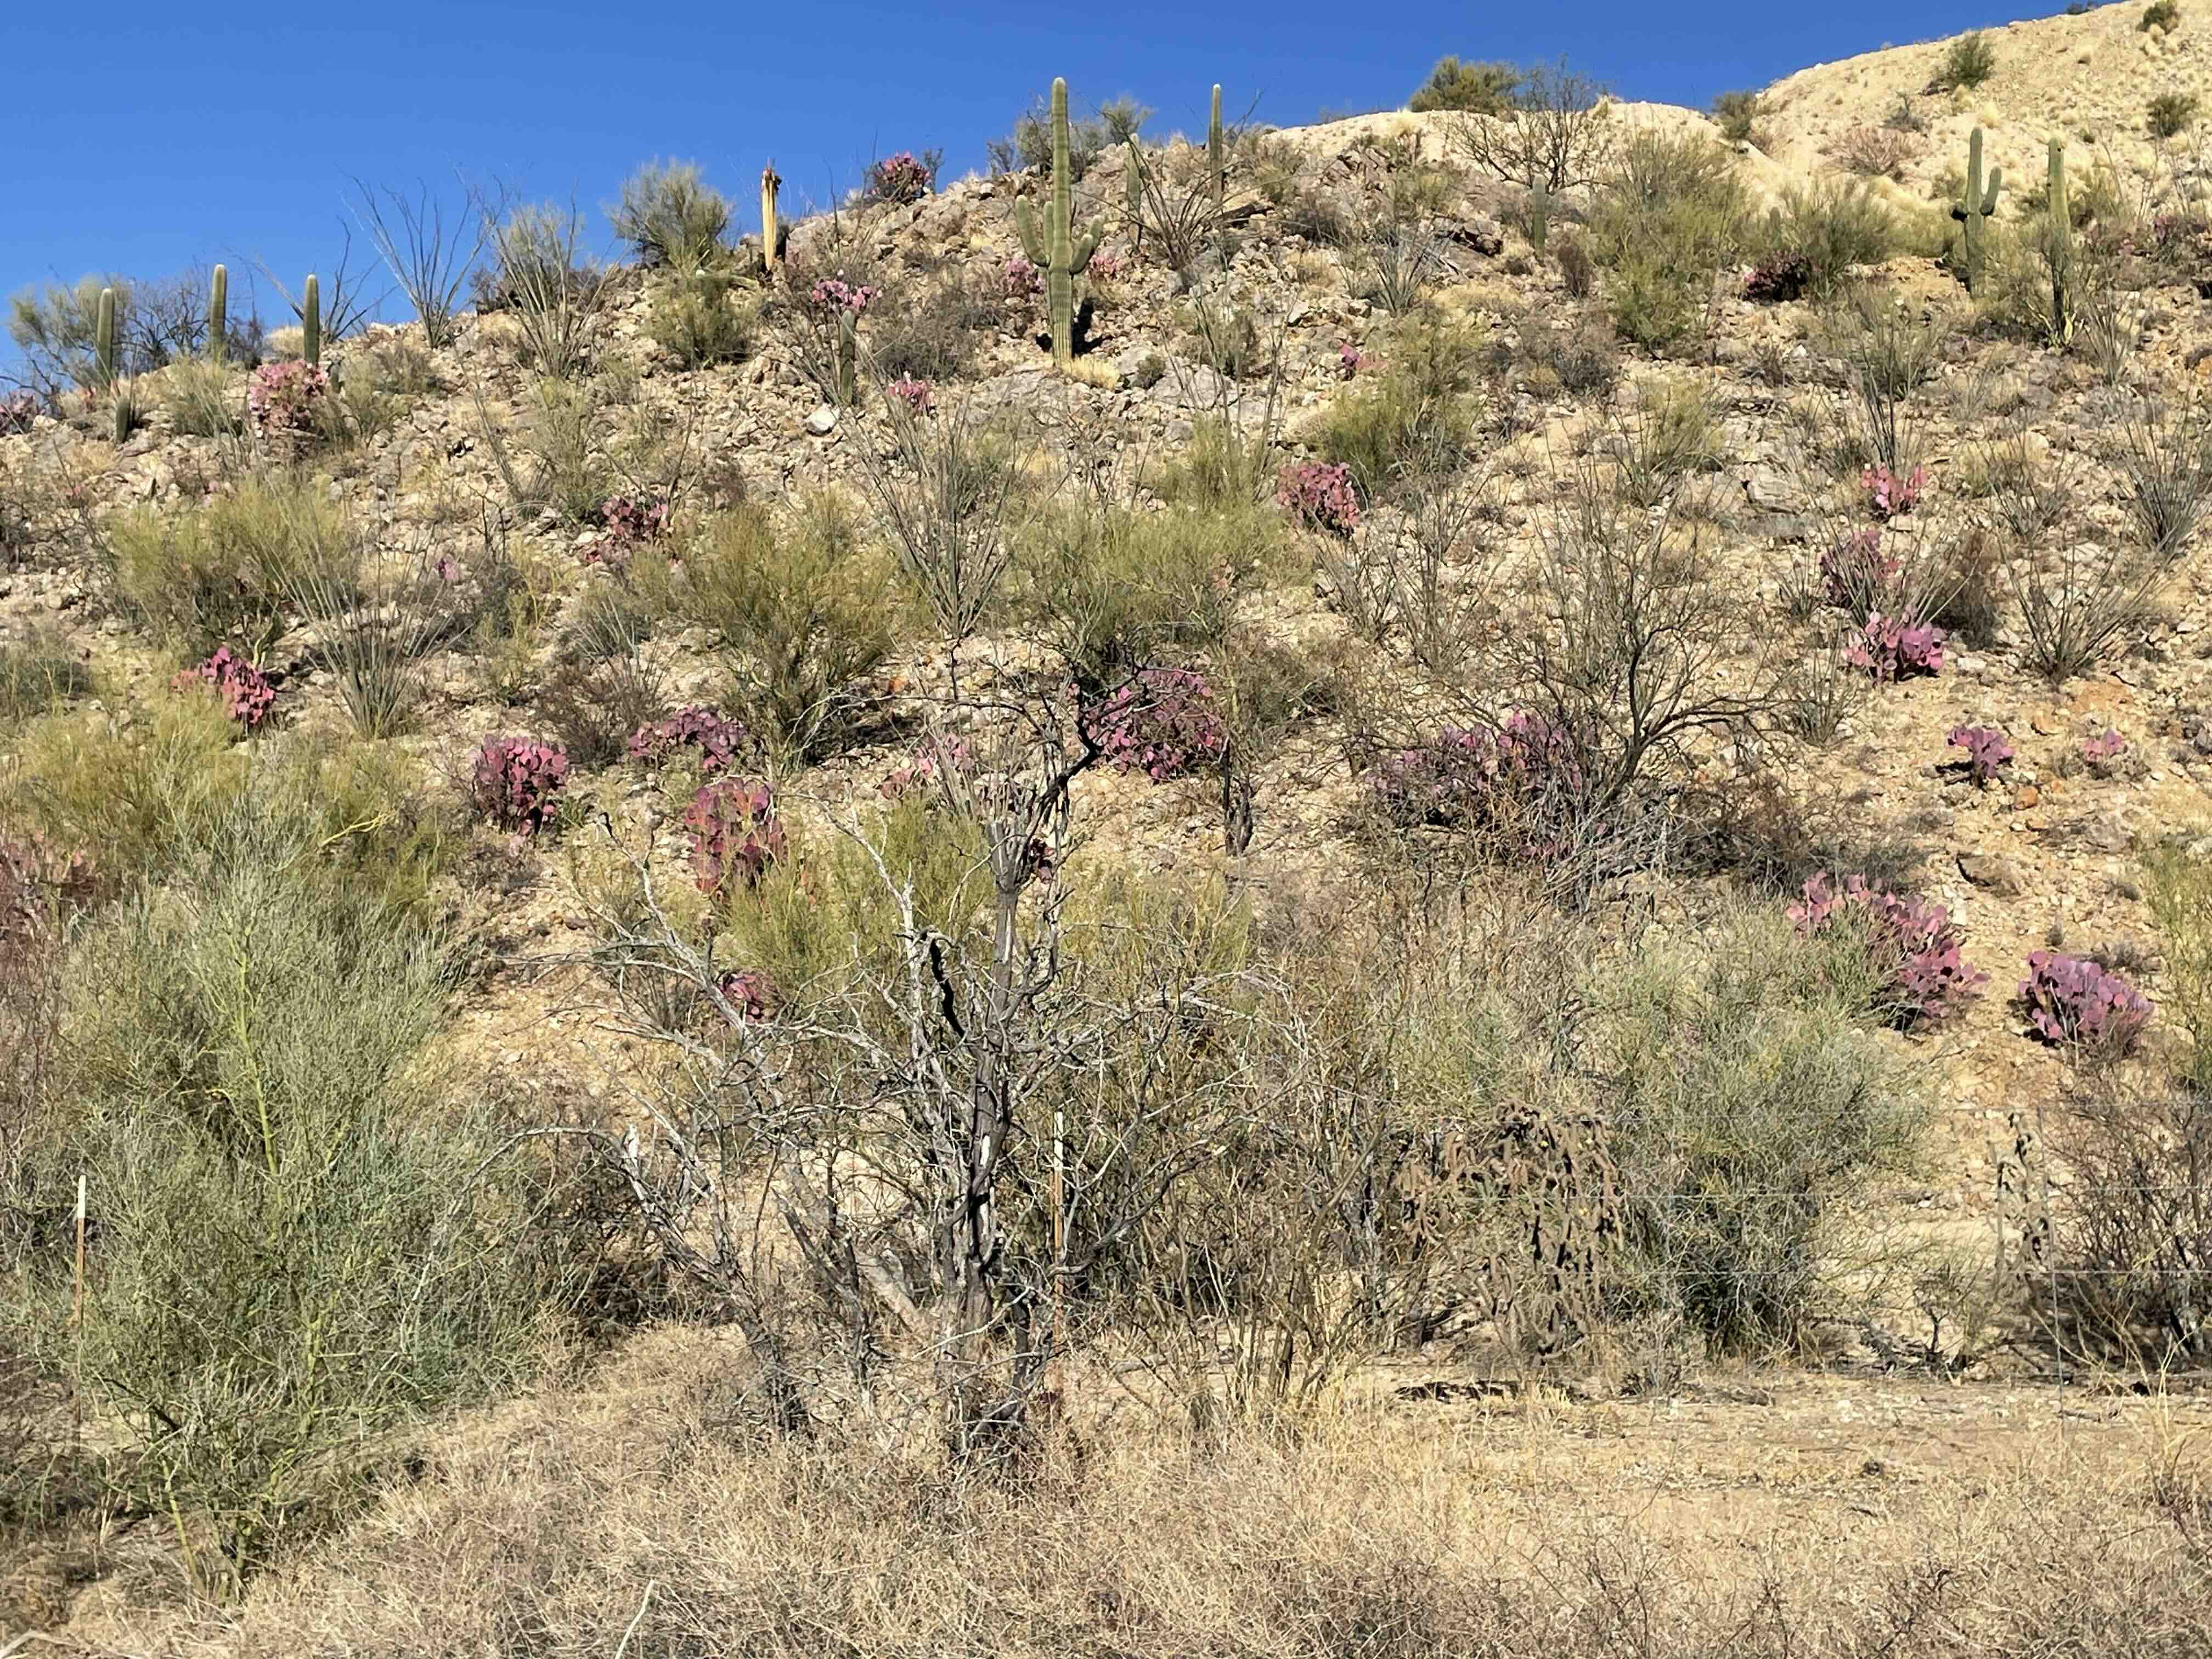
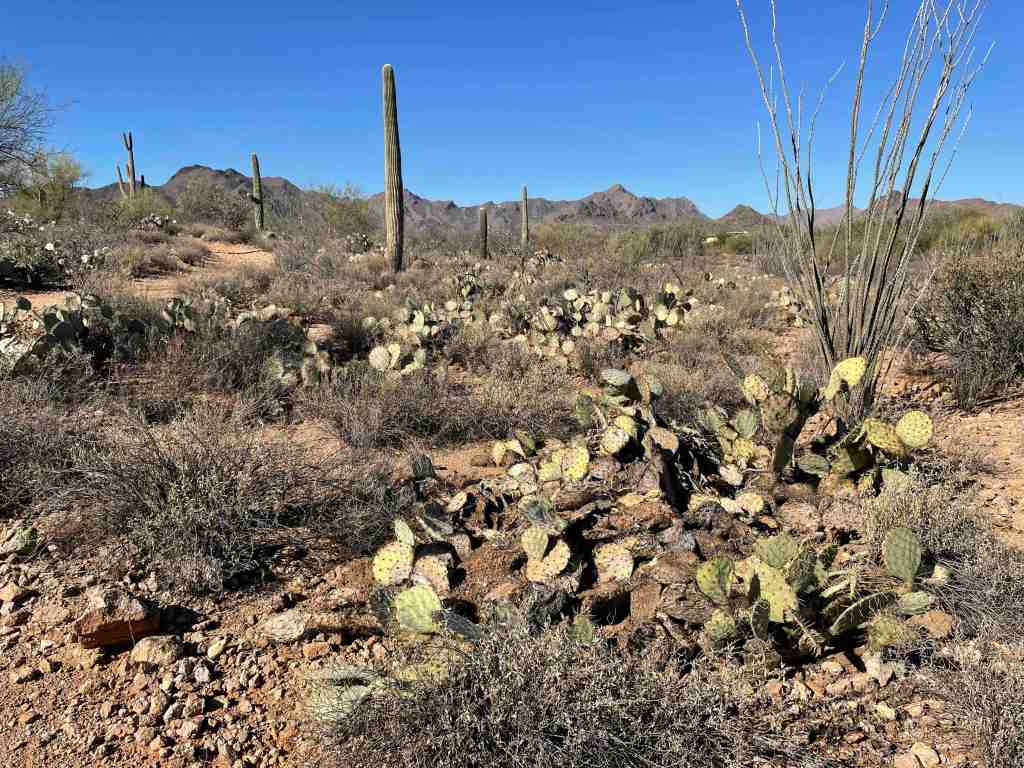
When the beautiful Santa Rita prickly pear around town turns a wild purple or lavender, it’s vividly screeming “thirsty“–a visual pop-out in the dry landscape, as in this photo taken along the old Helmet Peak road south of Tucson. According to Watershed Management Group, the last 6 months have been the driest on record for Tucson, Arizona. We’re in the midst of the acid test for what’s to come.
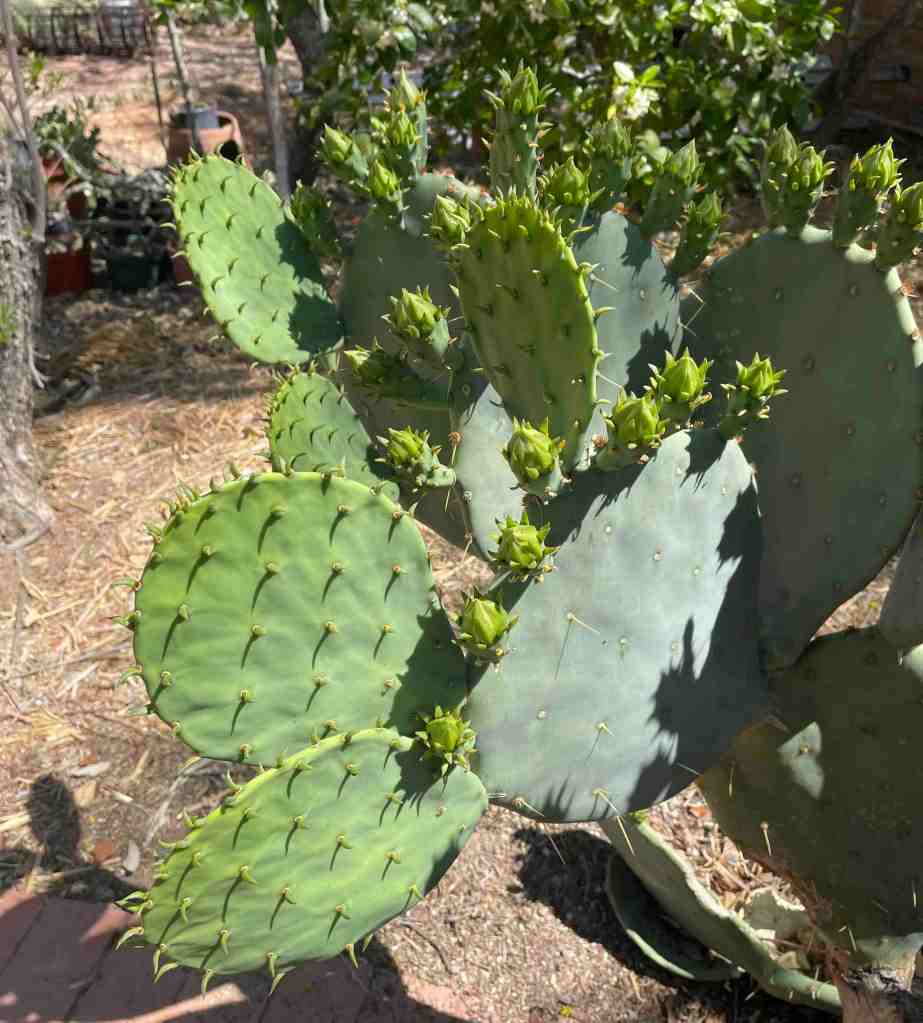
In a well-watered garden this drought year, a prickly pear will be full of new-growth pads and flower buds. Find SavorSisterCarri’s ideas for making nopalitos with the young pads on her recent post.
April is known as Oam Maṣaḍ (Yellow Moon), but there won’t be many yellow prickly pear flowers this year out in the des, with no rain since October’s minimal drops. In this photo at Feliz Paseos Park, prickly pears are sadly damaged with drought. Over my 50 years of harvesting ciolim (cholla cactus flower buds), I’ve never known them to be “on hold” as they are this spring (2025), saving their resources for a better-bet year. Juanita-baḍ said there are always a few, but ciolim may now be telling us of a new phase….
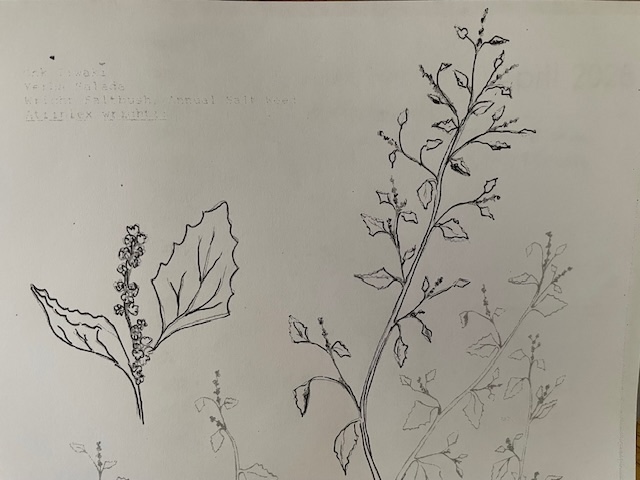
According to Juanita-baḍ, we should know where to look for onk i:wagĭ (Wright’s saltbush Atriplex wrightii pictured above) in poor, salty soils. (The O’odham name is also used for A. polycarpa & A.elegans). It grows as an annual and can provide satisfactory “greens” over the warm and hot seasons when nothing else is available.
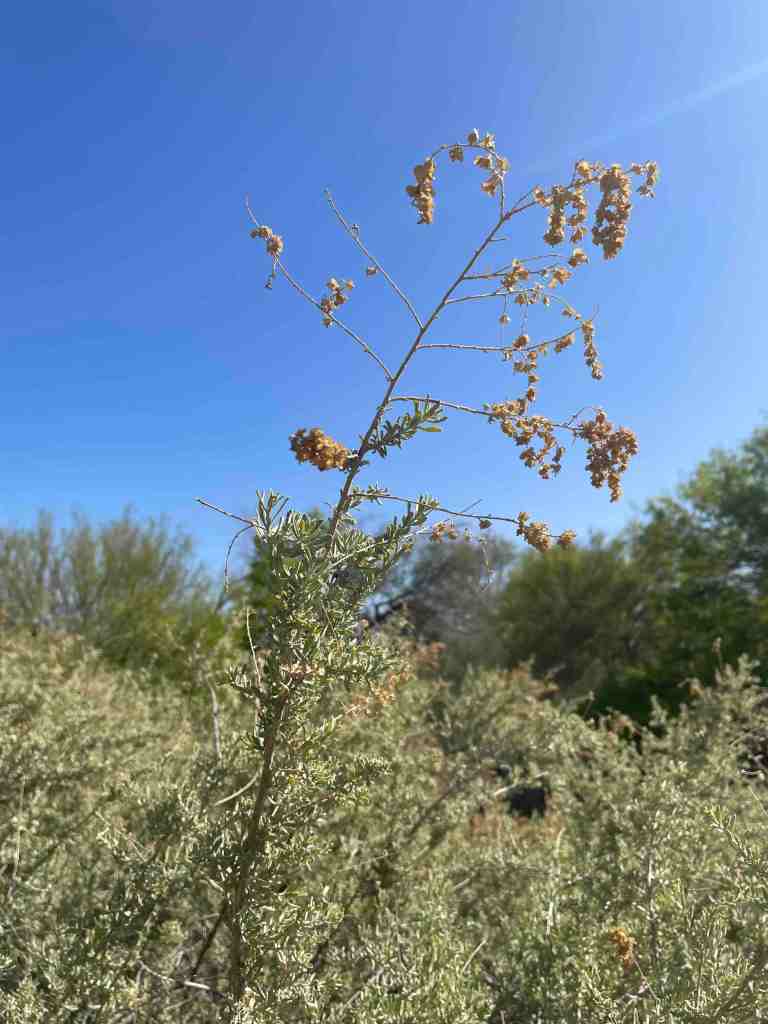
There are several “salt bushes” in the Sonoran Desert. Don’t be fooled by 2 different types of “seedheads” especially on our perennial four-wing saltbush (Atriplex canescens)! It is dioecious. Pictured here is the dried male flower. The (female) seed has “wings.” Foliage on both sexes is high in calcium, iron and potassium, high in salt, good for animals, but there isn’t a record of Indigenous people using it for food.
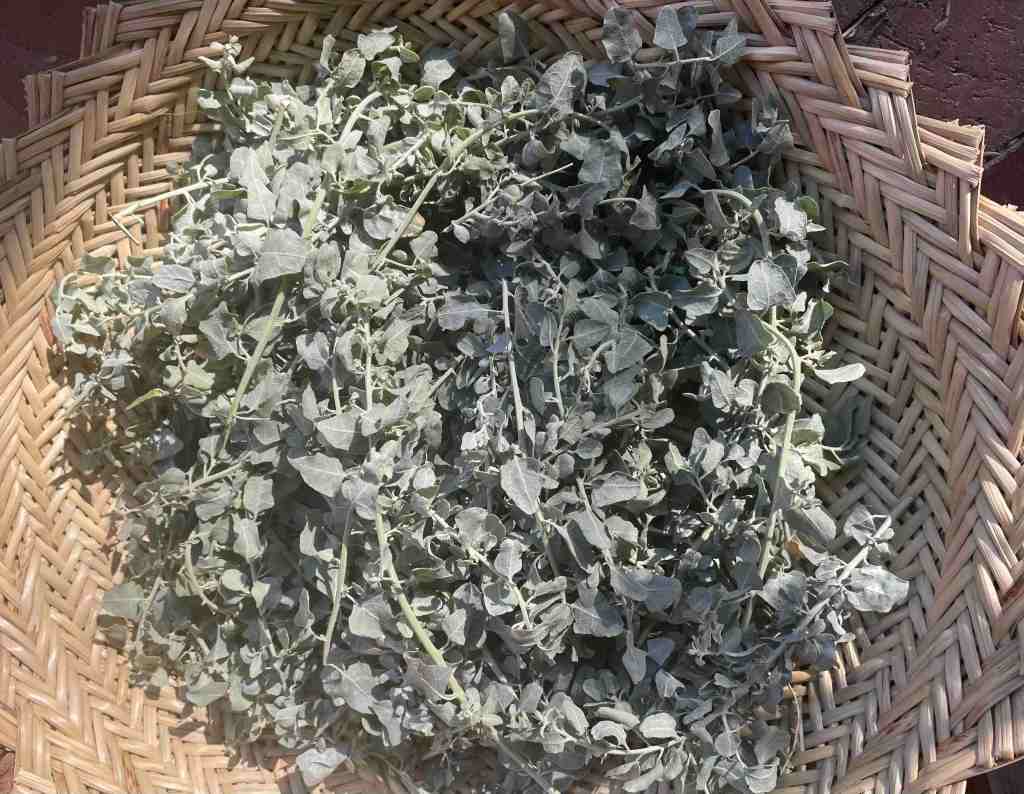
A perennial cousin of Onk I:wagĭ is Oedam or quailbush (Atriplex lentiformis) whose edible seeds are harvestable even in dry years. Many different Southwest Indigenous peoples have used its nutritious seeds to roast for flour and bread. Quailbush is a good landscape addition as a water-hardy hedge screen and bird habitat, as well as emergency food. See Food Plants of the Sonoran Desert by Wendy Hodgson, UA Press, 2001.
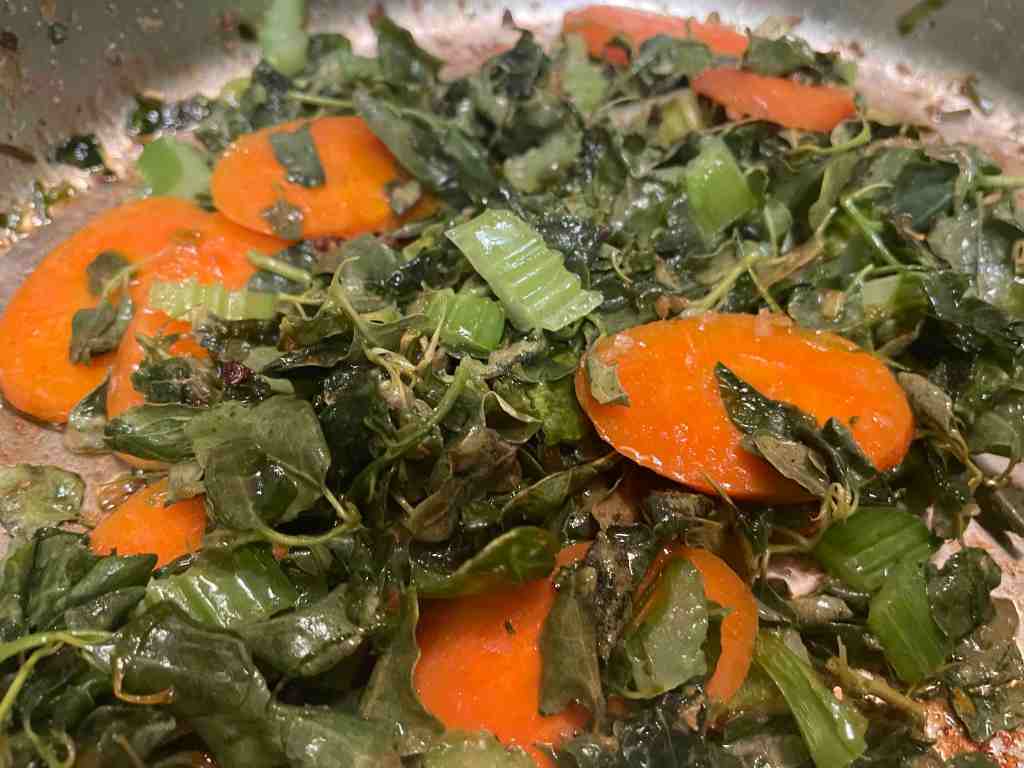
I tried stir-frying Oedam foliage with I’itoi’s onions, London rocket weed, carrots & celery, but –alert–I don’t recommend this! Tasty at first, the very salty greens became tough and bitter. I’ll stick to eating its seeds–and using its foliage in a dye bath.
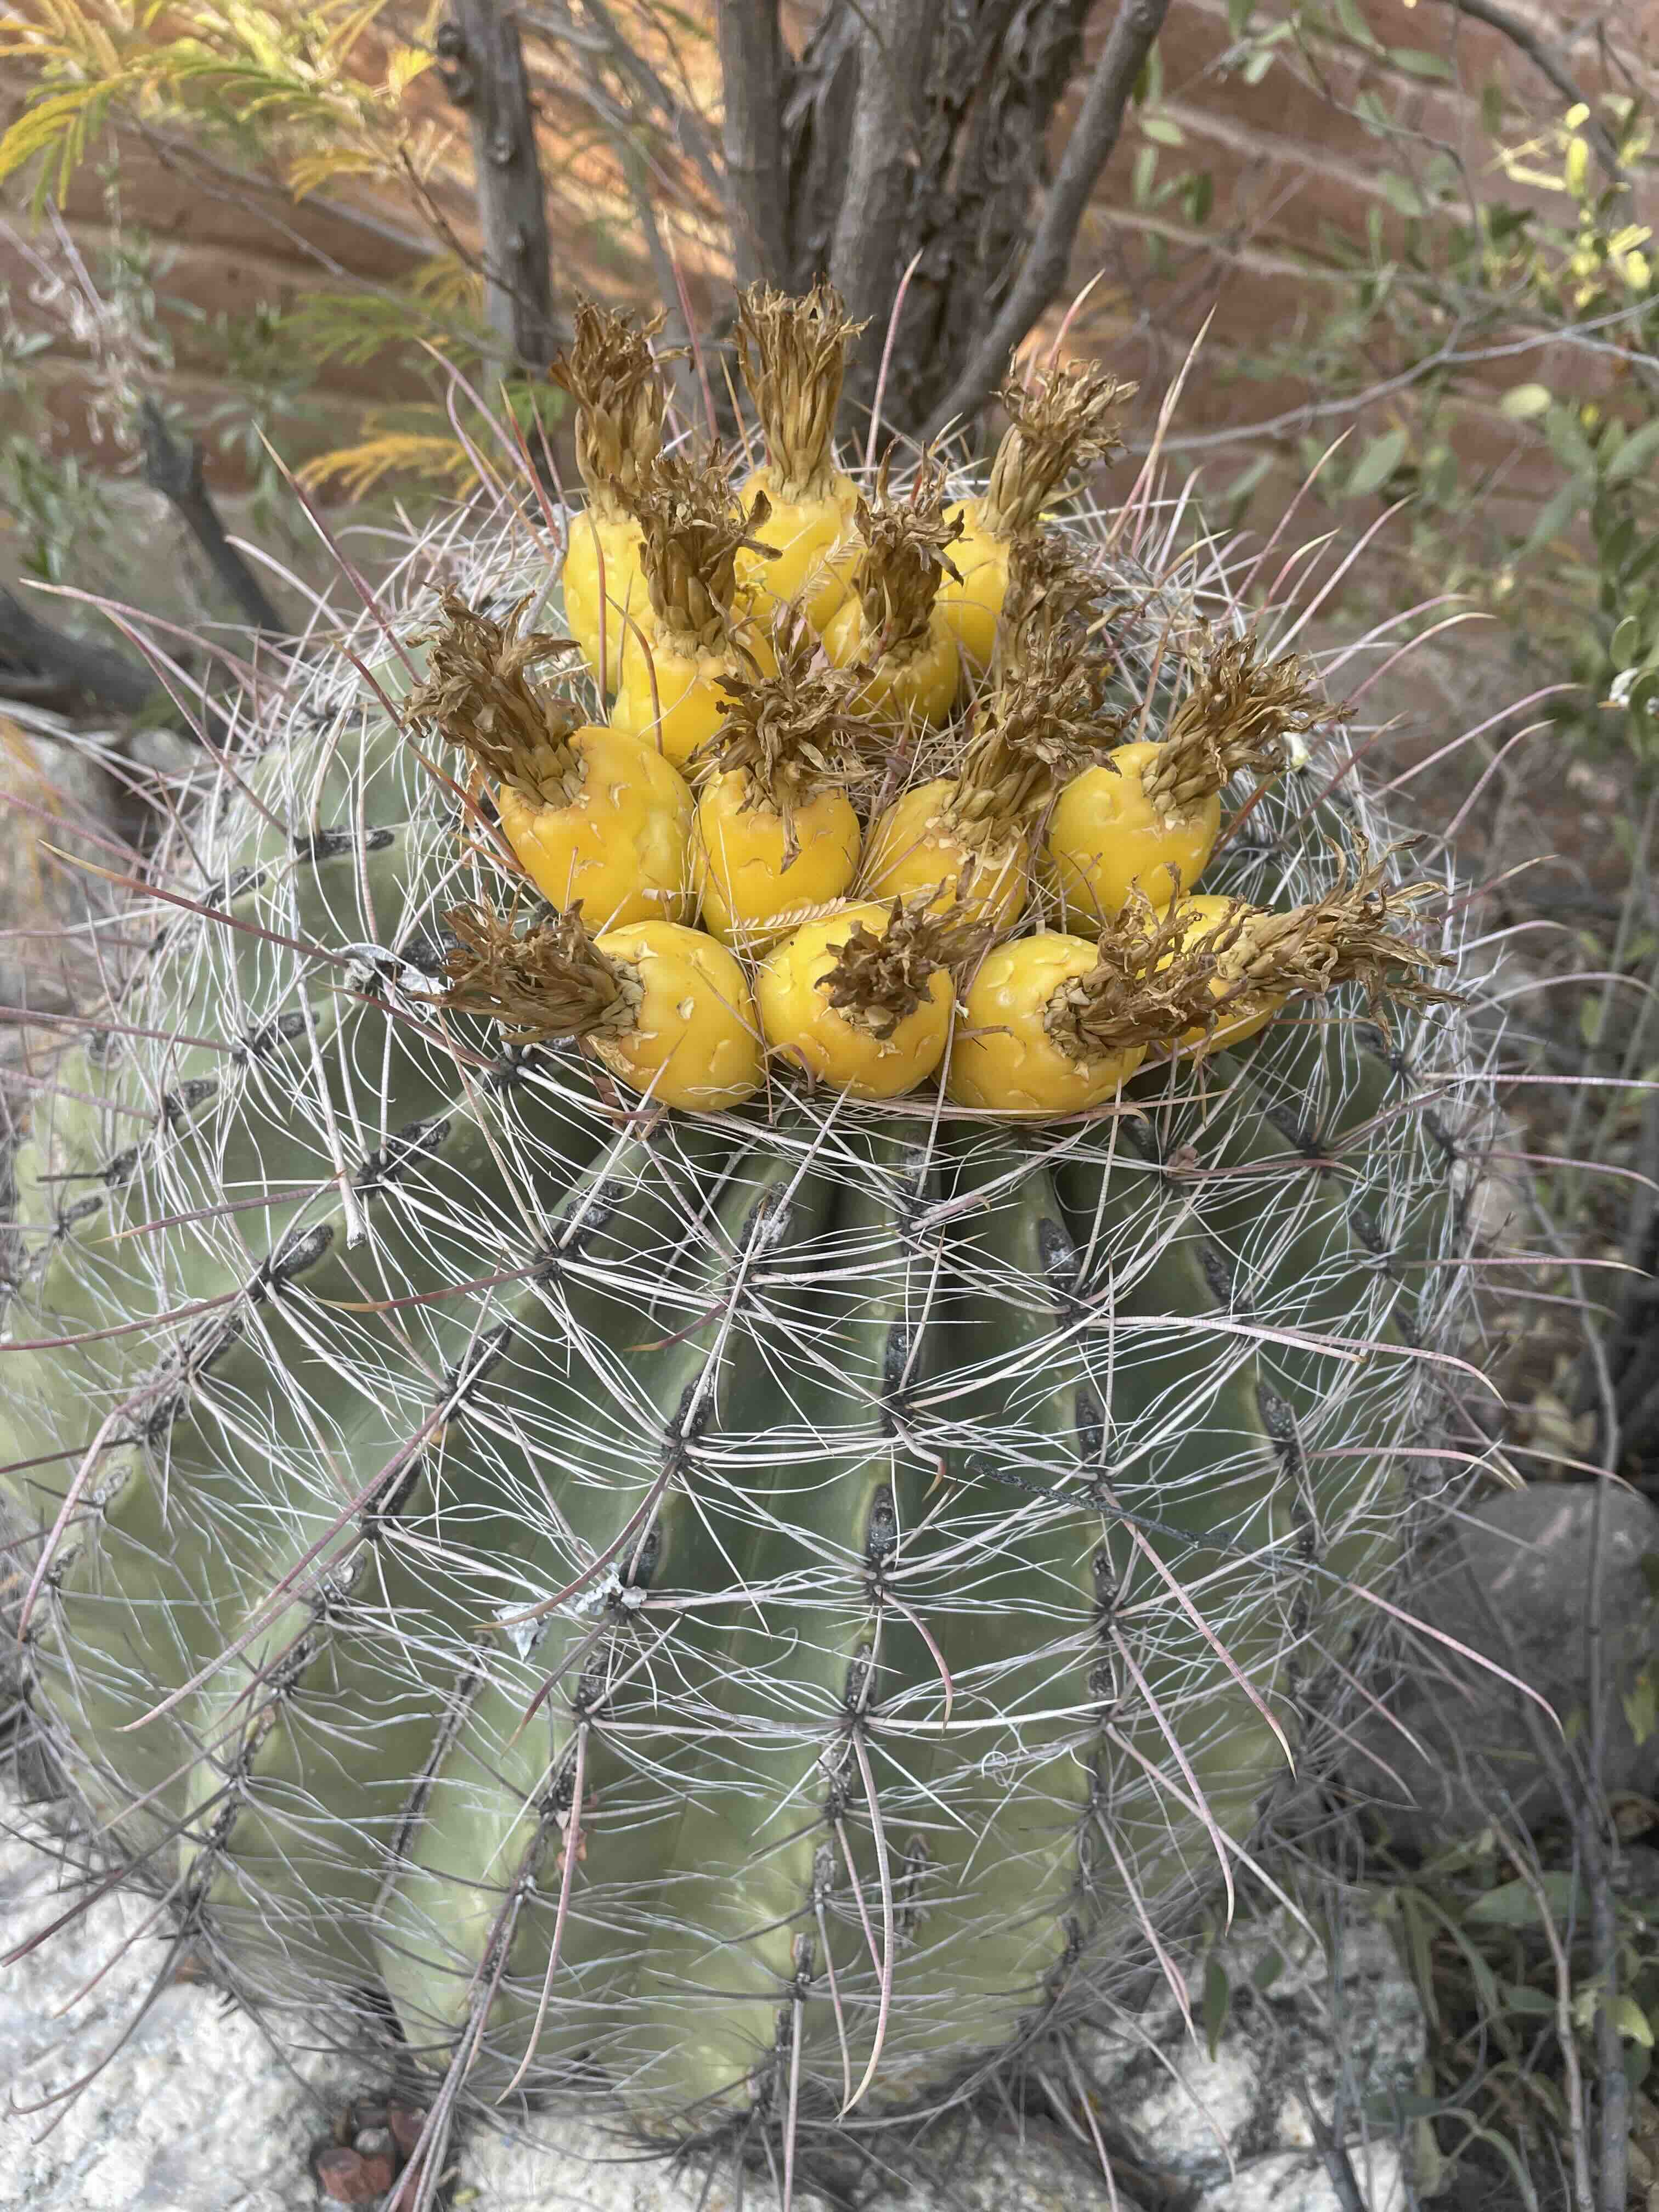
Advice from Juanita-baḍ about barrel cactus was to wait patiently to harvest their fruit until you have nothing left to eat–that is, let it stay on the plant all winter until you have used up all your other stored food. As a yellow crown atop the barrel, its fruit is right there waiting when you need–unless a hungry roundtail ground squirrel beats you to it. She knew their tangy vitamins and crunchy protein would be a nutritional lift for famine times.
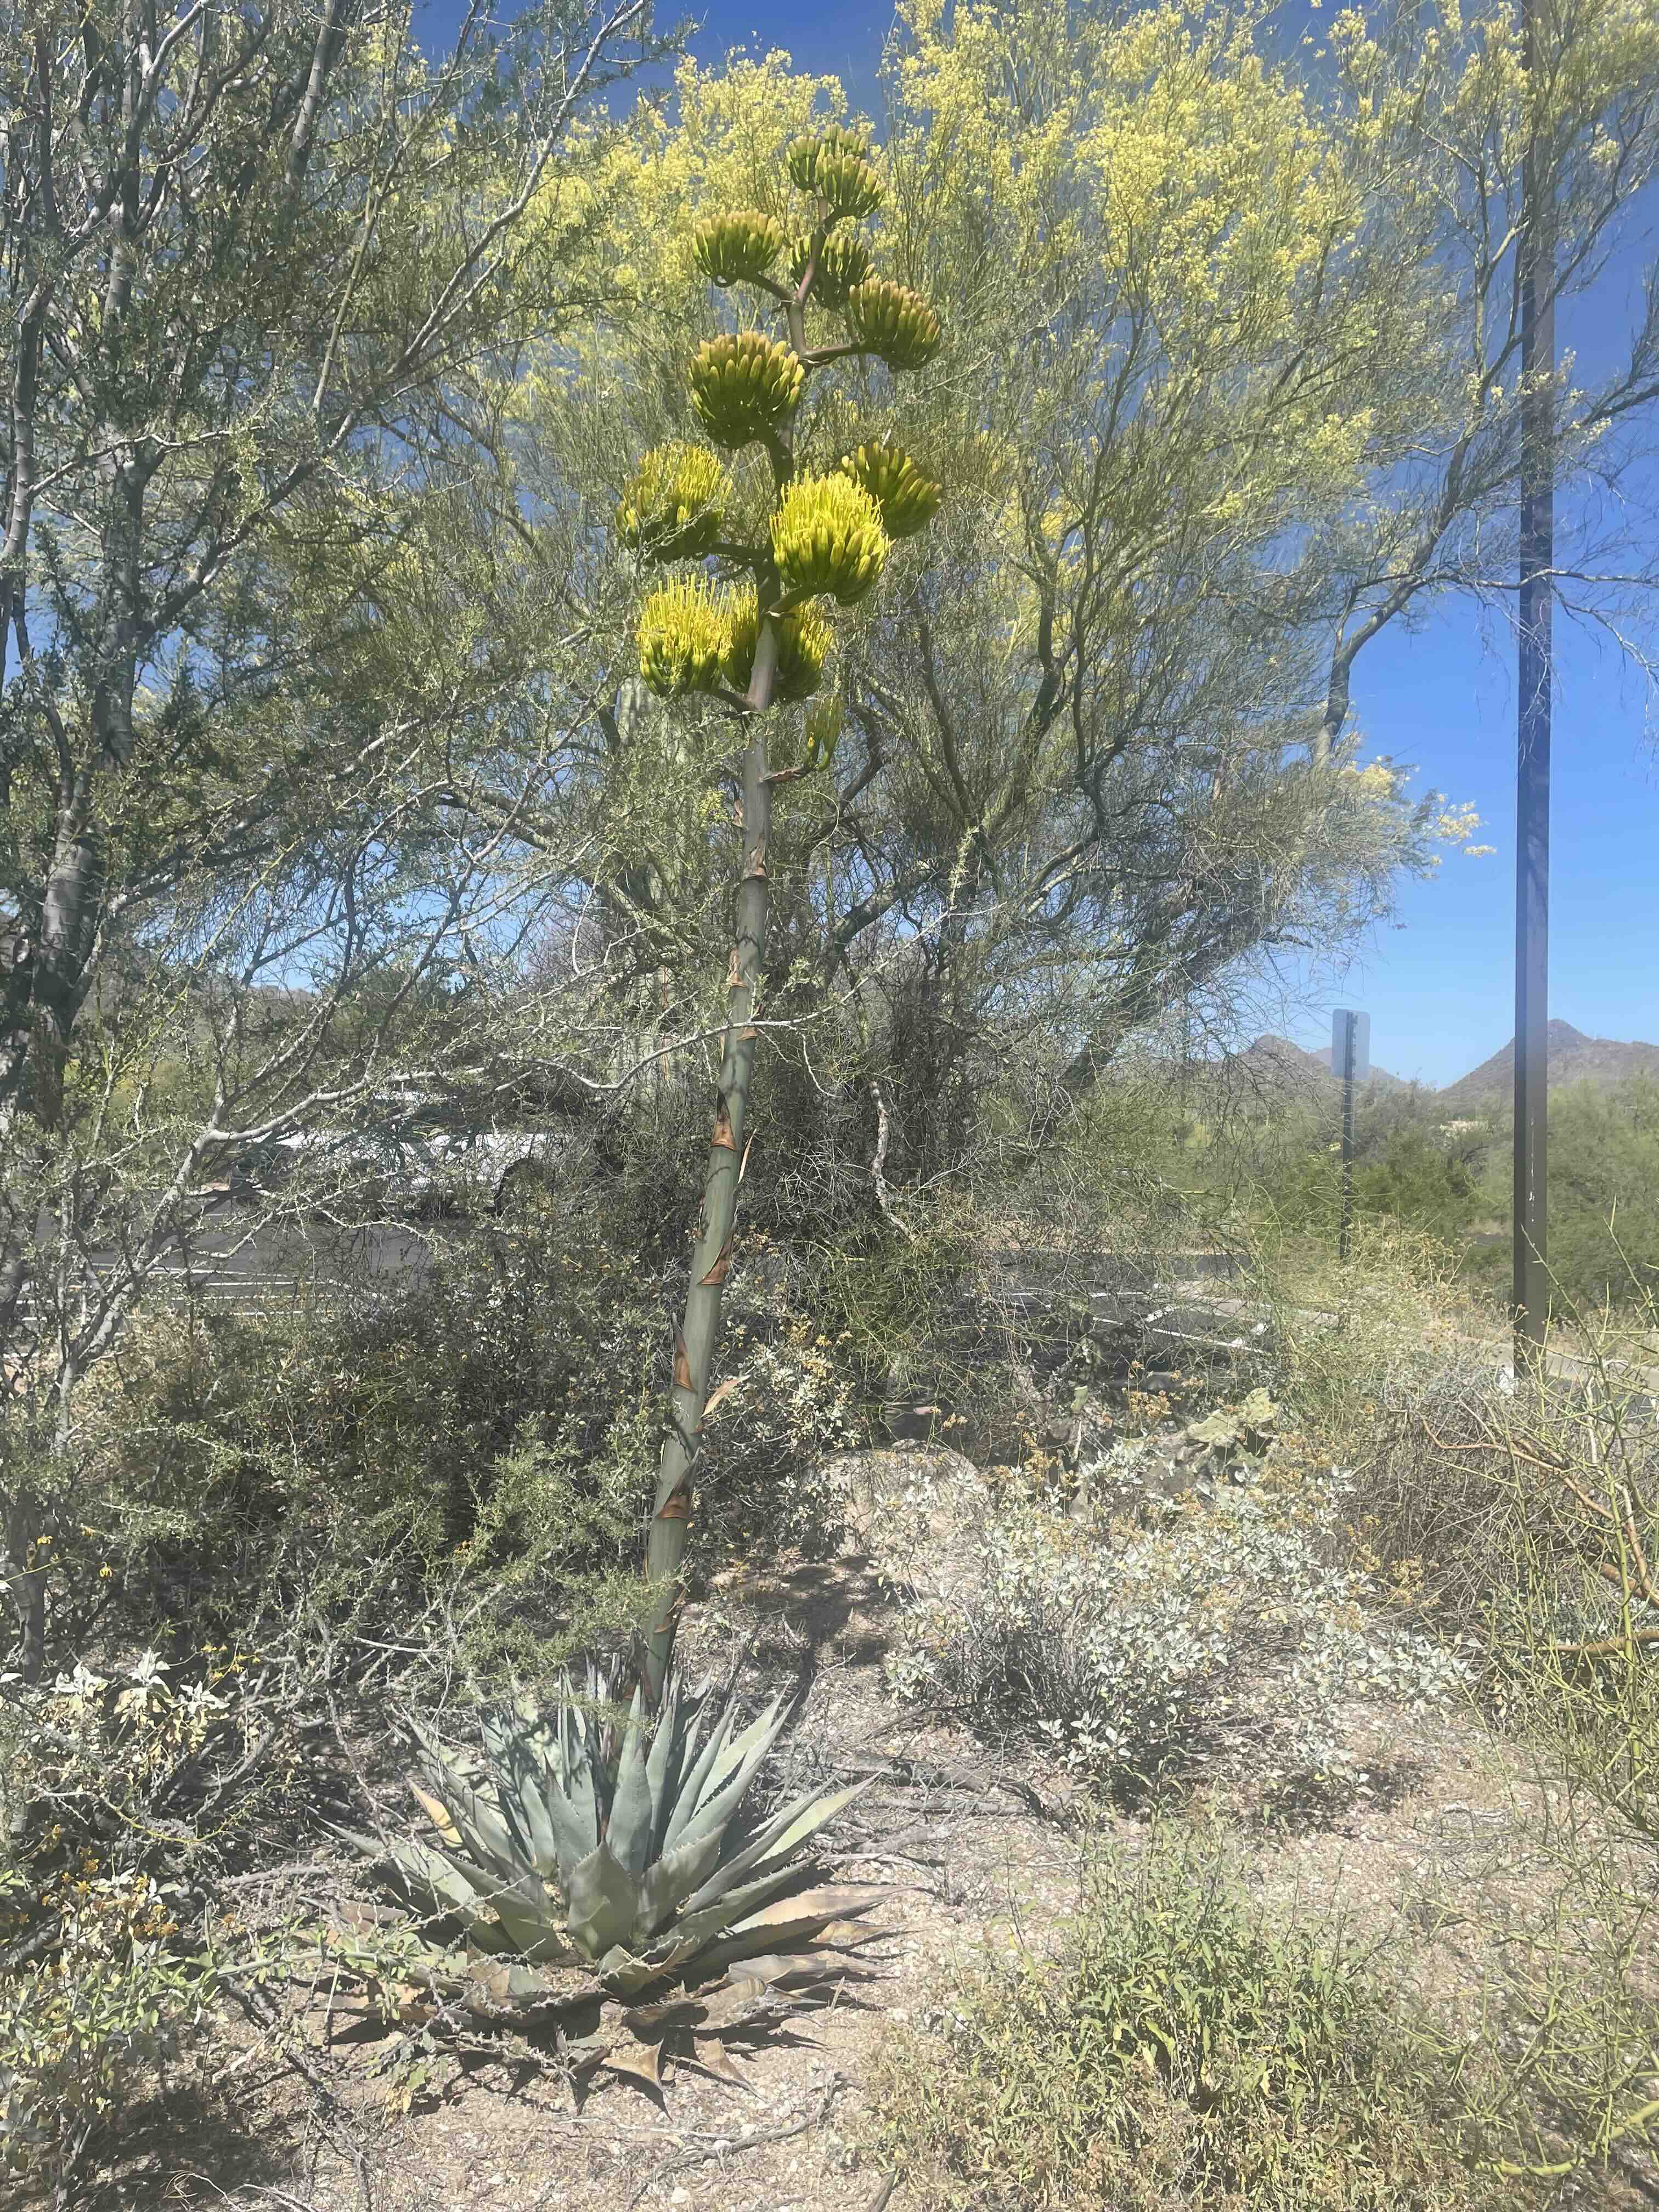
One of the few reliable desert spring foods–and one of her favorites, drought or not–is the sweet heart of a’ut from several species of Agave in the Sonoran Desert. Come celebrate this important, nutritious food at Tucson’s Agave Heritage Festivalhappening right now (April 10-13, 2025) all over town, with special events at Mission Garden! Hope to see you there!
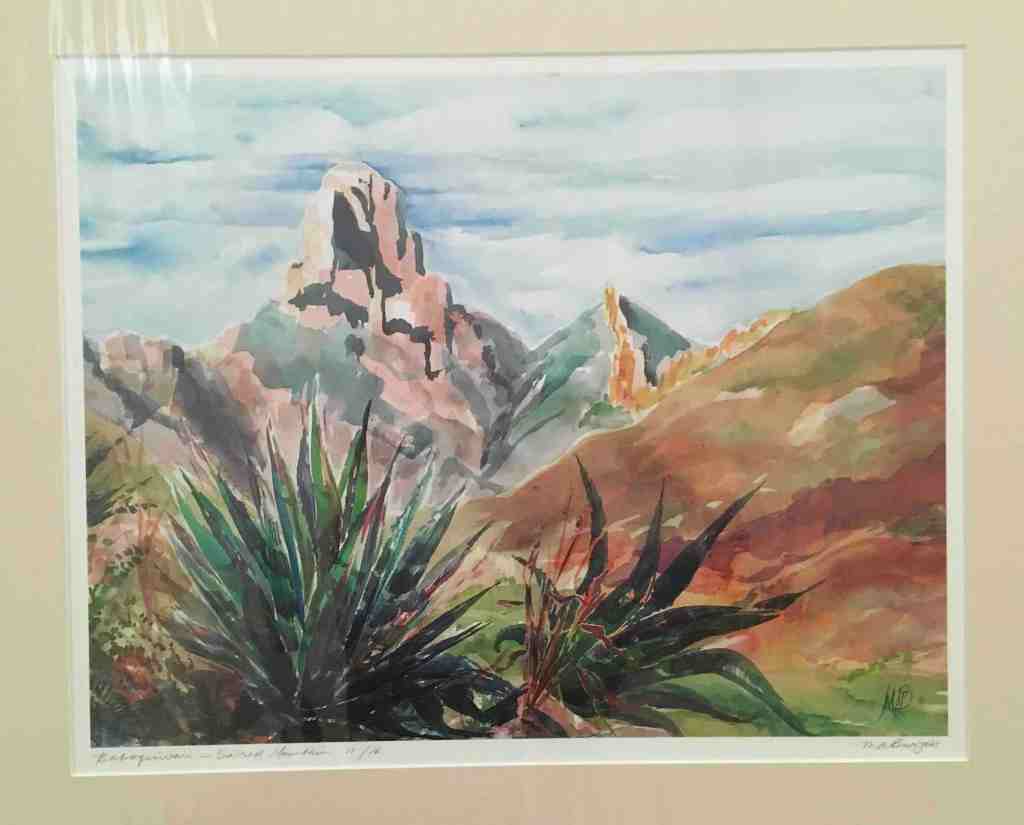
At Mission Garden’s gift shop and at the Coyote Kitchen & Gift Shop at San Xavier Plaza, you can find Tia Marta’s Southwest Native Foods artwork and notecards, including this image of sacred Waw Giwulk (Baboquivari Peak) and its resident Agaves!
For more good info on stress-time foods, check out SavorSisterCarolyn’s post from an earlier year in this unprecedented drought, and find the book Famine Foods: Plants we Eat to Survive by Paul Minnis, UArizona Press, 2021, which she reviews so timely. It will be a good reference to use as these conditions become the “new normal.”
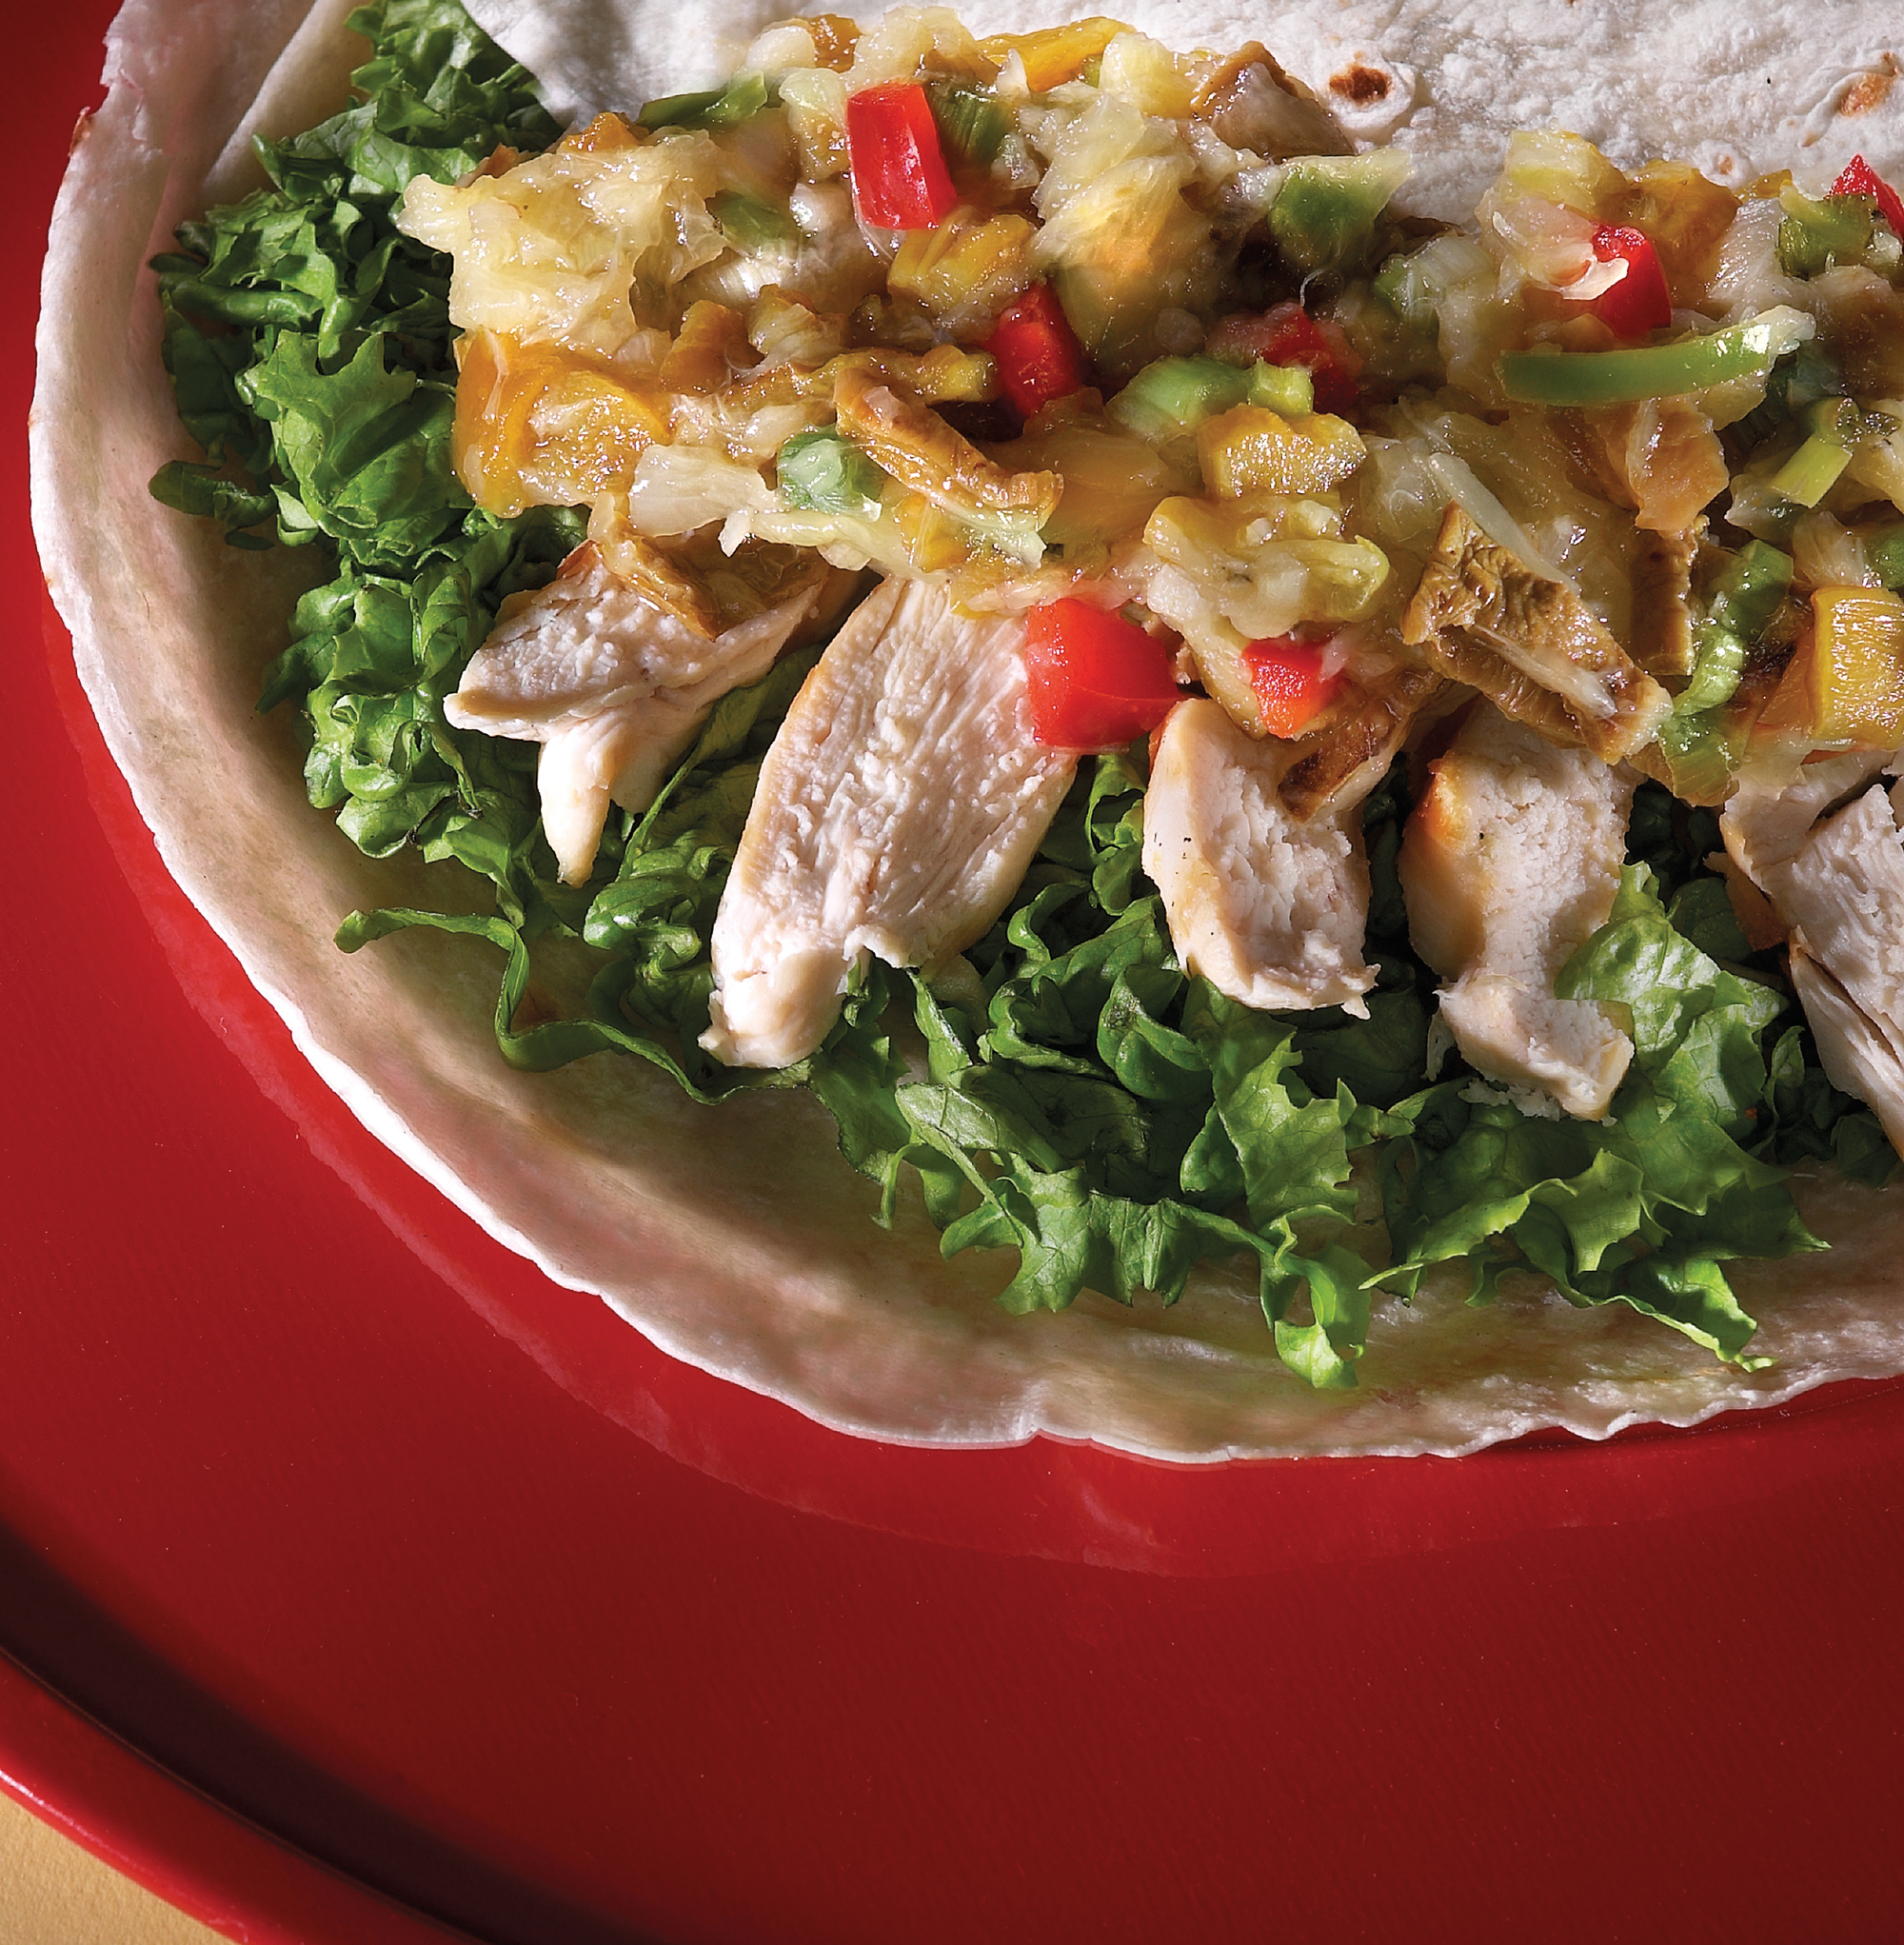
Grilled Chicken with Nopalito and Pineapple Salsa (from The Prickly Pear Cookbook)
(Note: I will be teaching a class on cooking with nopales at the Presidio of Tucson on April 3. You can sign up on their website.)
The new prickly pear pads (nopales) that we cook and use for nopalitos are usually ready in from March to early May. It’s Carolyn here today tempting you with two recipes for a delicious salsas made with nopalitos. (Definition of nopalito: a nopal, or cactus pad, cut into little pieces).
Why bother to learn how to use prickly pear pads? For hundreds of years, both the fruit and pads were considered folk medicine in Mexico and early research showed that the fibers in nopales were helpful in curbing blood sugar. Today, researchers in the US and Europe are using sophisticated laboratory techniques and specially bred mouse models (that would be transgenic mice, not transgender mice) to investigate prickly pear fruits, pads, flowers, and seeds as a cure for a wide array variety of ills.
Investigators are looking into prickly pear compounds as antioxidant, antiviral, anti tumor, anti diabetic, and antiparasite. It may be useful in combating a range of cancers including leukemia, lung, gastric, colon, and ovarian. Studies have considered its use in the treatment of ulcers and alcoholism and a possible role in boosting memory and energy metabolism. Many research labs are investigating prickly pear for cancer prevention.
The many varieties of prickly pear put out their new growth when the spring warms up. All prickly pear pads are edible (meaning they not only won’t kill you but in this case are very nutritious), but they are only appropriate for food when they are new. After about six weeks, they develop a fibrous infrastructure. The easiest kind of pads to prepare are those from the large Mexican variety of prickly pear that do not grow wild north of Mexico. You can grow them in your yard if your winter doesn’t bring much freezing. Or you can get them at a Mexican grocery story. They are called Ficus indica or sometimes Burbank because Luther Burbank did some breeding work on them. The wild cactus pads are also delicious, but harder to prepare because of the abundance of spines.
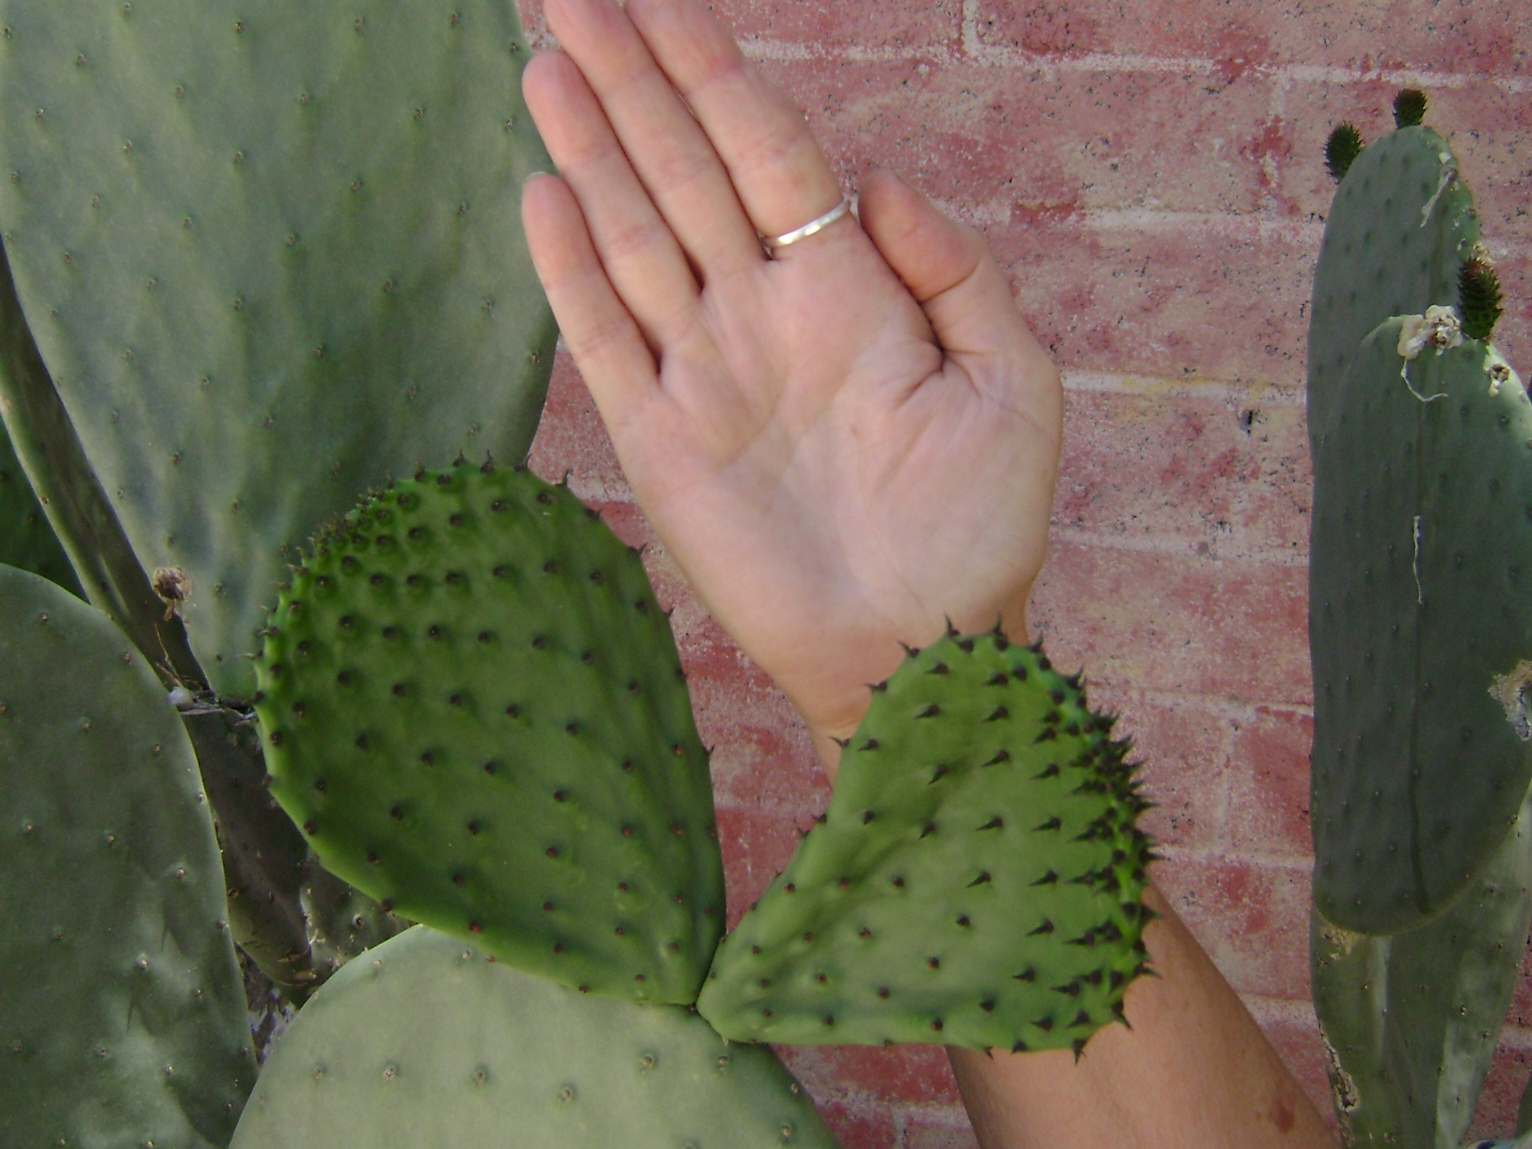
You can do a rough estimate of when a pad is ready to pick if it is about the size of your hand. The nopales available in Mexican grocery stores are grown by farmers who know how to manipulate the plant to keep fresh pads coming year ’round.
Pick nopales in the spring when the size of your hand.
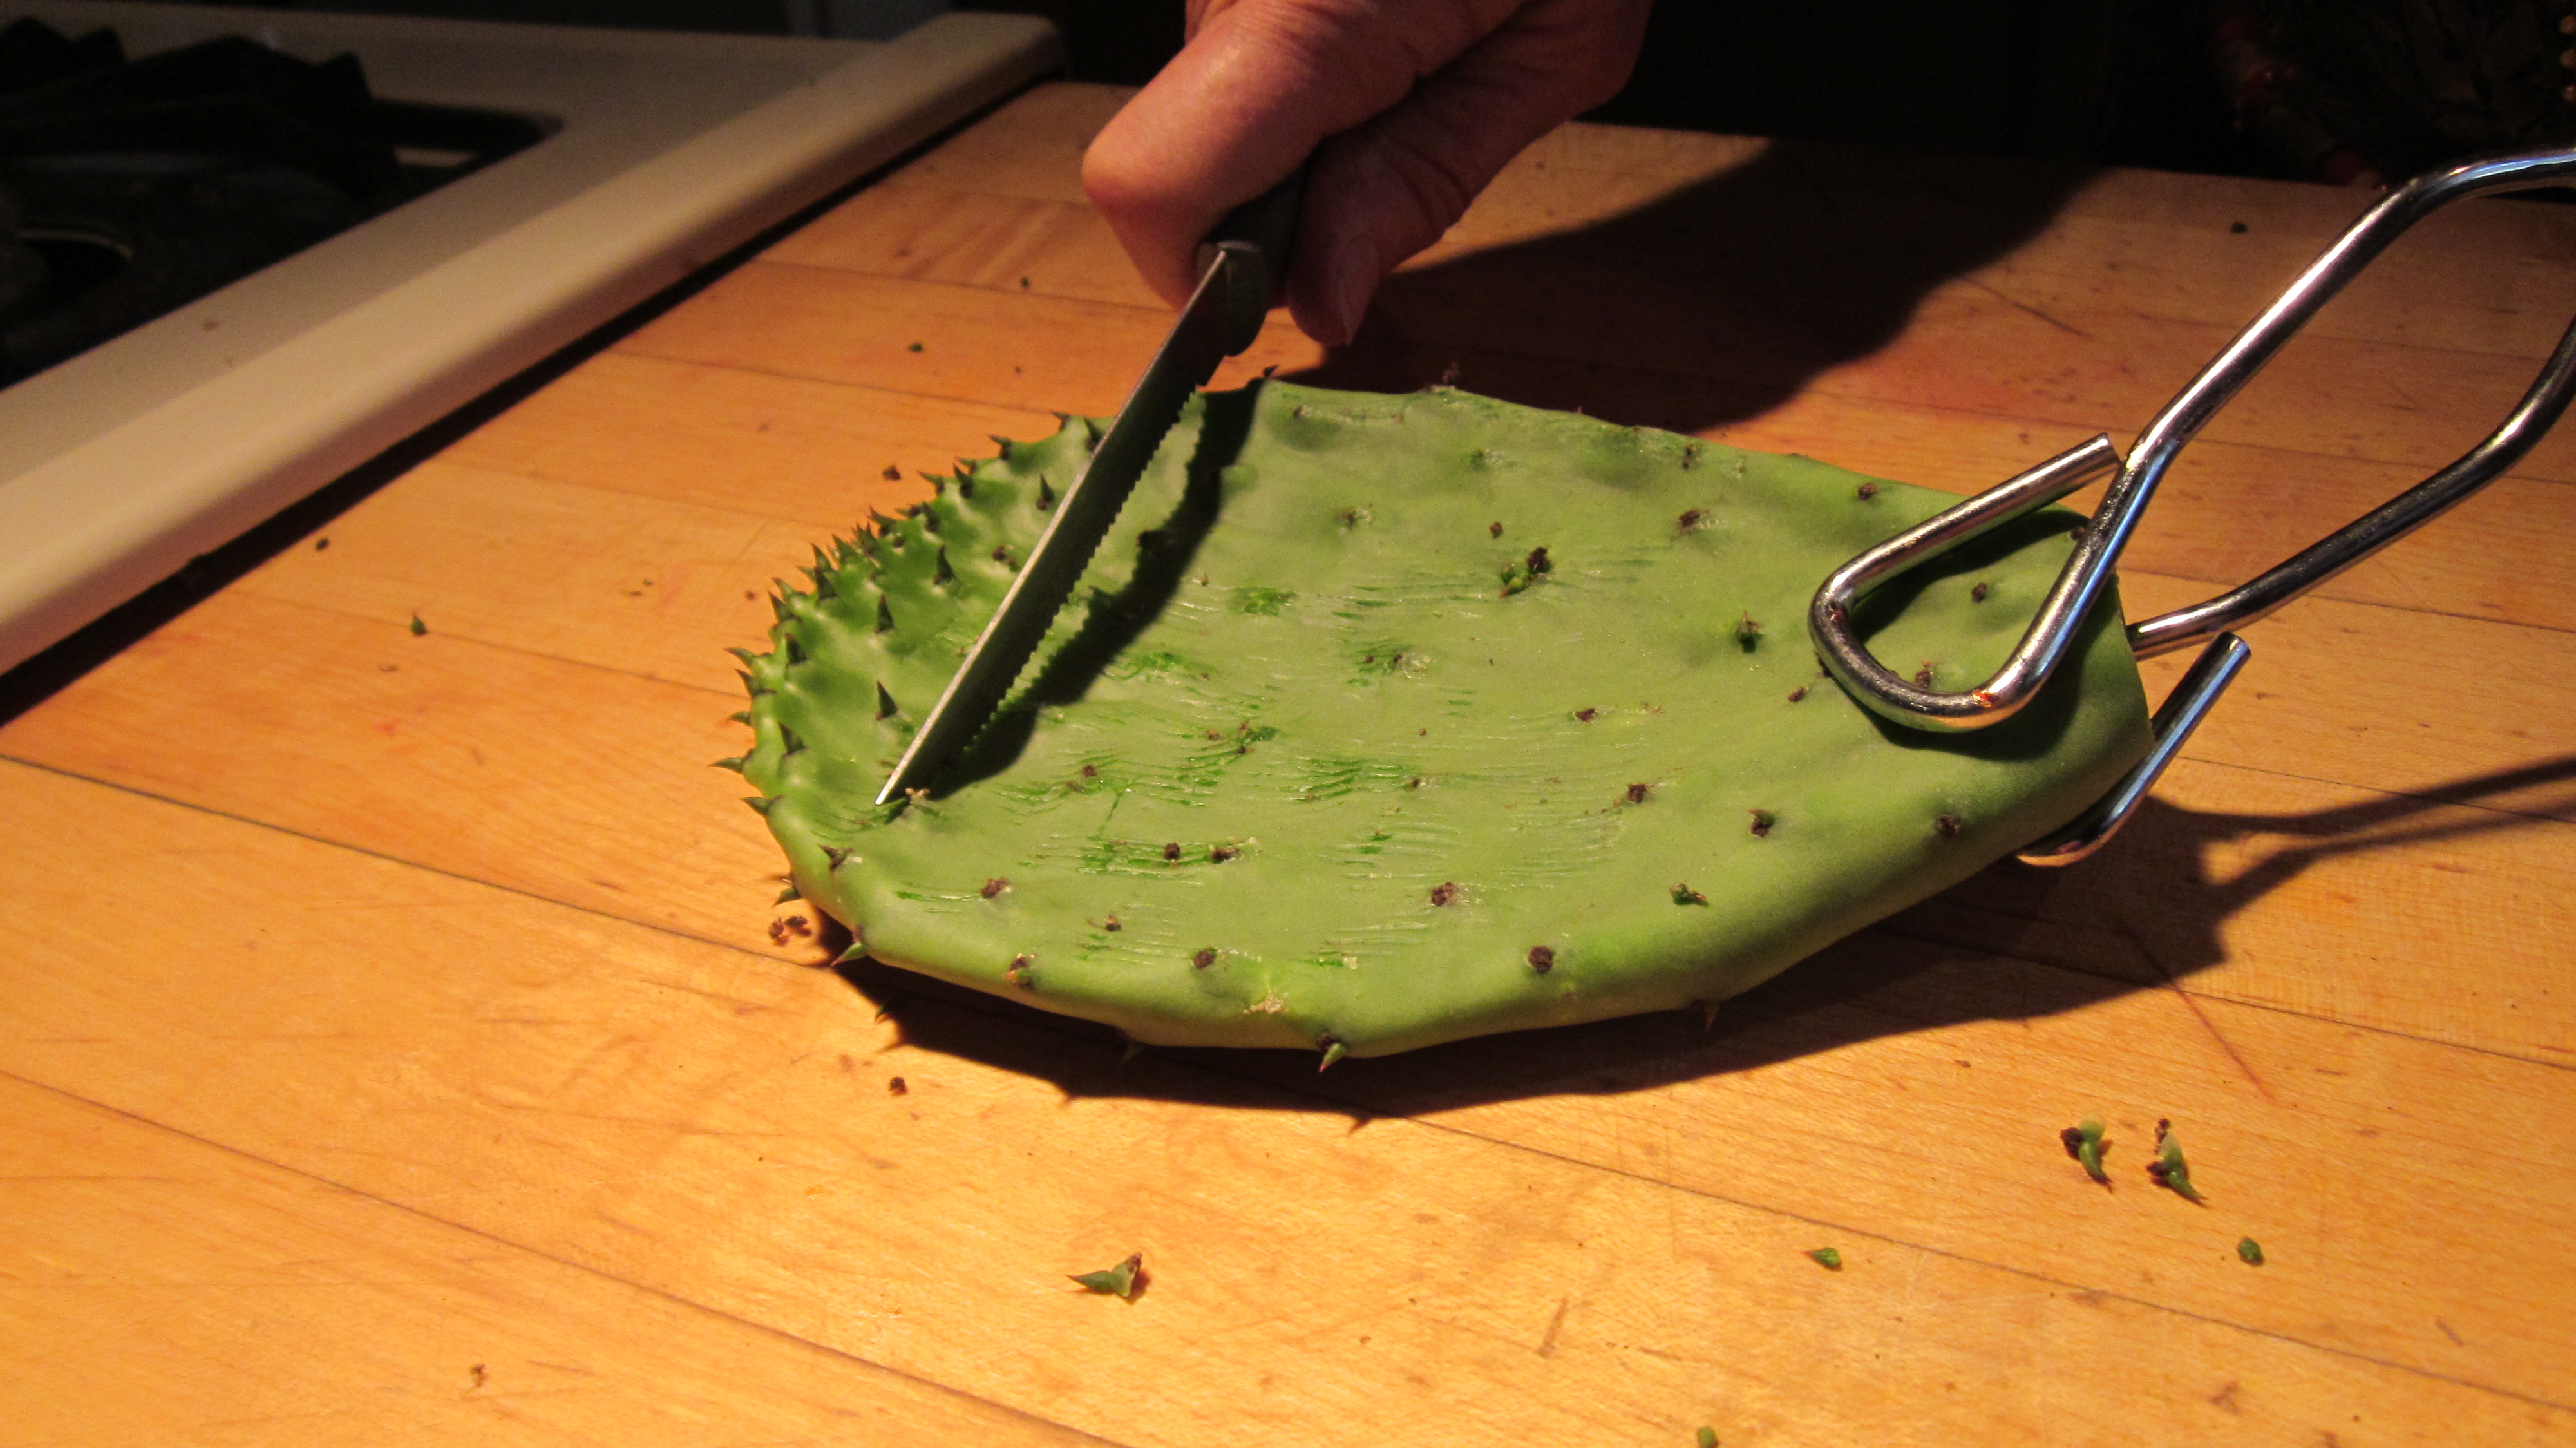
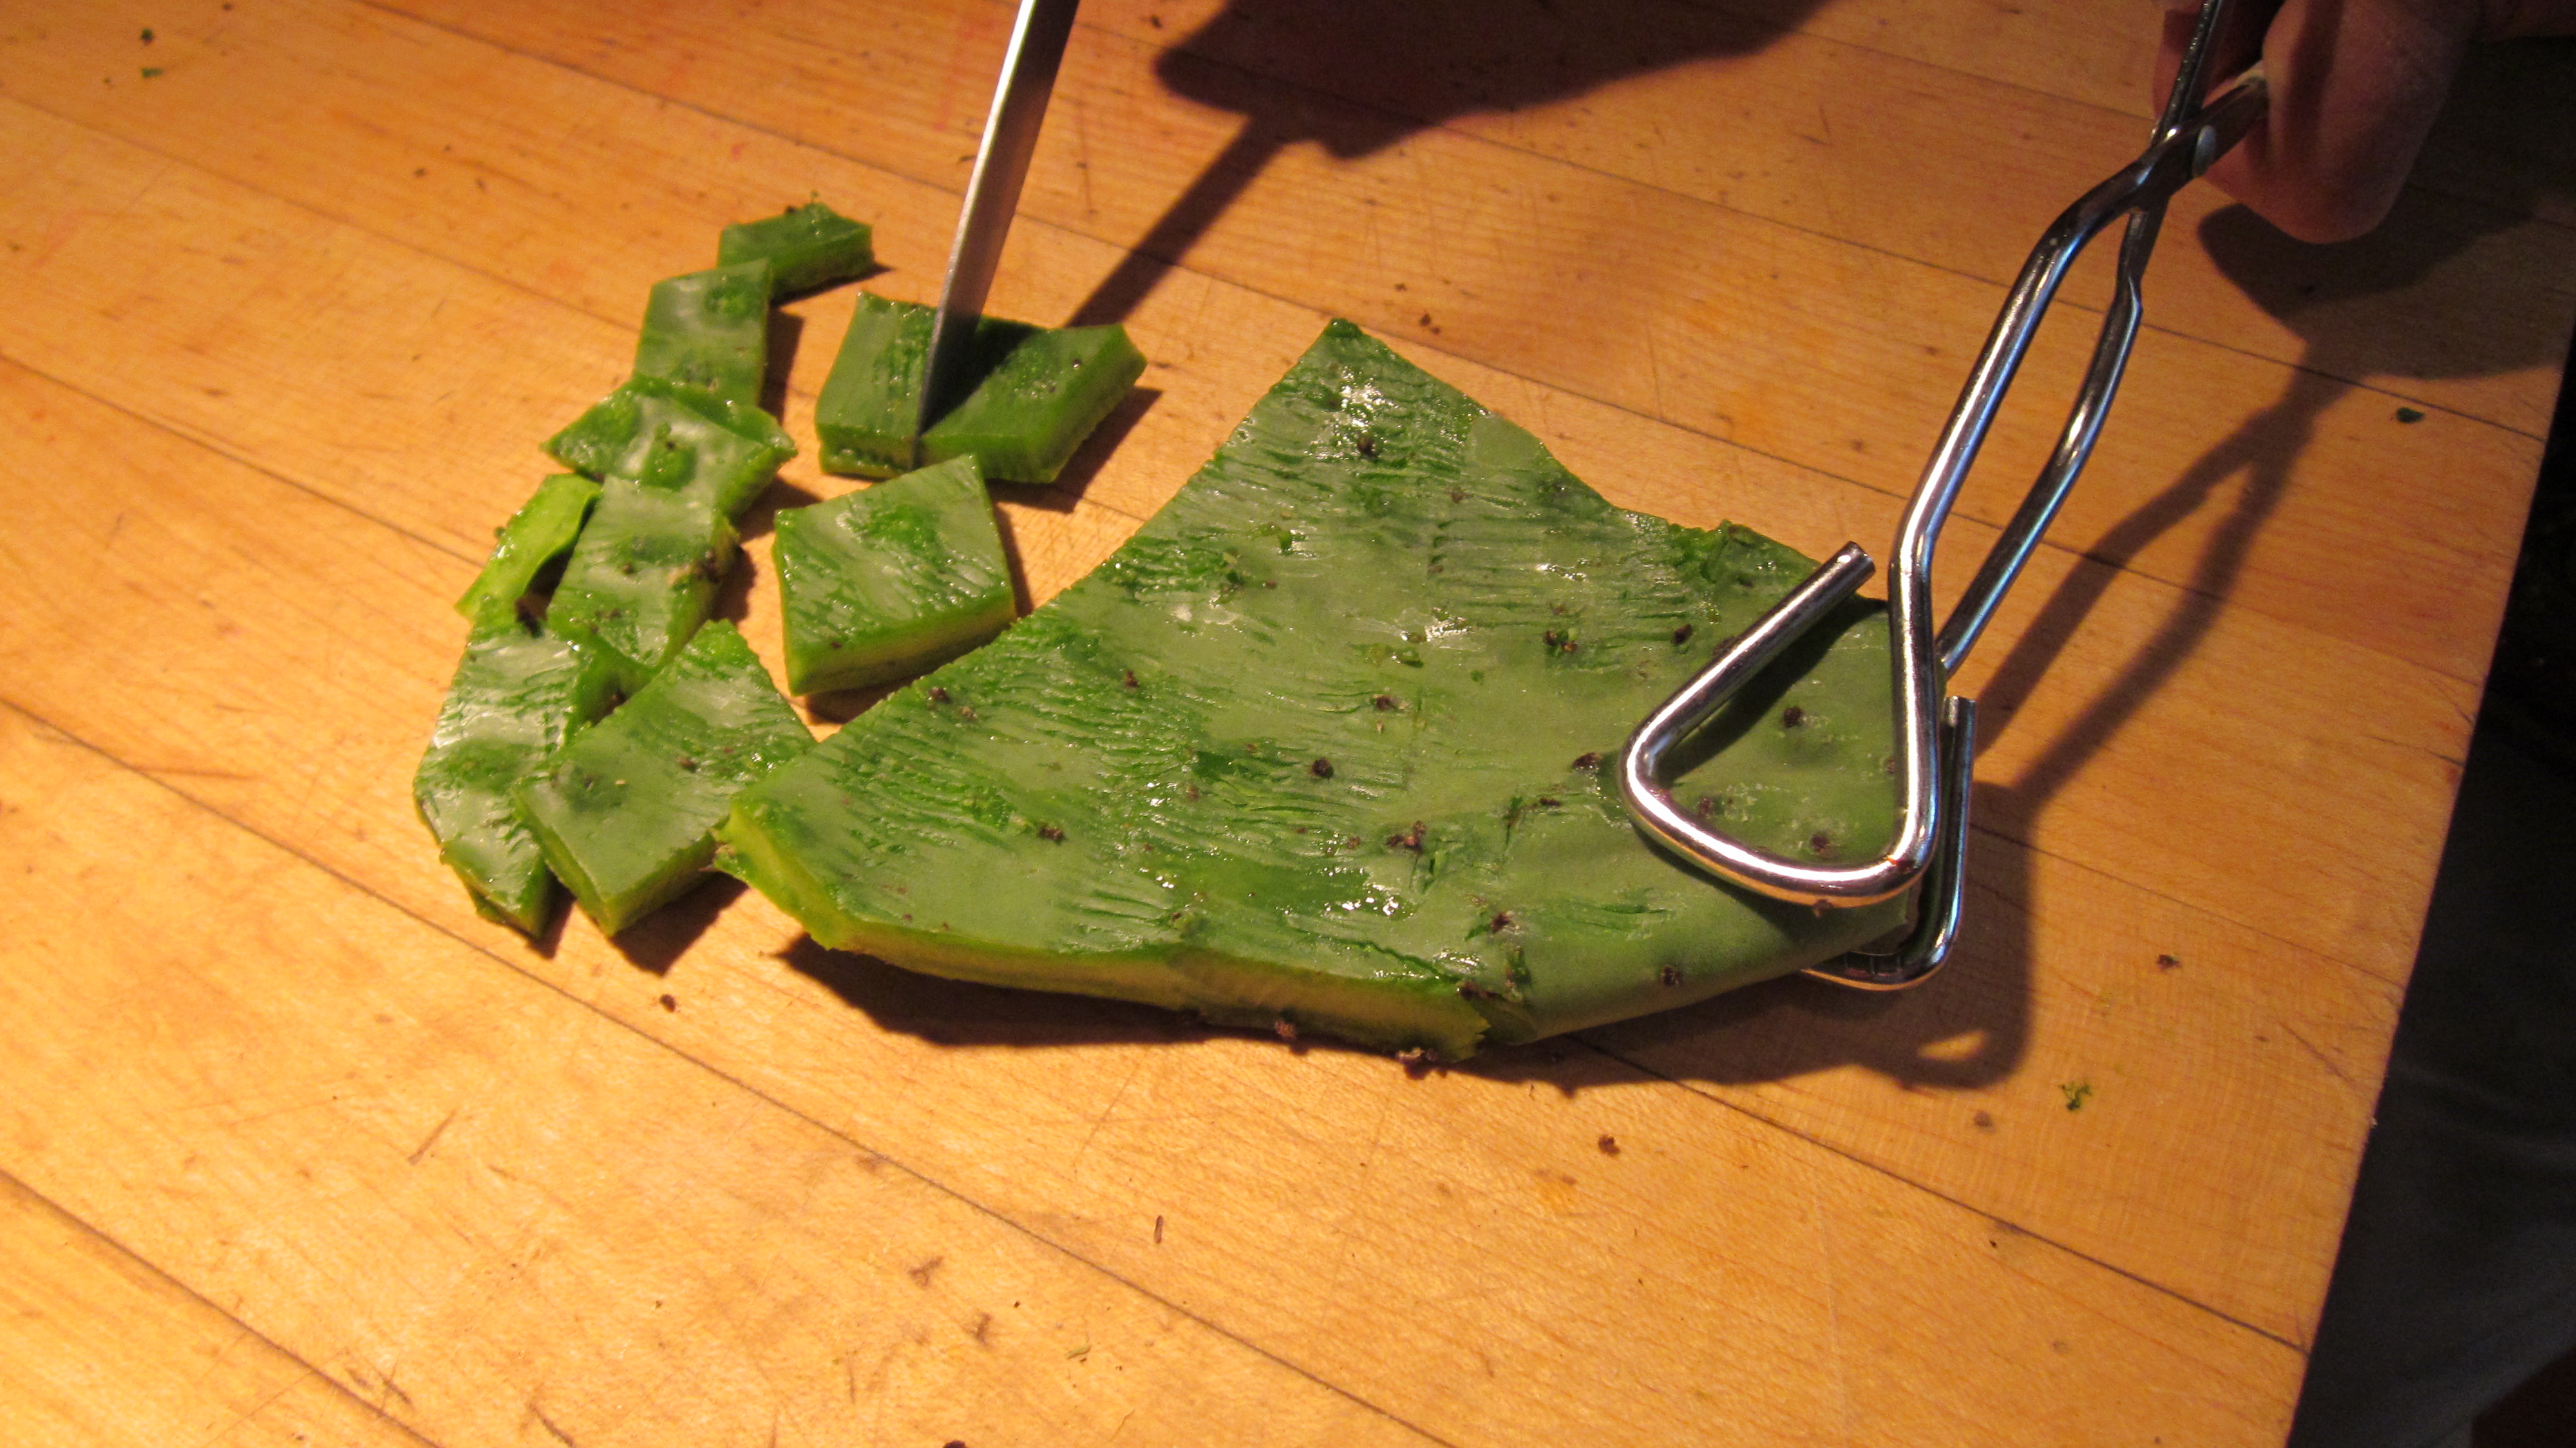
To prepare the nopales, you’ll use tongs, of course, and then don rubber kitchen gloves to protect your hands as you get rid of the stickers. You don’t need industrial strength gloves, just good quality ones from the grocery store will do. Using a common steak knife, scrape vigorously against the growth (from outer edge to stem) to remove the stickers.
Scrape the thorns vigorously in the direction of the stem.
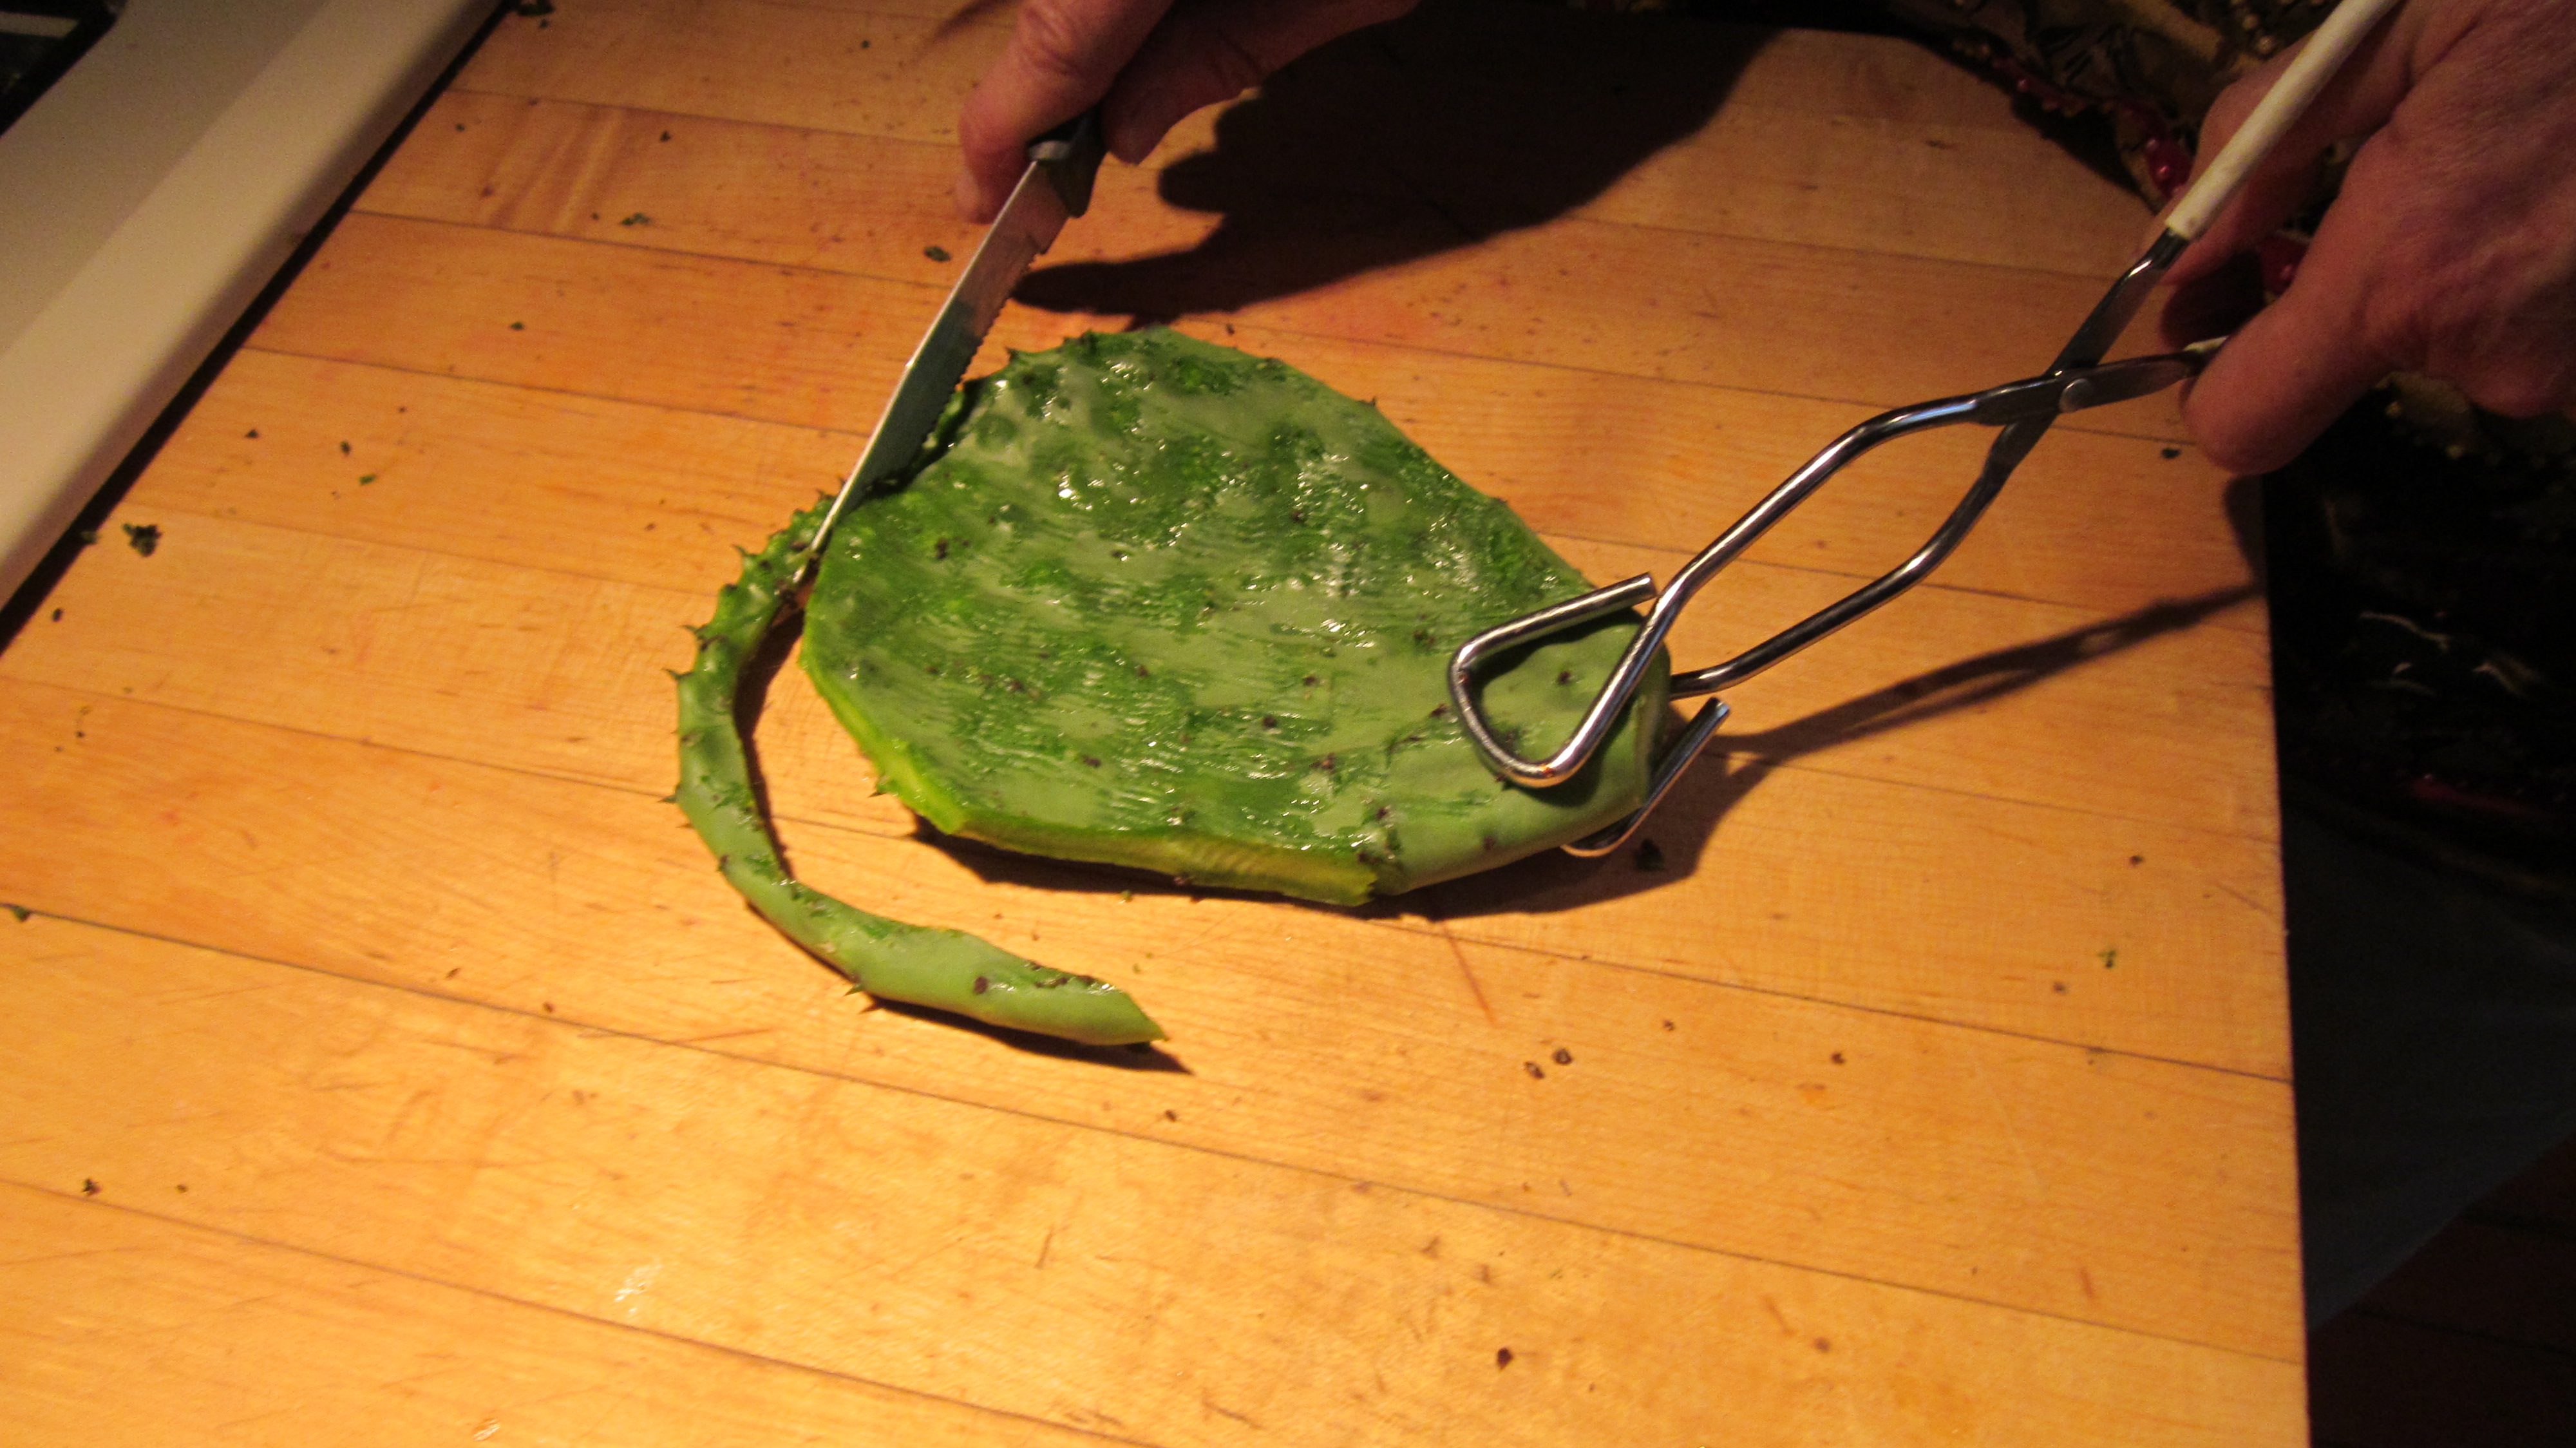
The edge has lots of stickers so just trim it off.
At this point, you can cut it into small pieces to cook or leave it whole and cut it up later. You can cook them in a frying pan filmed with oil, or use the Rick Bayless method (of TV show fame) and toss them with a little oil, sprinkle with sale, put on a cookie sheet and roast in a 375 degree oven for 20 minutes. In any case, you should check them and turn them over as they cook.
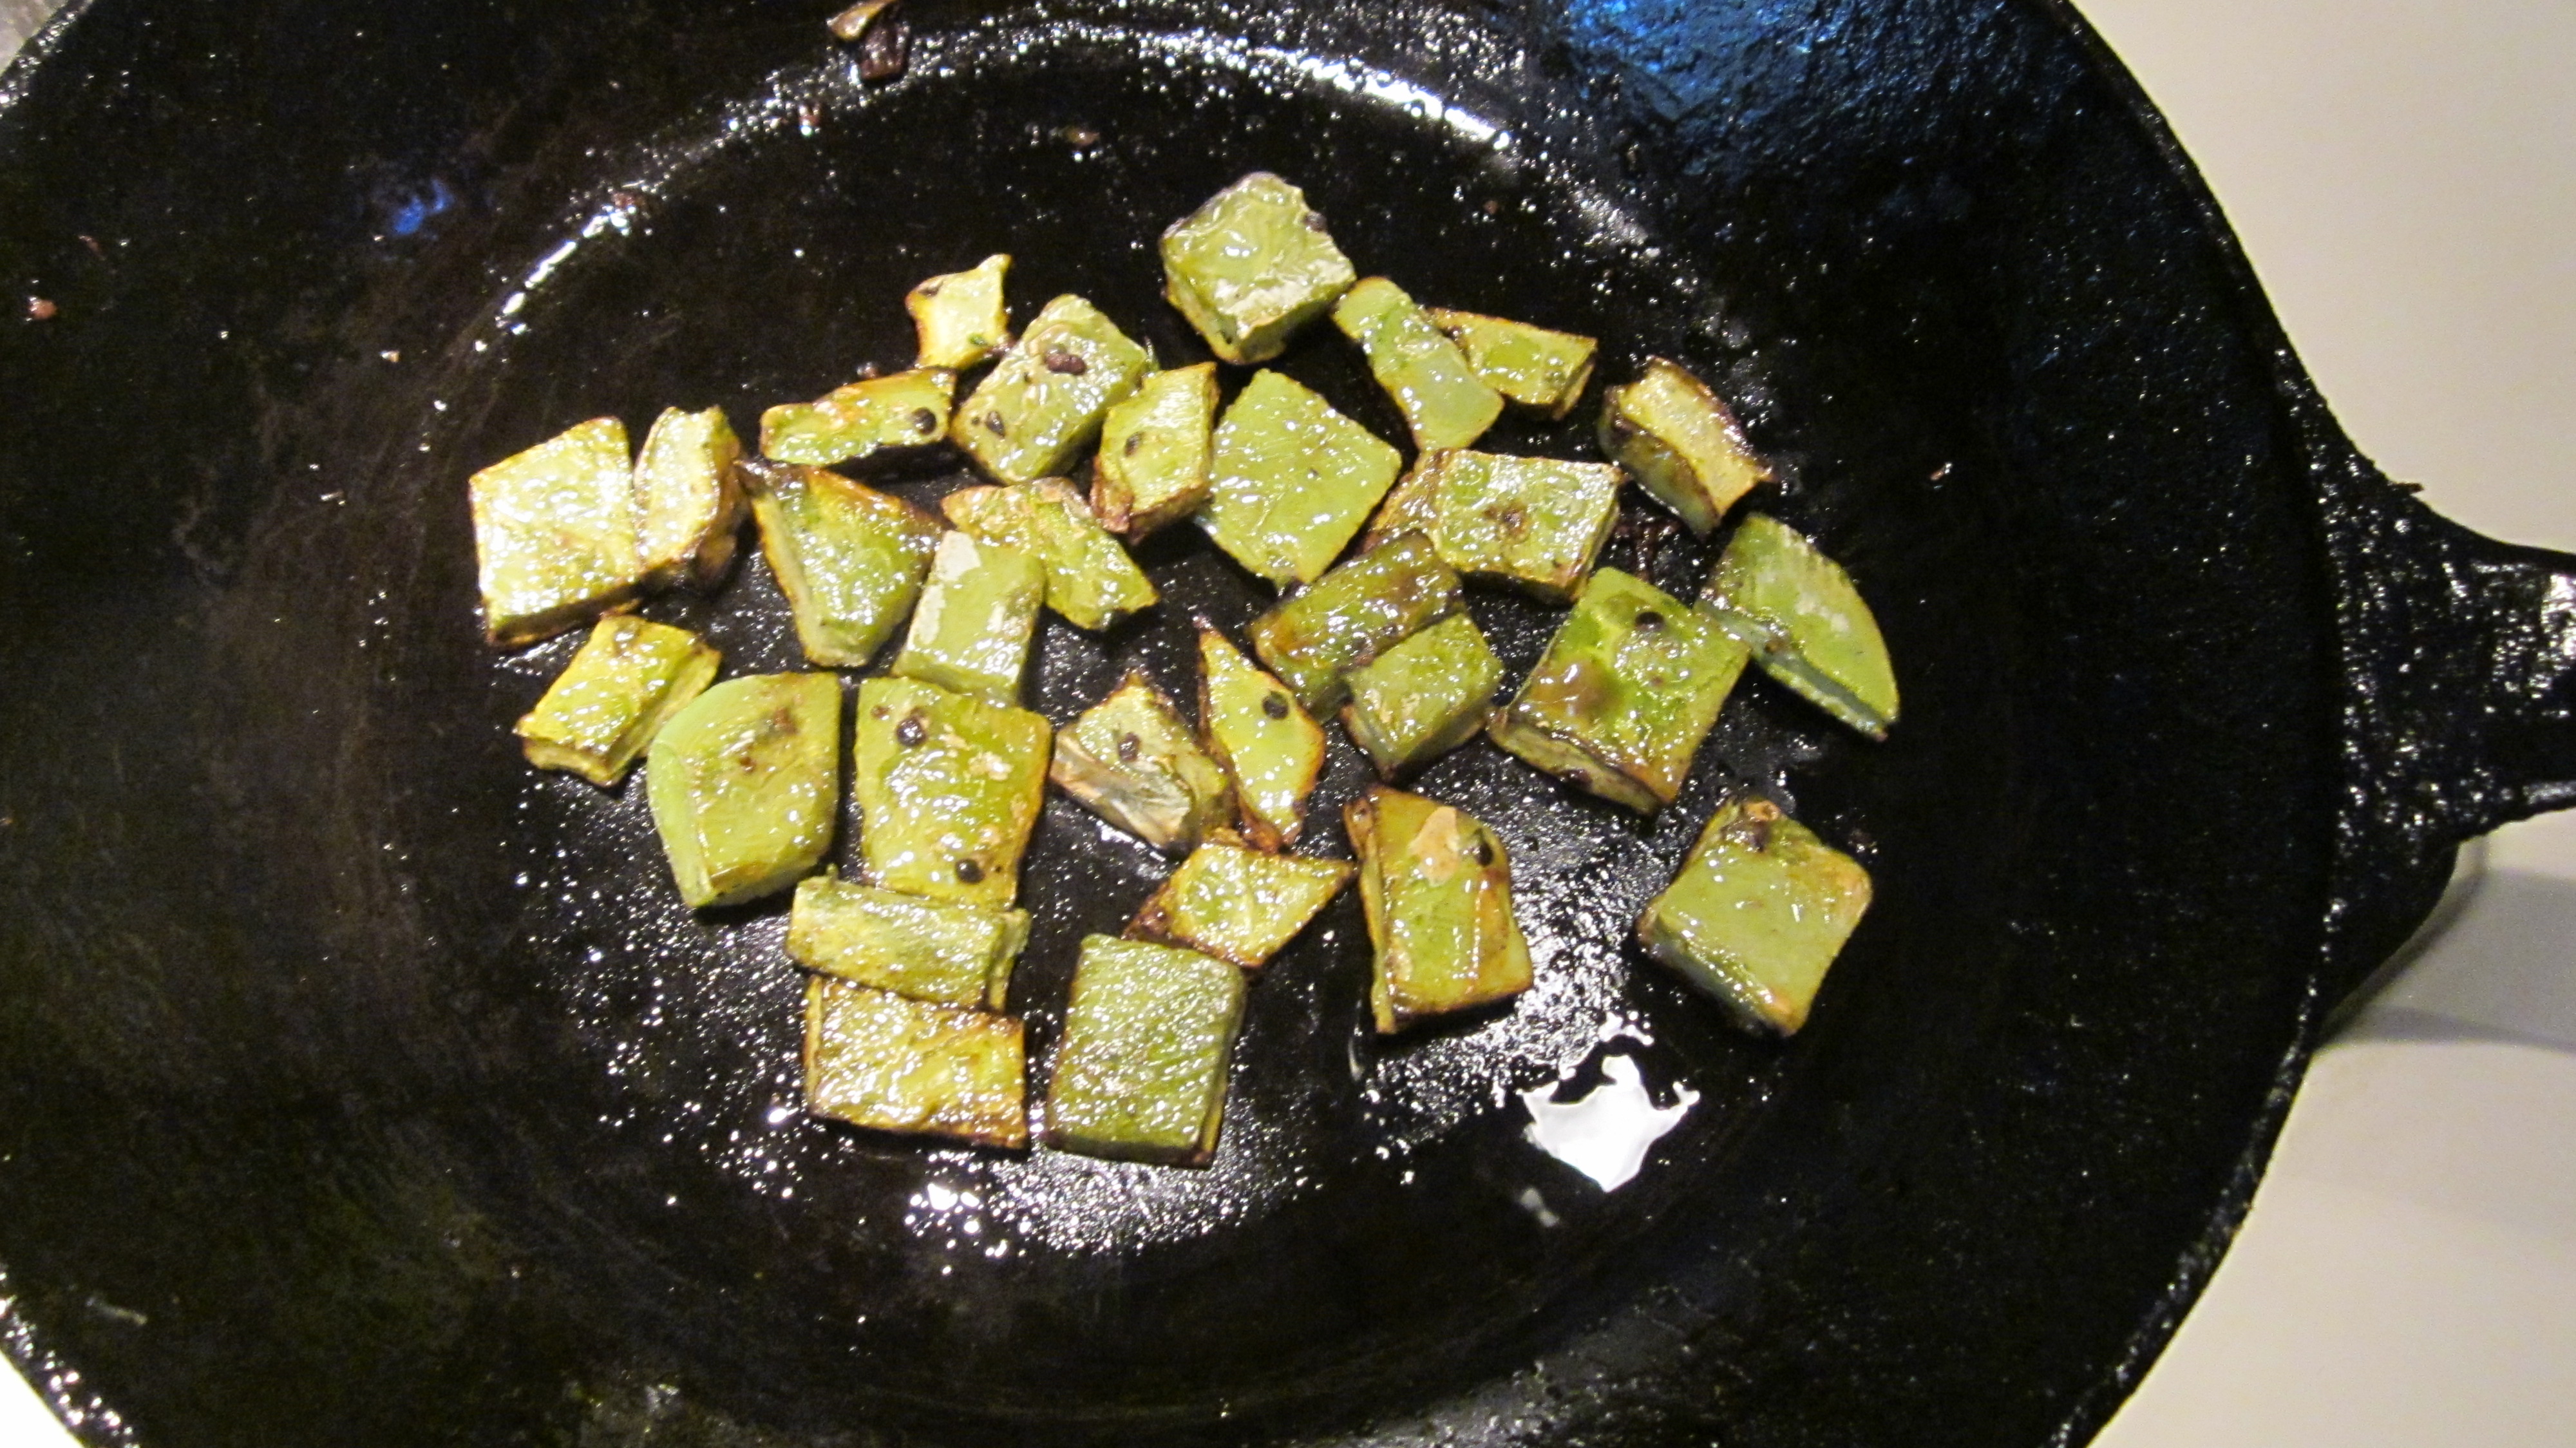
Cut into small pieces to cook.
The nopales will turn from bright green to a more olive color as they cook. The gummy sap that some people find objectionable will dry up and become less noticeable.
The cooked nopalitos turn from bright green to olive.
You can also cook nopales on the barbecue alongside some chicken to make a delicious taco.
Here’s the recipe for the sauce in the picture at the top of the blog:
Nopalito and Pineapple Salsa
1 raw, cleaned prickly pear pad
1 tablespoon vegetable oil
1 cup canned crushed pineapple packed in it’s own juice
¼ cup finely chopped red bell pepper
¼ cup thinly sliced green onions, including some tops
1 tablespoon canned green chiles
1 finely minced serrano chile (optional)
½ teaspoon finely minced garlic
2 tablespoons lime juice
¼ teaspoon salt
1 tablespoon finely minced cilantro (optional)
Cut prickly pear pad in 1 ½ inch squares. Film a heavy frying pan with the oil and add the prickly pear pads. Cook over low heat, turning occasionally, until pieces have given up much of their juice and are slightly brown. Remove from pan, cool, and chop into pieces as wide as a matchstick and about ¼-inch long.
Transfer to medium bowl. Add remaining ingredients, stir to combine and set aside for flavors to mingle.
Nopalito and Bean Salsa
Here’s an even easier recipe and you might have everything except the nopales in your pantry.
1 1/2 cups commercial red salsa
1/2 cup canned black beans, rinsed
1/2 cup cooked nopalitos
1 tablespoon lime juice
1-2 tablespoons chopped cilantro
Combine all ingredients in a bowl. Serve with chips.
______________________
You can learn more about the history of food in Southern Arizona in my latest book A Desert Feast, the story of the last 4,000 years of food in the Sonoran Desert. Want more recipes using foods of the Southwest? You’d find ideas for collecting and using 23 easily recognized and gathered desert foods in Cooking the Wild Southwest: Delicious Recipes for Desert Foods. . Recipes from top Southwest chefs are collected in The New Southwest Cookbook. Just click on the titles for more information. You can learn more about me on my website.
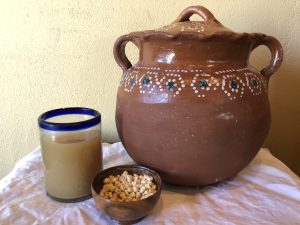
Clay Olla with Tohono O’odham 60-day corn, and tesgiüino corn beverage
Greetings from Tucson, it’s Savor Sister Emily here with my first official post! I am excited to be here, and am looking forward to hearing from you in the comments below. I first encountered tesgüino (tes-WEEN-oh) while learning about the traditions of the Rarámuri people at Mission Garden’s Rancheria (Beterachi) exhibit in Tucson, Arizona. I only knew a bit about the Tarahumara people who have lived since time immemorial in the rugged and beautiful mountains of Chihuahua in northern Mexico, called the Sierra Tarahumara. I soon learned to call them by their tribe’s own name for themselves: Rarámuri, as opposed to “Tarahumara” which was introduced by the Spanish. Many people have heard of the Rarámuri tradition of running long distances, but perhaps fewer people are familiar with another unique aspect of their culture which is found in a beverage called tesgüino.
Tesgüino is the Spanish name for a fermented corn beverage, primarily made from corn and water. The written observations of ethnographer John Kennedy in 1959 describe the important role that the beverage plays in the spiritual and ceremonial traditions of the Rarámuri people. It is also commonly enjoyed in social and community life. Known in the Rarámuri language as batàri and suguí, tesgüino is so integral to the culture that the average Rarámuri family might use 200 pounds of corn annually just for making tesgüino (Kennedy 634).
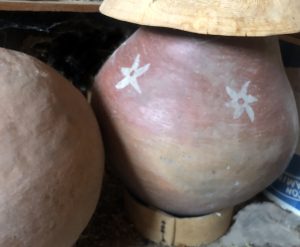
Clay olla tesgüineras with star pattern.
At least 4,500 years ago, corn became a vital crop for indigenous peoples in the Southwest, including the Rarámuri who developed and care-take many different corn varieties. Similarly, here in the neighboring Sonoran Desert, the Tohono O’odham have cultivated a fast growing 60-day corn for thousands of years and it still thrives today. I wondered if the 60-day corn indigenous to Cuk Shon could be made into tesgüino?
I reached out to my fermentation-obsessed researcher and friend Cesar Ojeda Linares in Mexico City who described to me the thick, distinctive beverage he tasted on his journeys and exploration in northern Mexico. He provided an excellent guide on how to make tesgüino according to what he learned in the community there. He found it similar to a type of atole, but thicker and with a stronger aroma. It is possible to find recipes for making tesgüino (including in Sandor Elix Katz’s book, The Art of Fermentation). Here is a fun short video on Vimeo of Señora Chenta from Alamos, Sonora making tesgüino using her traditional methods. Variations between recipes are part of the fun–diversity is where it’s at! But the basic recipe for this corn beverage always begins with dry corn kernels which are sprouted and grow roots, a simple process known as malting. This malting produces sweet sugars which can then be naturally fermented in water with the aid of healthful microbes. Natural yeasts and bacteria are present on the corn, in the air, or in a trusty heirloom tesguinera vessel, but wild plants can also be added to introduce the preferred microbes which catalyze the process. Brome grass seed (Bromus arizonicus) and sweet stevia (Stevia serrata) are among the plants that could be used to inoculate the brew, according to Fermentaciones tradicionales indígenas de México. After brewing for three to five days, the tesgüino is a mildly alcoholic, mildly sweet, refreshing and healthful beverage, best enjoyed when shared amongst family and friends.
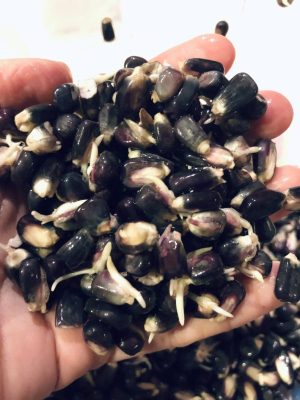
Roots emerge from kernels of blue corn after three days.
I made the beverage with O’odham 60-day corn in a clay olla following the directions below, and once again using Navajo Blue corn fermented in a ceramic salt glazed crock.
An important note on sugar. Sugar cane came to the America’s in the 15th century. Piloncillo (raw brown sugar cone) is thus not a truly “traditional” ingredient, but it has been common in the region for a long time. Including it certainly excites the hungry microbes, and the resulting beverage is not very sweet. In a traditional Rarámuri tesgüino, the tesguinera pot instead carries the inoculating microbes that kickstart the process (much like yogurt).
Recipe and Directions for Tesgüino Makes about 3 gallons tesgüino
3 pounds dry heirloom corn, preferably dent or flour varieties, organic and non-GMO. 3 gallons water, ideally filtered and de-chlorinated, *see note. 3-4 cones or bricks piloncillo (unrefined pure cane sugar from international markets) 1-3 sticks cinnamon 0.5-1 teaspoon brewers yeast (ale yeast or similar- not baking yeast), optional but recommended. Palmful organic sweet stevia leaves, optional but recommended. Ask local farmers/gardeners.
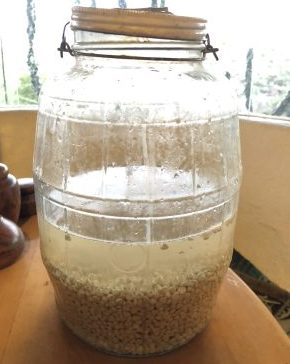
Dry corn first soaks in waterCorn seeds sprout in a large vessel after soaking and repeated rinsing.
1. Place dry corn in a large glass or plastic container (6+ quart size) such as a Cambro.
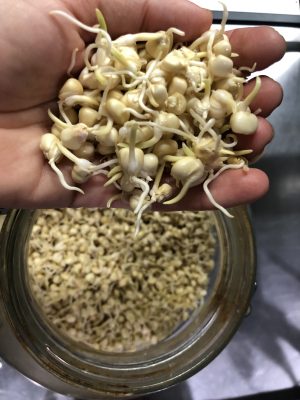
When corn seeds grow substantial roots, it is ready for grinding.
2. Cover with water and allow to soak overnight.
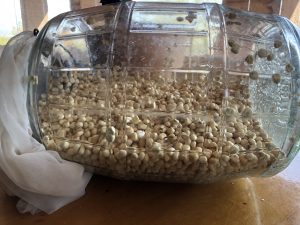
3. The next day, strain off the water, then cover opening with a breathable cloth or mesh lid and lay on its side, just like when sprouting seeds for eating. Store in a well lit, warm spot, avoiding direct sun.
4. Rinse and drain the corn in its container at least 2 times a day–more often is better, especially in warmer conditions.
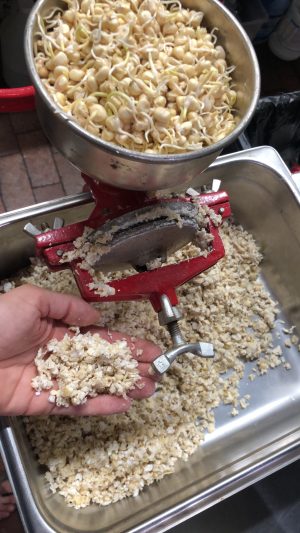
5. After a couple days, the corn will grow a little radical (root) and first shoot. This is very exciting! In three or four days, when nearly all the corn’s roots are about ½–1 inch long, it’s ready to grind.
60-day corn ground in a molino, in preparation for cooking and fermentation.
6. Pass the sprouted corn through a hand mill molino grinder on a coarse setting, so it resembles very coarse grits, or about the texture of cooked quinoa. If you don’t own a molino, pulse small batches in a food processor.
7. Place the ground corn in a large pot, ideally large enough to hold three (3) gallons of water and the corn together. Otherwise, you’ll need to work in two smaller batches (half the mixture at a time). Add the cinnamon, and gently boil the corn in water for 1-1.5 hours to extract its natural sweetness and flavor. Stir occasionally to prevent burning. After the time has passed, add the piloncillo sugar and simmer to dissolve.
Ground corn boiling in water with piloncillo
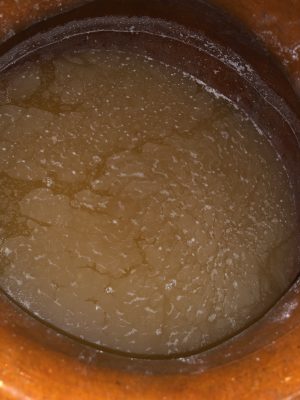
8. Cool the mixture and carefully strain to keep all the liquid in a 3+ gallon non-reactive fermentation vessel, *see note. The strained liquid will be thick and smooth in texture. Cover lightly with a tea towel, cloth napkin, or cheesecloth. (Compost the strained corn at this point, or feed to chickens.)
9. Once the liquid is completely cool (or the next day), add ½ to 1 teaspoon dry ale yeast, and fresh stevia leaves. Stir to dissolve. Keep covered with cloth.
Tesgüino fermenting, with the natural yeast visible on the surface (harmless).
10. Each day, wash your hands and visit your tesgüino, stirring well with a clean spoon. You will find increasing effervescence. Delight in the unique texture, aroma, and color.
11. On the fourth day, it should be ready to drink. Strain if desired to remove stevia leaves (if using). It’s time to taste and enjoy! Try both chilled and at room temperature to your liking.
Invite many friends to partake in the celebration, and raise a glass of appreciation to our Rarámuri neighbors who created this beautiful beverage.
Please write in the comments below about your experiences with fermenting corn, travel in Rarámuri lands, and tesgüino!
-Savor Sister Emily Rockey
Clay Olla with Tohono O’odham 60-day corn, and tesgiüino corn beverage
*Notes:
Water- Tap water can contain chlorine which can be counterproductive to fermentation (chlorine kills good beneficial microbes). Dechlorinating is easy: simply draw the water in a vessel and allow it to sit open at room temperature for a few hours. The chlorine naturally evaporates. Or boil water for 20 minutes and let it cool. Water is now ready to use for fermentation.
Vessels- This can be glass, ceramic, a clay olla, stainless steel, or food-safe plastic. Natural materials like clay will impart an earthy flavor on the tesgüino, while glass or ceramic does not.
Storage- Although it is best to enjoy all the tesgüino amongst friends at once, it is possible to refrigerate the drink for several days, or even freeze with good results.
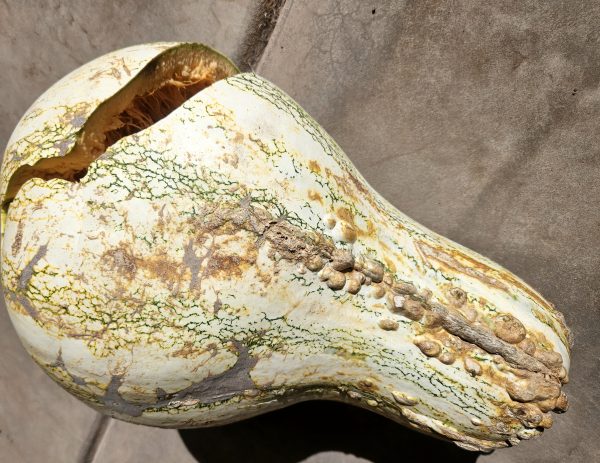
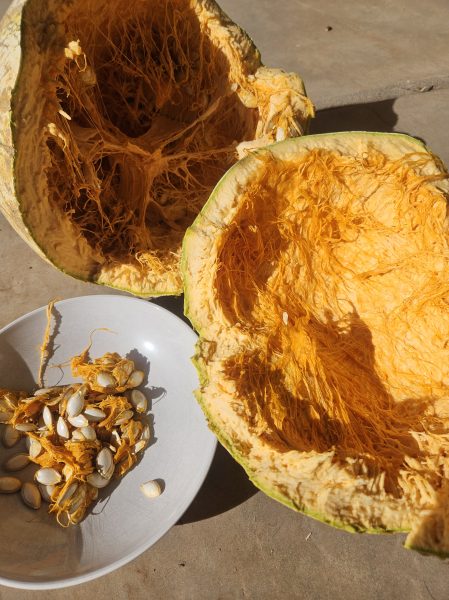
Hello friends, Amy here, with a BIG cushaw winter squash. For starters, it’s beautiful. Farmer Frank of Crooked Sky Farms has been sending Tucson CSA huge and tiny pumpkins and winter squashes for 20 years. People often ask us what to do with them. Well, twelve months a year I always have frozen winter squash in the freezer, ready for soup, pie, pumpkin bread and now ravioli.
Start by dropping on the patio until it cracks open. Big ones break more easily but sometimes little ones need to be slammed. This is much safer and easier than taking a cleaver to it.
Then I pry it open with my hands and scoop out the seeds, saving them for planting or eating.
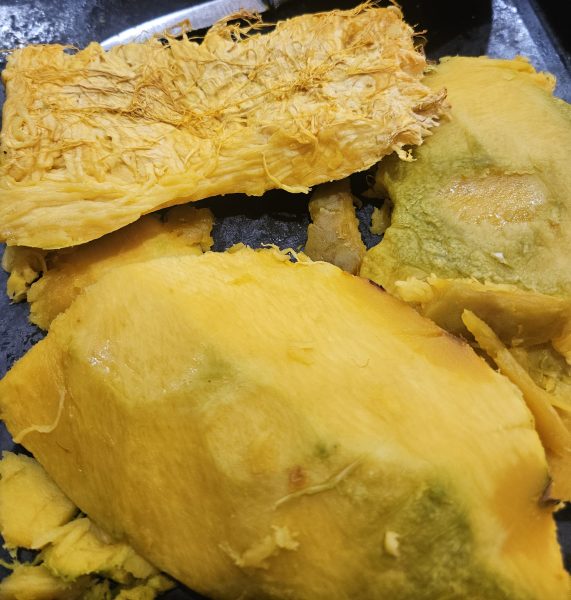
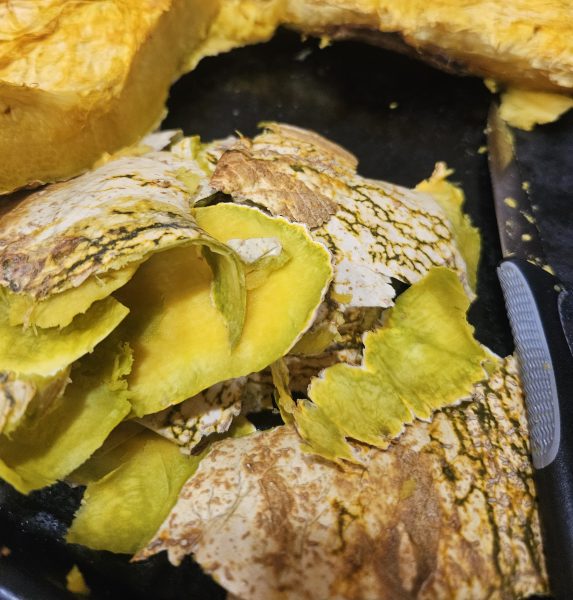
Place the pieces on a cookie sheet and bake uncovered at 350 F until a fork pierces the flesh easily and some of the moisture in the fruit evaporates. The flesh can be scooped out of the hard skin varieties with a big spoon or the skin can sometimes be trimmed off with a knife.
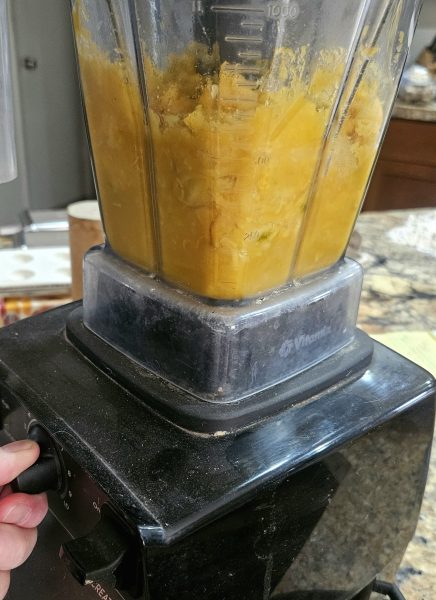
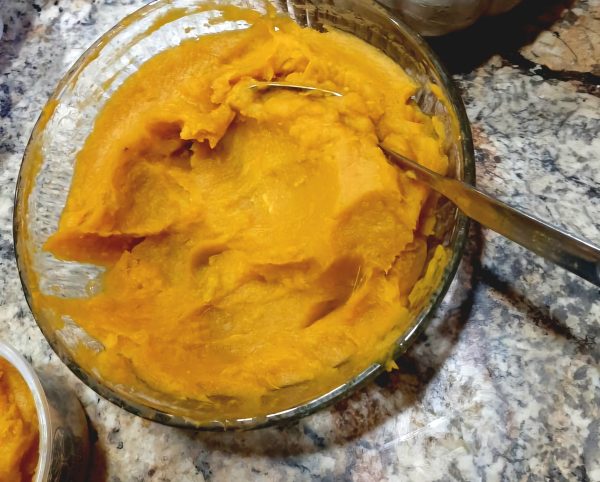
The flesh whizzed in a food processor or blender is pleasantly smooth. If I want texture, I add nuts to sweet creations or sautéed onion to savory concoctions. Stringy mashed squash turns many people away from the “mushy” vegetable entirely.
This cushaw squash was SO sweet and flavorful! If it wasn’t, I’d add a bit of sugar and salt to taste. This squash puree was thicker than normal, so I did not need to drain it. (It is critical to drain squash destined for pie or empanadas. Squash is very perishable, so I place the colander full of puree and bowl catching the liquid in the refrigerator. Don’t toss the liquid! It’s so good in a squash or vegetable soup.)
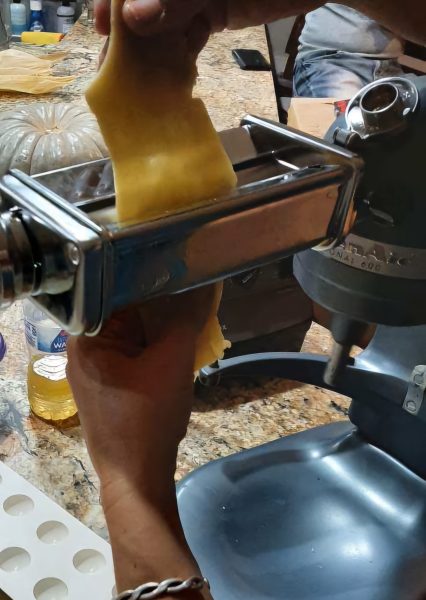
My uncle recently gave me a pasta roller attachment for the stand mixer and a ravioli press. I already own a hand crank roller that requires 3 hands to operate, and hasn’t been used in years. But inspired by the new toys, I wanted to put sweet, plentiful winter squash puree in ravioli.
Plus, I love food cooked in tiny edible parcels, like empanadas, stuffed grape leaves, cabbage rolls, spring rolls, pot stickers, samosas and floutas (taquitos)… What are your favorites?
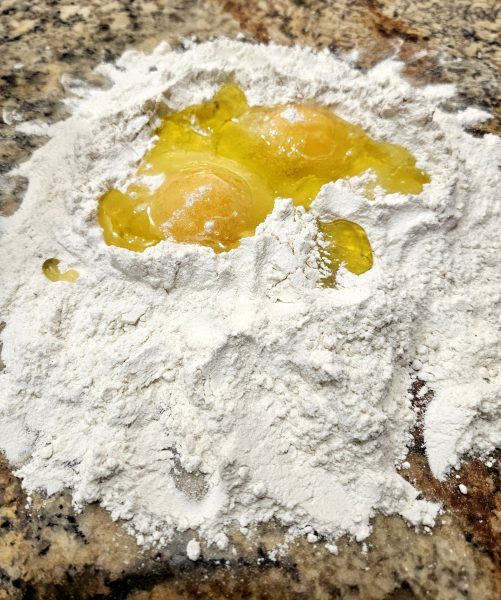
I tried different ravioli dough recipes with varying amounts of egg, water and olive oil, and everything I tried worked. It’s forgiving! But I liked the logic in this one, using a cup of all purpose flour, half a teaspoon salt, and egg and two yolks. I worked it on the countertop by hand and after an hour rest, I started to roll.
Apparently some home cooks use a machine to knead the dough, and some roll it out by hand. It’s forgiving! Basically, start the thickest roller setting and roll the dough through a few times before adjusting the setting a notch thinner.
This is easy but not fast!
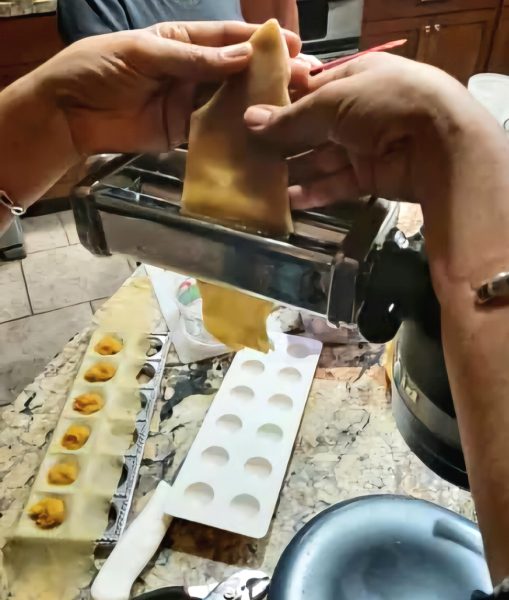
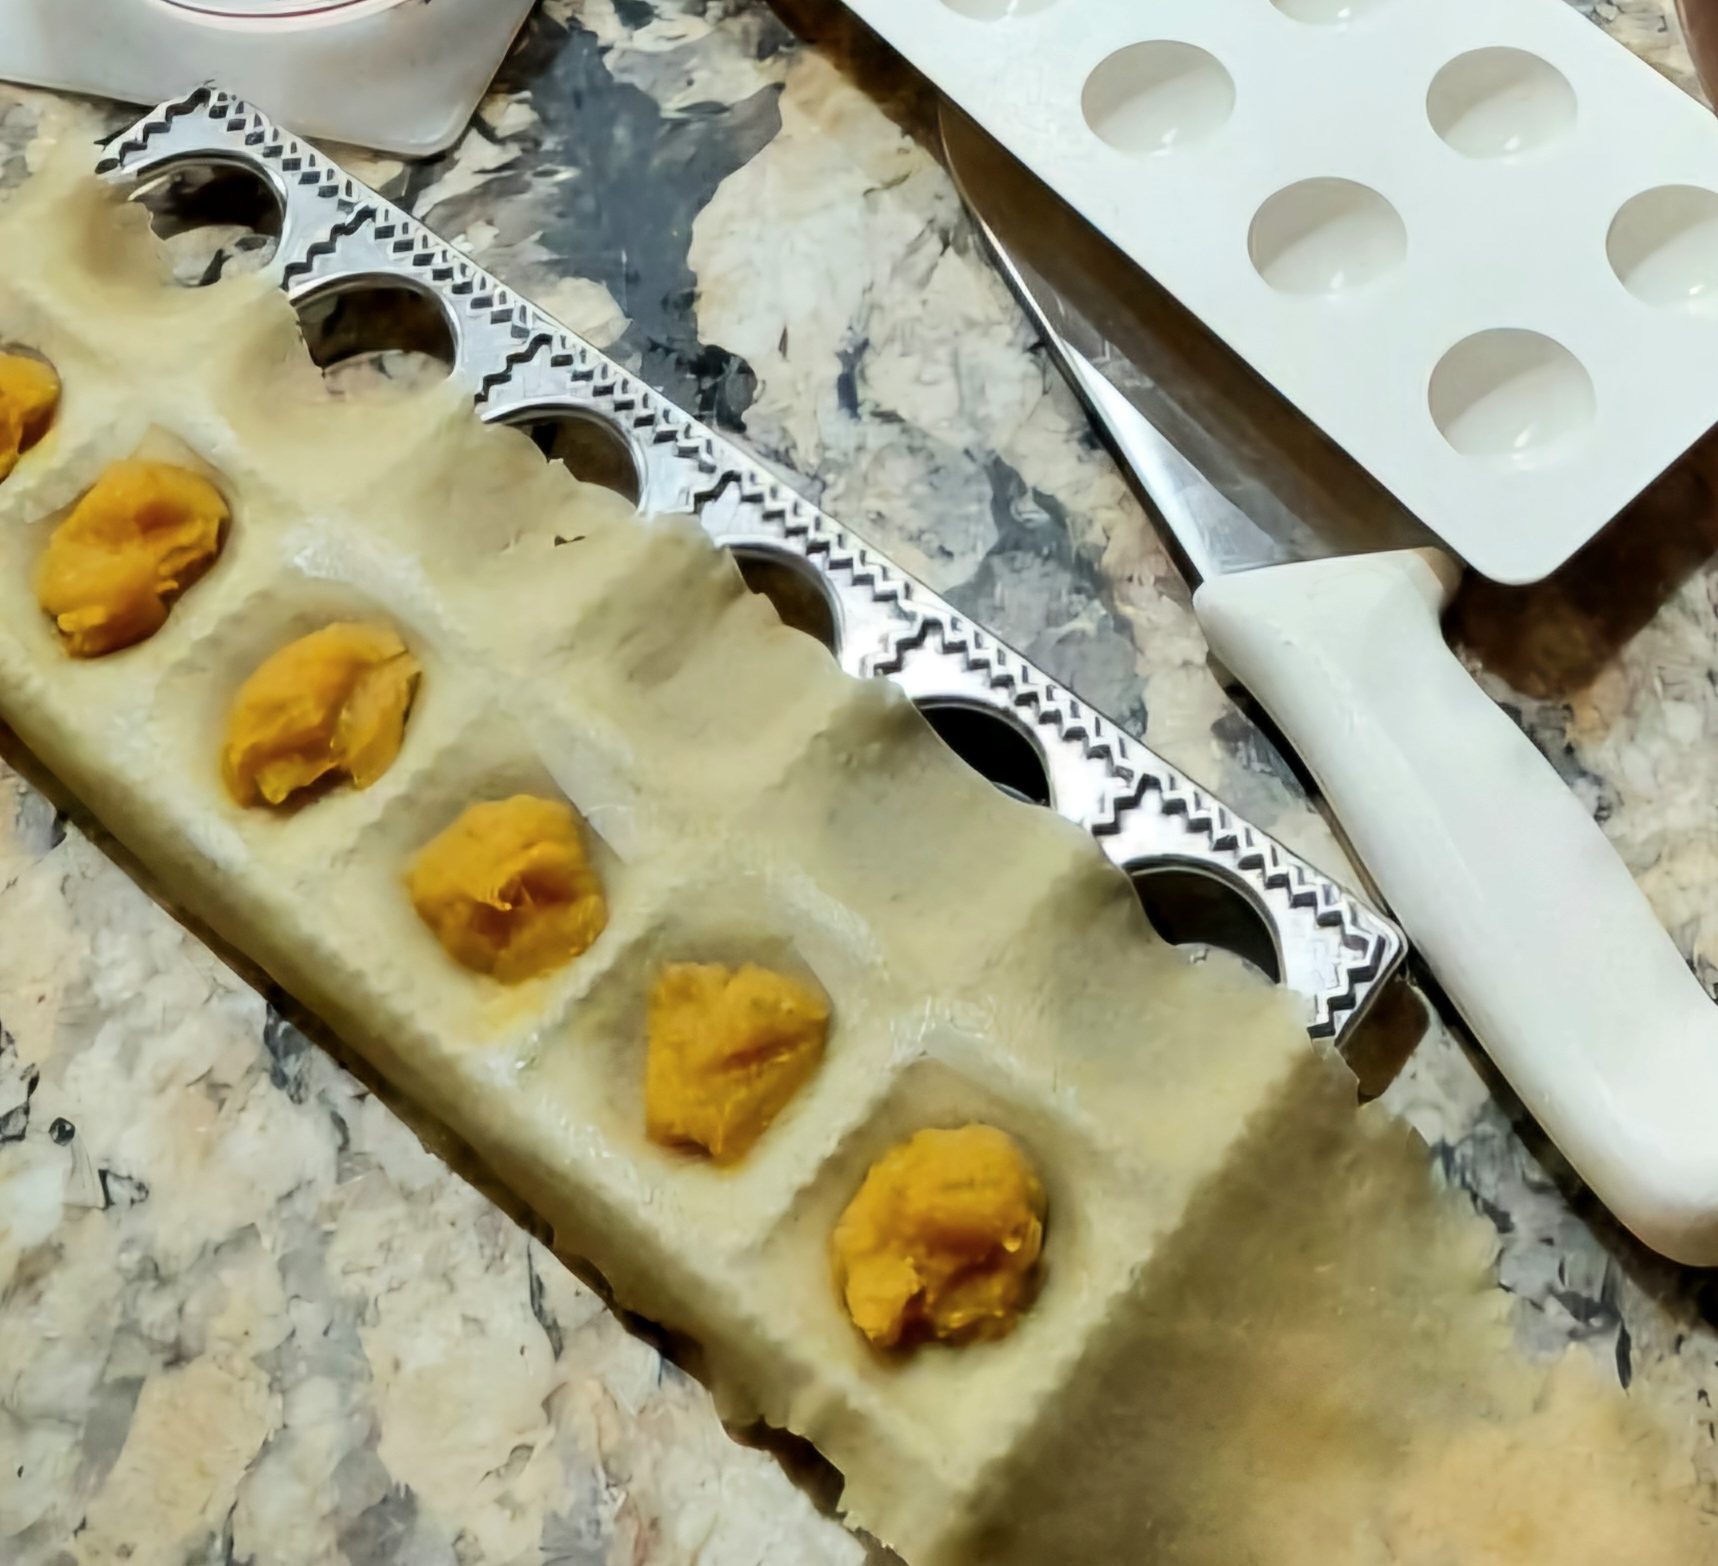
The form presses the thin dough into wells to hold a tablespoon of filling. I dabbed water along the seams to encourage better sealing, just in case. With the top sheet of dough covering the filling, it was easy to seal and perforate by using a rolling pin over the top.
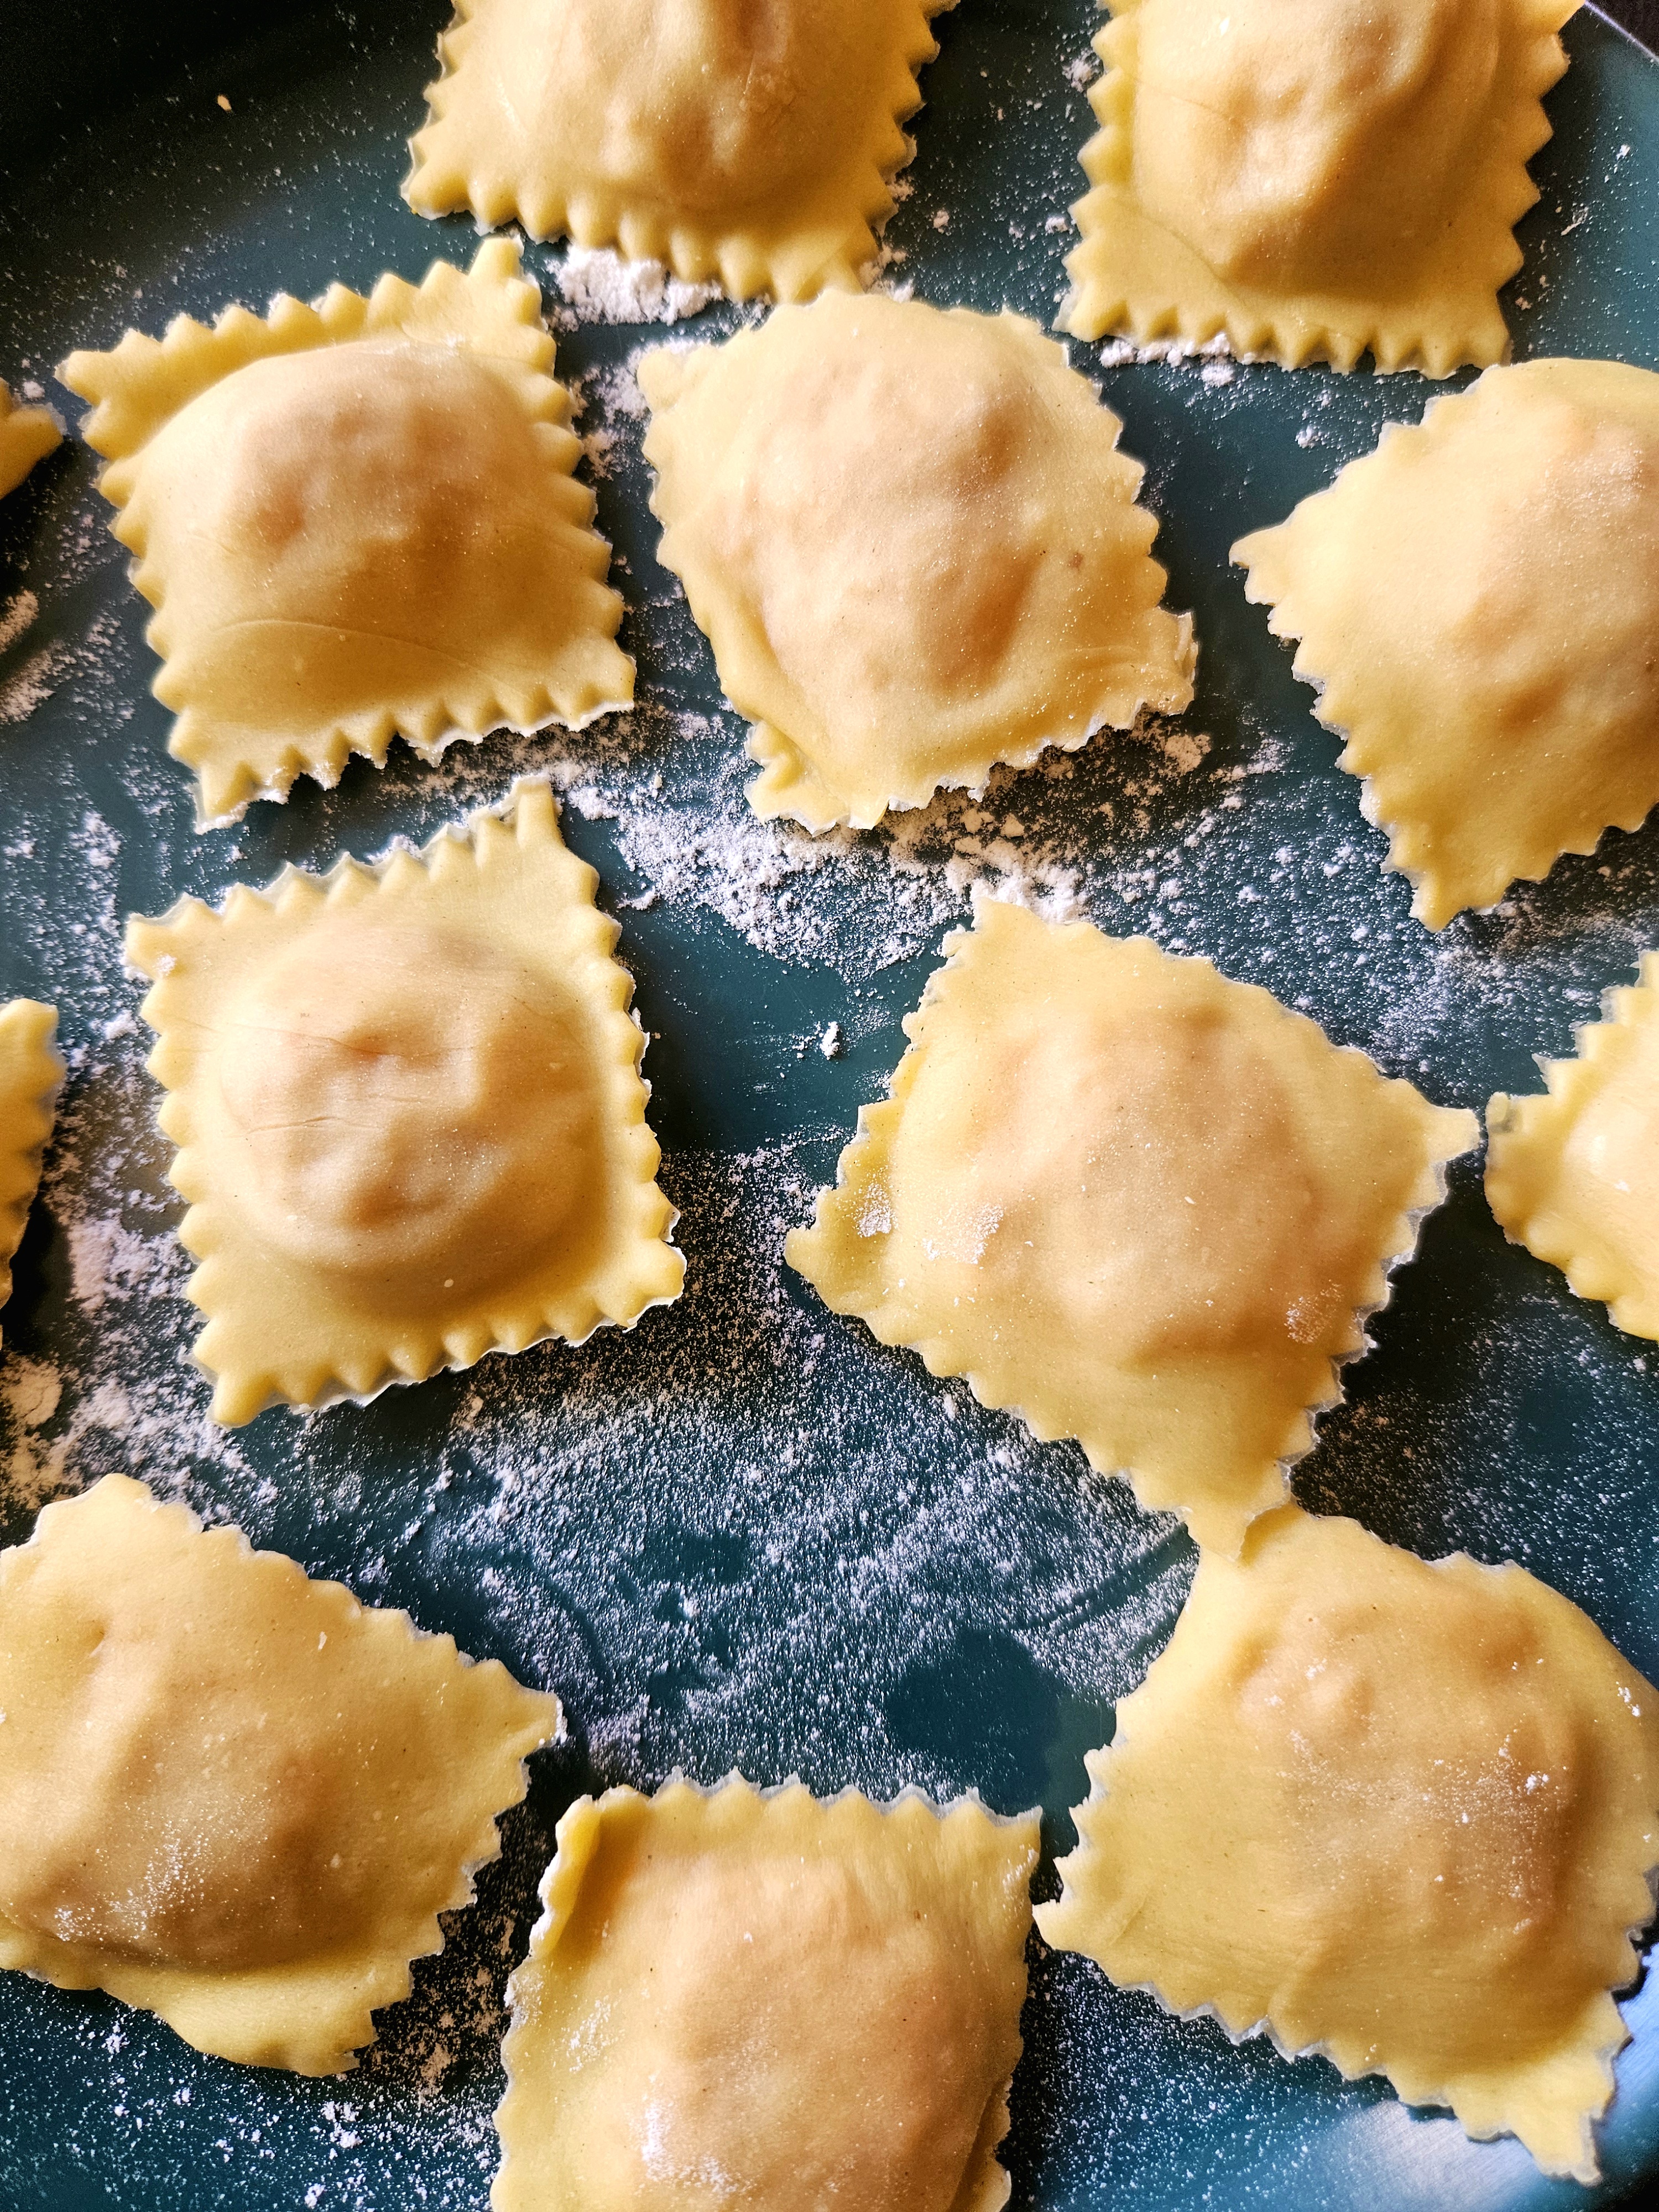
This gimmicky looking tool is efficient! Dusted with flour and resting in a single layer, they are tidy, symmetrical and well sealed.
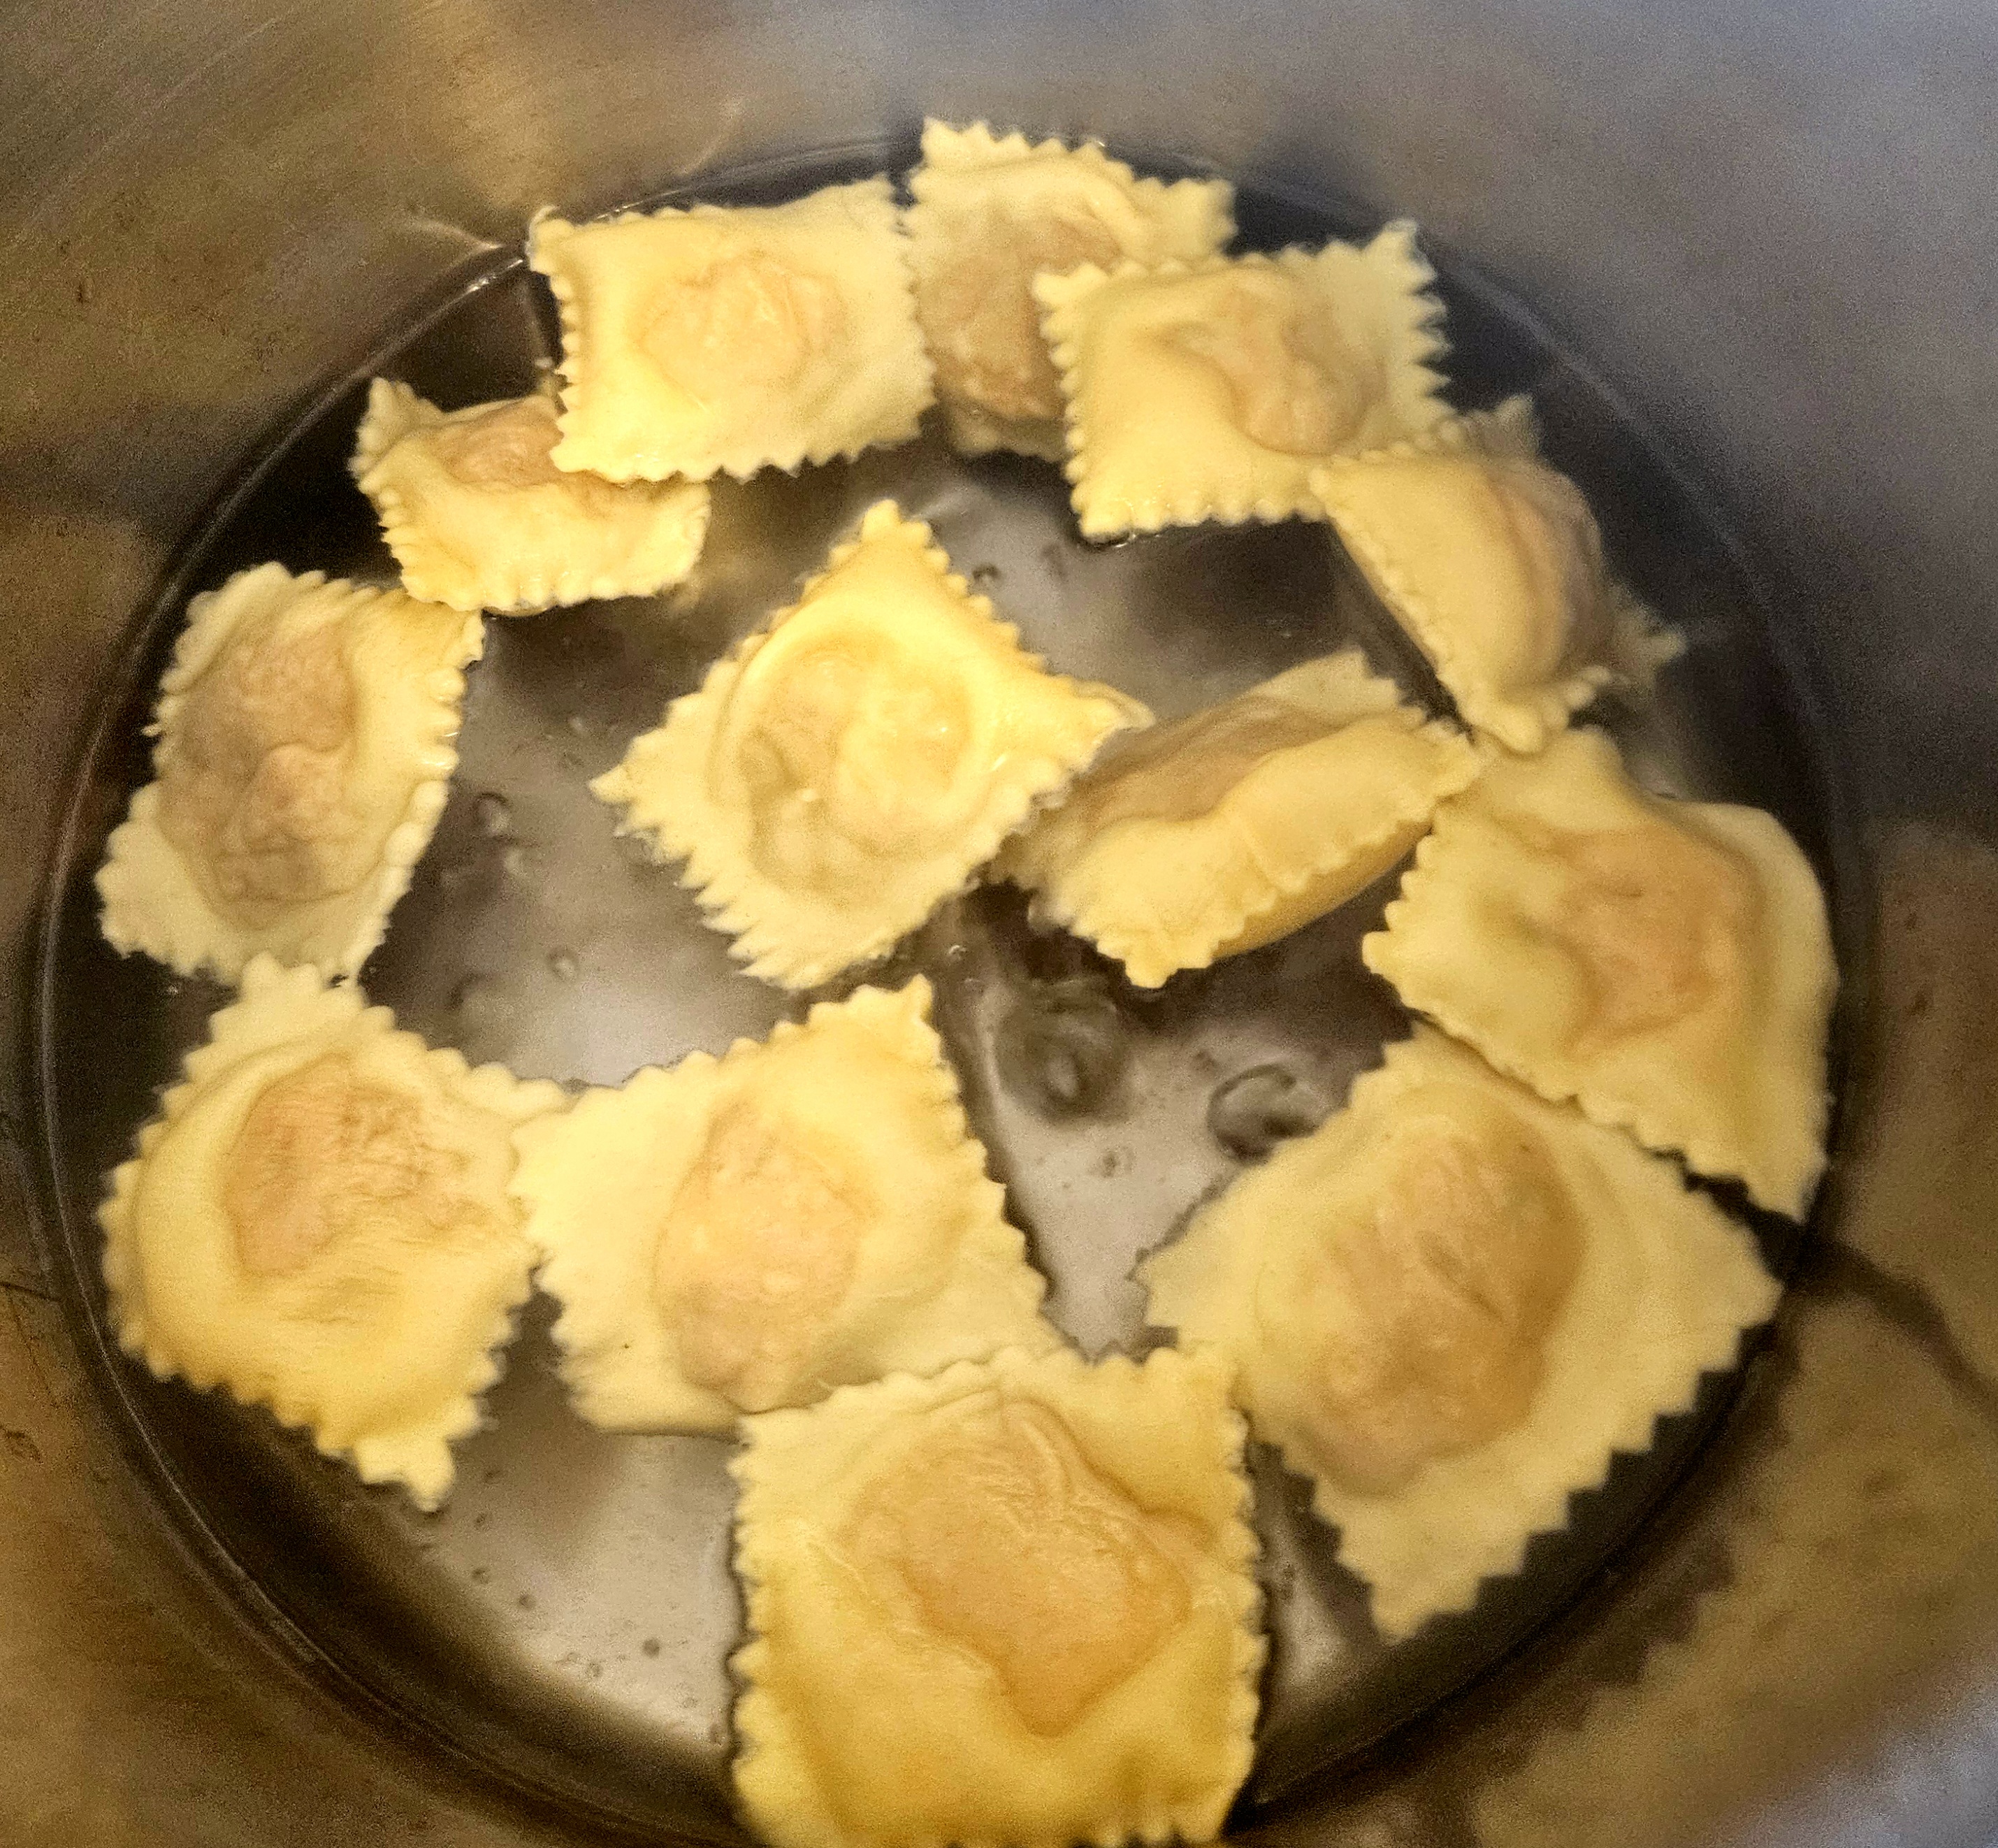
Cooking for three minutes in gently boiling water, it’s amazing they stay sealed.
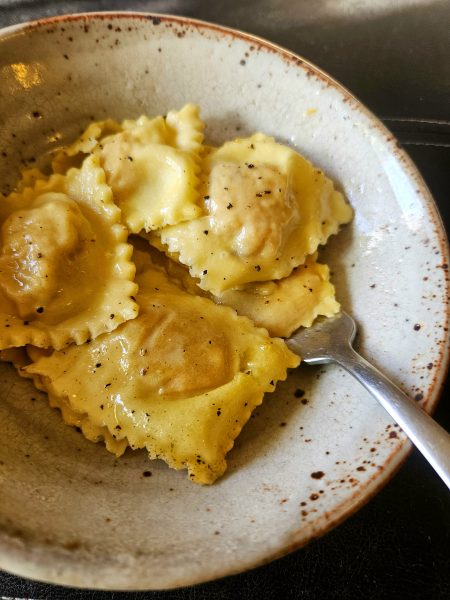
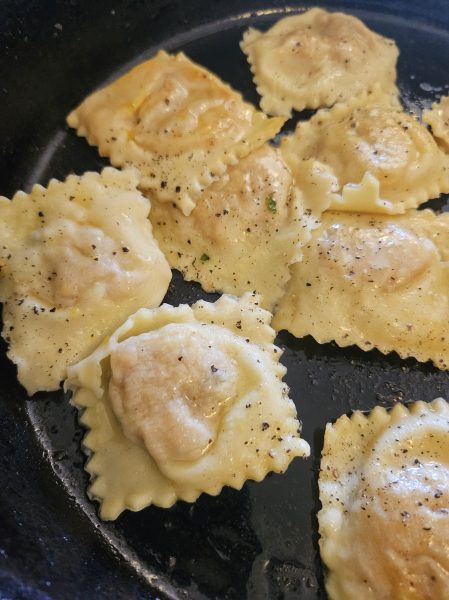
With the filling of unadorned sweet cushaw squash, dressing the finished product in various combinations of butter, olive oil, garlic, thyme, black pepper and hard cheese was delicious. My aunt fried some with tons of garlic until browned… oh my.
But my favorite way was just butter, salt and pepper, letting the sweet cushaw shine.
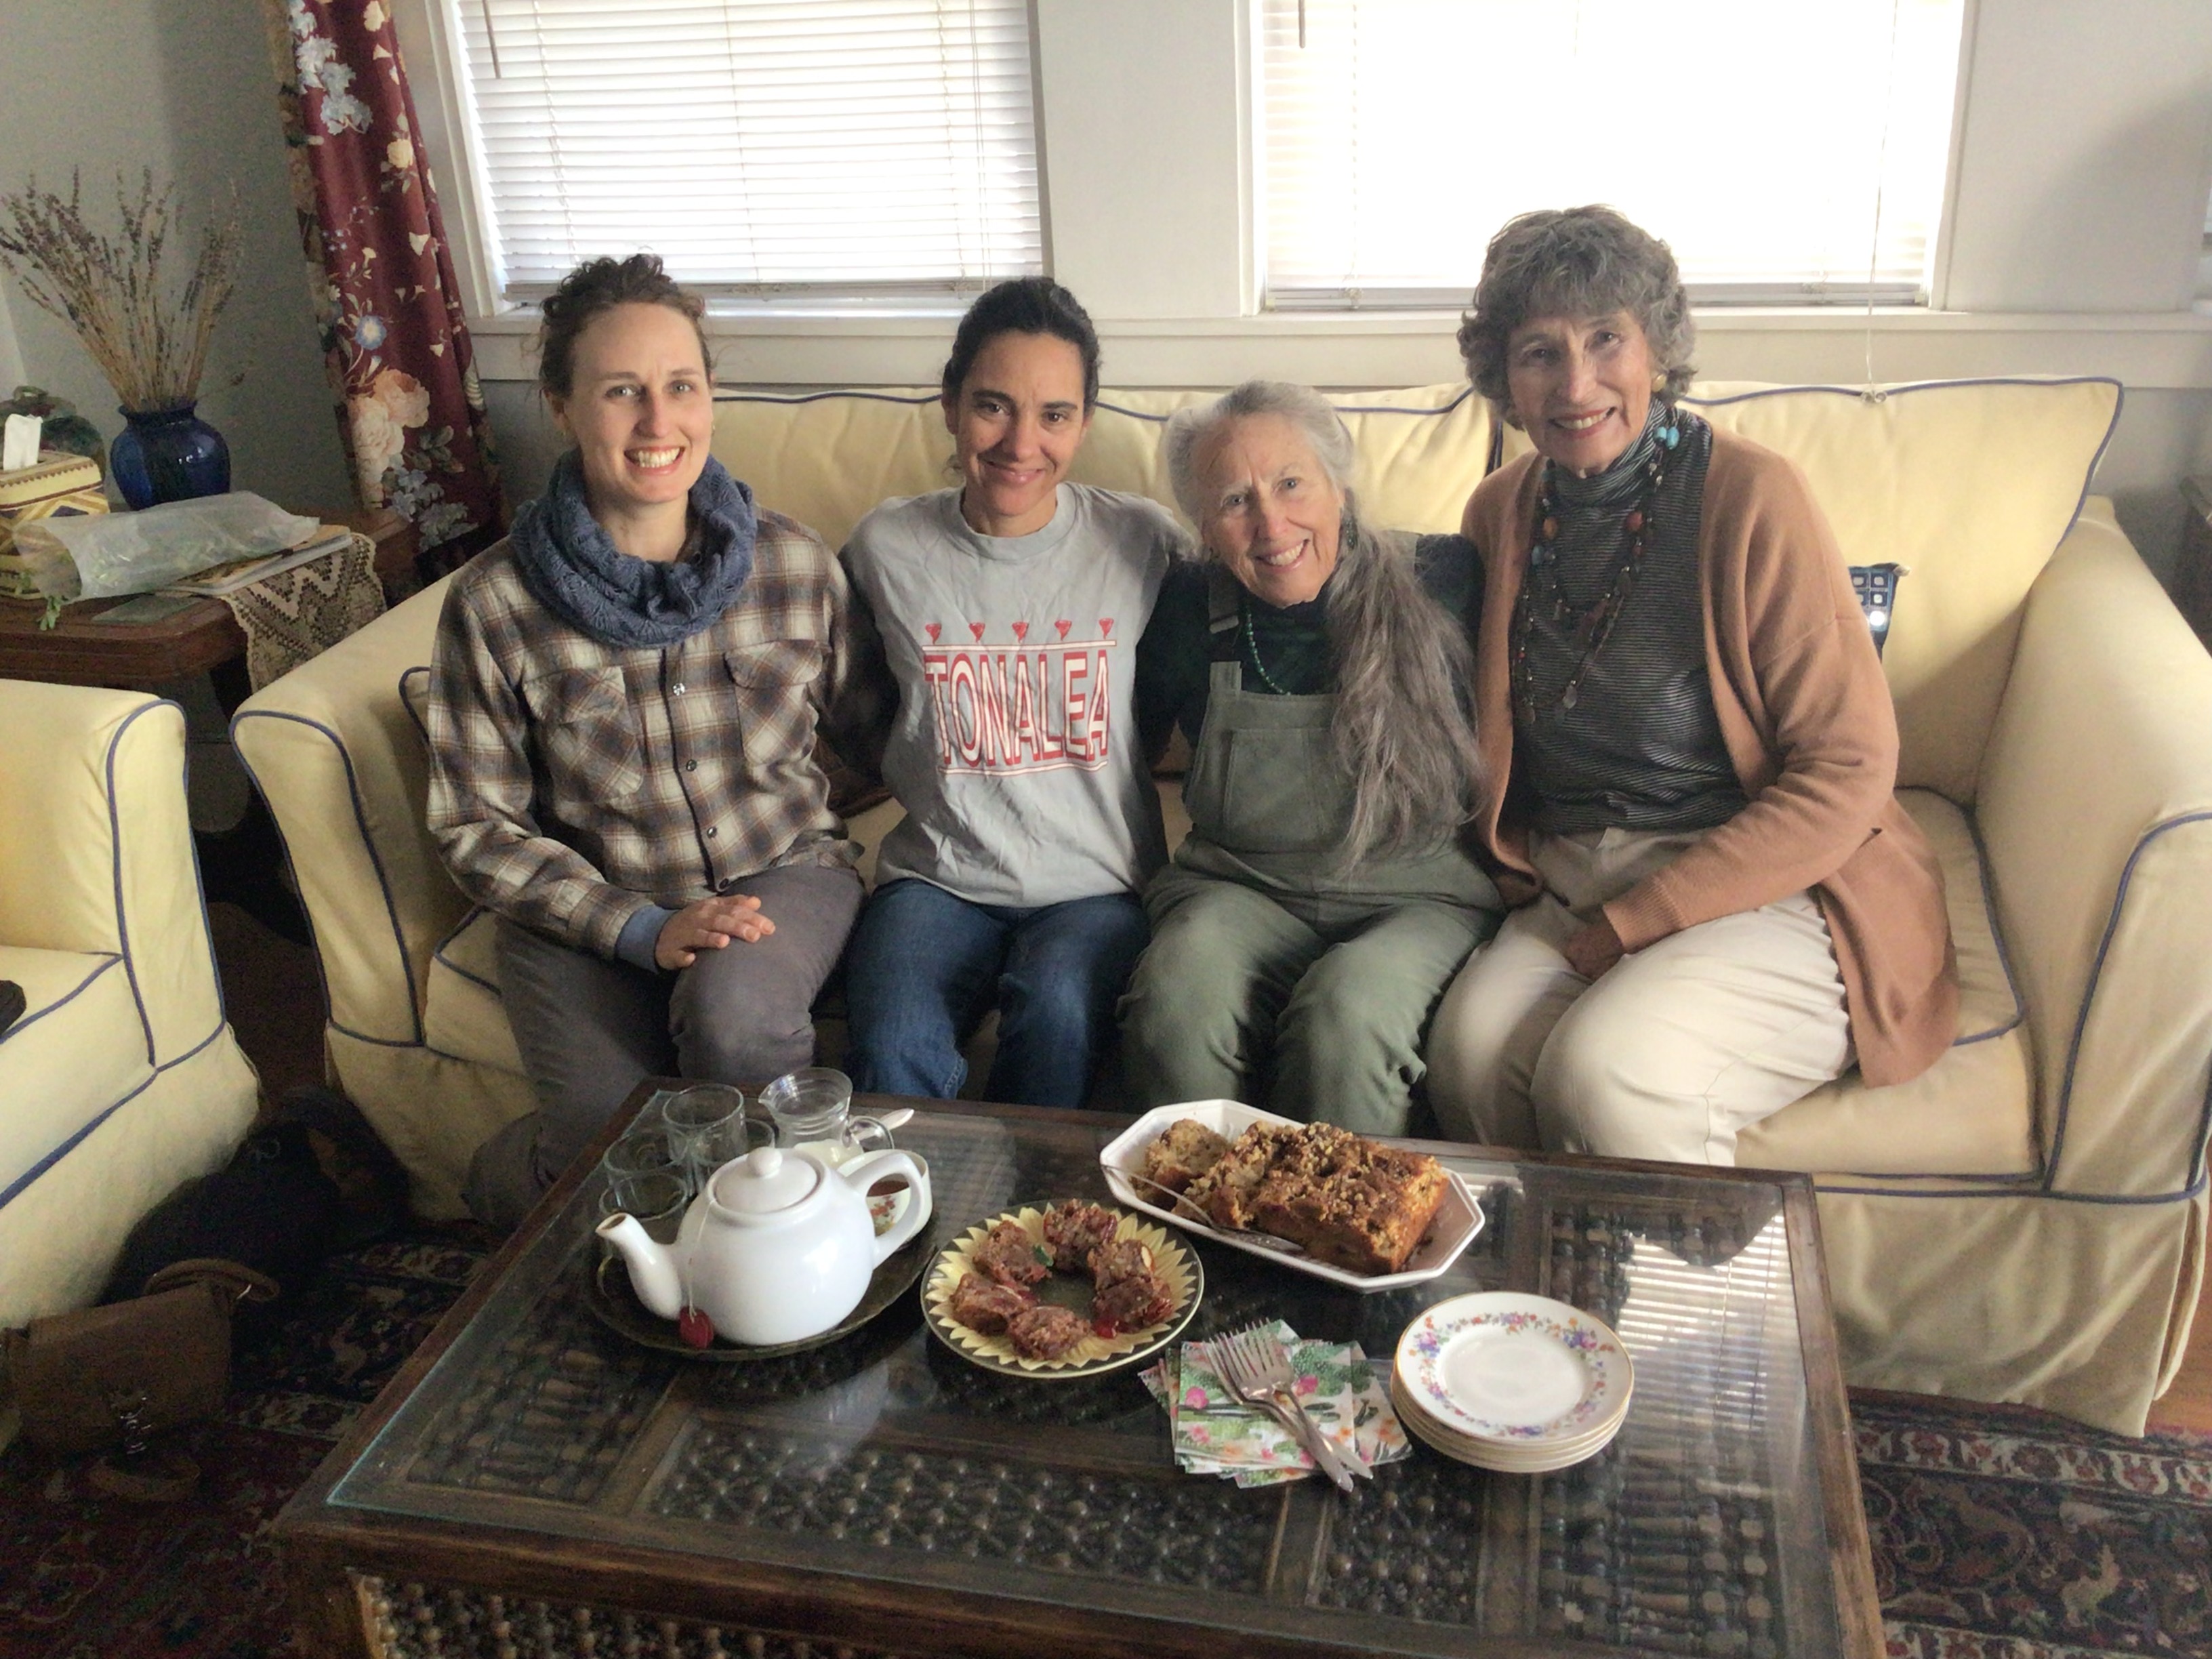
Savor Sisters (from left) Emily Rockey, Amy Valdes Schwemm, Martha Burgess, and Carolyn Niethammer gather to plan out the Savor year. We sampled a mesquite apple cake that may show up in a post.
As the Savor the Southwest blog enters its 13th year, we are so grateful to you, our readers, for following along and indulging us as we share our love of the flavors of the Southwest using both wild and cultivated plants. During those years we have entered 370 posts sharing recipes for everything from Christmas cookies (mesquite gingerfolk, anyone?) to how to cook quince. Our readers hail from nine foreign countries as well as the United States.
This year, we are thrilled to welcome a new Savor Sister, Emily Rockey. Emily has worked as a professional gardener for public gardens including most recently Tucson’s historic Mission Garden. Now as she returns to the university to learn even more about the soil that supports both wild and cultivated plants, she has time to share with us her expertise and creativity. Read her full bio on the Authors page. She has already shared her method for making prickly pear wine in a guest post last year. From now on she will be a regular and we are thrilled to welcome her.
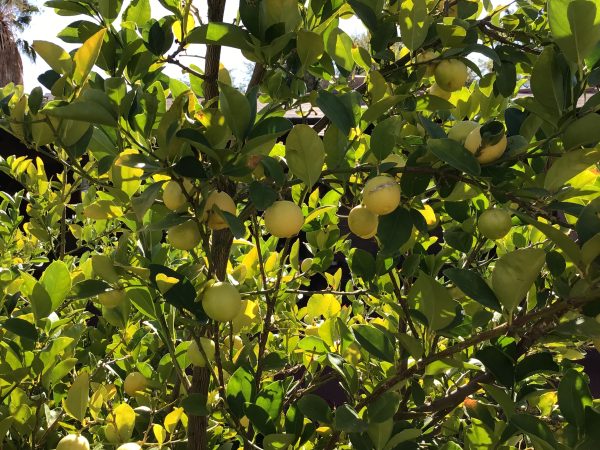
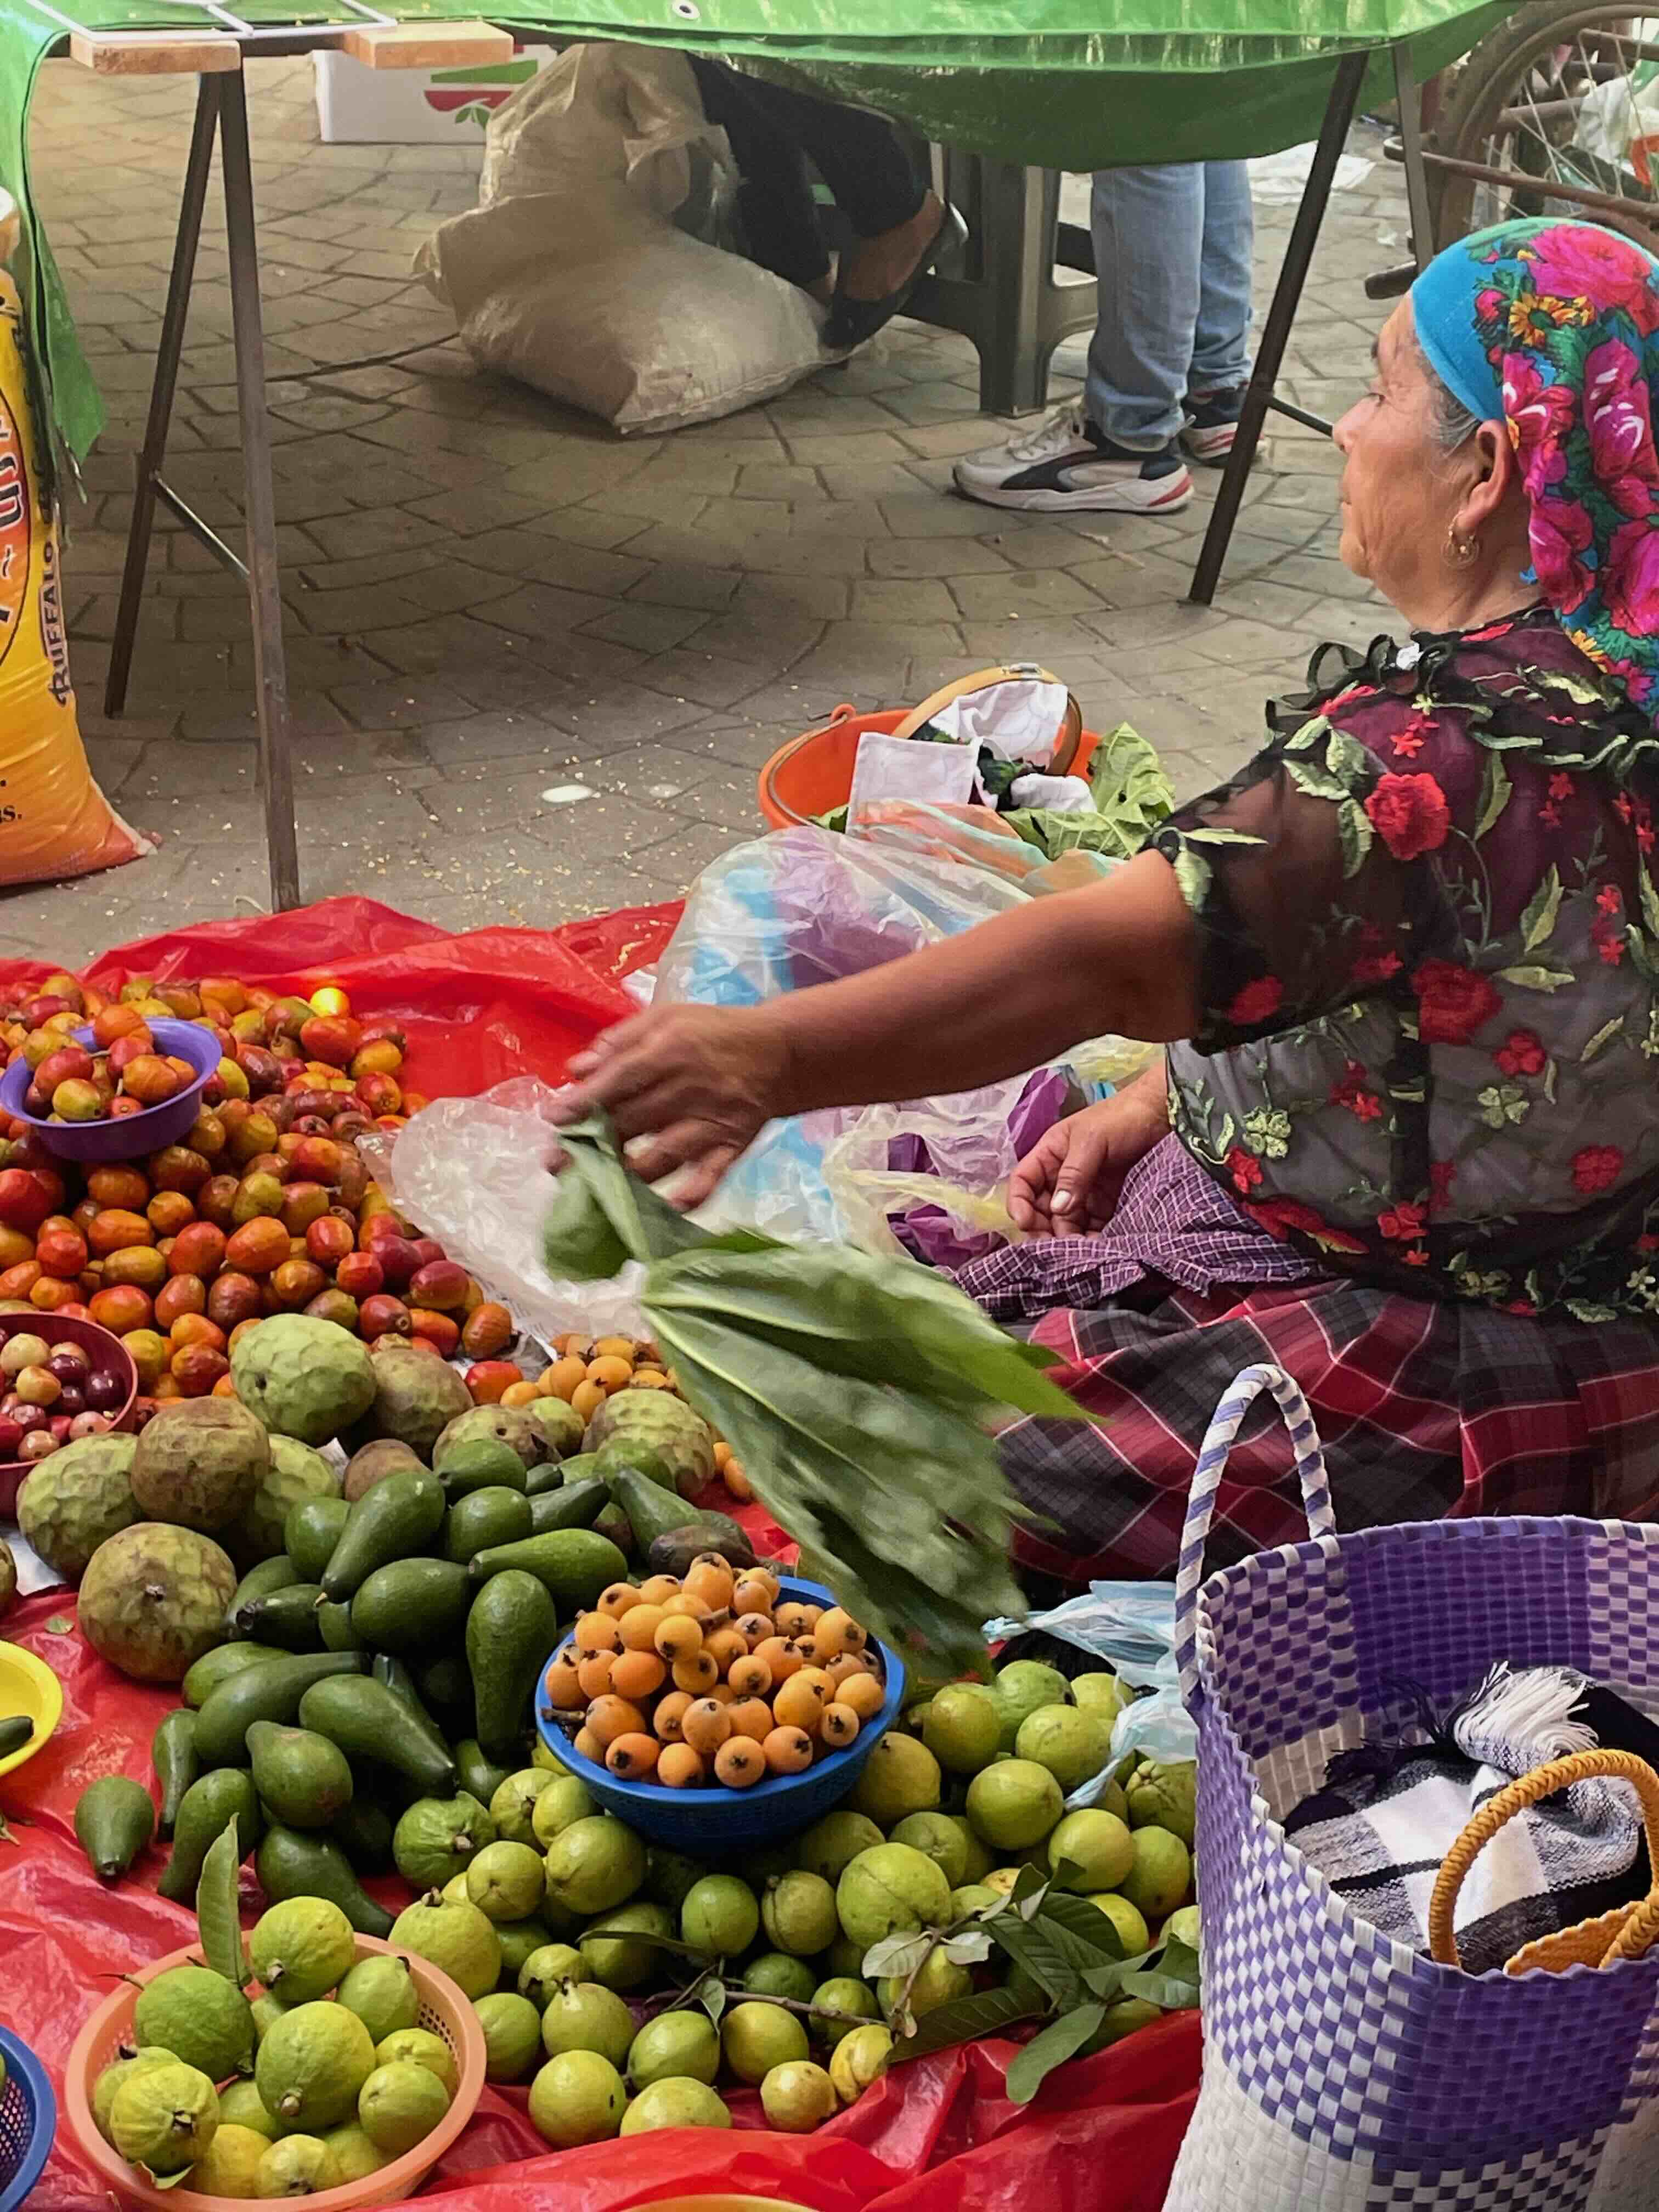
This is the season for small Mexican limes. Trees are usually very prolific and owners are happy to share the harvest. They are also available in produce sections of some store, particularly in the Southwest.
I live a five-hour drive from some glorious Mexican beaches along the Gulf of California. When I was younger, we often headed there on camping trips. As soon as we crossed the border, we’d buy a bag of Mexican limones from kids hawking them on the street and a bottle of tequila. A few sucks on the limes and a few swigs of the tequila and our vacation had begun. It’s Carolyn with you today. My days of crashing on the beach in a sleeping bag are over, but the love of the flavors that evoke our earlier adventures remains. Today I’ll show you how to combine those flavors into an adults-only marmalade.
This is the best season for the small limes called limones in Mexico or Mexican or Key limes elsewhere. If you live in a warm climate and have a friend with a tree, they will probably be happy to give you some. They are also widely available in grocery stores. Spike them with tequila or mescal and maybe jalapeño and you’ve got a treat made for gift giving. But keep some for yourself. This is an adaptation of a recipe from the 1965 version of “Joy of Cooking” that I have used for all my citrus marmalades for decades.
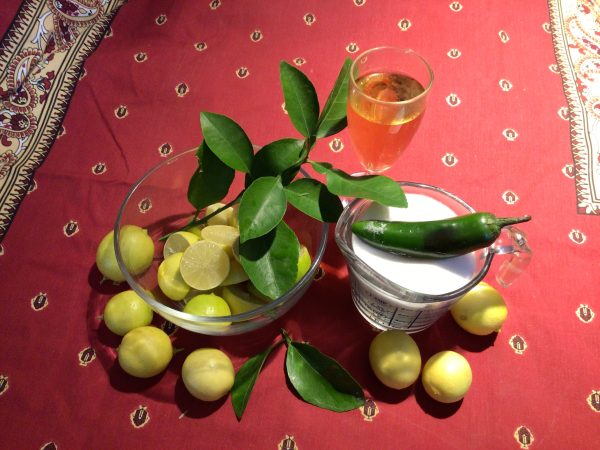
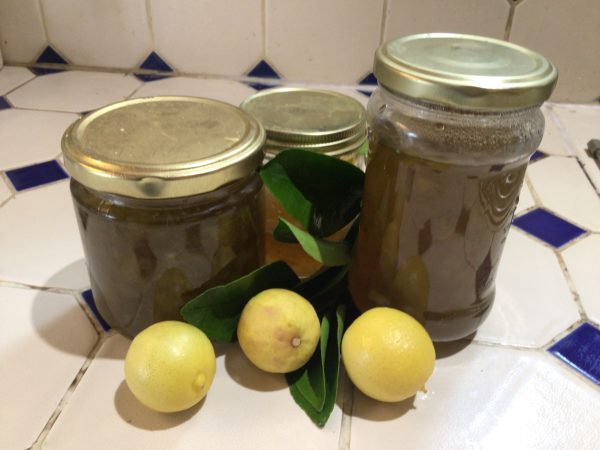
This is all you need to make a delicious lime marmalade: limes, sugar, some tequila or mescal, and a jalapeno
While tequila will work just fine, I prefer mescal for the smoky distinctive flavor. The soaking steps are to make sure the the rinds are very soft and almost melt into the rest of the marmalade.
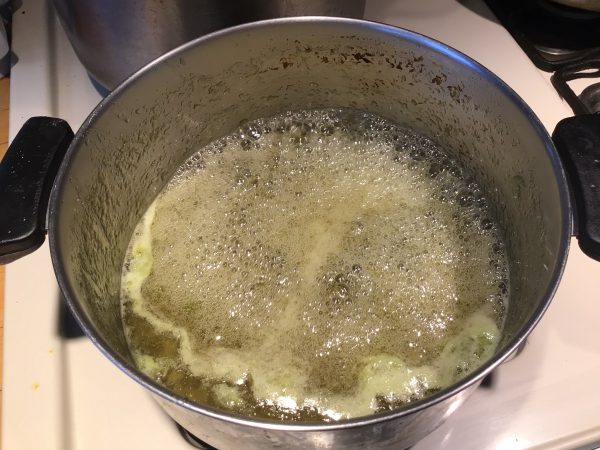
Here’s the marmalade happily boiling and getting thick.
The thermometer registered 220 degrees but had risen another degree in the time it took me to focus the camera. Moves fast at this point.
Boozy Spicy Lime Marmalade
(Makes 3 cups)
1 cup ground Mexican limes (11-12)
3 cups water
3 cups sugar
1 small jalapeño (optional)
1/4 -1/2 cup tequila or mescal
Quarter the limes and remove any seeds. Slit the jalapeno lengthwise and remove seeds and ribs. If you are using a food processor, add the quartered limes and jalapeno and process until all pieces are very fine. If you are using a blender, add the quartered limes and jalapeno and one cup of the water. Whirl until all rind pieces are fine.
Add fruit mixture to a large pot and add three cups of water or just two if you already used one cup in the blender. If any larger pieces of rind made it through, take them out and chop or slice finely. Let this sit for at least 12 hours. This softens the rind. (No, don’t get up at 2 a.m. if this is when the 12 hours are up. Proceed when convenient.) Bring the mixture to a boil and let sit for at least another six hours.
During the wait time, you can collect your jars. You will need enough jars for 3 cups. Sterilize them by covering with water and bringing to a boil or run them through a hot dishwasher cycle. If you use standard jars with two-part lids, they will seal. If you use recycled jars that don’t seal, you will need to store the marmalade in the refrigerator. Place the clean jars on clean newspaper or a kitchen towel.
When ready to proceed, add the sugar to the fruit, stir to combine, and bring the mixture to a slow simmer. Cook until it registers 220 degrees on a thermometer. This will take about 30 minutes. If you don’t have a cooking thermometer, take out a little and put it on a saucer in the freezer. (Turn the heat off under the marmalade while doing this.) If it firms up after 5 minutes, it’s done. If not, keep cooking. Watch closely. Once the temperature is reached, pour in the tequila or mescal. It will bubble furiously while the alcohol burns off. You’ll have to cook a little while longer to bring the temperature back up. At the end the temperature goes up quickly. Stir, scraping the bottom, very frequently to keep it from sticking and burning.
Ladle into jars. The marmalade will firm up as it cools over the next day.
(Note: If you’d like to make this quite spicy, add either more jalapeno or a small serrano chile.)
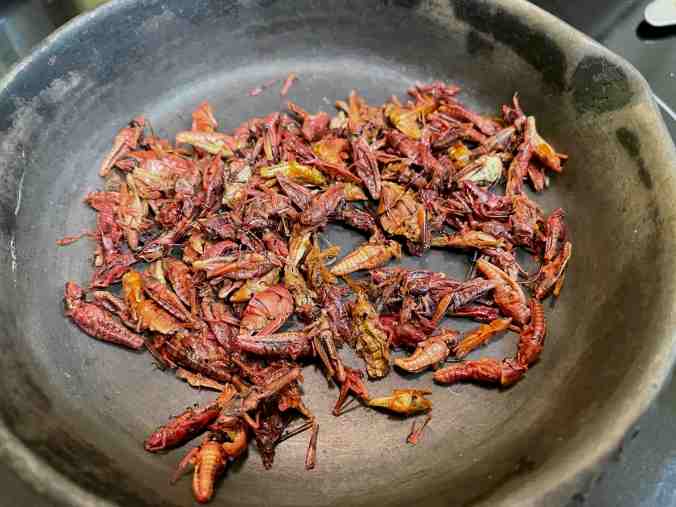
It was a whole new gastronomic experience for me–now perhaps for you too! On a recent trip to colorful Oaxaca, Mexico, with a Mission Garden tour, my eyes and tastes were opened to traditions and to tantalizing potentials of grasshoppers!!Chapulines! (cha-poo-LEE-nays). Tia Marta here to share some fun ideas for trying chapulines creatively, AND some surprising facts about their nutrition.
Grasshoppers, when cooked like this with salt and lime, look a bit more palatable than in nature. Better still–They crunch pleasantly and have tasty snack flavors! Get curious–throw preconceived notions to the wind! After all, insects are the wave of our food-future. (Now I see that chapulines are available all over the internet–no need to travel, but Oaxaca ISa special place to visit for amazing foods!)
Step 1–Roasting or toasting already-cooked chapulines in a dry iron skillet makes them into crispy delicacies–and they’re much easier to grind into the PerfectChapulin Spice Mix, full of flavor and NUTRITION too! Did you know they are high in protein, dietary fiber, rich in vitamins A,B,and C, have magnesium, calcium, zinc, and essential fatty acids? We might think of them as “recycled, concentrated vegetables.”
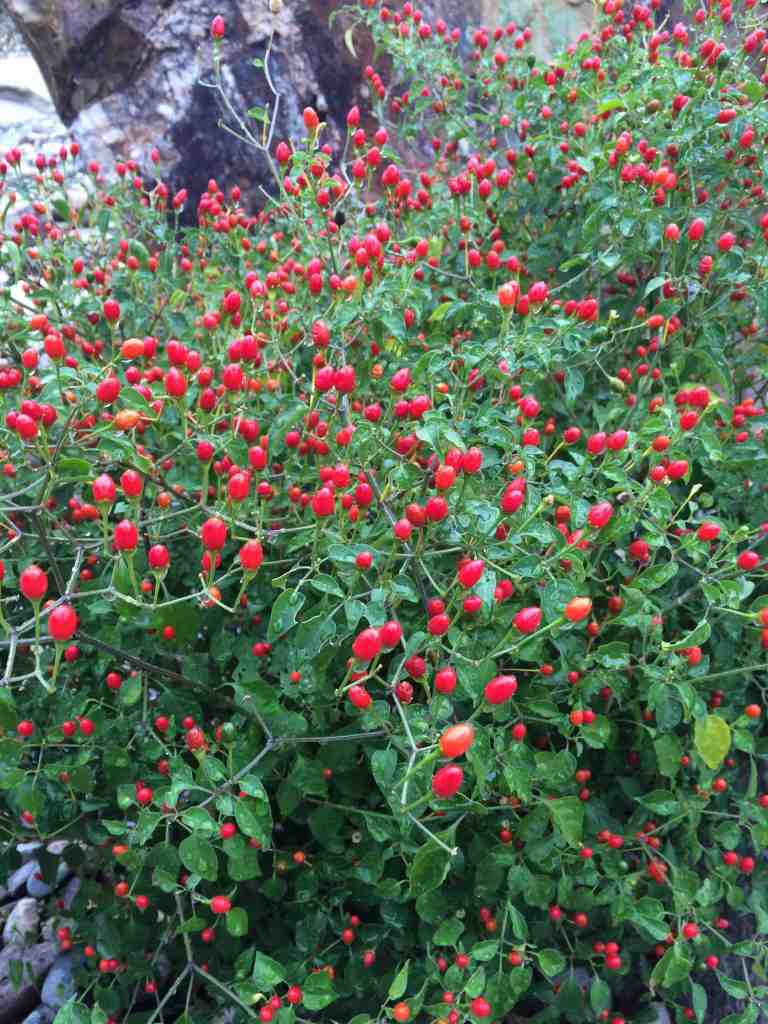
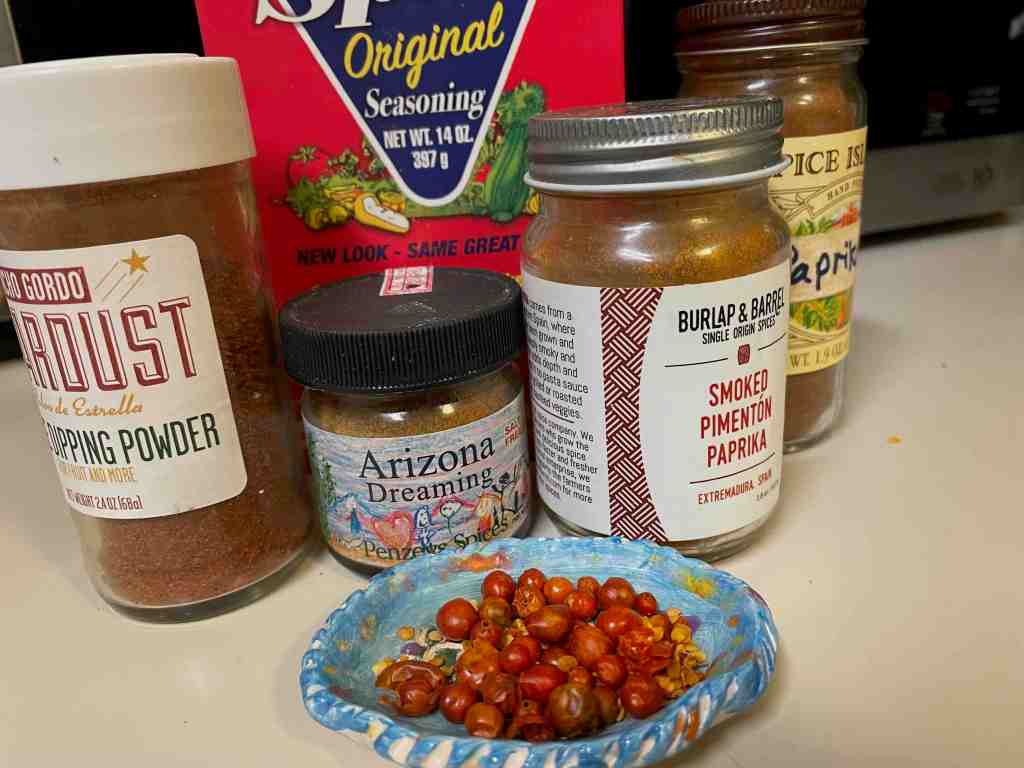
Step 2 for the Perfect Chapulin Spice Mix: collect and dry a few chiltepin peppers from your own bush before the birds get them–or find them at NativeSeedsSEARCH or Tucson’s Mission Garden. When pods are dry, you only need 2 or 3 tiny chiltepin pods to add to your spice mix.
Your chapulin–chiltepin spice mix will be more off-the-wall better than any other!
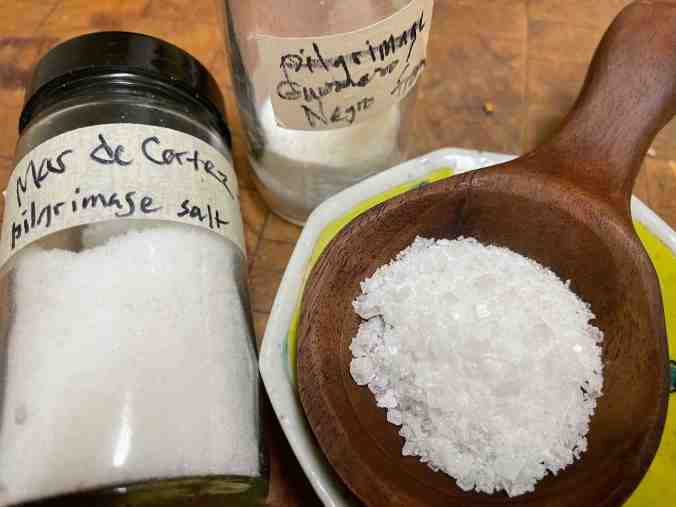
Step 3: Find good natural sea salt–available at many stores. To stay as Sonoran-Desert-local as possible for this project, I made a mix of local salt crystals, one from the Sea of Cortez gifted to me by ASDM ethnobotanist/explorer/educator Jesus Garcia, and another from Guerrero Negro actually made on the Pacific coast of Baja California by Mission Garden volunteer Gay Gilbert.
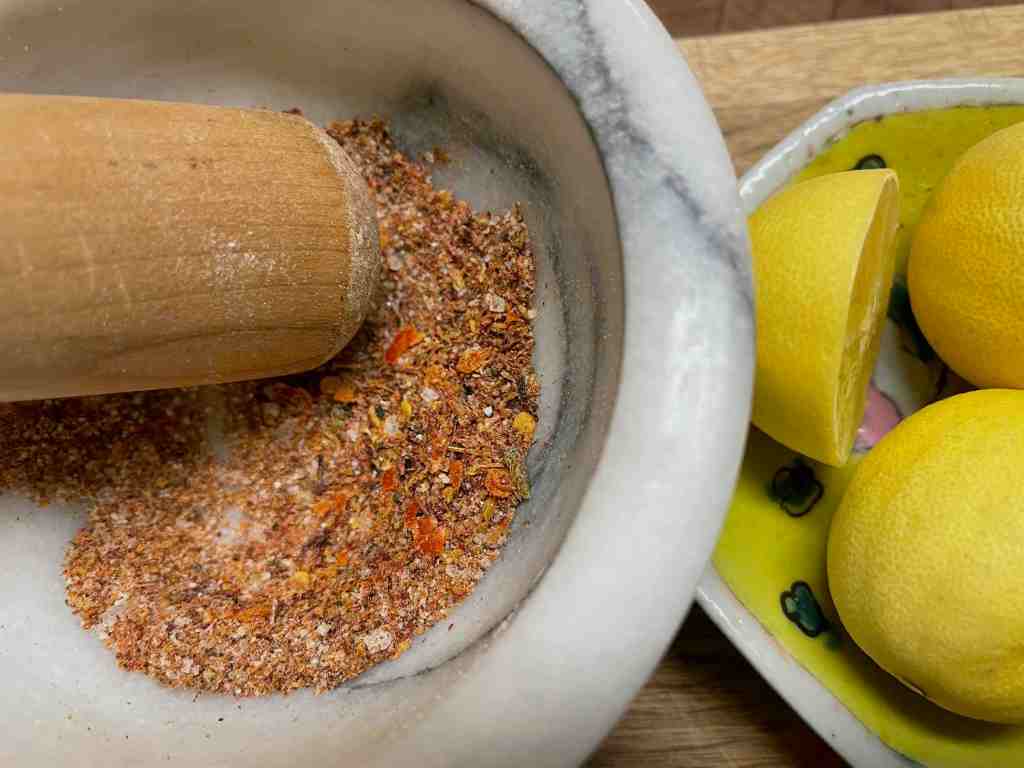
Step 4: You are ready to crush your ingredients with a hand mortar and pestle! RECIPE for the Perfect Chapulin Spice Mix: (This is a good ratio for any quantity): 1 Tbsp. toasted chapulines 1 tsp. sea salt crystals 2-3 tiny chiltepin pods (to desired “heat”) Mill to desired rough or fine texture.
1st idea: sprinkle on jicama slices w/lime!
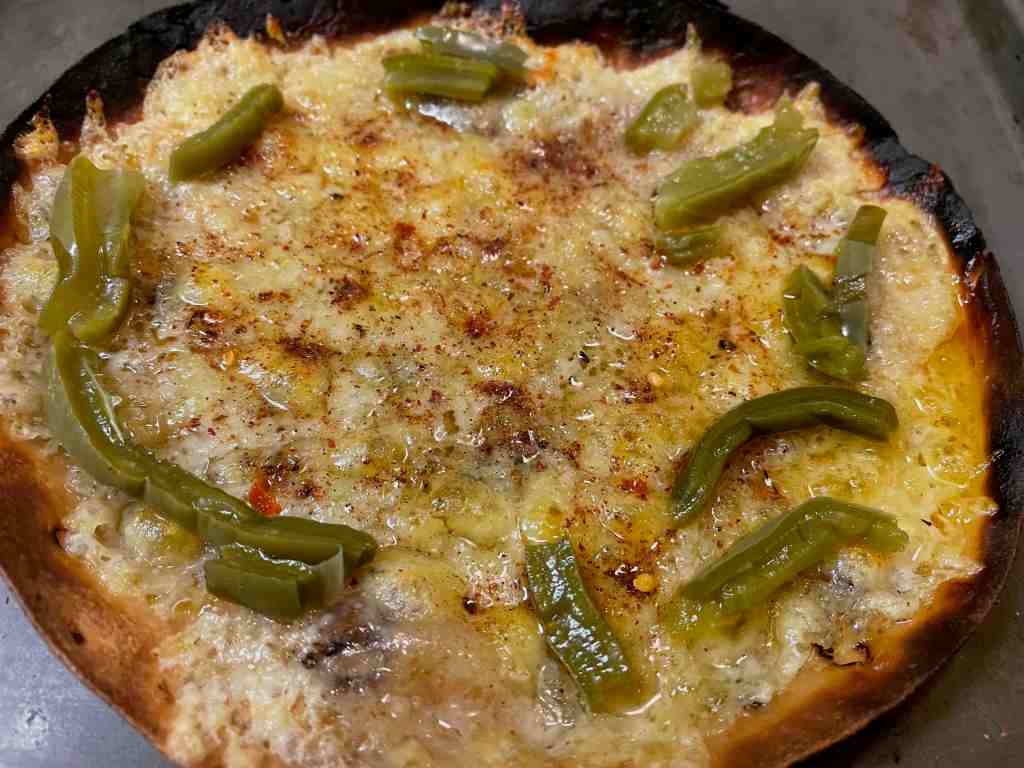
2nd idea: Chapulin Spice Mix on homemade pizza or quesadillas! I sprinkled my mix for a fast delicious lunch on a tortilla with melted cheddar cheese and nopalitos–yum!
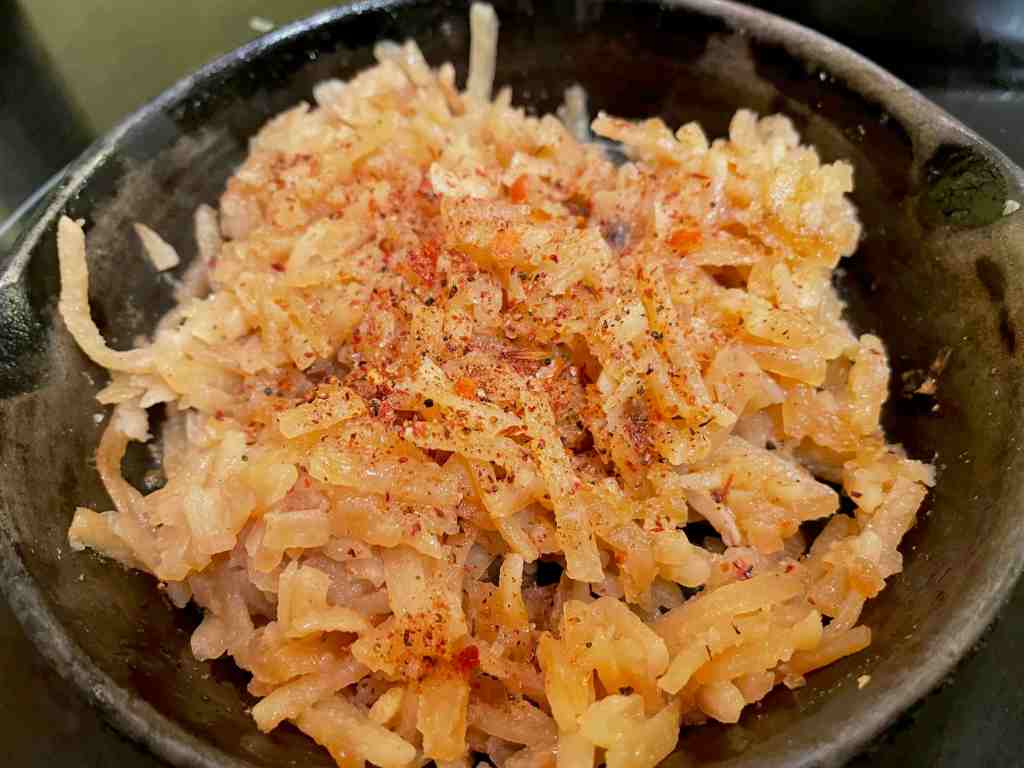
3rd idea: Dress up hash browns for a zippy Southwest palate-pleaser with your Chapulin Spice Mix!
4th idea: For a cool (and simple) buffet or hors d’oeuvre, sprinkle Chapulin Spice Mix on sliced cucumbers or other veggies. It adds a little kick!
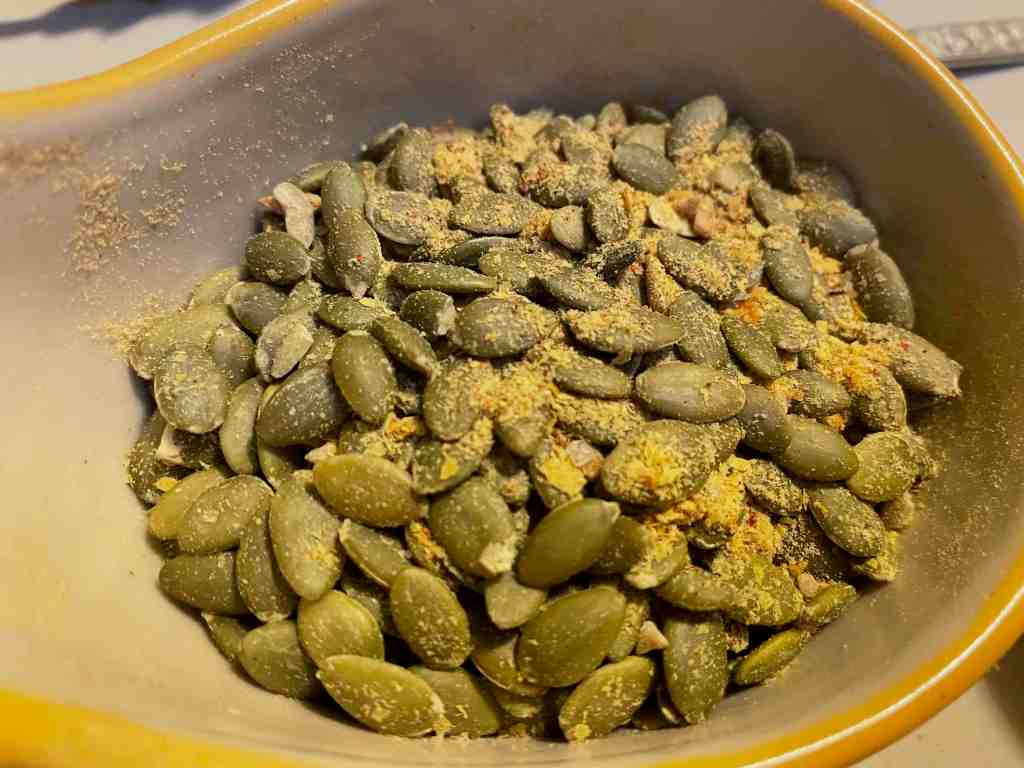
Another super-healthy idea: Add Braggs’ Nutritional Yeast to your Chapulin Spice Mix and toss it with pumpkin seeds or sunflower seeds for a grand health-enhancing snack or energy-boosting trail-mix!
Tia Marta encouraging you–don’t hesitate to take on these delicious gifts of Nature–chapulines! yes, grasshoppers– and try your hand experimenting with your own ways of enjoying them! The next time there is a grasshopper outbreak, don’t swear and fret. Grab your butterfly net! Get out to the garden for a new and different harvest on the fly! Bake them, toast them, spice them up for treats! See what kept early Zapotec and Mixtec cultures thriving with these tiny but plentiful gifts of the insect world. You will be a pace-setter for a future with changing climate!
(The Savor the Southwest guest poster today is Barbara Rose. She has lived and worked at Bean Tree Farm since 1985. She is an enthusiastic expert in all things Sonoran Desert and has taught hundreds of students how to live in and appreciate this fragile and glorious ecosystem. We thank her for her knowledge and years of inspiration.)
My grandma Evie was born in Brooklyn in 1900 to Ukrainian immigrants, and she moved to southwest Florida in the 1920s. Her back yard was a forest of avocado and citrus trees, and her kitchen was fragrant with crocks of garlicky green tomatoes, cucumber pickles and pots of simmering chicken soup “with the feet” (her way of saying the whole chicken). She smeared onion-infused chicken fat on slices of dense black pumpernickel, and served up bowls of cold, sweet-sour beet borscht, with a hot boiled potato and big dollop of sour cream. I am so grateful that she shared with me a treasure of food and family stories.
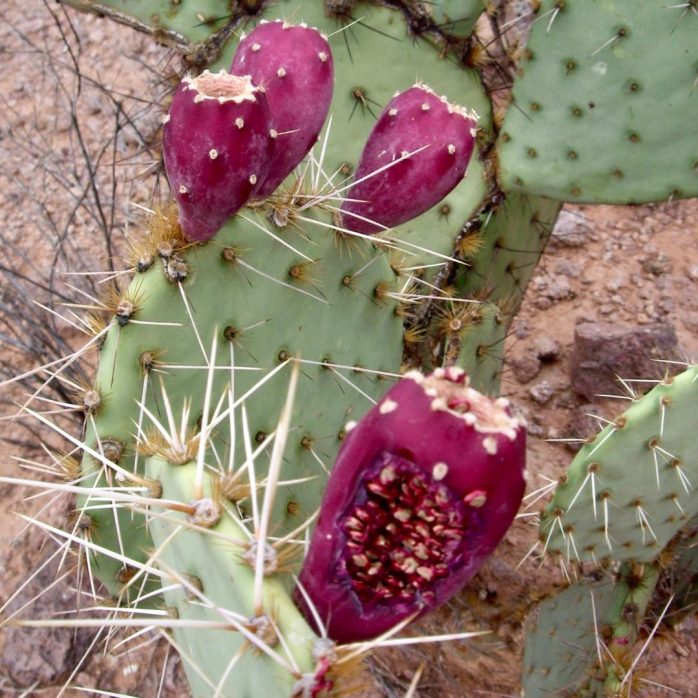
Beets have been pickled and soured by lactic acid fermentation for ages. I love beets, but I’m not so good at growing them. Prickly pear cactus thrive, and the ripe fruits are delicious, nutritious, and a gorgeous color.
The animals know when prickly pears are ripe. If they have been nibbling, it is time to pick.
I’ve developed a way to make borscht with fermented prickly pears- red desert fruits that sour nicely, have a sweet earthy flavor, and carry far away family food traditions into the desert food forest I love and care for!
I hope you enjoy the recipe, expand on it, and make it your own.
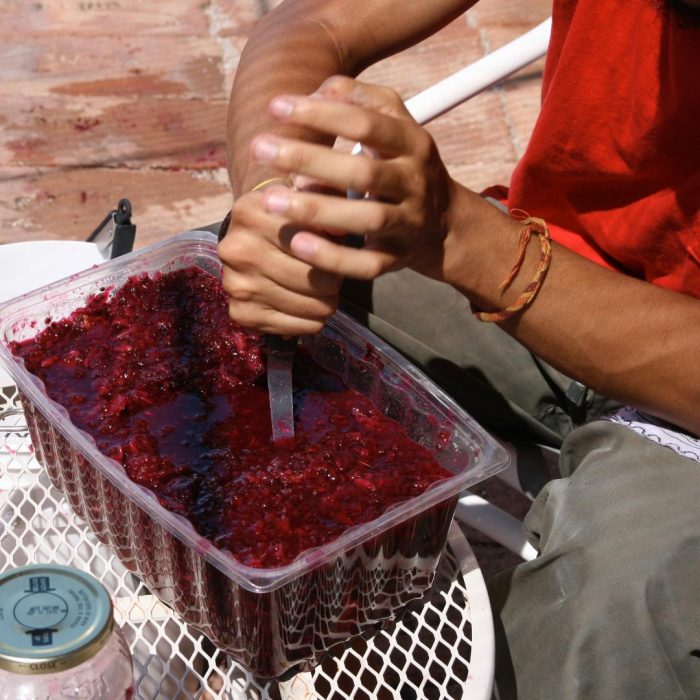
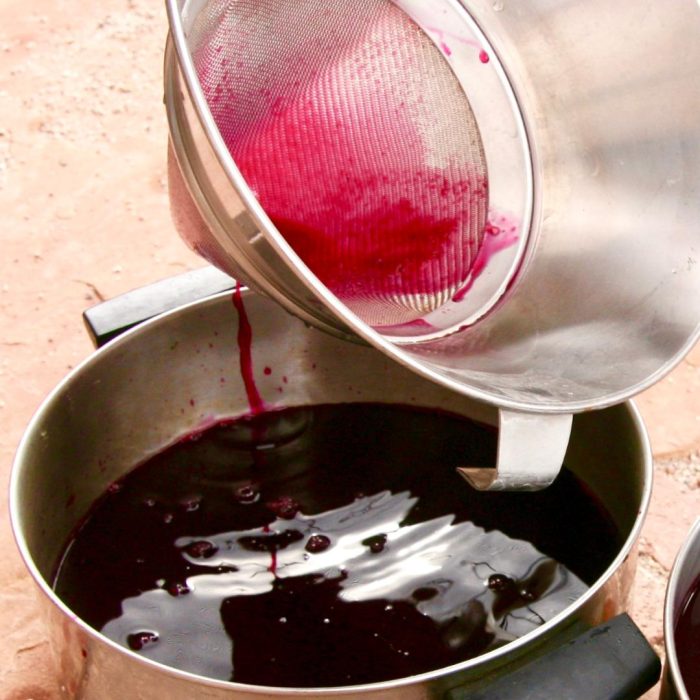
Mash the fruit. It is easier if you freeze first as this helps break down the cell walls.
Be sure to strain the liquid through a fine mesh strainer to catch every last glochid (those are the tiny thorns).
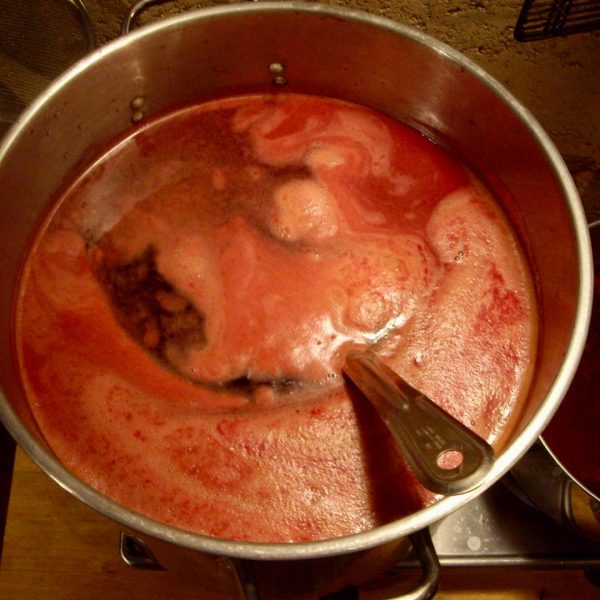
Simmering the juice and broth helps meld the flavors.
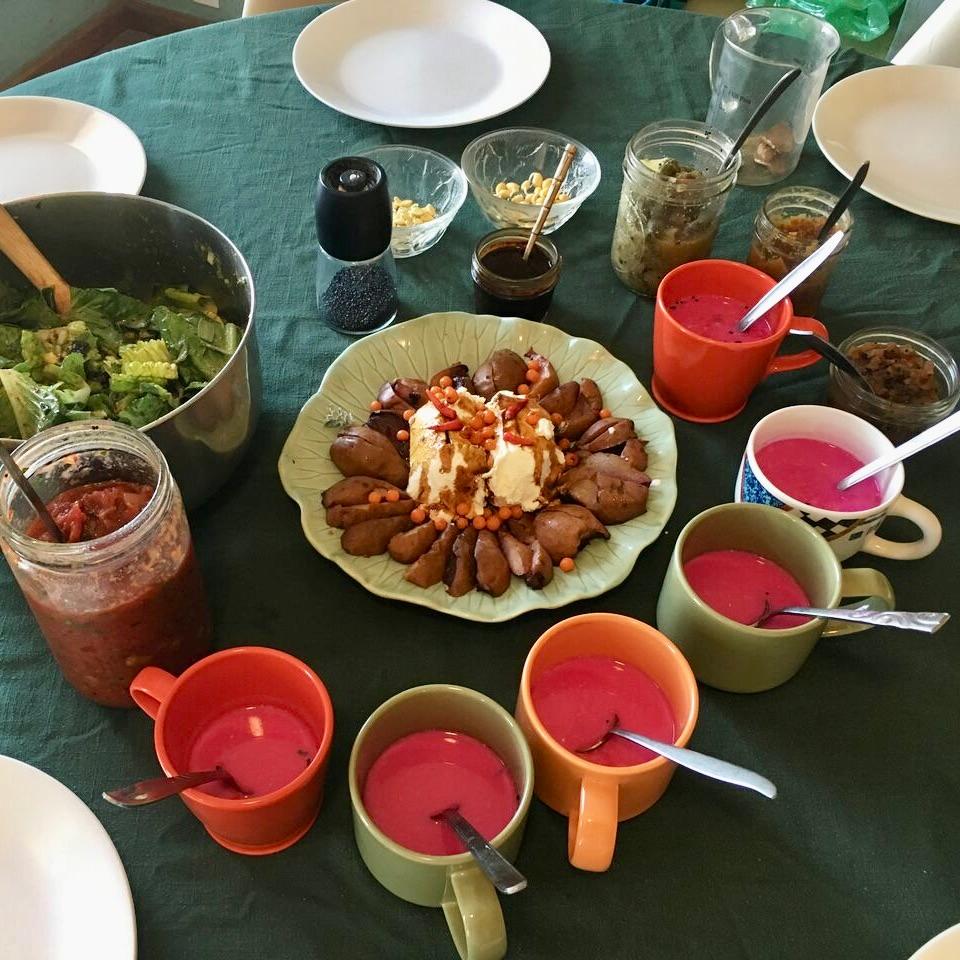
SONORAN DESERT BORSCHT
Makes 2 quarts
1 quart fermented, sweet-sour prickly pear fruit juice (see method below)
1 quart broth, strained and chilled (chicken, vegetable, bone, mesquite, or combo, flavored with herbs, alliums, chiles, or whatever you have.)
1 hot boiled potato per serving
Sour cream, crema, yogurt
Combine prickly pear mixture and broth. Simmer with salt, pepper, chile, and your choice of herbs to taste to blend flavors. Chill if serving cold.
To each bowl of borscht add a boiled potato. Garnish with sour cream, and serve with sides of hard-boiled eggs, green onion, and sliced cucumbers.. Borscht turns a gorgeous magenta-pink when the cream is stirred in. Enjoy!
How to ferment prickly pear juice:
Add 1/2 cup of kombucha or whey (liquid strained from yogurt or cheese-making) to 1 quart of prickly pear juice a day or so ahead of making your borscht. Cover with a cloth and taste on occasion. It will develop a sweet-sour flavor as it ferments. When it has that “tang” but still retains some sweetness, it’s ready to use. Sometimes I combine citrus juice with the prickly pear and ferment both. This juice will store in your fridge for some time, becoming more sour from fermentation. It can also be frozen.
Final step: Serve for lunch. Goes well with other desert delicacies. Find recipes in the Desert Harvesters’ cookbook Eat Mesquite, a Cookbook for Sonoran Desert Foods.
_______________________________________
You can find more recipes for prickly pear and other wild desert foods in Eat Mesquite and More: a Cookbook for Sonoran Desert Foods and Living, available at Food Conspiracy Co-op, EXO, Crisol, Mission Garden, Desert Museum, and online at desertharvesters.org. More recipes can be found inCooking the Wild Southwest: Delicious Recipes for Desert Plants.
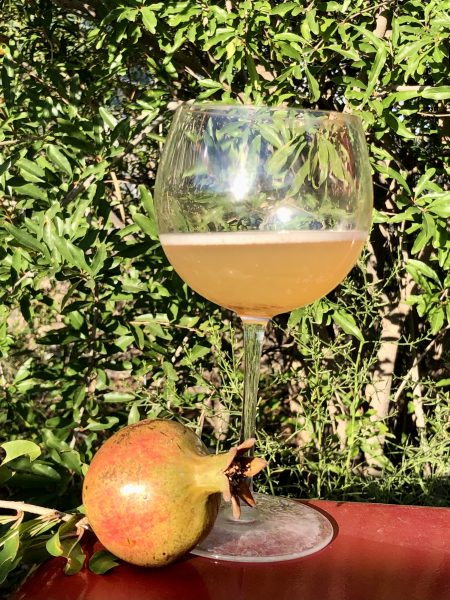
At the end of a year of simple steps, a refreshing glass of pomegranate wine.
(We are continuing our series of guest posts. Today it is Emily Rockey, who for many years was the garden supervisor at Mission Garden and in charge of the health of dozens of pomegranate trees. This post is a bit longer than we usually send, but if you’ve ever wanted to learn to make wine, Emily will take you on that journey.)
There’s something so sweetly satisfying about sitting down to enjoy a delicious treat that you made from scratch with your own hands. Better yet, something that you wild harvested or grew yourself. For some folks, that might be homemade sourdough bread, prickly pear jelly, or a meal prepared from the garden or desert. But have you ever tried making your own wine?
Perhaps you’re thinking that you need specialized, expensive equipment, or a degree in oenology (the study of winemaking). It’s possible you don’t have grapes with an impressive provenance which keeps you from crafting elegant fermented beverages. Or that you simply don’t have free time for long brewing processes, bottling, and years for aging wine to perfection. All these are misconceptions! The homebrewing process is quite fun–anticipation slowly building over many weeks as the bubbles of the beverage quietly gurgle away. It’s true that wine takes about a year before it’s ready to drink, but as they say, time flies, and before you know it, it’s time to pop the cork and gather friends to savor the moment. With regard to equipment or ingredients for winemaking, these things can come quite inexpensively, or DIY freely! Continue on for a basic step by step guide from me, guest contributor Emily Rockey. You, too, dear reader, can be a winemaker.
Winemaking, quite simply, is a natural process of live yeast consuming sugar, converting it to carbon dioxide (bubbles) and alcohol. This process is called fermentation, and with wine it takes place in two basic stages: the first fermentation occurs when fruit or plants are combined with water and yeast in an open container. Soon it becomes active and bubbly. When it slows, a second round of fermentation takes place in a closed container (less oxygen). After about eight weeks, the lively party is over and the wine shifts to a period of relative tranquility, resting in a cool dark spot such as a closet or interior room. After it settles, we’ll siphon the wine (called racking) to separate it from the yeast particles at the bottom, and let it sit for nine months. At last, your calendar will remind you that it’s time to bottle and finally taste your finished wine!
Ingredients:
To start, look around for what exists in abundance, or what’s in season. We can make wine from anything that contains sugar: fruits of all kinds, herbs, and even flowers. Prickly pear wine, elderberry, or wolfberry wine? Sure! I happened to have frozen pomegranate arils from Mission Garden.
Sugar. Organic cane sugar is the most versatile, but if you like you can experiment with other natural sweeteners (and their flavor profiles).
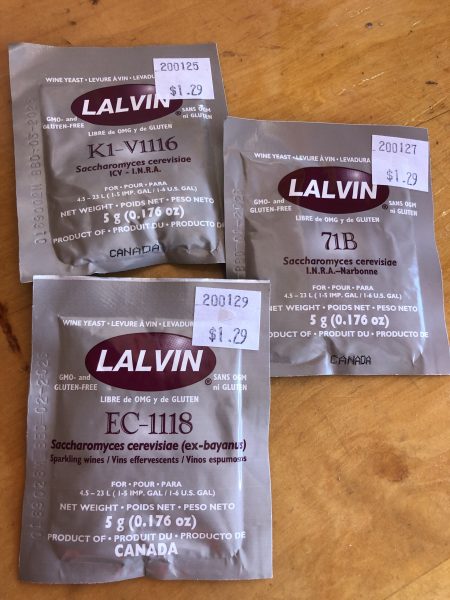
Brewing yeast: It is possible to make wine without adding packaged yeast, but for a home winemaker like you and me, yeast is easy to find and a reliable way to kickstart fermentation. Brewing yeast is sold at brew shops or online for $2-$3. Experiment a bit, or start with a neutral ale, cider, or champagne yeast.
For the recipe below, I used a neutral yeast strain called EC1118 which contributes very little flavor or aroma to the finished product. It is quite flexible, thriving in cool or warm temperatures (50-86°F). It also tolerates higher alcohol content.
For easiest and most reliable results in making your wine, use commercial yeast.
Time to produce: Regarding the preconception that wine requires significant time to produce, it’s mostly waiting time. My actual hands-on time to make a batch of wine totaled only about four fun hours…spread out over 12 months! The vast majority of the winemaking time is the wine doin’ its thing by itself.
Supplies for a 3-gallon batch: The good news is that you may already own or have easy access to the basic equipment. If not, everything is inexpensive or easy to make at home.
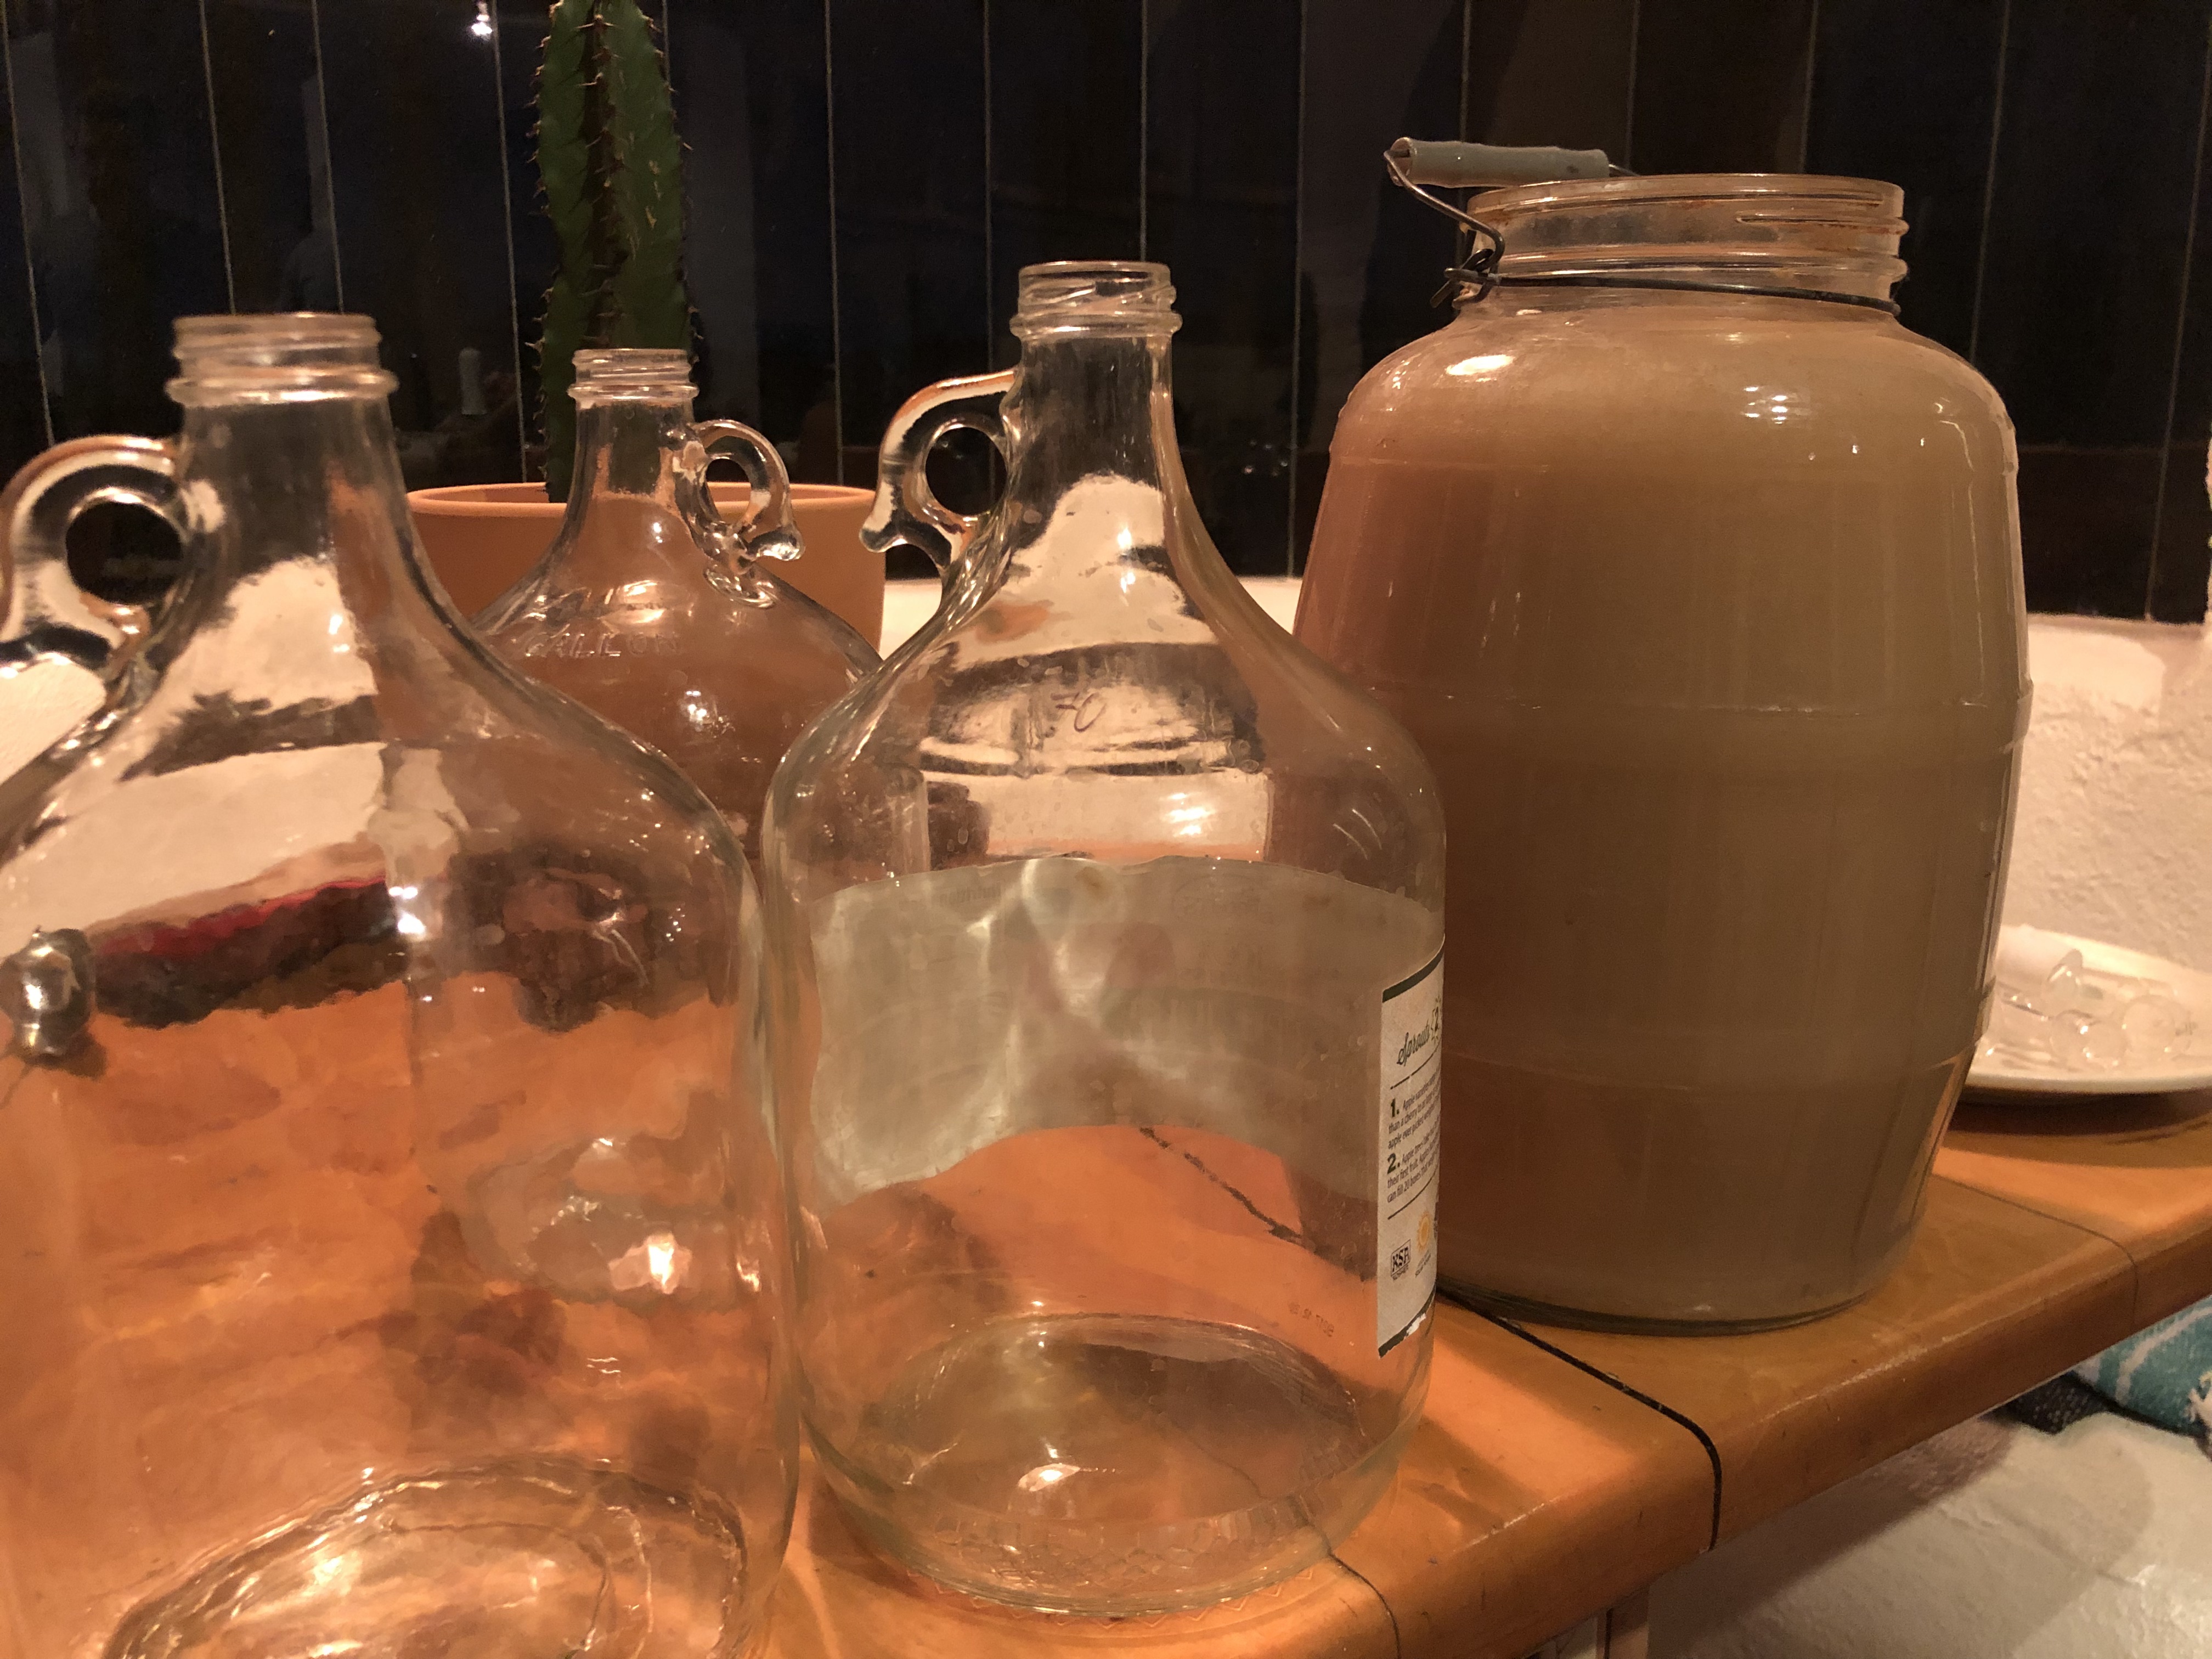
A 3-5gallon vessel for first fermentation. Non-reactive: preferably glass, stainless steel, but many folks use food-grade plastic. Also ceramic crocks in good condition work well.
Two or three 1-gallon glass jugs (carboys). The glass jars containing commercial pressed apple juice with the handy little finger handle work perfectly.
Airlock and rubber stopper. $5 from your local brew shop or online. Allows CO2 from the brew to be released, but prevents outside air from entering the vessel. (Here’s how airlocks work.)
Sanitizer. Please use well-cleaned hands, surfaces, and tools, but don’t worry too much about sterilization–I’ve never had a problem. (There were no sanitizers 6000+ years ago in the Mediterranean region where wine was first made.) However, this is an often discussed topic for brewers. I do use inexpensive sanitizer (such as Star San brand) because it’s quite easy, quick, and safe to use.
Optional: bottles for finished wine. Or just drink it when ready with a group of friends.
Now you’re ready to make wine!
The basic recipe is inspired mostly by Sandor Elix Katz in his book Wild Fermentation.
This batch was made with Sonora White Pomegranate (Punica granatum), but I’ve successfully made Elderberry-Blueberry Wine (from Sambucas mexicana), Wolfberry Wine (Lycium pallidum), Fig Wine (Ficus carica), Mission Grape Wine (Vitis vinifera), and a funky Quince Wine (Cydonia oblonga) which we quickly transformed into brandy…
Instructions:
*Note: The ultimate ratio of fruit volume to water is approximately 1:1, so for ~3 gallons of fruit (fresh or frozen, defrosted), add ~3 gallons of water. The finished wine will be about 5 gallons. You can make smaller or larger batches by keeping the same basic ratio.
1. Place 1.5 gallons pomegranate arils into a clean container or crock (at least 3 gallons/11+ liters in size), followed by 1.75 gallons boiling water. Cover with a clean towel. Set the container on the counter at room temperature on a cookie sheet to catch drips.
2. The next day, ladle out about 1 cup of liquid in a glass and add to it 3 grams of yeast. I used strain EC1118; see above). Allow it to dissolve and get bubby and active for a few minutes.
Then add it to the main fermentation vessel, also known as the wine must. Stir well and recover with towel.
Note: A 5g yeast packet will satisfy a 5 gallon batch. For a 1 gallon batch, use only about 1/4 of the packet, and so on.
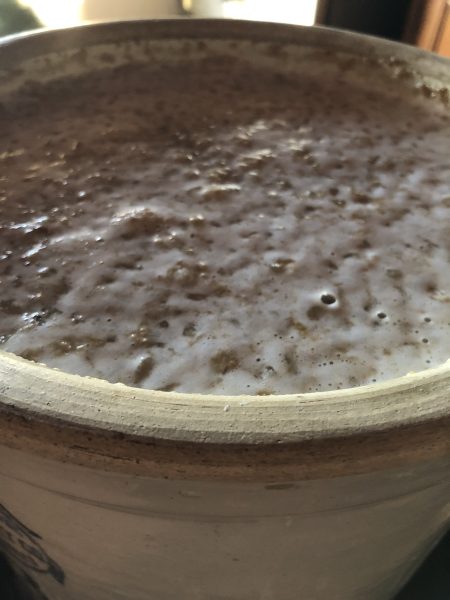
3. Within hours, the must will be bubbling vigorously! Use a ladle or spoon to “punch down” the fruit and stir it from the bottom. Recover with towel.
4. The next day, the brew will be bubbling excitedly (audibly!) as the yeast devours the fruit sugar. Each morning, midday, and night (or up to 5 times daily), punch down and stir. Keep covered with towel.
Here is the yeast bubbling vigorously devouring the fruit and water mixture.
5. On Day 3, the yeast have consumed much of the natural fruit sugar, and we need to feed them more. Heat 5-6 pounds pure cane sugar with just enough water to dissolve, cover and cool completely. Add this sugar/water mixture to the wine must, stir well, and cover. (If this seems like a lot of sugar, don’t worry, the yeast will consume most of it.)
6. Continue stirring 3-5 times daily as it continues to bubble and froth. A taste of the liquid will be sweet with a little alcohol detectable, and some zingy fruity flavors.
7. On Day 5-6 (or when bubbles are less vigorous upon stirring), it’s time to strain the fruit from the liquid and compost the spent fermented fruit. Using clean hands and tools (strainer, funnel, airlock, carboys), strain the wine to fill 2-3 carboys, avoiding empty space (oxygen) if you can; a few inches headspace is ideal. Properly fill airlocks with water (or vodka) and install.
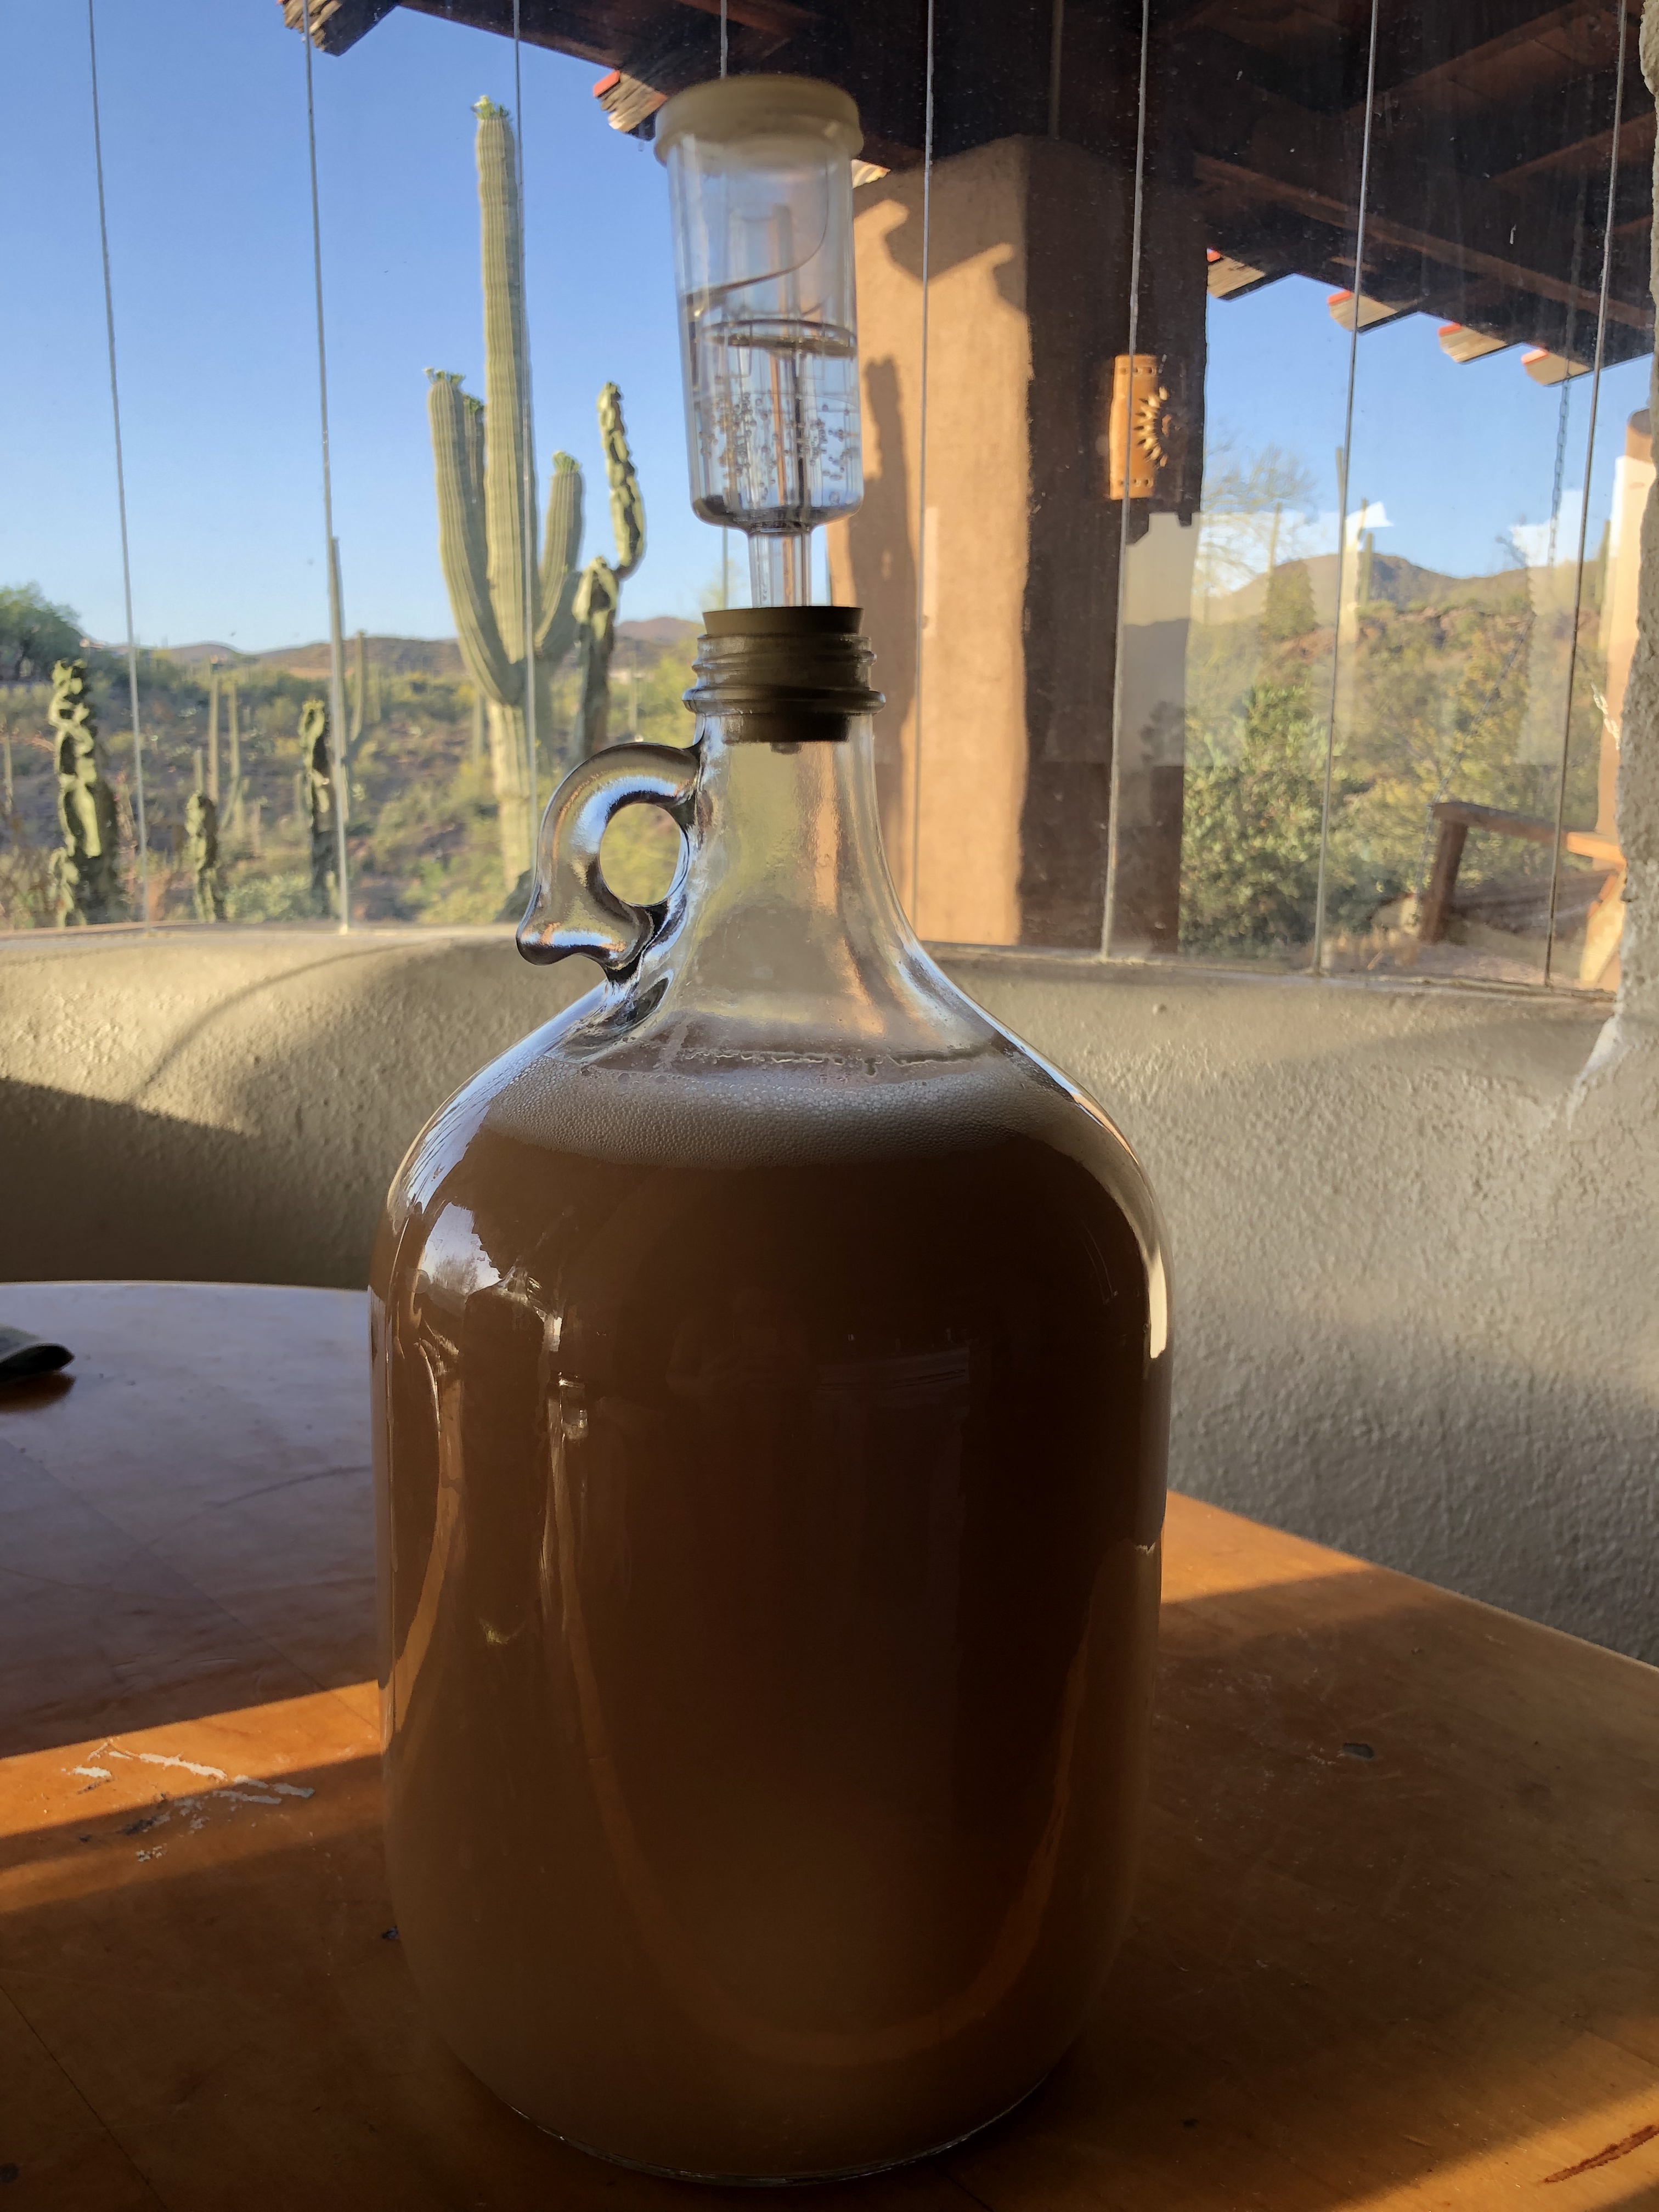
8. Keep in a cool spot for one month. I use my laundry room which stays fairly cool (~70F). Active bubbling resumes and the airlocks gurgle happily, letting carbon dioxide escape.
Carboy with an airlock. This will sit undisturbed for a month.
9. After a month, check the sugar content by carefully adding a spoonful of sugar onto the surface of the wine. If it doesn’t immediately respond with active bubbling, the sugar content is just right–replace airlock and wait another month.
If the wine does react excitedly, add ½ cup sugar, and recheck in a few days (totaling no more than 2 cups). Then, wait another month.
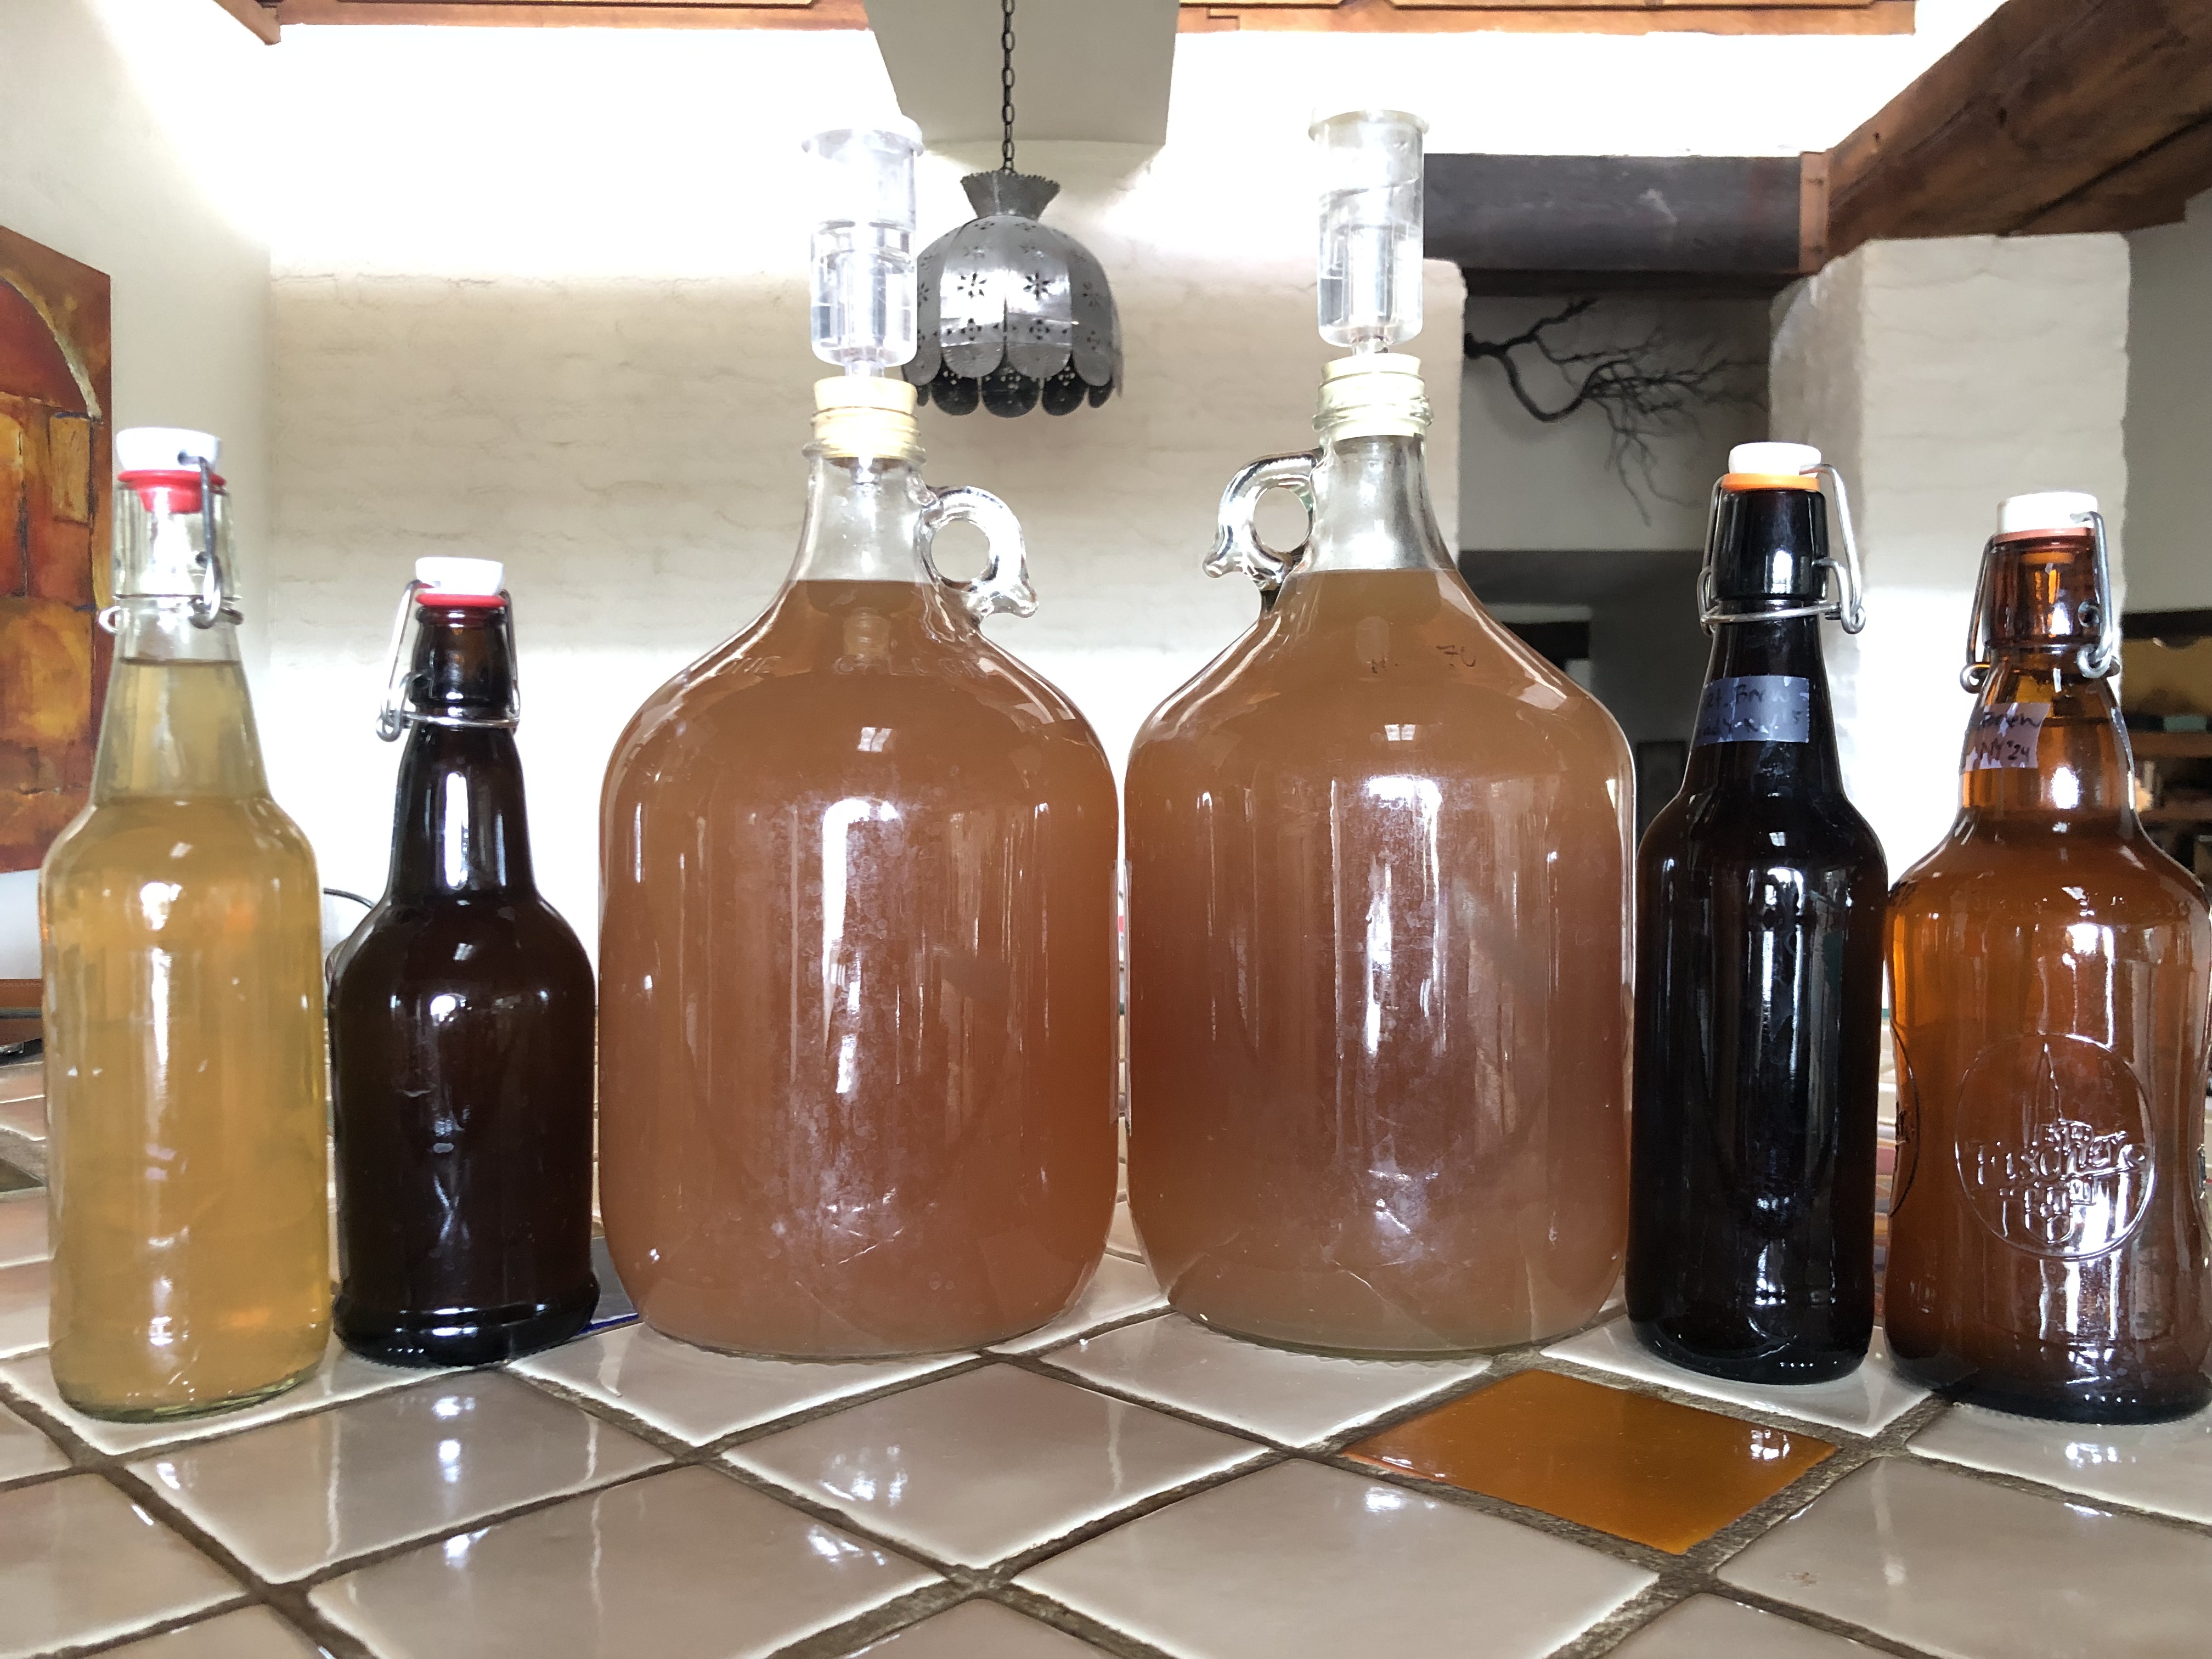
10. After these two months, clean supplies again because it’s time for the second and final siphon/rack! We’ll separate the yeast sediment on the bottom (called lees) from the finished wine. My batch made a little over 2.5 finished gallons, so I used pint sized flip-top bottles (Grolsch) for the partial gallon–just take care when opening these later due to possible pressurization.
11. Now go do something else for nine months. Periodically check that the airlock liquid hasn’t evaporated. When it’s time to sample the wine, try it both chilled or at room temp, and savor the complex and subtle flavors of the fruits of the desert.
Gallons of delicious finished wine!
Congratulations, winemaker! If the process is fun and you want to try more, there are wonderful books on home winemaking and fermentation. I am partial to Sandor Elix Katz’s guides because of their simplicity and use of natural ingredients. Sometimes I hesitate to embark on a new endeavor because I worry I’ll mess it up. I then remember that wine is a very forgiving process, and I have little to lose if anything goes truly awry. If wine gets exposed to too much oxygen, it will become vinegar (acetic acid), so the worst case scenario is you have some really interesting vinegar with which to cook. Salud!
(Please share below in the comments any wine adventures and experiences you embark upon.)